
Related Manuals for JAI AD-130GE


Summary of Contents for JAI AD-130GE
- Page 1 User's Manual AD-130GE Digital 2CCD Progressive Scan Multi-Spectral Camera Document Version: 1.1 AD-130GE_Ver.1.1_Mar2012 1036E-1201...
- Page 2 JAI Ltd., Japan and may only be used by the purchasers of the product. JAI Ltd., Japan makes no warranty for the use of its product and assumes no responsibility for any errors which may appear or for damages resulting from the use of the information contained herein.
- Page 3 AD-130GE Supplement The following statement is related to the regulation on “ Measures for the Administration of the control of Pollution by Electronic Information Products “ , known as “ China RoHS “. The table shows contained Hazardous Substances in this camera.
-
Page 4: Table Of Contents
Pulse generators (20 bit x 4) .............23 7.5.3 GPIO interface in GenICam standard ............24 7.5.4 Change polarity ................24 7.5.5 The restrictions to use TTL In I/F in the AD-130GE ........25 7.5.6 Caution when the software trigger is used ..........26 7.6. GPIO programming examples ..............28 7.6.1... - Page 5 Internal Trigger Generator ...............29 Video Signal Output .................30 8.1. Sensor layout ...................30 8.2. Partial scan (JAI Partial Scan ON) ............31 8.3. Digital Video Output (Bit Allocation) ............32 8.3.1 Bit Allocation (Pixel Format / Pixel Type) – (monochrome sensor) ....32 8.3.1.1 GVSP_PIX_MONO8 (8bit) .............32...
- Page 6 AD-130GE 10.2.1.1 Acquisition ................50 10.2.1.2 Exposure ................50 10.2.2 Triggersoftware ................51 10.2.3 Triggersource ................51 10.2.4 TriggerActivation ................51 10.3. Exposure Control ................52 10.3.1 Exposure Mode ................52 10.3.2 ExposureTime ................52 10.3.3 ExposureAuto ................53 10.4. ActionControl ..................53 10.4.1 ActionDeviceKey ................53 10.4.2 ActionSelector ................53 10.4.3 ActionGroupMask .................53...
- Page 7 AD-130GE 13.2. Specification Table ................81 Appendix ....................83 Precautions ..................83 Typical Sensor Characteristics ..............83 Caution when mounting a lens on the camera ..........83 Caution when mounting the camera ............84 Exportation ..................84 References ..................84 Change History .....................85 User's Record ....................86...
-
Page 8: Vision Camera Operation Manuals
JAI SDK Getting Started Guide Describes the network interface User’s manual is available at www.jai.com JAI SDK & Control Tool User Guide and JAI SDK Getting Started Guide are provided with the JAI SDK which is available at www.jai.com. Introduction GigE Vision is the new standard interface using Gigabit Ethernet for machine vision applications and it was mainly set up by AIA (Automated Imaging Association) members. -
Page 9: Camera Operation
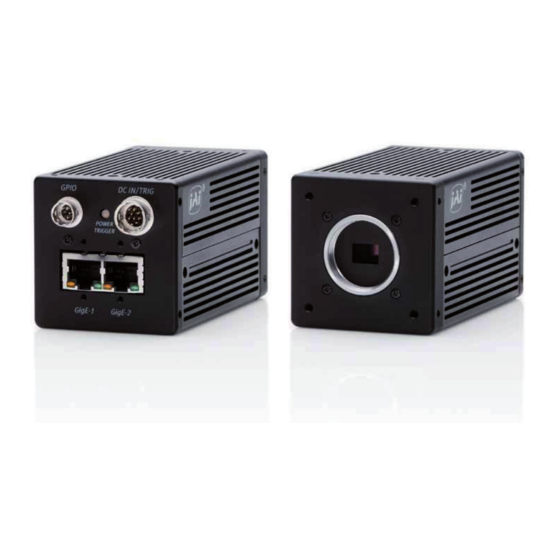
The AD-130GE is a GigE Vision compliant camera, belonging to the JAI C3 Advanced family. The AD-130GE employs 2 CCDs, one for Bayer color and the other for NIR monochrome utilizing prism optics so that the AD-130GE can inspect the objects by visible color sensor and Near IR sensor with the same angle of view. -
Page 10: Main Features
LVAL synchronous/asynchronous operation (auto-detect) Auto-iris lens video output for lens control Programmable GPIO with opto-isolated inputs and outputs Comprehensive software tools and SDK for Windows XP/Vista/7 (32 bit ―x86‖ and 64 bit ―x64‖ JAI SDK Ver. 1.2.1 and after ) -
Page 11: Locations And Functions
: M3, max length 5mm (Note*3) 1) : AD-130GE is based on a Dichroic Prism. For optimal performance, lenses designed for 3CCD cameras should be used with this camera. Be sure to avoid lenses that contain IR filters as this will impair the operation of the NIR sensor. Rear protrusion of the C-mount lens must be less than 4mm to avoid damage to the prism. -
Page 12: Rear Panel Indicator
AD-130GE 4.2. Rear Panel Indicator The rear panel mounted LED provides the following information: G P IO D C IN /T R IG Amber : Power connected – initiating P O W E R /T R IG Steady green : Camera is operating in Continuous mode ... -
Page 13: Pin Configuration & Dip Switch
AD-130GE Pin configuration & DIP switch 5.1. 12-pin Multi-connector (DC-in/GPIO/Iris Video) Type: HR10A-10R-12PB (Hirose) male. Pin no. Signal Remarks (Seen from the rear of camera) +12 V DC input Opt IN 2 (-) / GND (*1) Opt IN 2 (+)/Iris Video out (*1) -
Page 14: Dip Switches
AD-130GE 5.4. DIP switches SW700 for lens iris SW800 for 75 ohms termination SW100 for selecting TTL output 5.4.1 SW800 Trigger input 75 ohms termination Trigger input can be terminated with 75 ohms if DIP switch SW600 is selected as described below. -
Page 15: System Configuration
Fig.6 System configuration It should be noted that the hub being used should comply with Gigabit Ethernet. When JAI SDK control tool is started, AD-130GE is recognized as two cameras. #0 represents the Bayer color imager and #1 represents the NIR imager. -
Page 16: Sync Mode
In Sync mode, the trigger to Bayer also triggers to NIR. 6.4. Lens considerations The AD-130GE is based on a dichroic prism, allowing precise separation of the visible (color) and near-infrared parts of the spectrum. Thanks to the compact design of the... -
Page 17: Inputs And Outputs Interface
AD-130GE Inputs and outputs interface 7.1. Overview All input and output signals pass through the GPIO (General Purpose Input and Output) module. The GPIO module consists of a Look-Up Table (LUT – Cross-Point Switch), 2 Pulse Generators and a 12-bit counter. In the LUT, the relationship between inputs, counters and outputs is governed by internal register set-up. -
Page 18: 12-Bit Counter
The ―Sequence reset‖ resets the sequential settings. Outputs from the LUT described on the right side show GPIO settings for LINE SELECTOR in the JAI Camera Control tool and inputs to the LUT on the left side show GPIO settings for LINE SOURCE in the JAI Camera Control tool. 7.1.2 12-bit Counter A camera pixel clock can be used as a source. -
Page 19: Recommended External Input Circuit Diagram For Customer
AD-130GE 7.2.1 Recommended External Input circuit diagram for customer Fig.11 External Input Circuit、OPT IN 1 and 2 7.2.2 Recommended External Output circuit diagram for customer +3.3V Fig.12 External Output Circuit, OPT OUT 1 and 2... -
Page 20: Optical Interface Specifications
AD-130GE 7.2.3 Optical Interface Specifications The relation of the input signal and the output signal through the optical interface is as follows. Conditions for Input Input Line Voltage Range +3.3V ~ +24V Input Current 6mA ~ 30mA Minimum Input Pulse Width to Turn 0.5μs... -
Page 21: Iris Video Input And Output
Fig.15 Iris Video output 7.3.1.2 Iris video output select As the factory default setting, the signal from AD-130GE #0(color) is used for iris control. The setting can be changed in the following screen. This screen is effective if AD-130GE#0 is selected. -
Page 22: Een (Exposure Enable) Output
AD-130GE 7.3.3 EEN (Exposure Enable) output XEEN is available on pin 4 of the 6-pin Hirose connector. Open Collector 1K 1K The output can be selected as either open SW701 HIROSE collector or TTL level. +5V Push Pull The TTL output circuit is 75 complementary 10K... -
Page 23: Gpio Inputs And Outputs Table
AD-130GE 7.4. GPIO Inputs and outputs table Trigger Line Pulse Generator Selector Selector Selector Selector (Cross Point Switch Output) Source Signal (Cross Point Switch Input) ○ ○ ○ ○ ○ ○ ○ ○ ○ ○ ○ ○ ○ ○ Not Connected / Off ○... -
Page 24: Configuring The Gpio Module
AD-130GE 7.5. Configuring the GPIO module 7.5.1 Input /Output Signal Selector GPIO is used to determine which signal is assigned which terminal. For the details, please refer to Register Map, Digital I/O, Acquisition and Trigger Control and Pulse Generator. Line Selector Line Source 7.5.2... -
Page 25: Gpio Interface In Genicam Standard
Repeat counter: 0 to 255 Length = 102 =0: Continuously repeated The following shows JAI SDK Camera Control Tool for setting Pulse Generators. 7.5.3 GPIO interface in GenICam standard Outputs from Cross Point Switch are displayed in 3 sectors in GenICam standard. -
Page 26: The Restrictions To Use Ttl In I/F In The Ad-130Ge
7.5.5 The restrictions to use TTL In I/F in the AD-130GE If the polarity of TTL I/F in the AD-130GE is changed, the initialization is executed in the camera. If the source for the same selector item of Camera 0 and Camera 1 is assigned TTL In1 and TTL In2 respectively, the initialization is executed without any problem. -
Page 27: Caution When The Software Trigger Is Used
7.5.6 Caution when the software trigger is used The AD-130GE has the following restriction when using the software trigger. 1) The input port of GPIO, Camera 0 and Camera 1 have software trigger 0 to 3, respectively. However, the output port of GPIO has only one software trigger 0 to 3. - Page 28 Software Trigger setting restriction 2) Action Command In the action command of AD-130GE, Software 2 and 3 are used as action commands and sent to the selected source. If the source is set to Action 1, for instance, it is changed to Software trigger 2 in the camera control tool.
-
Page 29: Gpio Programming Examples
Example: 10µs unit pulse width exposure control (PWC). Pixel clock is 51.324MHz. 513 clocks (613-100) equal 10µs. Feature Value c)Acquisition and Trigger selector Trigger Mode Trigger controls JAI Acquisition and JAI Exposure Pulse width control Trigger Control Mode Pulse Generators Pulse Generator Pulse Generator 0 Selector... -
Page 30: Internal Trigger Generator
AD-130GE 7.6.2 Internal Trigger Generator Example: Create a trigger signal and trigger the camera. Feature Value c)Acquisition and Trigger Trigger Mode Trigger controls selector Pulse Generators Pulse Pulse Generator 0 Selector Generator selector Clock Choice 1 = Pixel Clock (50MHz) -
Page 31: Video Signal Output
BGR10V1_Packed, BGR10V2_Packed Note1: This is if JAI Partial Scan is set to ―False‖. This will be 966, if JAI Partial Scan is set to ―True‖ Note2: In case of RGB output, 2 pixels each on both sides are not read out. -
Page 32: Partial Scan (Jai Partial Scan On)
Conceptual drawing for partial scan The partial scan mode for AD-130GE is variable. The first line and the last line to be read out can be set. For Bayer color, the start line should set on an odd line and the last line is set so that the height is an even number. -
Page 33: Digital Video Output (Bit Allocation)
AD-130GE 8.3. Digital Video Output (Bit Allocation) Although the AD-130GE is a digital camera, the image is generated by an analog component, the CCD sensor. The table and diagram below show the relationship between the analog CCD output level and the digital output. -
Page 34: Gvsp_Pix_Mono10_Packed (10 Bit)
UDP transport layer protocol. It allows an application to receive image data, image information and other information from a device. As for the Bayer mosaic color sensor in the AD-130GE, the following pixel types supported by GVSP are available. -
Page 35: Gvsp_Pix_Bayrg10 -Bayer Rg10
AD-130GE 8.3.2.2 GVSP_PIX_BAYRG10 “Bayer RG10” Odd Lin 1 Byte 2 Byte 3 Byte 4 Byte 0 1 2 3 4 5 6 7 8 9 X X X X X X 0 1 2 3 4 5 6 7 8 9 X X X X X X... -
Page 36: Gvsp_Pix_Rgb10V1_Packed -Rgb 10V1 Packed
AD-130GE 8.3.2.5 GVSP_PIX_RGB10V1_PACKED “RGB 10V1 Packed” 1 Byte 2 Byte 3 Byte 4 Byte X X 0 1 2 3 4 5 6 7 0 1 2 3 4 5 6 7 0 1 2 3 4 5 6 7 8.3.2.6... -
Page 37: Video Timing
AD-130GE 8.4. Video timing 8.4.1 Horizontal Timing The horizontal timing for Continuous mode, full frame and partial scan are shown below. This is common for both Bayer color imager and monochrome IR imager. 1 Clock =51.324MHz (19.48ns) 1CLK: 1 Pixel clock period... -
Page 38: Vertical Timing
The vertical timing for Continuous mode and full frame scan are shown below. This is common for both Bayer color imager and monochrome IR imager If JAI Partial Scan = False, 1L = 1660 clock (32.344μs) 1L : 1 LVAL period OB: optical black... -
Page 39: Partial Scan Vertical Timing
The following chart shows the vertical timing of partial scanning in the continuous mode. The horizontal timing for partial scan is the same as full scan. This is common for Channel 1 (visible, color) and Channel 2 (near-IR) If JAI Partial Scan = True, 1L : 1LVAL period OB: Optical Black 1L = 1660 clock (32.344μs) - Page 40 AD-130GE Calculation example Reference JAI Partial Scan Height Offset Y Total Line Full Line False 31.484 Full Line True 31.613 Center 2/3 Partial True 42.941 Center 1/2 Partial True 52.403 Center 1/4 Partial True 77.682 Center 1/8Partial True 102.380 Center 8 Line True 145.84...
-
Page 41: Network Configuration
Guide” supplied with the JAI SDK. 9.1. GigE Vision Standard Interface The AD-130GE is designed in accordance with the GigE Vision standard. Digital images are transmitted over Cat5e or Cat6 Ethernet cables. All camera functions are also controlled via the GigE Vision interface. -
Page 42: Hub
(NICs) and switches/routers are suitable for use with the GigE Vision compliant camera. JAI will endeavor to continuously verify these combinations, in order to give users the widest choice of GigE components for their system design. -
Page 43: Video Data Rate (Network Bandwidth)
The packet size is set to 1476 as the factory default. Packet size can be modified in the GigE Vision Transport Layer Control section of the camera control tool (see below). For AD-130GE, users may enter any value for the packet size and the value will be internally adjusted to an appropriate, legal value that complies with the GenICam standard. -
Page 44: Simplified Calculation (Approximate Value)
(depending on the pixel format) x frame rate / 1,000,000 (convert to mega bit) In the case of the AD-130GE with the full image and Mono 8bit pixel format; The data transfer rate = 1296 x 966 x 8 x 31.484 / 1000000 = 315 Mbit/s... -
Page 45: Note For 100Base-Tx Connection
AD-130GE 9.3.4 Note for 100BASE-TX connection In order to use 100Mbps network, 100BASE-TX and Full Duplex are available. Half Duplex cannot be used. In the case of connecting on 100BASE-TX, the maximum packet size should be 1500 bytes. -
Page 46: Connecting A Camera To Each Port Of A Multi-Port Nic
AD-130GE 9.4.2 Connecting a camera to each port of a multi-port NIC This is the example for using a 4-port NIC The pair of the connecting camera and the NIC constructs one subnet. As for the IP configuration, it is appropriate to use the persistent IP. -
Page 47: If Delayed Readout Is Not Used In Trigger Mode
AD-130GE 9.4.3.2 If delayed readout is not used in trigger mode The packet delay should be set larger. The data traffic is controlled by the buffer of the hub. It is necessary to check the buffer value of the unit. -
Page 48: Functions (Conforming To Genicam Sfnc 1.3)
10. Functions (Conforming to GenICam SFNC 1.3) This section describes naming of GenICam SFNC ver.1.3. AD-130GE uses the feature names specified in GenICam SFNC ver.1.3 but some functions are not implemented. AD-130GE also provides feature names used in previous JAI cameras. 10.1. -
Page 49: Acquisition Mode
Status The following sections provide the details for each command set. 10.1.2 Acquisition mode The AD-130GE has three settings for capturing images. Single frame AcquisitionStart command outputs one frame. Then the acquisition is stopped. Continuous AcquisitionStart command outputs frames until AcquisitionEnd is initiated. -
Page 50: Continuous Mode
10.1.2.2 Continuous mode In this mode, when the AcquisitionStart command is set, the image is continuously output at the current frame rate. This is the default setting for the AD-130GE. 1) AcquisitionStart command is input 2) AcquisitionTriggerWait becomes effective 3) AcquisitionActive becomes “TRUE”... -
Page 51: Trigger Control
AD-130GE 10.2. Trigger Control 10.2.1 TriggerSelector(TriggerMode) This is the function to set the trigger operation. This will set how to control the output and the exposure. Frame Start Trigger Set the frame start externally Transfer Start Stream Set the stream start externally 10.2.1.1... -
Page 52: Triggersoftware
AD-130GE TriggerSelector Frame Previous JAI Start Operation trigger name ExposureMode (for reference) Trig OFF(Free run) Trigger OFF or No Exposure Control Trig OFF(Free run) Trigger Exposure Control Timed Is possible Trig On Trig OFF(Free run) Trigger No Exposure Control TriggerWidth Trig On ... -
Page 53: Exposure Control
Free Run. If FrameStart in TriggerSelector is “ON”, this functions as the EPS mode. Note: JAI Pre-Dump can be available by using TriggerOption. TriggerWidth: This mode controls the exposure time by the pulse width. If FrameStart in TriggerSelector is “OFF”, The camera operates in Free Run. -
Page 54: 10.3.3 Exposureauto
Set the key (value) to operate Action 1. Operation Mode 10.5. AD-130GE has the setting for the exposure timing when the trigger pulse is applied and the following 9 operation modes and OB transfer and ROI modes. Trigger mode Continuous mode... -
Page 55: The Exposure Timing When The Trigger Pulse Is Input
10.5.1.1 Auto-detect LVAL-sync / async accumulation This function replaces the manual setting found in older JAI cameras. Whether accumulation is synchronous or asynchronous in relationship to LVAL depends on the timing of the trigger input. When a trigger is received while FVAL is high (during readout), the camera works in LVAL-synchronous mode, preventing reset feed-through in the video signal. -
Page 56: Continuous Mode
:Exposure time/Exposure time(us)/ Exposure time(Raw) Other functions Input: External Trigger Trigger Source This function can be set by selecting Edge pre-select in Exposure mode of JAI Acquisition Control. However, Acqusition Mode, Sync Mode, Exposure Time, and so on should be set. - Page 57 Frame interval in continuous operation (L)+ 6L 1) LVAL SYNC/ASYNC can be selected automatically. 2) Frame interval of full frame in continuous operation is 982L and if JAI partial scan is set to True, please refer to 8.4.3 Partial Scan Vertical Timing for the frame interval.
- Page 58 AD-130GE Note: 2.8L to 3.8L after the exposure end of the longest exposure. 1 LVAL = 1660 clock (32.344μs) Fig.34 Edge Pre-select LVAL asynchronous Ext. Trigger FVAL LVAL Exposure Period Exposure DATA out t1(Exposure start delay) t3(Data output delay) 6.03μs 2.8L to 3.8L...
- Page 59 AD-130GE Note: 2.8L after the exposure end of the longest exposure Fig.36 Edge Pre-select LVAL synchronous Ext. Tri g FVAL LVAL Exposure Period Exposure DATA out t1(Exposure start delay) t3(Data output delay) 2.8L 10.8L 0.1L ~ 1.1L(3 ~ 35.2μs) Fig.37 Edge Pre-select LVAL synchronous details...
-
Page 60: Pulse Width Control (Pwc) Trigger Mode
Input: External Trigger Trigger Source This function can be set by selecting Pulse width control in Exposure mode of JAI Acquisition Control. However, Acquisition Mode, Sync Mode, Exposure Time, and so on should be set. Important Note: The minimum duration of the trigger is 2L. The minimum period of trigger is as follows. - Page 61 AD-130GE 0.5L 0.2L 2.8L ~ 3.8L Fig.38 Pulse Width Control LVAL asynchronous Ext. Tri g FVAL LVAL Exposure Period Exposure DATA out t1(Exposure start t3(Output delay) t4(Exposure end delay delay) 6.03μs 17.45μs 2.8L ~ 3.8L 10.8L ~ 11.8L Fig.39 Pulse Width Control LVAL asynchronous details In PWC mode, when ―Smearless ON ‖...
-
Page 62: Smearless Mode
196L. Thereafter the residual charge in the horizontal CCD register is read out in 1L and the new exposure starts. This function is available for both full scan and partial scan. This function can be set if Smearless Enable in JAI Acquisition Control is set at True. 10.5.5.1 Sync=Sync, LVAL Async, Smearless Enable=True, EPS trigger Fig. -
Page 63: Sync Mode=Sync, Lval Async, Smearless Enable=True, Pwc Trigger
AD-130GE 10.5.5.2 Sync Mode=Sync, LVAL Async, Smearless Enable=True, PWC trigger Fig 41. PWC timing chart with Smearless ON... -
Page 64: Reset Continuous Trigger (Rct) Mode
After the trigger pulse is input, a fast dump readout is performed. In the AD-130GE, this period is 6.34ms which is 196L. The exposure time is determined by the pre-set shutter speed. If no further trigger pulses are applied, the camera will continue in normal mode and the video signal is not output. -
Page 65: Sequential Trigger Mode (Eps)
AD-130GE Min. E x t . T r i g 1 F V A L L V A L Smearless (197L) Hi g h S peed Tr a ns f er S U B E x p o s u r e... - Page 66 AD-130GE Last Sequence:(applicable value:1~10) To determine how many sequences out of sequences 1 to 10 are executed as one consecutive sequence. Sequence Selector: In the Sequence Selector, there are 10 sequence tables. Each Sequence has 8 setting parameters such as Sequence ROI Size X and Y、Sequence ROI Offset X and Y、Sequence Exposure Raw、Sequence Master Gain Raw、and Repeat Count in Each Step.
-
Page 67: Initial Settings
AD-130GE 10.5.7.2 Initial settings The following are the default settings. Sequence Control Camera 0 Sequence Mode Sequence Repetition Count Last Sequence Sequence Repeat Count Sequence Selector Exposure Time Master Gain in Each Step Size Offset Sequence 1 1296 Sequence 2... -
Page 68: Multi Roi Mode (Multi Region Of Interest)
AD-130GE the image data is output. AD-130GE has up to 6 memories to store, and the stored image data can be output at the consecutive timing of Transfer Start Trigger. After the stored image is transmitted by Transfer Start Trigger, as the memory has the space, it is possible to store new images by Frame Start Trigger. -
Page 69: Initial Parameters
AD-130GE In ROI Selector, there is ROI 1 to 5 and each has Width, Height, Offset X and Offset Y settings. The following is how the settings appear in the GUI. If ROI Mode is set to 1, only one ROI can be set. -
Page 70: Operation Mode And Functions Matrix
AD-130GE 10.6. Operation Mode and Functions matrix 10.6.1. Sync Mode = SYNC AD-130GE #0 AD-130GE #1 Sensor Bayer(channel1) Monochrome(channel2) Auto Iris Trigger Input Trigger 1 : Valid Trigger 2 : Invalid output (note2) Smear Smear Mode Shutter Shutter Partial Partial... -
Page 71: Other Functions
11.1. Basic functions The AD-130GE is based on a dichroic prism, allowing precise separation of the visible (color) and near-infrared parts of the spectrum into two separate channels. The visible (color) channel is referred to as Channel 1 and the near-infrared channel is referred to as Channel 2. Channel 1 and 2 can be configured to operate separately or synchronously. -
Page 72: Shading Correction
The clock generator and counter can be programmed in very fine increments. 11.1.3 Shading correction The AD-130GE features a shading correction circuit that can be used for reducing shading resulting from illumination, lens vignetting or prism shading caused by lenses with a wide output aperture. -
Page 73: White Balance
11.1.5 Blemish compensation The AD-130GE has a blemish compensation function. In the factory, the data for blemish compensation is stored in the factory data. When the blemish compensation is set to ON, the factory data is loaded. The user can store the compensation data in the user area (1 to 3). -
Page 74: Test Signal Generator
AD-130GE 11.1.6 Test signal generator The AD-130GE has the following test generators built-in. Address Function Read/Write Size Value 0xA13C Test stream 0=OFF 4=H Ramp scale 5=V Ramp scale 6=Moving Ramp scale 8=Color bar (Normal) 9=Color bar (Vertical) 10=Moving color bar 11.2. - Page 75 AD-130GE b) Image Format Control AD-130GE #0 (Color) AD-130GE #1 (IR) c) Acquisition Control d) JAI Acquisition Control...
- Page 76 AD-130GE e) Analog Control AD-130GE #0 (Color) AD-130GE #1 (IR) f) Digital Processing g) Digital Control...
- Page 77 AD-130GE h) Pulse Generator i) Sequence Control...
- Page 78 AD-130GE j) Transport Layer Control...
- Page 79 AD-130GE k) LUT l) Event m) Action and n) User Controls How to check XML file All functions and registers are stored in the camera as XML file. The XML is saved in the following folder.
-
Page 80: External Appearance And Dimensions
AD-130GE External Appearance and Dimensions C M ount 5. 3 4- M 3 Depth5 5. 3 G PIO D C I N / T RIG PO W E R TRIGG E R Gig E-1 Gig E-2 98. 3 4- M 3 Depth5 4- M 3 Depth5 0. -
Page 81: Specifications
AD-130GE Specifications 13.1. Spectral response Fig. 50 Total spectral response including prism and sensor (Monochrome IR) -
Page 82: Specification Table
Full Scan height 8 to 966 lines, Partial In conjunction with ROI, if JAI Partial Scan is set to ON, Offset Y and Height is automatically set. Output readout Sync / async (Color and IR outputs readout) selected by Sync mode 0.4 lux... - Page 83 AD-130GE Electronic Shutter Exposure Time Abs 11.49 µs to 31.761ms(0.4L to 982L in 1L step) Pulse width control 1/13,000(2.4L) to Max. 2 sec GPIO plus Pulse width fine setting with GPIO and pulse width control Auto shutter 95L to 982L...
-
Page 84: Appendix
AD-130GE Appendix Precautions Personnel not trained in dealing with similar electronic devices should not service this camera. The camera contains components sensitive to electrostatic discharge. The handling of these devices should follow the requirements of electrostatic sensitive components. Do not attempt to disassemble this camera. -
Page 85: Caution When Mounting The Camera
When exporting this product, please follow the export regulation of your own country. References 1. This manual for AD-130GE can be downloaded from www.jai.com 2. Datasheet for AD-130GE can be downloaded from www.jai.com 3. JAI SDK software can be downloaded from www.jai.com... -
Page 86: Change History
AD-130GE Change History Month/Year Revision Changes Feb. 2012 New issue Mar. 2012 Delete color matrix, Correct the horizontal timing chart Correct offset and height figures in the partial scan... -
Page 87: User's Record
Company and product names mentioned in this manual are trademarks or registered trademarks of their respective owners. JAI A-S cannot be held responsible for any technical or typographical errors and reserves the right to make changes to products and documentation without prior notification.
Need help?
Do you have a question about the AD-130GE and is the answer not in the manual?
Questions and answers