Table of Contents
Advertisement
Quick Links
Advertisement
Table of Contents

Related Manuals for OnRobot 2FGP20


Summary of Contents for OnRobot 2FGP20
- Page 1 USER MANUAL FOR UR ROBOTS v1.13.0 Original Instructions...
-
Page 2: Table Of Contents
4.3.1. Optional - Clip-on Bracket....................14 4.4. Wiring via Tool Connector......................15 4.5. Wiring via Compute Box....................... 16 4.5.1. Tool Data Cable........................17 4.5.1.1. Cable to 2FGP20...................... 17 4.5.1.2. Cable to Compute Box...................17 4.5.2. Ethernet Cable........................18 4.5.3. Compute Box DIP Switch Settings................. 19... - Page 3 5.1.1.1. Device Info......................... 20 5.1.1.2. 2FGP20........................24 6. Operation............................. 28 6.1. URCap Commands.........................28 6.1.1. 2FGP20..........................28 6.1.1.1. 2FGP20 Finger Grip....................28 6.1.1.2. 2FGP20 Finger Release..................30 6.1.1.3. 2FGP20 Vacuum Grip..................... 31 6.1.1.4. 2FGP20 Vacuum Release..................32 6.2. URCap Toolbar..........................32 6.2.1. 2FGP20..........................35 6.3.
- Page 4 10.3. Changing the DIP Switch Does Not Take Effect..............76 10.4. URCap Operation......................... 76 10.5. Tool Functions Are Not Available..................... 77 11. Warranties........................... 78 11.1. Patents...............................78 11.2. Product Warranty........................... 78 11.3. Disclaimer............................78 12. Certifications..........................79 12.1. EMC..............................80 12.2. 2FGP20 - Environment....................... 80 12.3. Declaration of Incorporation.......................81 12.3.1. 2FGP20..........................81...
-
Page 5: Introduction
Failure to comply with safety information could result in death or serious injury. 1.2. Scope of the Manual The manual covers the following OnRobot products and their components: 1.2.1. 2FGP20 Tool... -
Page 6: Naming Convention
Eye Box and Compute Box are used interchangeably. 1.4. Copyright The information contained herein is property of OnRobot A/S and shall not be reproduced in whole or in part without prior written approval of OnRobot A/S. The information herein is subject to change without notice and should not be construed as a commitment by OnRobot A/S. -
Page 7: Safety
2.1. Intended Use OnRobot tools are intended to be used on collaborative robots and light industrial robots with different payloads depending on the end-of-arm tooling specifications. OnRobot tools are normally use in pick-and-place, palletizing, machine tending, assembly, quality testing and inspection and surface finishing applications. - Page 8 OnRobot A/S, that the robot application will not cause injury or damage, even if robot application complies with all safety instructions. OnRobot A/S disclaims any and all liability if any of OnRobot tools tooling are damaged, changed or modified in any way. OnRobot A/S cannot be held...
-
Page 9: Risk Assessment
The robot integrator must perform a risk assessment on the complete robot application. OnRobot tools are only components in a robot application and therefore they can be only safely operated if the integrator has considered the safety aspects of the whole application. -
Page 10: 2Fgp20 Safety
SAFETY 2.5. 2FGP20 Safety When setting the target force, be aware that the maximum permissible force on quasi-static contacts for collaborative applications is 140 N. For further details, please check the IS0/TS 15066 standard. -
Page 11: Operation Mode(S)
Compute Box. 3.2. Operation via UR's Tool Connector The product(s) could be used on both UR series via UR's Tool Connector, which works with the following products: 2FG7 or • 2FGP20 or • 3FG15 (Only on e-Series) or • MG10 •... -
Page 12: Hw Installation
2. Quick Changer (ISO 9409-1-50-4- 3. Dowel pin Ø6x10 (ISO2338 h8) 4. Adapter/ Robot tool flange (ISO 9409-1-50-4-M6) Use 10 Nm tightening torque. 4.2.1.2. 2FGP20 When using the tool connector: Quick Changer I/O Quick Changer - Quick Changer - Quick Changer - Name support –... -
Page 13: Tools
HW INSTALLATION * See gripper force and QC payload limitations in the 6. Operation and the 8.1.2. Technical Sheets sections. ** See QC payload limitations in the 8.1.2. Technical Sheets section. When using the Compute Box: Quick Changer - Quick Changer - Quick Changer - Name Robot Side... -
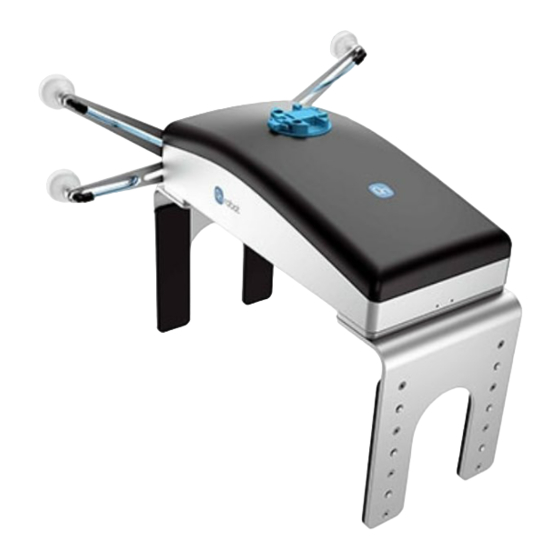
Page 14: 2Fgp20
For more information about the vacuum cups customization, go to the Vacuum cups section in 8.1.1. Technical Sheet. 4.2.2.2. 2FGP20 Step 1: Move the tool close to the Quick Changer as illustrated. -
Page 15: Wiring Via Tool Connector
1. Hook the Clip-on Bracket to the rail on the side of the Compute Box and then flip it down. 2. Fasten the Clip-on Bracket with the plastic srew. 4.4. Wiring via Tool Connector DANGER: Use only original OnRobot tool data cables. The following devices are supported in the operation mode via tool connector: 2FG7 •... -
Page 16: Wiring Via Compute Box
Connect the Quick Changer for I/O to the UR's tool connector. DANGER: Never connect the Quick Changer or Dual Quick Changer to a CB3 UR robot's tool connector. Wiring via Tool Connector is finished. 4.5. Wiring via Compute Box DANGER: Use only original OnRobot tool data cables. -
Page 17: Tool Data Cable
NOTE: For the Quick Changer - Robot Side no cable is needed to be connected. 4.5.1. Tool Data Cable 4.5.1.1. Cable to 2FGP20 First connect the data cable to the tool. Use the M8-8pin connector on the Quick Changer or on the Dual Quick Changer. -
Page 18: Ethernet Cable
Finally, connect the other end of the Tool data cable to the Compute Box's DEVICES connector. CAUTION: Quick Changer and Dual Quick Changer can only be used to power OnRobot tools. 4.5.2. Ethernet Cable Connect one end of the supplied Ethernet (UTP) cable to the robot controller's Ethernet (LAN) port. NOTE: If the robot controller's Ethernet port is in use, use a standard 4-port Ethernet switch to be able to use two network devices at the same time. -
Page 19: Compute Box Dip Switch Settings
(where the arrows are shown) and not the cable. CAUTION: Use only original OnRobot power supplies. Finally, power up the power supply that will power the Compute Box and the connected Tool(s). 4.5.4.1. 2FGP20 Power Supply 1.5 A... -
Page 20: Sw Installation
UR e-Series Select the Installation tab, then select Tap on the Installation tab in the top menu. OnRobot Setup. The following screen is Then tap on the URCaps. shown: 5.1.1.1. Device Info In the normal view of the panel, the available functions are shown below:... - Page 21 Device info to make sure that the right settings (e.g.: TCP) are used. No connection: If you want to use OnRobot URCap and there are no connected devices, select No connection from the dropdown menu and no error message will show up.
- Page 22 RTDE registers, see UR's Real-Time Data Exchange (RTDE) Guide. You need this option if you use OnRobot devices with other vendors' devices and OnRobot registers might overlap other vendors' registers. OnRobot uses three different types of registers: Bool, Int and Float.
- Page 23 If your registers overlap other vendors' registers, offset them by writing a certain value in the Offset fields. If the offset value is too high, the number of OnRobot registers can exceed the number of Total registers. In this case the values will turn red in the OnRobot row.
-
Page 24: 2Fgp20
Set the Linear offset (X,Y,Z) and the Rotation in RPY (Roll-Pitch-Yaw) values to adjust the OnRobot device dependent calculated TCP. 5.1.1.2. 2FGP20 The configuration panels for the 2FGP20 are shown in the images below: 2FGP20 In the normal view of the panel, the selected Pad offset, Finger length, Finger height and Vacuum cups offset are shown. - Page 25 SW INSTALLATION Pad offset Select one of the pad offsets: No pads • Standard pads • Custom pads • To input the right custom pad offset value, measure the width of the finger and the pad together and divide that value by two. Custom pad offset value = x/2. Finger length Select one of the finger lengths: Standard finger...
- Page 26 Add the custom vacuum cups offset value to the input field. NOTE: The changes in the 2FGP20 Setup settings are saved to the gripper and not to the installation file. Therefore, if the gripper is moved to another robot, the settings will remain the same.
- Page 27 (Static TCP mode). For further information and best practices on the TCP setting see 6.4. TCP Configuration section. TCP offset Set the Linear offset (X,Y,Z) and the Rotation in RPY (Roll-Pitch-Yaw) values to adjust the OnRobot device dependent calculated TCP.
-
Page 28: Operation
6.1. URCap Commands URCap commands provide an easy way to program an application. 6.1.1. 2FGP20 6.1.1.1. 2FGP20 Finger Grip When the command is executed, the gripper tries to reach the 2FGP20 Finger Grip specified target parameters (Width, Force, and Speed). The different functions are explained below. - Page 29 OPERATION Robot Type Speed Range Speed Resolution eSeries robots or 10-100% CB3 robots that are connected to a Compute Box CB3 robots that are connected to the tool connector 10-100% Force: Sets the target gripping force. Robot Type Force Range Force Resolution eSeries robots or 80-400 N...
-
Page 30: 2Fgp20 Finger Release
OPERATION 6.1.1.2. 2FGP20 Finger Release When the command is executed, the gripper tries to reach the 2FGP20 Finger Release specified target parameters (Width and Speed). The different functions are explained below. Release target settings Width: Sets the target release width. The width can be set by using the Save as Target button (recommended) or by typing it manually. -
Page 31: 2Fgp20 Vacuum Grip
OPERATION 6.1.1.3. 2FGP20 Vacuum Grip command is used to activate the pump and generate vacuum to 2FGP20 Vacuum Grip grip a workpiece. Grip target settings Vacuum: Use the slider to set the target vacuum level. The default value is 20 kPa. -
Page 32: 2Fgp20 Vacuum Release
Stop robot on lost vacuum: When this option is selected, the vacuum is monitored continuously. If the vacuum disappears unexpectedly, the robot will stop the movement and displays a popup window. 6.1.1.4. 2FGP20 Vacuum Release command is used to release the grip of the workpiece by 2FGP20 Vacuum Release removing the vacuum. - Page 33 Then press on the OnRobot icon Each OnRobot End of Arm Tooling has its own functionality and that is explained in the sections below. To open up the toolbar in the CB3, press on the OnRobot icon on the top left side.
- Page 34 OPERATION To enable/disable the toolbar, press on the OnRobot logo on the top right corner and check/uncheck the Enable toolbar checkbox.
-
Page 35: 2Fgp20
OPERATION 6.2.1. 2FGP20 To open up the toolbar, follow the instructions under How to Access the Toolbar in the 6.2. URCap Toolbar section. The toolbar for the 2FGP20 gripper is shown below. - Page 36 OPERATION Fingers Grip detected: The gripper detects that a workpiece is gripped with the fingers. Current width: Shows the current width value. NOTE: When the tool is connected to a CB3 robot via the tool connector, the precision of the displayed Current width value is valid up to 1 mm resolution. Force: Sets the target gripping force.
-
Page 37: Urscript Commands
6.3. URScript Commands URScript commands can be used alongside other scripts. 6.3.1. 2FGP20 When the OnRobot URCap is enabled, the following 2FGP script functions are available: • : Commands the 2FGP20 fingers to move to a specific fgp_grip(width, force, speed) width with a specific force and speed. - Page 38 Waypoints according to the Active TCP. For further info about the UR's TCP handling read the UR's Manual. How “far” the TCP needs to be moved to be at the “end” of the OnRobot tools could be found in the 8.3. TCP, COG section.
- Page 39 However, it is highly recommended to create the Waypoints in the UR's Move command in a way that the referencing TCP is set first. So, if only a single OnRobot device is used, before the Waypoints are defined, set the UR's Move command's TCP to use the OnRobot_Single.
- Page 40 Before you teach any Waypoint make sure to set the Active TCP beforehand: for Single device go to the OnRobot Installation panel • • for Dual devices go to the OnRobot Installation panel and Select the Device (1 or 2) that you are using at the time of the teaching...
-
Page 41: Feedback Variables
6.5. Feedback Variables 6.5.1. 2FGP20 Feedback Variable Unit Description fgp_Busy True/False Whether the 2FGP20 is busy or not. The gripper detects that a workpiece is gripped with fgp_Grip_Detected True/False the fingers. 0 - Not released fgp_vg_Release_Status 1 - Release ok... -
Page 42: Additional Software Options
ADDITIONAL SOFTWARE OPTIONS 7. Additional Software Options 7.1. Compute Box/Eye Box 7.1.1. Ethernet Interface Setup A proper IP address must be set for the Compute Box/Eye Box and the robot/computer to be able to use the Ethernet interface. The IP address can be configured using DIP switches 3 and WARNING: Stop the robot program before you change any Ethernet interface settings. - Page 43 ADDITIONAL SOFTWARE OPTIONS IP Address of the Compute Box/Eye IP Address of the Robot/Computer The IP address of the Compute The Compute Box/Eye Box will automatically assign an Box/Eye Box is fixed 192.168.1.1. IP address to the connected robot/computer if it was configured to obtain an IP address automatically.
-
Page 44: Web Client
Open a web browser on your computer and type in the IP address of the Compute Box • (factory default is 192.168.1.1). The Sign-in page opens: The factory default administrator login is: Username: admin Password: OnRobot For the first login a new password needs to be entered: (password must be at least 8 characters long) -
Page 45: Web Client: Devices Menu
Devices - Monitor and control the connected devices (e.g.: grippers) • • Configuration - Change the Compute Box's settings WebLogic™ - Program the Digital I/O interface through OnRobot WebLogic™ • Paths - Import/export the recorded Paths (not available to all robots) •... -
Page 46: 2Fgp20
ADDITIONAL SOFTWARE OPTIONS 7.1.3.1. 2FGP20 Monitor and control Actual Values and States This section displays information about the status of the gripper. - Page 47 ADDITIONAL SOFTWARE OPTIONS Busy: The gripper is in motion or the gripper is generating vacuum. • Finger grip detected: The gripper detects that a workpiece is gripped with the fingers. • • Vacuum grip status: The gripper detects that a workpiece is gripped with the vacuum cups.
- Page 48 ADDITIONAL SOFTWARE OPTIONS Settings Finger setup Pad offset Select one of the pad offsets: No pads • Standard pads • Custom pads • To input the right custom pad offset value, measure the width of the finger and the pad together and divide that value by two.
- Page 49 Add the custom vacuum cups offset value to the input field. NOTE: The changes in the 2FGP20 Setup settings are saved to the gripper and not to the installation file. Therefore, if the gripper is moved to another robot, the settings will remain the same.
-
Page 50: Web Client: Configuration Menu
ADDITIONAL SOFTWARE OPTIONS 7.1.4. Web Client: Configuration Menu Network settings: The MAC address is a world-wide unique identifier that is fixed for the device. The Network mode drop-down menu can be used to decide if the Compute Box will have a static or a dynamic IP address: If it is set to Dynamic IP, the Compute Box expects an IP address from a DHCP server. -
Page 51: Web Client: Update Menu
ADDITIONAL SOFTWARE OPTIONS After all parameters are set, click on the Save button to store the new values permanently. Wait 1 minute and reconnect to the device using the new settings. Compute Box / Eye Box settings: In case, more than one Compute Box is used within the same network, for identification purpose any user specific name can be entered to the Display name. - Page 52 ADDITIONAL SOFTWARE OPTIONS CAUTION: During the update process (takes about 5-10 minutes) DO NOT unplug any device or close the browser window. Otherwise the updated device could be damaged. The loading screens during the update process are the same for the software and the firmware updates.
-
Page 53: Web Client: Tcp/Cog
If the update is finished and was successful, the message below is shown. 7.1.6. Web Client: TCP/COG Use the TCP/COG calculator to calculate the TCP (Tool Center Point) and COG (Center of Gravity) values for your OnRobot product combination. The TCP/COG calculator will show the automatically detected settings. NOTE: Make sure to check the preset settings before calculating the TCP and COG values. -
Page 54: Web Client: Account Settings
Click on to get help about how to enter the values. 6. Click on Accessory to select any OnRobot accessories. 7. Click on Workpiece to enter the workpiece weight. Then the calculator calculates the resulting payload mass considering the gripper, the mounting, and the workpiece mass. - Page 55 ADDITIONAL SOFTWARE OPTIONS On the Users tab click on the Add new user button to add more users:...
- Page 56 ADDITIONAL SOFTWARE OPTIONS There are three user levels: Administrator • Operator • User • Fill in the user information and click Save. Later on to change any user information just click on the edit icon.
- Page 57 ADDITIONAL SOFTWARE OPTIONS To prevent a user to sign-in either could be: deactivated by changing its Active status in the edit mode • or removed by clicking the delete icon. •...
-
Page 58: Hardware Specification
HARDWARE SPECIFICATION 8. Hardware Specification 8.1. Technical Sheets 8.1.1. 2FGP20 Finger Grip Properties Minimum Typical Maximum Unit [kg] Payload 44.1 [lb] [mm] Total stroke 10.24 [inch] [mm] Grip width range * 6.69 16.93 [inch] +/- 0.5 [mm] Gripping repeatability +/- 0.0197... - Page 59 HARDWARE SPECIFICATION General properties Minimum Typical Maximum Unit Storage temperature [°C] [°F] IP Classification 400 x 121.6 x 188 [mm] Dimensions [L x W x D] 15.75 x 4.79 x 7.4 [inch] [kg] Weight - Base unit without fingers or cups 8.16 [lb] Weight - With fingers, pads on one finger, bracket for...
- Page 60 HARDWARE SPECIFICATION Consider the presence of the force sensor when the workpiece is aligned by using the fingers of the gripper or when the workpiece is picked sideways since the gravity can affect the force measurement. If the workpiece is picked sideways, make sure to orient the gripper with the moving finger on top, as shown in the image below.
- Page 61 HARDWARE SPECIFICATION Some examples of how the pads can be mounted are shown below. The pads are made of aluminum with a cover of silicone. The maximum force (equally distributed in the blue area of the images below) that can be applied to the finger pads is shown in the table below.
- Page 62 HARDWARE SPECIFICATION Illustration Pad position Maximum force (N)
- Page 63 HARDWARE SPECIFICATION Illustration Pad position Maximum force (N) Custom fingers The standard fingers provided with the gripper have a height of 220 mm. For workpieces taller than 220 mm, it is recommended to customize the fingers. An example is shown in the picture below where the pressure is recommended to be applied at the bottom of the workpiece.
- Page 64 HARDWARE SPECIFICATION Another example is shown in the image below for picking wrapped foil bottles. For this workpiece type, it is recommended to mount the pads horizontally to have as many contact points as possible. By doing so, the applied force can be increased and a firmer grip is achieved.
- Page 65 HARDWARE SPECIFICATION Moments in the finger base A maximum moment 80 Nm is allowed on each direction of the finger base. Vacuum cups The vacuum solution has been designed to handle slip sheets and similar items. The two most common configurations with the delivered bracket and cups are shown below. Square Shape Row Shape Better for cardboard slip sheets or multiple...
- Page 66 HARDWARE SPECIFICATION Square Shape Row Shape The provided tube length is adequate for the Square Shape. For using the Row Shape, please cut two of the tubes to 83 mm length. NOTE: It is important to always use the four air sources together. Custom Vacuum Bracket If a custom bracket is required, it can be made to fit the gripper according to the dimensions (mm) [inch] shown below.
-
Page 67: Quick Changers
HARDWARE SPECIFICATION 8.1.2. Quick Changers Quick Changer Quick Changer I/O Quick Changer - Quick Changer - Quick Changer - Name support – Robot Side Robot Side Robot Side 4.5A Robot Side Item # 102326 102037 104277 109498 Version QC-R – I/O QC-R v2 QC-R v2-4.5 QC-R v3... -
Page 68: Compute Box
HARDWARE SPECIFICATION Quick Changer Quick Changer Dual Quick Quick Changer - Units for I/O Changer Tool Side Weight 0.06 0.093 0.41 0.14 [kg] 0.13 0.21 0.31 [lb] Dimensions See Mechanical dimension section QC-R V3 | DQC V3 and the QC-R V2 | QC-R V2-4.5A | DQC V2 | DQC V2-4.5A The following graph shows the load capacity that the QC-R V3 | DQC V3 and the QC-R V2 | QC-R V2-4.5A | DQC V2 | DQC V2-4.5A can handle in a static situation. -
Page 69: Compute Box I/O Interface
HARDWARE SPECIFICATION Compute Box Power output (Device connector) Minimum Typical Maximum Unit Output voltage Output current 4.5* * Peak currents 8.1.3.2. Compute Box I/O interface Power Reference (24V, GND) Minimum Typical Maximum Unit Reference output voltage Reference output current [mA] Output (DO1-DO8) Minimum Typical... -
Page 70: Mountings
HARDWARE SPECIFICATION 8.2.2. Mountings 8.2.2.1. Quick Changer - Robot Side * Distance from Robot flange interface to OnRobot tool. All dimensions are in mm and [inches]. NOTE: The cable holder (on the left side) is only required with the long (5 meter) -
Page 71: Tools
HARDWARE SPECIFICATION 8.2.3. Tools 8.2.3.1. 2FGP20 All dimensions are in mm and [inches]. -
Page 72: Compute Box
All dimensions are in mm and [inches]. 8.3. TCP, COG Using Tool Connection Use the TCP/COG calculator to calculate the TCP and COG values for your OnRobot product combination. The TCP/COG calculator can be downloaded from www.onrobot.com/downloads. Using Compute Box/Eye Box For more information, see the 7.1.6. -
Page 73: 2Fgp20
HARDWARE SPECIFICATION 8.3.1. 2FGP20 Coordinate system TCP [mm] * Center of Gravity [mm] ** Weight ** X=168 cX=1.6 5.2 kg cY=-6 11.46 lb Z=341 cZ=110 * TCP at the end of the fixed finger (marked with the blue dot on the image below). -
Page 74: Maintenance
9. Maintenance WARNING: An overall inspection of the OnRobot's End of Arm Tooling must be performed regularly and at least once every 6 months. This inspection must include but is not limited to check for defective material and clean gripping surfaces. - Page 75 MAINTENANCE 1x Finger • 6x M6x12 screws • Finger pad kit - PN 109537 2x Finger pad • 8x M4x8 screws • Cleaning Recommendations The following cleaning aids can be used to clean the product: Isopropyl 70% alcohol • • Peroxide NOTE: Long time exposure and high temperatures can have a negative effect on the...
-
Page 76: Troubleshooting
CAUTION: Installed URCaps from different vendors may affect the OnRobot URCaps operation. If you experience slow GUI response, performance issue, slow program start, error pop-ups, or function loss, make sure that only the OnRobot URCap is installed on the robot. -
Page 77: Tool Functions Are Not Available
TROUBLESHOOTING 10.5. Tool Functions Are Not Available If the tool functions are not available (grayed out) in the program, return to the Installation tab > URCaps > Device info and then back to the program. -
Page 78: Warranties
Ownership of devices or components replaced by and returned to OnRobot A/S shall vest in OnRobot A/S. Any other claims resulting out of or in connection with the device shall be excluded from this warranty. Nothing in this warranty shall attempt to limit or exclude a customer’s statutory rights nor the manufacturer’s liability for death or personal injury resulting... -
Page 79: Certifications
CERTIFICATIONS 12. Certifications... -
Page 80: Emc
CERTIFICATIONS 12.1. EMC 12.2. 2FGP20 - Environment... -
Page 81: Declaration Of Incorporation
CERTIFICATIONS 12.3. Declaration of Incorporation 12.3.1. 2FGP20...
Need help?
Do you have a question about the 2FGP20 and is the answer not in the manual?
Questions and answers