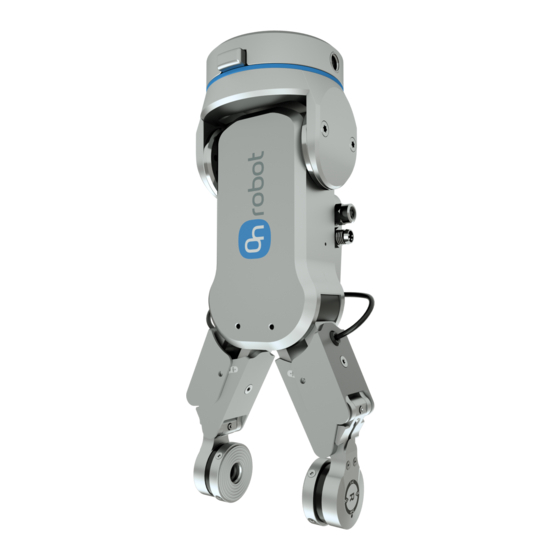
OnRobot RG2-FT User Manual
Industrial robot gripper
Hide thumbs
Also See for RG2-FT:
- Quick start manual (4 pages) ,
- User manual (282 pages) ,
- Original user manual (198 pages)

Related Manuals for OnRobot RG2-FT


Summary of Contents for OnRobot RG2-FT
- Page 1 USER MANUAL RG2-FT Industrial Robot Gripper For the Universal Robots Edition E1 OnRobot URCap Plugin Version 3.3.0 July 2018...
-
Page 2: Table Of Contents
UR Compatibility........................17 URCap Plugin Installation ....................17 2.10 URCap Plugin Setup ......................18 Using the URCap Plugin ..................... 21 OnRobot Hand Guide Toolbar ....................21 OnRobot Feedback Variables ....................23 OnRobot URCap Commands ....................24 3.3.1 F/T Width ......................... 24 3.3.2... - Page 3 “Socket vectorStream opening was unsuccessful.” ........... 57 5.4.6 Path Replay is Slower than Expected ................. 57 5.4.7 “Error number -2” on Path Saving ................57 5.4.8 “Error number -3” on Path Saving ................58 Declarations and Certificates ....................59 OnRobot © 2018 www.onrobot.com...
- Page 4 5.5.1 CE/EU Declaration of Incorporation (original) ............. 59 Editions ..........................60 OnRobot © 2018 www.onrobot.com...
- Page 5 OnRobot A/S. does not assume any responsibility for any errors or omissions in this document. In no event shall OnRobot A/S. be liable for losses or damages to persons or property arising from the use of this document.
-
Page 6: Preface
1.2 Intended Use The gripper is designed for grabbing objects, installed on the end effector of a robot, typically used in pick and place and assembly applications. OnRobot is not liable for any damage or injury resulting from misuse. Misuse includes, but is not limited to: •... -
Page 7: Warning Symbols
This indicates a potentially hazardous situation which, if not avoided, could result in injury or major damage to the equipment. CAUTION: This indicates a situation which, if not avoided, could result in damage to the equipment. NOTE: This indicates additional information such as tips or recommendations. OnRobot © 2018 www.onrobot.com... -
Page 8: Typographic Conventions
Bold text External links, or internal cross-references. Bold, blue text <angle brackets> Variable names that must be substituted by real values or strings. 1. Numbered lists Steps of a procedure. A. Alphabetical lists Image callout descriptions. OnRobot © 2018 www.onrobot.com... -
Page 9: Getting Started
Getting Started 9 2 Getting Started 2.1 Scope of Delivery In the Universal Robots OnRobot RG2-FT Gripper Kit everything is provided that is required to connect the OnRobot gripper to your UR robot. OnRobot © 2018 www.onrobot.com... -
Page 10: Mounting
0° to 180° in steps of 30°. However, to ensure all software functions are work properly, mount the gripper straight, exactly as you can see on the exploded view. Please also note where the tool connector is relative to the gripper connector. OnRobot © 2018 www.onrobot.com... -
Page 11: Mechanical Dimensions
The dimensions are in millimeters. 2.4 Load Capacity 2.4.1 Gripper Load Be aware that when grasping on an object, some of the parameters below are not directly aplicative, but can be used to calculate the load on the Gripper. OnRobot © 2018 www.onrobot.com... -
Page 12: Finger Sensor Load
The load that the gripper can handle is limited by the finger sensor. The actual object weight that the gripper can lift may vary with the actual fingertips been used. Parameter Static Unit [Nm] [Nm] [Nm] OnRobot © 2018 www.onrobot.com... -
Page 13: Fingertips
The proximity sensors are sensitive parts and shall be protected against: Direct strong light (such as directional laser sources) Direct high temperature Mechanical contacts in any case Expose to any liquid or fine conductive dust Dimensions of the Gripper’s finger, in millimeters. OnRobot © 2018 www.onrobot.com... -
Page 14: Gripper Working Range
Getting Started 14 2.6 Gripper Working Range The working range is measured between the fingers. See the figure below, for the gripper working range. The dimensions are in millimeters. OnRobot © 2018 www.onrobot.com... -
Page 15: Finger Thickness
In case when custom fingertips are used, the user should manually compensate for the difference in the finger thickness. 2.6.2 Gripping Speed Speed table illustrating the difference in speed relative to the Gripper finger position. OnRobot © 2018 www.onrobot.com... -
Page 16: Cable Connections
For more information, refer to the UR’s documentation. 6. Apply the correct network settings to both the Compute Box and the UR robot. The default Compute Box IP address is 192.168.1.1, to change it, see Changing the IP of the Compute Box. OnRobot © 2018 www.onrobot.com... -
Page 17: Ur Compatibility
To install the OnRobot URCap plugin, follow this process: 1. Insert the OnRobot USB drive in the USB slot on the right side of the Teach Pendant. 2. A message dialog window appears asking for your permission to continue with the installation. -
Page 18: Urcap Plugin Setup
Getting Started 18 2.10 URCap Plugin Setup Select the Installation tab, then select OnRobot FT Setup. The following screen is shown: Wait a few seconds while the software is automatically discovering the available OnRobot RG2-FT devices. The hourglass icon indicates that the discovery is still in progress. - Page 19 Compute Box the value will be 192.168.1.1. Status: This shows OK or the error message in case of a malfunction. Serial Number: The serial number of the RG2-FT. Compute Box version: The software version of the Compute Box. This must match the URCap version.
- Page 20 Getting Started 20 NOTE: After setting up the device the changes need to be saved to be part of the current installation with the Load/Save button. For embedded help, tap on the question mark icon. OnRobot © 2018 www.onrobot.com...
-
Page 21: Using The Urcap Plugin
3.1 OnRobot Hand Guide Toolbar After turning on the UR robot, the start screen of the PolyScope is visible. After 20 seconds, if it is activated, the OnRobot Hand Guide Toolbar appears on the top right. NOTE: It is normal to have a yellow warning signal during the boot- up for a few seconds. - Page 22 Wait until the enable button turns green and drive the robot by hand with the help of the OnRobot finger sensor. NOTE: Make sure that you do not touch the tool before the hand guiding is activated...
-
Page 23: Onrobot Feedback Variables
Using the URCap Plugin 23 3.2 OnRobot Feedback Variables Feedback Variable Unit Description of_return The return value for the OnRobot commands rg_F3D_left Length of the 3D force vector for the left finger rg_F3D_left= √���� + ���� + ���� sensor ��... -
Page 24: Onrobot Urcap Commands
Using the URCap Plugin 24 3.3 OnRobot URCap Commands These commands can be used to create complex pick and place and assembly applications easily with the help of the RG2-FT gripper. In the next sub-sections each of these commands will be described. NOTE:... - Page 25 RG2-FT will stop at a width that differs from the target width. F (Force): Enter the desired gripping force. Note that if the target width is reached before the target force, the RG2-FT will stop moving and the target force may not be achieved at the anticipated width.
- Page 26 Automatic Centering checkbox: if checked, during closing and opening the gripper, the robot moves the gripper sideways to grab the item symmetrically based on the proximity signals of the fingers. For return values, see F/T Width Command Return Values. OnRobot © 2018 www.onrobot.com...
-
Page 27: F/T Set Load
Rotation in RPY RX, RY, RZ: the rotational values of the TCP relative to the tool flange (or the fingertip center). Set payload checkbox: if checked, the installation Payload and Center of Gravity settings will be overridden with the given values. The payload must be the overall weight, including the gripper. OnRobot © 2018 www.onrobot.com... -
Page 28: F/T Zero
Set Center of Gravity to the TCP checkbox: if checked, CX,CY,CZ values are given by the set TCP offset. This command has no return value. 3.3.3 F/T Zero The F/T Zero command can be used to zero the RG2-FT finger sensor force/torque values. This command has no return value. OnRobot © 2018... -
Page 29: F/T Measure
Optical measurement (D=W-L-R) checkbox: if checked, the measurement is based on the width of the gripper and the optical sensor, without touching the part. NOTE: The measurement result (D) will be -1 if no object is placed between the fingers. OnRobot © 2018 www.onrobot.com... - Page 30 Speed <--> Precision selector buttons: the measurement precision can be selected. Current Width W=: the current width of the gripper. Current distances L, R: the current distance measured by the left and right side optical sensors. This command has no return value. OnRobot © 2018 www.onrobot.com...
-
Page 31: F/T Move
If the route or path has sharp changes in the direction, or the orientation, the actual speed of the robot may be less than specified, but still constant throughout the route or Path. Acceleration: The acceleration and deceleration parameter of the movement. OnRobot © 2018 www.onrobot.com... - Page 32 If disabled, then no pop-up message is shown but the user can handle any possible errors by the return value of the command. For return values, see F/T Move Command Return Values. OnRobot © 2018 www.onrobot.com...
-
Page 33: F/T Search
If the route or path has sharp changes in the direction, or the orientation, the actual speed of the robot may be less than specified, but still constant throughout the route or Path. OnRobot © 2018 www.onrobot.com... - Page 34 If disabled, then no pop-up message is shown but the user can handle any possible errors by the return value of the command. For return values, see F/T Search Command Return Values. OnRobot © 2018 www.onrobot.com...
-
Page 35: F/T Waypoint
Get current TCP pose button: inserts the current TCP coordinates into the Target TCP pose field. Move robot to pose [HOLD] button: moves the robot to the pose set in the Target TCP pose field, if the button is pressed. Once it is released the robot stops. OnRobot © 2018 www.onrobot.com... - Page 36 Variable: The position represented by the waypoint in the robot route. A variable can define the target pose. The variable needs to created first. Relative X, Y, Z, RX, RY, RZ: the distances and rotations this waypoint represents, compared to the previous robot position. This command has no return value. OnRobot © 2018 www.onrobot.com...
-
Page 37: F/T Path
Unsaved Path is selected. Delete Selected Path button: Deletes the path currently selected in the Path ID dropdown list from the Compute Box, permanently. NOTE: Do not delete a Path that any other F/T Path commands is using. OnRobot © 2018 www.onrobot.com... - Page 38 Path. NOTE: The maximum error of the replayed Path compared to the original recorded movement can be up to 1 mm. This command has no return value. OnRobot © 2018 www.onrobot.com...
-
Page 39: F/T Detect
Optical Detection checkbox: if checked, the optical sensor is used to detect the item. Force Detection checkbox: if checked, the force torque sensor is used to detect the item. OnRobot © 2018 www.onrobot.com... - Page 40 Current distances L, R: the current distance measured by the left and right side optical sensors. Current forces L, R: the current overall force (F3D) measured by the left and right-side force sensors. For return values, see F/T Detect Command Return Values. OnRobot © 2018 www.onrobot.com...
-
Page 41: F/T Insert Part
Min depth: The minimum distance required to consider the insertion successful, from the starting point. Max depth: The maximum distance the insertion can reach, from the starting point. Show advanced parameters checkbox: If checked, more options become available: OnRobot © 2018 www.onrobot.com... - Page 42 ‘bump’, an increase in the pushing force is expected (such as closing a snap-fit joint). This parameter is the additional force on top of Pushing force that the insertion is performed with, between the minimum and maximum depths. OnRobot © 2018 www.onrobot.com...
- Page 43 Generate warning (…): If enabled, a pop-up message (blocking) appears if the insertion was not successful. If disabled, then no pop-up message is shown but the user can handle any possible errors by the return value of the command. For return values, see F/T Insert Part Command Return Values. OnRobot © 2018 www.onrobot.com...
-
Page 44: F/T Control
F/T Control, otherwise the command may not work properly. Compliant axis Fx, Fy, Fz, TX, TY, TZ: The axis selection that needs to be compliant. If an axis is enabled (compliant) the movement along/about that axis is force/torque controlled OnRobot © 2018 www.onrobot.com... - Page 45 D Gain F: The force controller can be tuned with this derivative gain parameter. If any overshoots or vibrations occur, try lowering the gain value. D Gain T: The torque controller can be tuned with this derivative gain parameter. If any overshoots or vibrations occur, try lowering the gain value. OnRobot © 2018 www.onrobot.com...
- Page 46 Values that can be used as a base for tuning are: P Gain F =1, I Gain F = 0.1, D Gain F = 0.3 P Gain T =0.2, I Gain T = 0, D Gain T = 0 OnRobot © 2018 www.onrobot.com...
-
Page 47: Script Function
1. Go to the Welcome screen of the PolyScope. 2. Click Setup Robot. 3. Click on URCaps Setup and locate the RG - OnRobot in the list of active URCaps. 4. Click on the - sign at the bottom to uninstall it. -
Page 48: List Of Acronyms
List of Acronyms 48 4 List of Acronyms Acronym Expansion Input/Output Tool Center Point Universal Robots URCap Universal Robots Capabilities Universal Serial Bus OnRobot © 2018 www.onrobot.com... -
Page 49: Appendix
Appendix 49 5 Appendix 5.1 Technical Specifications RG2-FT General Properties Typical Units [mm] Total stroke (adjustable) [mm] Finger position resolution [mm] Repetition accuracy [mm] Reversing backlash Gripping force (adjustable) [mm/s] Gripping speed* 0,04 0,07 0,11 Gripping time** [°C] Ambient operating temperature [°C]... -
Page 50: Changing The Ip Of The Compute Box
5.2 Changing the IP of the Compute Box To change the IP address of the sensor, connect your laptop or an external PC to the OnRobot Compute Box. 1. Make sure that the device is not powered. Connect the device and the computer with the provided Ethernet cable. -
Page 51: Return Values
Address set in step 7. 5.3 Return Values Those OnRobot commands that has return values updates the of_return variable once the command exit. This global variable can be used with the UR’s built in If conditional expressions (for example: if of_return == 1 then do something). -
Page 52: F/T Search Command Return Values
The Insert Part command got stuck after the minimal insertion depth. Insertion is slower than required. The Insert Part command got stuck before the minimal insertion depth. Insertion is slower than required. The Insert Part command exited with timeout after the minimal insertion depth. OnRobot © 2018 www.onrobot.com... - Page 53 The Insert Part command exited due to too high side-forces/-torques at the non- compliant axes after the minimal insertion depth. The Insert Part command exited due to too high side-forces/-torques at the non- compliant axes before the minimal insertion depth. The Insert Part command has a parameter error. OnRobot © 2018 www.onrobot.com...
-
Page 54: Troubleshooting
2. If the OnRobot device(s) found successfully but the UR Robot IP shows “N/A” for troubleshooting, see UR Robot IP is “N/A”. 3. If both the OnRobot device(s) found successfully and the UR Robot IP shows a valid IP address, then for troubleshooting see Device found, and UR has 5.4.1.1 “No devices found”... - Page 55 Switch 3 is in off state on the Compute Box, as shown on the following figure: 2. If the DIP Switch is in on state, set it to off, then restart the OnRobot device (by disconnecting the power) and repeat the steps in Example Setup section.
-
Page 56: Too Close To Singularity
For safety and accuracy, the Hand Guide mode keeps the tool flange at a greater distance from the cylindrical volume than the physical possibility of the UR robot. Moving the tool flange closer is possible, by using the PolyScope Move tab, or move commands. OnRobot © 2018 www.onrobot.com... -
Page 57: Warning Sign On Hand Guide Bar
Appendix 57 5.4.3 Warning sign on Hand Guide Bar If the OnRobot device is not running properly, a warning sign appears. Repeat the steps of URCap Plugin Setup. 5.4.4 “socket_read_binary_integer: timeout” If any command is running for more than 2 seconds, a socket_read_binary_integer: timeout entry appears in the Log. -
Page 58: Error Number -3" On Path Saving
If a Path cannot be saved due to not enough storage space on the Compute Box, the “Error number -3” error message is displayed. In this case, delete previously recorded paths that are not used anymore. OnRobot © 2018 www.onrobot.com... -
Page 59: Declarations And Certificates
2006/42/EC. A comprehensive risk assessment must be carried out for each application as part of ensuring that all essential requirements are fulfilled. All essential requirements must be assessed. Instructions and guidance provided in the RG2-FT user manual must be followed. - Page 60 Appendix 60 5.6 Editions Edition Comment Edition 1 This is the First Edition of this document. OnRobot © 2018 www.onrobot.com...
Need help?
Do you have a question about the RG2-FT and is the answer not in the manual?
Questions and answers