Heartland VALUE Series Assembly Manual
Hide thumbs
Also See for VALUE Series:
- Assembly manual (103 pages) ,
- Assembly manual (72 pages) ,
- Assembly manual (60 pages)
Advertisement
Quick Links
This handout is designed to assist the public in describing the construction details of a shed for the purposes of
obtaining a building permit. A site plan will also be required to show us where the shed will be located on your
property.
The City of Pasco REQUIRES a permit for all sheds, no matter the size.
You may use this handout if your shed is
For larger structures you must provide a complete set of construction details. If you are purchasing a Pre-
Manufactured shed please simply provide us with a copy of the installation manual or brochure.
NOTE: ALL sheds must be anchored to the ground AND siding & roofing must be similar to that of the
house.
Fill In The Blanks:
a.
Width_____ Length_____ Height______
10
b.
Foundation (circle one):
(1) Concrete Slab
(2) Wood Foundation (minimun 4X6 PT)
(3) Gravel Floor
(4) Concrete Block
(5) Other___________________
c.
Framing Material (circle one) :
2 X 4
2X6 2X8
d.
Stud Spacing (circle one) :
16"
24"
Other_______
Will you use (circle one) :
e.
Pre-Manufactured Trusses OR Rafters?
o Rafter Size: 2 X 4
Other____________
o Rafter Spacing: 16"
Other____________
f.
Siding Type: ________________
T1-11
g.
Type of Roofing: _____________
h.
Door size: _____________ & location: ______________
6'
i.
Window : ______________ & location: ______________
na
Building Division
525 N 3
P: 509.543.5726
www.pasco-wa.gov
(1) Less than 200 square feet AND (2) Less than 10 feet in height.
10
10
Other_______
2X6
2X8
24"
Composite
end
rd
Ave, Pasco, WA 99301
|
permittech@pasco-wa.gov
Storage Shed Construction Details
Cannot be used as habitable space.
Cannot be heated or cooled.
Anchor bolts 6' (six
feet) on center – slab.
Maximum spacing 6'
(six feet) on center
secure with concrete
fill.
Provide 2x4 collar tie in bottom
1/3 of attic space. Provide
positive mechanical connectors
for wall to rafter connection.
Man Door OR Roll up?
REVIEWED
By Ben Mohs 14:37, May 07, 2021
4/2021
Advertisement

Related Manuals for Heartland VALUE Series


Summary of Contents for Heartland VALUE Series
- Page 1 REVIEWED Building Division By Ben Mohs 14:37, May 07, 2021 525 N 3 Ave, Pasco, WA 99301 P: 509.543.5726 www.pasco-wa.gov permittech@pasco-wa.gov Storage Shed Construction Details This handout is designed to assist the public in describing the construction details of a shed for the purposes of obtaining a building permit.
- Page 2 16656-L REVIEWED By Ben Mohs 14:36, May 07, 2021 STOP! STOP! Call Us First! DO NOT RETURN TO STORE. For immediate help with assembly or product information call our toll free number: 1-800-577-9663 or email: customerservice@backyardproductsllc.com Our staff is ready to provide assistance April through October M-F 8:00 AM to 4:30 PM EST Saturday 8:30 AM to 4:30 PM EST November through March M - F 8:00 AM to 5:00 PM EST...
-
Page 3: Assembly Manual
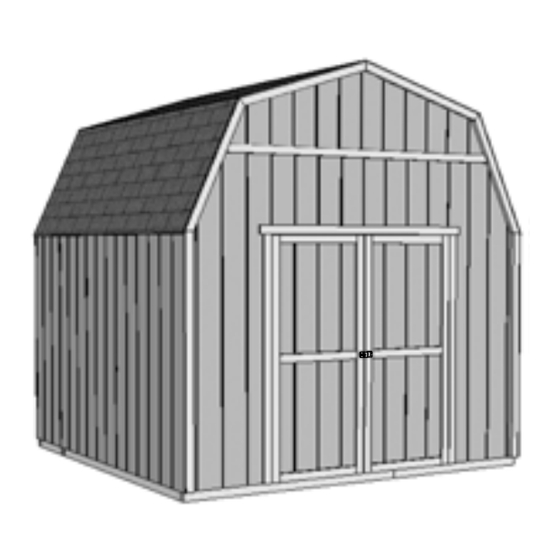
16656-L 07/12/2016 ASSEMBLY MANUAL A Backyard Products Company VALUE SERIES RAINIER 10' x 10' (305 x 305 cm) ACTUAL FLOOR SIZE IS 120 x 116-5/8" (305 x 296 cm) KEEP THIS MANUAL FOR FUTURE REFERENCE (This page intentionally left blank.) I MP O R TAN T ! READ INSTRUCTIONS THOROUGHLY PRIOR TO BEGINNING ASSEMBLY. -
Page 4: Additional Materials
TOOLS ADDITIONAL MATERIALS Required Optional Phillips Tool Belt/ Utility Knife FOUNDATION OR FLOOR MATERIALS Screwdriver Nail Pouch Shingle Blades Drill / Driver • This shed kit includes a complete wood fl oor frame system. It does not include floor panels. Tin Snips 3/8"... -
Page 5: Parts List
PARTS IDENTIFICATION AND SIZES PANEL PARTS LIST NOTE: Panel parts are not stamped with part identifi cation. Part identification Treated lumber is stamped: is stamped on some parts. Nominal Board Size Actual Size 7/16 x 48 x 96" 2" x 4"....1-1/2" x 3-1/2" (3,8 x 8,9 cm) (1,1 x 122 x 244 cm) 1"... - Page 6 BUILDING ANATOMY WALL PANEL & DOORS PARTS LIST LEFT BACK LEFT FRONT RIGHT FRONT RIGHT BACK NOTE: Edge painted NOTE: Edge NOTE: Edge NOTE: Edge painted green and black. painted green. painted red. red and black. 3/8 x 23-7/8 x 72" 3/8 x 48 x 72"...
- Page 7 FLOOR LEVELING OPTIONS CONCRETE FOUNDATION There are multiple ways to level your floor frame. Our recommended leveling method is shown below. Your kit contains all materials to construct a wooden floor. If you choose to install your kit Leveling materials are not included in this kit. on a concrete slab refer to the diagram below.
- Page 8 FLOOR FRAME FLOOR FRAME PARTS REQUIRED: PARTS REQUIRED: 3" (7,6 cm) x28 3" (7,6 cm) x28 TREATED TREATED 2 x 4 x 72" (5 x 10 x 183 cm) 2 x 4 x 72" (5 x 10 x 183 cm) Treated Wood TREATED TREATED NOTE:...
-
Page 9: Parts Required
FLOOR FRAME FLOOR PANELS (NOT INCLUDED) PARTS REQUIRED: 2" (5 cm) x55 3" (7,6 cm) x40 Floor Panels not included See page 3 for panel sizes Put both floor sections together and attach as shown using 3" nails. 3/4 x 48 x 92-5/8" and quantities. - Page 10 FLOOR PANELS (NOT INCLUDED) IMPORTANT! I M P O R T A N T ! PARTS REQUIRED: 3/4 x 23-7/8 x 23-7/8" (1,9 x 61 x 61 cm) 2" (5 cm) x154 Check the floor frame is level after installing floor panels. Re-level if needed. 3/4 x 23-7/8 x 92-5/8"...
- Page 11 BACK WALL FRAME BACK WALL FRAME PARTS REQUIRED: PARTS REQUIRED: 3" (7,6 cm) x6 3" (7,6 cm) x6 2 x 3 x 48" (5 x 7,6 x 122 cm) 3" (7,6 cm) x2 2 x 3 x 45" (5 x 7,6 x 114,3 cm) 2 x 3 x 94-1/2"...
- Page 12 BACK WALL PANELS BACK WALL PANELS PARTS REQUIRED: PARTS REQUIRED: 2" (5 cm) x44 2" (5 cm) x44 3/8 x 48 x 96" 3/4" 3/8 x 48 x 96" (1 x 122 x 244 cm) 3/4" (1 x 122 x 244 cm) GAUGE GAUGE BLOCK...
- Page 13 WING WALL PANELS BACK WALL PARTS REQUIRED: PARTS REQUIRED: 1-1/4" (3 cm) x32 2" (5 cm) x34 Pre-assembled LEFT LEFT RIGHT RIGHT Pre-assembled 2 x 3 x 72-5/8" (5 x 7,6 x 184,5 cm) Place wing wall assemblies onto frame with top of panels flush (Fig.A). BEGIN Nail left and right wing wall assemblies onto back wall frame You will assemble TWO RIGHT and TWO LEFT wing walls.
- Page 14 BACK WALL GABLE PANELS BACK GABLE PANELS AND TRIM PARTS REQUIRED: PARTS REQUIRED: 2" (5 cm) x24 1-1/4" (3 cm) x24 2 x 3 x 25" (5 x 7,6 x 63,5 cm) 2 x 3 x 45-1/8" (5 x 7,6 x 115 cm) 3"...
- Page 15 FRONT WALL FRAME FRONT WALL PANELS PARTS REQUIRED: PARTS REQUIRED: 2" (5 cm) x36 3" (7,6 cm) x12 2 x 3 x 22-1/2" (5 x 7,6 x 57 2 x 3 x 94-1/2" (5 x 7,6 x 240 cm) 3/4" GAUGE LEFT BLOCK 2 x 3 x 96"...
- Page 16 FRONT WALL PANELS FRONT WALL PANELS PARTS REQUIRED: PARTS REQUIRED: 2" (5 cm) x36 2" (5 cm) x34 Pre-assembled LEFT 3/4" GAUGE RIGHT BLOCK Pre-assembled RIGHT Place wing wall panels onto frame with top of panels (Fig. A). Place RIGHT panel on front frame. Use a 3/4"...
- Page 17 FRONT GABLE PANELS AND TRIM FRONT WALL GABLE PANELS PARTS REQUIRED: PARTS REQUIRED: 2" (5 cm) x24 2 x 3 x 45-1/8" (5 x 7,6 x 115 cm) 1-1/4" (3 cm) x24 2 x 3 x 25" (5 x 7,6 x 63,5 cm) 3"...
- Page 18 SIDE WALL FRAMES SIDE WALL PANELS PARTS REQUIRED: PARTS REQUIRED: 3" (7,6 cm) x20 2" (5 cm) x34 2" x 3" x 46-1/4" (5 x 7,6 x 117 cm) 3/4" GAUGE BLOCK 3/8 x 48 x 72" 2" x 3" x 68-3/4 " (5 x 7,6 x 174,6 cm) (1 x 122 x 183 cm) 2"...
-
Page 19: Back Wall Installation
SIDE WALL PANELS BACK WALL INSTALLATION PARTS REQUIRED: PARTS REQUIRED (TEMPORARY): 2" (5 cm) x166 3" (7,6 cm) x8 3/8 x 23-7/8 x 72" 1 x 4 x 96" (2,5 x 10 x 244 cm) (1 x 61 x 183 cm) 3/8"... - Page 20 SIDE WALLS INSTALLATION FRONT WALL INSTALLATION 3" (7,6 cm) x4 3" (7,6 cm) x8 3" (7,6 cm) x20 2" (5 cm) x70 2" (5 cm) x38 BEGIN Stand frontwall on floor. Stand right sidewall on floor. It is important to secure the frontwall in the following order. It is important to secure the sidewall in the following order.
- Page 21 GABLE TRIM RAFTERS PARTS REQUIRED: PARTS REQUIRED: 1-1/4" (3 cm) x24 2" (5 cm) x96 2 x 3 x 41" (5 x 7,6 x 104 cm) Pre-assembled GUSSET RAFTER-HALF BEGIN Install front lower gable trim PF so two points contact PD and You will build FOUR assemblies;...
- Page 22 RAFTERS LOFT JOISTS PARTS REQUIRED: PARTS REQUIRED: 3" (7,6 cm) x16 2 x 4 x 59-3/4" (5 x 10 x 152 cm) Rafter Assemblies BEGIN BEGIN Arrange four rafters centered on the mark you made for locating the wall Install SU at same height as top plates and level. Install using two 3" nails at studs.
- Page 23 LOFT JOISTS LOFT JOISTS PARTS REQUIRED: 3" (7,6 cm) x24 3" (7,6 cm) x22 2 x 4 x 28-3/4" (5 x 10 x 70 cm) 2 x 4 x 92-5/16" (5 x 10 x 234 Take two loft joist sub-assemblies and flip one end to end so they will produce a 4"...
- Page 24 LOFT JOISTS LOFT PANEL PARTS REQUIRED: PARTS REQUIRED: 3" (7,6 cm) x8 2" (5 cm) x4 ASSEMBLED LOFT JOIST 7/16 x 48 x 96" (1 x 122 x 244 cm) BEGIN BEGIN Place loft panel grid lines up onto the three loft joists centered from side-to-side Put a loft joist flush on the front side of each of the back two rafters.
- Page 25 ROOF PANELS ROOF PANELS PARTS REQUIRED: PARTS REQUIRED: 2" (5 cm) x196 3/4" 3/4" GAUGE BLOCK GAUGE 7/16 x 41-7/8 x 96" 7/16 x 45-1/8 x 96" BLOCK (1,1 x 106 x 244 cm) (1,1 x 115 x 244 cm) Keep spacing between the center of the rafters at the lower edge of the panel and secure with one 2"...
- Page 26 LOFT PANEL DOORS PARTS REQUIRED: 1-1/4" (3 cm) x4 2" (5 cm) x11 1 x 4 x 96" (2,5 x 10 x 244 cm) 2" (5 cm) x4 HINT: Look for 3/8" SPACER attached to doors. BEGIN Complete installation of Loft panel using 2" nails spaced 24". Left Door FINISH You have finished your loft panel...
- Page 27 DOORS DOOR PARTS REQUIRED: PARTS REQUIRED: 2" (5 cm) x8 3" (7,6 cm) x7 3/4" (1,9 cm) x50 2 x 3 x 69" (5 x 7,6 x 175,3 cm) 5/8 x 3 x 72" (1,6 x 7,6 x 183 cm) Attach temporary support OO as a ledger board flush under wall panels for doors to rest on, using three 3"...
-
Page 28: Door Hardware
DOOR WEATHERSTRIP DOOR HARDWARE PARTS REQUIRED: PARTS REQUIRED: 2" (5 cm) x14 3/8" (9 mm) Drill Bit 2 x 3 x 69" (5 x 7,6 x 175 cm) 3/4" (1,9 cm) x4 3/4" (1,9 cm) x7 BEGIN With left door closed, center a weatherstrip OO vertically on the left door in the door opening (Fig. - Page 29 TRIM COLLAR TIES PARTS REQUIRED: PARTS REQUIRED: 2" (5 cm) x20 2" (5 cm) x12 1 x 4 x 96" (2,5 x 10 x 244 cm) 1 x 3 x 94-1/2" (2,5 x 7,6 x 240 cm) BEGIN Install a collar tie KP on the two rafters closest to the door opening. BEGIN Install HQ over seam of front wall panels using 2"...
- Page 30 PAINT & CAULK SHINGLES - NOT INCLUDED - - NOT INCLUDED - • Follow directions provided by manufacturer and these instructions. • Use acrylic latex caulk that is paintable. Caulk at all horizontal and vertical seams, between the trim and walls, and all around the door trim.
- Page 31 SHINGLES SHINGLES continued... continued... Install second row of shingles flush at top of first row's rain slots. Ensure 1" overhang or flush to drip edge at front, After shingles are installed over bend, nail down overlap using two roofing nails per tab. stagger each row.
- Page 32 SHINGLES - RIDGE CAP SHINGLES - RIDGE CAP continued... • You will finish off the top of the roof with a ridge cap made from shingles. Continue installing ridge cap to back of roof. BEGIN Cut shingles into THREE pieces. Hint: Use cut-off pieces first.
- Page 33 All accessories, hardware and metal components are warranted for 2 years. All Oriented Strand Board (OSB) is warranted for 2 years Siding and Trim is warranted for: 10 years: Value Series / Solar Shed 12 years: Classic Series / Architectural Series 15 years: Big Buildings Solar Shed windows are warranted for 1 year.
Need help?
Do you have a question about the VALUE Series and is the answer not in the manual?
Questions and answers