Electronics Line iConnect User Manual
Hide thumbs
Also See for iConnect:
- Installation manual (140 pages) ,
- User manual (52 pages) ,
- Installation manual (12 pages)
Table of Contents
Advertisement
Quick Links
Download this manual
See also:
Installation Manual
Advertisement
Table of Contents

Related Manuals for Electronics Line iConnect


Summary of Contents for Electronics Line iConnect
- Page 1 ...
- Page 2 Catalog Number: ZI0548F (06/10) All data is subject to change without prior notice. Hereby, Electronics Line 3000 Ltd. declares that this Control System is in compliance with the essential requirements and other relevant provisions of Directive 1999/5/EC. Copyright © 2010 Electronics Line 3000 Ltd. All rights reserved. ii ...
- Page 3 After recording a message, “Message then RECORD Waiting” is displayed until the message is MESSAGE played back. The Message Center is an optional feature then PLAY that is included with certain versions of MESSAGE iConnect Control System. iii ...
- Page 4 Telecontrol Commands Function Press… Function Press… 2-WAY AUDIO DISARM FULL ARM SIREN CANCEL HA UNIT XX ON then EXTEND CALL HA UNIT XX OFF then DISCONNECT then For Partitioned Systems Function Press… Function Press… FULL ARM SYSTEM DISARM then then PARTITION 1 ARM PARTITION 1 DISARM then...
-
Page 5: Table Of Contents
Table of Contents Quick Reference Guide ................... iii Introduction and Overview ..............1 1.1. Documentation Conventions ..............1 1.2. Security System Components ..............2 1.3. System Monitoring ................... 2 1.4. Home Automation ..................3 1.5. Self-Monitoring ..................3 1.6. Telephone Control ..................3 1.7. - Page 6 7.2. Zone Bypassing/Unbypassing ..............30 7.3. User Codes.....................31 7.4. Follow-Me ....................33 7.5. Speed Dial Numbers ................34 7.6. Event Log ....................34 7.7. Service Menu..................35 Appendix A: Menu Structure ................40 Appendix B: Web User Application..............41 Log In Page ......................41 The Main Page ....................42 Options Available from Main Page ................43 Video .......................48 Appendix C: Glossary..................
-
Page 7: Introduction And Overview
Keep this manual in an accessible location for future reference. The iConnect system has many features in order to suit a wide range of applications. This manual outlines all of these features but it is likely that there are options that are ... -
Page 8: Security System Components
1.3. System Monitoring When an event occurs within the system, the Control System sends a message to your monitoring service describing the exact nature of the event. This enables the monitoring service to take the required action. System monitoring can implement either regular telephone or cellular communication. iConnect User Manual ... -
Page 9: Home Automation
1.6. Telephone Control DTMF Telecontrol The iConnect offers a range of “Telecontrol” features that provide remote access via the telephone (PSTN or Cellular). These features include remote arming/disarming, control over Home Automation units, PGM output activation/deactivation, siren cancel and Two‐Way audio via the Control System’s built‐in microphone and speaker – see p.27, 6 Telecontrol. ... -
Page 10: Vocal Message Annunciation
Via the Web you can perform a wide range of tasks such as arm/disarm, zone bypass, user code management and home automation control. Additionally, you can set up the contacts whom you wish to be alerted (by email or text message) when selected events occur. The application also allows you to check your home at any time either by viewing a history of recent events that have occurred or by viewing streaming video from cameras installed on the premises. For further information, see p. 41, Appendix B: Web User Application. iConnect User Manual ... -
Page 11: The User Interface
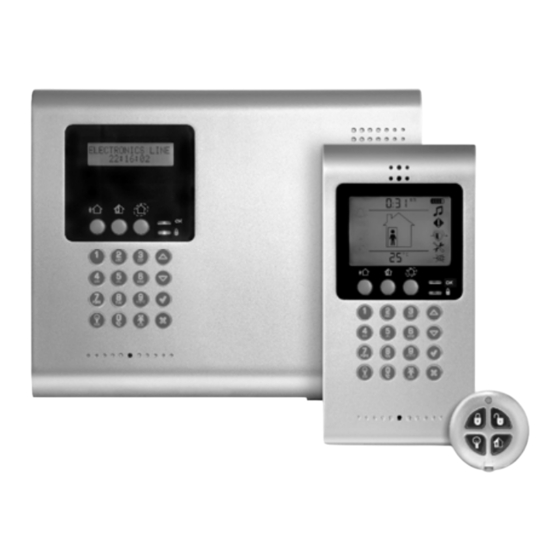
Display System Status indicators Arming Keys Menu Navigation Keys Alpha- numeric Keypad Home Automation Keys Arming Keys Three arming keys are available: Full, Part, and Perimeter. These buttons arm the system using one of the three arming methods. One‐key Arming is an option that is programmed by your installer. iConnect User Manual 5 ... - Page 12 On Yellow System Trouble. Flashing Yellow (slow) Battery low from the Control System or transmitters. Flashing Yellow (fast) AC loss. Flashing Yellow System Trouble in addition to AC loss/Low Battery. (intermittent) iConnect User Manual ...
-
Page 13: Front Panel (Led Configuration)
System status. In addition to System Status LEDs (OK and ʺ!ʺ), there are three Arming Status LEDs: full, part, and perimeter. The three‐button keypad allows you to make service call, record and play audio message, and to activate SOS panic alarm. Arming System Status Status LEDs LEDs Service Call Button Message Record Button Message Play Button iConnect User Manual 7 ... - Page 14 The system is ready for arming. Flashing Open Zone. Check that the relevant entrances are secured (i. e. windows and doors are closed and no movement is detected by the sensors within the protected area). iConnect User Manual ...
-
Page 15: Alarm Sounding Patterns
Medical ON (continuously) – only applicable for Medical alarm from zone Flood 4 rapid tones sounded once per minute (same as Trouble tones) Environmental 4 rapid tones sounded once per minute (same as Trouble tones) iConnect User Manual 9 ... -
Page 16: Lcd Keypad
2.5. Keyfobs The iConnect supports two types of keyfob transmitter. The EL‐2714 includes two buttons (B1 and B2) that you can program individually. The default functions for B1 and B2 buttons are arming functions. Arming functions of the keyfob for partitioned and unpartitioned systems are described in p. 17, Arming with the Keyfob. Alternatively, ... -
Page 17: Wireless Terminal
(if supported) against the center of the FULL PART PERIMETER smartkey reader. DISARM [USER CODE or SMARTKEY] Entering your user code also silences the siren in the event of an alarm. iConnect User Manual 11 ... - Page 18 The keypad is powered by AC and the battery is not low. Flashing Yellow Local backup battery low. (slow) Flashing Yellow Wireless Terminal AC loss. (fast) The system is disarmed. On - Green The system is armed. iConnect User Manual ...
- Page 19 The battery status of the Wireless Terminal. Status AC Status The AC power status of the Wireless Terminal. If the icon is crossed-out, it means AC power loss (i.e. the Wireless Terminal is disconnected). Clock A four-digit clock display. The icon shows all the three arming modes only when armed from the Terminal itself. If armed from the Control System, the icon always shows full arming. iConnect User Manual 13 ...
- Page 20 2. The User Interface Smartkey (Model Dependant) To disarm the System using smartkey: Place a registered smartkey against the center of the smartkey reader. When the smartkey is read, the keypad will sound a beep – the system is disarmed. Arming the System using Smartkey is possible when One‐Key Arming is disabled. To arm the System using smartkey: Press one of the Arming Keys, then place a registered smartkey against the center of the smartkey reader. When the smartkey is read, the keypad will sound a beep – the system is armed. iConnect User Manual ...
-
Page 21: Arming And Disarming
Certain sensors, such as smoke sensors, are always active regardless of system status. 3.3. Arming Modes: Partitioned systems If partitioning is enabled in programming, three arming modes are available: Full, Partition 1, and Partition 2. Partitions are entirely customizable; each partition can be armed and disarmed independently. iConnect User Manual 15 ... -
Page 22: Arming The System
To arm the system using the front panel/wireless keypads: Press one of the three arming keys. In a partitioned system, press Part Arming key for partition 1 arming and Perimeter Arming key for partition 2 arming. The exit delay begins to count down. At the end of the exit delay, the system is armed. Wireless Terminal EL‐2724 does not support partitioning. Enter your user code if One‐Key arming is disabled. To arm the system with smartkey (Wireless Terminal), one‐key arming must be disabled. Arming with the LCD Keypad To full arm the system using the LCD keypad: Press FULL on the keypad; the exit delay begins to count down. At the end of the exit delay, the system is armed. To Part or Perimeter arm the system, or to arm one partition in a partitioned system, using the LCD keypad: Press PART on the keypad. If One‐Key Arming is disabled, enter your user code. iConnect User Manual ... - Page 23 → → → (P1 and P2) Example 1: The keyfob is assigned to Partition 1. To Arm Partition 1, press B1 button. To disarm Partition 1, press the Disarm button. It is not possible to Full arm/ disarm the whole system or to arm/disarm partition 2 with this keyfob. Example 2: The keyfob is assigned to both partitions. To Arm Partition 1, press B1 button. To disarm Partition 1, press the Disarm button, and then press B1. Combination Arming There is an option to activate two arming modes simultaneously. Unpartitioned Systems In unpartitioned systems, the possible combinations are: Full + perimeter Part + Perimeter iConnect User Manual 17 ...
- Page 24 If Supervised Arm is enabled in programming and the system has not received a transmission from a sensor for a certain amount of time, all arming methods that include that sensor shall not be available. In this case, press to check which sensor is causing the “System Not Ready” condition. To make the required arming method available, activate the sensor. If activating the sensor does not help, there may be a problem with the sensor. You can bypass the faulty sensor’s zone to allow system arming until the problem is remedied – see p. 30, 7.2. Zone Bypassing/Unbypassing. iConnect User Manual ...
-
Page 25: Disarming The System
Disarming the System Using the Keyfob Unpartitioned Systems Press the disarm button. Partitioned Systems: If the keyfob is assigned to both partitions, two buttons shall be pressed. To disarm partitioned system, see the table below: Function Disarm the Disarm P1 Disarm P2 Whole System Partition P1 only P2 only Whole system (P1 → → → and P2) iConnect User Manual 19 ... -
Page 26: Arm Status And Other System Status Indication
PART 1 ARMED Partition 1/partition 2 has been armed. PART 2 ARMED SYSTEM ARMING The system is in the process of arming PART 1 ARMING Partition 1/partition 2 is in the process of arming. PART 2 ARMING iConnect User Manual ... -
Page 27: Arming Tones
Arming tones may be sounded by either the external wireless siren or the control panel’s built‐in siren. 3.8. Remote Arming/Disarming Remote Arming/Disarming via SMS You can arm and disarm the system remotely by sending the SMS commands from a cellular phone to the cellular communications module. Each SMS command contains the following elements: SMS Command Descriptor (up to 43 characters of free text) # (separates the descriptor from the actual command) User Code Command (120=Disarm, 121=Full Arm, 122=Part Arm/Partition 1 Arm, 123=Perimeter Arm/Partition 2 Arm, 124=Full + Perimeter Arm, 125=Part iConnect User Manual 21 ... - Page 28 The following example shows the confirmation message you receive for the sample command from the previous section. S A R M E D Remote Arming/Disarming via the Telephone Using the Telecontrol feature, you can arm and disarm the system via the telephone. For further information on the Telecontrol features, see p. 27, 6. Telecontrol. Remote Arming/Disarming via WUAPP and WAP You can arm and disarm the system remotely using the WUAPP (Web User Application) and WAP – see Appendix B: Web User Application. ∗ Master code is required for the Arm Status command. iConnect User Manual ...
-
Page 29: Panic Alarms
Press and hold down buttons 4 and 6 simultaneously. 4.2. Keyfob Panic Alarm To activate a Panic alarm using the four‐button keyfob (EL‐2714): Press the lower two buttons simultaneously. 4.3. Medical Emergency The one‐button keyfob (EL‐2611) is designed to send a message to your monitoring service in the event of a medical emergency. The transmitter is water‐resistant and can be worn around the neck as a pendant. iConnect User Manual 23 ... -
Page 30: Home Automation And
5.1. Keypad Control Two buttons on the keypad enable you to send On and Off commands to HA units, activate and deactivate PGM output. To turn HA units on using the keypad: Press the HA On button. Enter the two‐digit HA unit number (01‐16, or 30 for PGM); the chosen HA unit switches on. To turn HA units on using the keypad: Press the HA Off button. Enter the two‐digit HA unit number (01‐16, or 30 for PGM); the chosen HA unit switches off. 5.2. Keyfob Control You can control two separate HA units and/or PGM using the four‐button keyfob. This option can be programmed by the installer. See p. 10, 2.5. Keyfobs. iConnect User Manual ... -
Page 31: Telephone Control
After an SMS command is executed by the system, if programmed by your installer, a confirmation message may be returned to your mobile phone. This message includes the HA unit’s descriptor and the command that was sent. The following example shows the confirmation message you receive for the sample command from the previous section. 5.5. Scheduling (not relevant to PGM) The Scheduling feature allows you to set an On and Off time for each HA unit. At these times the system automatically switches the HA unit on and off. You can also choose the days of the week that the schedule is active. Scheduling is also available on the WUAPP (Web User Application) and WAP – see p. 48, Apendix B, WEB User Application, Automation. iConnect User Manual 25 ... - Page 32 5. Home Automation and PGM On Time To edit an HA unit’s “On” Time: From the main menu, select HA Schedules [8]. Select an HA unit. From the HA unit’s sub‐menu, select On Time. Enter a time (HH:MM). Off Time To edit an HA unit’s “Off” Time: From the main menu, select HA Schedules [8]. Select an HA unit. From the HA unit’s sub‐menu, select Off Time. Enter a time (HH:MM). Weekly Schedule To program the days of the week that the schedule is active: From the main menu, select HA Schedules [8]. Select an HA unit. From the HA unit’s sub‐menu, select Schedule. Use buttons 1 to 7 to toggle the days on and off. Press… To toggle… Press… To toggle… Sunday Thursday Monday Friday Tuesday Saturday Wednesday iConnect User Manual ...
-
Page 33: Telecontrol
Therefore, the double call method is not necessary and you may call the Control System directly. Call Procedure To prevent unauthorized attempts to call your Control System, you must enter a user code when calling your home – see p. 32, 7.3. User Codes, Code 29. To call your home: Call the Control System either using the double call method or directly (see above); when the Control System picks up, two tones are sounded. Enter the telecontrol code (Code 29) on your telephone within 15 seconds. iConnect User Manual 27 ... - Page 34 Press “6” to disarm the system. Press “9” to cancel the siren. For partitioned systems, arming and disarming commands are different: Press “31” to fully arm the system. Press ʺ32ʺ to arm partition 1. Press ʺ33ʺ to arm partition 2. Press “61” to disarm the entire system. Press ʺ62ʺ to disarm partition 1. Press ʺ63ʺ to disarm partition 2. The Arm/Disarm, Home Automation/PGM on/off, and Siren canceling can also be executed at any time during a Two‐Way Audio session. Error beeps (three tones) sound in case of a wrong command. To clear the last command, press “ ” or “#”. The duration of the call is an option programmed by your installer. Ten seconds before the end of the call, two short tones are sounded. To extend the call, press “7” on your telephone. To disconnect before the end of the call, press “ ” then “#” on your telephone. iConnect User Manual ...
-
Page 35: Service Call
“Simplex” mode. Simplex mode means that one party may speak while the other party listens. If using Simplex mode, the call is connected in Listen mode. In Listen mode, the microphone on the Control System is turned on so that you can listen in. If you want to switch to Speak mode, press “1” on your telephone. In Speak mode, the microphone is turned off and the speaker is turned on so that you can speak to the person on the other end of the line. If you want to switch back to Listen mode, press “0” on your telephone. iConnect User Manual 29 ... -
Page 36: Advanced System Operation
Throughout this chapter, we have tried to include all of the system functions using a similar structure and order as they appear in the menu. 7.1. Cancel Report The Cancel Report function enables you to prevent the system from reporting in the event of a false alarm. To cancel report: From the main menu, select Cancel Report [1]; all pending messages to the monitoring service are canceled. 7.2. Zone Bypassing/Unbypassing When a zone is bypassed, its sensor is ignored by the system and does not generate an alarm when triggered. To bypass or unbypass a zone: From the Bypass Zones menu, select Bypass/Unbyp. [21]. iConnect User Manual ... -
Page 37: User Codes
A fire zone cannot be bypassed. 7.3. User Codes The iConnect supports a variety of individual user codes. Each of these codes is four digits long. Most system functions require you to enter a valid user code. The ability to perform a function is defined by your user code’s authorization level. These authorization levels are pre‐defined for each code as explained below. Code 1: Master Code The ... - Page 38 Press ; the new code is stored in the memory. If you enter a code that is identical to an existing user code, the Control System sounds an error tone and the new code is not accepted. 0000 is not a valid user code as this value is used to delete a user code. Deleting User Codes As an additional security measure, make certain that you delete any extra codes that are no longer required. To delete a user code: From the main menu select, User Codes [4]. Select the code you want to delete; From the code’s sub‐menu, select Edit Code; the 4‐digit code is displayed with the cursor flashing on the first digit. Enter 0000. Press ; the code is deleted. The master code cannot be deleted. User Code Descriptors Using the alphanumeric keypad on the front panel, you can edit the 16‐character user code descriptors and enter the name or title of the users to whom the code is allocated. iConnect User Manual ...
-
Page 39: Follow-Me
The Follow‐Me feature is designed to notify the user that certain events have occurred. Notification is made by SMS to your cellular phone or by opening a two‐ way audio channel. If using the TWA Follow‐Me feature, the audio channel is opened after alarm events only. To edit the Follow‐me number: From the main menu, select Telephone #, Follow me # [51]. iConnect User Manual 33 ... -
Page 40: Speed Dial Numbers
You may only access Follow‐me programming if the protocol for Account 3 is programmed as SMS or TWA Follow‐me. 7.5. Speed Dial Numbers Speed Dial feature allows you to call five speed dial numbers from your Control System. For the Speed Dial call procedure, see p. 6, Speed Dial. To program one of the Speed Dial numbers: From the main menu, select Telephone # [5]. Select the speed dial number to be programmed. From the Speed Dial’s sub‐menu, select Phone Number [#1]. Enter the speed dial number. To program the Speed Dial interface: From the main menu, select Telephone # [5]. Select the speed dial number to be programmed. From the Speed Dial’s sub‐menu, select Interface [#2]. Select GSM or PSTN. 7.6. Event Log The event log records events that have occurred within your security system. When the log is full, the oldest events are automatically erased and are replaced by new events. To view the event log: From the Event Log menu, select View Log [61]; the most recent event is displayed. Press the HA On button to display the Time/Date stamp or the default descriptor on the second row of the display. Use the arrow buttons to scroll through the events. When you have finished viewing, press to exit the log. The event log displays the following information for each event: iConnect User Manual ... -
Page 41: Service Menu
The Message Center is designed to allow you to record a short message that may be played back later by another user. After a message is recorded, Message Waiting is displayed on the LCD until the message is played back. To play back a recorded message: From the Service menu, select Messages, Play Message [7021]. To record a message: From the Service menu, select Messages, Record Message [7022]. Press to start recording the message. Record your message. The message may be up to twenty seconds long. Press to stop recording; the message is automatically played back and OK? is displayed. Press to save your recording. iConnect User Manual 35 ... - Page 42 To test the system interface: From the Service menu, select Interface Test [705]; a short sequence of chimes are sounded from the speaker, all LEDs flash and the LCD is tested on all connected LCD keypads. Walk Test Walk Test mode enables you to test all the sensors registered to your system without triggering an alarm. To initiate Walk Test mode: From the Service menu, select Walk Test [706]; a list of registered sensors appears. Trigger each sensor; when the system receives a successful transmission from a sensor, the sensor is removed from the list. When all the sensors are removed from the list, End Walk Test is displayed. Press to exit Walk Test mode. Transmitters The Transmitters menu offers two utilities, TX List and TX Test. The TX List comprises all registered transmitters and their last reported status. To view the TX list: From the Service menu, select Transmitters, TX List [7071]; the first transmitter on the list is displayed. iConnect User Manual ...
- Page 43 The transmitter is inactive Press The HA on key to display the transmitter’s default descriptor. The second utility, TX Test enables you to identify transmitters. In TX Test mode, each time a transmission is received, a chime is sounded and the activated transmitterʹs details are displayed. To initiate TX Test mode: From the Service menu, select Transmitters, TX Test [7072]. Activate a transmitter; the transmitter’s details are displayed. When you have finished, press to exit TX Test mode. Audio Volume To adjust the sensitivity of the microphone and the volume of the speaker: Establish a two‐way audio connection. During the two‐way audio session, from the Service menu, select Audio Volume [708]. Adjust the setting according to the following table. iConnect User Manual 37 ...
- Page 44 t hen . press Remote Firmware Update There is an option of control system software version update from a remote PC using WEB communication. If Remote Programming is programmed as ʺuser initiatedʺ such update cannot be made unless the Master User grants access to it with Remote Software Update command. iConnect User Manual ...
- Page 45 7. Advanced System Operation To give access to Remote Firmware Update: From the Service menu, select SW Update [713]; a 24‐hours time window is opened during which the Remote Firmware Update may be performed. IP Display When using Ethernet connection, you can view the LAN IP address of the Control System, i.e. the address that your home router has assigned to the Control System. To display the IP Address: From the Service menu, select IP Display [714]; the LAN IP address of the Control System is displayed. iConnect User Manual 39 ...
-
Page 46: Appendix A: Menu Structure
Appendix A: Menu Structure Appendix A: Menu Structure Legend: Installer code required Master code required iConnect User Manual ... -
Page 47: Appendix B: Web User Application
You can also access the Web User Application from your cellular phone or PDA using the WAP portal. Log In Page This application is usually part of the service provider’s Web site and requires the end user to log in to gain access to the page. To enter the Web Application, on your browser enter the Web page address supplied by your WEB service provider and press Go. You will see the Login Page. To login to the Web Application, enter your user name and password supplied by your WEB service provider, and the passcode which is your User Code, then click the Enter button. For your system security reasons, you must change the password immediately at first login. You can change your password on the Change Password page that is accessible from the Settings menu. Your new password should be no less than six characters and must start with a letter – see p. 49, Change Password. iConnect User Manual 41 ... -
Page 48: The Main Page
After logging in, your system’s home page (Main Page) is displayed. Menu Bar Workspace Status Bar When using WAP service of your cellular phone, the main page looks the following way: Menu Bar The Menu Bar includes the Main Menu, arm/disarm options list, and the Log Off button. The Main Menu offers links to various pages in the Web Application. Use the Logoff button on the right side menu to properly close the session. The following options are available from the Main Menu: Home – pressing the Home button allows the user to return to the Main page at any time. Automation – allows control or scheduling of automated lights and appliances. Video – provides access to view streaming video from IP cameras. My Account – offers various options including user code and contact management, event log viewing and zone bypass. iConnect User Manual ... -
Page 49: Options Available From Main Page
For example, if you choose Automation from the Main Menu, a list of automated appliances is displayed in the workspace. SMS alerts relate only to SMS sent from ELAS (WEB User Application). Options Available from Main Page Arm/Disarm You can arm and disarm the system using the Arm/Disarm drop‐down box (upper‐right part of the page) or using the buttons in the System Operation Area. The Web Application allows you to arm and disarm your system via the Web Application using any of the available arming methods. It is important to note that when you arm using the Web application, the system is armed with the programmed delay. On the Status Bar below on the page you can see the current status of the system (in our example it is Disarmed and System Ready, which means that iConnect User Manual 43 ... - Page 50 From this page you can add, edit and delete users as required. You can even issue temporary (limited) codes to guests that will expire after 24 hours. For further information on user codes and their various uses, see p. 32, 7.3. User Codes, Code 29. On The Main Page menu, click Settings, then Web Interface Users and Codes, the following page appears: iConnect User Manual ...
- Page 51 Zone Bypass On The Main Page menu, click Settings then Zone Bypass to bypass certain zones in your home that you donʹt want to receive event messages from – see p. 30, 7.2. Zone Bypassing/Unbypassing. Select the checkboxes for the zones you want to bypass. iConnect User Manual 45 ...
- Page 52 On The Main Page menu, click Settings, then Change Appearance to change the color scheme of your account. Alerts The Alerts page allows you to enter the details of contacts you wish to be informed when events occur in your system. For example, you can enter your own email address and/or cellular phone number so that you will receive email or SMS notification in the event of an alarm. On The Main Page menu, click the Alerts area. iConnect User Manual ...
- Page 53 To start receiving the events messages, in the area below, select the checkboxes according to the event type and message type you prefer (email or SMS). Test the alerts you have programmed by clicking the Test button on the Alerts page near the newly added alert. History The History page enables you to view the system’s event log. The events are arranged in a table that offers the advantage of allowing you to view a large number of events at once. In addition to viewing the event log, you may also save the log to a file (HTML, PDF or RTF) or print the log. For further details on how to use the Web Application, refer to the Help menu included in the application. On The Main Page menu, click History, the following page appears: iConnect User Manual 47 ...
-
Page 54: Video
The Web Application allows you to control and schedule automated lights and appliances in your home. The application offers a comprehensive interface that enables you to view the settings for all of your automated devices at once. Additionally, you can add, edit or delete devices from the comfort of your PC. Discuss this capability with your security service provider to determine if it is applicable to your system – see p. 24, 5. Home Automation and PGM. On The Main Page menu, click Automation, the following page appears: You can program turning the HA units on/off at specific hour/day of the week. Video Using IP video cameras installed in your home, the Web Application enables you to view streaming video over the Web in order to check your home and family while you are away. Discuss this capability with your security service provider to determine if it is applicable to your system. iConnect User Manual ... -
Page 55: Appendix C: Glossary
LCD keypad. Full Arming An arming method that activates the entire system when the premises are vacated. Global Chime A feature that enables/disables the Chime feature for the entire system – see Chime. iConnect User Manual 49 ... - Page 56 Control System's firmware update from a remote PC using WEB Firmware communication. Update Restore Restore of the normal state when the trouble is repaired. For example, if AC power is reconnected, an AC Loss Restore event code is sent to the central station. iConnect User Manual ...
- Page 57 Wireless Intelligent two-way wireless keypad with large LCD display that Terminal serves as an additional user interface of the Control System. Zone A protected area within the security system. Zone Bypassing See Bypassed Zone iConnect User Manual 51 ...
- Page 58 ...
- Page 59 ...
- Page 60 ZI0548F (06/10) ...
Need help?
Do you have a question about the iConnect and is the answer not in the manual?
Questions and answers