Table of Contents
Advertisement
Quick Links
Advertisement
Table of Contents

Related Manuals for IBM 6400i


Summary of Contents for IBM 6400i
- Page 1 6400i Line Matrix Printers Setup Guide Cabinet and Pedestal Models S544-5640-04...
- Page 3 6400i Line Matrix Printers Setup Guide Cabinet and Pedestal Models S544-5640-04...
- Page 4 Requests for IBM publications should be made to your IBM representative or to the IBM branch office serving your locality. If you request publications from the address given below, your order will be delayed because publications are not stocked here. Many of the IBM Printing Systems Division publications are available from the web page listed below.
- Page 5 Safety Notices DANGER: <1> Before powering on the printer ensure the printer is plugged into an appropriate power source. Refer to Chapter 2 of the Setup Guide for information on the proper source. <2> Switch off the printer power and unplug the printer power cord before cleaning the printer.
-
Page 7: Table Of Contents
1 Introduction ............13 About This Setup Guide................13 Notes And Notices ................13 Conventions In This Setup Guide ............14 Related Documents................15 The IBM 6400 Printer Family ..............16 Standard Capabilities ...............18 Optional Features................21 Protocols And Emulations ..............23 Graphics Enhancements ..............23 Taking Care Of Your Printer.............23 2 Installation............. - Page 8 Table of Contents Changing the Paper Exit Location (Pedestal Models Only) ................49 Setting Top Paper Exit ..............49 Setting Rear Paper Exit..............51 Connect The Interface And Power Cables (Cabinet Models) ....52 Connect The Interface And Power Cables (Pedestal Models) ....58 Attach The Operator Panel Overlay Label..........
- Page 9 Table of Contents 5250 Interface Menu................139 3270 Interface Menu................145 Compatibility Options Menu ............151 Network Setup Menu ................155 Adapter Address Submenu ............155 Adapter Parameters Submenu............157 Ethernet Address Submenu ............161 Ethernet Parameters Submenu............162 Wireless Address Menu ..............165 Wireless Parameters Menu ............166 Parallel Interface Menu.................170 PC Parallel Menu ................172 Dataproducts Menu ................175 IEEE 1284 ..................178...
- Page 10 Fault Messages ..................275 Fault Correction Procedure ............275 A Printer Specifications .......... 289 Ribbon Specifications ................289 6400i Models Except 6400-i20 and -i24 ......... 289 6400-i20 and i24 Models ..............289 Ordering Ribbons.................. 290 6400-ixx Models ................290 Paper Specifications ................291 Paper....................
- Page 11 Attaching Printer to an iSeries with Twinax Interface .....311 Changing Your iSeries Printer Configuration .........312 Attaching Printer to Remote Control Unit with Twinax Interface ..314 Attaching Printer to an IBM System/36 with Twinax Interface..315 Attaching Printer to zSeries Systems ...........316 Types of Installation covered for MVS/JES2 ........316 6400-LU1-SCS-Local SNA 3174 Control Unit........316...
- Page 12 Table of Contents Physical and Logical Unit Types............325 Physical Unit (PU) types and examples ......... 325 Summary of LU Types and Representative IBM Products..... 326 Notices ..............329 Energy Star................... 329 Notices....................329 Trademarks................... 331 Product Recycling and Disposal ............332 Communication Statements..............
-
Page 13: Introduction
The word Danger next to the lightning slash indicates the presence of a hazard that could cause death or serious personal injury. Danger and Caution notices are numbered to help you find the translated versions in the IBM 6400 Safety Notices booklet. CAUTION <#>... -
Page 14: Conventions In This Setup Guide
Chapter About This Setup Guide CAUTION <#> The word Caution next to this symbol indicates a part or assembly that is sharp enough to cut you. ATTENTION The word Attention indicates the possibility of damage to a program, device, system, or data. IMPORTANT The word Important indicates information vital to proper operation of the printer. -
Page 15: Related Documents
Related Documents Related Documents • Maintenance Information Manual — Explains how to maintain and repair the line matrix printer at the field service level of maintenance. • Coax/Twinax Programmer's Reference Manual — Covers the host control codes and character sets for the Coax and Twinax emulations. •... -
Page 16: The Ibm 6400 Printer Family
The IBM 6400 Printer Family The IBM 6400 Printer Family The IBM 6400 series consist of 500, 1000, 1500, 2000, and 2400 lines per minute (lpm) models and are packaged in various configurations. All of the models offer software versatility and the latest refinements in line matrix printing technology. - Page 17 The IBM 6400 Printer Family Related Documents The printer model numbers indicate printing speed and physical configuration. • All printer models start with the 6400 series prefix, followed by a three digit or alphanumeric suffix. Models containing only numbers indicate cabinet models.
-
Page 18: Standard Capabilities
Support of similar features across the entire product line to allow maximum flexibility in matching the printer to the requirements • Energy Star compliant The following sections summarize the standard capabilities of the IBM 6400 printers. Host Computer Interfaces •... - Page 19 This emulation appears as “P-Series XQ” on the operator panel. Serial Matrix Printer Emulation This printer emulation is very similar to the code systems used by an IBM Graphics Printer, but incorporates several systems into one emulation. This emulation enables a line matrix printer to print files coded for a serial matrix printer, and is sometimes referred to as the Serial Matrix collection.
- Page 20 Resident multinational character sets Graphics And Vertical Formatting Several graphics and vertical formatting features are available: • Three built-in graphics generators: • IBM Proprinter III XL bit-image graphics • Epson FX dot graphics mode • P-Series Plot • Programmable electronic vertical formatting provides rapid vertical paper movement to specified lines for printing repetitive and continuous forms.
-
Page 21: Optional Features
IBM 3262 Models 3 and 13, IBM 4234 Models 1, 2, and 9, and IBM 5224 Models 1 and 2. This feature can be used with the Intelligent Printer Data Stream (IPDS) feature which is described below. - Page 22 The Network Print Server provides multiple network protocol support that allows you to submit print jobs from Novell** Netware**, IBM LAN Server, IBM AIX*, and other TCP/IP networks. •...
-
Page 23: Protocols And Emulations
“emulating” that printer. If the printer uses the Proprinter III XL protocol, for example, it is emulating an IBM ® Proprinter III XL printer. If the printer is using the Epson FX printer protocol, for example, we can also say it is in Epson FX emulation mode. - Page 24 Chapter The IBM 6400 Printer Family...
-
Page 25: Installation
NOTE: The Configuration Utility diskette contains a README.1ST file that describes the contents of the diskette, AIX print drivers, and configuration information for replacing existing IBM printers. In addition, there might be another file, called README.TXT that contains information that was added after the printer documentation... - Page 26 6. If you have not already ordered a communications cable, see page 297. 7. Configure the printer to work with host systems and to match your emulation, such as IBM Proprinter III XL. Follow the instructions provided in Chapter 3, “Configuring the Printer” and review the information provided in Appendix C, “Host Attachment.”...
-
Page 27: Before You Begin
Before You Begin Before You Begin Read this chapter carefully before installing and operating the printer. The printer is easy to install. However, for your safety and to protect valuable equipment, perform all the procedures in this chapter in the order presented. IMPORTANT Make sure you have a way to move the printer and shipping pallet. -
Page 28: Select A Site
Chapter Select A Site Select A Site Select a printer site that meets all of the following requirements: • Cabinet models: Permits complete opening of the printer cover and both doors of the floor cabinet. Allows at least three feet of clearance behind the printer. -
Page 29: Printer Dimensions
Printer Dimensions Printer Dimensions 41.0 in 57.5 in (104 cm) (146.1 cm) 27.0 in (68.84 cm) 29.0 in (73.7 cm) 83.0 in 27.0 in (210.8 cm) (68.6 cm) 27.0 in (68.6 cm) Figure 1. Exploded View Of Cabinet Model Printer Dimensions 59.0 in (149.9 cm) 42.5 in... - Page 30 Chapter Printer Dimensions 25 in. (63.5 cm) 10.5 in. (26.67 cm.) 48.0 in. (122 cm) 30 in. 24.6 in. (76.2 cm.) (62.48 cm) Figure 3. Exploded View Of Pedestal Model Printer Dimensions...
-
Page 31: Printer Component Locations
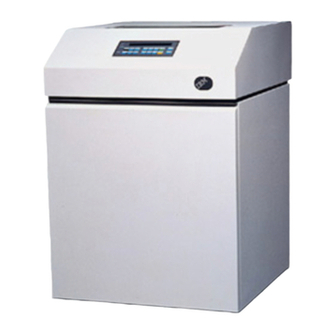
Printer Component Locations Printer Component Locations Familiarize yourself with the names and locations of the printer components, shown in Figure 4, and Figure 5 before continuing with the rest of the installation procedures. Ribbon Spool Paper Scale Paper Support Tractor Hammer Bank Hub Latch Base... - Page 32 Chapter Printer Component Locations Ribbon Spool Tractor Lock Tractor Printer Cover Door Tractor Adjustable Paper Guide Shuttle Cover Adjustable Assembly Hinge Hammerbank Cover & Ribbon Mask Operator Panel Forms Splined Shaft Thickness Lever Ribbon Hub Ribbon Guide Hub Latch Figure 5. Pedestal Model Printer Component Locations with Open Access Cover and Ribbon Spools Exploded Above...
-
Page 33: Remove Shipping Restraints (Cabinet Model)
Remove Shipping Restraints (Cabinet Model) Remove Shipping Restraints (Cabinet Model) Follow the instructions on the shipping package to perform these steps: 1. Remove shipping restraints from front of shipping pallet. 2. Move printer from shipping pallet. 3. Remove remaining shipping restraints from pallet. 4. -
Page 34: Remove The Cardboard Packing And Envelope
Chapter Remove Shipping Restraints (Cabinet Model) Remove The Cardboard Packing And Envelope Envelope Cardboard Packing (2) Forms Thickness Lever Figure 6. Removing the Cardboard Packing and Sample Configuration Printout 1. Raise the printer cover. 2. Remove the cardboard packing. 3. Open the tractor doors. 4. -
Page 35: Remove The Hammer Bank Protective Foam
Remove The Hammer Bank Protective Foam Remove The Hammer Bank Protective Foam Hammer Bank Protective Foam Paper Supports (2) Forms Thickness Lever Figure 7. Exploded View of the Removal of the Hammer Bank Protective Foam, 6400 Series Models 1. Slide the paper supports outward as far as they will go. 2. - Page 36 Chapter Remove Shipping Restraints (Cabinet Model) Hammer Bank Protective Foam Figure 8. Exploded View of Removal of the Hammer Bank Protective Foam, -i20, -i2s, and -i24 Models -i20, -i2s, -i24 Models: 4. Cut the tie wrap and remove it from the side plate. 5.
-
Page 37: Remove The Platen Protective Foam
Remove The Platen Protective Foam Remove The Platen Protective Foam Platen Protective Foam Forms Thickness Lever Figure 9. Exploded View of Removal of the Platen Protective Foam, 6400 Series Models 1. Rotate the forms thickness lever downward to position “A.” 2. -
Page 38: Remove Wood Blocks
Chapter Remove Shipping Restraints (Cabinet Model) Remove Wood Blocks Wood Blocks (6) Figure 10. Cover, Front, and Back Door Cabinet Open, Showing the Removal of Six Wood Blocks 1. Remove the six wood blocks. NOTE: Make sure the tape securing the wood blocks is removed entirely. -
Page 39: Adjust The Paper Supports
Adjust The Paper Supports Adjust The Paper Supports Paper Supports (2) Tractor Doors (2) Figure 11. Paper Supports With Directional Arrows Showing the Adjustment Capabilities, 6400 Series Models Slide the paper supports inward until they are approximately four inches from the tractor doors. -
Page 40: Release The Paper Chains (Cabinet Model)
Chapter Remove Shipping Restraints (Cabinet Model) Release The Paper Chains (Cabinet Model) Paper Chains (8) Tie Wraps (2) Bags (2) Figure 12. Back View of Printer Components, Cover Off, Showing the Release of Paper Chains NOTE: If you have the power paper stacker installed, skip this procedure and go to “Remove The Shipping Restraints From The Power Paper Stacker”... -
Page 41: Remove Tags (Cabinet Model)
Remove Tags (Cabinet Model) Remove Tags (Cabinet Model) Passive Stacker Paper Fence Tie Wrap Tie Wrap Passive Stacker Paper Fence Red Tag Red Tag 1000/1500/2000/2400 lpm model 500 lpm model Figure 13. Interior View Showing Removal Tag Removal from the Cabinet Models NOTE: If you have the power paper stacker installed, skip this procedure and go to “Remove The Shipping Restraints From The Power Paper Stacker”... -
Page 42: Remove The Shipping Restraints From The Power Paper Stacker
Chapter Remove Shipping Restraints (Cabinet Model) Remove The Shipping Restraints From The Power Paper Stacker This section applies only to printers with the power stacker installed. The power stacker can be factory or field installed. The power stacker is a vertically movable paper guide which directs the paper from the printer to the paper stack. - Page 43 Remove The Shipping Restraints From The Power Paper Stacker 1. Open the rear door panel. 2. Remove the eight tie wraps. 3. Raise the paper guide to its highest position by hand. 4. Remove the plastic bags from the paper chains. 5.
-
Page 44: Removing Shipping Restraints (Pedestal Model)
Chapter Removing Shipping Restraints (Pedestal Model) Removing Shipping Restraints (Pedestal Model) Protective films and foam blocks protect printer mechanisms from possible damage during shipment. You must remove these shipping restraints before you operate the printer. Save the foam blocks with the other packing materials. To avoid shipping damage, reinstall the shipping restraints whenever the printer is moved or shipped. -
Page 45: Remove The Hammer Bank And Protective Foam
Remove The Hammer Bank And Protective Foam Remove The Hammer Bank And Protective Foam Hammer Bank Protective Foam Paper Supports Figure 17. Pedestal Model with Cover Open Showing Removal of the Hammer Bank Protective Foam 1. Slide the paper supports outward as far as they will go. 2. -
Page 46: Remove The Platen Protective Foam
Chapter Removing Shipping Restraints (Pedestal Model) Remove The Platen Protective Foam Platen Protective Foam Support Shaft Forms Thickness Lever Figure 18. Pedestal Model with Cover Open Showing Removal of the Platen Protective Foam 1. Rotate the forms thickness lever downward (to position “A”). 2. -
Page 47: Attach The Input Paper Shelf And Output Basket
Attach The Input Paper Shelf and Output Basket Attach The Input Paper Shelf and Output Basket Optional Input Paper Shelf Output Basket Ground Wire Screw Figure 19. Exploded View of the Pedestal Model Showing Output Basket Attachment 1. Slide the two paper supports toward the center of the support shaft. Position them so that they divide teh space between the tractors into three approximately equal segments. -
Page 48: Remove Tags - Pedestal Model
Chapter Removing Shipping Restraints (Pedestal Model) Remove Tags - Pedestal Model Output Basket Tie Wrap Red Tag Figure 20. View of the Pedestal Model Showing Removal of the Tie Wrap Remove the tie wrap attached to the output basket. It is marked with a large, red tag. -
Page 49: Changing The Paper Exit Location (Pedestal Models Only)
Setting Top Paper Exit Changing the Paper Exit Location (Pedestal Models Only) On pedestal model printers you can select whether the paper exits from the rear or from the top of the printer. Normally, you should select the top exit only when you will be tearing the forms from the printer and using them soon after printing. - Page 50 Chapter Changing the Paper Exit Location (Pedestal Models Only) Figure 22. Inside View of the Pedestal Model Showing Paper Exit Options 5. Tighten the two hinge adjustment thumbscrews. 6. Slide the paper guide slightly to the left and raise it to its upper position for the top exit.
-
Page 51: Setting Rear Paper Exit
Setting Rear Paper Exit Setting Rear Paper Exit 1. Press Stop to place the printer in NOT READY state. NOTE: If there is paper in the printer, unload the paper, then continue with step 2 of this procedure. Thumbscrew Figure 24. Loosening the Hinge Thumbscres, Open View of the Back Rear Pedestal Model Cover 2. -
Page 52: Connect The Interface And Power Cables (Cabinet Models)
Chapter Connect The Interface And Power Cables (Cabinet Models) Figure 26. Top Back View of the Pedestal Model with Paper Exiting through the Rear 7. Load the paper (see page 66), feeding the paper out of the rear paper exit. Connect The Interface And Power Cables (Cabinet Models) DANGER <1>... - Page 53 Connect The Interface And Power Cables (Cabinet Models) Setting Rear Paper Exit 3. Connect the customer supplied interface cable from the host computer to the appropriate printer interface connector (refer to Figure 27 through Figure 32). 4. Thread the power cable connector up through the notch in the lower-right back corner of the cabinet (see Figure 31).
- Page 54 Chapter Connect The Interface And Power Cables (Cabinet Models) Figure 28. Interior Back View of the Cabinet Model Showing Product Description Label Location 1. Check the product description label to verify that the voltage source at the printer site conforms to the requirements specified on page 28. Figure 29.
- Page 55 Connect The Interface And Power Cables (Cabinet Models) Setting Rear Paper Exit I/O Connector I/O Cover Figure 30. Upper-Rear Inside View of the Cabinet Model Showing I/O Cover Removal 3. Open the cabinet rear door. 4. Remove the cover from the I/O connector you have selected. I/O Cable Grommet Figure 31.
- Page 56 Chapter Connect The Interface And Power Cables (Cabinet Models) I/O Connector I/O Plate Cable Connector Figure 32. Upper Inside View of the Cabinet Model Showing Cable Connector Attachment 7. Pull the cable up through the notch until it reaches the I/O plate. 8.
- Page 57 Connect The Interface And Power Cables (Cabinet Models) Setting Rear Paper Exit Power Cord Figure 34. Rear Inside View of the Cabinet Model Showing the Power Cord Route 12. Guide the power cord up through the hole in the lower right back corner of the cabinet.
-
Page 58: Connect The Interface And Power Cables (Pedestal Models)
Chapter Connect The Interface And Power Cables (Pedestal Models) Connect The Interface And Power Cables (Pedestal Models) DANGER <1> Before powering on the printer, ensure the printer is plugged into an appropriate power source. Refer to page 27 for information on the proper source. - Page 59 Connect The Interface And Power Cables (Pedestal Models) Setting Rear Paper Exit Parallel Connector Auxiliary I/O Serial Connector AC Power Connector Power Switch NOTE: The Dataproducts adapter feature attaches to the PC Parallel interface connector. Twinax, Coax, and Ethernet Interfaces appear only if these features are installed.
- Page 60 Chapter Connect The Interface And Power Cables (Pedestal Models) I/O Connector Cable Connector Figure 38. View of the Printer Interface Showing Cable Connector Attachment 5. Attach the cable connector to the printer I/O connector. PC Power Outlet Power Cord Figure 39. View of the Power Cord Attachment 6.
- Page 61 Connect The Interface And Power Cables (Pedestal Models) Setting Rear Paper Exit Dataproducts I/O Adapter Centronics, Ethernet Auxiliary I/O Dataproducts Standard Adapter Diagnostic Serial RS-232/RS-422 Pedestal Models Ethernet Auxiliary I/O Centronics Serial RS-23 Diagnostic Cabinet Models Figure 40. Pedestal and Cabinet Model Dataproducts I/O Adapter NOTE: Centronics is not present on Network-based models.
-
Page 62: Attach The Operator Panel Overlay Label
Chapter Attach The Operator Panel Overlay Label Network Dataproducts Coax/Twinax 10/100Base-T Long Line Figure 41. Optional Interface Types for Auxiliary I/O Attach The Operator Panel Overlay Label Power Ready Processing Line Form Start Cancel Micro Feed Feed Menu Scroll Enter Printer View Stop... -
Page 63: Install The Ribbon
Install The Ribbon Setting Rear Paper Exit Install The Ribbon Refer to the ribbon path diagram molded onto the shuttle cover for the following steps. Cabinet Model Pedestal Model Figure 43. Cabinet and Pedestal Models with the Printer Cover Open 1. - Page 64 Chapter Install The Ribbon Tractor Door Forms Thickness Lever Figure 44. View of the Forms Thickness Lever in the Raised Position 3. Raise the forms thickness lever as far as it will go. 4. Press STOP to silence the alarm. 5.
- Page 65 Install The Ribbon Setting Rear Paper Exit Cabinet Models Left Ribbon Spool Forms Thickness Lever Left Ribbon Spool Pedestal Models Forms Thickness Lever Figure 46. Cabinet and Pedestal Models, Interior View of Ribbon Installation 9. Starting from the right ribbon spool, thread the ribbon around the right ribbon guide, under the right tractor door, between the hammer bank cover and ribbon mask, and along the ribbon path to the left ribbon guide.
-
Page 66: Load The Paper
Chapter Load The Paper Load The Paper Figure 47. Cabinet and Pedestal Models with Printer Cover Open 1. Open the printer cover. Tractor Door Forms Thickness Lever Figure 48. View of the Forms Thickness Lever in the Raised Position 2. Raise the forms thickness lever as far as it will go. 3. - Page 67 Load The Paper Setting Rear Paper Exit Label Figure 49. Interior Rear View of the Cabinet Model Paper Supply Label Location 4. Prepare the paper supply: Cabinet models: a. Open the front door of the printer cabinet. b. Place the paper supply inside the printer, on the floor of the cabinet. c.
- Page 68 Chapter Load The Paper 5. Feed the paper up through the paper slot. NOTE: Be sure the paper feeds between the two wire guides. Only the 6400-i20, -i2s, and -i24 printer models contain the paper path guide as shown in Figure 50. 6.
- Page 69 Load The Paper Setting Rear Paper Exit ATTENTION To avoid damage to the printer caused by printing on the platen, always align the edge of the left tractor door with the number “1” on the paper scale. Tractor Splined Shaft Paper Tractor Paper Scale...
- Page 70 Chapter Load The Paper Right Tractor Door Figure 53. Paper Loaded onto the Right Tractor Sprockets 11. Unlock the right tractor. 12. Load the paper onto the right tractor sprockets. 13. Close the tractor door. 14. Make sure the leading edge of the first sheet of paper is parallel to the tractor splined shaft.
- Page 71 Load The Paper Setting Rear Paper Exit Forms Thickness Lever Figure 54. The Forms Thickness Lever in the Lowered Position 17. Turn the vertical position knob to feed the paper up into the paper guide assembly. 18. Lower the forms thickness lever, and set it to match the paper thickness. (The A-B-C scale corresponds approximately to 1-, 3-, and 6-part paper thickness.) NOTE: Do not set the forms thickness lever too tightly;...
-
Page 72: Power Paper Stacker Option
Chapter Power Paper Stacker Option Power Paper Stacker Option This section explains how to set up and use the optional power paper stacker. The power stacker mechanically directs the paper from the printer to the paper stacker. Power Paper Stacker Component Locations Familiarize yourself with the names and locations of the components shown in the following illustration before operating the power paper stacker. -
Page 73: Setting Up The Power Paper Stacker
Setting Up The Power Paper Stacker Setting Up The Power Paper Stacker Elevator Disable Switch Elevator Lift Handle Paper Advance Stacker Up Stacker Down Figure 56. Cabinet Model Rear Door Open Showing Rear Operator Panel 1. Turn the printer ON. 2. -
Page 74: Loading And Starting The Power Paper Stacker
Chapter Power Paper Stacker Option Paper Length Indicator Paddle Shaft Bearing Bracket Figure 58. Interior Side View of the Cabinet Model Showing the Paper Length Indicator 5. Set the desired paper length (5-12 inch range), as follows: Grasping the paddle shaft, push or pull toward the front or the rear of the printer, setting the desired paper length by aligning indicator notch on the bearing bracket with the paper length indicator. -
Page 75: Checking The Paper Feed
Checking The Paper Feed Loading And Starting The Power Paper Stacker Checking The Paper Feed Figure 59. Side View of the Cabinet Model Showing Paper Feed Route Cabinet Models: 1. Check that the paper feeds correctly. 2. Press the Form Feed key several times to ensure that the paper feeds properly beyond the tractors and over the paper guide assembly. - Page 76 Chapter Checking The Paper Feed Figure 60. Side View of the Pedestal Model Showing Paper Feed Routes Pedestal Models: NOTE: When using the top exit paper path, paper cannot be stacked. Paper is intended to be removed after each print job is completed. •...
-
Page 77: Set The Top-Of-Form
Set The Top-of-Form Loading And Starting The Power Paper Stacker Set The Top-of-Form Vertical Position Knob Forms Thickness Lever Figure 61. The Forms Thickness Level in the Raised Position 1. Raise the forms thickness lever as far as it will go. The “CLOSE PLATEN” message appears on the operator panel. -
Page 78: Test The Printer
On the configuration printout, examine the print quality of the characters. They should be fully formed and of uniform density. If text characters do not appear correctly formed or if the test does not run, contact your IBM service representative. -
Page 79: Configuring The Printer
Configuring the Printer Overview IMPORTANT Configuration directly affects printer operation. Do not try to change the configuration of your printer until you are thoroughly familiar with the procedures in this chapter. To print data, the printer must respond correctly to signals and commands received from the host computer. -
Page 80: Active Versus Saved Configurations
Chapter The Configuration Main Menu Active Versus Saved Configurations When you change a parameter value, it is active as long as the printer is on or until it is changed again. This is true whether you use the operator panel or send a control code from the host. - Page 81 C/T Hotport Hex Print Mode NOTE: The Twinax and Coax interface menus only appear in the menus if the IBM Coax/ Twinax feature is installed. The Early Print Complete option appears in the Twinax menu only if the IPDS feature is installed.
- Page 82 Chapter The Configuration Main Menu 3270 Network Parallel Serial (10) Interface Setup Interface Interface page 145 page 155 page 170 page 180 Print Language Adapter Address Interface Type Interface Type Print Character Table Adapter Parameters PC Parallel Data Protocol Active Print Language Ethernet Address Dataproducts Baud Rate...
-
Page 83: Using The Operator Panel
Using The Operator Panel Active Versus Saved Configurations Using The Operator Panel Power READY Ready Processing Micro Line Form Start Cancel Menu Scroll Enter Feed Feed Micro View Set Top Stop Eject/ Printer Con- Attention figuration Scroll Return of Form Restore Figure 65. -
Page 84: Program Mode
Chapter Program Mode Program Mode The printer is in Program mode whenever the configuration menus and option values are displayed on the operator panel message display. Program mode is either locked or unlocked. In order to select new configuration values, you must unlock Program mode. -
Page 85: Entering Program Mode
Entering Program Mode Entering Program Mode To place the printer in Program mode, press the Menu key. Printing The Current Configuration Step LCD Result Notes 1. Make sure the printer is on 2. Press NOT READY The printer must be in NOT READY mode to print the Stop configuration. - Page 86 Chapter Printing The Current Configuration * = Factory Default Configuration Management Recall Save Current Delete Change Protect Print Custom Custom Set Values Custom Set Power Custom Sets Set Values On Set Current Custom Set* Factory Default Power On Custom Set All Custom Sets Custom Set 1 Custom Set 2...
-
Page 87: Factory Default Configuration Values
Below is a representative factory default configuration. Your factory default configuration will depend on the features installed in your printer. POWER ON CURRENT CONFIGURATION - FACTORY CONFIGURATION IBM Printer Configuration File Part Number XXXXXXX Date XX-XXX-XXXX Reference Number XXXXXX V2.04D XX-XXX-XX #XXXXXX V2.01B XX-XXX-XX #XXXXXX... - Page 88 Chapter Factory Default Configuration Values Network.dat 1210 Bytes PTXLogo.gif 1210 Bytes Ethload 2191652 Bytes Printron.ec1 262400 Bytes Optimize&Reboot Print File List CONFIGURATION MANAGEMENT Recall Custom Set Factory Default Save Current Values Custom Set 1 Delete Custom Set Custom Set 1 Change Power On Set Factory Default Protect Custom Sets...
- Page 89 Factory Default Configuration Values Entering Program Mode Serial Hotport Trickle Time 1/4 Sec Timeout 10 Sec. Report Status Disable Framing Errors Enable EMULATION CONFIGURATION Active Graphic Emulation IGP Emulation Define CR Code CR = CR Define LF Code LF = LF Auto LF Disable Select SFCC...
- Page 90 Chapter Factory Default Configuration Values P-Series Emulation Character Sets IBM PC Print Language IBM PC ASCII (USA) Multinational ASCII (USA) EMCA Latin 1 DEC Multinational ASCII (USA) Control Code 06 8.0 LPI Control Code 08 Elongated Define CR Code CR = CR...
- Page 91 Factory Default Configuration Values Entering Program Mode Print Format Characters Per Inch 10.0 Characters Per Inch Lines Per Inch 6.0 Lines Per Inch DBCS CPI 6.7 CPI Forms Width Forms Width in inches 13.6 inches Forms Width in MM 345.4 MM Forms Width in Characters 136 Characters...
-
Page 92: Changing Parameters
Chapter Changing Parameters Changing Parameters * = Factory Default Printer Control Interface Display Alarm Print Hex Print Selection Language Control Direction Mode Bidirectional* Unidirectional The following procedure shows you how to change a configuration setting. Changing the Print Direction from the factory default setting BIDIRECTIONAL to the setting UNIDIRECTIONAL is provided as an example. - Page 93 Changing Parameters Entering Program Mode Step LCD Results Notes PRINTER CONTROL Moves into the PRINTER INTERFACE SELECTION CONTROL menu. Enter PRINTER CONTROL Moves to the PRINT PRINT DIRECTION DIRECTION parameter. Scroll↑ UNTIL PRINT DIRECTION Move into the PRINT BIDIRECTIONAL* DIRECTION menu. The asterisk Enter (*) shows that this is the active value.
-
Page 94: Saving Your Configuration In A Custom Set
Chapter Saving Your Configuration In A Custom Set Saving Your Configuration In A Custom Set * = Factory Default Configuration Management Print Custom Recall Save Current Delete Change Protect Set Values Custom Set Values Custom Set Power On Set Custom Sets Name Reset Custom Sets... - Page 95 Saving Your Configuration In A Custom Set Entering Program Mode Step LCD Results Notes 1. Press NOT READY Places the printer in NOT READY mode. Stop OPERATOR MENU Unlocks the Operator Menu, UNLOCKED which allows you to make Scroll↑ Scroll↓ configuration changes.
- Page 96 Chapter Saving Your Configuration In A Custom Set Step LCD Results Notes NOT READY Returns the printer to the NOT READY mode. Stop OPERATOR MENU Locks Program mode and the LOCKED Operator Menu. Scroll↑ Scroll↓ READY Places the printer in READY mode, prepared for normal Stop operation.
-
Page 97: Loading Custom Sets Or Factory Default Values
Loading Custom Sets Or Factory Default Values Entering Program Mode Loading Custom Sets Or Factory Default Values * = Factory Default Configuration Management Print Custom Recall Save Current Delete Change Protect Set Values Custom Set Values Custom Set Power On Set Custom Sets Factory Default* Custom Set 1... - Page 98 Chapter Loading Custom Sets Or Factory Default Values Step LCD Results Notes 1. Press NOT READY Places the printer in NOT READY mode. Stop OPERATOR MENU Unlocks the Operator Menu, UNLOCKED which allows you to make Scroll↑ Scroll↓ configuration changes. OPERATOR MENU Displays the first Configuration PRINTER CONTROL...
-
Page 99: Changing The Power On Configuration
Changing The Power On Configuration Entering Program Mode Step LCD Results Notes READY Places the printer in READY mode, prepared for normal Stop operation. Changing The Power On Configuration * = Factory Default Configuration Management Print Custom Recall Save Current Delete Change Protect... - Page 100 Chapter Changing The Power On Configuration Step LCD Results Notes 1. Press NOT READY Places the printer in NOT READY mode. Stop OPERATOR MENU Unlocks the Operator Menu, UNLOCKED which allows you to make Scroll↑ Scroll↓ configuration changes. OPERATOR MENU Displays the first Configuration PRINTER CONTROL Main Menu option, PRINTER...
- Page 101 Changing The Power On Configuration Entering Program Mode Step LCD Results Notes NOT READY Returns the printer to the NOT READY mode. Stop OPERATOR MENU Locks Program mode and the LOCKED Operator Menu. Scroll↑ Scroll↓ READY Places the printer in READY mode, prepared for normal Stop operation.
- Page 102 Chapter Changing The Power On Configuration...
-
Page 103: The Configuration Menus
The Configuration Menus Configuration Overview This chapter describes the configuration menus. The Configuration Main Menu options and all of the submenu options are illustrated in menu diagrams and described in detail. For procedures showing how to enter Program mode, save, recall, and print configurations, refer to Chapter 3, “Configuring the Printer”... -
Page 104: Main Menu
C/T Hotport Hex Print Mode NOTE: The Twinax and Coax interface menus only appear in the menus if the IBM Coax/ Twinax feature is installed. The Early Print Complete option appears in the Twinax menu only if the IPDS feature is installed. - Page 105 Main Menu 3270 Network Parallel Serial (10) Interface Setup Interface Interface page 145 page 155 page 170 page 180 Print Language Adapter Address Interface Type Interface Type Print Character Table Adapter Parameters PC Parallel Data Protocol Active Print Language Ethernet Address Dataproducts Baud Rate Early Print Complete...
-
Page 106: Printer Control Menu
Enter The Twinax and Coax interface menus only appear in the To select an option, press: menus if the IBM Coax/Twinax feature is installed. Top exit tear path can only be selected on pedestal models. To exit the configuration menus If the Power Paper Stacker is installed. - Page 107 Printer Control Menu Interface Selection Interface selection enables or disables physical interfaces for attachment switching. If an interface is disabled, it is set offline and any data received will be ignored. When coax or twinax is selected, a POR status is sent to the host. Selecting Autoswitching provides automatic interface switching among parallel, serial, and either coax or twinax communication.
- Page 108 Chapter Printer Control Menu Hex Print Mode A hex code printout (or hex dump) translates all incoming data to hexadecimal equivalents. A hex dump lists each ASCII data character received from the host computer, together with its corresponding two–digit hexadecimal code. Hex dumps can be used to troubleshoot some types of printer data reception problems.
- Page 109 Printer Control Menu Set Platen at Bottom of Form Some special forms have perforation areas that are thicker than the rest of the form. Enable this parameter when you are using this type of form. This parameter, when open is selected, allows the platen to open and close when perforations thicker than the rest of a form move across the platen.
- Page 110 Chapter Printer Control Menu OCR Font Density OCR FONT DENSITY determines the print quality for OCR A and OCR B character sets. The following options are available: • 120 Dots Per Inch (the default). Vertical is 144; horizontal is 120. •...
- Page 111 Printer Control Menu PTR Setup Option This option selects the Special Function Control Code (SFCC) for the PTR_SETUP command and functions. The selections for this process are given below. Setup Parse This selection is used to enable or disable the PTR Setup Option. •...
- Page 112 Chapter Printer Control Menu Auto Elevator This parameter exists only on printers with the power paper stacker installed. The power stacker has a sensor which detects paper movement and raises the stacker as the printed paper stack grows. If the printer has been printing for three minutes continually and the sensor has not detected any growth in the paper stack, the stacker raises itself 1/4 inch automatically.
-
Page 113: Configuration Management Menu
Configuration Management Menu Configuration Management Menu The CONFIG. CONTROL menu allows you to control your printer’s configurations according to the specifications necessary for your print jobs. Configuration Management (from page 104) Recall Save Delete Change Custom Set Current Values Custom Set Power On Set Factory Default* Custom Set 1*... - Page 114 Chapter Configuration Management Menu Recall Custom Set The printer can store 8 custom sets in NVRAM. This parameter allows you to select and load a specific custom set. • Factory Default (the default). The factory–preset custom set; its parameters cannot be changed. It is always available for loading. Custom/Preloaded Sets 5-8 contain configuration sets that assist with the installation and configuration of this printer.
- Page 115 Configuration Management Menu IMPORTANT A new custom set will overwrite an existing custom set if the PROTECT CUSTOM SETS parameter is disabled (e.g., a new Custom Set 4 will overwrite an existing Custom Set 4). See the “Protect Custom Sets” in this section.
- Page 116 Chapter Configuration Management Menu Name Custom Sets You may specify a 39-character name which can be used to refer to a custom set. The name you enter for a custom set will be used in the Recall Custom Set, Save Current Values, Delete Custom Set, Change Power On Set, Protect Custom Sets, Print Custom Set Values, and Name Custom Sets menus.
-
Page 117: Twinax Interface Menu
COMPLETE option appears in this menu. and return to READY, press: Start Does not apply to IPDS. The Twinax and Coax interface menus only appear in the * = Factory Default menus if the IBM Coax/Twinax is installed. Only if Autoswitching is enabled. - Page 118 Chapter Twinax Interface Menu Print Language (from page 139) Standard Print Alternate Print Language Language English US* 0037 English (USA/Canada)* Austrian/German 0037 English (Netherlands) Belgian 0500 Swiss Bilingual Brazilian 0500 Belgian New Canadian French 0273 Austrian/German Danish/Norwegian 0274 Belgian Old Finnish/Swedish 0275 Brazilian French...
- Page 119 Twinax Interface Menu Print Language PRINT LANGUAGE specifies the set of print languages used by the printer. Refer to the previous page for print language menus. • Standard Print Language (the default) • Alternate Print Language. Provides code pages compatible with 6408/ 6412 Model CT0 printers.
- Page 120 Coax/Twinax Programmer’s Reference Manual. You can configure the printer to use the Standard Character Set so the printer contains the IBM World Trade character set, such as the Austria/Germany character set. Or, you can select Extended Character Set and use the multinational character set as a base with the selected world trade character set overlaid.
- Page 121 Hex Transparent Control This option allows you to enable (the default) or disable additional features that are not available in standard IBM emulations. To access these features, send lead-in character text commands in the data stream. You can also use ASCII codes 80 hex through 9F hex as control codes if configured to do so.
- Page 122 Chapter Twinax Interface Menu Undefined Character Reporting UNDEFINED CHARACTER REPORTING allows overriding of the host setting of the SGEA (Set Graphic Error Action) command. For more information about the SGEA command, refer to the 6400 Coax/Twinax Programmer’s Reference Manual. • Enable (the default).
- Page 123 Twinax Interface Menu Print Text Direction PRINT TEXT DIRECTION specifies the direction in which characters are printed on the page. This allows the printer to print languages that are printed right to left instead of left to right. • Control By Host (the default) •...
- Page 124 Chapter Twinax Interface Menu Maximum Printable Width MAXIMUM PRINTABLE WIDTH sets the maximum width of the printer when using a CT host interface. • 13.2 Inches (the default) • 13.6 Inches NOTE: The twinax interface menu and coax interface menu option for maximum printable width use the same internal variable.
- Page 125 Twinax Interface Menu C/T Hotport Gives the printer the ability to handle multiple data streams simultaneously. It allows the printer to serve hosts attached to the serial, parallel, and either coax or twinax ports as if they were the only interface connected. Port Type Selects the type of port to be used.
-
Page 126: Coax Interface Menu
Does not apply to IPDS. and return to READY, press: The Twinax and Coax interface menus only appear in the Start menus if the IBM Coax/Twinax is installed. Only if Autoswitching is enabled. * = Factory Default Only if Coax Emulation is enabled. - Page 127 Coax Interface Menu Print Language (from page 145) Standard Print Alternate Print Language Language English US* 0037 English (USA/Canada)* English UK/Ireland 0037 English (Netherlands) Austrian/German 0285 English (UK/Ireland) Austrian/German (Alternate) 0273 Austrian/German Belgian 0274 Belgian Old Brazilian 0275 Brazilian Canadian French 0260 Canadian French 0277 Danish/Norwegian Danish/Norwegian...
- Page 128 Chapter Coax Interface Menu Print Language PRINT LANGUAGE specifies the set of print languages used by the printer. Refer to the previous page for print language menus. • Standard Print Language (the default) • Alternate Print Language. Provides code pages compatible with 6408/ 6412 Model CT0 printers.
- Page 129 Coax Interface Menu PA2 is only valid when the printer is in the NOT READY state and the coax SCS data stream is active. This function displays the “PA2 ENABLED” message when the Enter key is pressed and sends a special operator request to the host when the printer is made READY.
- Page 130 Hex Transparent Control You can enable additional features that are not available in standard IBM emulations. To access these features, send lead-in character text commands in the data stream. You can also use ASCII codes 80 hex through 9F hex as control codes if configured to do so.
- Page 131 Coax Interface Menu Alternate Set 80 - 9F This selection determines if ASCII codes 80 hex through 9F hex will be used as control codes or printed as standard printable characters. • Printable (the default). Prints the alternate set as standard characters •...
- Page 132 Chapter Coax Interface Menu Image Buffer Size IMAGE BUFFER SIZE (screen buffer size) allows you to select the following image buffer sizes: • 4K (the default) • A POR status is sent to the host when the printer is made READY. Intervention Required Select from the following: •...
- Page 133 Coax Interface Menu Format Control FORMAT CONTROL enables the printer to reflect the same spacing as 6408/ 6412 Model CT0 printers after absolute and relative move commands are executed. The following options are available: • Disable (the default). Does not reflect distance, generated by the Code V feature, IGP feature, and Hex Transparent control code sequence, in the new position (after absolute and relative move commands are executed).
- Page 134 Chapter Coax Interface Menu Maximum Printable Width MAXIMUM PRINTABLE WIDTH sets the maximum width of the printer when using a CT host interface. • 13.2 Inches (the default) • 13.6 Inches NOTE: The twinax interface menu and coax interface menu option for maximum printable width use the same internal variable.
-
Page 135: Compatibility Options Menu
Compatibility Options Menu Compatibility Options Menu The Compatibility Options menu allows you to select special printer functions in the non–SCS mode, based on the capabilities of the printer emulated. Compatibility Options (from page 126) (4234 only) Compatibility Compatibility Compatibility Compatibility Compatibility Option 1 Option 2... - Page 136 Chapter Coax Interface Menu Compatibility Option 2: New Line at MPP+1 NEW LINE AT MPP+1 controls how many lines are skipped when the carriage returns to a new line. • ON (the default). Moves to the first print position two lines down from the current position.
- Page 137 Compatibility Options Menu Compatibility Option 6: Form Feed Command Position FORM FEED COMMAND POSITION determines if the position of a form feed command affects its execution. • OFF (the default). Performs a form feed only if it occurs at the first print position in a line or at Maximum Print Position +1.
- Page 138 Chapter Coax Interface Menu Compatibility Option 9: CR, EM, and NL (3287 only) CR (Carriage Return), EM (Error Message), and NL (New Line) specify that the printer treat the CR, EM, and NL control codes either as spaces or as control codes.
-
Page 139: 5250 Interface Menu
5250 Interface Menu Compatibility Options Menu 5250 Interface Menu 5250 Interface (from page 104) Undefined Character Print Print Character Active Print Hex Transparent Reporting Language Table Language Control Lead-In Characters Enable* See the following Standard Print Language* Set 1 <%>* Disable page. - Page 140 Chapter 5250 Interface Menu * = Factory Default Print Language (from page 139) Standard Print Alternate Print Language Language English US* 0037 English (USA/Canada)* Austrian/German 0037 English (Netherlands) Belgian 0500 Swiss Bilingual Brazilian 0500 Belgian New Canadian French 0273 Austrian/German Danish/Norwegian 0274 Belgian Old Finnish/Swedish...
- Page 141 Hex Transparent Control This option allows you to enable (the default) or disable additional features that are not available in standard IBM emulations. To access these features, send lead-in character text commands in the data stream. You can also use...
- Page 142 Chapter 5250 Interface Menu Lead-In Characters The Lead-In Character commands must have a start and end code. Set 1 is the factory default. Three sets (each containing a start and end code) are available: • Set 1: start code = <% (the default) end code = >...
- Page 143 5250 Interface Menu Compatibility Options Menu Undefined Character Substitution UNDEFINED CHARACTER SUBSTITUTION specifies the replacement character to print in place of any unprintable character that is received from the host. The character becomes the printer default when: • The printer is powered off and then powered on. •...
- Page 144 Chapter 5250 Interface Menu Format Control Enables the printer to reflect the same spacing as 6408/6412 Model CT0 printers after absolute and relative move commands are executed. The following options are available: • Disable (the default) does not reflect distance, generated by the Code V feature, IGP feature, and Hex Transparent control code sequence, in the new position (after absolute and relative move commands are executed).
-
Page 145: 3270 Interface Menu
3270 Interface Menu Compatibility Options Menu 3270 Interface Menu 3270 Interface (from page 104) Print Print Character Active Print Early Print Hex Transparent Language Table Language Complete Control See the following Standard Print Language* Disable* Lead-In Characters Set 1 <%>* page. - Page 146 Chapter 3270 Interface Menu Print Language * = Factory Default (from page 145) Standard Print Alternate Print Language Language 0037 English (USA/Canada)* English US* 0037 English (Netherlands) English UK/Ireland 0285 English (UK/Ireland) Austrian/German 0273 Austrian/German Austrian/German (Alternate) 0274 Belgian Old Belgian 0275 Brazilian Brazilian...
- Page 147 Early Print Complete is enabled. Hex Transparent Control You can enable additional features that are not available in standard IBM emulations. To access these features, send lead-in character text commands in the data stream. You can also use ASCII codes 80 hex through 9F hex as...
- Page 148 Chapter 3270 Interface Menu Lead-In Characters The Lead-In Character commands must have a start and end code. Set 1 is the factory default. Three sets (each containing a start and end code) are available: • Set 1: start code = <% end code = >...
- Page 149 3270 Interface Menu Compatibility Options Menu Undefined Character Substitution UNDEFINED CHARACTER SUBSTITUTION specifies the replacement character to print in place of any unprintable character that is received from the host. The character becomes the printer default when: • The printer is powered off and then powered on. •...
- Page 150 Chapter 3270 Interface Menu Override Host Determines whether the printer executes certain commands sent by the host, or continues to use the current settings. The following host commands are ignored when OVERRIDE HOST is enabled: line length, forms length, lines per inch (LPI), characters per inch (CPI), print quality, and text orientation (i.e.
-
Page 151: Compatibility Options Menu
Compatibility Options Menu Compatibility Options Menu Compatibility Options (from page 145) (4234 only) Compatibility Compatibility Compatibility Compatibility Compatibility Option 1 Option 2 Option 3 Option 4 Option 5 Off* Off* (3287 only) (SCS data stream only) Compatibility Compatibility Compatibility Compatibility Compatibility Option 10 Option 6... - Page 152 Chapter 3270 Interface Menu Compatibility Option 2: New Line at MPP+1 NEW LINE AT MPP+1 controls how many lines are skipped when the carriage returns to a new line. • ON (the default). Moves to the first print position two lines down from the current position.
- Page 153 Compatibility Options Menu Compatibility Option 6: Form Feed Command Position FORM FEED COMMAND POSITION determines if the position of a form feed command affects its execution. • OFF (the default). Performs a form feed only if it occurs at the first print position in a line or at Maximum Print Position +1.
- Page 154 Chapter 3270 Interface Menu Compatibility Option 9: CR, EM, and NL (3287 only) CR (Carriage Return), EM (Error Message), and NL (New Line) specify that the printer treat the CR, EM, and NL control codes either as spaces or as control codes.
-
Page 155: Network Setup Menu
Adapter Address Submenu Network Setup Menu Network Setup (from page 107) Ethernet Ethernet Wireless Wireless Adapter Adapter Address Parameters Address Parameters Parameters Address See page 155. See page 157. See page 161. See page 162. See page 165. See page 166. To view options, press: Scroll Scroll... - Page 156 Chapter Network Setup Menu IP ADDRESS A numeric address such as 123.45.61.23 which identifies a printer or server in a LAN or WAN. Subnet Mask A binary value used to divide IP networks into smaller subnetworks or subnets. This mask is used to help determine whether IP packets need to be forwarded to other subnets.
-
Page 157: Adapter Parameters Submenu
Adapter Parameters Submenu Adapter Parameters Submenu Adapter * = Factory Default Parameters (from page 155) NetBIOS Buffer Size Novell Nest Serv Novell ASCII In Kilobytes Protocol Type Protocol Frame Data Port Enable* Auto* Enable* Auto Sensing* 9100* 1-16 Disable Bindery Disable Ethernet II 9099 - 9101... - Page 158 Chapter Network Setup Menu Novell Protocol This option determines whether the Novell protocol will be available. The selections are as indicated below: • Enable (default). Makes the Novell protocol available with the ethernet adapter installed. • Disable. Makes the Novell protocol unavailable during printer operation. Nest Serv Type You can change the Nest Server using this option, but consult your administrator for the appropriate setting.
- Page 159 Adapter Parameters Submenu Ethernet Speed The Ethernet Speed menu allows compatibility with different systems and networks. The factory default is Auto Select. • Auto Select. (default) This setting tells the 10/100Base-T NIC to perform an auto detection scheme and configure itself to be 10 Half Duplex, 10 Full Duplex, 100 Half Duplex, or 100 Full Duplex.
- Page 160 Chapter Network Setup Menu Ethernet Hotport Gives the printer the ability to handle multiple data streams simultaneously. It allows the printer to service hosts attached to the serial, ethernet, and either the coax or twinax ports as if they were the only interface connected. Trickle Time This functionality prevents an attached host from timing out.
-
Page 161: Ethernet Address Submenu
Ethernet Address Submenu Ethernet Address Submenu Ethernet * = Factory Default Address (from page 155) IP ADDRESS SUBNET GATEWAY DHCP MASK ADDRESS ADDRESS XXX.XXX.XXX XXX.XXX.XXX XXX.XXX.XXX hhhhhhhhhhhh Disable* Enable To view options, press: Scroll Scroll Enter Return Enter To select an option, press: To exit the configuration menus and return to READY, press: Start... -
Page 162: Ethernet Parameters Submenu
Chapter Network Setup Menu Ethernet Parameters Submenu * = Factory Default Ethernet Parameters (from page 155) Buffer Size in NetBIOS ASCII Data Keep-Alive Ethernet Kilobytes Protocol Port Number Timer Speed Enable* 9100* 3 Minutes* Auto Select* (1-16) Disable 0 - 65535 2 - 10 Min 10 Half Duplex 10 Full Duplex... - Page 163 Ethernet Parameters Submenu NetBIOS Protocol This option determines whether the NetBIOS protocol will be available. The selections are as indicated below: • Enable (the default). Makes the NetBIOS protocol available with the integrated ethernet installed. • Disable. Make the NetBIOS protocol unavailable during printer operation. ASCII Data Port Number This option sets the port number for ASCII print jobs.
- Page 164 Chapter Network Setup Menu Job Control The job control mode has three options: • Standard (the default). The NIC waits for the printer to finish receiving the current job before sending another job. The status line shows “done” when the job is completely received by the NIC. This is default. •...
-
Page 165: Wireless Address Menu
Wireless Address Menu Wireless Address Menu Wireless * = Factory Default Address (from page 155) IP ADDRESS SUBNET GATEWAY DHCP MASK ADDRESS ADDRESS 000.000.000.000 000.000.000.000 000.000.000.000 Disable* Enable To view options, press: Scroll Scroll Enter Return Enter To select an option, press: To exit the configuration menus and return to READY, press: Start... -
Page 166: Wireless Parameters Menu
Chapter Network Setup Menu Wireless Parameters Menu * = Factory Default Wireless 1 = Only when 40 Bites is selected Parameters 2 = Only when 128 Bits is selected (from page 155) Signal SSID Operation Minimum Channel Strength Name Mode Transfer Rate SSID Name (01 - 15)* Ad Hoc*... - Page 167 Wireless Parameters Menu Signal Strength This menu displays the strength of the wireless signal. NOTE: This is a display value only and cannot be changed. SSID Name A 1 - 32 character, case sensitive string that identifies the group the printer talks to.
- Page 168 Chapter Network Setup Menu Antenna Diversity The type of antenna used: • Diverse (default). Select when you want to use the antenna with the best reception. • Primary. Select when you want to use the Primary antenna on the server. •...
- Page 169 Wireless Parameters Menu WEP Key Width This is the encryption strength. The options are 40 Bits and 128 Bits; 40 Bits are weaker and 128 Bits are stronger. NOTE: If you select 40 Bits, the WEP key BYTE6 through WEP Key BYTE13 menus will not display.
-
Page 170: Parallel Interface Menu
Chapter Parallel Interface Menu Parallel Interface Menu Refer to Chapter 5 for more information about printer interfaces. * = Factory Default Parallel Interface (from page 104) Interface PC Parallel Dataproducts IEEE 1284 Parallel Type Hotport IEEE 1284* See page 172 See page 175 See page 178 Trickle Time... - Page 171 Parallel Interface Menu Wireless Parameters Menu Parallel Hotport Gives the printer the ability to handle multiple data streams simultaneously. It allows the printer to service hosts attached to the serial, parallel, and either the coax or twinax ports as if they were the only interface connected. Trickle Time This functionality prevents an attached host from timing out.
-
Page 172: Pc Parallel Menu
Chapter Parallel Interface Menu PC Parallel Menu The PC PARALLEL menu configures the electrical signals to operate as a PC Parallel printer. * = Factory Default PC Parallel (from page 170) Busy On Data Bit 8 Data Strobe Response Polarity Polarity Polarity Strobe... - Page 173 PC Parallel Menu Data Polarity The DATA POLARITY parameter must be set to match the data polarity of your host computer. • Standard (the default). Does not expect the host computer to invert the data. • Inverted. Expects the host computer to invert the data received on the data lines.
- Page 174 Chapter Parallel Interface Menu TOF Action at Prime Signal TOF (Top–of–Form) ACTION AT PRIME SIGNAL determines whether or not a form feed is performed before a warm start when the prime signal is asserted from the host. This setting is only used if PRIME SIGNAL parameter is enabled.
-
Page 175: Dataproducts Menu
Dataproducts Menu Dataproducts Menu The Dataproducts parallel interface is configured using the following configuration options. * = Factory Default Dataproducts (from page 170) Data Bit 8 Data Data Request Strobe Ignored Polarity Polarity Polarity Enable* Enable* Standard* Standard* Standard* Disable Disable Inverted Inverted... - Page 176 Chapter Parallel Interface Menu Data Bit 8 The DATA BIT 8 parameter allows access to the extended ASCII character set. When this parameter is disabled, the printer interprets bit 8 of each incoming data character as a zero, regardless of its actual setting. •...
- Page 177 Dataproducts Menu Auto Trickle Auto Trickle is used to prevent a host computer from timing out because the parallel interface was busy for too long. When Auto Trickle is enabled and the printer's buffers are almost full, the printer will begin to trickle data in (at the rate set in the Trickle Time menu) until the buffers start to empty out.
-
Page 178: Ieee 1284
Chapter Parallel Interface Menu IEEE 1284 The IEEE 1284 interface is configured using the following configuration options. IEEE 1284 * = Factory Default (from page 170) Buffer Size in Auto Trickle Kilobytes Trickle Time Disable* 1/4 sec* (1-16) Enable 1/2 sec 1 sec 2 sec 4 sec... - Page 179 IEEE 1284 Trickle Time This functionality prevents an attached host from timing out. To support this feature, the port has to be able to accept data from the host and store it for future use. The selected value is the time that the printer waits before getting the next byte of data from the host.
-
Page 180: Serial Interface Menu
Chapter Serial Interface Menu Serial Interface Menu IMPORTANT The serial parameters in the printer must be set to match the serial interface in the host computer (at the other end of the printer data cable). Otherwise, the printer may not operate correctly, and data characters from the computer may not print or may appear as “garbled”... - Page 181 Serial Interface Menu IEEE 1284 Interface Type This parameter configures the electrical interface for the serial port, as follows: • RS-232 (the default) • RS-422 Data Protocol You may select one of the following serial interface protocols to meet the host interface requirements.
- Page 182 Chapter Serial Interface Menu Data Bits The DATA BITS parameter sets the length of the serial data word. The length of the data word must match the corresponding data bits setting in the host computer. • 8 (the default) • Stop Bits The STOP BITS parameter sets the number of stop bits in the serial data word.
- Page 183 Serial Interface Menu IEEE 1284 Request to Send This configuration is part of hardware flow control and determines when the REQUEST TO SEND (RTS) signal is generated. This signal indicates whether or not the printer is ready to receive data. •...
- Page 184 Chapter Serial Interface Menu The status byte sent to the host is defined as follows: 1 = printer fault 1 = IGP busy 0 = offline, 1 = online 1 = serial input buffer exceeds xoff/on Serial Hotport Gives the printer the ability to handle multiple data streams simultaneously. It allows the printer to service hosts attached to the serial, parallel, and either coax or twinax ports as if they were the only interface connected.
- Page 185 Serial Interface Menu IEEE 1284 Timeout This is the value used by the printer to time out from the current port and check the other ports for data to print. When the printer has not received data from the host after a certain period of time, it needs to Timeout in order to service the other ports.
-
Page 186: Emulation Configuration Menu
Your printer can support other emulations: IPDS, Code V, and IGP. These emulations are features that must be ordered separately. (These features may have been installed at the factory if the features were ordered with the printer.) For the IPDS Coax/Twinax emulation, the IBM Coax/Twinax feature must be installed. -
Page 187: Ipds Feature
Emulation Configuration Menu IEEE 1284 Active Emulation This parameter allows you to select either of the following emulations: • ANSI Emulation (the default) • IGP. See page 186. • Code V. See page 186. • IPDS ASCII Printer Emulation This parameter selects one of the following ASCII printer emulations as the active emulation: •... -
Page 188: Ipds Configuration Menu
Chapter IPDS Feature IPDS Parameters The IPDS parameters are described on the following pages. Parameters marked with an asterisk (*) indicate the default value. The printer must be offline to enter the configuration structure. Enter and exit the IPDS configuration menu according to the configuration procedures in Chapter 3, “Configuring the Printer.”... - Page 189 IPDS Configuration Menu Print Language (from page 188) Standard Print Language 0037 English (USA/Canada)* 0037 English (Netherlands) 0285 English (UK/Ireland) 0273 Austrian/German 0274 Belgian Old 0275 Brazilian 0260 Canadian French 0277 Danish/Norwegian 0287 Danish/Norwegian (Alternate) 0278 Finnish/Swedish 0288 Finnish/Swedish (Alternate) 0297 French/French Azerty 0500 International Set 5 0280 Italian...
- Page 190 Chapter IPDS Feature Print Language (TCP/IP IPDS) PRINT LANGUAGE specifies the set of print languages used by the printer. Refer to the previous page for print language menus. Specifying a print quality of OCR A or OCR B will change the print language to OCR A or OCR B.
- Page 191 IPDS Configuration Menu Override Host (Emulation Configuration) Override Host determines if the operator panel overrides specified IPDS menu values. Select one of the following two values: • Disable (the default). Does not allow operator panel settings to override IPDS application commands. •...
- Page 192 NOTE: There is one bit of image data per pel. If your print job contains an image created to print 144 by 144, which is very common for IBM 4234 printers, some bits of data will be dropped out to support the best fit resolution, which is 120 by 144.
- Page 193 IPDS Configuration Menu Postnet Barcode Width Determines the width of Postnet bar code. This option applies to non-rotated Postnet bar codes. • Standard (the default). Postnet bar codes are printed at the standard width. • Narrow. Postnet bar codes are printed with a narrow width. NOTE: The printer caches bar codes to improve performance.
- Page 194 Compressed Font The Compressed Font option allows the printer to print vertically compressed (short) fonts available on the IBM 4234 IPDS printer. • Disable (the default). Normal size fonts are substituted whenever compressed fonts are requested.
-
Page 195: Ansi
ANSI ANSI EMULATION * = Factory Default (from page 186) ANSI/IGP Emulation CPI/LPI Font Page Define CR Auto LF Define LF Select Attributes Format Code Code Select CPI (see next page) (see next page) CR = CR* Disable* LF = CR + LF* 10.0* CPI CR = CR + LF Enable... - Page 196 Courier NLQ (from page 195) OCR-A OCR-B Latin 1 8859-1* Latin 9 8859-15 Cyrillic 8859-5 DEC 256 Greek IBM PC-2 CP 437 Turkish CP 857 IBM PC-2 CP 850 Slavic CP 852 German Page Format Cyrillic CP 855 French A (from page 195) French Canadian.
- Page 197 ANSI CPI/LPI Select Defines the default values for the horizontal and vertical character spacing. The number of characters per inch can range from 10.0 through 17.1. The number of lines per inch can range from 3.0 through 8.0. CPI Select •...
- Page 198 Chapter IPDS Feature Prop. Spacing (Proportional Spacing) Each printed character is contained inside a character cell. The width of the character cell includes the character and the space around the character. • Disable (the default). Each character cell is printed with the same width. Each column in the printed text will line up.
- Page 199 ANSI Page Format Margins • Left Margin. Defines where the first print column is located. The left margin is specified as the number of characters from the left edge of the form. • Right Margin. Defines where the last print column is located. The right margin is specified as the number of characters from the right edge of the form.
- Page 200 Chapter IPDS Feature Table 3 lists the maximum number of characters that can be printed for a given Characters Per Inch (CPI) setting. IMPORTANT If the form width is set in characters and the CPI is changed, the effective page width is changed to be equal to the form width in characters divided by the new CPI.
- Page 201 ANSI Character Set This parameter selects a character set for the ANSI emulation. Note that when 0876 OCR-A or 0877 OCR-B is selected as the print language, the Font Attributes Typeface parameter is changed to OCR-A or OCR-B, respectively. Character sets are shown in detail in the Character Sets Reference Manual. Printer Select •...
- Page 202 Chapter IPDS Feature Private Mode Determines the default type of character set (Set 1 or Set 2). This can also be set by ESC sequences ESC [>5h and ESC [>5l. Refer to these descriptions in the ANSI Programmer's Reference Manual for further details. •...
-
Page 203: Igp Feature
IGP Feature (PGL) ANSI IGP Feature (PGL) Configuration Matching printer operational settings to those of the host computer is known as “printer configuration.” The settings, or configuration parameters, such as selecting the host interface, are adjusted according to the operator panel key descriptions. -
Page 204: Igp Emulation Menu
Chapter IGP Feature (PGL) IGP Emulation Menu Emulation Configuration (from page 186) Emulation Define CR Define LF Auto LF Select PI Slew Range Code Code SFCC CR = CR* LF = LF* Disable* CR = CR + LF LF = CR + LF Enable 1 - FF CR Edit... - Page 205 IGP Emulation Menu Define LF Code (Line Feed) This parameter forces the printer to insert an automatic Carriage Return code into the data stream whenever a Line Feed code occurs. This can be used in most installations, but it is required if the host computer does not send Carriage Returns to the printer.
- Page 206 Chapter IGP Feature (PGL) Select Font This parameter allows you to select a font for the IGP feature. Valid selections are 0 to 33. The following predefined values are available: U.S. ASCII (the default) German Swedish Danish Norwegian Finnish English Dutch French Spanish...
- Page 207 IGP Emulation Menu Skip Command Prefix This parameter determines if a data string before an IGP command will be ignored. • Enable (the default). The printer ignores all text before an IGP command. • Disable. The printer will print any data before an IGP command. Power On IGP You can set the IGP feature so that it is enabled or disabled when the printer is powered on.
- Page 208 Chapter IGP Feature (PGL) Ignore Character Ignore Mode This parameter instructs the IGP to ignore the character selected under the Select Character menu. • Disable (the default). The IGP does not ignore any characters. • Enable. The IGP ignores the characters selected under the Selected Character menu.
-
Page 209: Code V Feature (Vgl)
Code V Feature (VGL) IGP Emulation Menu Code V Feature (VGL) Configuration Matching printer operational settings to those of the host computer is known as printer configuration. The settings, or configuration parameters, such as selecting the host interface, are adjusted according to the configuration instructions in Chapter 3, “Configuring the Printer.”... -
Page 210: Code V Emulation Menu
Chapter Code V Feature (VGL) Code V Emulation Menu Emulation Configuration (from page 186) Code V Emulation SFCC and Lines Graphics Error Character Power On Per Inch Options Handling Filtering Select SFCC See the following Error Messages Ignore Characters Disable* page. - Page 211 Code V Emulation Menu Graphics Options (from page 210) Slashed Zero Ignore Dots Append Truncate Off True Vertical Value Rotated Page Alpha 1/10 Disable* Disable* Disable* Disable* Disable* Enable Enable Enable Enable Enable Absorb at ^PY Rotate Ignore Midline PY Dark Descenders Character Size...
- Page 212 Chapter Code V Feature (VGL) Power On ^F Enable Free format causes the Code V to ignore carriage returns, line feeds and all characters below 20 hex sent from the host. Refer to the 6400 Code V User’s Manual for more information on Free Format. •...
- Page 213 Code V Emulation Menu Truncate Off Page Alpha When enabled, this parameter prevents the printing of Error 48 (Element Off Page Error) if alphanumeric data, including spaces, extends beyond the right side of the form. • Disable (the default) • Enable True Vertical 1/10 Determines if a vertical 1/10 of an inch parameter is used as 1/10 of an inch...
- Page 214 Chapter Code V Feature (VGL) Ignore Spaces • Disable (the default). Trailing spaces are NOT deleted from alphanumeric elements in a graphics pass. • Enable. Trailing spaces are deleted from alphanumeric elements in a graphics pass. Midline PY • Enable (the default). Allows printable characters to precede the ^PY command.
- Page 215 Code V Emulation Menu IGP110 Compatibility • Enable (the default). This menu will process ^IPEXP commands in the same manner the IGP does, and does not expand special font characters if an ^IPEXP command precedes it. • Disable. If disabled, it will allow the special font characters to be expanded.
- Page 216 Chapter Code V Feature (VGL) Bar Code Errors • Enable (the default). Prints an error message when invalid bar code data is encountered. • Disable. Does not print an error for invalid bar code data and the bar code will be printed as is. Character Filtering Ignore Characters Determines if character filtering is enabled, or if one or both characters are...
- Page 217 Code V Emulation Menu Data Bit 8 • Enable (the default). The PI line is not passed directly from host to printer; all 8 bits are used for data bits, and characters in the 80-FF hex range can be accessed. •...
- Page 218 Chapter Code V Feature (VGL) PI Control Printer PI • Disable (the default). Does not inform the Code V that the ASCII emulation is configured with the PI line enabled. • Enable. Informs the Code V that the ASCII emulation is configured with the PI line enabled.
-
Page 219: Printer Emulation Configuration Menu
Printer Emulation Configuration Menu Code V Emulation Menu Printer Emulation Configuration Menu Printer Emulation Configuration (from page 186) Printer Emulation Configuration P-Series Proprinter III Epson P-Series XQ Serial Matrix Emulation XL Emulation Emulation Emulation Emulation See page 220 See page 222 See page 224 See page 228 See page 231... -
Page 220: Proprinter Iii Xl Emulation Menu
Chapter Printer Emulation Configuration Menu Proprinter III XL Emulation Menu Proprinter III XL Emulation (from page 219) Define CR Auto LF Print Alternate Define LF Code Language Character Set Code CR = CR* Enable* LF = LF* 0437 PC Character Set* PC Character Set 2* CR = CR + LF Disable... - Page 221 Proprinter III XL Emulation Menu Print Language Print language specifies the set of print languages used by the printer. Refer to the previous page for print language menus. Alternate Character Set The alternate character set code can be used to mix primary and alternate characters on a single line.
-
Page 222: Epson Emulation Menu
Chapter Printer Emulation Configuration Menu 20 CPI Condensed Compressed print characters are narrower than the normal character set. This is helpful for applications where you need to print the maximum amount of information on a page. • Enable (the default). Prints characters about 60 percent the width of normal characters when compressed print is chosen by the host computer. - Page 223 Epson Emulation Menu Character Sets This parameter selects a character set for the Epson emulation, as shown in the “Epson Emulation Menu” on page 222. To use one of these sets, choose the desired group heading (such as 0862 Hebrew) and press ENTER. Character sets are shown in detail in the Character Sets Reference Manual.
-
Page 224: P-Series Emulation Menu
(from page 219) Define CR Control Code Control Code Character Print Code Sets Language Elongated* IBM PC* 8.0 LPI* CR = CR* See the Backspace CR = CR + LF Multinational 10.3 LPI following page. EMCA Latin 1 6.0 LPI... - Page 225 P-Series Emulation Menu Print Language (from page 224) IBM PC Select Subset Primary ASCII (USA)* French German English (UK) Danish Swedish Italian Spanish Japanese French Canadian Latin American Danish II Spanish II Latin American II Select Subset Extended 0437 PC Character Set*...
- Page 226 Chapter Printer Emulation Configuration Menu Character Sets Specifies a character set as shown in the “P-Series Emulation Menu” on page 224. To use one of these sets, choose the desired group heading (such as 0862 Hebrew) and press ENTER. Character sets are shown in detail in the Character Sets Reference Manual.
- Page 227 P-Series Emulation Menu Overstrike This option enables you to print bold characters. • Enable (the default). Turns on bold print. When enabled, overstrike printing slows down the printer. • Disable. Turns off bold print. Define LF Code • LF = CR + LF (the default). Forces an automatic carriage return with each line feed command.
-
Page 228: P-Series Xq Emulation Menu
Chapter Printer Emulation Configuration Menu P-Series XQ Emulation Menu P-Series XQ Emulation (from page 219) Define LF Compressed Control Code Define CR Auto LF Code Print Code CR = CR* LF = CR + LF* Char 01 SOH* 8.0 LPI* Disable* CR = CR + LF LF = LF... - Page 229 P-Series XQ Emulation Menu Define CR Code (Carriage Return) This option controls the action of the printer when it receives a Carriage Return code (hex 0D) from the host computer. If this feature is enabled, each time the printer receives a Carriage Return, it inserts an additional Line Feed code (hex 0A) into the data stream.
- Page 230 Chapter Printer Emulation Configuration Menu EVFU Select The EVFU SELECT (Electronic Vertical Format Unit Select) option determines if EVFU skips can be defined. An EVFU skip is an instruction to move the paper to a specific location on a form. See the 6400 ASCII Programmer’s Reference Manual for more information.
-
Page 231: Serial Matrix Emulation Menu
Serial Matrix Emulation (from page 219) Character Print Control Code Define CR Code Sets Language IBM PC 8.0 LPI* CR = CR* IBM PC* Select Subset Primary 10.3 LPI CR = CR + LF Multinational Select Subset Extended 6.0 LPI... - Page 232 Specifies a character set as shown above. To use one of these sets, choose the desired group heading (such as 0862 Hebrew) and press ENTER. Character sets are shown in detail in the Character Sets Reference Manual. • IBM PC (the default) • Multinational •...
- Page 233 Serial Matrix Emulation Menu Auto LF The Auto LF option defines the printer action when print data is received past the forms width setting. • Enable (the default). Performs an automatic carriage return and line feed when data is received past the forms width. •...
-
Page 234: Print Format Menu
Chapter Printer Emulation Configuration Menu Print Format Menu Print Format (from page 186) Print Format Forms Characters Lines Forms Width Per Inch Per Inch Length Forms Width in Inches 10.0 Characters Per Inch* 6.0 Lines Per Inch* Forms Length in Inches 13.6 Inches* 12.0 Characters Per Inch 8.0 Lines Per Inch... - Page 235 Print Format Menu Characters Per Inch CHARACTERS PER INCH (CPI) specifies the number of characters that will print per horizontal inch. • 10.0 Characters Per Inch (the default) • 12.0 Characters Per Inch • 13.3 Characters Per Inch • 15.0 Characters Per Inch •...
- Page 236 Chapter Printer Emulation Configuration Menu Forms Width FORMS WIDTH specifies the forms width in inches, millimeters or characters. All three measurements will update the same configuration parameter. The default values for forms width are 13.6 inches, 345.4 mm and 136 characters. NOTE: The default values for forms width are 13.2 inches, 335.5 mm and 132 characters when P-Series, Coax/Twinax, IGP, Code V, or IPDS are installed.
- Page 237 Print Format Menu The following table lists the maximum number of characters that can be printed for a given Characters Per Inch (CPI) setting. Maximum Forms Width CPI Setting (in Characters) 10.0 136* 12.0 13.3 15.0 16.7 17.1 18.0 20.0 * = Default IMPORTANT If the forms width is set in characters and the CPI is changed, the...
- Page 238 Chapter Printer Emulation Configuration Menu Forms Length In Inches Allows you to input the forms length in inches. Valid values range from 00.1 through 24 inches, in increments of 0.1 inch. (This option not available for the coax interface.) Forms Length In MM Allows you to input the forms length in millimeters.
- Page 239 Print Format Menu Print Quality NOTE: When using bold or emphasized printing, the printer prints two dots instead of one to produce the desired effect. This does not affect characters per inch. This parameter specifies the density (quality) of printing: •...
- Page 240 Chapter Printer Emulation Configuration Menu Slashed Zero Prints zeros with a slash, when enabled, to distinguish zeros from the alphabetic capital “O.” • Disable (the default) • Enable. Prints zeros with a slash. Text Position Specifies where the text will be positioned in the line space. When set to Top of Line, text will be positioned at the top of the line space.
- Page 241 Print Format Menu Right Margin Defines where the last print position is located. The right margin is specified as the number of characters from the right edge of the forms. Valid values range from the following: • 0 Characters (the default) •...
-
Page 242: Operator Print Tests Menu
Chapter Operator Print Tests Menu Operator Print Tests Menu Operator Print Tests (from page 104) Printer Print Error Ripple All E’s Demonstration Print All H’s All E’s + FF Underlines Adapter Test Ethernet Test Page Page To view options, press: Scroll Scroll Enter... - Page 243 NOTE: This page contains important system and ethernet adapter information and should be maintained with your system configuration printout. Your IBM Customer Service Representative will typically run these tests. Ethernet Test Page Prints an Ethernet configuration page. If the Integrated Ethernet is not properly installed, this page will not print.
-
Page 244: Printer Information Menu
Chapter Printer Information Menu Printer Information Menu Printer Information (from page 104) Installed Power On Printing Time Memory Time To view options, press: 11 Inch Pages Print Strokes Scroll Scroll Enter Return Enter To select an option, press: To exit the configuration menus and return to READY, press: Start * = Factory Default... -
Page 245: Ribbonminder Menu
RibbonMinder Menu Print Format Menu RibbonMinder Menu RibbonMinder (from page 104) New Ribbon Ribbon Ribbon Ribbon End New Ribbon XXX% Action Type Point Detect Press the ENTER Disable* 6400-I Premium 30 Ribbon* Normal* Disable* key to reset ribbon Display 6400-I Premium 20 Reduce 5% - 100% Enable life to 100%. - Page 246 Ribbon Type The factory default setting is dependent on the host printer. All printer models except the 6400-i20 and -i24 use IBM Premium 20 or Premium 30 Ribbon. The 6400-i20 and -i24 use IBM Premium 2000. The ribbon types include:...
- Page 247 • Normal (the default). This value corresponds to the character life expectancy of the installed ribbon. For example, the life of the IBM Premium 30 Ribbon is specified at 30 million DP characters. By selecting NORMAL Ribbon End Point, the Ribbon Minder tracks characters up to 30 million before declaring RIBBON INK OUT/CHANGE RIBBON.
- Page 248 Chapter RibbonMinder Menu...
-
Page 249: Printer Interfaces
(PCBA) and a cable connector for the data line. Communication signals and data may be sent over parallel or serial lines. Each IBM 6400 printer is equipped with three parallel interface protocols and two serial interface protocols. Coax and twinax interface protocols are available as optional features. -
Page 250: Rs-232 And Rs-422 Serial Interfaces
(A copper conductor, twisted-pair telephone cable with a shunt capacitance of 16 pF/foot [52.5 pF/meter] terminated in a 100 ohm resistive load must be used for the RS-422.) RS-232 6400i Series Printers Table 4. 6400i Series RS-232 Serial Interface Connector Pin Assignments Input Signals Output Signals Miscellaneous Signal... - Page 251 Request To Send (RTS). Control signal from the printer. Subject to configuration. Data Terminal Ready (DTR). Control signal from the printer. Subject to configuration. RS-422 6400i Series Printers Table 6. 6400i Series RS-422 Serial Interface Connector Pin Assignments Input Signals Output Signals Miscellaneous Signal Signal...
-
Page 252: Rs-232 Serial Interface Protocols
Chapter RS-232 And RS-422 Serial Interfaces 6400-i24 and -i2s Models NOTE: The RS-422 is optional for the 6400-i24 model. Table 7. PSA3 RS-422 Serial Interface Connector Pin Assignments Input Signals Output Signals Miscellaneous Signal Signal Signal - Receive Data - Transmit Data Chassis/Signal (-RXD) (-TXD) -
Page 253: Rs-232 And Rs-422 Serial Interface Error Handling
Parity (None, Odd, Even, Mark, or Sense) RS-232 only: • Data Terminal Ready logic • Request to Send logic Some application programs require a unique configuration. If the printer is not working properly in the configuration you selected, contact an IBM service representative. -
Page 254: Pc Parallel Interface
Chapter PC Parallel Interface One Char Enquiry When enabled, and the IGP feature is available, a status byte is sent back to the host when the poll character or the command SFCC enquiry is sent to the printer (serial interface only). The poll character is received and the status byte is sent whether the printer is online or offline. -
Page 255: Pc Parallel Interface Signals
PC Parallel Interface Signals Table 8. Printer PC Parallel Interface Connector Pin Assignments Input Signals Output Signals Miscellaneous Signal Signal Signal DATA STROBE EXTERNAL 5 VOLTS Return PAPER N SELECT INSTRUCTION Return PC Parallel Interface Signals Data Lines 1 through 8. Provides eight standard or inverted levels from the host that specify character data, plot data, or a control code. -
Page 256: Pc Parallel Interface Configuration
TOF Action at Prime Signal (do nothing or form feed) • Buffer Size in kilobytes (1 to 16) Some application programs require a unique configuration. If the printer is not working properly in the configuration you have selected, contact an IBM service representative. -
Page 257: Dataproducts Parallel Interface
Dataproducts Parallel Interface PC Parallel Interface Configuration Dataproducts Parallel Interface The Dataproducts parallel interface allows the printer to operate with a 50-pin Amplimite (AMP) HDH-20 data cable connector. This adapter can be obtained as a feature on the 6400. The length of the data cable from the host computer to the printer must not exceed 40 feet (12 meters). -
Page 258: Dataproducts Parallel Interface Signals
Chapter Dataproducts Parallel Interface Dataproducts Parallel Interface Signals Data Lines 1 through 8. Provides eight standard or inverted levels from the host that specify character data, plot data, or a control code. Data Line 8 allows access to the extended ASCII character set. You can enable or disable this line via the Data Bit 8 parameter on the Dataproducts submenu (see page page 175). -
Page 259: Ieee 1284 Parallel Interface
IEEE 1284 Parallel Interface Operating Modes Some application programs require a unique configuration. If the printer is not working properly in the configuration you have selected, contact an IBM service representative. IEEE 1284 Parallel Interface The IEEE 1284 is a parallel interface with bidirectional capabilities. Features include the following: Faster data transmission. -
Page 260: The Negotiation Phase
Chapter IEEE 1284 Parallel Interface Byte Mode The printer and host send data to each other along eight data lines (one bit per line). If bidirectional communication is supported by the printer and the host, the host will take control of the data transfer. The Negotiation Phase The negotiation phase determines which operating mode will be used. - Page 261 Signals Table 10. 1284 Signals (continued) Type of Mode Source of Data Compatible Nibble Byte Host nAutoFd Host Busy HostAck Not Defined Logic Grid Chassis Grid Printer Peripheral Logic High Signal Ground (nStrobe) Signal Ground (Data 1) Signal Ground (Data 2) Signal Ground (Data 3) Signal Ground (Data 4) Signal Ground (Data 5)
- Page 262 Chapter IEEE 1284 Parallel Interface Host Clock / nWrite. Driven by host. Data transferred from host to printer. When printer sends data, two types are available. If Nibble mode, signal is set high. If Byte mode, signal is set low. Data 1 through Data 8.
-
Page 263: Terminating Resistor Configurations
If the values of these terminating resistors are not compatible with the particular interface driver requirements of your host computer, you may need to install resistors with different pull-up and pull-down values. NOTE: Must be installed by an IBM service representative. RP1 Default: 470 ohm Alt 1: 220 ohm... - Page 264 Chapter IEEE 1284 Parallel Interface Removal And Installation The procedure for removing and installing terminating resistors is provided in your Maintenance Information Manual. Important This is an involved maintenance procedure. To avoid damage to the equipment, only a trained technician should perform this procedure.
-
Page 265: Routine Service And Diagnostics
Periodically remove excess paper chaff and dust from the ribbon and paper paths. If print quality or paper motion deteriorates seriously even after cleaning, contact your IBM service representative for prompt attention. Cleaning Requirements Periodic cleaning ensures efficient operation and clear print quality. If the printer is located in a dusty area or is used for heavy duty printing, clean it more often. -
Page 266: Cleaning Inside The Cabinet
Chapter Cleaning Requirements Cleaning Inside The Cabinet Over time, particles of paper, ink, and ribbon accumulate inside impact printers. This is normal. These particles must be removed periodically to avoid degraded print quality. Most paper particles accumulate around the ends of the platen and ribbon path. - Page 267 Cleaning Inside The Cabinet Ribbon Spool Paper Scale Paper Support Tractor Hammer Bank Hub Latch Base Cover and Casting Ribbon Mask Vertical Tractor Lock Position Knob Ribbon Path Forms Loading Diagram Thickness Lever Ribbon Splined Shaft Guide Figure 68. Interior Components of the Cabinet Models with Ribbon Spool Above...
- Page 268 Chapter Cleaning Requirements Ribbon Spool Tractor Lock Printer Cover Tractor Adjustable Paper Guide Shuttle Cover Adjustable Assembly Hinge Tractor Door Operator Panel Forms Splined Shaft Thickness Lever Ribbon Hub Ribbon Guide Hub Latch Figure 69. Interior Components of the Pedestal Models with Ribbon Spool Above...
-
Page 269: Printer Self -Tests
Printer Self – Tests Cleaning Inside The Cabinet Printer Self –Tests With the exception of testing the interface between the printer and the host computer (and the associated data cable), you do not need to send data from the host computer to the printer to test printer operation. You can use the printer’s built–in diagnostic tests to check many of the functions of your printer, including print quality and overall operation. -
Page 270: Running The Printer Self-Tests
Chapter Running The Printer Self–Tests Running The Printer Self–Tests Step Result Notes 1. Make that the ribbon is installed and the printer is powered on and loaded with paper. 2. Press NOT READY Places the printer in NOT READY mode. Stop OPERATOR MENU Press both keys at the... -
Page 271: Hex Code Printout
Enter 10. Examine the print quality of the characters. They should be fully formed and of uniform density. If the test does not run or if text characters do not appear correctly formed, contact your IBM service representative. NOT READY Returns the printer to the NOT READY mode. - Page 272 Chapter Hex Code Printout To obtain a hex code printout, perform the following steps. NOTE: The asterisks (*) indicate steps specific to using the coax/twinax interface menus which are only displayed when the IBM Coax/Twinax feature is installed. Step Result Notes 1.
- Page 273 Hex Code Printout Cleaning Inside The Cabinet Step Result Notes COAX INTERFACE Moves forward to the HEX HEX PRINT MODE PRINT MODE option. HEX PRINT MODE HEX PRINT MODE Moves forward to DISABLE* DISABLE, the active Enter option. HEX PRINT MODE Moves forward to ENABLE ENABLE, the alternate...
- Page 274 Chapter Hex Code Printout Figure 70. Sample ASCII Hex Code Printout Figure 71. Sample Coax Hex Code Printout...
-
Page 275: Fault Messages
Displayed faults fall into one of two categories: • Operator correctable. • IBM service representative required to correct. Fault Correction Procedure Before correcting a fault, read the fault explanation, then proceed to fix the problem, taking the following steps: 1. - Page 276 6. Run your print job again. If the fault message reappears, turn off power to the printer, then call your IBM service representative. Otherwise, no further attention is required. The following table explains each fault message and offers suggestions for correcting the fault condition.
- Page 277 CHECK STACKER 019 STACKER FAULT Stacker is not functioning Check for obstructions in correctly the stacker area. If fault CHECK STACKER persists, contact your IBM service representative. 021 RECEIVE BUFFER Receive overrun. (Serial Check printer serial port OVERRUN interface) configuration setup.
- Page 278 (Coax CALL SYSTEM OPERATOR interface) 029 8344 DIAGNOSTIC Link–level code test Contact your IBM service TEST FAILED detects hardware failure. representative. 031 END OF FORMS A timeout message is Load paper. Refer to the...
- Page 279 CHECK RIBBON occurred 5 seconds if match thickness of media Stop was not pressed to being used. If fault clear the fault. reoccurs, contact your IBM service representative. 037 STACKER JAM A timeout message is Clear stacker jam and TIMEOUT sent to the host if paper reload paper.
- Page 280 Fault Messages Table 12: Fault Messages Operator Fault Message Explanation Solution Correctable? 046 EC STOPPED AT Controller self–test and Contact your IBM service STATE initialization sequence representative. was halted at <state>, <state> where <state> is one of 10 numerically coded messages.
- Page 281 Check for items beneath the printer blocking cabinet vents. Power back on the printer. If this message reoccurs, contact your IBM service representative. 069 DATA CLEARED Appears when data is No action necessary. cleared out of printer after Cancel key has been pressed.
- Page 282 Make sure the ribbon is not twisted and the forms CHECK RIBBON thickness lever is set to match thickness of media being used. If fault reoccurs, contact your IBM service representative. 090 SHUTTLE COVER Shuttle cover is missing, Contact your IBM service OPEN damaged, or not representative.
- Page 283 Table 12: Fault Messages Operator Explanation Solution Fault Message Correctable? 112 UNDEFINED OPCODE Fatal firmware error on Contact your IBM service the controller board. representative. SEE SETUP GUIDE 113 PROTECTED Fatal firmware error on Contact your IBM service INSTRUCTION the controller board.
- Page 284 Table 12: Fault Messages Operator Fault Message Explanation Solution Correctable? 123 PAPER BUSY TOO Fatal firmware error on Contact your IBM service LONG the controller board. representative. SEE SETUP GUIDE 124 PAPER FIFO Fatal firmware error on Contact your IBM service OVERFLOW the controller board.
- Page 285 Table 12: Fault Messages Operator Explanation Solution Fault Message Correctable? 133 RIBBON INVALID Fatal firmware error on Contact your IBM service STATE the controller board. representative. SEE SETUP GUIDE XXX PAPER FEED DRIVER The paper feed driver Contact your IBM service...
- Page 286 Table 12: Fault Messages Operator Fault Message Explanation Solution Correctable? NON–VOLATILE MEMORY Non–volatile memory Contact your IBM service FAILED fault. representative. NOTE: You can still print, but you cannot save configuration changes as the NVRAM is defective. A97 GRAPHIC CHECK Printer has received a Press Stop then Start.
- Page 287 Operator Explanation Solution Fault Message Correctable? P17 SECURITY VIOLATION Security code of PAL on Contact your IBM service controller board does not representative. match code of firmware on the controller board. PLEASE WAIT... Printer reset in progress. No action necessary.
- Page 288 Chapter Fault Messages...
-
Page 289: A Printer Specifications
Printer Specifications Ribbon Specifications NOTE: The ribbon life figures listed below are based on IBM tests conducted in accordance with ANSI Standard X3A.182. Actual ribbon life may vary depending upon the user quality criteria, printer condition, machine settings, paper quality, and bar code requirements. Label yield depends on label format, bar code symbology, and other parameters. -
Page 290: Ordering Ribbons
IBM Printing Supplies are distributed through Priority Fulfillment Services (PSFweb) and a worldwide network of dealers. Please contact one of the following numbers to place an order for IBM 6400-i ribbons or to locate an IBM Printing Supplies Dealer in your area:... -
Page 291: Paper Specifications
Paper Specifications Paper Paper Specifications The following paper specifications are general guidelines. Paper stock should be tested with applications to determine print quality. Paper • Type Edge-perforated, fan-fold, 3 to 17 inches (7.62 to 43.18 cm) wide*, 3 to 16 inches with stacker, 2 to 24 inches (5.08 to 60.96 cm) long**, 5 to 12 inches with stacker. -
Page 292: Labels
Appendix A Printer Dimensions and Weight Labels On Backing: One-part continuous perforated fan-fold back form. Labels must be placed at least 1/6 inch (0.42 cm) from the fan-fold perforation. Backing adhesive must not be squeezed out during printing. Sheet Size: 3 to 17 inches (7.62 to 43.18 cm) wide*, including the two standard perforated tractor feed strips. -
Page 293: Environmental Characteristics
Environmental Characteristics Temperature Environmental Characteristics Temperature Operating: 50° to 104° F (10° to 40°C) up to 5000 feet (1524 meters), 50° to 90° F (10° to 32°C) up to 8000 feet (2438 meters) Storage: -40° to 158° F (- 40° to 70°C) Relative Humidity Operating: 15% to 80% (noncondensing) -
Page 294: Electrical Characteristics
Appendix A Electrical Characteristics Electrical Characteristics Input Voltage RMS Current Line Line Voltage 2000 LPM Design Range Frequency 500 LPM 1000 LPM 1500 LPM 2400 LPM 88-140 V RMS 47-63 Hz 6A @ 100 V 6A @ 100 V 8A @ 100 V 9A @ 100V 178-270 V RMS 47-63 Hz 3A @ 200 V 3A @ 200 V 5A @ 200 V 9A @ 100V Power Consumption... - Page 295 Power Consumption 6400-i10 6400-i1P Operating DP Mode Standby 120 VAC All H’s ECMA132*l Not Energy Energy Star 60 Hz Star Watts BTU/Hour 1025 Operating DP Mode Standby 220 VAC All H’s ECMA132* Not Energy Energy Star 60 Hz Star Watts BTU/Hour 6400-i15 Operating DP Mode...
- Page 296 Appendix A Electrical Characteristics Operating DP Mode Standby 220 VAC All H’s ECMA132* Not Energy Energy Star 60 Hz Star Watts BTU/Hour 1434 6400-i20 6400-i2s 6400-i24 Operating DP Mode Standby 120 VAC All H’s ECMA132* Not Energy Energy Star 60 Hz Star Watts BTU/Hour...
-
Page 297: Interfaces
ASCII Serial/Parallel: The 6400 printer is connected to personal computers and controllers via industry standard EIA-232-E and PC-parallel printer cables. For Dataproducts interfaces, you will need to obtain a Dataproducts cable. Contact your IBM service representative to order the following: • EIA-232-E Cable •... -
Page 298: Printing Rates
Appendix A Printing Rates RISC System/6000: For RS-232 attachment to the IBM RISC System/6000, the following are required: • IBM Async cable EIA-232/V.24 • Printer/terminal interposer EIA-232 • Serial Cable Kit (PN 12H1204) Coax/Twinax Interface Feature: Contact your IBM service representative for attachment requirements. - Page 299 Printing Rates Power Consumption Table 13. 6400I Nominal Print Rates (1 of 2) PERFORMANCE PRINT QUALITY DOT DENSITY CHARACTERS MATRIX Uppercase Only Descenders & Underline LPM (DPI) PER INCH Note 2 Note 1 1000 1500 2000s 2400 1000 1500 2000s...
- Page 300 Appendix A Printing Rates Table 14. 6400I Nominal Print Rates (2 of 2) PERFORMANCE PRINT QUALITY DOT MATRIX DOT DENSITY CHARACTERS Note 2 Plot Mode IPM (DPI) PER INCH Note 1 1000 1500 2000 2400 CORRESPONDENCE 7(13) x 9+3 90 (180) x 96...
-
Page 301: B A Quick Look At Line Matrix Printing
Matrix Printing Character Formation The IBM 6400 is an impact printer: it creates characters by printing ink dots on paper. Dots overlap to produce a solid–appearing character of uniform density. The dots are made by an assembly of steel hammers mounted on a rapidly oscillating shuttle. - Page 302 Unlike serial matrix printers, line matrix printers divide every printable line into horizontal dot rows, then print a dot row of the entire line at every lateral sweep of the shuttle. The IBM 6400 is a line matrix printer.
-
Page 303: Printing Speed
Printing Speed Printing Speed The speed of text printing is measured in lines per minute (lpm). This speed is dependent upon the number of dot rows required to produce a line of characters, regardless of the number of characters in the line. Because more dot rows are required to print lowercase characters with descenders, those character lines will print at a fractionally lower rate. - Page 304 Appendix B Printing Speed...
-
Page 305: C Host Attachment
Host Systems (formerly VM, MVS, VSE) – Coax Interface • 3174 Controller – Asynchronous Emulation Adapter • IBM Personal Computer Systems – ASCII Serial or Parallel port • pSeries (formerly RS/6000) – ASCII Serial or Parallel port • Non-IBM systems that support ASCII attachments through the following... -
Page 306: Compatibility And Limitations
• The Proprinter III XL emulation is very similar to the datastream used by the IBM 4202-003 Proprinter but contains more features. This protocol enables this line matrix printer to closely emulate a moving-head serial matrix printer but does not support downloaded fonts. In addition, NLQ compresses to 17.1 CPI, not 20 CPI. - Page 307 6400 ASCII Programmer’s Reference Manual. • For P-Series XQ Variant, the IBM 6400 only prints condensed print at 15 CPI like the Printronix P600, but unlike the P300, which printed condensed print at either 13.3 or 16.7 CPI.
-
Page 308: Limitations
• The coaxial portion of the IBM Coax/Twinax feature of this printer is subject to the following limitations: Minimum dot matrix of 9 wide by 8 high Minimum dot matrix of 4 or 7 wide by 8 high... - Page 309 Limitations • The twinaxial portion of the IBM Coax/Twinax feature of this printer is subject to the following limitations: Minimum dot matrix of 9 wide by 8 high Minimum dot matrix of 4 or 7 wide by 8 high Print lines greater than 198 characters •...
- Page 310 Appendix C Compatibility and Limitations...
-
Page 311: D Attaching Host Systems To A
Attaching Host Systems to a Coax/Twinax Printer Attaching Printer to an iSeries or zSeries Host System The following information describes how to attach this printer to a zSeries or iSeries System. If you are installing this printer with the IPDS feature, review the 6400 IPDS Programmer’s Reference Manual for information on attaching a printer to host systems using IPDS. -
Page 312: Changing Your Iseries Printer Configuration
Appendix D Attaching Printer to an iSeries Host System Follow these steps: 1. Select a printer address from 0 through 6. 2. From the printer operator panel Twinax Interface menu, make sure the printer address matches the printer address you selected from the table above. - Page 313 Changing Your iSeries Printer Configuration Changing Printer Configuration Settings on iSeries If you want to change the settings created by iSeries auto configuration, you will need to use the following parameters: Parameter Parameter Parameter Setting Description Device description DEVD Workstation printer name Device class DEVCLS *LCL...
-
Page 314: Attaching Printer To Remote Control Unit With Twinax Interface
Appendix D Attaching Printer to an iSeries Host System Attaching Printer to Remote Control Unit with Twinax Interface iSeries auto configuration program does not support remote attached printers. You must manually configure this printer as a remote printer attached to a 5294, 5394, or 5494 Remote Control Unit. -
Page 315: Attaching Printer To An Ibm System/36 With Twinax Interface
Power off the printer and disconnect the power cord before connecting of disconnecting communication port, teleport, or attachment cable connector. This section contains instructions for attaching your printer to an IBM System/ 36. For additional information not found here, see your System/36 documentation. -
Page 316: Attaching Printer To Zseries Systems
Appendix D Attaching Printer to zSeries Systems Attaching Printer to zSeries Systems It is necessary to define a printer in the zSeries environment to VTAM*, JES2, POWER, PSF, VPS, JES328X Print Facility, NCP, z/VM, z/OS, VSE/ESA and/or other software depending upon your operating environment and printing requirements. - Page 317 Refer to the vendor documentation for defining an SCS printer to the program for its use. If there is no specific information on the 6400 you may use the IBM 4234 for reference.
-
Page 318: 6400-Lu1-Scs-Remote Sna 3174 Control Unit
Appendix D Attaching Printer to zSeries Systems 6400-LU1-SCS-Remote SNA 3174 Control Unit LU1-SCS mode is utilized when neither IPDS nor PSF is needed to accomplish the print function desired. An existing remote 3174 SNA- connected control unit is assumed. The steps required to install a remote LU1-SCS printer for host definitions are as follows: 1. - Page 319 Refer to the vendor documentation for defining an SCS printer to the program for its use. If there is no specific information on the 6400 you may use the IBM 4234 for reference.
-
Page 320: 6400-Lu3-Dse-Local Sna 3174 Control Unit
Appendix D Attaching Printer to zSeries Systems 6400-LU3-DSE-Local SNA 3174 Control Unit LU3-DSE mode is utilized when no host printing controls are required to accomplish the print function desired. The printer settings will be used and cannot be overridden by the host system. An existing local 3174 SNA- connected control unit is assumed. -
Page 321: 6400-Lu3-Dse-Remote Sna 3174 Control Unit
6400-LU3-DSE-Remote SNA 3174 Control Unit Step 3 - Define to CICS or another application program Refer to the vendor documentation for defining a DSE printer to the program for its use. Host system commands to change printer settings are not supported in DSE mode. - Page 322 Appendix D Attaching Printer to zSeries Systems Step 2 - VTAM Definition * The following entry should be placed in the VTAM MODE TABLE specified above or another of your choice. 6400DSER MODEENT LOGMODE=6400DSER FMPROF=X’03’,TSPROF=X’03’,PRIPROT=X’B1’, SECPROT=X’90’,COMPROT=X’3080’,RUSIZES=X’87C6’, PSERVIC=X’038000000000185018507F00’. PSNDPAC=X’01’,SRCVPAC=X’01’ Step 3 - JES2 Definition This definition is not required if you are using VPS and using U1 - U9999 as the printer ID.
-
Page 323: 6400-Lu0-Dsc-Local Non-Sna 3174 Control Unit
6400-LU0-DSC-Local Non-SNA 3174 Control Unit 6400-LU0-DSC-Local Non-SNA 3174 Control Unit LU0-DSC mode is utilized when no host printing controls are required to accomplish the print function desired and the control unit is attached by a VTAM-Controlled NON-SNA Control Unit. An existing local 3174 NON-SNA- connected control unit is assumed. -
Page 324: Attaching Printer To Vm Host System
Appendix D Attaching Printer to VM Host System Step 3 - Define to CICS or another application program Host commands for changing printer settings are not supported in this mode. Refer to the vendor documentation for defining an DSC printer to the program for its use. -
Page 325: Non-Sna Attachment
Non-SNA Attachment Non-SNA Attachment Sample exec file for attaching to a LOCAL 3174 NON SNA port /* Signal JUST_VM to avoid redefining printer */ ’DISABLE XXXX’ ’ATT 1601 TO RSCSCOAX AS XXXX’ ’SMSG RSCSCOAX STOP PRTXXXX’ ’SMSG RSCSCOAX DELET PRTXXXX’ ’SMSG RSCSCOAX DEFINE PRTXXXX LINE XXXX TYPE 3270P PARM BUF=2560’... -
Page 326: Summary Of Lu Types And Representative Ibm Products
LU type 0 printers are Non-SNA Local or Bisync connections. This mode is also commonly called DSC (Data Stream Compatibility) mode printing. An example of an LU 0 printer connection is an IBM 3816 attached to a non-SNA 3174 control unit. Not all printers support this type connection. This connection type is used when VTAM is controlling the non-SNA control unit and device. - Page 327 CICS/VS and communicates with another application program that uses CICS/VS, (2) An application program which uses VTAM and PSF/MVS communicating with an IBM 3820, 3935, or PSF/2; or (3) Two iSeries Host Systems communicating in APPC mode. LU type 7 An LU type 7 is for an application program and a single display workstation in an interactive environment.
- Page 328 Appendix D Physical and Logical Unit Types...
-
Page 329: Notices
Consult your IBM representative for information on the products and services currently available in your area. Any reference to an IBM product, program, or service is not intended to state or imply that only that IBM product, program, or service may be used. Any functionally equivalent product, program, or service that does not infringe any IBM intellectual property rights may be used instead. - Page 330 Web sites. The materials at those Web sites are not part of the materials for this IBM product and use of those Web sites is at your own risk. IBM may use or distribute any of the information you supply in any way it believes appropriate without incurring any obligation to you.
-
Page 331: Trademarks
• Transfer the original unaltered copy of the documentation when you transfer the related IBM product (which may be either machines you own, or programs, if the program’s license terms permit a transfer). You must, at the same time, destroy all other copies of the documentation. -
Page 332: Product Recycling And Disposal
Microsoft Corporation in the United States, other countries, or both. PC Direct is a trademark of Ziff Communications Company in the United States, other countries, or both and is used by IBM Corporation under license. ActionMedia, LANDesk, MMX, Pentium and ProShare are trademarks of Intel Corporation in the United States, other countries, or both. -
Page 333: Communication Statements
Properly shielded and grounded cables and connectors must be used in order to meet FCC emission limits. Proper cables and connectors are available from IBM authorized dealers. IBM is not responsible for any radio or television interference caused by using other than recommended cables and connectors or by unauthorized changes or modifications to this equipment. - Page 334 TV communications and to other electrical or electronic equipment. Such cables and connectors are available from IBM authorized dealers. IBM cannot accept responsibility for any interference caused by using other than recommended cables and connectors.
- Page 335 Communication Statements (Taiwan) Warning: This is a Class A product. In a domestic environment this product may cause radio interference in which case the user will be required to take adequate measures. Australia/New Zealand Attention: This is a Class A Product. In a domestic environment this product may cause radio interference in which case the user may be required to take adequate measures.
- Page 336 Dieses Gerät ist berechtigt in Übereinstimmung mit dem deutschen das EG- Konformitätszeichen - CE - zu führen. Verantwortlich für die Konformitätserklärung nach Paragraph 5 des EMVG ist die IBM Deutschland Informationssysteme GmbH, 70548 Stuttgart. Informationen in Hinsicht EMVG Paragraph 3 Abs. (2) 2: Das Gerät erfüllt die Schutzanforderungen nach EN 55022 Klasse A und EN...
-
Page 337: Glossary
Glossary A to D Analog to Digital active The horizontal location on the paper where the next character will print. After printing a character, the printer advances the active column. active line The vertical location on the paper where the next character will print. - Page 338 A circuit for the transfer of data or electrical signals between two devices. character cell The invisible rectangular space occupied by a character, including the white space around the character. The height of a cell remains constant even with changes in the current line spacing, and the width is equal to the current character spacing.
- Page 339 (character) printer. Central Processing Unit Carriage Return Abbreviation for Coax/Twinax only. A model available in a previous generation of the IBM Line Matrix Printer. Abbreviation for Coax/Twinax/ASCII. Clear To Send CVFU Abbreviation for Centronics direct access Vertical Format Unit.
- Page 340 DVFU Abbreviation for Dataproducts direct access Vertical Format Unit. EBCDIC Extended Binary Coded Decimal Interchange Code. Engine Controller ECMA European Computer Manufacturers Association. Electronic Industries Association Elite A name indicating a monospaced font with a pitch of 12 cpi (and usually 10 points in height). A unit of measure in typesetting.
- Page 341 font The complete set of a given size of type, including characters, symbols, figures, punctuation marks, ligatures, signs, and accents. To fully describe a font, you must specify seven characteristics: typeface (Courier, Helvetica, Swiss, etc.) spacing (proportional or monospaced) type size (12 point, 14 point, etc.) scale factor (character height/width ratio) type style (Roman or italic) character weight (bold, normal, etc.)
- Page 342 Abbreviation for high speed font. Also referred to as draft. Horizontal Tab Hertz. Cycles per second, a measure of frequency. Intelligent Graphics Processor. An optional emulation that converts graphics commands received from the host computer to binary plot data that is usable by the printer. initialization A series of processes and self-tests to set power-up defalt conditions and parameters.
- Page 343 Negative acknowledge. Not acknowledged. Not available or not applicable. New Line (3287 only). Abbreviation for near letter quality font. This is the highest resolution mode supported on the 6400. Not Ready Mode Offline. The printer is not ready to receive and process commands and data.
- Page 344 PMPP Physical Maximum Print Position. The longest line teh printer is capable of printing. This differs from MPP in that the printer may be capable of printing lines 132 characters wide (PMPP), but the print job is only 80 characters wide (MPP). See also MPP. point A unit of length in printing and typography, used to specify type sizes, heights of font characters, etc.
- Page 345 Roman An NLQ type style in which the characters are upright and the edges of the characters have a serif. This sentence is printed in a Roman type style. Request To Send Set Attribute Systems Application Architecture sans serif An NLQ type style in which the characters are upright and blocked.
- Page 346 Top Of Form Transistor-Transistor Logic type family See typeface. type size See point. type style Refers to either the upright or italic character style in a specific font family. Roman is upright, italic is slanted. typeface A descriptive name or brand name that identifies a particular design of type.
- Page 347 Index Numerics 042 CUSTOM SET DOES NOT EXIST, 279 043 CUSTOM SET ALREADY EXISTS, 279 001 END OF FORMS, 276 044 EC FIRMWARE/HARDWARE ERROR, 279 002 FORMS JAMMED, 276 046 EC STOPPED AT STATE, 280 003 FORMS EJECTED, 276 056 HAMMER COIL OPEN, 280 004 VIEW FORMS, 276 057 CLOSE PLATEN, 280 006 HOST SYSTEM REQUEST ATTENTION, 276...
- Page 348 118 UNDEFINED INTERRUPT, 283 5250 Interface menu, 139 119 TCB CORRUPTED, 283 Active Print Language, 141 120 ACCESS NULL POINTER, 283 Format Control, 144 121 PAPER NOT AT SPEED, 283 Hex Transparent Control, 141 122 PAPER NOT SCHEDULED, 283 Maximum printable width, 144 123 PAPER BUSY TOO LONG, 284 Override Host, 143 124 PAPER FIFO OVERFLOW, 284...
- Page 349 Job Control, 159 ASCII printer emulation, 187 Keep alive timer, 158 Attach printer Nest Serv Type, 158 IBM System/36 with Twinax interface, 315 NetBIOS protocol, 158 iSeries system, 311 Novell frame, 158 iSeries with Twinax interface, 311 Novell protocol, 158...
- Page 350 Buffer Size in Kilobytes, Adapter Parameters Characteristics menu, 157 electrical, 294 Built-in diagnostic tools, 21 environmental, 293 Busy on strobe, PC Parallel menu, 173 Characters per inch, IGP Configuration menu, 235 Busy, PC Parallel Interface Signals, 255 Check paper feed, 75 Byte Mode, IEEE 1284 Parallel Interface, 260 Cleaning inside of cabinet, 266...
- Page 351 Lines per inch, 212 Reset Custom Set Names, 116 PI control, 218 Save current values, 114 Power On ^F, 212 Configuration overview, printer, 25 Power On ^PY, 212 Configuration values, factory default, 87 Power On ^X, 211 Connections, cable (cabinet models), 52 SFCC and power on, 211 Control Code 06 Compatibility Mode, IEEE 1284 Parallel...
- Page 352 Data Terminal Ready (DTR) P-Series Emulation menu, 227 RS-232, 251 P-Series XQ Emulation menu, 229 Serial Interface menu, 182 Serial Matrix Emulation menu, 233 Dataproducts I/O adaptor, pedestal models, 61 Delete custom set, Configuration Management Dataproducts menu menu, 115 Auto Tricle, 177 Demand/Data Request, Dataproducts Parallel Data Bit 8, 176 Interface Signals, 258...
- Page 353 Epson Emulation menu, 222 FF Valid @ TOF, Proprinter III XL Emulation 20 CPI Condensed, 224 menu, 221 Auto LF, 223 File system, Printer Control menu, 111 Character sets, 223 Font Attributes, ANSI Emulation, 197 Define CR Code, 223 Font set, Code V Emulation menu, 217 Define LF code, 223 Form feed at end of print buffer, Compatibility Epson print language, 223...
- Page 354 Select font, 206 Humidity requirements, 293 Select SFCC, 205 Skip command prefix, 207 Slash 0, 206 IBM System/36 Twinax interface, attach UPC descenders, 207 printer, 315 IGP100 compatibility, IGP Emulation menu, 208 IEEE 1284 Parallel Interface, 259 Image buffer size, Coax Interface menu, 132...
- Page 355 IP Address, Wireless Address menu, 165 Lines per inch IPDS Code V Emulation menu, 212 configuration, 187 IGP Configuration menu, 235 parameters, 188 IGP Emulation menu, 206 IPDS Configuration menu, 188 Load Bar code quality, 191 custom sets, 97 Compressed font, 194 factory default values, 97 Enhanced bar code mode, 193 Load alternate character option, Twinax Interface...
- Page 356 Compatibility Options, 135 017 STACKER JAM, 277 Configuration Management, 113 018 STACKER FULL, 277 Emulation Configuration, 186 019 STACKER FAULT, 277 Epson Emulation, 222 021 RECEIVE BUFFER OVERRUN, 277 Ethernet Address, 161 022 UNIT ADDRESS NOT RECEIVED, 278 Ethernet Parameters, 162 024 SERIAL LINE PARITY ERROR, 278 IPDS Configuration, 188 025 SERIAL FRAMING ERROR, 278...
- Page 357 101 UPPER DRIVER SHORT, 282 NOT READY, 286 102 LOWER DRIVER SHORT, 282 OPERATOR MENU, 286 107 H/B CONTROL MODE 107 H/B CONTROL OPERATOR MENU LOCKED, 286 MODE, 282 OPERATOR MENU UNLOCKED, 286 110 STACK OVERFLOW, 282 P05 DIAGNOSTIC TEST PASSED, 286 111 STACK UNDERFLOW, 282 P17 SECURITY VIOLATION, 287 112 UNDEFINED OP CODE, 283...
- Page 358 New line at MPP+1, Compatibility Options Order ribbons, 290 menu, 136 Output basket, pedestal models, 47 New Ribbon Detect, RibbonMinder Menu, 247 Output control, 20 New Ribbon, RibbonMinder Menu, 245 Overlay label, attach, 62 Nibble Mode, IEEE 1284 Parallel Interface, 259 Override Host Noise level, acoustic, 293 3270 Interface menu, 150...
- Page 359 Parallel Interface menu, 170 hammer bank protective foam, 45 Auto Tricle, 174, 178 paper exit location, 49 Interface type, 170 platen protective foam, 46 Parallel hotport, 171 remove shipping restraints, 44 PC Parallel menu, 172 remove tags, 48 Trickle Time, 174, 179 setting rear paper exit, 51 Parallel Interface, Dataproducts, 257 setting top paper exit, 49...
- Page 360 Power paper stacker, 72 Printer component locations, 72 active versus saved configurations, 80 load, 74 attach to iSeries or zSeries host system, 311 remove shipping restraints, 42 attachment, 25 set up, 73 cables, 297 start, 74 component locations, 31 Power requirements, 27 configuration main menu, 80 Power stacker, Printer Control menu, 111 configuration overview, 25, 79...
- Page 361 Hex print mode, 108 Proprinter III XL Emulation menu, 220 Interface selection, 107 20 CPI Condensed, 222 OCR font density, 110 Alternate character set, 221 Paper jam detection, 108 Auto LF, 221 Power on state, 108 Define CR Code, 221 Power stacker, 111 Define LF code, 221 Print direction, 107...
- Page 362 Clear to Send (CTS), 251 cabinet models, 41 Data Carrier Detect (DCD), 251 pedestal models, 48 Data Set Ready (DSR), 251 Representative IBM products, summary, 326 Data Terminal Ready (DTR), 251 Request to Send one char enquiry, 254 RS-232, 251...
- Page 363 Select SFCC Serial Matrix Emulation menu, 231 Code V Configuration menu, 211 Alternate Set 80-9F, 233 IGP Emulation menu, 205 Auto LF, 233 P-Series Emulation menu, 227 Character sets, 232 Self-tests Control Code 06, 232 All E’s, 269 Define CR Code, 232 All E’s + FF, 269 Define LF code, 233 All H’s, 269...
- Page 364 Specifications Twinax Interface menu, 117 cables, 297 Active print language, 119 interfaces, 297 C/T Hotport, 125 labels, 292 Cancel buffers, 120 paper, 291 Early print complete, 120 printer, 289 Format control, 123 ribbon, 289 Hex print mode, 124 temperature, 293 Hex transparent control, 121 Speed, printing, 303 LAC approximation, 122...
- Page 365 Weight, printer, 292 WEP Key BYTE1 through BYTE13, Wireless Parameters menu, 169 WEP Key Format, Wireless Parameters menu, 168 WEP Key Width, Wireless Parameters menu, 169 Wireless Address menu DHCP, 165 Gateway Address, 165 IP Address, 165 MAC Address, 165 Subnet Mask, 165 Wireless Parameters menu Antenna Diversity, 168...
- Page 367 Thank you for your responses. May we contact you? h Yes h No When you send comments to IBM, you grant IBM a nonexclusive right to use or distribute your comments in any way it believes appropriate without incurring any obligation to you. Name...
- Page 368 FIRST-CLASS MAIL PERMIT NO. 40 ARMONK, NEW YORK POSTAGE WILL BE PAID BY ADDRESSEE IBM Corporation IBM Corporation Information Development Information Development IBM Printing Systems IBM Printing Systems Department H7FE Building 004M Depatment 583E Building 003G PO Box 1900 PO Box 1900...
- Page 370 ® Part Number: 75P1626 Printed in U.S.A 176811-001A *176811-001* S544-5640-04 *07S544564004*...
Need help?
Do you have a question about the 6400i and is the answer not in the manual?
Questions and answers