
Related Manuals for Sartorius cubis MPS


Summary of Contents for Sartorius cubis MPS
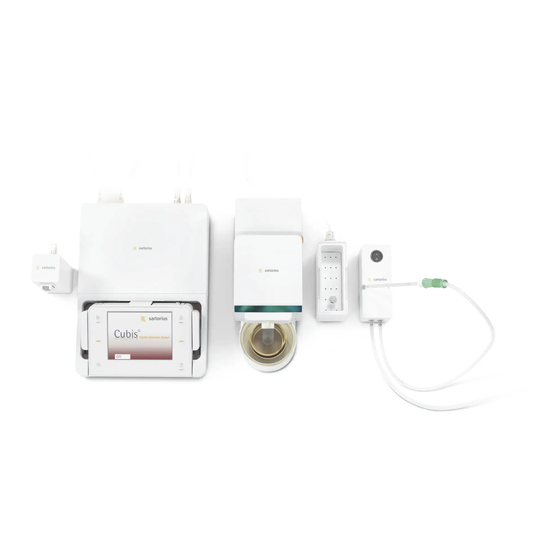
- Page 1 Quick Reference Guide ® Cubis Pipette Calibration System Electronic Pipette Calibration System Model MPS 98648-022-20...
-
Page 2: Table Of Contents
Contents Contents 1 User Information............5 1.1 Warning/Danger Symbols . - Page 3 Contents 4.6 Importing/Exporting Data......... .29 4.6.1 Inserting Memory Cards into the Display and Control Unit .
- Page 4 Contents This Quick Reference Guide will help familiarize you with the operation of the pipette calibration system, introduce you to the Q-Guide operating design and offer you examples of how to perform simple tasks. ® The user manual for the Cubis MCM model also contains the following: —...
-
Page 5: User Information
User Information User Information Please read these instructions carefully and completely before using the device. Read the safety precautions carefully. Warning/Danger Symbols Warning and Danger Symbols used in These Instructions: This symbol denotes hazards which are highly likely to cause death or serious injury unless avoided. -
Page 6: Safety Instructions
Safety Instructions Safety Instructions Guidelines and General Information The pipette calibration system complies with EU directives and standards for electrical safety and electromagnetic compatibility. Nevertheless, improper use or handling can result in damage and/or injury. Any improper use or operation of the pipette calibration system that is not consistent with the instructions will result in forfeiture of all claims under the manufacturer’s warranty. - Page 7 Do not open the AC adapter. The pipette calibration system and AC adapter may only be opened by specialized personnel trained by Sartorius. Equipment damage due to electrostatic charge! Electrostatic charge may compromise the function of the pipette calibration system.
-
Page 8: Operating The Pipette Calibration System
Operating the Pipette Calibration System Operating the Pipette Calibration System Equipment damage due to being improperly secured during transportation! Transporting the pipette calibration system when it is switched on can damage the sensors. The pipette calibration system should be switched to the standby mode each time before being transported. -
Page 9: Operating Structure
Operating the Pipette Calibration System This type of user guidance is highly intuitive. Nonetheless, this quick reference guide includes a section with very detailed, step-by-step instructions where you can learn about all of the operating options (see Section “Creating User Profile” in Chapter “User Management”). -
Page 10: Using The "Wizard
Operating the Pipette Calibration System 3.3.2 Using the “Wizard” You can choose between two display types in some menus: The overview lists all parameters with their set options. You can select each Overview individual option to change its setting. When you activate the wizard in the same menu, the program guides you step by Wizard step. -
Page 11: Inserting Memory Cards Into The Display And Control Unit
Operating the Pipette Calibration System 3.4.3 Inserting Memory Cards into the Display and Control Unit The slot for the SD card is located at the back of the display and control unit. 3.4.4 Setting the Language The default language for the display is English. Climate Control Administrator 02/23/2016 09:47:22... -
Page 12: Display In Operating Mode
Level me! Maintenance: The next scheduled maintenance date has been reached. Touch the tab to view details of your contact person at Sartorius. Maintenance GLP: GLP print is active; the header will be printed. Touch the tab to print the footer. -
Page 13: Display In Setup Mode
Operating the Pipette Calibration System 3.6.3 Display in Setup Mode Please select the menu item: Menu a Device parameters Configure balance parameters Draft shield Configure data output Enter the device ID Set date/time Back Symbol indicating which menu (TASK, USER, or MENU) is currently open Scroll bar to view the entire selection area Toolbar with currently available buttons Selection area with selectable options... -
Page 14: Entering Text And Numbers
Operating the Pipette Calibration System 3.7.1 Entering Text and Numbers A keypad will appear whenever you have to enter text and numbers. A cursor Change profile name here if desired: appears in the entry line above the keypad. User 2 Select the desired characters with a light touch. -
Page 15: System Settings (Menu)
System Settings (Menu) System Settings (Menu) This menu contains all settings relevant to the device. Basic settings can be made here that immediately affect the device. Changed settings do not affect previously defined tasks and user profiles. All system settings are user-independent; in other words, they are applied to all users. As long as a task is active and/or a user has been selected, several basic settings cannot be changed. - Page 16 System Settings (Menu) As soon as the display shows the message Level me! , you must perform the leveling process. The process is quick and easy. Touch the tab, Level me! Level me! In the menu, select the option Level balance Menu Level balance Make sure that the weighing plate is unloaded.
-
Page 17: Configuring Calibration/Adjustment
System Settings (Menu) Configuring Calibration/Adjustment In the operating mode, touch Menu The selection of the system settings is displayed. Please select the menu item: Touch Calibration/adjustment data Menu Level balance Calibration/adjustment data Configure timer controlled actions Display device information Device parameters Back Language The selection of the settings options is displayed (the settings options will be... -
Page 18: Defining External Linearization Weights
System Settings (Menu) 4.2.3 Defining External Linearization Weights In the menu, touch to access the selection Calibration/adjustment data Calibration/adjustment data of the settings options. In the selection of the settings options, touch Define external Define external linearization weights linearization weights Ext. - Page 19 System Settings (Menu) The editing options available are displayed. Please select the function for action pro- files: If you want to set up a new timer controlled action, touch . Later you Create can also modify, copy, or delete each action here. Actions a Edit Create Modify...
- Page 20 System Settings (Menu) Enter the date and time at which the action should be executed for the first time. Please enter the execution date and time: a New a Planner a Wizard a Execution date/time Date: 02/23/2016 Time: 12:00:00 Back Overview Info Next...
-
Page 21: Displaying Device Information
System Settings (Menu) Displaying Device Information In the operating mode, touch Menu and then Display device information Menu Display device information You can view various information here. Please select the menu item: Select the information that you want to view. Menu a Display device information Basic data Service information/hotline... -
Page 22: Device Parameters
System Settings (Menu) Device Parameters In the operating mode, touch Menu and then Device parameters Menu Device parameters Here you can update the software and change the following device settings. Please select the menu item: Settings are applied to all user profiles. Menu a Device parameters −... - Page 23 System Settings (Menu) Adapt filter : The effects of unfavorable weighing conditions such as drafts or Please check the standard weighing param- eters: vibration can be filtered out by adapting the balance filter (and thus its measuring time) to suit ambient conditions. Options: Menu a Weighing a Overview Very stable conditions Stable...
-
Page 24: Configuring Data Output (Print Parameters)
System Settings (Menu) 4.5.1.3 Defining the Startup Mode of the Pipette Calibration System Menu Select the mode that is used when the pipette calibration system is turned on and when the on/off key A is pressed repeatedly ( Device parameters startup behavior Options: On/standby... -
Page 25: Entering The Device Id
System Settings (Menu) Print event : What event should trigger printing? Options: *PRINT key Start of task Initialization of application Result of application Printing component Evaluation of application Exit task Calibration - adjustment : Which elements should be printed? Print key elements For more information, please read Chapter “Interfaces”... -
Page 26: Configuring Display And Control Unit Properties
System Settings (Menu) 4.5.5 Configuring Display and Control Unit Properties The following properties of the display and control unit can be changed as necessary: Menu Device parameters , and Language Background colors User field colors Brightness Acoustic signals Configure display and control unit properties These general properties are applied to all user profiles, are also used when no user is logged in, and serve as a template when a new user profile is created. -
Page 27: Configuring The Alibi Memory
System Settings (Menu) 4.5.8 Configuring the Alibi Memory Here you can switch on the alibi memory, delete the recorded data, and set the Menu interval for automatic deletion. Device parameters Slide the right scroll bar in the submenu Device parameters downward to the menu item Alibi memory configuration... -
Page 28: Settings For The Upper Draft Shield Panel
System Settings (Menu) 4.5.12 Settings for the Upper Draft Shield Panel (“Draft Shield” in the Menu) The functions of the keys can be set here. The following settings are defined manually on the upper draft shield panel. In the menu, touch Device parameters Draft shield Menu... -
Page 29: Importing/Exporting Data
System Settings (Menu) Define the acoustic signal for the upper draft shield panel. Do you want a beep after Open/Close? − : The acoustic signal is switched off. Beep, off − : An acoustic signal sounds after the upper draft shield panel has Beep, on Menu a Draft shield a Overview a Acoustic signal been opened/closed. - Page 30 System Settings (Menu) You can view the data from the alibi memory with any web browser and also import it into Microsoft Excel. Select the menu item Import/export data. Menu Import/export data Insert the SD card into the slot as shown in the picture. Please follow the instructions to insert SD memory card: Menu a Insert SD card...
- Page 31 Touch Next All previous data will be saved in the new format. Check your settings after importing the data (Menu, TASK, and USER). If the XML files continue to cause problems, contact your local Sartorius Service Center. ® Cubis MPS Quick Reference Guide...
-
Page 32: Activating The Service Mode
System Settings (Menu) Activating the Service Mode The service mode gives you the option to make basic settings centrally from this menu. Depending upon the configuration of the pipette calibration system when delivered, and on user access rights, some menu items can be operated only to a limited extent. -
Page 33: Task Management
Task Management Task Management In the Task Management menu (TASK), you can: − start a task, − configure a new task and, − edit an existing task (modify, copy, delete). Some applications like weighing, density determination, statistics, etc. are available to you for a task;... -
Page 34: Importing Tasks
You can also load pre-configured tasks on the pipette calibration system: 1. Unpack the desired ZIP archive file to the root directory (Root Dir) of an SD card after download from the Sartorius homepage or from the enclosed CD. 2. In the pipette calibration system menu, access the sub-menu “Import/Export Data: Import files from the SD card.”... -
Page 35: Sorting The Task List
No combination with an application of the same group possible No meaningful combination possible ® Detailed information about this application can be found in the user manual for the Cubis MCM model. The user manual can be downloaded from the following website: http://www.sartorius.com. ® Cubis MPS Quick Reference Guide... -
Page 36: Creating New Tasks (Configuration)
Task Management Creating New Tasks (Configuration) ® The following applications are included in the Cubis pipette calibration system software. You can configure them as tasks according to your requirements and preferences: − Weighing − Mass unit conversion − Individual identifiers −... -
Page 37: Flow Chart "Configuring A Task
Task Management 5.3.1 Flow Chart “Configuring a Task” If the button is visible on the display, you can navigate backwards. Back Select the function for the task profile: Task a Edit Create new task Create Modify Copy Delete Back Select the application for the task profile: Task a New a Application 1 Select application Weighing... -
Page 38: Settings For Weighing
Task Management An application list is displayed. Select the application for the task profile: To view all applications, use the scroll bar on the right. Task a New a Application 1 Select the application you want to assign to the new task. Configure this application as required. - Page 39 Task Management The settings for the printouts are displayed. You can now define individual print elements for the selected print events. Touch the scroll bar and scroll downwards to view additional settings. To select the elements to be printed for the “PRINT” event: Touch PRINT.MEASURE Please check the printout parameters of...
- Page 40 You will be routinely prompted for the printer settings with every new task you create and can then modify them. Printout (Example): Print events Printout content (record) Print elements Start task ------------------ GLP header 02/21/2016 09:17 SARTORIUS Mod. MPS 105S Ser. no. 33712345 ------------------ Start task Laboratory Operator name e.g. here:...
-
Page 41: Executing Tasks
In this Quick Reference Guide, we only describe the applications “Weighing” and “Climate Control.” Complete information on all applications can be found in the user ® manual for the Cubis MCM model. The user manual can be downloaded from the following website: http://www.sartorius.com. ® Cubis MPS Quick Reference Guide... -
Page 42: Weighing
Weighing Weighing Purpose Weight determination within the scope of the device-specific weighing capacity (see “Technical Data”) Combination Options “Mass Unit Conversion” and “Individual Identification” Configuring a Task: My Weighing If you have not already done so, switch over to Task Management and touch Edit Edit y You can create, modify, copy, and delete a task profile. -
Page 43: Executing A Task: My Weighing
Weighing Executing a Task: My Weighing If you haven’t already done so, go to Task Management. The task selection is displayed. Select the task. Weighing Please select task: Task Climate control Climate control Weighing Basic weighing Edit Weighing Sort Start If the desired task is already selected, touch Start Start... -
Page 44: "Climate Control" Application
“Climate Control” Application “Climate Control” Application Purpose The “Climate Control” application has been especially developed for use in pipette and calibration laboratories in order to provide users with a simple, fast, and comprehensive mass pipette calibration process. This application is referred to as ®... -
Page 45: Sliding Upper Draft Shield Panel
“Climate Control” Application Sliding Upper Draft Shield Panel 7.1.1 Sensor Range The pipette calibration system has a motion sensor that automatically opens the upper draft shield panel as soon as movement occurs within the range of the sensor. The upper draft shield panel is then closed again automatically. Operation is optimized by the motion sensor for use by both right-handed and left-handed individuals. - Page 46 “Climate Control” Application Check the settings for the weighing and change them as required. Please check the weighing parameters in this task: Touch if you would like explanations or help with the individual settings. Wizard Task a New a Weighing a Overview Touch if you want to skip the next step and switch directly over to user Done...
-
Page 47: Configuring A Task: Climate Control
“Climate Control” Application Configuring a Task: Climate Control If you haven’t already done so, go to Task Management. The task selection is displayed. Touch the task of your choice or: Climate control Climate control If the desired task is already selected, touch Start Start The main menu for pipette calibration is displayed after a few seconds. -
Page 48: Creating New Limits For The External Climate Module
“Climate Control” Application Touch Save The new limits for the minimum and maximum air humidity within the weighing chamber are used in the “Climate Control” application. 7.3.2 Creating New Limits for the External Climate Module You can define the values for the minimum and maximum air temperature, humidity, and pressure in the ambient environment for an external climate module (climate tower). -
Page 49: Defining General Settings For The "Climate Control" Application
“Climate Control” Application 7.3.4 Defining General Settings for the “Climate Control” Application In the menu for the “Climate Control” application, select Basic settings Basic settings The overview of all settings for the “Climate Control” application is displayed. Administrator Climate control | Basic settings Select the settings for the application: 03/01/2016 14:45:33... -
Page 50: Importing/Exporting Data
“Climate Control” Application 7.3.5 Importing/Exporting Data You can export and import data from the “Climate Control” application. In the menu for the “Climate Control” application, select Import/export Import/export data data Here you can export the settings for the “Climate Control” application to an SD Climate control Administrator | Import/export data... - Page 51 “Climate Control” Application The display goes to prepare for the Climate Control application. Climate control Administrator If the display shows the message , you must level the device | Preparation 03/01/2016 14:45:33 Level me! Max 101000 mg d = 0.01 mg (see page 15).
- Page 52 “Climate Control” Application Move the tip of the pipette into the range of the sensor. -30° – 30° Empty the pipette into the pipetting vessel. Observe all regulations for correct pipetting, e.g., ISO 8655. 0° – 45° Remove the pipette from the range of the sensor. Close the upper draft shield panel using the keys.
- Page 53 “Climate Control” Application Viewing Climate Data To view the current climate data, touch Cl. data Cl. data The displayed climate data is updated every 5 seconds. Climate Control Administrator | Extern. climate module 03/01/2016 14:45:30 Max 101000 mg d = 0.01 mg 0.05 Int.
- Page 54 Air pressure C1 998.27 hPa Interface Function Detailed information about this application can be found in the user manual for ® the Cubis MCM model. The user manual can be downloaded from the following website: http://www.sartorius.com. ® Cubis MPS Quick Reference Guide...
-
Page 55: Pipette Calibration System Calibration, Adjustment, And Linearization
Pipette Calibration System Calibration, Adjustment, and Linearization Pipette Calibration System Calibration, Adjustment, and Linearization Background During calibration, a calibration weight is used to determine how much the displayed value deviates from the actual measurement value. This deviation is compared with an entered target value and is then eliminated by subsequent adjustment. - Page 56 Pipette Calibration System Calibration, Adjustment, and Linearization Insert the supplied weighing pan. D key. Press the TASK y A list of available tasks is displayed. Please select task: Touch Weighing Task y You are in the operating mode. Weighing Basic weighing Climate control Climate control Weighing...
- Page 57 Pipette Calibration System Calibration, Adjustment, and Linearization y While the function is active, Cal.Int. will be displayed. Administrator 03/01/2016 14:45:33 Wait until the process is completed and is no longer displayed. Cal.Int. Cal. Int. Calibration/adjustment procedure active Cancel calibration/adjustment: Press [Cancel] Cancel y The internal calibration has been completed, the results are displayed.
-
Page 58: Calibration Using External Calibration Weight
Pipette Calibration System Calibration, Adjustment, and Linearization Calibration Using External Calibration Weight An external calibration weight is required for this function. Please note the tolerance of the calibration weight being used. Models MPS 2.7S and MPS 6.6S Model MPS 105 Insert the supplied adapter into the pipetting vessel. - Page 59 Pipette Calibration System Calibration, Adjustment, and Linearization In the calibration/adjustment selection, touch External cal./adj. with Administrator or a different external test weight. user-defined weight 03/01/2016 14:45:33 Max 101000 mg d = 0.01 mg isoCAL External cal./adj. with factory-defined weight External cal./adj. with user-defined weight Internal calibration/adjustment Back Start...
-
Page 60: User Management
User Management User Management You can configure the following settings in this menu: − Creating new user profiles (only possible as administrator) − Editing user profiles (modify, copy, delete, change, and delete passwords, depending on user rights) − Activating users User management includes users with different rights: the administrator and regular users. - Page 61 Next Steps 2 to 4: Setting the Color and Brightness of the Display To select the background color, touch the desired color. Please select your background color: The standard Sartorius background color is which is configured at Black Berry the factory.
- Page 62 If the administrator forgets the password: Back Overview Next Please contact your Sartorius Service Center. Step 8: Checking All Settings Use the scroll bar or press the down arrow to view all settings. Please check the user parameters: To modify a setting, press the corresponding button. This opens a screen showing the options for that setting.
-
Page 63: Activating Users
User Management Step 9: Defining the Password (If Password Protection Is Enabled) If you selected the option for password protection, you are now prompted to Please enter your password twice: enter the desired password twice. Press the top button. User a New a User profile a Overview Enter the desired password (min. -
Page 64: Editing User Profiles
User Management Editing User Profiles The options which are available for editing user profiles depend on whether or not you have administrator rights. The following table shows who can carry out which changes to user profiles. Accordingly, the displays shown in this section may differ from your screen because in this chapter, the administrator view is always shown here. -
Page 65: Copying User Profiles
User Management 9.3.2 Copying User Profiles This function can only be performed by the administrator. When you copy a user profile with password protection, the password is not transferred to the copy, but is deleted instead! Touch Copy Select the function for the user profile: All available user profiles are displayed. -
Page 66: Changing Or Deleting Your Own Password
User Management 9.3.4 Changing or Deleting Your Own Password If you haven’t already done so, activate your own user profile. Select the function for the user profile: In the user selection, touch Edit User a Edit Select Change or delete own password If you want to change the password, touch Modify Select both buttons in order and enter the new password twice. - Page 67 Sartorius Lab Instruments GmbH & Co. KG Otto-Brenner-Strasse 20 37079 Goettingen, Germany Phone: +49.551.308.0 Fax: +49.551.308.3289 www.sartorius.com The information and figures contained in these instructions correspond to the version date specified below. Sartorius reserves the right to make changes to the technology, features, specifications and design of the equipment without notice.
Need help?
Do you have a question about the cubis MPS and is the answer not in the manual?
Questions and answers