Table of Contents
Advertisement
Quick Links
Download this manual
See also:
Service Manual
Advertisement
Table of Contents

Related Manuals for ESAB 100i


Summary of Contents for ESAB 100i
- Page 1 100i, 200i, 300i, and 400i Plasma Systems Instruction Manual Article Number: 0560956430 Revision Date: May 13, 2016 Revision Number: AB Language: ENG...
- Page 2 WE APPRECIATE YOUR BUSINESS! Congratulations on your new ESAB product. We are proud to have you as our customer and will strive to provide you with the best service and reliability in the industry. This product is backed by our extensive warranty and world-wide service network. To locate your nearest distributor or service agency call 1-800-ESAB-123, or visit us on the web at www.ESAB.com.
- Page 3 While the information contained in this Manual represents the Manufacturer’s best judgement, the Manufacturer assumes no liability for its use. Plasma Cutting Power Supply with Automated Gas Control 100i / 200i / 300i / 400i Published by: ESAB Welding and Cutting Products.
-
Page 4: User Responsibility
Be sure this information reaches the operator. You can get extra copies through your supplier. CAUTION These INSTRUCTIONS are for experienced operators. If you are not fully familiar with the principles of operation and safe practices for arc welding and cutting equipment, we urge you to read our booklet, “Precautions and Safe Practices for Arc Welding, Cutting, and Gouging,”... - Page 5 ASSUREZ-VOUS QUE CETTE INFORMATION EST DISTRIBUÉE À L’OPÉRATEUR. VOUS POUVEZ OBTENIR DES COPIES SUPPLÉMENTAIRES CHEZ VOTRE FOURNISSEUR. ATTENTION Les INSTRUCTIONS suivantes sont destinées aux opérateurs qualifiés seulement. Si vous n’avez pas une connaissance approfondie des principes de fonctionnement et des règles de sécurité pour le soudage à l’arc et l’équipement de coupage, nous vous suggérons de lire notre brochure «...
- Page 6 This Page Intentionally Blank...
-
Page 7: Table Of Contents
Gas Applications ....................28 2.11 Torch Specifications ..................29 SECTION 3: INSTALLATION ................31 3.01 Installation Requirements .................31 3.02 System Layout 100i - 200i Amp ..............32 3.03 System Layout 300i Amp ..................33 3.04 System Layout 400i Amp ..................33 3.05 Recommended Gas Supply Hose ..............34 3.06... - Page 8 TABLE OF CONTENTS SECTION 4: OPERATION ..................79 4.01 Power Supply Control Panel ................79 4.02 System Operation .....................79 4.03 CCM Status Codes ....................81 4.04 Gas Selection Console Status Codes ..............89 4.05 Gas Control Unit Status Codes ................91 4.06 Remote Arc Starter Trouble Shooting ...............94 SECTION 5: MAINTENANCE ................
- Page 9 TABLE OF CONTENTS APPENDIX 1: CNC - CONTROL MODULE PCB CONNECTIONS ........A-1 APPENDIX 2: CNC ..................A-2 CNC functions ....................... A-2 CNC Input / Output Descriptions ................... A-4 Simplified CNC Circuit ....................A-6 CNC Connections ......................A-8 CNC Cable Color Code ....................A-9 APPENDIX 3: COOLING DIAGRAM ..............A-10 APPENDIX 4: SYSTEM SCHEMATIC 100A, 380-415V PG 1 ..........A-12 APPENDIX 5: SYSTEM SCHEMATIC 100A, 380-415V PG 2 ..........A-14...
- Page 10 This Page Intentionally Blank...
-
Page 11: Section 1: Safety
100i / 200i / 300i / 400i SECTION 1: SAFETY 1.01 Safety Precautions - ENGLISH WARNING: These Safety Precautions are for your protection. They summarize precautionary information from the references listed in Additional Safety Information section. Before performing any installation or operating procedures, be sure to read and follow the safety precautions listed below as well as all other manuals, material safety data sheets, labels, etc. - Page 12 100i / 200i / 300i / 400i ELECTRICAL SHOCK -- Contact with live electrical parts and ground can cause severe injury or death. DO NOT use AC welding current in damp areas, if movement is confined, or if there is danger of falling.
- Page 13 100i / 200i / 300i / 400i CYLINDER HANDLING -- Cylinders, if mishandled, can rupture and violently release gas. Sudden rupture of cylinder, valve, or relief device can injure or kill. Therefore: 1. Use the proper gas for the process and use the proper pressure reducing regulator designed to operate from the compressed gas cylinder.
- Page 14 100i / 200i / 300i / 400i Meaning of symbols - As used throughout this manual: Means Attention! Be Alert! Your safety is involved. Means immediate hazards which, if not avoided, will result in immediate, serious per- DANGER sonal injury or loss of life.
- Page 15 100i / 200i / 300i / 400i This Page Intentionally Blank Manual PN: 0560956430 SAFETY INSTRUCTIONS...
-
Page 16: Précautions De Sécurité - French Canadian
100i / 200i / 300i / 400i 1.02 Précautions de sécurité - FRENCH CANADIAN AVERTISSEMENT : Ces règles de sécurité ont pour but d’assurer votre protection. Ils récapitulent les informations de précaution provenant des références dans la section des Informations de sécurité sup- plémentaires. - Page 17 100i / 200i / 300i / 400i 5. Assurez-vous de ne pas excéder la capacité de l’équipement. Par exemple, un câble de soudage surchargé peut surchauffer et provoquer un incendie. 6. Une fois les opérations terminées, inspectez l’aire de travail pour assurer qu’aucune étincelle ou projec- tion de métal incandescent ne risque de provoquer un incendie ultérieurement.
- Page 18 100i / 200i / 300i / 400i LES VAPEURS ET LES GAZ -- peuvent causer un malaise ou des dommages corporels, plus particu- lièrement dans les espaces restreints. Ne respirez pas les vapeurs et les gaz. Le gaz de protection risque de causer l’asphyxie.
- Page 19 100i / 200i / 300i / 400i 4. N’utilisez pas l’équipement de façon abusive. Gardez l’équipement à l’écart de toute source de chaleur, notamment des fours, de l’humidité, des flaques d’eau, de l’huile ou de la graisse, des atmosphères corrosives et des intempéries.
- Page 20 100i / 200i / 300i / 400i MISE EN GARDE L’équipement pourrait basculer s’il est placé sur une surface dont la pente dépasse 15°. Vous pourriez vous blesser ou endommager l’équipement de façon importante. 15° Art# A-12726 MISE EN GARDE Soulevez à...
-
Page 21: Section 2: Specifications
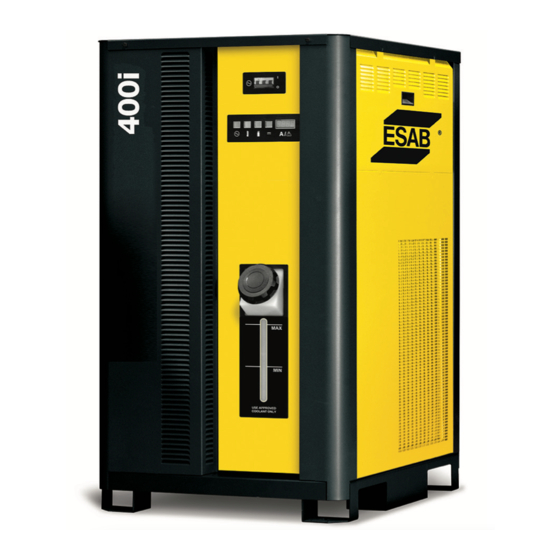
100i / 200i / 300i / 400i SECTION 2: SPECIFICATIONS 2.01 General Description Of The System A typical plasma system configuration includes: • One Power Supply • Remote Arc Starter • Gas Control Module • Torch Valve Assembly • Precision Plasma Cutting Torch •... -
Page 22: Specifications & Electrical Requirements
100i / 200i / 300i / 400i 2.06 Specifications & Electrical Requirements 100i Specifications & Design Features Max OCV (U0) 425 vdc Minimum Output Current 5 Amps Max Output Current 100 Amps Output Voltage 60 - 180 vdc 100 Amp System... - Page 23 100i / 200i / 300i / 400i 100i Power Supply Input Power Input Current Suggested Sizes (See Note) Voltage Freq. 3-Ph 3-Ph Fuse (Amps) Wire (AWG) Wire (mm (Volts) (Hz) (kVA) (Amps) 3-Ph 3-Ph 3-Ph 50/60 40-45 400/400 CE 50/60...
-
Page 24: Power Supply Dimensions
100i / 200i / 300i / 400i NOTE! * Suggested wire size based on United States NFPA 70 National Electrical Code 2011 edition published by the National Fire Prevention Association. Listings are from table 400.5(A)(2) for flexible cord of certain types rated for 75 deg C in ambient temperatures up to 30 deg C. -
Page 25: Power Supply Rear Panel Features
100i / 200i / 300i / 400i 2.08 Power Supply Rear Panel Features TSC/Comm Customer Optional Circuit Breakers Ports GCM Connector CNC Connector J55 - GCM USER INPUT Coolant Return C.C.M. J15 - CNC HEIGHT CONTROL Coolant Supply J54 - TSC /COMM... -
Page 26: Gas Requirements
The customer will provide all gases and pressure regulators. Gases must be of high quality. Pressure regulators shall be double stage and installed within 3 meters from the Gas Console. 100i Power Supply: Gas Pressures, Flows, and Quality Requirements Quality... - Page 27 100i / 200i / 300i / 400i 300i Power Supply: Gas Pressures, Flows, and Quality Requirements Quality Minimum Pressure Flow 99.5% Purity 120 psi (Oxygen) 200 scfh (95 lpm) (Liquid recommended) 8.3 bar / 827 kPa 99.5% Purity (Liquid recommended)
-
Page 28: Gas Applications
100i / 200i / 300i / 400i 2.10 Gas Applications MATERIAL MILD STEEL STAINLESS STEEL ALUMINUM GAS TYPE GAS TYPE GAS TYPE OPERATION PREFLOW PLASMA SHIELD PREFLOW PLASMA SHIELD PREFLOW PLASMA SHIELD 30A Cut 50A Cut 70A Cut 100A Cut... -
Page 29: Torch Specifications
100i / 200i / 300i / 400i 2.11 Torch Specifications A. Torch Dimensions Basic 400 Amp torch dimensions Basic 100 Amp torch dimensions Manual PN: 0560956430 SPECIFICATIONS... - Page 30 100i / 200i / 300i / 400i B. Torch Leads Lengths Torch Lead Assembly Lengths Feet Meters 3.05 15.2 22.9 30.4 C. Torch Parts (Generic Parts Shown) Art # A-04741_AB Plasma Gas Shield Gas Distributor Distributor Shield Cap Electrode Cartridge Shield Cup D.
-
Page 31: Section 3: Installation
100i / 200i / 300i / 400i SECTION 3: INSTALLATION 3.01 Installation Requirements Electric Supply The electrical supply network, the gas and water supply system must meet local safety standards. This conformity shall be checked by qualified personnel. 100i Power Supply... -
Page 32: System Layout 100I - 200I Amp
• Oil or grease contamination from compressed or bottled air can cause fires in conjunction with oxygen. Cooling System Requirements Coolant must be added to the system on installation. The amount required varies with torch leads length. ESAB recommends the use of its coolants 7-3580 and 7-3581 (for low temperatures). Coolant Capabilities Cat. Number and Mixture... -
Page 33: System Layout 300I Amp
100i / 200i / 300i / 400i 3.03 System Layout 300i Amp Refer to section 3.08 and 3.10 for ground connections and ground cables. 175’ / 53.3 m Maximum Length 125’ / 38.1 m Maximum Length 50’ / 15.25 m Maximum Length... -
Page 34: Recommended Gas Supply Hose
100i / 200i / 300i / 400i 3.05 Recommended Gas Supply Hose Item # Description Catalog # 3/8”Gray Synflex Hose. No fittings included. Catalog number per foot. 9-3616 3.06 Leads and Cables All Amperage #8 AWG Cable Pilot Return, Power Supply... -
Page 35: Lift The Power Supply
100i / 200i / 300i / 400i 3.07 Lift the Power Supply WARNING Do not touch live electrical parts. Disconnect input power conductors from de-energized supply line before moving unit. FALLING EQUIPMENT can cause serious personal injury and equipment damage. -
Page 36: Connect Input Power And Ground Cables
100i / 200i / 300i / 400i 3.08 Connect Input Power and Ground Cables Connect Input Power and System Ground Cables 1. Remove the input power cover to the right of the coolant filter at the rear of the power supply. To do this remove the two screws then lift up and pull away. -
Page 37: Connect Work Cable And Pilot And Negative Leads
100i / 200i / 300i / 400i 3.09 Connect Work Cable and Pilot and Negative Leads 1. Remove the output power cover to the left of the coolant filter at the rear of the power supply. To do this remove the two screws then lift up and pull away. -
Page 38: Ground Connections
2. Grounding for components mounted on the cutting table (CNC controllers, height controllers, plasma remote controls, etc.) should follow the manufacturer’s recommendations for wire size, type, and connection point locations. For ESAB components (except Remote Arc Starter and Gas Control Module) it is recommended to use a minimum of 10 AWG (European 6 mm ) wire or flat copper braid with cross section equal to or greater than 10 AWG connected to the cutting table frame. - Page 39 100i / 200i / 300i / 400i 5. Make sure work cable and ground cables are properly connected. The work cable must have a solid connection to the cutting table. The work and ground connections must be free from rust, dirt, grease, oil and paint. If necessary grind or sand down to bare metal.
- Page 40 100i / 200i / 300i / 400i 4. Assemble the transformer and power resistor in a metal box. Connect a 3 wire (w/gnd) power cord with ground wire attached to the metal box for safety. If a plastic box is used instead, connect the transformer core and the resistor mounts to the power cord ground wire.
-
Page 41: Connect Coolant Leads
100i / 200i / 300i / 400i 3.11 Connect Coolant Leads 1. Connect the color-coded coolant hoses to the coolant connections on the power supply rear panel. The supply line (out) is flagged green, the return line (in) is flagged red. -
Page 42: Connect Cables For Cnc, Remote Arc Starter, Gas Selection, And Heat Exchanger
100i / 200i / 300i / 400i 3.12 Connect Cables for CNC, Remote Arc Starter, Gas Selection, and Heat Exchanger 1. Connect one end of each cable to the power supply. 2. Connect the other end of the CNC cable to the CNC device. -
Page 43: Handling And Installation Of Fiber Optics
3.13 Handling and Installation of Fiber Optics General Information This kit is for proper handling and installation of Fiber Optic Cables used in ESAB iSeries automated gas boxes and Gas Control Modules. Fiber Optic cable is used in place of wire because it offers far superior immunity to electrical noise but it is more delicate and requires careful handling. -
Page 44: Correct Installation
100i / 200i / 300i / 400i 2. Do not hook onto the fiber to pull on the cable. Art # A-09418 3. Once the fiber cable is installed in the CCM or gas control make sure the strain relief nut is securely tightened onto the hose so the hose can’t pull out of it like this:... - Page 45 100i / 200i / 300i / 400i sharp Sharp Bends bends Art # A-12014 Correct routing of fiber optic cable. No sharp bends going into connectors. Art # A-09678_AB Manual PN: 0560956430 INSTALLATION...
- Page 46 100i / 200i / 300i / 400i Unplugging the fiber optic connector. Do not pull on the fiber cable! Art # A-09423 For the CCM grip the fiber connector front and back squeezing the latch lever and remove from the socket.
-
Page 47: Connect Cable And Gas Section Console Fiber Optic Cable To Ccm
100i / 200i / 300i / 400i 3.14 Connect Cable and Gas Section Console Fiber Optic Cable to CCM 1. Remove the bottom plastic plug in the CCM at the rear of the Power Supply. J55 - GCM USER INPUT... - Page 48 100i / 200i / 300i / 400i CAUTION Avoid kinking, twisting, or bunching the fiber optic cable. The cable can be damaged by being forced into tight-radius turns. 2. Remove outer thin nut from through hole protector at one end of Fiber Optic Cable (L) that connects between the CCM portion of the Power Supply and the Gas Selection Cosole.
-
Page 49: Set Switches On The Command - Control Module
100i / 200i / 300i / 400i 3.15 Set Switches on the Command - Control Module Remove the power supply upper right side. Set switches on the CCM (Command-Control Module) per the illustrations. Switch settings and connection details are provided in the Appendix. Any changes made require a restart of the power supply. - Page 50 100i / 200i / 300i / 400i CAUTION Printed circuit boards in the Command - Control Module are static - sensitive. Discharge any built-up static charges in your body or surroundings before touching the printed circuit boards. SW11 SW12 SW13...
-
Page 51: Height Control Connections
100i / 200i / 300i / 400i 2 - Wire and 4 - Wire settings When used with the Vision T5™ CNC, plug should be in the 2 wire (2W) position shown below. For other CNC controls using 4 wire communication, place the jumper in the 4W position. -
Page 52: Gas Selection Console Installation
100i / 200i / 300i / 400i 3.17 Gas Selection Console Installation The Gas Selection Console must be installed in a suitable location where it is easily accessible to the system operator. The unit must be mounted to a flat horizontal surface. If the Module is mounted to any support subject to vibration or motion, the installer must fasten the module to the support securely. - Page 53 100i / 200i / 300i / 400i 2. Carefully remove the cover from the module noting the attached wire harness that connects to J1. Remove the wire har- ness and then set the cover to the side. Art # A-09140 3.
- Page 54 100i / 200i / 300i / 400i NOTE! If you need to replace a gas or water fitting all inlets and outlets of the aluminum manifold are 1/4” NPT (United States National Pipe Thread) into which are screwed the various adapters.
-
Page 55: Gas Control Unit Installation
100i / 200i / 300i / 400i 7. Make sure that the hose going to the Gas Selection Console is connected to the port on the WMS Water Softener marked “OUT” and the incoming water supply connected to the port marked “IN”. Do not mount over any electronics or outlets in case of leaks during operation or spills when changing the element at a later date. - Page 56 100i / 200i / 300i / 400i Mounting Dimensions DPC-3000 Top DPC-3000 Profile 6.64in 4.00 in [168.7mm] [101.6 mm] 10.90 in [276.86 mm] .30 in [7.62mm] 10.45 in [265.4 mm] 11.00 in Art # A-09143 [279.4 mm] Preparation 1. Remove the screws securing the Cover Panel to the Module.
- Page 57 100i / 200i / 300i / 400i Art # A-09145 3. Attach all hoses and cables to the back of the Gas Control Unit except the Fiber Optic cable which will be covered a little later. Avoid turning any fittings already mounted in the unit by placing a wrench on it before tightening the hose fitting to...
-
Page 58: Fiber Optic Cable Installation From Ccm To Gas Selection Console
100i / 200i / 300i / 400i 3.19 Fiber Optic Cable Installation from CCM to Gas Selection Console CAUTION Avoid kinking, twisting, or bunching the fiber optic cable. The cable can be damaged by being forced into tight-radius turns. Review section 3.10 for proper handling and installation of fiber optic cable. - Page 59 100i / 200i / 300i / 400i Art # A-09148_AB 4. Secure the thin nut on the through hole protector so both nut faces are tight against the sheet metal inside and out. Art # A-09149_AB Manual PN: 0560956430 INSTALLATION...
-
Page 60: Fiber Optic Cable Installation From Gas Selection Console To Gas Control Unit
100i / 200i / 300i / 400i 5. Plug the Fiber Optic Cable into the PCB as shown below. Make sure the locking tabs are engaged. Fiber Optic Cable to/from CCM plugs in here Art # A-11999 3.20 Fiber Optic Cable Installation From Gas Selection Console to Gas Control Unit 1. - Page 61 100i / 200i / 300i / 400i Fiber Optic for DMC-3000 goes here Art # A-09152_AB Insert Fiber Optic cable here Art # A-09153_AB 4. Secure each of the thin nuts on the through hole protectors so both nut faces are tight against the sheet metal inside and out.
- Page 62 100i / 200i / 300i / 400i Plug Fiber Optic cable to/from Gas Control Unit here. Plug Fiber Optic cable to/from DPC-3000 here Art # A-09154 6. Plug the Fiber Optic Cable into the PCB as shown below for the Gas Control Unit. Make sure the locking tabs are engaged.
-
Page 63: Install Touch Screen Cnc
100i / 200i / 300i / 400i 3.21 Install Touch Screen CNC See CNC instruction manuals for mounting directions, preparation and electrical connections. Manual PN: 0560956430 INSTALLATION... -
Page 64: External Cooler
100i / 200i / 300i / 400i 3.22 External Cooler Used in series with the existing cooling system of the 400i series power supplies, the External Cooler provides necessary addi- tional water cooling for the torch head when cutting at over 300amps. The External Cooler fan is thermally controlled to operate whenever the fan and pump is on and the coolant temperature is above a predetermined level. - Page 65 100i / 200i / 300i / 400i Included with the External Cooler are two 10’ hoses, supply (green) and return (red), that are to be connected to the matching colors on left side of the External Cooler and to the supply and return fittings on the rear of the 400i power supply. Hoses to the Remote Arc Starter connect on the right side of the External Cooler.
-
Page 66: Install Remote Arc Starter
100i / 200i / 300i / 400i Under low power plasma cutting the External Cooler may not come on. This is normal operation. Periodically check obstructions in the radiator and remove them by vacuuming the fins. Do not use cleaners or fluids to remove debris, they may affect the radiator integrity. - Page 67 100i / 200i / 300i / 400i Installation The Remote Arc Starter must be installed in a suitable location near the torch head. If the Arc Starter is mounted to a gantry or to any other support subject to motion or vibration, fasten the Arc Starter to the support securely.
- Page 68 100i / 200i / 300i / 400i Minimum 2 Art # A-12060 Input Connections 1. Refer to the illustrations. Make the following input connections to the Arc Starter. • Coolant Supply and Return Hoses (from External Cooler). Hoses and connectors are color-coded; Red for Return, Green for Supply.
- Page 69 100i / 200i / 300i / 400i Art # A-12062 Coolant Return (Red) Green Coolant Supply (Green) 2. Refer to illustration. Connect the Pilot wire and Negative cables using a star washer on each. NOTE! * Slave and Master refer to only those set ups using two power supplies in parrallel.
- Page 70 100i / 200i / 300i / 400i *Negative (Slave) Pilot *Negative (Master) Torch Lead Art # A-12063_AB Negative Master, Negative Slave and Pilot Cables (from Power Supply ) Art # A-12064 Control Cable from Power Supply rear panel INSTALLATION Manual PN: 0560956430...
- Page 71 100i / 200i / 300i / 400i Output Connections 1. Refer to the illustrations. Make the following output connections to the Arc Starter. Pilot Lead Coolant Return (Red) Coolant Supply (Green) Green Art # A-12065 Pilot Return Cable, Coolant Supply and Return Hoses (from Torch) 2.
- Page 72 100i / 200i / 300i / 400i 3. The Arc Starter must be grounded; the grounding terminal is marked . Refer to the previous section for grounding details. Art # A-04758 Torch Leads 1 Nut and 1 Washer Remain in Place Ground Cable 4.
- Page 73 100i / 200i / 300i / 400i J55 - GCM USER INPUT J15 - CNC HEIGHT CONTROL J54 - TSC /COMM J59 - RAS CB2 - 5A 120 VAC CB3 - 5A 24 VAC J70 - HE CB4 - 5A 120 VAC...
-
Page 74: Connecting Torch
100i / 200i / 300i / 400i 3.24 Connecting Torch Connect the Torch as follows: Coolant Supply, Coolant Return, and Pilot Leads Leads Cover Torch Leads End Cap Shield Gas (Right Hand Thread) Groove for O-Ring Pilot Lead Mounting Tube... -
Page 75: Install Consumable Torch Parts
100i / 200i / 300i / 400i 7. Connect the pilot lead to the Torch Head. Press the two ends of the connector firmly together. Thread the plastic lead cover/connector onto the mating Torch Head connector. 8. Press the Torch Head Assembly upward to connect to the Mounting Tube. Pull the leads back as needed to ensure a proper fit through the Mounting Tube and Torch Leads End Cap. - Page 76 100i / 200i / 300i / 400i Art # A-12789 Shield Shield Retainer 1 - Assemble “A” 200 A only. 2 - Assemble “B”. 3 - Assemble “B” to “C”. 4 - Assemble “A” to “B-C” assembly. 4. Insert the stack of consumable parts into the cartridge. Ensure that the large O-ring on the torch tip fits completely into the cartridge.
- Page 77 100i / 200i / 300i / 400i 8. Connect the wire lead from the height finder to the ohmic clip if using ohmic torch height sensing. Ohmic Clip Art # A-03393_AB NOTE! Ohmic height sensing is not recommended with water shield. Water on the plate interferes electrically with the ohmic sensing circuit.
-
Page 78: Voltage Divider For Ihc Torch Height Control
100i / 200i / 300i / 400i 30 - 100 Amp Parts Assembly 1: Stack Parts 2: Press Cartridge onto Stacked Parts Electrode Plasma Gas Distributor O-Ring on Tip No Gaps Between Parts Shield Gas Cartridge Covers Distributor O-Ring on Torch Tip... -
Page 79: Section 4: Operation
100i / 200i / 300i / 400i SECTION 4: OPERATION 4.01 Power Supply Control Panel Gas Indicator Status Indicator AC Indicator Temp Indicator DC Indicator Art # A-11541_AB AC Power Lamp Indicates unit has passed the input power tests and AC power is being supplied to the inverter modules via the input contactor when the ON/OFF switch is in ON position. - Page 80 100i / 200i / 300i / 400i NOTE! Prior to starting the system determine the process to be used. The process is determined by the type and thickness of the metal to be cut. Select and install the required consumables, connect the required gasses to the system.
-
Page 81: Ccm Status Codes
100i / 200i / 300i / 400i B. Shield Gases 1. Compressed Air Shield • Air shield is normally used when operating with air or oxygen plasma. • Improves cut quality on some ferrous materials. • Inexpensive - reduces operating costs. - Page 82 100i / 200i / 300i / 400i CCM Status Code Group 1 -- Plasma Process Message Code Remedy / Comments Plasma Enable Off ; Disable activated on or external SW disabled (CNC); Plasma Disabled CCM TB1-1&2 jumper missing; 40 circuit ribbon cable from Relay PCB to CCM disconnected or defective;...
- Page 83 100i / 200i / 300i / 400i CCM Status Code Group 2 -- Plasma Power Supply Work Current Too Work lead current detected greater than 16% above process setting. Possible defec- High tive HCT1 Work lead current sensor or Relay PCB; Defective CCM.
- Page 84 100i / 200i / 300i / 400i CCM Status Code Group 2 -- Plasma Power Supply Inverter 3B Incompat- Unsupported Inverter Revision; Ribbon cable CCM J36 to Inverter Module 3 Section ible Revision B damaged; CCM code version incompatible with Inverter revision or model Inverter AC Voltage rating incompatible with Power Supply voltage rating;...
- Page 85 100i / 200i / 300i / 400i CCM Status Code Group 2 -- Plasma Power Supply Inverter Input Voltage fault; voltage out of range or missing phase at AC Input of In- Inverter 3B Input Volt- verter Module 3 Section B; Poor AC Power Quality; Defective W2 contactor; Loose or...
- Page 86 100i / 200i / 300i / 400i CCM Status Code Group 2 -- Plasma Power Supply Inverter circuitry is over temperature likely cause is ambient greater than 40 deg Inverter 3B Over Temp C; Reduce power supply cutting Duty Cycle; Reduce ambient air temperature; Add Ambient auxiliary cooler.
- Page 87 100i / 200i / 300i / 400i CCM Status Code Group 3 -- Gas Controller Status & Protocol Gas Controller not config- Gas Selection Console or Gas Control Unit not configured for a process or 313 * ured. locked; See Gas Selection Console and Gas Control Unit status...
- Page 88 100i / 200i / 300i / 400i CCM Status Code Group 6 -- CCM Code Message Remedy / Comments Analog Voltage Error Defective CCM, replace. ADC or DAC error Defective CCM, replace. Reserved No information available; Contact customer service Data Memory error Defective CCM, replace.
-
Page 89: Gas Selection Console Status Codes
100i / 200i / 300i / 400i CCM Status Code Code Message Remedy / Comments Group 7 -- Options 1 Torch isolation contactor W5 appears closed when expected to be Isolation Contactor Fault open. Contacts may fused or, W5 could be energized, 24 VAC on it's coil, when it should not be due to faulty Relay PCB. - Page 90 100i / 200i / 300i / 400i Gas Selection Console Status Code Key Group 1 - Gas Selection Console Code Message Cause/Remedy Plasma Disabled Enable Plasma; Defective Gas Selection Console Power Supply (E-Stop relay) 24 VDC fault Check /replace Gas Selection Console power supply fuse (F2); Replace Gas Selection Console Power Supply;...
-
Page 91: Gas Control Unit Status Codes
100i / 200i / 300i / 400i Group 5 - Shorted Solenoid Faults Sol 1 – H35 Plasma Replace solenoid; Shorted wire harness; Defective Gas Selection Console Control PCB Sol 2 – Oxygen Plasma Replace solenoid; Shorted wire harness; Defective Gas Selection Console Control PCB Sol 3 –... - Page 92 100i / 200i / 300i / 400i Group 3 - Inlet Pressure Faults Plasma Gas High (>145 PSI) Reduce pressure from gas supply; defective pressure sensor (PS4). Pilot Gas High (>145 PSI) Reduce pressure from gas supply; defective pressure sensor (PS3).
- Page 93 100i / 200i / 300i / 400i Group 8 - Shield Gas Proportional Valve (V1) Valve open Check for open connection; Replace valve. Gas Control Unit inlet Sup- Raise plasma inlet pressure; check for Gas Selection Console valve not open; restriction in gas sup- ply pressure low ply/hoses.
-
Page 94: Remote Arc Starter Trouble Shooting
100i / 200i / 300i / 400i 4.06 Remote Arc Starter Trouble Shooting Arc Starter Trouble Shooting Symptom Cause Check Remedy Pilot return wire not connected at torch head or broken in torch Visual inspection, continuity check Connect Wire or replace leads. -
Page 95: Section 5: Maintenance
100i / 200i / 300i / 400i SECTION 5: MAINTENANCE 5.01 General Maintenance Perform the following checks periodically to ensure proper system performance: Power Supply Maintenance Schedule Daily Check coolant level; add coolant as needed. Check gas hose connections and pressures. -
Page 96: Coolant Replacement Procedure
100i / 200i / 300i / 400i 5.03 Coolant Replacement Procedure Replace coolant as follows: 1. Disconnect the system from main input power. 2. Remove the two right side panels. 3. Locate the coupling in the coolant line that comes from the bottom of the coolant tank, #1 in the following illustration. -
Page 97: Section 6: Replacement Assemblies & Parts
100i / 200i / 300i / 400i SECTION 6: REPLACEMENT ASSEMBLIES & PARTS 6.01 Replacement Power Supply Complete Unit / Component Catalog Number 100i Power Supply, 480V 0559381162 100i Power Supply, 400V 0559381163 100i Power Supply, 400V CE 0559381164 200i Power Supply, 480V... -
Page 98: System Layout 100 - 200 Amp
100i / 200i / 300i / 400i 6.02 System Layout 100 - 200 Amp Refer to section 3.08 and 3.10 for ground connections and ground cables. 175’ / 53.3 m Maximum Length 125’ / 38.1 m Maximum Length 100’ / 30.5 m Maximum Length... -
Page 99: System Layout 400 Amp
100i / 200i / 300i / 400i 6.04 System Layout 400 Amp Refer to section 3.08 and 3.10 for ground connections and ground cables. 175’ / 53.3 m Maximum Length 125’ / 38.1 m Maximum Length 50’ / 15.25 m Maximum Length... -
Page 100: Leads And Cables All Amperages
100i / 200i / 300i / 400i 6.06 Leads And Cables All Amperages #8 AWG Cable Pilot Return, Power Supply to Arc Starter 3/0 AWG Cable (95 mm Negative Lead, Power Supply to Arc Starter Coolant Supply Lead, Green Green... - Page 101 100i / 200i / 300i / 400i Manual PN: 0560956430 PARTS LISTS...
-
Page 102: Power Supply External Replacement Parts
100i / 200i / 300i / 400i 6.07 Power Supply External Replacement Parts Item # Description Catalog # Power and Leads Cable Cover 0559235533 Top Panel, 0559097300 Upper Side Covers 0559097301 Lower Left Side Panel 0559097304 Lower Right Side Panel... -
Page 103: Power Supply Replacement Parts - Upper Right Side
100i / 200i / 300i / 400i 6.08 Power Supply Replacement Parts - Upper Right Side Item # Description Ref. Des. Catalog # System Bias PCB 9-9253 Pilot PCB 9-9250 CCM Assembly 0559097335 Relays, Pump / Fan MC3 / MC2... -
Page 104: Power Supply Replacement Parts - Lower Right Side
100i / 200i / 300i / 400i 6.09 Power Supply Replacement Parts - Lower Right Side Item # Qty Description Ref. Des. Catalog # Coolant Tank Cap 8-5142 Coolant Tank 9-7306 Coolant level Sensor 9-7307 Pump, Coolant, Assembly (with motor) -
Page 105: Power Supply Replacement Parts - Rear Panel
100i / 200i / 300i / 400i 6.10 Power Supply Replacement Parts - Rear Panel Item # Qty Description Breaker Rating Circuit Rating Ref. Des. Catalog # Coolant Filter Assy 9-7320 Coolant Filter 9-7321 Fuse, 8A 500V - Time Delay (2 total) -
Page 106: Power Supply Replacement Parts - Left Side
100i / 200i / 300i / 400i 6.11 Power Supply Replacement Parts - Left Side Item # Description Ref. Des. Catalog # AC Suppresion PCB 9-9254 Main Contactor (2 total) W1, W2 9-7318 Inverter Module, Full, 480 VAC 9-7330 Inverter Module, Full, 400 VAC... -
Page 107: Automated Gas Control System Replacement Components
100i / 200i / 300i / 400i 6.12 Automated Gas Control System Replacement Components Item # Description Catalog # Assy, Gas Selection Console 0559099491 Assy, Gas Control Unit 0559099443 Manual PN: 0560956430 PARTS LISTS... -
Page 108: Gas Selection Console Replacement Parts
100i / 200i / 300i / 400i 6.13 Gas Selection Console Replacement Parts Item # Description Catalog # Gas Seletion Control assembly 0559099491 Solenoid 9-8264 Manifold subassembly (includes 15 of item 2) 9-7546 SMPS PCB 9-8263 Control PCB 9-7291 Not shown:... -
Page 109: Gas Control Unit Replacement Parts
100i / 200i / 300i / 400i 6.14 Gas Control Unit Replacement Parts Item # Description Catalog # Gas Control Unit Assembly 0559099443 Gas Control Unit - PCB 9-8262 SMPS PCB 9-8263 Shield Gas P Valve 9-8267 Sensor, Pressure, 1/8mnpt (six total) -
Page 110: Remote Arc Starter (Ras) Replacement Parts
100i / 200i / 300i / 400i 6.15 Remote Arc Starter (RAS) Replacement Parts Item # Description Catalog # Complete RAS Assembly 0559039130 Pilot Cap Assembly 9-9423 Electronic Ignition Module 9-7342 Toroidal Coil 9-7343 Art # A-12066 PARTS LISTS Manual PN: 0560956430... -
Page 111: Torch Maintenance
100i / 200i / 300i / 400i SECTION 7: TORCH MAINTENANCE 7.01 Consumable Removal 1. Use the removal tool to hold the Shield Cup & Cartridge Assembly stationary. Turn the Shield Cup to remove it from the Cartridge Assembly. Cartridge Tool... -
Page 112: O-Ring Lubrication
100i / 200i / 300i / 400i 7.02 O-Ring Lubrication Lubricate all three O-Rings on the Cartridge Assembly and all three O-Rings on the Torch Head periodically with O-Ring Lubricant supplied. Remove the snap ring on the cartridge assembly and slide the locking ring downward for access to the O-Ring under the locking ring. -
Page 113: Parts Wear
100i / 200i / 300i / 400i 7.03 Parts Wear Replace the Gas Distributor if it is charred or cracked. Replace the Gas Distributor if the flange is damaged in any way. Replace the tip and/or electrode if they are worn. -
Page 114: Torch Consumables Installation
100i / 200i / 300i / 400i 7.04 Torch Consumables Installation WARNINGS Do not install consumables into the Cartridge while the Cartridge is attached to the Torch Head. Keep foreign materials out of the consumables and Cartridge. Handle all parts carefully to avoid damage, which may affect torch performance. - Page 115 100i / 200i / 300i / 400i CAUTION The cartridge assembly must cover the O-Ring on the torch head. Do not force the cartridge if it will not tighten fully. Remove the cartridge assembly and gently clean the threads on the torch head with a wire brush. Apply oxygen-compatible lubricant (supplied with the torch) to the threads.
-
Page 116: Coolant Leak Trouble-Shooting
100i / 200i / 300i / 400i 7.05 Coolant Leak Trouble-Shooting Never operate the system if coolant leaks from the torch. A steady drip indicates that torch parts are damaged or installed im- properly. Operating the system in this condition can damage the torch head. Refer to the following chart for guidance on coolant leakage from the torch head. - Page 117 100i / 200i / 300i / 400i Recommended Wear Depth for Electrode Amperage Plasma Gas Replacement Inch 0.04 0.04 0.04 0.04 0.08 0.04 0.04 0.08 0.04 0.04 0.08 0.08 0.06 0.08 0.08 0.06 0.08 0.08 0.06 0.06 0.08 0.08 0.08 0.08...
- Page 118 100i / 200i / 300i / 400i This Page Intentionally Blank TORCH INFORMATION Manual PN: 0560956430...
-
Page 119: Torch Operation
The plasma gas stream swirls as it leaves the torch to maintain a stable arc column. This swirl effect results in one side of a cut being more square than the other. Viewed along the direction of travel, the right side of the cut is more square than the left. Manual 0560956430 TORCH DATA 100i-400i... - Page 120 The arc voltages for bevel cutting are not supplied in the bevel cut charts. Torch Center-line 0° Bevel Angle Effective Cut Height Clearance Nominal Work Piece Thickness Art # A-08568_AB Effective Thickness TORCH DATA 100i-400i Manual 0560956430...
- Page 121 Often called AVC delay, this is time starting when torch is moved to Cut Height until THC starts controlling height to the sampled arc voltage. Cut Speed Recommended cut speed based on the material thickness, torch parts and gas combination used. Kerf Width The width of material removed during the cut. Manual 0560956430 TORCH DATA 100i-400i...
- Page 122 Moving the Plate Over Pierce Work Puddle Height Delay Before Arc Torch Height Controlled Voltage Control with Arc Voltage Initial Height Sense CNC Motion Delay Transfer Detected THC Pierce Control Art # A-09754 Delay Delay TORCH DATA 100i-400i Manual 0560956430...
- Page 123 Insert "Up To 100 Amp Standard Cutting" Tab. Discard this sheet. Manual 0560956430 TORCH DATA 100i-400i TAB SHEET...
- Page 124 This Page Intentionally Blank TORCH DATA 100i-400i Manual 0560956430...
-
Page 125: Standard Cutting Up To 100 Amp
Shield (O₂) (Air) Delay Height Elevation (mm) (mm/ (mm) (Bar) Ball (Bar) Ball (Bar) (Volts) (sec) (mm) (mm) (sec) (mm) (sec) (mm) ±0.1 min) 3090 1840 1620 1450 1340 1050 BOLD TYPE indicates maximum piercing parameters. Manual 0560956430 TORCH DATA 100i-400i... - Page 126 (mm) ±0.1 (mm/ min) happen for thicknesses decreases. < 1/16” (0.063”) / 40 / 80 / 300 / 20 / 1.4 0.100 / 2.5 0.100 / 2.5 1.6 mm. 7620 BOLD TYPE indicates maximum piercing parameters. TORCH DATA 100i-400i Manual 0560956430...
- Page 127 * Pressure of the water supply line should be regulated by customer pressure regulator. Note 1: Ohmic height sensing is not recommended with water shield. Water on the plate interferes electrically with the ohmic sensing circuit. Note 2: Water source used for shield must be demineralized. Manual 0560956430 TORCH DATA 100i-400i...
- Page 128 (mm) ±0.1 (mm/ min) happen for thicknesses decreases. < 1/16” (0.063”) / 40 / 80 / 300 / 20 / 1.4 0.100 / 2.5 0.100 / 2.5 1.6 mm. 7620 BOLD TYPE indicates maximum piercing parameters. TORCH DATA 100i-400i Manual 0560956430...
- Page 129 * Pressure of the water supply line should be regulated by customer pressure regulator. Note1: Ohmic height sensing is not recommended with water shield. Water on the plate interferes electrically with the ohmic sensing circuit. Note2: Water source used for shield must be demineralized. Manual 0560956430 TORCH DATA 100i-400i...
- Page 130 (Bar) (Bar) (mm) ±0.1 (mm/ min) decreases. < 1/16” (0.063”) / 40 / 80 / 300 / 20 / 1.4 0.120 / 3.0 0.120 / 3.0 1.6 mm. 7620 BOLD TYPE indicates maximum piercing parameters. TORCH DATA 100i-400i Manual 0560956430...
- Page 131 (sec) (sec) (Bar) (Bar) (Bar) (mm) ±0.1 (mm/ min) happen for thicknesses decreases. < 1/16” (0.063”) / 40 / 80 / 300 / 20 / 1.4 0.120 / 3.0 0.120 / 3.0 1.6 mm. 7620 Manual 0560956430 TORCH DATA 100i-400i...
- Page 132 * Pressure of the water supply line should be regulated by customer pressure regulator. Note1: Ohmic height sensing is not recommended with water shield. Water on the plate interferes electrically with the ohmic sensing circuit. Note2: Water source used for shield must be demineralized. TORCH DATA 100i-400i Manual 0560956430...
- Page 133 (mm) ±0.1 (mm/ min) happen for thicknesses decreases. < 1/16” (0.063”) / 40 / 80 / 300 / 20 / 1.4 0.120 / 3.0 0.120 / 3.0 1.6 mm. 7620 BOLD TYPE indicates maximum piercing parameters. Manual 0560956430 TORCH DATA 100i-400i...
- Page 134 * Pressure of the water supply line should be regulated by customer pressure regulator. Note1: Ohmic height sensing is not recommended with water shield. Water on the plate interferes electrically with the ohmic sensing circuit. Note2: Water source used for shield must be demineralized. TORCH DATA 100i-400i Manual 0560956430...
- Page 135 (sec) (sec) (Bar) (Bar) (Bar) (mm) ±0.1 (mm/ min) happen for thicknesses decreases. < 1/16” (0.063”) / 40 / 80 / 300 / 20 / 1.4 0.120 / 3.0 0.120 / 3.0 1.6 mm. 7620 Manual 0560956430 TORCH DATA 100i-400i...
- Page 136 (Bar) (Bar) (mm) ±0.1 (mm/ min) decreases. < 1/16” (0.063”) / 40 / 80 / 300 / 20 / 1.4 0.120 / 3.0 0.120 / 3.0 1.6 mm. 7620 BOLD TYPE indicates maximum piercing parameters. TORCH DATA 100i-400i Manual 0560956430...
- Page 137 * Pressure of the water supply line should be regulated by customer pressure regulator. Note 1: Ohmic height sensing is not recommended with water shield. Water on the plate interferes electrically with the ohmic sensing circuit. Note 2: Water source used for shield must be demineralized. Manual 0560956430 TORCH DATA 100i-400i...
- Page 138 (sec) (sec) happen for thicknesses (Bar) (Bar) (Bar) (mm) ±0.1 (mm/ min) decreases. < 1/16” (0.063”) / 40 / 80 / 300 / 20 / 1.4 0.120 / 3.0 0.120 / 3.0 1.6 mm. 7620 TORCH DATA 100i-400i Manual 0560956430...
- Page 139 * Pressure of the water supply line should be regulated by customer pressure regulator. Note 1: Ohmic height sensing is not recommended with water shield. Water on the plate interferes electrically with the ohmic sensing circuit. Note 2: Water source used for shield must be demineralized. Manual 0560956430 TORCH DATA 100i-400i...
- Page 140 < 1/16” (0.063”) / 40 / 80 / 300 / 20 / 1.4 0.120 / 3.0 0.120 / 3.0 1.6 mm. 7620 BOLD TYPE indicates maximum piercing parameters. BOLD ITALIC indicates edge starts only. TORCH DATA 100i-400i Manual 0560956430...
- Page 141 (mm) ±0.1 (mm/ min) happen for thicknesses decreases. < 1/16” (0.063”) / 40 / 80 / 300 / 20 / 1.4 0.120 / 3.0 0.120 / 3.0 1.6 mm. 7620 BOLD TYPE indicates maximum piercing parameters. Manual 0560956430 TORCH DATA 100i-400i...
- Page 142 * Pressure of the water supply line should be regulated by customer pressure regulator. Note 1: Ohmic height sensing is not recommended with water shield. Water on the plate interferes electrically with the ohmic sensing circuit. Note 2: Water source used for shield must be demineralized. TORCH DATA 100i-400i Manual 0560956430...
- Page 143 (mm) ±0.1 (mm/ min) happen for thicknesses decreases. < 1/16” (0.063”) / 40 / 80 / 300 / 20 / 1.4 0.120 / 3.0 0.120 / 3.0 1.6 mm. 7620 BOLD TYPE indicates maximum piercing parameters. Manual 0560956430 TORCH DATA 100i-400i...
- Page 144 * Pressure of the water supply line should be regulated by customer pressure regulator. Note 1: Ohmic height sensing is not recommended with water shield. Water on the plate interferes electrically with the ohmic sensing circuit. Note 2: Water source used for shield must be demineralized. TORCH DATA 100i-400i Manual 0560956430...
- Page 145 Insert "Up to 100 Amp Bevel/ Robotic Cutting" Tab. Discard this sheet. Manual 0560956430 TORCH DATA 100i-400i TAB SHEET...
- Page 146 TORCH DATA 100i-400i Manual 0560956430...
-
Page 147: Bevel And Robotic Cutting Up To 100 Amp
4040 2.7 - 6.4 3080 2.8 - 6.4 2310 3.0 - 6.4 1880 3.0 - 6.4 1490 4.0 - 6.4 Edge Start Edge BOLD TYPE indicates maximum piercing parameters. BOLD ITALIC indicates edge starts only. Manual 0560956430 TORCH DATA 100i-400i... - Page 148 (mm) ±0.1 min) 5100 2500 3500 1900 1900 1200 Note 1: Recommended with DFC-3000 automated gas console to improve cut quality at the start. Note 2: Recommended for flat plate, bevel and robotic cutting applications. TORCH DATA 100i-400i Manual 0560956430...
- Page 149 (mm) ±0.1 min) 3200 2300 2800 2200 1600 1000 Note 1: Recommended with DFC-3000 automated gas console to improve cut quality at the start. Note 2: Recommended for flat plate, bevel and robotic cutting applications Manual 0560956430 TORCH DATA 100i-400i...
- Page 150 This Page Intentionallly Blank TORCH DATA 100i-400i Manual 0560956430...
- Page 151 Shield (Air) Delay Height Delay Thickness Elevation (mm/ (mm) (mm) (Bar) Ball (Bar) Ball (Bar) (mm) (sec) (mm) (mm) (sec) (mm) (sec) (mm) min) BOLD TYPE indicates maximum piercing parameters. BOLD ITALIC indicates edge starts only. Manual 0560956430 TORCH DATA 100i-400i...
- Page 152 This Page Intentionally Blank TORCH DATA 100i-400i Manual 0560956430...
- Page 153 Insert "150-200 Amp Standard Cutting" Tab. Discard this sheet. Manual 0560956430 TORCH DATA 100i-400i TAB SHEET...
- Page 154 This Page Intentionallly Blank TORCH DATA 100i-400i Manual 0560956430...
-
Page 155: Standard Cutting 150 - 200 Amp
< 1/16” (0.063”) / 60 / 80 / 300 / 20 / 1.4 0.120 / 3.0 0.120 / 3.0 1.6 mm. 7620 BOLD TYPE indicates maximum piercing parameters. BOLD ITALIC indicates edge starts only. Manual 0560956430 TORCH DATA 100i-400i... - Page 156 (mm) ±0.1 (mm/ min) happen for thicknesses decreases. < 1/16” (0.063”) / 60 / 80 / 300 / 20 / 1.4 0.120 / 3.0 0.120 / 3.0 1.6 mm. 7620 BOLD TYPE indicates maximum piercing parameters. TORCH DATA 100i-400i Manual 0560956430...
- Page 157 * Pressure of the water supply line should be regulated by customer pressure regulator. Note 1: Ohmic height sensing is not recommended with water shield. Water on the plate interferes electrically with the ohmic sensing circuit. Note 2: Water source used for shield must be demineralized. Manual 0560956430 TORCH DATA 100i-400i...
- Page 158 (mm) ±0.1 (mm/ min) happen for thicknesses decreases. < 1/16” (0.063”) / 60 / 80 / 300 / 20 / 1.4 0.120 / 3.0 0.120 / 3.0 1.6 mm. 7620 BOLD TYPE indicates maximum piercing parameters. TORCH DATA 100i-400i Manual 0560956430...
- Page 159 * Pressure of the water supply line should be regulated by customer pressure regulator. Note 1: Ohmic height sensing is not recommended with water shield. Water on the plate interferes electrically with the ohmic sensing circuit. Note 2: Water source used for shield must be demineralized. Manual 0560956430 TORCH DATA 100i-400i...
- Page 160 (Bar) (Bar) (mm) ±0.1 (mm/ min) decreases. 60 / 80 / 300 / 15 / 1.0 0.120 / 3.0 0.120 / 3.0 7620 BOLD TYPE indicates maximum piercing parameters. BOLD ITALIC indicates edge starts only. TORCH DATA 100i-400i Manual 0560956430...
- Page 161 < 1/16” (0.063”) / 300 / 15 / 1.0 0.120 / 3.0 0.120 / 3.0 60 / 4.1 80 / 5.5 1.6 mm. 7620 BOLD TYPE indicates maximum piercing parameters. BOLD ITALIC indicates edge starts only. Manual 0560956430 TORCH DATA 100i-400i...
- Page 162 * Pressure of the water supply line should be regulated by customer pressure regulator. Note 1: Ohmic height sensing is not recommended with water shield. Water on the plate interferes electrically with the ohmic sensing circuit. Note 2: Water source used for shield must be demineralized. TORCH DATA 100i-400i Manual 0560956430...
- Page 163 < 1/16” (0.063”) / 60 / 80 / 300 / 15 / 1.0 0.120 / 3.0 0.120 / 3.0 1.6 mm. 7620 BOLD TYPE indicates maximum piercing parameters. BOLD ITALIC indicates edge starts only. Manual 0560956430 TORCH DATA 100i-400i...
- Page 164 * Pressure of the water supply line should be regulated by customer pressure regulator. Note 1: Ohmic height sensing is not recommended with water shield. Water on the plate interferes electrically with the ohmic sensing circuit. Note 2: Water source used for shield must be demineralized. TORCH DATA 100i-400i Manual 0560956430...
- Page 165 Insert "150-200 Amp Robotic /Bevel Cutting" Tab. Discard this sheet. Manual 0560956430 TORCH DATA 100i-400i TAB SHEET...
- Page 166 TORCH DATA 100i-400i Manual 0560956430...
-
Page 167: Robotic And Bevel Cutting 150 - 200 Amp
10.6 5.1 - 14.0 11.1 5.1 - 14.0 Edge Start Edge 5.1 - 14.0 Edge Start Edge 5.1 - 14.0 Edge Start Edge BOLD TYPE indicates maximum piercing parameters. BOLD ITALIC indicates edge starts only. Manual 0560956430 TORCH DATA 100i-400i... - Page 168 8.9 - 14.0 Edge Start Edge 8.9 - 14.0 Edge Start Edge 8.9 - 14.0 Edge Start Edge 8.9 - 14.0 Edge Start Edge BOLD TYPE indicates maximum piercing parameters. BOLD ITALIC indicates edge starts only. TORCH DATA 100i-400i Manual 0560956430...
- Page 169 * Pressure of the water supply line should be regulated by customer pressure regulator. Note 1: Ohmic height sensing is not recommended with water shield. Water on the plate interferes electrically with the ohmic sensing circuit. Note 2: Water source used for shield must be demineralized. Manual 0560956430 TORCH DATA 100i-400i...
- Page 170 10.2 - 14.0 Edge Start Edge 10.2 - 14.0 Edge Start Edge 10.2 - 14.0 Edge Start Edge 10.2 - 14.0 Edge Start Edge BOLD TYPE indicates maximum piercing parameters. BOLD ITALIC indicates edge starts only. TORCH DATA 100i-400i Manual 0560956430...
- Page 171 * Pressure of the water supply line should be regulated by customer pressure regulator. Note 1: Ohmic height sensing is not recommended with water shield. Water on the plate interferes electrically with the ohmic sensing circuit. Note 2: Water source used for shield must be demineralized. Manual 0560956430 TORCH DATA 100i-400i...
- Page 172 This Page Intentionally Blank TORCH DATA 100i-400i Manual 0560956430...
- Page 173 Shield (Air) Delay Height Delay Thickness Elevation (mm/ (mm) (mm) (Bar) Ball (Bar) Ball (Bar) (mm) (sec) (mm) (mm) (sec) (mm) (sec) (mm) min) BOLD TYPE indicates maximum piercing parameters. BOLD ITALIC indicates edge starts only. Manual 0560956430 TORCH DATA 100i-400i...
- Page 174 This Page Intentionally Blank TORCH DATA 100i-400i Manual 0560956430...
- Page 175 Insert "250 - 300 Amp Standard Cutting" Tab. Discard this sheet. Manual 0560956430 TORCH DATA 100i-400i TAB SHEET...
- Page 176 TORCH DATA 100i-400i Manual 0560956430...
-
Page 177: Standard Cutting 250 - 300 Amp
< 1/16” (0.063”) / 60 / 90 / 300 / 15 / 1.0 0.120 / 3.0 0.120 / 3.0 1.6 mm. 7620 BOLD TYPE indicates maximum piercing parameters. BOLD ITALIC indicates edge starts only. Manual 0560956430 TORCH DATA 100i-400i... - Page 178 15 / 1.0 0.120 / 3.0 0.120 / 3.0 300 / 7620 BOLD TYPE indicates maximum piercing parameters. BOLD ITALIC indicates edge starts only. Use CCM 4.5.0 or later and Electronic Cut Chart 2.4.0 or later TORCH DATA 100i-400i Manual 0560956430...
- Page 179 < 1/16” (0.063”) / 60 / 90 / 300 / 15 / 1.0 0.120 / 3.0 0.120 / 3.0 1.6 mm. 7620 BOLD TYPE indicates maximum piercing parameters. BOLD ITALIC indicates edge starts only. Manual 0560956430 TORCH DATA 100i-400i...
- Page 180 * Pressure of the water supply line should be regulated by customer pressure regulator. Note 1: Ohmic height sensing is not recommended with water shield. Water on the plate interferes electrically with the ohmic sensing circuit. Note 2: Water source used for shield must be demineralized. TORCH DATA 100i-400i Manual 0560956430...
- Page 181 < 1/16” (0.063”) / 60 / 90 / 300 / 15 / 1.0 0.120 / 3.0 0.120 / 3.0 1.6 mm. 7620 BOLD TYPE indicates maximum piercing parameters. BOLD ITALIC indicates edge starts only. Manual 0560956430 TORCH DATA 100i-400i...
- Page 182 * Pressure of the water supply line should be regulated by customer pressure regulator. Note 1: Ohmic height sensing is not recommended with water shield. Water on the plate interferes electrically with the ohmic sensing circuit. Note 2: Water source used for shield must be demineralized. TORCH DATA 100i-400i Manual 0560956430...
- Page 183 Insert "250 - 300 Amp Robotic /Bevel Cutting" Tab. Discard this sheet. Manual 0560956430 TORCH DATA 100i-400i TAB SHEET...
- Page 184 This Page Intentionally Blank TORCH DATA 100i-400i Manual 0560956430...
-
Page 185: Robotic And Bevel Cutting 250 - 300 Amp
5.1 - 9.1 10.2 12.7 1210 5.1 - 9.1 10.2 13.4 5.1 - 9.1 Edge Start Edge 5.1 - 9.1 Edge Start Edge BOLD TYPE indicates maximum piercing parameters. BOLD ITALIC indicates edge starts only. Manual 0560956430 TORCH DATA 100i-400i... - Page 186 5.1 - 14 Edge Start Edge 5.1 - 14 Edge Start Edge 11.7 BOLD TYPE indicates maximum piercing parameters. BOLD ITALIC indicates edge starts only. Use CCM 4.5.0 or later and Electronic Cut Chart 2.4.0 or later TORCH DATA 100i-400i Manual 0560956430...
- Page 187 10.8 - 14 10.2 10.2 20.4 10.2 - 14 Edge Start Edge 10.2 - 14 Edge Start Edge 10.2 - 14 Edge Start Edge BOLD TYPE indicates maximum piercing parameters. BOLD ITALIC indicates edge starts only. Manual 0560956430 TORCH DATA 100i-400i...
- Page 188 * Pressure of the water supply line should be regulated by customer pressure regulator. Note 1: Ohmic height sensing is not recommended with water shield. Water on the plate interferes electrically with the ohmic sensing circuit. Note 2: Water source used for shield must be demineralized. TORCH DATA 100i-400i Manual 0560956430...
- Page 189 9.8 - 11.4 12.4 1700 10.2 - 11.4 Edge Start Edge 1270 10.2 - 11.4 Edge Start Edge 1070 10.2 - 11.4 Edge Start Edge BOLD TYPE indicates maximum piercing parameters. BOLD ITALIC indicates edge starts only. Manual 0560956430 TORCH DATA 100i-400i...
- Page 190 * Pressure of the water supply line should be regulated by customer pressure regulator. Note 1: Ohmic height sensing is not recommended with water shield. Water on the plate interferes electrically with the ohmic sensing circuit. Note 2: Water source used for shield must be demineralized. TORCH DATA 100i-400i Manual 0560956430...
- Page 191 Shield (Air) Delay Height Delay Thickness Elevation (mm/ (mm) (mm) (Bar) Ball (Bar) Ball (Bar)* (mm) (sec) (mm) (mm) (sec) (mm) (sec) (mm) min) BOLD TYPE indicates maximum piercing parameters. BOLD ITALIC indicates edge starts only. Manual 0560956430 TORCH DATA 100i-400i...
- Page 192 This Page Intentionally Blank TORCH DATA 100i-400i Manual 0560956430...
- Page 193 Insert "400 Amp Standard Cutting" Tab. Discard this sheet. Manual 0560956430 TORCH DATA 100i-400i...
- Page 194 This Page Intentionally Blank TORCH DATA 100i-400i Manual 0560956430...
-
Page 195: Standard Cutting 400 Amp
Note1: Ohmic height sensing is not recommended with water shield. Water on the plate interferes electrically with the ohmic sensing circuit. Note2: Water source used for shield must be demineralized. THC Pierce Delay values shown are the minimum values. It is recommended that this value should be increased depending on the application. Manual 0560956430 TORCH DATA 100i-400i... - Page 196 2540 BOLD TYPE indicates maximum piercing parameters. BOLD ITALIC indicates edge starts only. Note 1: For best results when cutting 4” or 100mm Stainless Steel, H35 can be used for both Plasma and Shield gas. TORCH DATA 100i-400i Manual 0560956430...
- Page 197 < 1/16” (0.063”) / 100 / 100 / 15 / 1.0 0.120 / 3.0 0.120 / 3.0 0 / 0 1.6 mm. BOLD TYPE indicates maximum piercing parameters. BOLD ITALIC indicates edge starts only. Manual 0560956430 TORCH DATA 100i-400i...
- Page 198 * Pressure of the water supply line should be regulated by customer pressure regulator. Note1: Ohmic height sensing is not recommended with water shield. Water on the plate interferes electrically with the ohmic sensing circuit. Note2: Water source used for shield must be demineralized. TORCH DATA 100i-400i Manual 0560956430...
- Page 199 < 1/16” (0.063”) / 80 / 20 / 100 / 15 / 1.0 0.200 / 5.1 0.120 / 3.0 1.6 mm. 2540 BOLD TYPE indicates maximum piercing parameters. BOLD ITALIC indicates edge starts only. Manual 0560956430 TORCH DATA 100i-400i...
- Page 200 < 1/16” (0.063”) / 80 / 20 / 100 / 15 / 1.0 0.200 / 5.1 0.120 / 3.0 1.6 mm. 2540 BOLD TYPE indicates maximum piercing parameters. BOLD ITALIC indicates edge starts only. TORCH DATA 100i-400i Manual 0560956430...
- Page 201 * Pressure of the water supply line should be regulated by customer pressure regulator. Note1: Ohmic height sensing is not recommended with water shield. Water on the plate interferes electrically with the ohmic sensing circuit. Note2: Water source used for shield must be demineralized. Manual 0560956430 TORCH DATA 100i-400i...
- Page 202 This Page Intentionally Blank TORCH DATA 100i-400i Manual 0560956430...
- Page 203 Insert "400 Amp Robotic /Bevel Cutting" Tab. Discard this sheet. Manual 0560956430 TORCH DATA 100i-400i...
- Page 204 TORCH DATA 100i-400i Manual 0560956430...
-
Page 205: Robotic And Bevel Cutting 400 Amp
Note1: Ohmic height sensing is not recommended with water shield. Water on the plate interferes electrically with the ohmic sensing circuit. Note2: Water source used for shield must be demineralized. THC Pierce Delay values shown are the minimum values. It is recommended that this value should be increased depending on the application. Manual 0560956430 TORCH DATA 100i-400i... - Page 206 8.9 - 15.2 Edge Start 8.9 - 15.2 Edge Start 8.9 - 15.2 Edge Start 8.9 - 15.2 Edge Start 8.9 - 15.2 Edge Start BOLD TYPE indicates maximum piercing parameters. BOLD ITALIC indicates edge starts only. TORCH DATA 100i-400i Manual 0560956430...
- Page 207 5.1 - 15.2 1300 6.9 - 15.2 1050 7.6 - 15.2 11.5 7.6 - 15.2 14.6 7.6 - 15.2 19.1 7.6 - 15.2 19.1 BOLD TYPE indicates maximum piercing parameters. BOLD ITALIC indicates edge starts only. Manual 0560956430 TORCH DATA 100i-400i...
- Page 208 * Pressure of the water supply line should be regulated by customer pressure regulator. Note1: Ohmic height sensing is not recommended with water shield. Water on the plate interferes electrically with the ohmic sensing circuit. Note2: Water source used for shield must be demineralized. TORCH DATA 100i-400i Manual 0560956430...
- Page 209 10.2 - 15.2 12.7 19.1 10.2 - 15.2 Edge Start 10.2 - 15.2 Edge Start 10.2 - 15.2 Edge Start 10.2 - 15.2 Edge Start BOLD TYPE indicates maximum piercing parameters. BOLD ITALIC indicates edge starts only. Manual 0560956430 TORCH DATA 100i-400i...
- Page 210 8.7 - 15.2 2620 8.9 - 15.2 2170 8.9 - 15.2 1770 9.3 - 15.2 1410 10.2 - 15.2 17.1 10.2 - 15.2 Edge Start BOLD TYPE indicates maximum piercing parameters. BOLD ITALIC indicates edge starts only. TORCH DATA 100i-400i Manual 0560956430...
- Page 211 * Pressure of the water supply line should be regulated by customer pressure regulator. Note1: Ohmic height sensing is not recommended with water shield. Water on the plate interferes electrically with the ohmic sensing circuit. Note2: Water source used for shield must be demineralized. Manual 0560956430 TORCH DATA 100i-400i...
- Page 212 This Page Intentionally Blank TORCH DATA 100i-400i Manual 0560956430...
- Page 213 Voltage Height Delay without Speed @ Rec. Speed (N₂) Plasma (H35) Shield (N₂) Delay Height Delay Elevation (mm/ (mm) (Bar) Ball (Bar) Ball (Bar) (Volts) (mm) ±0.1 (sec) (mm) (mm) (sec) (mm) (sec) (mm) min) Manual 0560956430 TORCH DATA 100i-400i...
- Page 214 This Page Intentionally Blank TORCH DATA 100i-400i Manual 0560956430...
- Page 215 Insert "Torch Appendix" Tab Discard this sheet. Manual 0560956430 TORCH DATA 100i-400i...
- Page 216 This Page Intentionally Blank TORCH DATA 100i-400i Manual 0560956430...
-
Page 217: Torch Parts List
Location (Under Locking Ring) Cat. No. 9-9429 O-Ring, Cat. No. 9-3029 300 Amp and Less O-Ring, Cat. No. 9-3028 Art # A-04066_AE Cartridge Assembly Cartridge Retaining Ring (Cat. No. 9-9489) Snap Ring Art # A-07087_AD Manual 0560956430 TORCH DATA 100i-400i... - Page 218 Art # A-07419_AB O-Ring O-Ring O-Ring O-Ring 9-9060 9-9060 9-9035 8-0558 Assembly Sequence, 200/300 Amp Consumables Cartridge Art # A-07424_AB Shield Gas Plasma Gas Shield Retainer Shield Cap Electrode Shield Cup Distributor Distributor Assembly sequence: TORCH DATA 100i-400i Manual 0560956430...
- Page 219 Baffle Shield Cup Cartridge Body Older Cartridge Assembly 400 Amp (0559211400) Consumables Art # A-09618 Outer Cartridge, 400A Thread Ring Speedlok Retaining Ring Cartridge Body Tool, Torchhead, XT 9-9489 9-7918 Not Sold Seperately 9-9431 9-7917 Manual 0560956430 TORCH DATA 100i-400i...
-
Page 220: Torch Consumables Installation
Cartridge is attached to the Torch Head. Keep foreign materials out of the consumables and Cartridge. Handle all parts carefully to avoid damage, which may affect torch performance. Art # A-03887 1. Install the consumables as follows: TORCH DATA 100i-400i Manual 0560956430... - Page 221 Do not force the cartridge if it will not tighten fully. Remove the cartridge assembly and gently clean the threads on the torch head with a wire brush. Apply oxygen-compatible lubricant (supplied with the torch) to the threads. Manual 0560956430 TORCH DATA 100i-400i...
- Page 222 Ohmic height sensing is not recommended with water shield. Water on the plate interferes electrically with the ohmic sensing circuit. Ohmic Clip Art # A-03393_AB 4. Connect the wire lead from the height finder to the ohmic clip. TORCH DATA 100i-400i Manual 0560956430...
-
Page 223: Patent Information
Art # A-07423_AB Coolant Tube Assembly 8.11 PATENT INFORMATION This product may be protected by one or more of the following U.S. Patent Nos.: 6852944; 6919526; 694616; 6989505; 6998566; 7005600; 7019254; 7071443; 7126080; 7132619; 7737383 Manual 0560956430 TORCH DATA 100i-400i... - Page 224 This Page Intentionally Blank TORCH DATA 100i-400i Manual 0560956430...
-
Page 225: Appendix 1: Cnc - Control Module Pcb Connections
100i / 200i / 300i / 400i APPENDIX 1: CNC - Control Module PCB Connections (LV) OK To Move 2 High +10V Analog Current Control Wiper / Input Low (-) Divided Arc Volts Output Start/Stop Input Stop (NC) (LV) OK To Move 2... -
Page 226: Appendix 2: Cnc
100i / 200i / 300i / 400i APPENDIX 2: CNC CNC functions CNC I/O circuits provide at least 1000V galvanic isolation from the plasma power supply. While the CNC circuits are isolated from the power supply, many of the signal returns on J15 and TB1, TB2 & TB3 are common to each other. - Page 227 100i / 200i / 300i / 400i Internal CNC connections. TB1, TB2 & TB3 on CCM module. Connections are provided on the CCM module TB1, TB2 & TB3 terminal blocks including most of the rear panel functions plus some additional features. All these signals are isolated from the plasma power supply but signals marked (comm.) and (-) are common to each other.
-
Page 228: Cnc Input / Output Descriptions
100i / 200i / 300i / 400i CNC Input / Output Descriptions E-Stop input— Requires closed connection rated for 35ma. @ 20VDC for unit to operate. Factory installed jumper between TB1-1&2 must be removing when connecting user supplied E-Stop circuit. - Page 229 100i / 200i / 300i / 400i OK to Move2 – Provides a second set of N.O. contacts that close when arc transfer is detected. Contacts are rated for maximum of 24 VAC/DC @ 1A. Simplified CNC Circuit. +10V @ 10ma. For Remote CC Pot – Previously CCM versions if one wanted to use a potentiometer for the Remote Analog Current Control (CC) input an external 10 V supply was required for Pot High..
-
Page 230: Simplified Cnc Circuit
100i / 200i / 300i / 400i Simplified CNC Circuit Simplified CNC Ult racut X T Simplified CNC OK TO MOV E SELECT 18 V D C or Con tacts SW6A D C VO LT S +18VDC OK2 (cont act) - Page 231 100i / 200i / 300i / 400i J54 - Rem ote HM I & CN C CO M M (100) 1 - 24 V AC (101) 2 - 24 V AC Re t (102) 3- Jumper to 24 V AC...
-
Page 232: Cnc Connections
100i / 200i / 300i / 400i CNC Connections Cutting Machine CNC Cable Power Supply START/STOP ..Source, 16 VDC, 10 ma..Divided Arc V (-) ..Divided Arc V (+) ..Pre Flow ON (+) ..Pre Flow ON (-) .. -
Page 233: Cnc Cable Color Code
100i / 200i / 300i / 400i CNC Cable Color Code TABLE 1: CABLE ITEM#4 COLOR CODE TABLE COLOR SIGNAL DESCRIPTION LOCATION WHITE/BLUE START CNC (+) WHITE/VIOLET START CNC (-) WHITE/BROWN/VIOLET DIV ARC (-) WHITE/BROWN DIV ARC(+) YELLOW PREFLOW ON (+) -
Page 234: Appendix 3: Cooling Diagram
100i / 200i / 300i / 400i APPENDIX 3: Cooling Diagram APPENDIX Manual PN: 0560956430 A-10... - Page 235 100i / 200i / 300i / 400i This Page Intentionally Blank Manual PN: 0560956430 APPENDIX A-11...
-
Page 236: Appendix 4: System Schematic 100A, 380-415V Pg 1
100i / 200i / 300i / 400i APPENDIX 4: System Schematic 100A, 380-415V PG 1 INVERTER MODULE (IM) #1 J105B IM #1 Section B (upper) AC INPUT (23) J100 -- 30 CKT RIBBON J104B MAIN PCB LEDS CAP BIAS PCB LEDS... - Page 237 100i / 200i / 300i / 400i TORCH (49) (49) PILOT BOARD TEST POINTS TORCH TP1 GND LED'S (49) To TB4-7 TP2 PILOT GATE D2 PILOT ENABLE TP3 +5V D11 +5V PILOT ELECTRODE To TB4-6 PILOT PCB J58A (52) EARTH GROUND R3 &...
-
Page 238: Appendix 4: System Schematic 100A, 380-415V
100i / 200i / 300i / 400i APPENDIX 5: System Schematic 100A, 380-415V PG 2 J12 = Mini-Fit Jr AMBIENT COOLANT 400 VAC -- Single 18 AWG in pins 1 & 4 480 VAC -- Single 18 AWG in pins 1 & 8... - Page 239 100i / 200i / 300i / 400i J70 - HE TO PILOT PCB (70) 230 VAC to HE 400 (70) (Sht 1, B8) Fan Control 230 VAC _ SW (D2) 230 VAC Ret 230 VAC _ SW _ RET (D2)
-
Page 240: Appendix 6: System Schematic 200A, 380-415V
100i / 200i / 300i / 400i APPENDIX 6: System Schematic 200A, 380-415V PG 1 INVERTER MODULE (IM) #2 half module (middle position) J105A AC INPUT (23) IM #2 Section A (lower) J100 -- 30 CKT RIBBON J104A (24) J103A... - Page 241 100i / 200i / 300i / 400i TORCH (49) PILOT BOARD LED'S TEST POINTS (49) TORCH TP1 GND To TB4-7 TP2 PILOT GATE D2 PILOT ENABLE TP3 +5V D11 +5V PILOT ELECTRODE To TB4-6 PILOT PCB J58A (52) R3 & R4...
-
Page 242: Appendix 7: System Schematic 200A, 380-415V
100i / 200i / 300i / 400i APPENDIX 7: System Schematic 200A, 380-415V PG 2 AMBIENT COOLANT J12 = Mini-Fit Jr 400 VAC -- Single 18 AWG in pins 1 & 4 (90) 480 VAC -- Single 18 AWG in pins 1 & 8... - Page 243 100i / 200i / 300i / 400i J70 - HE TO PILOT PCB Sht 1, B8) (70) 230 VAC to HE 400 (70) Fan Control 230 VAC _ SW (D2) 230 VAC Ret 230 VAC _ SW _ RET (D2)
-
Page 244: Appendix 8: System Schematic 300A, 380-415V
100i / 200i / 300i / 400i APPENDIX 8: System Schematic 300A, 380-415V PG 1 INVERTER MODULE (IM) #3 (top) IM #3 Section B (upper) AC INPUT J105B J104B J103B 019X502700 J105A AC INPUT IM #3 Section A (lower) J104A... - Page 245 100i / 200i / 300i / 400i TO CCM CPU PCB J36 (Sht 2, C3) J100 -- 30 CKT RIBBON TORCH (49F) (49) ELECTRODE (-) (51F) PILOT BOARD LED'S TEST POINTS TORCH WORK (+) TP1 GND (49) To TB4-7 TP2 PILOT GATE...
-
Page 246: Appendix 9: System Schematic 300A, 380-415V
100i / 200i / 300i / 400i APPENDIX 9: System Schematic 300A, 380-415V PG 2 J12 = Mini-Fit Jr AMBIENT COOLANT 400 VAC -- Single 18 AWG in pins 1 & 4 (90) 480 VAC -- Single 18 AWG in pins 1 & 8... - Page 247 100i / 200i / 300i / 400i TO PILOT PCB J70 - HE (70) 230 VAC to HE 400 (70) Fan Control 230 VAC _ SW (D2) 230 VAC Ret 230 VAC _ SW _ RET (D2) (96) ARC_SUPPRESSOR Pump Motor Control...
-
Page 248: Appendix 10: System Schematic 400A, 380-415V
100i / 200i / 300i / 400i APPENDIX 10: System Schematic 400A, 380-415V PG 1 INVERTER MODULE (IM) #3 (top) IM #3 Section B (upper) AC INPUT J105B J104B J103B 019X502700 J105A AC INPUT IM #3 Section A (lower) J104A... - Page 249 100i / 200i / 300i / 400i TO CCM CPU PCB J36 (Sht 2, C3) J100 -- 30 CKT RIBBON TORCH (49F) (49) ELECTRODE (-) (51F) PILOT BOARD LED'S TEST POINTS TORCH TP1 GND WORK (+) (49) To TB4-7 TP2 PILOT GATE...
-
Page 250: Appendix 11: System Schematic 400A, 380-415V
100i / 200i / 300i / 400i APPENDIX 11: System Schematic 400A, 380-415V PG 2 AMBIENT COOLANT J12 = Mini-Fit Jr 400 VAC -- Single 18 AWG in pins 1 & 4 (90) 480 VAC -- Single 18 AWG in pins 1 & 8... - Page 251 100i / 200i / 300i / 400i TO PILOT PCB J70 - HE (70) 230 VAC to HE 400 (70) Fan Control 230 VAC _ SW (D2) 230 VAC Ret 230 VAC _ SW _ RET (D2) (96) ARC_SUPPRESSOR Pump Motor Control...
- Page 252 100i / 200i / 300i / 400i This Page Intentionally Blank APPENDIX Manual PN: 0560956430 A-28...
- Page 253 100i / 200i / 300i / 400i Manual PN: 0560956430 APPENDIX A-29...
- Page 254 Customer // Technical Support (843) 664-4405 (800) ESAB-123 (372-2123) ESAB Welding and Cutting Products PO BOX 100545 Ebenezer Road Florence, SC 29501-0545 http://www.esab.com ESAB Cutting Systems – Canada 6010 Tomken Road Mississauga, Ontario Canada L5T 1X9 Phone: (905) 670-0220 Fax: (905) 670-4879...
Need help?
Do you have a question about the 100i and is the answer not in the manual?
Questions and answers