Table of Contents
Advertisement
Quick Links
Advertisement
Table of Contents

Related Manuals for Agilent Technologies Cary 8454


Summary of Contents for Agilent Technologies Cary 8454
- Page 1 Agilent Cary 8454 UV-Visible Spectroscopy System Installation Guide ...
- Page 2 Microsoft is a U.S. registered trade- sure of Software is subject to Agilent Tech- mark of Microsoft Corporation. nologies’ standard commercial license terms, and non-DOD Departments and Agencies of the U.S. Government will Agilent Cary 8454 UV-Visible Spectroscopy System Installation Guide...
- Page 3 Use this chapter as an overview of the different actions you must perform to install your UV-Visible spectroscopy system. If you are an experienced user of analytical equipment from Agilent Technologies, this may be all you need. If you need more information, this chapter guides you to other relevant areas in this or another handbooks.
- Page 4 LAN Communication, Installation, Connection and Configuration This chapter describes how to set up LAN communication between your Agilent ChemStation and your UV-Visible spectrophotometer. Safety Information This chapter contains relevant safety information. Agilent Cary 8454 UV-Visible Spectroscopy System Installation Guide...
-
Page 5: Table Of Contents
Unpacking Your Spectrophotometer Installing your UV-Visible Spectrophotometer Instrument overview Setting up the Spectrophotometer Installing Your Computer Setting up the computer Starting the Spectrophotometer Turning On Instrument Warm-up Starting the Agilent ChemStation Software Operational Checkout Agilent Cary 8454 UV-Visible Spectroscopy System Installation Guide... - Page 6 Long Path Cell Holder Installing the Long Path Cell Holder Installing a Sample Cell Optical Filter Wheel Installing the Filter Wheel Assembly Removing the Filter Wheel Assembly Installing the UV-Visible Software Agilent ChemStation Computer Details Agilent Cary 8454 UV-Visible Spectroscopy System Installation Guide...
- Page 7 What is the Agilent ChemStation Configuration Editor? Configuring an Agilent Cary 8454 UV-Visible Spectrophotometer Troubleshooting LAN Communication Power failure reported on the Agilent ChemStation Frequent buffer overrun in Agilent Cary 8454 logbook Agilent Cary 8454 UV-Visible Spectroscopy System Installation Guide...
- Page 8 Contents Safety Information Protective Earth Disconnecting Device UV Light Source Equipment Class Installation category Pollution level Index Agilent Cary 8454 UV-Visible Spectroscopy System Installation Guide...
-
Page 9: Fast Installation
Agilent Cary 8454 UV-Visible Spectroscopy System Installation Guide Fast Installation Installing Preconfigured Agilent Cary 8454 UV-Visible Systems 10 Installing Non-Preconfigured Agilent Cary 8454 UV-Visible Spectrophotometer Systems 11 Installing Software Only 13 Installation is straightforward, but if you have difficulties, or need more information, references to detailed installation information are given. -
Page 10: Installing Preconfigured Agilent Cary 8454 Uv-Visible Systems
Switch on the spectrophotometer (make sure the sample area is clear), wait 2 minutes for the lamps to ignite. When you are ready to operate your spectrophotometer, switch on the computer and printer. For more information, see “Starting the Spectrophotometer” on page 27. Agilent Cary 8454 UV-Visible Spectroscopy System Installation Guide... -
Page 11: Installing Non-Preconfigured Agilent Cary 8454 Uv-Visible Spectrophotometer Systems
Fast Installation Installing Non-Preconfigured Agilent Cary 8454 UV-Visible Spectrophotometer Systems Installing Non-Preconfigured Agilent Cary 8454 UV-Visible Spectrophotometer Systems You must install and configure the software. Ensure you have space and an appropriate power supply. For more information, see “Site Requirements for Your Spectrophotometer”... - Page 12 Fast Installation Installing Non-Preconfigured Agilent Cary 8454 UV-Visible Spectrophotometer Systems Switch on the spectrophotometer (make sure sample area is clear) and wait two minutes for the lamps to ignite. When you are ready to operate your spectrophotometer, switch on the computer and printer.
-
Page 13: Installing Software Only
Ensure that your software and spectrophotometer operate properly, by taking a blank measurement or by performing the automatic self-test in the diagnostic section of your software. For more information, see “Operational Checkout” on page 30. Agilent Cary 8454 UV-Visible Spectroscopy System Installation Guide... - Page 14 Fast Installation Installing Software Only Agilent Cary 8454 UV-Visible Spectroscopy System Installation Guide...
-
Page 15: Installation And Start Up
Agilent Cary 8454 UV-Visible Spectroscopy System Installation Guide Installation and Start Up Site Requirements for Your Spectrophotometer 17 Unpacking Your Spectrophotometer 20 Installing your UV-Visible Spectrophotometer 21 Installing Your Computer 26 Starting the Spectrophotometer 27 Starting the Agilent ChemStation Software 30... - Page 16 There is an optional automated self-test which can be used for a quick check of the spectrophotometer. This self-test can only be executed after the instrument has warmed up for at least one hour. Agilent Cary 8454 UV-Visible Spectroscopy System Installation Guide...
-
Page 17: Site Requirements For Your Spectrophotometer
Connecting your instrument to a line voltage that is higher than specified causes a WARNING shock hazard, and damage may occur to your instrument. Agilent Cary 8454 UV-Visible Spectroscopy System Installation Guide... -
Page 18: Power Cords
8 cm (3.1 inches) in the rear for electrical connections. The computer, including the keyboard, is approximately 50 cm (19.7 inches) wide and 60 cm (23.6 inches) deep. Additional space is required for accessories like pumps and autosamplers. Agilent Cary 8454 UV-Visible Spectroscopy System Installation Guide... -
Page 19: Environment
Avoid air circulation of varying temperatures (like from refrigerators or air conditioners) and exposure to direct sun light to ensure the instrument operates within performance specifications. Agilent Cary 8454 UV-Visible Spectroscopy System Installation Guide... -
Page 20: Unpacking Your Spectrophotometer
If the shipping container or cushioning material is damaged, notify the carrier as well as Agilent Technologies. Save the shipping material for the carrier’s inspection. Check the contents of the shipping container against the list below. If any items are missing or obviously damaged, call Agilent Technologies. -
Page 21: Installing Your Uv-Visible Spectrophotometer
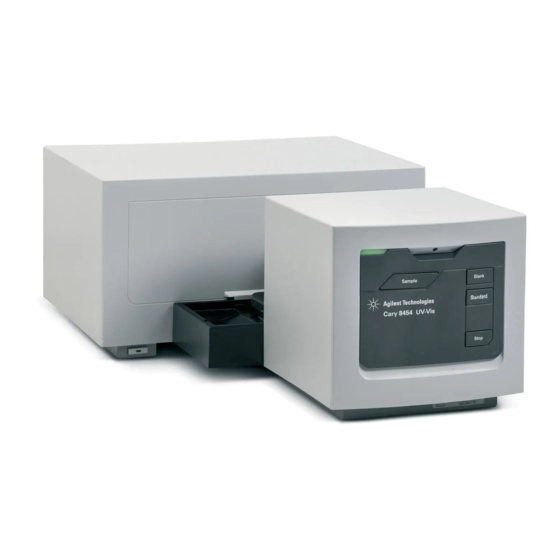
The spectrophotometer is shipped with the standard single-cell cell holder already in place. Standard and accessory cell holders can be removed and replaced in seconds with few or no tools. Agilent Cary 8454 UV-Visible Spectroscopy System Installation Guide... - Page 22 Indicator Figure 1 Front view of the Agilent Cary 8454 UV-Visible spectrophotometer The line power switch is located at the lower left part of the instrument. Pressing it in turns on the instrument. It stays pressed in and shows a green light when the instrument is turned on.
- Page 23 GPIB connector and switches Remote connector MIO slot for LAN interface Multicell transport connector GP-IO connector Line connector RS 232 connector Figure 2 Rear view of the Agilent Cary 8454 UV-Visible spectrophotometer Agilent Cary 8454 UV-Visible Spectroscopy System Installation Guide...
-
Page 24: Setting Up The Spectrophotometer
• The remote connector may be used in combination with other analytical instruments from Agilent Technologies if you want to use features such as common shut down, prepare etc. • The RS 232 connector may be used to control the spectrophotometer from a computer through RS 232 connection, using appropriate software (for future use). - Page 25 3 Put the other end of the waste tubing into the waste container. 4 Make sure that the waste tubing has a constant down slope from the spectrophotometer to the waste container. Agilent Cary 8454 UV-Visible Spectroscopy System Installation Guide...
-
Page 26: Installing Your Computer
For correct setup, see Chapter 6, “LAN Communication, Installation, Connection and Configuration”. Connect the power sockets to the computer, display and printer, and switch them on. Follow the instructions for setting up the computer in your computer documentation. Agilent Cary 8454 UV-Visible Spectroscopy System Installation Guide... -
Page 27: Starting The Spectrophotometer
The pushbutton will stay pressed in and light green if power is present. Indicator Line power switch with green light Figure 4 Turning on the Agilent Cary 8454 UV-Visible spectrophotometer Agilent Cary 8454 UV-Visible Spectroscopy System Installation Guide... - Page 28 • red, blinking: error condition of the spectrophotometer processor system. Because in this case there is no communication with the computer there will be no error message. The online help system and the Operator’s Manual gives more information about troubleshooting. Agilent Cary 8454 UV-Visible Spectroscopy System Installation Guide...
-
Page 29: Instrument Warm-Up
In general, the life of your spectrophotometer will be increased by leaving it on all the time but switching off the lamps when the instrument is not in use. lamp intensity of the deuterium lamp and lifetime of lamps decrease with use. Agilent Cary 8454 UV-Visible Spectroscopy System Installation Guide... -
Page 30: Starting The Agilent Chemstation Software
The successful completion of these tests complete the operational qualification of your spectrophotometer. For reference purposes, you may want to print a copy of the results. Agilent Cary 8454 UV-Visible Spectroscopy System Installation Guide... -
Page 31: Good Measurement Practices
Agilent Cary 8454 UV-Visible Spectroscopy System Installation Guide Good Measurement Practices General Considerations 32 Inserting a Cell 44 This chapter describes: • making measurements • selecting material, optical specification and type of cell • handling and maintaining cells • checklist for good results •... -
Page 32: General Considerations
Chemically, the only difference between the blank and the sample should be the presence of the analyte(s). For measurements with liquid samples, the blank should be a sample cell filled with the solvent you plan to use. Agilent Cary 8454 UV-Visible Spectroscopy System Installation Guide... -
Page 33: Sample Cell Or Cuvette Material
350 to 1100 nm, you can use good quality glass cells. Disposable plastic sample cells, for measurements in the range 400 - 1100 nm, are also available. The quality of these cells varies and they are generally not recommended. Agilent Cary 8454 UV-Visible Spectroscopy System Installation Guide... -
Page 34: Optical Specifications Of Cells
Light Beam in Parallel Cell Walls Light Beam out Light Beam in Non-parallel Cell Walls Light Beam out Figure 5 Shift of the instrument light beam due to non parallel cell walls Agilent Cary 8454 UV-Visible Spectroscopy System Installation Guide... -
Page 35: Apertured Cells Or Cuvettes
Quartz cells with black apertures* Figure 6 Recommended cells * Quartz cells with black apertures smaller than 2 mm, when used with a multicell CAUTION transport, can lead to measurements of poor reproducibility. Agilent Cary 8454 UV-Visible Spectroscopy System Installation Guide... -
Page 36: Flow Cells
Also, the cell can be rinsed thoroughly with the solution to be measured. The design of the flow cell should minimize entrapment of bubbles and flow channeling to provide the most reliable results. Agilent Cary 8454 UV-Visible Spectroscopy System Installation Guide... -
Page 37: Handling And Maintaining Cells Or Cuvettes
Figure 8 Floating particles in a cell Agilent Cary 8454 UV-Visible Spectroscopy System Installation Guide... - Page 38 Solutions should be removed and replaced by pipette or use flow cells. If glass pasteur pipettes are used, make sure that the optical windows of the cell are CAUTION not touched or scratched by the pipette. Agilent Cary 8454 UV-Visible Spectroscopy System Installation Guide...
-
Page 39: Solvents
Cyclohexane Ethyl ether 245–260 nm Chloroform Ethyl acetate Methyl formate 265–275 nm Carbon tetrachloride Dimethyl sulfoxide Dimethyl formamide Acetic acid 280–290 nm Benzene Toluene m-Xylene Above 300 nm Pyridine Acetone Carbon disulfide Agilent Cary 8454 UV-Visible Spectroscopy System Installation Guide... -
Page 40: Sample Preparation
Samples which contain colloidal dispersions, dust or other particulate matter should be filtered, centrifuged or allowed to settle. If not, the overall attenuation-of-transmittance spectrum due to light scattering and/or reflection will hide the spectral information from the analyte. Agilent Cary 8454 UV-Visible Spectroscopy System Installation Guide... -
Page 41: Photosensitive Samples
A similar effect can occur in cases of incomplete mixing. This is especially true where the specific gravities or miscibilities of the solvent and analyte are quite different. Again, stirring is a way to prevent this kind of problem. Agilent Cary 8454 UV-Visible Spectroscopy System Installation Guide... -
Page 42: Checklist For Best Results
Ideally, the cell is not removed between the measurement, which means the cell is filled/rinsed using a pipette or a flow cell is used Time between blank and sample measurement should be short Agilent Cary 8454 UV-Visible Spectroscopy System Installation Guide... - Page 43 Example of a blank on water with bubbles causing a poor baseline If your blank or spectra show artifacts similar to the one in Figure 11, see “Solvents” on NOTE page 39 to optimize the measurement procedure. Agilent Cary 8454 UV-Visible Spectroscopy System Installation Guide...
-
Page 44: Inserting A Cell
2 mm aperture may require use of the optional adjustable cell holder. The adjustable cell holder helps you ensure the cells are properly centered in the light path. Agilent Cary 8454 UV-Visible Spectroscopy System Installation Guide... -
Page 45: Installing Accessories
Agilent Cary 8454 UV-Visible Spectroscopy System Installation Guide Installing Accessories Thermostattable Cell Holder 46 Cell Stirring Module 48 Long Path Cell Holder 52 Optical Filter Wheel 55 Many simple, mechanical/optical accessories are available to expand the capabilities of your UV-Visible spectrophotometer. This section briefly describes these accessories and outlines how to install them. -
Page 46: Thermostattable Cell Holder
Up to 1 cm open-topped cells and flow cells can be used in a thermostattable cell holder. Tubing connector Tubing restraint tab Figure 12 Thermostattable cell holder Agilent Cary 8454 UV-Visible Spectroscopy System Installation Guide... -
Page 47: Installing A Thermostattable Cell Holder
When the thermostattable cell holder is not in use, it is best to disconnect the tubing and drain the manifold. Agilent Cary 8454 UV-Visible Spectroscopy System Installation Guide... -
Page 48: Cell Stirring Module
When you put a magnetic stirring bar (9301-1161) into the filled sample cell, the stirring bar rotates in tandem with the impeller magnet, thus stirring the sample. Figure 13 Cell stirring module Agilent Cary 8454 UV-Visible Spectroscopy System Installation Guide... -
Page 49: Installing The Cell Stirring Module
4 Tighten the four screws (flathead, M36 mm) that hold the cell stirring module in place. 5 Attach the thermostattable cell holder to its base. 6 Mount the thermostattable cell holder back in the sample compartment. Agilent Cary 8454 UV-Visible Spectroscopy System Installation Guide... -
Page 50: Tubing Connections And Operation
• The stirring module can be used alone, without the thermostattable functions of the cell holder. • The same water supply can be used to regulate sample cell temperature and to power the cell stirring module. Agilent Cary 8454 UV-Visible Spectroscopy System Installation Guide... - Page 51 C (in), D (out) Without cell thermostatting A (in), B to D, C (out) In series with cell thermostatting A and C (in), B and D (out) In parallel with cell thermostatting Agilent Cary 8454 UV-Visible Spectroscopy System Installation Guide...
-
Page 52: Long Path Cell Holder
“Optical Filter Wheel” on page 55 for details. However, instead of a screwdriver, a 2.5-mm hex wrench is required to install the optical filter wheel on the long path cell holder. Agilent Cary 8454 UV-Visible Spectroscopy System Installation Guide... -
Page 53: Installing The Long Path Cell Holder
1 Position the cell stops according to the path length of the sample cell you will be using. This example shows a 1-cm sample cell: Cell stops Cell clamps Position cell here Clamp screws Figure 17 Positioning the cell stops for a 1-cm sample cell Agilent Cary 8454 UV-Visible Spectroscopy System Installation Guide... - Page 54 5 Allow the clamps to close against the sample cell, see Figure 18. Tighten the four screws that hold the sample cell in place. Figure 18 Installed 10-cm cylindrical cell in the long path cell holder Agilent Cary 8454 UV-Visible Spectroscopy System Installation Guide...
-
Page 55: Optical Filter Wheel
The filter wheel rotates to four different positions. Position zero is empty and permits 100% transmittance at all light wavelengths. Positions one, two and three have filters which absorb varying amounts of the UV spectrum. Figure 20 shows the transmission characteristics of each filter. Agilent Cary 8454 UV-Visible Spectroscopy System Installation Guide... - Page 56 The optical filters of the filter wheel must be kept clean. Dirty filters interfere with light transmission and lower the spectrophotometer performance. These filters may be cleaned with isopropanol and photographic lens tissues. Agilent Cary 8454 UV-Visible Spectroscopy System Installation Guide...
-
Page 57: Installing The Filter Wheel Assembly
The base of the filter wheel assembly should be against the base of the cell holder. 6 Tighten the screws that hold the clamp. Agilent Cary 8454 UV-Visible Spectroscopy System Installation Guide... -
Page 58: Removing The Filter Wheel Assembly
2 Separate the filter wheel assembly from the cell holder. 3 The filter wheel clamp may be left in place or removed. In either case, retighten the two screws. 4 Store the filter wheel in a clean plastic bag. Agilent Cary 8454 UV-Visible Spectroscopy System Installation Guide... -
Page 59: Installing The Uv-Visible Software
Agilent Cary 8454 UV-Visible Spectroscopy System Installation Guide Installing the UV-Visible Software Agilent ChemStation Computer Details 60 Installing the Agilent ChemStation Using the DVD 63 This chapter describes the minimum hardware and software requirements and describes the installation process for the UV-Visible software. -
Page 60: Agilent Chemstation Computer Details
The recommended graphics resolutions for video graphics adapter are: 1024 x 768 with large fonts or 1280 x 1024 with large fonts Processor 3 GHz Screen resolution Super VGA (1280 × 1024) Agilent Cary 8454 UV-Visible Spectroscopy System Installation Guide... - Page 61 To avoid wrong values displayed or printed, the International settings must include the correct number format. Set the Number Format Decimal Separator to "." (decimal point) in Control Panel > Region and Settings. Agilent Cary 8454 UV-Visible Spectroscopy System Installation Guide...
- Page 62 If no default printer is configured, you may encounter the following problems: • the 'Copy To Clipboard' menu may have an error • in the 'Custom Report View' there may be problems with new templates • the 'Print Preview' will not work Agilent Cary 8454 UV-Visible Spectroscopy System Installation Guide...
-
Page 63: Installing The Agilent Chemstation Using The Dvd
Installing the Agilent ChemStation Using the DVD Installing the Agilent ChemStation Using the DVD Overview This section explains how to use the Agilent Technologies UV-Visible ChemStation Software Products DVD to: • install the Agilent ChemStation for the first time • upgrade/repair an existing Agilent ChemStation software •... -
Page 64: Installation Procedure
Agilent ChemStation software. Before installing the software: • Set up the computer hardware. • To connect your Spectrophotometer via LAN to the Computer see Chapter 6, “LAN Communication, Installation, Connection and Configuration” Agilent Cary 8454 UV-Visible Spectroscopy System Installation Guide... - Page 65 2 Click the Search or Cortana icon in the Windows 10 taskbar or Windows 7 Start menu. Type “Run”. Select Run. 3 At the command line, type diskdrive:\Setup.exe (for example, D:\ Setup.exe), then click OK. Agilent Cary 8454 UV-Visible Spectroscopy System Installation Guide...
- Page 66 6 Select the additional modules you want to install and click Next. Note that the Security-Pack Add-On and the ECM Add-On are mutually exclusive. One or the other can be installed, but not both. Agilent Cary 8454 UV-Visible Spectroscopy System Installation Guide...
- Page 67 Save the configuration and exit the configuration editor. Setup will then continue. Editing the instrument configuration in the Configuration Editor must be performed by a NOTE user logged onto the client PC as the administrator account, ChemStationSystem. Agilent Cary 8454 UV-Visible Spectroscopy System Installation Guide...
- Page 68 2 Give (NFTS-Permission) Full Control for ChemStationSystem on the following directories and files (see below for instructions): • C:\Chem32 • C:\Chem32\core • C:\Chem32\uvexe • C:\Chem32\1 • C:\Chem32\2 • C:\Chem32\3 • C:\Chem32\4 • C:\Chem32\TMP • C:\Chem32\NonInst • C:\Windows\ChemStation.ini Agilent Cary 8454 UV-Visible Spectroscopy System Installation Guide...
- Page 69 6 Log out of Microsoft Windows. 7 Log into the ChemStationSystem account. Set up any printers that are to be used with the UV-Visible ChemStation while on this account. Log out when finished. Agilent Cary 8454 UV-Visible Spectroscopy System Installation Guide...
- Page 70 Installing the Agilent ChemStation Using the DVD Designating Folder Permissions when Creating a Domain ChemStation User 1 Right click on the file/folder and then select Properties. Figure 24 Accessing the folder properties Agilent Cary 8454 UV-Visible Spectroscopy System Installation Guide...
- Page 71 Opening the Edit Security dialog 3 Click Add. 4 Make sure the location is the PC, and type ChemStationSystem in the object name field, click OK and click OK again. Figure 26 Entering the object name Agilent Cary 8454 UV-Visible Spectroscopy System Installation Guide...
-
Page 72: Configuring Your System
Identify by Host Name or Identify by IP Address and enter the selected information - Host Name: or IP Address: - in the entry field. Press OK to add the module to the list of Selected Modules. Agilent Cary 8454 UV-Visible Spectroscopy System Installation Guide... - Page 73 Help in the UV-Visible ChemStation software. Autosamplers If you have an Agilent XY autosampler, your Agilent ChemStation software requires a special driver and a cable. See the readme.txt for further information. Agilent Cary 8454 UV-Visible Spectroscopy System Installation Guide...
- Page 74 Installing the UV-Visible Software Installing the Agilent ChemStation Using the DVD Agilent Cary 8454 UV-Visible Spectroscopy System Installation Guide...
-
Page 75: Lan Communication, Installation, Connection And Configuration
Agilent Cary 8454 UV-Visible Spectroscopy System Installation Guide LAN Communication, Installation, Connection and Configuration Installing and Configuring TCP/IP on the PC 76 Installing the LAN Interface in your UV-Visible Spectrophotometer 79 Connecting the Spectrophotometer to the PC 80 Using the Agilent BootP Service 82... -
Page 76: Installing And Configuring Tcp/Ip On The Pc
2 In the Tasks list click on Manage network connections. In the LAN or High-Speed Internet list right click on your LAN adapter icon and select Properties. Figure 27 Local Area Connection Properties Agilent Cary 8454 UV-Visible Spectroscopy System Installation Guide... - Page 77 ‘Subnet Mask’ if available. Ask your responsible IT consultant for this mask if not available and request a fixed IP address for your instrument, if you want to use the existing LAN for the instrument connection. For further details please see“Connecting the Spectrophotometer to the PC”. Agilent Cary 8454 UV-Visible Spectroscopy System Installation Guide...
- Page 78 Gateway, DNS and WINS IP addresses do not need to be configured if you do not connect NOTE to any other part of a network. 7 Turn off the Microsoft Windows Firewall and reboot the computer. Agilent Cary 8454 UV-Visible Spectroscopy System Installation Guide...
-
Page 79: Installing The Lan Interface In Your Uv-Visible Spectrophotometer
192.168.254.11 for the spectrophotometer. (note: to use these defaults, DIP switches 5 and 6 on the LAN card must be "ON"). 4 Plug the LAN interface card into the slot and screw down the two mounting screws. Agilent Cary 8454 UV-Visible Spectroscopy System Installation Guide... -
Page 80: Connecting The Spectrophotometer To The Pc
10BaseT cable (part number G1530-61485) provided with the LAN interface cards to connect the switch to the spectrophotometer. Do not use the black 10 ft. long crossover twisted pair cable (part number 5183-4649) in an NOTE installation with multiple instruments. Agilent Cary 8454 UV-Visible Spectroscopy System Installation Guide... -
Page 81: Setting The Ip Address Of The Spectrophotometer
Refer to the next section “Using the Agilent BootP Service” on page 82. If the system is on an isolated LAN and the default IP address 192.168.254.11 for the NOTE spectrophotometer is used, BootP is not necessary. Agilent Cary 8454 UV-Visible Spectroscopy System Installation Guide... -
Page 82: Using The Agilent Bootp Service
“Configuring the G1369C LAN Card Using BootP” on page 89. If you do not have a BootP Service, we suggest to use the Agilent BootP Service program supplied on the Agilent UV-Visible ChemStation DVD. Agilent Cary 8454 UV-Visible Spectroscopy System Installation Guide... -
Page 83: Addresses
Before installing and configuring BootP Service, you must know the IP addresses of the computer and instruments, the subnet mask, and the gateway. Table 6 Example Device Address 10.10.10.1 Spectrophotometer 10.10.10.101 Subnet mask 255.255.255.0 Gateway 10.10.10.1 Agilent Cary 8454 UV-Visible Spectroscopy System Installation Guide... -
Page 84: Using The Agilent Bootp Service Program
IP address pair to the configuration. The Launch Manager is displaying a list of the currently configured MAC address and allows modification of the current configured settings. Figure 30 Configured interfaces view of the Agilent BootP Service Agilent Cary 8454 UV-Visible Spectroscopy System Installation Guide... -
Page 85: Configure The Agilent Bootp Service Program
Write down the MAC address before installing the card into the module. To remove the card from the system, turn the module off before removing the LAN card. Read the MAC address from the label. Reinstall the card and turn on the module again. Agilent Cary 8454 UV-Visible Spectroscopy System Installation Guide... - Page 86 • Gateway Address 6 Click OK. 7 Exit Launch Manager and reboot both the PC and the spectrophotometer. 8 Ping the IP address from a command prompt on the PC to verify. Agilent Cary 8454 UV-Visible Spectroscopy System Installation Guide...
-
Page 87: Configure The Agilent Bootp Service
4 Close the Services and Administrative Tools windows. 5 To edit the BootP Settings go to Start >All Programs or All Apps > Agilent BootP Service > Edit BootP Settings. The BootP Settings screen appears. Agilent Cary 8454 UV-Visible Spectroscopy System Installation Guide... - Page 88 For Windows 10: Right-click on Start and then select Control Panel > System and Security > Administrative Tools > Services. 12 Right click Agilent BootP Service. 13 Select Start. 14 Close the Services and Administrative Tools screen. 15 This completes the configuration. Agilent Cary 8454 UV-Visible Spectroscopy System Installation Guide...
-
Page 89: Configuring The G1369C Lan Card Using Bootp
- ask your system administrator> #8454 lab UV-Vis:\ ht=1:\ ha=0030D30D3277:\ ip=<ip address - ask your system administrator> sm=255.255.255.0:\ gw=<gateway address - ask your system administrator> vm=auto:\ hn:\ bs=auto:\ T145=64:T146=01:T147=01 Agilent Cary 8454 UV-Visible Spectroscopy System Installation Guide... - Page 90 The entries are described below • #8454 lab Comment line starting the configuration set for an Agilent Cary 8454 UV-Visible spectrophotometer. A comment is preceded with #; all characters after the # on the same line are ignored by the BootP Service.
-
Page 91: Using The Agilent Chemstation Configuration Editor To Configure The Spectrophotometer
LAN interface Card must be installed, the spectrophotometer must be connected to the PC, and a bootp server must be installed and configured before the spectrophotometer(s) can be used. See “Installing and Configuring TCP/IP on the PC” on page 76 for details. Agilent Cary 8454 UV-Visible Spectroscopy System Installation Guide... -
Page 92: Configuring An Agilent Cary 8454 Uv-Visible Spectrophotometer
Using the Agilent ChemStation Configuration Editor to Configure the Spectrophotometer Configuring an Agilent Cary 8454 UV-Visible Spectrophotometer This section describes how to configure an Agilent Cary 8454 UV-Visible spectrophotometer for LAN communication. 1 Start the Agilent ChemStation Configuration Editor by double-clicking on the Configuration Editor icon in the UV-Visible ChemStation start-up group, by choosing Start >... - Page 93 Agilent ChemStation to check if the software communicates with the spectrophotometer. In case the red error message line Power Fail shows up, refer either to the following troubleshooting section or repeat the installation procedure. Agilent Cary 8454 UV-Visible Spectroscopy System Installation Guide...
-
Page 94: Troubleshooting Lan Communication
If you identify the UV-Visible system by host name, ensure that the used host name and IP address are correctly setup in the DNS server. Try using the IP address in the Configuration Editor. Agilent Cary 8454 UV-Visible Spectroscopy System Installation Guide... -
Page 95: Frequent Buffer Overrun In Agilent Cary 8454 Logbook
Ask you IT consultant to make sure that no IP address conflict may occur. Frequent buffer overrun in Agilent Cary 8454 logbook Please contact your system administrator, to check if the network is not capable of the network traffic induced due to the data acquisition of the instrument(s). - Page 96 LAN Communication, Installation, Connection and Configuration Troubleshooting LAN Communication Agilent Cary 8454 UV-Visible Spectroscopy System Installation Guide...
-
Page 97: Safety Information
Shock Hazard WARNING Connecting the Agilent Cary 8454 UV-Vis to a power source that is not equipped with a protective earth contact creates s shock hazard for the operator and can damage the instrument. Always operate your instrument from a power outlet which has a ground connection. -
Page 98: Uv Light Source
Direct viewing of ultraviolet rays without protection causes permanent blindness or vision impairment. Equipment Class The Agilent Cary 8454 UV-Vis instrument is suitable for indoor use only and is classified suitable under Equipment class I category. Installation category The installation category is II, based on IEC61010-1. The installation category implies the regulation for impulse withstand voltage. -
Page 99: Index
44 common solvents, 39 frequency (line power), 17 computer video socket, 26 front panel indicator, 22 configuration editor, 72, 92 JetDirect card front panel pushbuttons, 23 spectrophotometer IP addresses, 81 Agilent Cary 8454 UV-Visible Spectroscopy System Installation Guide... - Page 100 RS 232 connector, 24 n-hexane, 39 TalkToLab, 79 temperature control, 40 thermal equilibrium, 47 safety light switches, 24 thermostattable cell holder, 41 offline mode, 30 sample, 32, 42 thermostatted water, 47 online mode, 30 Agilent Cary 8454 UV-Visible Spectroscopy System Installation Guide...
- Page 101 39 UV grade water, 40 video socket on computer, 26 viscous solutions, 41 volatile solvents, 40 voltage (line power), 17 waste container, 25 water, 39 wedge shaped cells, 34 Agilent Cary 8454 UV-Visible Spectroscopy System Installation Guide...
- Page 102 Index Agilent Cary 8454 UV-Visible Spectroscopy System Installation Guide...
- Page 104 In This Book This handbook describes the steps needed to install your new Agilent Cary 8454 UV-Visible spectroscopy system. Most of the handbook deals with installing a complete system, that is, spectrophotometer, computer and printer. However, in the second half of this handbook...