RADVision scopia xt5000 series Administrator's Manual
Hide thumbs
Also See for scopia xt5000 series:
- Installation manual (184 pages) ,
- Administrator's manual (154 pages) ,
- User manual (113 pages)
Table of Contents
Advertisement
Quick Links
Advertisement
Table of Contents

Related Manuals for RADVision scopia xt5000 series


Summary of Contents for RADVision scopia xt5000 series
- Page 1 Scopia XT5000 Series Administrator Guide Version 3.2 For Solution 7.7, 8.0.x, 8.2...
- Page 2 Administrator Guide for Scopia XT5000 Series Version guide is made either by RADVISION Ltd or its agents. 3.2, May 30, 2013 RADVISION Ltd reserves the right to revise this http://www.radvision.com...
-
Page 3: Table Of Contents
Pairing an XT Remote Control Unit with a XT Codec Unit ............42 Maintaining the Scopia XT Series Locally from the Endpoint ............44 Managing Scopia XT Series from Scopia Management ................46 Administrator Guide for Scopia XT5000 Series Version 3.2 Table of Contents | 3... - Page 4 Registering the XT Series to a SIP Server ..................99 Configuring Call Settings ........................102 Configuring Scopia XT Series Endpoints to use an LDAP Directory ..........106 Administrator Guide for Scopia XT5000 Series Version 3.2 Table of Contents | 4...
- Page 5 Echo Cancelling on HDMI Monitors ......................149 Resolving Monitor Display Problems ......................151 Resolving Lip Sync Problem .........................155 Resolving Camera Issues ..........................157 Resolving IP Address Problems ........................159 Administrator Guide for Scopia XT5000 Series Version 3.2 Table of Contents | 5...
- Page 6 Retrieving Network Traffic Logs ....................... 164 Retrieving System Logs ........................165 USB Software Upgrade Failure ........................166 Restoring Default User Settings ........................167 Glossary of Terms for Scopia Solution Administrator Guide for Scopia XT5000 Series Version 3.2 Table of Contents | 6...
-
Page 7: Chapter 1: About The Scopia Xt Series
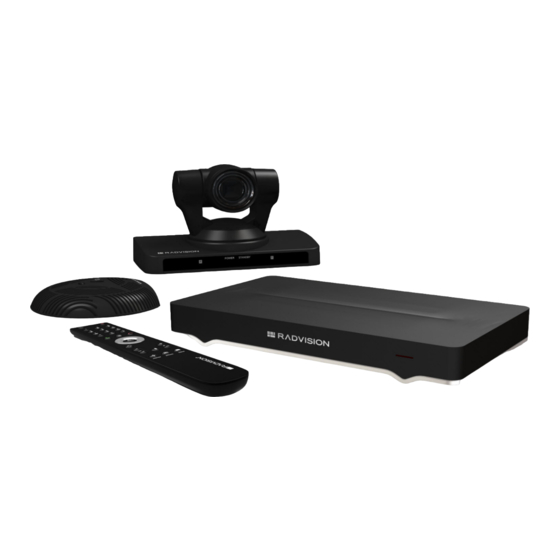
Using encryption is subject to local regulation. In some countries it is restricted or limited for usage. For more information, consult your local reseller. Figure 1: Scopia XT Series products on page 8 shows the different Scopia XT Series endpoints available. Administrator Guide for Scopia XT5000 Series Version 3.2 About the Scopia XT Series | 7... -
Page 8: About The Models In The Scopia Xt Series Product Line
7. To easily compare the different Scopia XT Series endpoints, see Comparing Between Scopia XT Series Models on page 12. The Scopia XT Series includes the following models: • Scopia XT5000 Series Administrator Guide for Scopia XT5000 Series Version 3.2 About the Scopia XT Series | 8... - Page 9 Includes a high-quality camera (10x optical zoom, and an additional 4x digital zoom) – The 3-way Microphone Pod provides superb signal-to-noise ratios. You can also add a second microphone for unparalleled large room coverage. Administrator Guide for Scopia XT5000 Series Version 3.2 About the Scopia XT Series | 9...
- Page 10 PC or Mac. Using a unique control application, you can place calls, join videoconferences, and navigate the system menus with your computer's keyboard and mouse. The XT Remote Control Unit can be used as well. Administrator Guide for Scopia XT5000 Series Version 3.2 About the Scopia XT Series | 10...
- Page 11 Depending on your deployment and the model, you can locally host videoconferences with other endpoints (including H.323, SIP, Scopia XT Desktop clients, Scopia Mobile, and ISDN endpoints, if your Administrator Guide for Scopia XT5000 Series Version 3.2 About the Scopia XT Series | 11...
-
Page 12: Comparing Between Scopia Xt Series Models
Hosting with Can host Can host video- Can host Can host internal MCU video- conferences video- video- conferences (optional) conferences conferences (optional) (optional) (optional) Administrator Guide for Scopia XT5000 Series Version 3.2 About the Scopia XT Series | 12... -
Page 13: Technical Specifications
14. • For network information of the system, such as network interface cards, see Table 4: Network and security capabilities on page 16. Administrator Guide for Scopia XT5000 Series Version 3.2 About the Scopia XT Series | 13... - Page 14 H.323, SIP, ISDN (in conjunction with Scopia Gateway) Video codecs H.263, H.263+, H.263++,H.264, H.264 SVC, H.264 High Profile, H.264 High Profile SVC Dual video H.239 (H.323); BFCP (SIP) Administrator Guide for Scopia XT5000 Series Version 3.2 About the Scopia XT Series | 14...
- Page 15 (optional) multipoint call (optional) Up to 6Mbps for 1080p Up to 6Mbps for a point- in a point-to-point call to-point call (720p for XT5000 720) Administrator Guide for Scopia XT5000 Series Version 3.2 About the Scopia XT Series | 15...
- Page 16 2nd GLAN enabled by 2nd GLAN is optional 2nd GLAN enabled by default default (optional for XT5000 720) Firewall Traversal Auto NAT discovery HTTP and STUN H.460.18, H.460.19 Administrator Guide for Scopia XT5000 Series Version 3.2 About the Scopia XT Series | 16...
-
Page 17: Topology For Scopia Xt Series As Endpoints
About the Scopia XT Series on page 7). Scopia XT Executive integrates advanced videoconferencing into a high resolution 24-inch multimedia LED monitor. Administrator Guide for Scopia XT5000 Series Version 3.2 Planning the Topology of the Scopia XT Series Deployment | 17... -
Page 18: About The Scopia Xt Series Embedded Mcu
SD video streams and HD endpoints receive HD video streams. • Both wide-screen (16:9) and standard formats (4:3) are incorporated into the continuous presence (CP) video layout. Administrator Guide for Scopia XT5000 Series Version 3.2 Planning the Topology of the Scopia XT Series Deployment | 18... -
Page 19: Planning The Topology For The Scopia Xt Series With Scopia Xt Desktop
• The included Scopia XT Desktop provides built-in NAT and firewall traversal functionality, enabling secure remote connections from Scopia Mobile and Scopia Desktop Clients. You can enable this functionality via the XT Series license. Administrator Guide for Scopia XT5000 Series Version 3.2 Planning the Topology of the Scopia XT Series Deployment | 19... -
Page 20: Planning Nat And Firewall Traversal With Scopia Xt Series
NAT router or firewall and connect with other endpoints seamlessly. This section describes the available methods to incorporate NAT and firewall traversal with XT Series: • Using a Radvision HTTP server or a STUN public server for NAT and firewall traversal When the XT Series hosts a videoconference with endpoints outside the enterprise... - Page 21 H.460 is an extension of the H.323 protocol used for NAT and firewall traversal, employing ITU-T standards. The traversal server can be a Scopia PathFinder or a third-party ITU-T compliant server. Administrator Guide for Scopia XT5000 Series Version 3.2 Planning the Topology of the Scopia XT Series Deployment | 21...
- Page 22 The second GLAN is an optional feature for selected models (for details, see Installing and Enabling Licenses which Extend System Functionality on page 48). Administrator Guide for Scopia XT5000 Series Version 3.2 Planning the Topology of the Scopia XT Series Deployment | 22...
-
Page 23: Supporting Isdn Connectivity
The Scopia XT Series supports ISDN connectivity, allowing calls from endpoints to be routed to the relevant videoconference via the Scopia Gateway for ISDN. Administrator Guide for Scopia XT5000 Series Version 3.2 Planning the Topology of the Scopia XT Series Deployment | 23... - Page 24 ISDN endpoints via the Scopia Gateway for ISDN. Gateway IP Address Enter the IP address of the Scopia Gateway for ISDN used by your organization. 4. Select Save. Administrator Guide for Scopia XT5000 Series Version 3.2 Planning the Topology of the Scopia XT Series Deployment | 24...
-
Page 25: Implementing External Api Control
You can control the XT Codec Unit using the Scopia XT Series API (requires integration with AMX, Creston, or Extron control devices). Contact Radvision customer support to receive the Reference Guide for Scopia XT Series API, which includes the list of commands over the Ethernet interface. - Page 26 Desktop Server Scopia XT Desktop Server Scopia Control by sending commands and application or and receiving responses Scopia XT Desktop Server Administrator Guide for Scopia XT5000 Series Version 3.2 Planning the Topology of the Scopia XT Series Deployment | 26...
- Page 27 Cannot send system Optional (TCP) Scopia XT system status alerts status alerts; Scopia Desktop Server Control and Scopia XT Desktop Server cannot function. Administrator Guide for Scopia XT5000 Series Version 3.2 Planning the Topology of the Scopia XT Series Deployment | 27...
-
Page 28: Configuring The Tcp Or Udp Port Range On The Scopia Xt Series
• From the web interface, select Administrator Settings > Networks > Preferences > Dynamic Ports. • From the endpoint interface, select Configure > Advanced > Networks > Preferences > Dynamic Ports. Administrator Guide for Scopia XT5000 Series Version 3.2 Planning the Topology of the Scopia XT Series Deployment | 28... - Page 29 MCU license and its type. 4. From the web interface only, select Save. Administrator Guide for Scopia XT5000 Series Version 3.2 Planning the Topology of the Scopia XT Series Deployment | 29...
-
Page 30: Chapter 3: Getting Started With Managing The Xt Series
Before you begin Activate the Scopia XT Series and perform the required basic settings, as described in the Quick Setup Guide for Scopia XT Series. Administrator Guide for Scopia XT5000 Series Version 3.2 Getting Started with Managing the XT Series | 30... - Page 31 9. If your deployment includes Scopia Management, you can set up remote monitoring and management of the XT Codec Unit over TCP/IP using SNMP messages and AT commands, depending on the system used in your deployment: Administrator Guide for Scopia XT5000 Series Version 3.2 Getting Started with Managing the XT Series | 31...
-
Page 32: Managing Your Xt Series From The Web Interface
32 • Enabling Remote Management on the Scopia XT Series on page 33 • Configuring Remote Upgrade Settings on page 35 Administrator Guide for Scopia XT5000 Series Version 3.2 Getting Started with Managing the XT Series | 32... - Page 33 Modifying the Username and Password for the Scopia XT Series Web Interface on page 125. 3. (Optional) Select the web interface language from the Language list. 4. Select Login. Administrator Guide for Scopia XT5000 Series Version 3.2 Getting Started with Managing the XT Series | 33...
-
Page 34: Enabling Remote Management On The Scopia Xt Series
Figure 16: Configuring remote management on Scopia XT Series 2. Set the fields as described in Table 9: Configuring remote management on Scopia XT Series on page 35. Administrator Guide for Scopia XT5000 Series Version 3.2 Getting Started with Managing the XT Series | 34... -
Page 35: Configuring Remote Upgrade Settings
3. From the web interface only, select Save. 4. To perform remote upgrades, enable remote downloads as described in Configuring Remote Upgrade SettingsConfiguring Remote Upgrade Settings on page 0 Administrator Guide for Scopia XT5000 Series Version 3.2 Getting Started with Managing the XT Series | 35... - Page 36 Figure 17: Enabling remote access to the Scopia XT Series 2. Set the fields as described in Table 10: Enabling remote upgrade on page 37. Administrator Guide for Scopia XT5000 Series Version 3.2 Getting Started with Managing the XT Series | 36...
-
Page 37: Managing Your Xt Series Locally From The Endpoint
• Using the XT Remote Control Unit on page 39 • Maintaining the Scopia XT Series Locally from the Endpoint on page 44 Administrator Guide for Scopia XT5000 Series Version 3.2 Getting Started with Managing the XT Series | 37... -
Page 38: Accessing The Scopia Xt Series Main Menu
When you access the system for the first time only, the Quick Setup wizard is displayed (for details, see Accessing the Quick Setup Procedure on page 54). Administrator Guide for Scopia XT5000 Series Version 3.2 Getting Started with Managing the XT Series | 38... -
Page 39: Using The Xt Remote Control Unit
Figure 19: The new XT Remote Control Unit on page 40 describes the functions of the XT Remote Control Unit. Administrator Guide for Scopia XT5000 Series Version 3.2 Getting Started with Managing the XT Series | 39... - Page 40 Administrator Guide for Scopia XT5000 Series Version 3.2 Getting Started with Managing the XT Series | 40...
- Page 41 Control Unit repeatedly before entering a digit. To enter text in the XT Series interface, scroll to the input field and enter the required characters. The current input method is displayed in the field you are in: Administrator Guide for Scopia XT5000 Series Version 3.2 Getting Started with Managing the XT Series | 41...
-
Page 42: Pairing An Xt Remote Control Unit With A Xt Codec Unit
1. Access the general settings, as follows: • From the web interface, select Basic Settings > General. • From the endpoint's Main menu, select Configure > General. Administrator Guide for Scopia XT5000 Series Version 3.2 Getting Started with Managing the XT Series | 42... - Page 43 The code of the XT Remote Control Unit is changed and the Remote Control icon with the new Remote Control code appear at the top-right corner of the screen: Administrator Guide for Scopia XT5000 Series Version 3.2 Getting Started with Managing the XT Series | 43...
-
Page 44: Maintaining The Scopia Xt Series Locally From The Endpoint
Ensure that you have the password to access the Advanced settings. The default password is 1234. Procedure 1. From the endpoint's main menu, select Configure > General. Administrator Guide for Scopia XT5000 Series Version 3.2 Getting Started with Managing the XT Series | 44... - Page 45 4. Select Configure > Advanced. 5. Enter the password required to access the Advanced settings. The default password is 1234. The Advanced screen appears. Administrator Guide for Scopia XT5000 Series Version 3.2 Getting Started with Managing the XT Series | 45...
-
Page 46: Managing Scopia Xt Series From Scopia Management
For more information on adding, removing and upgrading the system remotely in Scopia Management, or for details on synchronizing contacts for the endpoints in your organization, see the Administrator Guide for Scopia Management. Administrator Guide for Scopia XT5000 Series Version 3.2 Getting Started with Managing the XT Series | 46... -
Page 47: Registering And Enabling Your Scopia Xt Series License
3. If you are enabling licenses with additional features, such as an embedded MCU or higher bandwidth, see Installing and Enabling Licenses which Extend System Functionality on page Administrator Guide for Scopia XT5000 Series Version 3.2 Initial Configuration | 47... -
Page 48: Installing And Enabling Licenses Which Extend System Functionality
You can find the user code (and the serial number) by selecting Configure > About from the Main menu. 3. From your computer's Internet browser, navigate to http://licensing.radvision.com/. 4. Complete the online registration form and enter the serial number (or the user code) AND the product key. - Page 49 55111-00917 Scopia Control This option is already included for the XT5000 and is available for the XT5000 720. Enables Scopia XT Series control using the Scopia Control Application (iPad). Administrator Guide for Scopia XT5000 Series Version 3.2 Initial Configuration | 49...
-
Page 50: Remotely Enabling The License From The Web Interface
You can also retrieve the user code and serial number by selecting Configure > About from the Main menu. 3. From your computer's Internet browser, navigate to http://licensing.radvision.com/. 4. Complete the online registration form and enter the serial number or the user code and the option key. - Page 51 2. From the Home page, select Enable License, or, navigate to Administrator Settings > Utilities > Licenses. Figure 23: Accessing licenses from the Scopia XT Series home page The Licenses page appears. Administrator Guide for Scopia XT5000 Series Version 3.2 Initial Configuration | 51...
-
Page 52: Enabling The License From The Scopia Xt Series Endpoint
Enabling the License from the Scopia XT Series Endpoint About this task This procedure describes how to enable the software license of an XT Codec Unit via the endpoint's interface. Administrator Guide for Scopia XT5000 Series Version 3.2 Initial Configuration | 52... - Page 53 3. Enter the license key you received when registering the product. You can also enter license keys for optional features. 4. Select Activate Licenses. The license is automatically enabled. Administrator Guide for Scopia XT5000 Series Version 3.2 Initial Configuration | 53...
-
Page 54: Performing Basic Configuration
Access the quick setup procedure to define basic settings for your Scopia XT Series, such as the system's language, the name of this endpoint, and network settings. Follow the tasks of the quick setup procedure in the order they are presented. Administrator Guide for Scopia XT5000 Series Version 3.2 Initial Configuration | 54... - Page 55 • Configuring Gatekeeper Settings on page 61: If your Scopia XT Series works in conjunction with a gatekeeper, configure gatekeeper-related settings. Administrator Guide for Scopia XT5000 Series Version 3.2 Initial Configuration | 55...
-
Page 56: Setting The System Name And Language
If you perform this task from the endpoint interface, use the alphanumeric keys of the XT Remote Control Unit (for more information, see Using the XT Remote Control Unit on page 39). Administrator Guide for Scopia XT5000 Series Version 3.2 Initial Configuration | 56... -
Page 57: Adjusting The Image Position
Setting the System Name and Language on page 56. Access the quick setup wizard from the endpoint, as described in Accessing the Quick Setup Procedure on page 54. Administrator Guide for Scopia XT5000 Series Version 3.2 Initial Configuration | 57... - Page 58 If the image is centered correctly, skip this procedure and select Next. Figure 28: Examining the image position 2. Press 1 to align the top left corner. Figure 29: Adjusting the image position Administrator Guide for Scopia XT5000 Series Version 3.2 Initial Configuration | 58...
-
Page 59: Configuring Network Settings
IP address as the Common Name (CN). For more information, see Securing Connections to the XT Series Using TLS on page 111. Administrator Guide for Scopia XT5000 Series Version 3.2 Initial Configuration | 59... - Page 60 If the system gets its IP address automatically, this field displays the assigned DNS server IP address. 3. To configure your gatekeeper's settings, select Next and continue with Configuring Gatekeeper Settings on page 61. Administrator Guide for Scopia XT5000 Series Version 3.2 Initial Configuration | 60...
-
Page 61: Configuring Gatekeeper Settings
Accessing the Quick Setup Procedure on page 54. Procedure 1. Set the Use Gatekeeper list to Yes. Figure 31: Gatekeeper settings 2. Set the Mode list to Manual. Administrator Guide for Scopia XT5000 Series Version 3.2 Initial Configuration | 61... -
Page 62: Setting Basic System Information
1. Access the name and language settings: • From the XT Series web interface, select Basic Settings > Preferences > General. • From the endpoint's main menu, select Configure > General. Administrator Guide for Scopia XT5000 Series Version 3.2 Initial Configuration | 62... -
Page 63: Modifying The System's Name On The Titlebar
For more information, see Registering the XT Series to a SIP Server on page 99 and Registering the Scopia XT Series with a Gatekeeper on page 96. Administrator Guide for Scopia XT5000 Series Version 3.2 Initial Configuration | 63... - Page 64 You need to enter the PIN required to access the Advanced settings. The default PIN is 1234. Figure 34: Selecting the system name 2. Enter the following settings: Administrator Guide for Scopia XT5000 Series Version 3.2 Initial Configuration | 64...
- Page 65 System Name includes characters that are not supported by the hostname standard. Invalid characters are replaced by the - character. 3. From the web interface only, select Save. Administrator Guide for Scopia XT5000 Series Version 3.2 Initial Configuration | 65...
-
Page 66: Setting Date And Time
Enter the minutes. Internet time Select Yes to synchronize the system clock with the network clock, thus allowing you to align devices connected to the Internet using NTP. Administrator Guide for Scopia XT5000 Series Version 3.2 Initial Configuration | 66... -
Page 67: Setting The Time Zone
You need to enter the PIN required to access the Advanced settings. The default PIN is 1234. 2. Configure settings as described in Table 15: Configuring time zone related settings on page Administrator Guide for Scopia XT5000 Series Version 3.2 Initial Configuration | 67... -
Page 68: Remotely Setting Regional Information
Procedure 1. Access the XT Series web interface, as described in Accessing XT Series Web Interface page 32. 2. Select Administrator Settings > System > Location. Administrator Guide for Scopia XT5000 Series Version 3.2 Initial Configuration | 68... - Page 69 (east or west); thus in Japan the system administrator must select manually the correct value related to the geographic location. 4. Select Save. Administrator Guide for Scopia XT5000 Series Version 3.2 Initial Configuration | 69...
-
Page 70: Configuring The Screen Saver To Start Automatically
2. Select Yes from the Screen Saver list. 3. Set the time after which the screen saver automatically starts on the display in the Minutes field. 4. From the web interface only, select Save. Administrator Guide for Scopia XT5000 Series Version 3.2 Initial Configuration | 70... -
Page 71: Configuring Video Connections
• From the endpoint's main menu, select Configure > Advanced > I/O connections > Cameras > General. • From the XT Series web interface, select Administrator settings > I/O connections > Cameras > General. Administrator Guide for Scopia XT5000 Series Version 3.2 Initial Configuration | 71... - Page 72 Figure 38: Configuring general camera settings from the web interface 2. Configure the camera connection as described in Table 17: Configuring general camera settings on page 73: Administrator Guide for Scopia XT5000 Series Version 3.2 Initial Configuration | 72...
- Page 73 Bring back to place If enabled, the system stores camera positions when the camera is switched off, and restores this position the next time the camera is switched on. Administrator Guide for Scopia XT5000 Series Version 3.2 Initial Configuration | 73...
- Page 74 • From the XT Series web interface, select Administrator settings > I/O connections > Cameras. Figure 40: Configuring the camera settings from the web interface 5. Define the following camera settings: Administrator Guide for Scopia XT5000 Series Version 3.2 Initial Configuration | 74...
- Page 75 7. Configure the settings described in Table 18: Configuring advanced camera settings on page 75 for each camera you are using. From the web interface only, select Save. Administrator Guide for Scopia XT5000 Series Version 3.2 Initial Configuration | 75...
-
Page 76: Setting Up The Monitor Display Modes
• From the XT Series web interface, select Administrator settings > I/O connections > Monitor. 2. Configure the general monitor settings as follows: a. Select General to access the general settings. Administrator Guide for Scopia XT5000 Series Version 3.2 Initial Configuration | 76... - Page 77 Figure 41: Configuring the general monitor settings from the web interface b. Configure the general settings: Administrator Guide for Scopia XT5000 Series Version 3.2 Initial Configuration | 77...
- Page 78 720p, even if the received resolution is higher. c. From the web interface only, select Save. 3. Configure the monitor to show more than one video stream: a. Select PIP-PaP under Monitor. Administrator Guide for Scopia XT5000 Series Version 3.2 Initial Configuration | 78...
- Page 79 The PaP (Picture and Picture) view shows two images of the same size, presented side by side. For more information about video layouts, see Scopia XT Series User Guide. Administrator Guide for Scopia XT5000 Series Version 3.2 Initial Configuration | 79...
-
Page 80: Configuring Audio Connections
Part of the initial configuration is ensuring the microphones and speakers are set up correctly, and that there is no noticeable echo across connections in a call or conference. The settings are detailed in these sections: Administrator Guide for Scopia XT5000 Series Version 3.2 Initial Configuration | 80... -
Page 81: Configuring The Microphone
• From the XT Series web interface, select Administrator settings > I/O connections > Audio - Input. 2. Select the microphone you are using, such as POD1 or USB. If you are using a second Microphone Pod, select POD2. Administrator Guide for Scopia XT5000 Series Version 3.2 Initial Configuration | 81... -
Page 82: Configuring Analog Audio Connections
4. From the web interface only, select Save. Configuring Analog Audio Connections About this task You must perform this procedure if you are using the analog audio connections: Administrator Guide for Scopia XT5000 Series Version 3.2 Initial Configuration | 82... - Page 83 • Analog always - The audio coming from analog connection is always sent to remote participants, regardless of which video is selected. Administrator Guide for Scopia XT5000 Series Version 3.2 Initial Configuration | 83...
-
Page 84: Configuring The Echo Canceller
Configuring the Echo Canceller About this task If your Scopia XT Series works with an external microphone system that does not contain echo cancellation, perform this procedure to cancel echo. Administrator Guide for Scopia XT5000 Series Version 3.2 Initial Configuration | 84... - Page 85 The AGC reduces the volume if the audio is strong and raises when it is weak. Noise reduction Enables/disables reduction of ambient noise in a conference room (e.g.: coughing, paper rustling, etc.). Administrator Guide for Scopia XT5000 Series Version 3.2 Initial Configuration | 85...
-
Page 86: Configuring Audio Outputs
Before you begin If configuring from the endpoint, you must first enable advanced configuration, as described in Maintaining the Scopia XT Series Locally from the Endpoint on page 44. Administrator Guide for Scopia XT5000 Series Version 3.2 Initial Configuration | 86... - Page 87 If enabled, sends the echo cancelled input from the microphones to one of the system’s audio output channels: HD1, digital audio or analog output. Administrator Guide for Scopia XT5000 Series Version 3.2 Initial Configuration | 87...
-
Page 88: Configuring Network Settings
91 • Enabling NAT and Firewall Traversal with Scopia XT Series on page 93 • Determining the Priority of Audio versus Video Quality on page 95 Administrator Guide for Scopia XT5000 Series Version 3.2 Initial Configuration | 88... -
Page 89: Configuring Ip Addresses
4. Access the IP address settings, as follows: • From the endpoint, select either GLAN 1 or GLAN 2. • From the web interface, select Addresses under GLAN 1 or GLAN 2. Administrator Guide for Scopia XT5000 Series Version 3.2 Initial Configuration | 89... - Page 90 111. IP Address If the system gets its IP address automatically, indicates the IP address assigned to the system. Otherwise, enter the system static IP address here. Administrator Guide for Scopia XT5000 Series Version 3.2 Initial Configuration | 90...
-
Page 91: Configuring Network Connectivity
• From the XT Series web interface, select Administrator Settings > Networks. • From the endpoint's main menu, select Configure > Advanced > Networks. 2. Select Parameters under GLAN. Administrator Guide for Scopia XT5000 Series Version 3.2 Initial Configuration | 91... - Page 92 XT Codec Unit selects the Ethernet speed and transmission mode according to the specified values. • Manual: You must configure speed and transmission mode and know the network and remote endpoints requirements. Administrator Guide for Scopia XT5000 Series Version 3.2 Initial Configuration | 92...
-
Page 93: Enabling Nat And Firewall Traversal With Scopia Xt Series
• From the XT Series web interface, select Administrator Settings > Networks > Preferences > NAT. • From the endpoint's main menu, select Configure > Advanced > Networks > Preferences > NAT. Administrator Guide for Scopia XT5000 Series Version 3.2 Initial Configuration | 93... - Page 94 Manual method of setting the system’s firewall/NAT public IP address. Enter the Public IP address for that setting. HTTP discovery - This method uses a Radvision HTTP server to discover the presence of a firewall/NAT and its public IP address (requires the endpoint to have internet access).
-
Page 95: Determining The Priority Of Audio Versus Video Quality
• From the XT Series web interface, select Administrator Settings > Networks > Preferences > QoS. • From the endpoint's main menu, select Configure > Advanced > Networks > Preferences > QoS. Administrator Guide for Scopia XT5000 Series Version 3.2 Initial Configuration | 95... - Page 96 Differentiated Service - For each stream (Audio, Video, Data, Signal) sent to the system, you may define a priority level to fit network capabilities. 3. From the web interface only, select Save. Administrator Guide for Scopia XT5000 Series Version 3.2 Initial Configuration | 96...
-
Page 97: Registering The Scopia Xt Series With A Gatekeeper
• From the endpoint's main menu, select Configure > Advanced > Protocols > H.323 > General. Figure 52: Configuring H.323 settings from the web interface 2. Set the fields as described in Table 29: Configuring H.323 settings on page 98. Administrator Guide for Scopia XT5000 Series Version 3.2 Initial Configuration | 97... - Page 98 4. Select Gatekeeper under H.323. Figure 53: Configuring the Gatekeeper settings from the web interface 5. Set the fields as described in Table 30: Configuring the gatekeeper on page 99. Administrator Guide for Scopia XT5000 Series Version 3.2 Initial Configuration | 98...
-
Page 99: Registering The Xt Series To A Sip Server
“joesmith” and the SIP server routes the call correctly. To do this, the SIP server must register all endpoints to maintain the mapping list of aliases and endpoints to successfully route calls. Administrator Guide for Scopia XT5000 Series Version 3.2 Initial Configuration | 99... - Page 100 • From the XT Series web interface, select Administrator Settings > Protocols > SIP. • From the endpoint's main menu, select Configure > Advanced > Protocols > SIP. Administrator Guide for Scopia XT5000 Series Version 3.2 Initial Configuration | 100...
- Page 101 Authentication Name If necessary, enter the name for authenticating the XT Series with the SIP Proxy server and SIP Registrar. It can be the same as the User parameter. Administrator Guide for Scopia XT5000 Series Version 3.2 Initial Configuration | 101...
-
Page 102: Configuring Call Settings
• Call settings, such as defining calls as audio-only, or specifying the call rate • IP settings, such as determining whether the XT Codec Unit checks the source of audio and video data packets Administrator Guide for Scopia XT5000 Series Version 3.2 Initial Configuration | 102... - Page 103 • From the web interface, select Administrator Settings > Calls > Preferences > General. • From the endpoint, select Configure > Advanced > Calls > Preferences > General. Administrator Guide for Scopia XT5000 Series Version 3.2 Initial Configuration | 103...
- Page 104 If set to Yes allows to change bandwidth used for content and bandwidth (IP) live video (DualVideo/Live bandwidth). DualVideo/Live bandwidth Sets more bandwidth on Live Video or Content. (IP) Administrator Guide for Scopia XT5000 Series Version 3.2 Initial Configuration | 104...
- Page 105 If set to Yes, the XT Codec Unit checks the source of the RTP packets (audio, video, and presentation) it receives to verify that it matches the remote endpoint's IP address. Administrator Guide for Scopia XT5000 Series Version 3.2 Initial Configuration | 105...
-
Page 106: Configuring Scopia Xt Series Endpoints To Use An Ldap Directory
(Figure 58: Viewing and editing contacts in Local LDAP server on page 106). The local LDAP server has a password which can be changed if needed. Administrator Guide for Scopia XT5000 Series Version 3.2 Initial Configuration | 106... - Page 107 At least one of these fields h323IdentitytransportDigits <E/164 dial number> must be defined for an h323IdentitytransportNumber <H.323 alias> H.323 endpoint. h323Identityh323-ID <H.323 alias> SIPIdentitySIPURI <URI address of SIP endpoint> SIP endpoints only. Administrator Guide for Scopia XT5000 Series Version 3.2 Initial Configuration | 107...
- Page 108 • From the endpoint's main menu, select Configure > Advanced > System > LDAP. • From the XT Series web interface, select Administrator Settings > System > LDAP. Figure 59: Configuring LDAP settings from the web interface 2. Select Add Server. Administrator Guide for Scopia XT5000 Series Version 3.2 Initial Configuration | 108...
- Page 109 Distinguished Name (DN). Some standard components of DN are: domain controller (dc), organizational unit (ou), common name (cn), country (c), state or province (st), locality (l), organization (o). Administrator Guide for Scopia XT5000 Series Version 3.2 Initial Configuration | 109...
- Page 110 The filter applied to the LDAP tree, so you view only the relevant contacts. This value is predefined when the LDAP server is an XT Series or Scopia Management. 4. From the web interface only, select Save. Administrator Guide for Scopia XT5000 Series Version 3.2 Initial Configuration | 110...
-
Page 111: Chapter 5: Securing Your Scopia Xt Series
Ensure you have the root certificate of the certificate authority your organization uses. This root certificate is used when uploading signed certificates into the XT Series. Perform Uploading XT Series Certificates on page 114. Administrator Guide for Scopia XT5000 Series Version 3.2 Securing your Scopia XT Series | 111... -
Page 112: Generating A Certificate Signing Request For Xt Series
1. Access the XT Series web interface, as described in Accessing XT Series Web Interface page 32. 2. Select Administrator Settings > Utilities > Certificates. 3. Enter your organization's details and your email. Administrator Guide for Scopia XT5000 Series Version 3.2 Securing your Scopia XT Series | 112... - Page 113 Enter the name of your specific department within the organization. Email Enter your email address. 4. Select Create. The CSR is created. 5. Select Download > Download CSR to save the CSR. Administrator Guide for Scopia XT5000 Series Version 3.2 Securing your Scopia XT Series | 113...
-
Page 114: Uploading Xt Series Certificates
Backing Up and Restoring XT Series Certificates on page 116. To delete the certificates, see Backing Up and Restoring XT Series Certificates on page 116. Administrator Guide for Scopia XT5000 Series Version 3.2 Securing your Scopia XT Series | 114... - Page 115 Select Choose File (next to Step 4) and browse to the signed certificate you received from the CA. b. Select Upload. The certificate is validated and its details appear (Figure 65: Signed certificate from the CA on page 116). Administrator Guide for Scopia XT5000 Series Version 3.2 Securing your Scopia XT Series | 115...
-
Page 116: Backing Up And Restoring Xt Series Certificates
1. Connect a USB key to the upper USB port of the XT Codec Unit (Figure 66: Connecting a USB Key to the XT Codec Unit on page 117). Administrator Guide for Scopia XT5000 Series Version 3.2 Securing your Scopia XT Series | 116... -
Page 117: Deleting Xt Series Certificates
To secure SIP connections using TLS certificates, your system must have a static IP address, since the system generates the certificate request using its IP address as the Common Name (CN). Administrator Guide for Scopia XT5000 Series Version 3.2 Securing your Scopia XT Series | 117... -
Page 118: Enabling The Tls Connection In Xt Series
XT Series. Before you begin Upload the required certificates to the XT Series, as described in Uploading XT Series Certificates page 114. Administrator Guide for Scopia XT5000 Series Version 3.2 Securing your Scopia XT Series | 118... - Page 119 2. Select Administrator Settings > Protocols > SIP. 3. Select Yes from the Use TLS list to accept incoming calls using TLS. Figure 69: Enabling TLS 4. Define the following settings: Administrator Guide for Scopia XT5000 Series Version 3.2 Securing your Scopia XT Series | 119...
-
Page 120: Enabling Encryption For Videoconferences
Important: Using encryption is subject to local regulation. In some countries it is restricted or limited for usage. For more information, consult your local reseller. Administrator Guide for Scopia XT5000 Series Version 3.2 Securing your Scopia XT Series | 120... - Page 121 2. Select Yes from the Enable encryption field. 3. Set the fields as described in Table 38: Configuring settings for securing calls on page 122. Administrator Guide for Scopia XT5000 Series Version 3.2 Securing your Scopia XT Series | 121...
- Page 122 Length of Prime DH Number This value is always fixed at 1024 bit, which is the standard H.323 value. 4. From the web interface only, select Save. Administrator Guide for Scopia XT5000 Series Version 3.2 Securing your Scopia XT Series | 122...
-
Page 123: Chapter 6: Maintaining The Scopia Xt Series
To modify the PIN, you must be connected via HTTPS (see Enabling Remote Management on the Scopia XT Series on page 33). Procedure 1. Access the PIN settings, as follows: Administrator Guide for Scopia XT5000 Series Version 3.2 Maintaining the Scopia XT Series | 123... -
Page 124: Setting The User Pin Code For The Scopia Xt Series Endpoint
SNMP management. To modify the web username and password for the Scopia XT Series, see Modifying the Username and Password for the Scopia XT Series Web Interface on page 125. Administrator Guide for Scopia XT5000 Series Version 3.2 Maintaining the Scopia XT Series | 124... -
Page 125: Modifying The Username And Password For The Scopia Xt Series Web Interface
• From the endpoint, select Done. • From the web interface, select Save. Use this new PIN the next time you are required access basic settings. Administrator Guide for Scopia XT5000 Series Version 3.2 Maintaining the Scopia XT Series | 125... - Page 126 • From the endpoint's main menu, select Configure > Advanced > Utilities > Remote Access > Web. Figure 73: Modifying the username and password for the web interface 2. Modify the User Name and Password fields. Administrator Guide for Scopia XT5000 Series Version 3.2 Maintaining the Scopia XT Series | 126...
-
Page 127: Preparing For A Video Call Or Videoconference
Select Control Camera from the Main menu (or from the In-Call menu, during a call). Important: To position the remote camera, press ok/menu and select Control Far. Administrator Guide for Scopia XT5000 Series Version 3.2 Maintaining the Scopia XT Series | 127... - Page 128 The number of the preset is now blue, indicating that it was successfully stored. Use the camera position ID in the future to quickly adjust your camera. Administrator Guide for Scopia XT5000 Series Version 3.2 Maintaining the Scopia XT Series | 128...
-
Page 129: Saving A Camera Position From The Web Interface
Procedure 1. Access the XT Series web interface, as described in Accessing XT Series Web Interface page 32. 2. Select More Actions > Camera Control. Administrator Guide for Scopia XT5000 Series Version 3.2 Maintaining the Scopia XT Series | 129... -
Page 130: Setting Your Recording Preferences
USB storage device. You can do this procedure from the endpoint itself or from the XT Series web interface. Administrator Guide for Scopia XT5000 Series Version 3.2 Maintaining the Scopia XT Series | 130... - Page 131 • From the XT Series web interface, select Basic Settings > Recording > General. • From the endpoint's main menu, select Configure > Recording. Figure 78: Setting your recording preferences 2. Define the following recording settings: Administrator Guide for Scopia XT5000 Series Version 3.2 Maintaining the Scopia XT Series | 131...
- Page 132 7.5 MB 225 MB 450 MB 3.75 MB 112.5 MB 225 MB 3 MB 85 MB 169 MB 3. From the web interface only, select Save. Administrator Guide for Scopia XT5000 Series Version 3.2 Maintaining the Scopia XT Series | 132...
-
Page 133: Setting A Time Limit For Videoconferences
Figure 79: Setting a Time Limit for Videoconferences 2. For XT Series with an embedded MCU, define the time limit for meetings with multiple participants in the Meeting Time Limit field. Administrator Guide for Scopia XT5000 Series Version 3.2 Maintaining the Scopia XT Series | 133... -
Page 134: Enabling At Commands For Managing The Xt Codec Unit
• From the XT Series web interface, select Administrator Settings > Utilities > Remote Access > AT Commands. • From the endpoint's main menu, select Configure > Advanced > Utilities > Remote Access > AT Commands. Administrator Guide for Scopia XT5000 Series Version 3.2 Maintaining the Scopia XT Series | 134... -
Page 135: Configuring The System For Snmp Management
This field is only relevant if you set the Enable all addresses field as No. Enter the Subnet mask associated with the IP address. 3. From the web interface only, select Save. Administrator Guide for Scopia XT5000 Series Version 3.2 Maintaining the Scopia XT Series | 135... - Page 136 • From the endpoint's main menu, select Configure > Advanced > Utilities > Remote Access > SNMP. Figure 81: Configuring SNMP settings 2. Set the fields as required. Administrator Guide for Scopia XT5000 Series Version 3.2 Maintaining the Scopia XT Series | 136...
-
Page 137: Enabling Backup And Restore From Scopia Management
This procedure configures the XT Series to allow Scopia Management to retrieve or apply configuration files remotely. You can do this procedure from the endpoint itself or from the XT Series web interface. Administrator Guide for Scopia XT5000 Series Version 3.2 Maintaining the Scopia XT Series | 137... -
Page 138: Updating Software For Scopia Xt Series
Any software version, even if it is restricted by a license, can run in a temporary mode for 24 hours. After that, you must enter a new license key or download the previous allowed version. The software version 3.0 does not need a license. Administrator Guide for Scopia XT5000 Series Version 3.2 Maintaining the Scopia XT Series | 138... -
Page 139: Configuring Remote Upgrade Settings
141: Download and run a new software package from the Radvision web or FTP site. Downloading the update package from the Radvision web or FTP site ensures you get the latest available version. For more information, see http://licensing.radvision.com/. - Page 140 This field is only relevant if you set the Enable all addresses field to No. Enter the Subnet mask associated with the IP address or group of IP addresses specified above. Administrator Guide for Scopia XT5000 Series Version 3.2 Maintaining the Scopia XT Series | 140...
-
Page 141: Upgrading The Software Using A Pc
2. Verify that the network allows communication between the Codec Unit and the computer, and that a firewall does not block TCP port 55099. 3. Download the .exe file (for example, XT5000_Vxxx.exe) from the Radvision site to the computer. Administrator Guide for Scopia XT5000 Series Version 3.2... -
Page 142: Upgrading The Scopia Xt Series Software Using A Usb Drive
About this task Your Scopia XT Series comes with a USB drive containing the latest firmware version available at the time the system was shipped. We recommend that you always access the Radvision site to check if a later version is available. - Page 143 Do not turn off the Scopia XT Series before the upgrade procedure is completed. 5. If the upgrade fails, see USB Software Upgrade Failure on page 166. Administrator Guide for Scopia XT5000 Series Version 3.2 Maintaining the Scopia XT Series | 143...
-
Page 144: Chapter 7: Troubleshooting The Scopia Xt Series
• Software version • User code (MAC address) • IP addresses • Serial number • System name and model • Licenses • Network, gatekeeper, and SIP settings Administrator Guide for Scopia XT5000 Series Version 3.2 Troubleshooting the Scopia XT Series | 144... - Page 145 2. To view additional system information such as IP addresses and the gatekeeper's registration status from the endpoint, press the Back key and select System Status. Administrator Guide for Scopia XT5000 Series Version 3.2 Troubleshooting the Scopia XT Series | 145...
-
Page 146: Resolving Problems Connecting Calls
Make sure the Do Not Disturb (DND) function is not enabled. DND is indicated by the icon in the top bar on the menu screens. Problem Cannot connect to a videoconference. Solution Check you dialed the correct conference number. Administrator Guide for Scopia XT5000 Series Version 3.2 Troubleshooting the Scopia XT Series | 146... -
Page 147: Resolving Problems With Audio
Make sure the monitor volume is not set to 0. Solution Make sure the system volume is not set to 0 by activating on the XT Remote Control Unit. Administrator Guide for Scopia XT5000 Series Version 3.2 Troubleshooting the Scopia XT Series | 147... - Page 148 If the tone level is not constant but increases and decreases (the tone is amplitude modulated), the HDMI monitor is incompatible with the XT Codec Unit or not set properly. Administrator Guide for Scopia XT5000 Series Version 3.2 Troubleshooting the Scopia XT Series | 148...
-
Page 149: Echo Cancelling On Hdmi Monitors
You can also generate the audio delay manually. Then you can train the echo canceller to use the manual estimation as described in this procedure. Administrator Guide for Scopia XT5000 Series Version 3.2 Troubleshooting the Scopia XT Series | 149... - Page 150 • From the endpoint's Main menu, select Configure > System Status > Diagnostics > Audio > Tests. • From the web interface, select Diagnostics > Audio > Tests. Administrator Guide for Scopia XT5000 Series Version 3.2 Troubleshooting the Scopia XT Series | 150...
-
Page 151: Resolving Monitor Display Problems
Verify the power cord of the XT Codec Unit is connected properly at both ends. Solution Verify the monitor’s power cord is connected properly at both ends. Solution Check that the monitor power switch is set to ON. Administrator Guide for Scopia XT5000 Series Version 3.2 Troubleshooting the Scopia XT Series | 151... - Page 152 Left monitor. Important: You can also adjust the image for the monitor displaying the system menu, in the quick setup Administrator Guide for Scopia XT5000 Series Version 3.2 Troubleshooting the Scopia XT Series | 152...
- Page 153 • From the endpoint's Main menu, select Configure > Advanced > I/O connections > Cameras > HD1. • From the Scopia XT Series web interface, select Administrator Settings > I/O connections > Cameras > HD1. Administrator Guide for Scopia XT5000 Series Version 3.2 Troubleshooting the Scopia XT Series | 153...
- Page 154 Access the video settings by doing one of the following: • From the Scopia XT Series web interface, select Administrator Settings > Calls > Preferences > Video. Administrator Guide for Scopia XT5000 Series Version 3.2 Troubleshooting the Scopia XT Series | 154...
- Page 155 VISCA IN. This prevents the XT Codec Unit from setting the camera to the necessary resolution. For details, see Installation Guide for Scopia XT Series. Administrator Guide for Scopia XT5000 Series Version 3.2 Troubleshooting the Scopia XT Series | 155...
-
Page 156: Resolving Lip Sync Problem
Error strategies If set to Yes, you may set the number of allowed line errors before video is frozen. Administrator Guide for Scopia XT5000 Series Version 3.2 Troubleshooting the Scopia XT Series | 156... -
Page 157: Resolving Camera Issues
More Actions > Web Video: Figure 98: Remotely monitoring your camera’s Problem I can see the camera’s output, but I cannot move the camera. Administrator Guide for Scopia XT5000 Series Version 3.2 Troubleshooting the Scopia XT Series | 157... - Page 158 > Cameras > HD1 from the Main menu. • From the XT Series web interface, select Administrator Settings > I/O connections > Cameras > HD1. Administrator Guide for Scopia XT5000 Series Version 3.2 Troubleshooting the Scopia XT Series | 158...
-
Page 159: Resolving Ip Address Problems
Make sure the GLAN cable is connected properly at both ends: to the network socket and to the GLAN1 port of the XT Codec Unit, as shown in Figure 101: GLAN1 port on page 160. Administrator Guide for Scopia XT5000 Series Version 3.2 Troubleshooting the Scopia XT Series | 159... - Page 160 From the endpoint's main menu, select Configure > Quick Setup. Press Next several times until the Configure TCP/IP screen appears. Figure 102: Configuring IP address Enter the IP address. Administrator Guide for Scopia XT5000 Series Version 3.2 Troubleshooting the Scopia XT Series | 160...
-
Page 161: Resolving Problems With Pc Presentations
Installation Guide for Scopia XT Series. Solution Make sure the resolution of the PC output is supported by the XT Codec Unit (see User Guide for Scopia XT Series). Administrator Guide for Scopia XT5000 Series Version 3.2 Troubleshooting the Scopia XT Series | 161... -
Page 162: Resolving Problems With Displaying Video
HD 1080 (full HD) or Dual Video SIP (BFCP). Solution The endpoint administrator must disable specific video codec if there is any compliance issue with older endpoints. Administrator Guide for Scopia XT5000 Series Version 3.2 Troubleshooting the Scopia XT Series | 162... - Page 163 2. Disable specific video codecs by selecting No from the lists. Important: The video codecs available depends on your XT Series model. 3. From the web interface only, select Save. Administrator Guide for Scopia XT5000 Series Version 3.2 Troubleshooting the Scopia XT Series | 163...
-
Page 164: How To Retrieve Scopia Xt Series Logs
1. Access the XT Series web interface, as described in Accessing XT Series Web Interface page 32. 2. Select Diagnostics > Utilities > Advanced Tools. Administrator Guide for Scopia XT5000 Series Version 3.2 Troubleshooting the Scopia XT Series | 164... -
Page 165: Retrieving System Logs
Figure 107: Downloading Netlog files Retrieving System Logs About this task This procedure explains how to retrieve log files of Scopia XT Series internal system activities and memory dump. Administrator Guide for Scopia XT5000 Series Version 3.2 Troubleshooting the Scopia XT Series | 165... -
Page 166: Usb Software Upgrade Failure
Connect the USB drive to a computer. Locate the upgrade.log file on the flash drive. Send the log file to your local customer service representative. Administrator Guide for Scopia XT5000 Series Version 3.2 Troubleshooting the Scopia XT Series | 166... -
Page 167: Restoring Default User Settings
4. Select Advanced. 5. Enter your four-digit PIN code, and press ok/menu. The default PIN code is 1234. 6. Select Utilities > Restore System > Factory Defaults. Administrator Guide for Scopia XT5000 Series Version 3.2 Troubleshooting the Scopia XT Series | 167... - Page 168 Figure 110: Restoring factory default settings 7. Press ok/menu, and select Yes. The default settings are restored. Administrator Guide for Scopia XT5000 Series Version 3.2 Troubleshooting the Scopia XT Series | 168...
-
Page 169: Glossary Of Terms For Scopia Solution
In H.323, an alias represents the unique name of an endpoint. Instead of dialling an IP address to reach an endpoint, you can dial an alias, and the gatekeeper resolves it to an IP address. Administrator Guide for Scopia XT5000 Series Version 3.2 Glossary of Terms for Scopia Solution | 169... -
Page 170: Continuous Presence
The range of video layouts depends on the type of media processing supported, typically located in the MCU. Continuous Presence on page 170. Administrator Guide for Scopia XT5000 Series Version 3.2 Glossary of Terms for Scopia Solution | 170... - Page 171 Endpoints include dedicated endpoints, like Scopia XT Executive, software endpoints Administrator Guide for Scopia XT5000 Series Version 3.2 Glossary of Terms for Scopia Solution | 171...
-
Page 172: Frame Rate
The higher the frame rate, the smoother the video. Full HD Full HD, or Full High Definition, also known as 1080p, describes a video resolution of 1920 x 1080 pixels. Administrator Guide for Scopia XT5000 Series Version 3.2 Glossary of Terms for Scopia Solution | 172... - Page 173 A gateway is a component in a video solution which routes information between two subnets or acts as a translator between different protocols. For example, a gateway can route data between the headquarters and a partner site, or between two protocols like the Scopia TIP Gateway, Radvision SIP Gateway, or the Scopia TIP Gateway.
- Page 174 SVC which is an adaptive technology working to improve quality even when only one side supports the standard. H.320 H.320 is a protocol for defining videoconferencing over ISDN networks. Administrator Guide for Scopia XT5000 Series Version 3.2 Glossary of Terms for Scopia Solution | 174...
- Page 175 HTTPS is the secured version of the standard web browser protocol HTTP. It secures communication between a web browser and a web server through authentication of the web site and encrypting Administrator Guide for Scopia XT5000 Series Version 3.2 Glossary of Terms for Scopia Solution | 175...
-
Page 176: Lecture Mode
A location is a physical space (building) or a network (subnet) where video devices can share a single set of addresses. A distributed deployment places these components in different locations, often connected via a VPN. Administrator Guide for Scopia XT5000 Series Version 3.2 Glossary of Terms for Scopia Solution | 176... - Page 177 Scopia Management can manage a separate set of users for each organization, separate local administrators, separate bandwidth policies etc. all within a single multi-tenant installation. Administrator Guide for Scopia XT5000 Series Version 3.2 Glossary of Terms for Scopia Solution | 177...
-
Page 178: Packet Loss
NetSense NetSense is a proprietary Radvision technology which optimizes the video quality according to the available bandwidth to minimize packet loss. As the available bandwidth of a connection varies depending on data traffic, NetSense's sophisticated algorithm dynamically scans the video stream, and then reduces or improves the video resolution to maximize quality with the available bandwidth. - Page 179 IP. It underpins most videoconferencing protocols today, including H.323, SIP and the streaming control protocol known as RTSP. The secured version of RTP is SRTP. Administrator Guide for Scopia XT5000 Series Version 3.2 Glossary of Terms for Scopia Solution | 179...
- Page 180 SIF defines a video resolution of 352 x 240 pixels (NTSC) or 352 x 288 (PAL). This is often used in security cameras and countries. Administrator Guide for Scopia XT5000 Series Version 3.2 Glossary of Terms for Scopia Solution | 180...
- Page 181 Secure Real-time Transport Protocol (SRTP) adds security to the standard RTP protocol, which is used to send video and audio data between devices in SIP calls using TLS. It offers security via encrypting, authenticating and ensuring message integrity. Administrator Guide for Scopia XT5000 Series Version 3.2 Glossary of Terms for Scopia Solution | 181...
- Page 182 (CP). Using video switching increases the port capacity of the MCU by four times. Administrator Guide for Scopia XT5000 Series Version 3.2 Glossary of Terms for Scopia Solution | 182...
- Page 183 SIP server domain name. For example, <endpoint name>@<SIP server domain name> or user@domain_name.com. URI Dialling Accessing a device via its on page 183. Administrator Guide for Scopia XT5000 Series Version 3.2 Glossary of Terms for Scopia Solution | 183...
-
Page 184: Video Switching
External participants can download Scopia Desktop or Scopia Mobile free to access a registered user's virtual room and participate in the videoconference. Administrator Guide for Scopia XT5000 Series Version 3.2 Glossary of Terms for Scopia Solution | 184... - Page 185 Often a zone is assigned a dial prefix, and usually corresponds to a physical location like an organization's department or branch. Administrator Guide for Scopia XT5000 Series Version 3.2 Glossary of Terms for Scopia Solution | 185...
- Page 186 About Radvision Radvision, an Avaya company, is a leading provider of videoconferencing and telepresence technologies over IP and wireless networks. We offer end-to-end visual communications that help businesses collaborate more efficiently. Together, Radvision and Avaya are propelling the unified communications evolution forward with unique technologies that harness the power of video, voice, and data over any network.
Need help?
Do you have a question about the scopia xt5000 series and is the answer not in the manual?
Questions and answers