RADVision SCOPIA XT1000 Piccolo Administrator's Manual
Scopia xt series
Hide thumbs
Also See for SCOPIA XT1000 Piccolo:
- Administrator's manual (79 pages) ,
- User manual (70 pages) ,
- Test results (35 pages)
Table of Contents
Advertisement
Advertisement
Table of Contents

Subscribe to Our Youtube Channel
Related Manuals for RADVision SCOPIA XT1000 Piccolo


Summary of Contents for RADVision SCOPIA XT1000 Piccolo
- Page 1 SCOPIA XT4000 Series Administrator Guide Version 3.0 For Solution 7.7...
- Page 2 If there is any software on removable media described in this publication, it is furnished under a license agreement included with the product as a separate document. If you are unable to locate a copy, please contact RADVISION Ltd and a copy will be provided to you.
-
Page 3: Table Of Contents
Enabling AT Commands for Managing the XT Codec Unit......... 20 Configuring the System for SNMP Management.............21 Enabling Backup and Restore of SCOPIA XT Series Configuration Files from SCOPIA iVIEW Management Suite..................23 RADVISION | Administrator Guide for SCOPIA XT4000 Series Version 3.0 Table of Contents | i... - Page 4 How to Retrieve SCOPIA XT Series Logs............. 34 Retrieving Network Traffic Logs..............35 Retrieving Memory Dump Logs..............36 Reporting a Software Upgrade Failure...............37 Viewing System Information................37 Contacting Support..................38 RADVISION | Administrator Guide for SCOPIA XT4000 Series Version 3.0 Table of Contents | ii...
-
Page 5: Planning The Topology Of The Scopia Xt Series Deployment
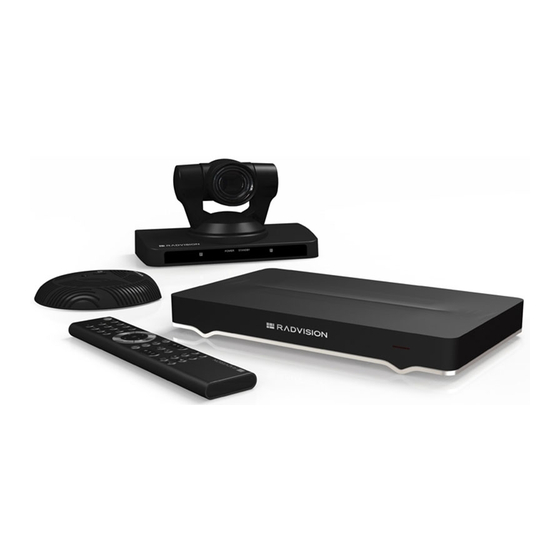
The SCOPIA XT1000 Piccolo supports high-resolution PC data sharing at 30fps, thus allowing presentations and video clips to be shared with no quality loss. The SCOPIA XT1000 Piccolo provides full band audio encoding to ensure high-clarity audio transmission with no loss of quality. The 3-way Microphone Pod uses state-of-the-art technology to focus on the speaker’s voice signal while filtering out the background noise. - Page 6 Videoconferencing. Table 1-1 on page 3 summarizes the differences between each of the models in the SCOPIA XT Series. RADVISION | Administrator Guide for SCOPIA XT4000 Series Version 3.0 Planning the Topology of the SCOPIA XT Series Deployment | 2...
-
Page 7: Using Scopia Xt Series As Endpoints
Scalable Video Coding (SVC). • SCOPIA VC240 integrates advanced video conferencing into a Samsung high resolution 24- inch multimedia LCD monitor. RADVISION | Administrator Guide for SCOPIA XT4000 Series Version 3.0 Planning the Topology of the SCOPIA XT Series Deployment | 3... -
Page 8: Planning Nat And Firewall Traversal With Scopia Xt Series
NAT and firewall traversal with XT Series: • Using a RADVISION HTTP server or a STUN public server for NAT and firewall traversal When the XT Series hosts a videoconference with endpoints outside the enterprise (Figure... - Page 9 H.460 is an extension of the H.323 protocol used for NAT and firewall traversal, employing ITU-T standards. The traversal server can be a a SCOPIA PathFinder or a third-party ITU-T compliant server. RADVISION | Administrator Guide for SCOPIA XT4000 Series Version 3.0 Planning the Topology of the SCOPIA XT Series Deployment | 5...
- Page 10 XT Series which acts as the virtual conference room for all the endpoints. Note The second GLAN is an optional feature for SCOPIA XT4000 Series. RADVISION | Administrator Guide for SCOPIA XT4000 Series Version 3.0 Planning the Topology of the SCOPIA XT Series Deployment | 6...
- Page 11 MCU option is activated. In this scenario SCOPIA XT Series uses either aliases or IP addresses depending on whether it deploys the gatekeeper or not. RADVISION | Administrator Guide for SCOPIA XT4000 Series Version 3.0 Planning the Topology of the SCOPIA XT Series Deployment | 7...
-
Page 12: Supporting Isdn Connectivity
The SCOPIA XT Series has a feature-rich API. Using this API, integrators can implement AMX and Creston applications to control the XT Codec Unit. The API is implemented as commands over the Ethernet interface. Contact RADVISION customer support for a copy of the API documentation. -
Page 13: Maintenance Tasks
900 (HD+900p)1280 x 1024 (SXGA), 1280 x 720, 1280 x 768 (WXGA), 1280 x 960 (UVGA),1024 x 768 (XGA), 800 x 600 (SVGA), 640 x 480 (VGA). Procedure Step 1 Connect your computer to the XT Codec Unit: RADVISION | Administrator Guide for SCOPIA XT4000 Series Version 3.0 Maintenance Tasks | 9... -
Page 14: Selecting The Computer Display Resolution
If you connect a camera to the DVI-I input, the system manages it as PC content. • When using XGA adapters, the system supports only 60Hz for 720p and 1080p formats. RADVISION | Administrator Guide for SCOPIA XT4000 Series Version 3.0 Maintenance Tasks | 10... -
Page 15: Configuring And Controlling Your Scopia Xt Series Remotely
SCOPIA XT Series so that it can be remotely manager from any computer or from a specific computer only. The default credentials for remote access are: • username - Admin • password - 1234 RADVISION | Administrator Guide for SCOPIA XT4000 Series Version 3.0 Maintenance Tasks | 11... -
Page 16: Before You Begin
In the Administrator Settings tab, select Utilities > Remote Access > Web. Figure 2-2 Configuring remote management on SCOPIA XT Series Step 3 Set the fields as described in Table 2-2 on page RADVISION | Administrator Guide for SCOPIA XT4000 Series Version 3.0 Maintenance Tasks | 12... -
Page 17: Accessing Scopia Xt Series Web Interface
Step 2 Enter the XT Codec Unit IP address in the address bar of the browser. For example, http://192.168.185.25/. The SCOPIA XT Series login page opens. RADVISION | Administrator Guide for SCOPIA XT4000 Series Version 3.0 Maintenance Tasks | 13... -
Page 18: Pairing A Xt Remote Control Unit With A Xt Codec Unit
Decide what numeric code you want to use for your monitor and the XT Codec Unit. Procedure Step 1 Access the SCOPIA XT Series web interface. Step 2 In the User settings tab, select User preferences > General > General. RADVISION | Administrator Guide for SCOPIA XT4000 Series Version 3.0 Maintenance Tasks | 14... -
Page 19: Managing Scopia Xt Series From Iview Management Suite
For more information on adding, removing and upgrading endpoint remotely in iVIEW Management Suite, or for details on synchronizing contacts for the endpoints in your organization, see the Administrator Guide for SCOPIA iVIEW Management Suite. RADVISION | Administrator Guide for SCOPIA XT4000 Series Version 3.0 Maintenance Tasks | 15... -
Page 20: How To Update The Software For Scopia Xt Series
The software version 3.0 does not need a license. Download a new software package from the RADVISION web or FTP site. The software release contains new features or patch release. The software update package is an auto-extracting file containing a software version, usually with a filename indicating the exact version number (for example: XT5000_V3_0_115.exe). - Page 21 Enter the IP address allowed to access the XT Codec Unit. SubNet mask Enter the SubNet mask associated with the IP address. Step 4 Press Save. RADVISION | Administrator Guide for SCOPIA XT4000 Series Version 3.0 Maintenance Tasks | 17...
-
Page 22: Upgrading The Software Using A Pc
Verify that the network allows communication between the Codec Unit and the computer, and that a firewall does not block TCP port 55099. Step 3 Download the XT5000_Vxxx.exe from the RADVISION site to the computer. Step 4 On the computer, launch the XT5000_Vxxx.exe. It automatically starts the upgrade program. -
Page 23: Upgrading The Scopia Xt Series Software Using A Usb Drive
Upgrading the SCOPIA XT Series Software Using a USB Drive Your SCOPIA XT Series comes with a USB drive containing the latest firmware version available at the time the system was shipped. We recommend that you always access the RADVISION site to check if a later version is available. -
Page 24: Enabling At Commands For Managing The Xt Codec Unit
Before you begin Ensure you have the IP addresses and the subnet mask of the computers which you want to use for remote management of SCOPIA XT Series. RADVISION | Administrator Guide for SCOPIA XT4000 Series Version 3.0 Maintenance Tasks | 20... -
Page 25: Configuring The System For Snmp Management
SCOPIA XT Series endpoints, using SNMP (Simple Network Management Protocol) and an AT command-based protocol on TCP/IP. In particular, these features have been introduced: RADVISION | Administrator Guide for SCOPIA XT4000 Series Version 3.0 Maintenance Tasks | 21... - Page 26 Step 2 In the Administrator settings tab, select Utilities > Remote Access > SNMP. Figure 2-10 Configuring SNMP settings Step 3 Set the fields as required. RADVISION | Administrator Guide for SCOPIA XT4000 Series Version 3.0 Maintenance Tasks | 22...
-
Page 27: Management Suite
Procedure Step 1 Access the SCOPIA XT Series web interface. Step 2 In the Administrator settings tab, select Utilities > Remote Access > Advanced. RADVISION | Administrator Guide for SCOPIA XT4000 Series Version 3.0 Maintenance Tasks | 23... -
Page 28: Additional Documentation
Enable/disable export of configuration files to iVIEW Management Suite. Step 4 Select Save. Additional Documentation When configuring the system, consult the documentation RADVISION puts at your disposal: • User Guide for SCOPIA XT4000 Series , which explains how to operate the SCOPIA XT Series. -
Page 29: Troubleshooting
Cannot receive a SIP or H.323 video call. Solution Verify the number/address used to connect to you is correct. Solution Recheck the Network Configuration, Network Preferences and H.323/SIP Proxy settings. RADVISION | Administrator Guide for SCOPIA XT4000 Series Version 3.0 Troubleshooting | 25... - Page 30 Disconnect the call. Select the Advanced options button Figure 3-1 Changing advanced call settings Check that the call type is set to Audio & Video. Redial the same contact. RADVISION | Administrator Guide for SCOPIA XT4000 Series Version 3.0 Troubleshooting | 26...
-
Page 31: Resolving Problems With Audio
Select the Loc tone button to run the audio input. If the test is completed successfully, the Done message is displayed. Figure 3-3 The audio test completed successfully RADVISION | Administrator Guide for SCOPIA XT4000 Series Version 3.0 Troubleshooting | 27... -
Page 32: Echo Cancelling On Hdmi Monitors
Configuring echo cancellation settings Step 3 Set the Audio delay automatic estimation field to Yes. Step 4 Set the Apply audio delay value field to Yes. Step 5 Select Save. RADVISION | Administrator Guide for SCOPIA XT4000 Series Version 3.0 Troubleshooting | 28... -
Page 33: Resolving Monitor Display Problems
One of the optional video devices, an optional camera or a video converter, causes the video delay. Solution Configure lip sync settings: Access the SCOPIA XT Series web interface. RADVISION | Administrator Guide for SCOPIA XT4000 Series Version 3.0 Troubleshooting | 29... - Page 34 Received audio delay in milliseconds. If Lip-sync automatic is set to No, drag the slider until you obtain the best synchronization. Sharpness Enable/disable video sharpness. Select Save. RADVISION | Administrator Guide for SCOPIA XT4000 Series Version 3.0 Troubleshooting | 30...
-
Page 35: Resolving Camera Issues
In the Administrator settings tab, select I/O Connections > Cameras > General > HD1. Figure 3-6 Enabling the Moving setting Make sure that the Moving field is set to Yes. RADVISION | Administrator Guide for SCOPIA XT4000 Series Version 3.0 Troubleshooting | 31... -
Page 36: Resolving Ip Address Problems
If the GLAN2 port is enabled and in use, check that it is properly connected. Solution Redefine the IP address: From the Main menu, select Configure. Press Next several times until the Configure TCP/IP screen appears. RADVISION | Administrator Guide for SCOPIA XT4000 Series Version 3.0 Troubleshooting | 32... - Page 37 In the Administrator settingstab, select Networks > Preferences > General. Figure 3-9 Set the Use IPv6 field to Yes. Select Save. Set the Use IPv6 field to No. RADVISION | Administrator Guide for SCOPIA XT4000 Series Version 3.0 Troubleshooting | 33...
-
Page 38: Resolving Problems With Pc Presentations
These log files are analyzed by customer support only. • Retrieving Network Traffic Logs ............page 35 • Retrieving Memory Dump Logs ............page 36 RADVISION | Administrator Guide for SCOPIA XT4000 Series Version 3.0 Troubleshooting | 34... -
Page 39: Retrieving Network Traffic Logs
This command clears logs from both the unit’s RAM and flash memory. Step 5 Define the interface card using this command: CAP-SET-INTERFACE<type of interface> Where the type of interface is one of these values: • eth0—for GLAN1 RADVISION | Administrator Guide for SCOPIA XT4000 Series Version 3.0 Troubleshooting | 35... -
Page 40: Retrieving Memory Dump Logs
“How to Retrieve SCOPIA XT Series Logs” on page Procedure Step 1 Access the SCOPIA XT Series web interface. Step 2 In the User Settings tab, select Diagnostics > Utilities > Customer Support Package. RADVISION | Administrator Guide for SCOPIA XT4000 Series Version 3.0 Troubleshooting | 36... -
Page 41: Reporting A Software Upgrade Failure
You can view the following system information if your system is not currently in a call: • software version • user code • IP addresses • serial number RADVISION | Administrator Guide for SCOPIA XT4000 Series Version 3.0 Troubleshooting | 37... -
Page 42: Contacting Support
Figure 3-11 The Main Menu Step 2 Select System Status. The system information is displayed. Contacting Support When you contact RADVISION for support, you must provide this information: • Serial number which identifies your unit • Software version • User code To find this information, select Configure >... - Page 43 This document is not part of a contract or license as may be expressly agreed. RADVISION is a registered trademark of RADVISION, Ltd. All product and company names herein may be trademarks of their registered owners. All rights reserved © 2012 RADVISION, Ltd.
Need help?
Do you have a question about the SCOPIA XT1000 Piccolo and is the answer not in the manual?
Questions and answers