RADVision Scopia XT4000 Series User Manual
Hide thumbs
Also See for Scopia XT4000 Series:
- User manual (102 pages) ,
- Installation manual (184 pages) ,
- Administrator's manual (43 pages)
Table of Contents
Advertisement
Quick Links
Advertisement
Table of Contents

Related Manuals for RADVision Scopia XT4000 Series


Summary of Contents for RADVision Scopia XT4000 Series
- Page 1 Scopia XT4000 Series User Guide Version 3.1.1 For Solution 7.7, 8.0.x...
- Page 2 If there is any software on removable media described in this publication, it is furnished under a license agreement included with the product as a separate document. If you are unable to locate a copy, please contact RADVISION Ltd and a copy will be provided to you.
-
Page 3: Table Of Contents
Configuring Network Settings..............22 Configuring Gatekeeper Settings............24 Remotely Setting the System Name and Language........... 25 Making Point-to-Point Video Calls Tips for Participating in a Videoconference............27 RADVISION | User Guide for Scopia XT4000 Series Version 3.1.1 Table of Contents | i... - Page 4 Blocking an Incoming Call................62 Enabling Do Not Disturb to Block All Incoming Calls..........63 Blocking Video Input by Default..............64 Activating the Screen Saver................65 RADVISION | User Guide for Scopia XT4000 Series Version 3.1.1 Table of Contents | ii...
- Page 5 Resolving Monitor Display Problems..............68 Resolving Problems with PC Presentations............70 Resolving XT Remote Control Unit Problems............70 Restoring Default User Settings..............70 Resolving Video or Audio Disruptions..............72 RADVISION | User Guide for Scopia XT4000 Series Version 3.1.1 Table of Contents | iii...
-
Page 6: About The Scopia Xt Series
This allows quality video at much lower bit rates (selected models only). • Ability to host videoconferences locally with a high-capacity embedded MCU, without requiring an external MCU deployment (selected models only). RADVISION | User Guide for Scopia XT4000 Series Version 3.1.1 About the Scopia XT Series | 1... - Page 7 About the Models in the Scopia XT Series Product Line ......... page 3 • Comparing Between Scopia XT Series Models ..........page 7 RADVISION | User Guide for Scopia XT4000 Series Version 3.1.1 About the Scopia XT Series | 2...
-
Page 8: About The Models In The Scopia Xt Series Product Line
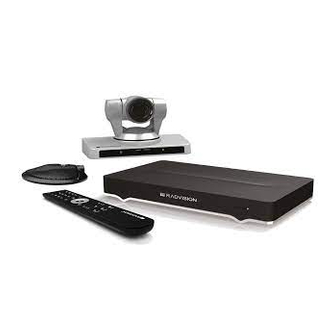
Scopia XT5000 • Scopia XT4000 Series Experience cost-effective HD videoconferencing with the Scopia XT4000 Series, which was designed specifically for small meeting rooms. The included camera has 5x with an option to upgrade to 10x. RADVISION | User Guide for Scopia XT4000 Series Version 3.1.1... - Page 9 Depending on the XT Codec Unit used in your XT Telepresence deployment, you can inherit the features of the Scopia XT1200 or the Scopia XT5000. RADVISION | User Guide for Scopia XT4000 Series Version 3.1.1 About the Scopia XT Series | 4...
- Page 10 1080p at 30 frames per second (fps) together with the display. To fit your videoconferencing needs, you can also connect an optional XT Premium Camera with PTZ capability. RADVISION | User Guide for Scopia XT4000 Series Version 3.1.1 About the Scopia XT Series | 5...
- Page 11 Depending on your deployment and the model, you can locally host videoconferences with other endpoints (including H.323, SIP, Scopia XT Desktop clients, Scopia Mobile, and ISDN RADVISION | User Guide for Scopia XT4000 Series Version 3.1.1 About the Scopia XT Series | 6...
-
Page 12: Comparing Between Scopia Xt Series Models
“About the Scopia XT Series” on page Table 1-1 on page 8 summarizes the differences between each of the models in the Scopia XT Series. RADVISION | User Guide for Scopia XT4000 Series Version 3.1.1 About the Scopia XT Series | 7... - Page 13 10/100/1000 Mbps connection Mbps speed Scopia Control Scopia Control Scopia Control Scopia Control Scopia Control Scopia Control Scopia Control (optional) (optional) (optional) (optional) RADVISION | User Guide for Scopia XT4000 Series Version 3.1.1 About the Scopia XT Series | 8...
-
Page 14: Getting Started
Power key on the XT Remote Control Unit. Step 2 Configure the basic settings required to start using the XT Series, as described in “Performing Basic Configuration” on page RADVISION | User Guide for Scopia XT4000 Series Version 3.1.1 Getting Started | 9... -
Page 15: How To Control The Xt Series
Google Chrome version 11 or later • Mozilla Firefox version 3.6 or later • Apple Safari version 5 or later • Opera version 11 or later RADVISION | User Guide for Scopia XT4000 Series Version 3.1.1 Getting Started | 10... -
Page 16: Accessing The Scopia Xt Series Main Menu
Perform basic configuration, such as setting the interface language • Set your preferences, such as activating the Do Not Disturb feature • Check the system status RADVISION | User Guide for Scopia XT4000 Series Version 3.1.1 Getting Started | 11... -
Page 17: Using The Xt Remote Control Unit
Using the XT Remote Control Unit This section explains how to use the XT Remote Control Unit to navigate through the system menus, and lists the function of each key. RADVISION | User Guide for Scopia XT4000 Series Version 3.1.1 Getting Started | 12... - Page 18 Figure 2-3 on page 13 describes the functions of the XT Remote Control Unit. Figure 2-3 The new XT Remote Control Unit RADVISION | User Guide for Scopia XT4000 Series Version 3.1.1 Getting Started | 13...
- Page 19 Remote Control Unit repeatedly before entering a digit. To enter text in the XT Series interface, scroll to the input field and enter the required characters. The current input method is displayed in the field you are in: RADVISION | User Guide for Scopia XT4000 Series Version 3.1.1 Getting Started | 14...
-
Page 20: Pairing An Xt Remote Control Unit With A Xt Codec Unit
Access the general settings, as follows: • From the web interface, select Basic Settings > General. • From the endpoint's Main menu, select Configure > General. RADVISION | User Guide for Scopia XT4000 Series Version 3.1.1 Getting Started | 15... - Page 21 Using the keypad, type the number you just entered in the Remote control code field. Note You must always use two digits for a code. For example, to set the code to “1”, enter “01”. RADVISION | User Guide for Scopia XT4000 Series Version 3.1.1 Getting Started | 16...
-
Page 22: Performing Basic Configuration
You cannot remotely set the image on the monitor; this must be done from the endpoint itself. For details on performing basic configuration, see: RADVISION | User Guide for Scopia XT4000 Series Version 3.1.1 Getting Started | 17... -
Page 23: Accessing The Quick Setup Procedure
If the quick setup wizard is not displayed automatically, select Configure > Quick Setup from the Main Menu. Figure 2-6 Accessing the Quick Setup Step 2 The quick setup wizard guides you through these basic configuration tasks: RADVISION | User Guide for Scopia XT4000 Series Version 3.1.1 Getting Started | 18... -
Page 24: Setting The System Name And Language
Enter the name of the Scopia XT Series in the System Name field using the alphanumeric keys of the XT Remote Control Unit (for more information, see “Using the XT Remote Control Unit” on page 12). RADVISION | User Guide for Scopia XT4000 Series Version 3.1.1 Getting Started | 19... -
Page 25: Adjusting The Image Position
The triangles in the top left corner and bottom right corner must be fully visible so that the white border of the triangle is fully visible on all sides. If the image is centered correctly, skip this procedure and select Next. RADVISION | User Guide for Scopia XT4000 Series Version 3.1.1 Getting Started | 20... - Page 26 Use the arrow keys on the XT Remote Control Unit to position the image, and then press ok/menu. Step 4 Press 2 to align the bottom right corner. RADVISION | User Guide for Scopia XT4000 Series Version 3.1.1 Getting Started | 21...
-
Page 27: Configuring Network Settings
Manual: Select this option if you require a static IP address. This is required, for example, if the XT Series is connected directly to the Internet, without any address translation. Enter the fields as described in Table 2-1 on page RADVISION | User Guide for Scopia XT4000 Series Version 3.1.1 Getting Started | 22... - Page 28 IP addresses. If the system gets its IP address automatically, this field displays the assigned DNS server IP address. RADVISION | User Guide for Scopia XT4000 Series Version 3.1.1 Getting Started | 23...
-
Page 29: Configuring Gatekeeper Settings
H.323 from the Main menu. Procedure Step 1 Set the Use Gatekeeper list to Yes. Figure 2-11 Gatekeeper settings Step 2 Set the Mode list to Manual. RADVISION | User Guide for Scopia XT4000 Series Version 3.1.1 Getting Started | 24... -
Page 30: Remotely Setting The System Name And Language
Basic Settings page Step 3 Enter the name of the Scopia XT Series in the System Name field. Step 4 Select the required language from the Language list. RADVISION | User Guide for Scopia XT4000 Series Version 3.1.1 Getting Started | 25... - Page 31 Step 5 Select Save. RADVISION | User Guide for Scopia XT4000 Series Version 3.1.1 Getting Started | 26...
-
Page 32: Making Point-To-Point Video Calls
Use natural gestures and speak normally as in a real meeting. • Do not rustle paper or tap on the table or the Microphone Pod. RADVISION | User Guide for Scopia XT4000 Series Version 3.1.1 Making Point-to-Point Video Calls | 27... -
Page 33: Dialing A Number Directly From The Endpoint
6 for an audio-only call. For more information on the dial plan in your organization, contact your system administrator. RADVISION | User Guide for Scopia XT4000 Series Version 3.1.1 Making Point-to-Point Video Calls | 28... -
Page 34: Dialing A Number From The Scopia Xt Series Web Interface
This can be useful, for example, when you are moderating a call remotely. You can also do this from the endpoint interface (see “Dialing a Number Directly from the Endpoint” on page 28). RADVISION | User Guide for Scopia XT4000 Series Version 3.1.1 Making Point-to-Point Video Calls | 29... - Page 35 • Dial a contact in the phone book by selecting Make your call > Basic Options > Contacts. Choose the contact and select Call. RADVISION | User Guide for Scopia XT4000 Series Version 3.1.1 Making Point-to-Point Video Calls | 30...
-
Page 36: Modifying The Default Call Settings
“Dialing a Number Directly from the Endpoint” on page 28). • From the web interface, select Advanced Calling Options > Direct call. RADVISION | User Guide for Scopia XT4000 Series Version 3.1.1 Making Point-to-Point Video Calls | 31... - Page 37 Select whether the call is Audio-Video or Audio-Only. Step 3 Dial the number, as follows: • Using the XT Remote Control Unit, press , or select Call and press ok/menu. RADVISION | User Guide for Scopia XT4000 Series Version 3.1.1 Making Point-to-Point Video Calls | 32...
-
Page 38: Answering And Ending A Video Call
XT Remote Control Unit. If your system is set to Confirm disconnection, select ok/menu to confirm (see “Confirming Call Disconnections” on page 61 for details). RADVISION | User Guide for Scopia XT4000 Series Version 3.1.1 Making Point-to-Point Video Calls | 33... -
Page 39: Joining A Videoconference
This can be done from the endpoint itself or from the Scopia XT Series web interface. RADVISION | User Guide for Scopia XT4000 Series Version 3.1.1 Making Point-to-Point Video Calls | 34... - Page 40 You can also choose a contact to edit, from either the Recent Calls or Contact list. Step 2 Select the Plus icon next to Insert number. RADVISION | User Guide for Scopia XT4000 Series Version 3.1.1 Making Point-to-Point Video Calls | 35...
- Page 41 This is only relevant if the contact is a person. Step 4 Enter additional information for this contact, such as the number and default call type, as described in Table 3-4 on page RADVISION | User Guide for Scopia XT4000 Series Version 3.1.1 Making Point-to-Point Video Calls | 36...
-
Page 42: Searching For A Contact In The Phone Book
• From the endpoint's main menu, select Contacts. • From the XT Series web interface, select Make your call > Basic Options > Contacts. RADVISION | User Guide for Scopia XT4000 Series Version 3.1.1 Making Point-to-Point Video Calls | 37... -
Page 43: Deleting A Contact From The Phone Book
From the endpoint, select the right-arrow next to the contact and Delete Contact. • From the web interface, select Delete. Step 3 Select Yes to confirm. RADVISION | User Guide for Scopia XT4000 Series Version 3.1.1 Making Point-to-Point Video Calls | 38... -
Page 44: About Video Layouts
In a call, the monitor can split the screen to show both the participants' video (local and remote) and presentation (local or remote) in different windows, with the system menus displayed transparently: RADVISION | User Guide for Scopia XT4000 Series Version 3.1.1 Making Point-to-Point Video Calls | 39... - Page 45 Fullscreen The full screen view shows one video image. Typically, the remote presentation is displayed, or, if there is no presentation, the remote video. RADVISION | User Guide for Scopia XT4000 Series Version 3.1.1 Making Point-to-Point Video Calls | 40...
-
Page 46: Selecting Your Video Layout With Two Monitors
Figure 3-12 on page 42). One monitor is defined to be the primary one (HD1), and the second monitor is defined as auxiliary (HD2). RADVISION | User Guide for Scopia XT4000 Series Version 3.1.1 Making Point-to-Point Video Calls | 41... - Page 47 Your system administrator configures the monitors to show one of these layouts when you are in a call (see Table 3-5 on page 43): RADVISION | User Guide for Scopia XT4000 Series Version 3.1.1 Making Point-to-Point Video Calls | 42...
- Page 48 For more information about configuring your monitor views, see Administrator Guide for Scopia XT Series. RADVISION | User Guide for Scopia XT4000 Series Version 3.1.1 Making Point-to-Point Video Calls | 43...
-
Page 49: Changing The Video Layout During The Call
The PoP (Picture out Picture) view shows up to three images of different size, presented side by side. The image on the left is larger, with two smaller images on the right. RADVISION | User Guide for Scopia XT4000 Series Version 3.1.1 Making Point-to-Point Video Calls | 44... - Page 50 The In-call menu automatically disappears from the display after a few seconds in a call. To bring back the In-call menu, press ok/menu on the XT Remote Control Unit. RADVISION | User Guide for Scopia XT4000 Series Version 3.1.1 Making Point-to-Point Video Calls | 45...
-
Page 51: Sharing Content
DVI-out or VGA-out connector. Procedure Step 1 Connect your computer to the XT Codec Unit: RADVISION | User Guide for Scopia XT4000 Series Version 3.1.1 Making Point-to-Point Video Calls | 46... - Page 52 PC output to the codec via an audio mixer. For details, see Scopia XT Series Installation Guide. Note The audio input port supports both analog and digital optical audio. RADVISION | User Guide for Scopia XT4000 Series Version 3.1.1 Making Point-to-Point Video Calls | 47...
-
Page 53: Selecting The Computer Display Resolution
DVI input formats supported by XT Codec Unit Name Resolution 1080p 1920x1080 SXGA 1280x1024 HD+ (900p) 1600x900 WSGA 1440x900 UVGA 1280x960 WXGA 1280x768 720p 1280x720 1024x768 RADVISION | User Guide for Scopia XT4000 Series Version 3.1.1 Making Point-to-Point Video Calls | 48... -
Page 54: Start Sharing Content Automatically
Alternatively, you can manually start presenting content (for details, see “Sharing Content during a Call” on page 51 “Sharing Content in the Local Conference Room” on page 50). RADVISION | User Guide for Scopia XT4000 Series Version 3.1.1 Making Point-to-Point Video Calls | 49... -
Page 55: Sharing Content In The Local Conference Room
You must setup your computer and the XT Codec Unit before starting the presentation: • Verify that the Scopia XT Series is not in a call. RADVISION | User Guide for Scopia XT4000 Series Version 3.1.1 Making Point-to-Point Video Calls | 50... -
Page 56: Sharing Content During A Call
If you are not in a call, you can share your presentation with participants in the local conference room (see “Sharing Content in the Local Conference Room” on page 50). RADVISION | User Guide for Scopia XT4000 Series Version 3.1.1 Making Point-to-Point Video Calls | 51... - Page 57 XT Remote Control Unit. • Select Present from the In-call menu. Access the call menu by pressing OK on the XT Remote Control Unit: RADVISION | User Guide for Scopia XT4000 Series Version 3.1.1 Making Point-to-Point Video Calls | 52...
-
Page 58: Controlling Your Video And Audio
During a call, you can block and unblock your local video. Press ok/menu on the XT Remote Control Unit to access the In-call menu, and select Privacy: RADVISION | User Guide for Scopia XT4000 Series Version 3.1.1 Making Point-to-Point Video Calls | 53... -
Page 59: Adjusting The Volume
From the endpoint's main menu, select Configure > Calling from the Main menu. • From the XT Series web interface, select Basic Settings > Call-Answer mode > General. RADVISION | User Guide for Scopia XT4000 Series Version 3.1.1 Making Point-to-Point Video Calls | 54... -
Page 60: Muting The Microphone Pod
Mute key on the XT Remote Control Unit or press the Mute button on the Microphone Pod. • Press ok/menu to access the In-call menu and select Mute: RADVISION | User Guide for Scopia XT4000 Series Version 3.1.1 Making Point-to-Point Video Calls | 55... -
Page 61: Moderating A Videoconference Hosted By Another Scopia Xt Series Endpoint
From the endpoint, press ok/menu on the XT Remote Control Unit and select Meeting. • From the XT Series web interface, select Make your call > Meeting Call. RADVISION | User Guide for Scopia XT4000 Series Version 3.1.1 Making Point-to-Point Video Calls | 56... - Page 62 Select Disconnect to disconnect the endpoint. • For your endpoint, you can also mute your endpoint and view information such as the call rate. RADVISION | User Guide for Scopia XT4000 Series Version 3.1.1 Making Point-to-Point Video Calls | 57...
- Page 63 Figure 3-25 Managing remote participants Step 5 To stop moderating, select Release chair. --Or-- To end the videoconference, select End Meeting. RADVISION | User Guide for Scopia XT4000 Series Version 3.1.1 Making Point-to-Point Video Calls | 58...
-
Page 64: Customizing Your User Experience
Series. Before you begin If configuring from the endpoint, you must first enable advanced configuration, as described in Administrator Guide for SCOPIA XT Series. RADVISION | User Guide for Scopia XT4000 Series Version 3.1.1 Customizing Your User Experience | 59... -
Page 65: Setting Call Answering Preferences
This can be done from the endpoint itself or from the Scopia XT Series web interface. Procedure Step 1 Access the call settings, as follows: RADVISION | User Guide for Scopia XT4000 Series Version 3.1.1 Customizing Your User Experience | 60... -
Page 66: Confirming Call Disconnections
To prevent accidental disconnection from a call, you can configure the system to confirm before a call is disconnected. By default, calls are disconnected when a participant ends the call, without requiring a confirmation. RADVISION | User Guide for Scopia XT4000 Series Version 3.1.1 Customizing Your User Experience | 61... -
Page 67: Blocking An Incoming Call
You can configure the XT Series to automatically block all incoming calls, if you want this to be the default behavior. For more information, see “Enabling Do Not Disturb to Block All Incoming Calls” on page RADVISION | User Guide for Scopia XT4000 Series Version 3.1.1 Customizing Your User Experience | 62... -
Page 68: Enabling Do Not Disturb To Block All Incoming Calls
From the endpoint's main menu, select Configure > Calling. Figure 4-4 Calling preferences Step 2 Set Do Not Disturb to Yes. Step 3 From the web interface only, select Save. RADVISION | User Guide for Scopia XT4000 Series Version 3.1.1 Customizing Your User Experience | 63... -
Page 69: Blocking Video Input By Default
From the web interface, set Privacy to Yes. • From the endpoint's interface, set Video Privacy to Yes. Step 3 From the web interface only, select Save. RADVISION | User Guide for Scopia XT4000 Series Version 3.1.1 Customizing Your User Experience | 64... -
Page 70: Activating The Screen Saver
XT Series is not used for some time. You can activate the screen saver at any moment by pressing the Power key on the XT Remote Control Unit. RADVISION | User Guide for Scopia XT4000 Series Version 3.1.1 Customizing Your User Experience | 65... -
Page 71: Viewing System Information For Customer Support
Network, gatekeeper, and SIP settings Note The system serial number also appears on the label at the back of the XT Codec Unit. RADVISION | User Guide for Scopia XT4000 Series Version 3.1.1 Troubleshooting the Scopia XT Series | 66... - Page 72 To view additional system information such as IP addresses and the gatekeeper's registration status from the endpoint, press the Back key and select System Status. RADVISION | User Guide for Scopia XT4000 Series Version 3.1.1 Troubleshooting the Scopia XT Series | 67...
-
Page 73: Resolving Monitor Display Problems
Verify the XT Codec Unit’s LED is on. If the LED is blinking, press the Power key on the XT Remote Control Unit. RADVISION | User Guide for Scopia XT4000 Series Version 3.1.1 Troubleshooting the Scopia XT Series | 68... - Page 74 Note You can also adjust the image for the monitor displaying the system menu, in the quick setup wizard as described in RADVISION | User Guide for Scopia XT4000 Series Version 3.1.1 Troubleshooting the Scopia XT Series | 69...
-
Page 75: Resolving Problems With Pc Presentations
If you still experience problems, reconfigure the XT Remote Control Unit code to be a number between 01-04, inclusive. Restoring Default User Settings This procedure explains how to restore the default settings if necessary, from the endpoint itself. RADVISION | User Guide for Scopia XT4000 Series Version 3.1.1 Troubleshooting the Scopia XT Series | 70... - Page 76 Enter your four-digit PIN code, and press ok/menu. The default PIN code is 1234. Step 6 Select Utilities > Restore System > Factory Defaults. RADVISION | User Guide for Scopia XT4000 Series Version 3.1.1 Troubleshooting the Scopia XT Series | 71...
-
Page 77: Resolving Video Or Audio Disruptions
Loss in audio quality may result from noise produced by a computer's cooling system. Solution If you are using a laptop during a meeting, do not place it too close to the microphone. RADVISION | User Guide for Scopia XT4000 Series Version 3.1.1 Troubleshooting the Scopia XT Series | 72... - Page 78 This document is not part of a contract or license as may be expressly agreed. RADVISION is a registered trademark of RADVISION, Ltd. All product and company names herein may be trademarks of their registered owners. All rights reserved © 2013 RADVISION, Ltd.
Need help?
Do you have a question about the Scopia XT4000 Series and is the answer not in the manual?
Questions and answers