RADVision Scopia XT5000 Series User Manual
Scopia xt5000 series
Hide thumbs
Also See for Scopia XT5000 Series:
- Administrator's manual (186 pages) ,
- Installation manual (184 pages) ,
- User manual (89 pages)
Table of Contents
Advertisement
Quick Links
Advertisement
Table of Contents

Related Manuals for RADVision Scopia XT5000 Series


Summary of Contents for RADVision Scopia XT5000 Series
- Page 1 Scopia XT5000 Series User Guide Version 3.2 For Solution 7.7, 8.0.x, 8.2...
- Page 2 No representation of warranties for fitness for any distributor or reseller. purpose other than what is specifically mentioned in this User Guide for Scopia XT5000 Series Version 3.2 , June guide is made either by RADVISION Ltd or its agents. 9, 2013 RADVISION Ltd reserves the right to revise this http://www.radvision.com...
-
Page 3: Table Of Contents
Dialing a Number from the XT Series Web Interface ..................39 Modifying the Default Call Settings ........................ 41 Answering and Ending a Video Call ....................... 43 Joining a Videoconference ..........................44 User Guide for Scopia XT5000 Series Version 3.2 Table of Contents | 3... - Page 4 Setting the User PIN Code for the Scopia XT Series ..................81 Setting Call Answering Preferences .......................82 Confirming Call Disconnections ........................83 Enabling Do Not Disturb to Block All Incoming Calls ..................84 Blocking Video Input by Default ........................86 User Guide for Scopia XT5000 Series Version 3.2 Table of Contents | 4...
- Page 5 Resolving XT Remote Control Unit Problems ....................92 Restoring Default User Settings ........................92 Resolving Video or Audio Disruptions ......................94 Glossary of Terms for Scopia Solution User Guide for Scopia XT5000 Series Version 3.2 Table of Contents | 5...
-
Page 6: Chapter 1: About The Scopia Xt Series
Using encryption is subject to local regulation. In some countries it is restricted or limited for usage. For more information, consult your local reseller. Figure 1: Scopia XT Series products on page 7 shows the different Scopia XT Series endpoints available. User Guide for Scopia XT5000 Series Version 3.2 About the Scopia XT Series | 6... -
Page 7: About The Models In The Scopia Xt Series Product Line
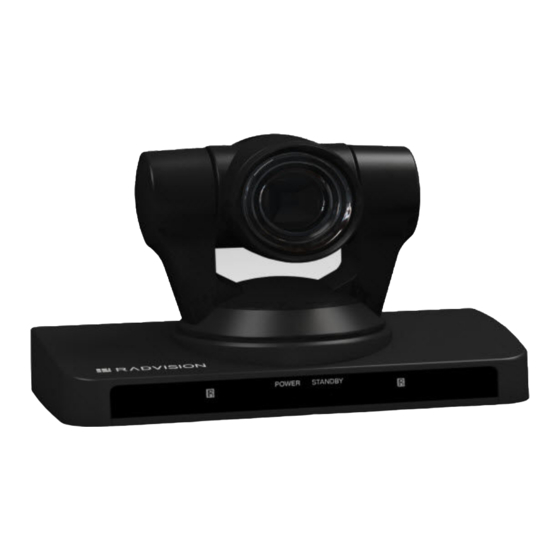
With HD video resolution of up to 1080p video at 60 frames per second (fps), Scopia XT5000 sets the standard for an exceptional videoconferencing experience, and is designed for easy setup and control. User Guide for Scopia XT5000 Series Version 3.2 About the Scopia XT Series | 7... - Page 8 Includes a high-quality camera (10x optical zoom, and an additional 4x digital zoom) – The 3-way Microphone Pod provides superb signal-to-noise ratios. You can also add a second microphone for unparalleled large room coverage. User Guide for Scopia XT5000 Series Version 3.2 About the Scopia XT Series | 8...
- Page 9 PC or Mac. Using a unique control application, you can place calls, join videoconferences, and navigate the system menus with your computer's keyboard and mouse. The XT Remote Control Unit can be used as well. User Guide for Scopia XT5000 Series Version 3.2 About the Scopia XT Series | 9...
- Page 10 Depending on your deployment and the model, you can locally host videoconferences with other endpoints (including H.323, SIP, Scopia XT Desktop clients, Scopia Mobile, and ISDN endpoints, if your User Guide for Scopia XT5000 Series Version 3.2 About the Scopia XT Series | 10...
-
Page 11: Comparing Between Scopia Xt Series Models
Hosting with Can host Can host video- Can host Can host internal MCU video- conferences video- video- conferences (optional) conferences conferences (optional) (optional) (optional) User Guide for Scopia XT5000 Series Version 3.2 About the Scopia XT Series | 11... - Page 12 (optional) Recording Can record on Can record on Can record on Can record on USB disk USB disk USB disk USB disk (optional) (optional) (optional) User Guide for Scopia XT5000 Series Version 3.2 About the Scopia XT Series | 12...
-
Page 13: Chapter 2: Getting Started
How to Control the XT Series on page 14. 3. You can now make point-to-point video calls and videoconferences, as described in Starting a Videoconference on page 32. User Guide for Scopia XT5000 Series Version 3.2 Getting Started | 13... -
Page 14: How To Control The Xt Series
This procedure describes how to access the XT Series web interface. The XT Series supports the following internet browsers: • Internet Explorer version 8 or later • Google Chrome version 11 or later User Guide for Scopia XT5000 Series Version 3.2 Getting Started | 14... -
Page 15: Accessing The Main Menu Of The Xt Series
• View contacts in the phone book • Start sharing content from your computer • Adjust the camera position. You can also store the position to retrieve it later. • Record your videoconferences User Guide for Scopia XT5000 Series Version 3.2 Getting Started | 15... - Page 16 Important: When you access the system for the first time only, the Quick Setup wizard is displayed (for details, see Accessing the Quick Setup Procedure on page 22). User Guide for Scopia XT5000 Series Version 3.2 Getting Started | 16...
-
Page 17: Using The Xt Remote Control Unit
The XT Remote Control Unit has an improved design and increases usability to give you a smoother and more efficient videoconferencing experience. Figure 10: The new XT Remote Control Unit on page 18 describes the functions of the XT Remote Control Unit. User Guide for Scopia XT5000 Series Version 3.2 Getting Started | 17... - Page 18 User Guide for Scopia XT5000 Series Version 3.2 Getting Started | 18...
- Page 19 Control Unit repeatedly before entering a digit. To enter text in the XT Series interface, scroll to the input field and enter the required characters. The current input method is displayed in the field you are in: User Guide for Scopia XT5000 Series Version 3.2 Getting Started | 19...
-
Page 20: Pairing An Xt Remote Control Unit With A Xt Codec Unit
Procedure 1. Access the general settings, as follows: • From the web interface, select Basic Settings > General. • From the endpoint's Main menu, select Configure > General. User Guide for Scopia XT5000 Series Version 3.2 Getting Started | 20... - Page 21 The code of the XT Remote Control Unit is changed and the Remote Control icon with the new Remote Control code appear at the top-right corner of the screen: User Guide for Scopia XT5000 Series Version 3.2 Getting Started | 21...
-
Page 22: Performing Basic Configuration
You cannot remotely set the image on the monitor; this must be done from the endpoint itself. Navigation • Accessing the Quick Setup Procedure on page 22 • Remotely Setting the System Name and Language on page 30 User Guide for Scopia XT5000 Series Version 3.2 Getting Started | 22... -
Page 23: Accessing The Quick Setup Procedure
24: Define your system's name, your country, and preferred language for the interface. • Adjusting the Image Position on page 25: Adjust your monitor's image if necessary. User Guide for Scopia XT5000 Series Version 3.2 Getting Started | 23... -
Page 24: Setting The System Name And Language
If you perform this task from the endpoint interface, use the alphanumeric keys of the XT Remote Control Unit (for more information, see Using the XT Remote Control Unit on page 17). User Guide for Scopia XT5000 Series Version 3.2 Getting Started | 24... -
Page 25: Adjusting The Image Position
Setting the System Name and Language on page 24. Access the quick setup wizard from the endpoint, as described in Accessing the Quick Setup Procedure on page 22. User Guide for Scopia XT5000 Series Version 3.2 Getting Started | 25... - Page 26 If the image is centered correctly, skip this procedure and select Next. Figure 15: Examining the image position 2. Press 1 to align the top left corner. Figure 16: Adjusting the image position User Guide for Scopia XT5000 Series Version 3.2 Getting Started | 26...
-
Page 27: Configuring Network Settings
To secure SIP connections using TLS certificates, your system must have a static IP address, since the system generates the certificate request using its IP address as the Common Name (CN). For more information, see Administrator Guide for Scopia XT Series. User Guide for Scopia XT5000 Series Version 3.2 Getting Started | 27... - Page 28 If the system gets its IP address automatically, this field displays the assigned DNS server IP address. 3. To configure your gatekeeper's settings, select Next and continue with Configuring Gatekeeper Settings on page 29. User Guide for Scopia XT5000 Series Version 3.2 Getting Started | 28...
-
Page 29: Configuring Gatekeeper Settings
Accessing the Quick Setup Procedure on page 22. Procedure 1. Set the Use Gatekeeper list to Yes. Figure 18: Gatekeeper settings 2. Set the Mode list to Manual. User Guide for Scopia XT5000 Series Version 3.2 Getting Started | 29... -
Page 30: Remotely Setting The System Name And Language
1. Access the name and language settings: • From the XT Series web interface, select Basic Settings > Preferences > General. • From the endpoint's main menu, select Configure > General. User Guide for Scopia XT5000 Series Version 3.2 Getting Started | 30... - Page 31 2. Enter the name of the XT Series in the System Name field. 3. Select the required language from the Language list. 4. From the web interface only, select Save. User Guide for Scopia XT5000 Series Version 3.2 Getting Started | 31...
-
Page 32: Chapter 3: Starting A Videoconference
• Keyboard clicking can be disruptive to the videoconference, so we recommend using the mute when listening but not actively participating. • Zooming too close can show that your eyes are not looking directly at the camera, in some cases. User Guide for Scopia XT5000 Series Version 3.2 Starting a Videoconference | 32... -
Page 33: Managing The Phone Book
• From the XT Series web interface, select, Make your call > Basic Options > Recent Calls to add a recent number, or select Make your call > Contacts > Add Contact. User Guide for Scopia XT5000 Series Version 3.2 Starting a Videoconference | 33... - Page 34 Figure 21: Entering contact dialing information from the web interface 3. Enter the required information, as described in Table 3: Entering contact's basic information on page 35. User Guide for Scopia XT5000 Series Version 3.2 Starting a Videoconference | 34...
- Page 35 Define the contact's label to provide a short description of the contact, for example: home, office or virtual room. Number Enter the number or alias, to be dialed when contacting this endpoint. User Guide for Scopia XT5000 Series Version 3.2 Starting a Videoconference | 35...
-
Page 36: Searching For A Contact In The Phone Book
2. Enter the name or surname of the contact you want to find in the Search field, or scroll through the list to find a contact. 3. Select the Search icon. User Guide for Scopia XT5000 Series Version 3.2 Starting a Videoconference | 36... -
Page 37: Deleting A Contact From The Phone Book
If your system administrator enabled encryption in your system and your call is secured, an icon showing a padlock appears on your display. For more information, see Administrator Guide for Scopia XT Series. User Guide for Scopia XT5000 Series Version 3.2 Starting a Videoconference | 37... - Page 38 , or select Call and press ok/menu. Important: To modify advanced calling options, such as the call rate, see Modifying the Default Call Settings on page 41. User Guide for Scopia XT5000 Series Version 3.2 Starting a Videoconference | 38...
-
Page 39: Dialing A Number From The Xt Series Web Interface
The system stores a list of recent calls, and displays these icons appear next to a contact number or name: • — Received call • — Dialed call • — Missed call User Guide for Scopia XT5000 Series Version 3.2 Starting a Videoconference | 39... - Page 40 Choose the number and select Call. • Dial a contact in the phone book by selecting Make your call > Basic Options > Contacts. Choose the contact and select Call. User Guide for Scopia XT5000 Series Version 3.2 Starting a Videoconference | 40...
-
Page 41: Modifying The Default Call Settings
Dialing a Number Directly from the Endpoint on page 37). • From the web interface, select Advanced Calling Options > Direct call. User Guide for Scopia XT5000 Series Version 3.2 Starting a Videoconference | 41... - Page 42 3. Dial the number, as follows: • Using the XT Remote Control Unit, press , or select Call and press ok/menu. • From the web interface, select Call. User Guide for Scopia XT5000 Series Version 3.2 Starting a Videoconference | 42...
-
Page 43: Answering And Ending A Video Call
If your system administrator defined a time limit for videoconferences, a message appears when the limit is reached, and you can select one of the following: User Guide for Scopia XT5000 Series Version 3.2 Starting a Videoconference | 43... -
Page 44: Joining A Videoconference
For more information, see Administrator Guide for Scopia XT Series. Important: Using encryption is subject to local regulation. In some countries it is restricted or limited for usage. For more information, consult your local reseller. User Guide for Scopia XT5000 Series Version 3.2 Starting a Videoconference | 44... -
Page 45: Recording A Videoconference
MCU, you can include up to 6 remote endpoints. The Scopia XT Series SMB Edition edition can include up to 5 remote endpoints. User Guide for Scopia XT5000 Series Version 3.2 During Your Videoconference | 45... - Page 46 • From the XT Series web interface, select Basic Settings > Recording > General. • From the endpoint's main menu, select Configure > Recording. Figure 30: Setting your recording preferences 2. Define the following recording settings: User Guide for Scopia XT5000 Series Version 3.2 During Your Videoconference | 46...
-
Page 47: Starting A Recording
1024 7.5 MB 225 MB 450 MB 3.75 MB 112.5 MB 225 MB 3 MB 85 MB 169 MB 3. From the web interface only, select Save. User Guide for Scopia XT5000 Series Version 3.2 During Your Videoconference | 47... -
Page 48: Starting A Recording
During a videoconference, press ok/menu on the XT Remote Control Unit, and select Meeting Options > Recording. The Recording menu appears, indicating the amount of time you can record based on the available space on your USB storage device. User Guide for Scopia XT5000 Series Version 3.2 During Your Videoconference | 48... - Page 49 If you started the recording at any time after the videoconference started, the recording automatically stops when the videoconference ends. Otherwise, stop the recording by selecting Stop. User Guide for Scopia XT5000 Series Version 3.2 During Your Videoconference | 49...
-
Page 50: Viewing A Recording From The Web Interface
Verify that you have one of the following Internet Browsers installed, required to view the recording: • Google Chrome version 11 or later • Apple Safari version 5 or later User Guide for Scopia XT5000 Series Version 3.2 During Your Videoconference | 50... -
Page 51: Controlling Your Video And Audio
If you are hosting a videoconference with your embedded MCU, you have the additional option of hiding your video from the videoconference layout, as described in Hiding your Video and Audio from the Videoconference on page 73. User Guide for Scopia XT5000 Series Version 3.2 During Your Videoconference | 51... -
Page 52: Moving The Camera's Position
DVI port open to connect a computer and share content. For more information about connecting the Scopia XT Camera Switch, see Installation Guide for Scopia XT Series. User Guide for Scopia XT5000 Series Version 3.2 During Your Videoconference | 52... -
Page 53: Before You Begin
• From the endpoint's main menu, press ok/menu and select Video Source. Press ok/menu repeatedly to switch between cameras. • From the XT Series web interface, select the camera type icon next to Cameras to switch between different cameras. User Guide for Scopia XT5000 Series Version 3.2 During Your Videoconference | 53... -
Page 54: Adjusting The Volume
• From the endpoint's main menu, select Configure > Calling from the Main menu. • From the XT Series web interface, select Basic Settings > Call-Answer mode > General. User Guide for Scopia XT5000 Series Version 3.2 During Your Videoconference | 54... -
Page 55: Muting The Microphone Pod
Mute key on the XT Remote Control Unit or press the Mute button on the Microphone Pod. • Press ok/menu to access the In-call menu and select Mute Myself: User Guide for Scopia XT5000 Series Version 3.2 During Your Videoconference | 55... -
Page 56: About Video Layouts
Selecting your Video Layout with One Monitor on page 56 • Selecting your Video Layout with Two Monitors on page 58 • Changing the Video Layout During the Call on page 61 User Guide for Scopia XT5000 Series Version 3.2 During Your Videoconference | 56... - Page 57 If the remote endpoint does not show any content, the display shows the remote video in the main part of the screen, and the local presentation in the small image. • PaP User Guide for Scopia XT5000 Series Version 3.2 During Your Videoconference | 57...
-
Page 58: Selecting Your Video Layout With Two Monitors
Figure 43: Available video and content (example) on page 59). One monitor is defined to be the primary one (HD1), and the second monitor is defined as auxiliary (HD2). User Guide for Scopia XT5000 Series Version 3.2 During Your Videoconference | 58... - Page 59 Your system administrator configures the monitors to show one of these layouts when you are in a call (see Table 9: Video configuration options with two monitors on page 60): User Guide for Scopia XT5000 Series Version 3.2 During Your Videoconference | 59...
- Page 60 PaP (Picture and Picture) view. For more information, see Changing the Video Layout During the Call on page 61. User Guide for Scopia XT5000 Series Version 3.2 During Your Videoconference | 60...
-
Page 61: Changing The Video Layout During The Call
The PoP (Picture out Picture) view shows up to three images of different size, presented side by side. The image on the left is larger, with two smaller images on the right. User Guide for Scopia XT5000 Series Version 3.2 During Your Videoconference | 61... - Page 62 The In-call menu automatically disappears from the display after a few seconds in a call. To bring back the In-call menu, press ok/menu on the XT Remote Control Unit. User Guide for Scopia XT5000 Series Version 3.2 During Your Videoconference | 62...
-
Page 63: Sharing Content
Use a computer to share a presentation or other PC content during a call. This procedure describes how to connect computers that are equipped with a DVI-out or VGA-out connector. Procedure 1. Connect your computer to the XT Codec Unit: User Guide for Scopia XT5000 Series Version 3.2 During Your Videoconference | 63... - Page 64 When you share content from the PC during a call, remote participants hear the computer's audio output as well as the audio from the Microphone Pod. Important: The audio input port supports both analog and digital optical audio. User Guide for Scopia XT5000 Series Version 3.2 During Your Videoconference | 64...
-
Page 65: Selecting The Computer Display Resolution
Table 11: DVI input formats supported by XT Codec Unit Name Resolution 1080p 1920x1080 SXGA 1280x1024 HD+ (900p) 1600x900 WSGA 1440x900 UVGA 1280x960 WXGA 1280x768/ 1280x800 720p 1280x720 User Guide for Scopia XT5000 Series Version 3.2 During Your Videoconference | 65... -
Page 66: Start Sharing Content Automatically
• When you have an incoming call, local presentation mode is suspended and you are asked how to handle the call (accept/reject/do not disturb). • Video input switches to DVI and the audio settings associated to DVI are automatically used. User Guide for Scopia XT5000 Series Version 3.2 During Your Videoconference | 66... -
Page 67: Sharing Content In The Local Conference Room
• Does not automatically accept incoming calls. • When you have an incoming call, local presentation mode is suspended and you are asked how to handle the call (accept/reject/do not disturb). User Guide for Scopia XT5000 Series Version 3.2 During Your Videoconference | 67... -
Page 68: Sharing Content During A Call
Back key from the XT Remote Control Unit • Present from the Main menu The XT Codec Unit switches back to the previously used live camera. User Guide for Scopia XT5000 Series Version 3.2 During Your Videoconference | 68... - Page 69 XT Remote Control Unit. • Select Present from the In-call menu. Access the call menu by pressing OK on the XT Remote Control Unit: User Guide for Scopia XT5000 Series Version 3.2 During Your Videoconference | 69...
- Page 70 Figure 50: In-call menu 2. Repeat the previous step to stop sharing the presentation. User Guide for Scopia XT5000 Series Version 3.2 During Your Videoconference | 70...
-
Page 71: Chapter 5: Hosting Videoconferences With The Built-In Mcu
For details, see Installation Guide for Scopia XT Series. User Guide for Scopia XT5000 Series Version 3.2 Hosting Videoconferences with the Built-in MCU | 71... - Page 72 4. Continue with: a. To choose the video layout, see Changing the Video Layout from the Scopia XT Series MCU Edition on page 73. User Guide for Scopia XT5000 Series Version 3.2 Hosting Videoconferences with the Built-in MCU | 72...
-
Page 73: Hiding Your Video And Audio From The Videoconference
Meeting Options > Hide Myself. Figure 52: Hiding your Video and Audio from the Videoconference Other participants cannot see your video in the layout and cannot hear you. User Guide for Scopia XT5000 Series Version 3.2 Hosting Videoconferences with the Built-in MCU | 73... -
Page 74: Changing The Video Layout From The Scopia Xt Series Mcu Edition
If you are not hosting this videoconference, you must first become a moderator of this videoconference, as described in Moderating a Videoconference Hosted by Another Scopia XT Series on page 77. User Guide for Scopia XT5000 Series Version 3.2 Hosting Videoconferences with the Built-in MCU | 74... -
Page 75: Moderating A Hosted Videoconference
Figure 55: Changing the video layout from the web interface 2. Select the desired layout according to the number of participants. Important: Select Auto to restore the default layout. User Guide for Scopia XT5000 Series Version 3.2 Hosting Videoconferences with the Built-in MCU | 75... -
Page 76: Moderating A Hosted Videoconference
To manage a specific endpoint, select it from the list of endpoints and choose from the options described in Table 14: Managing endpoints in the videoconference on page 77. To manage your own endpoint, select Local. User Guide for Scopia XT5000 Series Version 3.2 Hosting Videoconferences with the Built-in MCU | 76... - Page 77 Stats. Use the arrow keys on your XT Remote Control Unit to scroll through the endpoints. Figure 58: Viewing the remote endpoint's information User Guide for Scopia XT5000 Series Version 3.2 Hosting Videoconferences with the Built-in MCU | 77...
-
Page 78: Moderating A Videoconference Hosted By Another Scopia Xt Series
4. Moderate this endpoint in the videoconference by choosing one of the following actions: • Select Make Lecturer to assign the participant as the lecturer. User Guide for Scopia XT5000 Series Version 3.2 Hosting Videoconferences with the Built-in MCU | 78... -
Page 79: Ending A Videoconference
Meeting in the videoconference menu. If your system is set to Confirm disconnection, press ok/menu to confirm (for details, see Confirming Call Disconnections on page 83). User Guide for Scopia XT5000 Series Version 3.2 Hosting Videoconferences with the Built-in MCU | 79... - Page 80 • End Meeting to immediately end the call • Do Not Limit to remove the time limit • Snooze to postpone the reminder and extend the meeting for another hour User Guide for Scopia XT5000 Series Version 3.2 Hosting Videoconferences with the Built-in MCU | 80...
-
Page 81: Chapter 6: Customizing Your User Experience
1. Access the user PIN settings, as follows: • From the endpoint's main menu, select Configure > Advanced > Utilities > PIN Protect Settings > Basic Settings. User Guide for Scopia XT5000 Series Version 3.2 Customizing Your User Experience | 81... -
Page 82: Setting Call Answering Preferences
You can do this procedure from the endpoint itself or from the XT Series web interface. Procedure 1. Access the call settings, as follows: • From the XT Series web interface, select Basic Settings > Call-Answer Mode > General. User Guide for Scopia XT5000 Series Version 3.2 Customizing Your User Experience | 82... -
Page 83: Confirming Call Disconnections
To prevent accidental disconnection from a call, you can configure the system to confirm before a call is disconnected. By default, calls are disconnected when a participant ends the call, without requiring a confirmation. User Guide for Scopia XT5000 Series Version 3.2 Customizing Your User Experience | 83... -
Page 84: Enabling Do Not Disturb To Block All Incoming Calls
• When a remote endpoint calls, the system informs it that you are unavailable and automatically disconnects the calling endpoint. User Guide for Scopia XT5000 Series Version 3.2 Customizing Your User Experience | 84... - Page 85 1. Access the call settings, as follows: • From the XT Series web interface, select Basic Settings > Call-Answer Mode > General. • From the endpoint's main menu, select Configure > Calling. User Guide for Scopia XT5000 Series Version 3.2 Customizing Your User Experience | 85...
-
Page 86: Blocking Video Input By Default
1. Access the call settings, as follows: • From the XT Series web interface, select Basic Settings > Call-Answer Mode > General. • From the endpoint's main menu, select Configure > Calling. User Guide for Scopia XT5000 Series Version 3.2 Customizing Your User Experience | 86... -
Page 87: Activating The Screen Saver
You can activate the screen saver at any moment by pressing the Power key on the XT Remote Control Unit. User Guide for Scopia XT5000 Series Version 3.2 Customizing Your User Experience | 87... -
Page 88: Viewing System Information For Customer Support
Procedure 1. View system information as follows: • From the XT Series web interface, log in. The system information is displayed in the Home tab. User Guide for Scopia XT5000 Series Version 3.2 Troubleshooting the Scopia XT Series | 88... - Page 89 2. To view additional system information such as IP addresses and the gatekeeper's registration status from the endpoint, press the Back key and select System Status. User Guide for Scopia XT5000 Series Version 3.2 Troubleshooting the Scopia XT Series | 89...
-
Page 90: Resolving Monitor Display Problems
Check that the monitor power switch is set to ON. Solution Verify the XT Codec Unit’s LED is on. If the LED is blinking, press the Power key on the XT Remote Control Unit. User Guide for Scopia XT5000 Series Version 3.2 Troubleshooting the Scopia XT Series | 90... - Page 91 Adjusting the Image Position on page 25. From the web interface only, select Save. User Guide for Scopia XT5000 Series Version 3.2 Troubleshooting the Scopia XT Series | 91...
-
Page 92: Resolving Problems With Pc Presentations
• Turn on the Scopia XT Series unit. • Verify that you have the four-digit PIN code required to make changes to the system settings. The default PIN code is 1234. User Guide for Scopia XT5000 Series Version 3.2 Troubleshooting the Scopia XT Series | 92... - Page 93 4. Select Advanced. 5. Enter your four-digit PIN code, and press ok/menu. The default PIN code is 1234. 6. Select Utilities > Restore System > Factory Defaults. User Guide for Scopia XT5000 Series Version 3.2 Troubleshooting the Scopia XT Series | 93...
-
Page 94: Resolving Video Or Audio Disruptions
Loss in audio quality may result from noise produced by a computer's cooling system. Solution If you are using a laptop during a meeting, do not place it too close to the microphone. User Guide for Scopia XT5000 Series Version 3.2 Troubleshooting the Scopia XT Series | 94... -
Page 95: Glossary Of Terms For Scopia Solution
In H.323, an alias represents the unique name of an endpoint. Instead of dialling an IP address to reach an endpoint, you can dial an alias, and the gatekeeper resolves it to an IP address. User Guide for Scopia XT5000 Series Version 3.2 Glossary of Terms for Scopia Solution | 95... - Page 96 The range of video layouts depends on the type of media processing supported, typically located in the MCU. User Guide for Scopia XT5000 Series Version 3.2 Glossary of Terms for Scopia Solution | 96...
- Page 97 DNS Server A DNS server is responsible for resolving domain names in your network by translating them into IP addresses. User Guide for Scopia XT5000 Series Version 3.2 Glossary of Terms for Scopia Solution | 97...
- Page 98 Far End Camera Control (FECC) is a feature of endpoints, where the camera can be controlled remotely by another endpoint in the call. Forward Error Correction on page 98. User Guide for Scopia XT5000 Series Version 3.2 Glossary of Terms for Scopia Solution | 98...
- Page 99 A gateway is a component in a video solution which routes information between two subnets or acts as a translator between different protocols. For example, a gateway can route data between the headquarters and a partner site, or between two protocols like the Scopia TIP Gateway, Radvision SIP Gateway, or the Scopia TIP Gateway.
- Page 100 There are several profiles within H.264. The default profile is the H.264 Baseline Profile, but H.264 High Profile uses more sophisticated compression techniques. User Guide for Scopia XT5000 Series Version 3.2 Glossary of Terms for Scopia Solution | 100...
- Page 101 Mobile, however, uses the same protocols as Scopia Desktop Client. H.350 H.350 is the protocol used to enhance LDAP user databases to add video endpoint information for users and groups. User Guide for Scopia XT5000 Series Version 3.2 Glossary of Terms for Scopia Solution | 101...
- Page 102 > staff members. The database standard is employed by most user directories including Microsoft Active Directory, IBM Sametime and others. H.350 is an extension to the LDAP standard for the videoconferencing industry. User Guide for Scopia XT5000 Series Version 3.2 Glossary of Terms for Scopia Solution | 102...
- Page 103 Far end camera control (FECC) is another example of information carried on the data stream. Media is transmitted via the RTP and RTCP protocols in both SIP and H.323 calls. User Guide for Scopia XT5000 Series Version 3.2 Glossary of Terms for Scopia Solution | 103...
- Page 104 IP address, can be represented publicly by a single, unique IP address. The NAT translates between public and private addresses, enabling users toplace calls between public network users and private network users. User Guide for Scopia XT5000 Series Version 3.2 Glossary of Terms for Scopia Solution | 104...
- Page 105 NetSense NetSense is a proprietary Radvision technology which optimizes the video quality according to the available bandwidth to minimize packet loss. As the available bandwidth of a connection varies depending on data traffic, NetSense's sophisticated algorithm dynamically scans the video stream, and then reduces or improves the video resolution to maximize quality with the available bandwidth.
- Page 106 RTSP. The secured version of RTP is SRTP. RTCP Real-time Control Transport Protocol, used alongside RTP for sending statistical information about the media sent over RTP. User Guide for Scopia XT5000 Series Version 3.2 Glossary of Terms for Scopia Solution | 106...
- Page 107 Signaling is transmitted via the H.225.0/Q.931 and User Guide for Scopia XT5000 Series Version 3.2 Glossary of Terms for Scopia Solution | 107...
- Page 108 It uses the system's camera and microphone to send image and sound to the other participants, and displays their images on the screen. For example, Scopia Desktop Client or Scopia Mobile. User Guide for Scopia XT5000 Series Version 3.2 Glossary of Terms for Scopia Solution | 108...
- Page 109 SVGA SVGA defines a video resolution of 800 x 600 pixels. SQCIF SQCIF defines a video resolution of 128 x 96 pixels. User Guide for Scopia XT5000 Series Version 3.2 Glossary of Terms for Scopia Solution | 109...
- Page 110 URI is an address format to locate a device on a network. For a SIP call, the URI consists of the endpoint's name or number, followed by the SIP server domain name. For example, <endpoint name>@<SIP server domain name> or user@domain_name.com. User Guide for Scopia XT5000 Series Version 3.2 Glossary of Terms for Scopia Solution | 110...
- Page 111 A virtual room in Scopia Desktop and Scopia Mobile offers a virtual meeting place for videoconferences. An administrator can assign a virtual room to the organization's users and conference rooms. Users can User Guide for Scopia XT5000 Series Version 3.2 Glossary of Terms for Scopia Solution | 111...
- Page 112 Often a zone is assigned a dial prefix, and usually corresponds to a physical location like an organization's department or branch. User Guide for Scopia XT5000 Series Version 3.2 Glossary of Terms for Scopia Solution | 112...
- Page 113 About Radvision Radvision, an Avaya company, is a leading provider of videoconferencing and telepresence technologies over IP and wireless networks. We offer end-to-end visual communications that help businesses collaborate more efficiently. Together, Radvision and Avaya are propelling the unified communications evolution forward with unique technologies that harness the power of video, voice, and data over any network.
Need help?
Do you have a question about the Scopia XT5000 Series and is the answer not in the manual?
Questions and answers