RADVision Scopia XT1000 Administrator's Manual
Hide thumbs
Also See for Scopia XT1000:
- User manual (70 pages) ,
- Administrator's manual (43 pages) ,
- Test results (35 pages)
Table of Contents
Advertisement
Advertisement
Table of Contents

Related Manuals for RADVision Scopia XT1000


Summary of Contents for RADVision Scopia XT1000
-
Page 1: Scopia Xt1000
SCOPIA XT1000 Administrator Guide Version 2.0... - Page 2 If there is any software on removable media described in this publication, it is furnished under a license agreement included with the product as a separate document. If you are unable to locate a copy, please contact RADVISION Ltd and a copy will be provided to you.
-
Page 3: Table Of Contents
Using the Quick Setup Wizard ................14 Setting the Country and Language ..............14 Adjusting the Image Size................14 Setting Date and Time................16 Setting the Codec Unit Display Name............. 16 RADVISION | Administrator Guide for SCOPIA XT1000 Version 2.0 Table of Contents| i... - Page 4 Configuring Network Addresses .............. 38 Configuring Bandwidths ............... 39 Configuring MTU Parameters ..............40 Configuring Gatekeeper Use................ 41 General Settings ................41 Settings for Gatekeeper Use..............41 Table of Contents| ii RADVISION | Administrator Guide for SCOPIA XT1000 Version 2.0...
- Page 5 Calls ....................69 Call Performance ..................70 Graphics ....................70 IP Address ..................... 71 Monitor and Power On ................71 PC Presentation..................72 Remote Control Unit ................. 72 Table of Contents| iii RADVISION | Administrator Guide for SCOPIA XT1000 Version 2.0...
- Page 6 Video and Camera ................... 72 Contacting Support ..................72 Table of Contents| iv RADVISION | Administrator Guide for SCOPIA XT1000 Version 2.0...
-
Page 7: Architecture Considerations
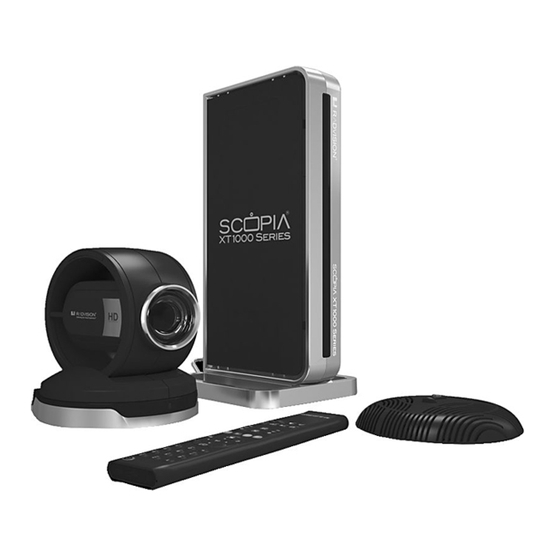
MCU. Among its key features, SCOPIA XT1000 delivers support for two full High Definition (HD) 1080p video streams as standard. It includes a PTZ (Pan-Tilt-Zoom) camera with 10x optical zoom for viewing details, and wide-angle capability for capturing an entire group. -
Page 8: Scopia Xt1000 Series As Embedded Mcus
SCOPIA XT1000 Series as Endpoints SCOPIA XT1000 Series as Embedded MCUs The MCU capability is embedded in the SCOPIA XT1000 and can be activated by registering the Codec Unit serial number and product key in the XT1000 web registration page reserved to SCOPIA XT1000 purchasers. - Page 9 SD video streams and HD endpoints will receive HD video streams. In the same way 4:3 and 16:9 video formats are included in the best possible way into the CP mosaic. 'Architecture Considerations' | 3 RADVISION | Administrator Guide for SCOPIA XT1000 Version 2.0...
-
Page 10: Embedded Mcus And Scopia Xt Desktop
Embedded MCUs and SCOPIA XT Desktop Built on the SCOPIA XT1000 HD room system with its high capacity embedded MCU, the SCOPIA XT Desktop solution combines HD room system capabilities, embedded multi-party conferencing, desktop conferencing and firewall traversal. The SCOPIA XT Desktop option is delivered on a CD for installation on a separate server. -
Page 11: Isdn Connectivity
Implementing External Control The SCOPIA XT1000 has a feature-rich API. Using this API, integrators can implement AMX and Creston applications to control the Codec Unit. The API is implemented as text commands over the Ethernet interface. Contact RADVISION customer support for a copy of the API documentations. - Page 12 'Architecture Considerations' | 6 RADVISION | Administrator Guide for SCOPIA XT1000 Version 2.0...
-
Page 13: Initial Configuration
Initial Configuration Useful Documentation When configuring the system, consult the documentation RADVISION puts at your disposal: • SCOPIA XT1000 User Guide, which explains how to operate the SCOPIA XT1000. • Release Notes, for the latest software updates. • SCOPIA XT1000 Specifications on the RADVISION web site. -
Page 14: Enabling The Software License
You can use software versions V1.0.x without any license. Starting from Software Version V2.0, you need an enabling license to upgrade a SCOPIA XT1000 with major or minor software versions. You can also load a new software version into the system, but its functionalities will be freely available only for a limited period of time. -
Page 15: Enabling The Temporary License
Step 1 Start a web browser on your PC (Internet Explorer V7). Step 2 Enable download management as described in Configuring the Codec Unit for Remote Upgrade page 'Initial Configuration' | 9 RADVISION | Administrator Guide for SCOPIA XT1000 Version 2.0... - Page 16 Enter the IP address of Codec Unit in the address bar of the browser. Figure 2-4 Web Access Step 4 Once in this page select Settings > Utilities > Licenses. Figure 2-5 Web Interface 'Initial Configuration' | 10 RADVISION | Administrator Guide for SCOPIA XT1000 Version 2.0...
- Page 17 Enable code Enter the license key you received when registering the product. Step 6 Press Enable license. Step 7 Press Close to close the screen. 'Initial Configuration' | 11 RADVISION | Administrator Guide for SCOPIA XT1000 Version 2.0...
-
Page 18: Enabling The License From The Utilities Page
Administrator Settings. Enter the administrator password (default is 1234). Step 2 Scroll to Utilities. Step 3 Select Licenses. Step 4 Enter the license key. Step 5 Press Save. 'Initial Configuration' | 12 RADVISION | Administrator Guide for SCOPIA XT1000 Version 2.0... -
Page 19: Installing And Enabling An Option License
System Info page that appears when you press on the Remote Control Unit. Step 3 On a computer, open a browser and navigate to http://www.radvision.com/XT1000. Step 4 Complete the online registration form and enter the serial number or the user code and the option key. -
Page 20: Setting The User Interface Language
If the display appears cropped on your monitor, you may need to adjust the image size the system sends you. For an optimal video experience, some heuristic suggestions might help to configure the monitor: 'Initial Configuration' | 14 RADVISION | Administrator Guide for SCOPIA XT1000 Version 2.0... - Page 21 Repeat the procedure for the Left, Bottom, and Right side. Step 3 Press Next. 'Initial Configuration' | 15 RADVISION | Administrator Guide for SCOPIA XT1000 Version 2.0...
-
Page 22: Setting Date And Time
Step 1 On the Main Menu page, scroll to Settings. Step 2 Press Quick setup on the XT1000 Remote Control Unit. Step 3 Navigate to Page 5/6. 'Initial Configuration' | 16 RADVISION | Administrator Guide for SCOPIA XT1000 Version 2.0... -
Page 23: Network Settings
The network administrator knows how to configure these settings. Contact him to get the information. Press Finish to exit Quick Setup. Note: For LAN setup, you must acquire a separate license. 'Initial Configuration' | 17 RADVISION | Administrator Guide for SCOPIA XT1000 Version 2.0... -
Page 24: Setting The Administrator/User Password
You may also modify these settings in this page. Procedure Step 1 In the Administrator settings menu select System. Step 2 Select Date - time. 'Initial Configuration' | 18 RADVISION | Administrator Guide for SCOPIA XT1000 Version 2.0... -
Page 25: Setting The Time Zone
Set the day and month of the current year when energy saving will start. Stop (dd/mm) Set the day and month of the current year when energy saving will stop. Step 4 Press Save. 'Initial Configuration' | 19 RADVISION | Administrator Guide for SCOPIA XT1000 Version 2.0... -
Page 26: Setting Regional Data
(east or west); thus in Japan the system administrator must select manually the correct value related to the geographic location. Step 4 Press Save. 'Initial Configuration' | 20 RADVISION | Administrator Guide for SCOPIA XT1000 Version 2.0... -
Page 27: Pairing A Remote Control Unit With A Codec Unit
. The button becomes red. Step 6 Using the keypad, type the two-digit code you just entered in the Remote control code field. Step 7 Press Finish. 'Initial Configuration' | 21 RADVISION | Administrator Guide for SCOPIA XT1000 Version 2.0... -
Page 28: Enabling The Screen Saver
You may also access this page from a previous screen in the configuration. Procedure Step 1 In the Administrator settings menu select I/O connections. Step 2 Scroll to Cameras. 'Initial Configuration' | 22 RADVISION | Administrator Guide for SCOPIA XT1000 Version 2.0... -
Page 29: Configuring The Camera(S)
If set to Automatic, the camera adjusts automatically to room lighting. If set to Customize, a Calibration button appears on the display, allowing you to calibrate white balance. Step 5 Press Save. 'Initial Configuration' | 23 RADVISION | Administrator Guide for SCOPIA XT1000 Version 2.0... -
Page 30: Configuring Other Video Equipment
You may connect a camera to the DVI-I input, but it will be managed as PC content. Step 5 Press Save. Configuring the Monitor Note: You can return to the Default Auto settings at any time by holding down simultaneously 'Initial Configuration' | 24 RADVISION | Administrator Guide for SCOPIA XT1000 Version 2.0... -
Page 31: General Settings
DVI - The Codec Unit only supports a DVI video equipment. Reset HD1/HD2 Select the arrow to reset the fields to their default settings. Step 5 Press Save. 'Initial Configuration' | 25 RADVISION | Administrator Guide for SCOPIA XT1000 Version 2.0... -
Page 32: Graphic Adjustment
You may also access this page from a previous screen in the configuration. Procedure Step 1 In the Administrator settings menu select I/O connections. Step 2 Scroll to Monitor. Step 3 Select the PiP-PAP page. 'Initial Configuration' | 26 RADVISION | Administrator Guide for SCOPIA XT1000 Version 2.0... -
Page 33: Configuring Audio Connections
You may also access this page from a previous screen in the configuration. Procedure Step 1 In the Administrator settings menu select I/O connections. Step 2 Scroll to Audio - Inputs. Step 3 Select the POD1 or POD2 page. 'Initial Configuration' | 27 RADVISION | Administrator Guide for SCOPIA XT1000 Version 2.0... -
Page 34: Configuring Other Audio Inputs
You may also access this page from a previous screen in the configuration. Procedure Step 1 In the Administrator settings menu select I/O connections. Step 2 Scroll to Audio - Inputs. Step 3 Select the SPDIF/HD page. 'Initial Configuration' | 28 RADVISION | Administrator Guide for SCOPIA XT1000 Version 2.0... -
Page 35: Configuring The Echocanceller
You may also access this page from a previous screen in the configuration. Procedure Step 1 In the Administrator settings menu select I/O connections. Step 2 Scroll to Audio - Inputs. Step 3 Select the EchoCanceller page. 'Initial Configuration' | 29 RADVISION | Administrator Guide for SCOPIA XT1000 Version 2.0... -
Page 36: Configuring Audio Outputs
Step 5 Press Save. Settings for HDMI Recording Procedure Step 1 In the Administrator settings menu select I/O connections. Step 2 Select Audio - Outputs > General. 'Initial Configuration' | 30 RADVISION | Administrator Guide for SCOPIA XT1000 Version 2.0... -
Page 37: Upgrading To The Xt1000 With Embedded Mcu
Step 2 Enable the license as explained in Installing and Enabling an Option License page Step 3 Set up a call to check how the system works. 'Initial Configuration' | 31 RADVISION | Administrator Guide for SCOPIA XT1000 Version 2.0... -
Page 38: Configuring Network Settings
IP traffic. Moreover, once the ports have been opened, the protocols [TCP 1720 (Q.931), TCP 1503 (T.120), UDP 1719, and 1718 (RAS)] involved in a call must be taken into account. 'Initial Configuration' | 32 RADVISION | Administrator Guide for SCOPIA XT1000 Version 2.0... - Page 39 GUI. See the Public Port List table for default values. The H.323/SIP signaling and media ports are programmable. 'Initial Configuration' | 33 RADVISION | Administrator Guide for SCOPIA XT1000 Version 2.0...
- Page 40 XML Com- Remote control Both Cannot send/ iPAD SCOPIA mands receive Control; XT1000 command. iPAD SCOPIA Desktop SCOPIA Control Server and XT1000 SCOPIA Desktop Server are not operational. 'Initial Configuration' | 34 RADVISION | Administrator Guide for SCOPIA XT1000 Version 2.0...
- Page 41 BFCP signaling 5070 BFCP SIP content Both No SIP content “Well known” (presentation) video available. BFCP service port video signaling (used by SIP). 'Initial Configuration' | 35 RADVISION | Administrator Guide for SCOPIA XT1000 Version 2.0...
-
Page 42: Configuring Nat/Firewall Traversal Use
This page allows to manage the presence of a firewall/NAT traversal on the network. Procedure Step 1 In the Administrator settings menu select Networks. Step 2 Select Preferences. Step 3 Select the NAT page. 'Initial Configuration' | 36 RADVISION | Administrator Guide for SCOPIA XT1000 Version 2.0... -
Page 43: Configuring Quality Of Service (Qos)
Manual method of setting the system’s firewall/NAT public IP address. Enter the Public IP address for that setting. HTTP discovery - This method uses a RADVISION HTTP server to discover the presence of a firewall/NAT and its public IP address. -
Page 44: Configuring Glan/Lan Properties
Configuring GLAN/LAN Properties Configuring Network Addresses Procedure Step 1 In the Administrator settings menu select Networks. Step 2 Scroll to GLAN/LAN. Step 3 Select the Addresses page. 'Initial Configuration' | 38 RADVISION | Administrator Guide for SCOPIA XT1000 Version 2.0... -
Page 45: Configuring Bandwidths
We recommend enabling the High Bandwidth Option (12Mbps) when using the embedded MCU. If the High Bandwidth option is not enabled, the MCU will send out a lower resolution according to the standard 4Mbps total bandwidth. 'Initial Configuration' | 39 RADVISION | Administrator Guide for SCOPIA XT1000 Version 2.0... -
Page 46: Configuring Mtu Parameters
Step 3 Select the Parameters page. Step 4 Set the field as required. Field Name Setting Sets the maximum size of each data packet. Step 5 Press Save. 'Initial Configuration' | 40 RADVISION | Administrator Guide for SCOPIA XT1000 Version 2.0... -
Page 47: Configuring Gatekeeper Use
Press Save. Settings for Gatekeeper Use Procedure Step 1 In the Administrator settings menu select Protocols. Step 2 Scroll to H.323. Step 3 Select the Gatekeeper page. 'Initial Configuration' | 41 RADVISION | Administrator Guide for SCOPIA XT1000 Version 2.0... - Page 48 Gatekeeper H.323 identifier. Ask the network administrator. User name The network administrator must pre-configure the User name in the gatekeeper. Password The network administrator must pre-configure the Password in the gatekeeper. 'Initial Configuration' | 42 RADVISION | Administrator Guide for SCOPIA XT1000 Version 2.0...
-
Page 49: Configuring Gateway Use
Specifies the preferred transport for outgoing calls (UDP or TCP). Port Sets the port for server signaling (default is UDP and TCP 5060). Step 5 Press Save. 'Initial Configuration' | 43 RADVISION | Administrator Guide for SCOPIA XT1000 Version 2.0... -
Page 50: Configuring Ldap Server Use
Base Filter User. For the SCOPIA XT1000 remote server, the server administrator defines the User. For the SCOPIA iVIEW, the User must be agreed upon with the iVIEW server administrator. For the remote generic LDAP server, all parameters must be agreed upon with the server administrator. - Page 51 Filter Represents the object that must be retrieved to populate the local directory of the SCOPIA XT1000 with the data stored in the remote server. Records are stored with the inetOrgPerson structure. Pre-defined value. These screens illustrate the LDAP server trees.
-
Page 52: Configuring Isdn Connectivity
Save. Configuring ISDN Connectivity When dialing an ISDN call from SCOPIA XT1000 using a RADVISION Gateway, the user can dial the ISDN number as it is, with no IP address or delimiters. This feature is available in automatic mode when a RADVISION Gateway is present, with or without a gatekeeper. User experience is the same as using an embedded board, in all possible network configurations. - Page 53 Direct Call GUI, and select the pre-defined rate. When the SCOPIA gateway is used, the Codec Unit will automatically detect the rate used to place the call. Figure 2-11 Advanced Call 'Initial Configuration' | 47 RADVISION | Administrator Guide for SCOPIA XT1000 Version 2.0...
- Page 54 Service Mode >Manual, and the user interface will change as shown in the figure. This interface will allow to configure the services for any possible value of the connection rate. Figure 2-13 Manual Service Mode Step 8 Press Save. 'Initial Configuration' | 48 RADVISION | Administrator Guide for SCOPIA XT1000 Version 2.0...
-
Page 55: Configuring Call Properties
Sets the maximum call rate that the system will use for all incoming or outgoing calls in ISDN connectivity . For ISDN configuration, see Configuring ISDN Connectivity page Step 5 Press Save. 'Initial Configuration' | 49 RADVISION | Administrator Guide for SCOPIA XT1000 Version 2.0... -
Page 56: Audio/Video Compatibility With Older Systems
Audio/Video Compatibility with Older Systems The Audio and Video pages list various functionalities that you may enable/disable to make the SCOPIA XT1000 compatible with an older generation of remote systems. Procedure Step 1 In the Administrator settings menu select Calls. -
Page 57: Configuring Video Quality
Received audio delay in milliseconds. If Lip-sync automatic is set to No, drag the slider until you obtain the best synchronization. Sharpness Enable/disable video sharpness. Step 5 Press Save. 'Initial Configuration' | 51 RADVISION | Administrator Guide for SCOPIA XT1000 Version 2.0... -
Page 58: Securing Calls
Length of Prime DH Number Aways greyed. You cannot change the value. It is set to 1024bit, which is the standard H.323 value. Step 5 Press Save. 'Initial Configuration' | 52 RADVISION | Administrator Guide for SCOPIA XT1000 Version 2.0... -
Page 59: Maintenance Tasks
Maintenance Tasks System Remote Management If you enable web management, you can control the SCOPIA XT1000 via the Web: • Place a call • Change settings • Activate/deactivate options • Perform administrative tasks Procedure Step 1 In the Administrator settings menu scroll to Utilities. - Page 60 Enables/disables https service, i.e. the Secure Socket Layer (SSL) function. Enable all addresses If set to Yes, enables access to SCOPIA XT1000 from any IP address in a network. If set to No, configure Address and SubNet mask of PC (or PCs) that should be enabled to remotely access SCOPIA XT1000.
- Page 61 Protocols Set up SIP and H.323 (General and Gatekeeper) Utilities Enable licenses and load default values. Options Diagnostics Check the system. Release software Lists the software releases. 'Maintenance Tasks' | 55 RADVISION | Administrator Guide for SCOPIA XT1000 Version 2.0...
-
Page 62: Configuring The Codec Unit For Remote Upgrade
Use the Download page to define restriction for software upgrade if the system is accessible in an unsecured network. Procedure Step 1 In the Administrator settings menu scroll to Utilities. Step 2 Select Remote access. Step 3 Select the Download page. 'Maintenance Tasks' | 56 RADVISION | Administrator Guide for SCOPIA XT1000 Version 2.0... -
Page 63: Upgrading The Software
(or the license key of an older software version) in the relevant screen. Download a new software package from the RADVISION Web/ftp site. The software release contains new features or patch release. The software update package is an auto extracting file containing a specific software version (for example: XT1000_V1_0_19.exe). - Page 64 Landownload program is going to be executed is included among the enabled IP addresses. Figure 3-3 Enabling Download Management Step 4 Access the RADVISION site as explained at the beginning of this section, or contact Customer Support. Step 5 Download the XT1000_Vxxx.exe from the RADVISION site to a Windows PC.
-
Page 65: Managing The Codec Unit With At Commands
Figure 3-5 AT Control Interface Procedure Step 1 In the Administrator settings menu scroll to Utilities. Step 2 Select Remote access. Step 3 Select the AT commands page. 'Maintenance Tasks' | 59 RADVISION | Administrator Guide for SCOPIA XT1000 Version 2.0... -
Page 66: Configuring The System For Snmp Management
Configuring the System for SNMP Management iVIEW/NMS integration allows remote monitoring, configuring, upgrading and control features of SCOPIA XT1000 terminals, using SNMP (Simple Network Management Protocol) and an AT command-based protocol on TCP/IP . In particular, these features have been introduced: •... -
Page 67: Importing/Exporting Configuration Files
Enter the SubNet mask associated with the IP address. Step 5 Press Save. Importing/Exporting Configuration Files When these settings are set to Yes, RADVISION iVIEW SCOPIA Management Suite can get and install configuration files. Procedure Step 1 In the Administrator settings menu scroll to Utilities. - Page 68 Set the fields as required. Field Name Description Enable import Enable/disable import of configuration files from iVIEW. Enable export Enable/disable export of configuration files to iVIEW. Step 5 Press Save. 'Maintenance Tasks' | 62 RADVISION | Administrator Guide for SCOPIA XT1000 Version 2.0...
-
Page 69: Troubleshooting
PC in their office). In that configuration you can use the PC’s arrows, Enter, numbers and Delete keys to control the system. This feature is available from SCOPIA XT1000 Service Pack V1_0_11. Procedure Step 1 Launch the VNCViewer_Enable utility and enter the system address. -
Page 70: Activating Recovery Mode
PC VNC Setup Activating Recovery Mode The SCOPIA XT1000 Recovery Mode allows to recover the Codec Unit in case the running software is malfunctioning or when you must reinstall the software from scratch. The Recovery Mode can be activated in two ways: 'Troubleshooting' | 64 RADVISION | Administrator Guide for SCOPIA XT1000 Version 2.0... - Page 71 It also indicates the personalized Remote Control Code used by the Codec Unit ( default 01). See the SCOPIA XT1000 User Guide for information on how to personalize the Remote Control Unit. Verify that the network cable is connected to the GLAN connector (marked 10/100/1000) on the back panel of the Codec Unit.
- Page 72 Step 3 Once the IP address of the Codec Unit is set, you will be prompted to confirm activation of the download procedure. Figure 4-6 Download Procedure Warning 'Troubleshooting' | 66 RADVISION | Administrator Guide for SCOPIA XT1000 Version 2.0...
- Page 73 Codec Unit. Figure 4-8 System Ready to Receive Software Package Step 5 The software update package is an autoextracting file containing a specific software version (e.g.: XT1000_V1_0_5.exe). 'Troubleshooting' | 67 RADVISION | Administrator Guide for SCOPIA XT1000 Version 2.0...
- Page 74 Figure 4-9 Landownload Start Screen Download the package from RADVISION site to a Windows PC. Double click the package to autoextract the Landownload program. In the interface of the landownload program enter the IP address of the Codec Unit and press the Start button.
-
Page 75: Using The Diagnostics Feature
See the SCOPIA XT1000 User Guide for detailed information. FAQs This section lists issues that might come up while using the SCOPIA XT1000. 12 Mbps License I entered the 12Mbps license, but the system still works at a lower rate. -
Page 76: Call Performance
• Make sure the remote system supports 1080p. Remote systems that are limited to 720p or below will negotiate lower resolutions with the SCOPIA XT1000. • Make sure the camera is connected to the HDMI1 input port of the Codec Unit. -
Page 77: Ip Address
Disconnect and reconnect the Microphone Pod. • Disconnect and reconnect the HDMI monitor. • Select Administrator settings > I/O Connections > Monitor > General and reset the monitor without audio. 'Troubleshooting' | 71 RADVISION | Administrator Guide for SCOPIA XT1000 Version 2.0... -
Page 78: Pc Presentation
Contacting Support Before contacting RADVISION support for help, write down the Serial Number that identifies your video conferencing system. The number is printed on a label affixed at the rear of the XT1000 Codec Unit. The Serial Number starts with AE followed by 9 digits, space, 4 digits, space, 1 digit, space, 6 digits. - Page 79 F +44 20 3178 5717 F +852 2801 4071 infoUSA@radvision.com infoUK@radvision.com infoAPAC@radvision.com This document is not part of a contract of license as may be expressly agreed RADVISION is registered trademarks of RADVISION, Ltd. All trademarks recognized. All rights reserved © 2010 RADVISION, Ltd.
Need help?
Do you have a question about the Scopia XT1000 and is the answer not in the manual?
Questions and answers