RADVision SCOPIA XT4000 Series User Manual
Version 3.1 for solution 7.7, 8.0
Hide thumbs
Also See for SCOPIA XT4000 Series:
- User manual (102 pages) ,
- Installation manual (184 pages) ,
- Administrator's manual (43 pages)
Table of Contents
Advertisement
Quick Links
Advertisement
Table of Contents

Subscribe to Our Youtube Channel
Related Manuals for RADVision SCOPIA XT4000 Series


Summary of Contents for RADVision SCOPIA XT4000 Series
- Page 1 SCOPIA XT4000 Series User Guide Version 3.1 For Solution 7.7, 8.0...
- Page 2 If there is any software on removable media described in this publication, it is furnished under a license agreement included with the product as a separate document. If you are unable to locate a copy, please contact RADVISION Ltd and a copy will be provided to you.
-
Page 3: Table Of Contents
Remotely Adding and Modifying Contacts in the Phone Book....... 18 Searching for a Contact in the Phone Book............20 Modifying a Contact in the Phone Book............21 Deleting a Contact from the Phone Book............22 RADVISION | User Guide for SCOPIA XT4000 Series Version 3.1 Table of Contents | i... - Page 4 Making Videoconference Calls Starting a Videoconference................51 Remotely Setting an End Time for the Videoconference..........52 Changing the Video Layout from the SCOPIA XT Series MCU Edition......52 RADVISION | User Guide for SCOPIA XT4000 Series Version 3.1 Table of Contents | ii...
- Page 5 Viewing System Information for Customer Support..........62 Resolving Monitor Display Problems..............64 Resolving Problems with PC Presentations............65 Resolving XT Remote Control Unit Problems............65 Restoring Default User Settings..............65 RADVISION | User Guide for SCOPIA XT4000 Series Version 3.1 Table of Contents | iii...
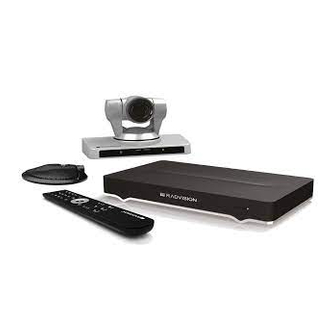
- Page 6 The wide angle PTZ camera captures the whole conference room. To maintain high quality video and audio, the SCOPIA XT4000 Series uses H.264 Scalable Video Coding Technology (SVC). The SCOPIA XT4000 Series ensures high quality audio even during poor network conditions, using its 48 kHz sampling rate (full band) audio encoding capability.
- Page 7 SCOPIA Desktop Server. For more information on the SMB Solution deployment, see Features of the Small Medium Business Solution for Videoconferencing. RADVISION | User Guide for SCOPIA XT4000 Series Version 3.1 About the SCOPIA XT Series | 2...
-
Page 8: Getting Started
This section explains how to use the XT Remote Control Unit and lists the function of each key. Figure 2-2 on page 4 describes the functions of the XT Remote Control Unit. RADVISION | User Guide for SCOPIA XT4000 Series Version 3.1 Getting Started | 3... - Page 9 Figure 2-2 The XT Remote Control Unit RADVISION | User Guide for SCOPIA XT4000 Series Version 3.1 Getting Started | 4...
-
Page 10: Pairing An Xt Remote Control Unit With A Xt Codec Unit
• From the web interface, navigate to: Basic Settings > General. • From the endpoint itself, access the Main menu and navigate to: Configure > General. RADVISION | User Guide for SCOPIA XT4000 Series Version 3.1 Getting Started | 5... - Page 11 Using the keypad, type the number you just entered in the Remote control code field. Note You must always use two digits for a code. For example, to set the code to “1”, enter “01”. RADVISION | User Guide for SCOPIA XT4000 Series Version 3.1 Getting Started | 6...
-
Page 12: Installing And Activating Your Scopia Xt Series
You navigate SCOPIA XT Series menus using arrow keys and pressing the OK key on the XT Remote Control Unit (for details, see “Using the XT Remote Control Unit” on page RADVISION | User Guide for SCOPIA XT4000 Series Version 3.1 Getting Started | 7... - Page 13 Main menu appears. Figure 2-6 Main menu Step 4 Select one of the options using the arrow keys of the XT Remote Control Unit. RADVISION | User Guide for SCOPIA XT4000 Series Version 3.1 Getting Started | 8...
-
Page 14: Accessing Scopia Xt Series Web Interface
We recommend changing the default credentials after logging in for the first time, as described in the Administrator Guide. Step 3 (Optional) Select the web interface language from the Language list. Step 4 Select Login. RADVISION | User Guide for SCOPIA XT4000 Series Version 3.1 Getting Started | 9... -
Page 15: Performing Basic Configuration
(for example: Hong-Kong, or 9th-Floor-Room, or NY-Office). You can also select the country in which the system is located and the language in which the system menus are displayed. RADVISION | User Guide for SCOPIA XT4000 Series Version 3.1 Getting Started | 10... - Page 16 To adjust the image on your monitor, select Next and continue with “Adjusting the Image Position” on page • To exit the quick setup wizard, select Close. RADVISION | User Guide for SCOPIA XT4000 Series Version 3.1 Getting Started | 11...
-
Page 17: Adjusting The Image Position
If the image is centered correctly, skip this procedure and select Next. Figure 2-10 Examining the image position Step 2 Press 1 to align the top left corner. RADVISION | User Guide for SCOPIA XT4000 Series Version 3.1 Getting Started | 12... -
Page 18: Configuring Network Settings
This procedure is performed as part of the Quick Setup Wizard, after “Adjusting the Image Position” on page Start the Quick Setup Wizard by selecting Configure > Quick Setup from the Main menu. RADVISION | User Guide for SCOPIA XT4000 Series Version 3.1 Getting Started | 13... - Page 19 Enter the fields as described in Table 2-1 on page Figure 2-12 Defining IP Settings Step 2 If you selected Manual, configure the following, as instructed by the system administrator: RADVISION | User Guide for SCOPIA XT4000 Series Version 3.1 Getting Started | 14...
-
Page 20: Configuring Gatekeeper Settings
Start the Quick Setup Wizard by selecting Configure > Quick Setup from the Main menu. Note If you are modifying these settings after initial setup, navigate to Configure > Network > H.323 from the Main menu. RADVISION | User Guide for SCOPIA XT4000 Series Version 3.1 Getting Started | 15... -
Page 21: Remotely Setting The Interface Language
You can also do this from the endpoint itself, as described in “Setting the System Name and Language” on page Procedure Step 1 Access the SCOPIA XT Series web interface. RADVISION | User Guide for SCOPIA XT4000 Series Version 3.1 Getting Started | 16... -
Page 22: Activating The Screen Saver
Searching for a Contact in the Phone Book ..........page 20 • Modifying a Contact in the Phone Book ..........page 21 • Deleting a Contact from the Phone Book ..........page 22 RADVISION | User Guide for SCOPIA XT4000 Series Version 3.1 Getting Started | 17... -
Page 23: Adding Contacts From The Endpoint
To add a new contact from recent calls, see “Adding Contacts from the Endpoint” on page Procedure Step 1 Access the SCOPIA XT Series web interface. RADVISION | User Guide for SCOPIA XT4000 Series Version 3.1 Getting Started | 18... - Page 24 This is only relevant if the contact is a person. Company This is only relevant if the contact is a person. Step 6 Select the Plus button next to Insert number. RADVISION | User Guide for SCOPIA XT4000 Series Version 3.1 Getting Started | 19...
-
Page 25: Searching For A Contact In The Phone Book
Procedure Step 1 Access the SCOPIA XT Series web interface. Step 2 Select the Make your call tab. RADVISION | User Guide for SCOPIA XT4000 Series Version 3.1 Getting Started | 20... -
Page 26: Modifying A Contact In The Phone Book
Step 3 Select Contacts on the left. Figure 2-20 The Contacts page Step 4 Search for the contact you want to modify. The contact information is displayed. RADVISION | User Guide for SCOPIA XT4000 Series Version 3.1 Getting Started | 21... -
Page 27: Deleting A Contact From The Phone Book
Select the Make your call tab. Step 3 Select Contacts on the left. Figure 2-22 The Contacts page Step 4 Search for the contact you want to modify. RADVISION | User Guide for SCOPIA XT4000 Series Version 3.1 Getting Started | 22... -
Page 28: Contact Information
The contact information is displayed. Figure 2-23 Contact information Step 5 Select Delete number. Step 6 Select Yes to confirm. RADVISION | User Guide for SCOPIA XT4000 Series Version 3.1 Getting Started | 23... -
Page 29: Tailoring Your User Experience
From the web interface, navigate to: Basic Settings > Call-Answer Mode > General. • From the endpoint, access the Main menu and navigate to: Configure > Calling. RADVISION | User Guide for SCOPIA XT4000 Series Version 3.1 Tailoring Your User Experience | 24... -
Page 30: Confirming Call Disconnections
Procedure Step 1 Access the call settings, as follows: • From the web interface, navigate to: Basic Settings > Call-Answer Mode > General. RADVISION | User Guide for SCOPIA XT4000 Series Version 3.1 Tailoring Your User Experience | 25... -
Page 31: Enabling Do Not Disturb
DND feature as follows: Press and hold the Mute key on the XT Remote Control Unit. Procedure Step 1 Access the call settings, as follows: RADVISION | User Guide for SCOPIA XT4000 Series Version 3.1 Tailoring Your User Experience | 26... -
Page 32: Blocking Video Input By Default
From the web interface, navigate to the Call-Answer Mode settings by selecting: Basic Settings > Call-Answer Mode > General. • From the endpoint itself, navigate to the Calling settings as follows: Configure > Calling. RADVISION | User Guide for SCOPIA XT4000 Series Version 3.1 Tailoring Your User Experience | 27... - Page 33 From the endpoint's interface, set Video Privacy to Yes. Step 3 In the XT Series web interface, select Save. Note If you are configuring from the endpoint, your changes are automatically saved. RADVISION | User Guide for SCOPIA XT4000 Series Version 3.1 Tailoring Your User Experience | 28...
-
Page 34: Preparing For A Video Call Or Videoconference
Note You can control a remote camera when connected to it, as long as it is configured to be remotely managed. RADVISION | User Guide for SCOPIA XT4000 Series Version 3.1 Preparing for a Video Call or Videoconference | 29... - Page 35 The number of the preset is now blue, indicating that it was successfully stored. Use the camera position ID in the future to quickly adjust your camera. RADVISION | User Guide for SCOPIA XT4000 Series Version 3.1 Preparing for a Video Call or Videoconference | 30...
-
Page 36: Saving A Camera Position From The Web Interface
Procedure Step 1 Access the web interface. Step 2 Select More Actions > Camera Control. RADVISION | User Guide for SCOPIA XT4000 Series Version 3.1 Preparing for a Video Call or Videoconference | 31... -
Page 37: Sharing Content
Start Sharing Content Automatically ............. page 35 • Sharing Content in the Local Conference Room ........page 36 • Sharing Content during a Call ............. page 37 RADVISION | User Guide for SCOPIA XT4000 Series Version 3.1 Preparing for a Video Call or Videoconference | 32... -
Page 38: Connecting A Computer
For computers and laptops with a DVI out connector, connect the DVI cable to the DVI-I socket of the XT Codec Unit and connect the other end of the cable to the computer. RADVISION | User Guide for SCOPIA XT4000 Series Version 3.1 Preparing for a Video Call or Videoconference | 33... -
Page 39: Selecting The Computer Display Resolution
Select the desired screen resolution. See Table 4-2 on page 35 for the list of resolutions supported by the XT Codec Unit. RADVISION | User Guide for SCOPIA XT4000 Series Version 3.1 Preparing for a Video Call or Videoconference | 34... -
Page 40: Start Sharing Content Automatically
Access the general settings, as follows: • From the web interface, select Basic Settings. • From the endpoint, access the Main menu and navigate to: RADVISION | User Guide for SCOPIA XT4000 Series Version 3.1 Preparing for a Video Call or Videoconference | 35... -
Page 41: Sharing Content In The Local Conference Room
Navigate to Administrator settings > I/O connections > Audio - Inputs > Analog audio > Audio selection and select one of the following options: RADVISION | User Guide for SCOPIA XT4000 Series Version 3.1 Preparing for a Video Call or Videoconference | 36... -
Page 42: Sharing Content During A Call
By default, the total available bandwidth is evenly divided between live video and presentation. In most cases it ensures the best content sharing experience. If necessary, your RADVISION | User Guide for SCOPIA XT4000 Series Version 3.1 Preparing for a Video Call or Videoconference | 37... -
Page 43: About Video Layouts
Video layouts of your XT Series depend on whether it uses one or two monitors. The layouts are preconfigured by the administrator so that a set of default layouts is available for you. RADVISION | User Guide for SCOPIA XT4000 Series Version 3.1 Preparing for a Video Call or Videoconference | 38... -
Page 44: About Video Layouts In The Scopia Xt Series Using One Monitor
PaP (Picture and Picture) view in which two images are presented side by side and at the same size. RADVISION | User Guide for SCOPIA XT4000 Series Version 3.1 Preparing for a Video Call or Videoconference | 39... -
Page 45: About Video Layouts In The Scopia Xt Series Using Two Monitors
You can further arrange the monitor layouts and content by using Layout and PIP keys on the XT Remote Control Unit. RADVISION | User Guide for SCOPIA XT4000 Series Version 3.1 Preparing for a Video Call or Videoconference | 40... - Page 46 HD2 shows the received video. The audio is automatically enabled on HD1. Figure 4-11 Menu, presentation, and local video on HD1 and received video on HD2 RADVISION | User Guide for SCOPIA XT4000 Series Version 3.1 Preparing for a Video Call or Videoconference | 41...
- Page 47 PaP view. You can use PIP or PaP views only if your system administrator has configured them in your XT Codec Unit. RADVISION | User Guide for SCOPIA XT4000 Series Version 3.1 Preparing for a Video Call or Videoconference | 42...
-
Page 48: What You Should Know About Participating In A Video Call
Using encryption is subject to local regulation, in some countries it is restricted or limited for usage. Please consult your local reseller for further details. RADVISION | User Guide for SCOPIA XT4000 Series Version 3.1 Preparing for a Video Call or Videoconference | 43... -
Page 49: Making Calls
— Missed call Procedure Step 1 Access the endpoint's Main menu. Step 2 Select the number you want to call in one of the following ways: RADVISION | User Guide for SCOPIA XT4000 Series Version 3.1 Making Calls | 44... - Page 50 Figure 5-2 List of recent calls Step 3 (Optional) If necessary, change the call settings, for example set the call as audio only: Select Advanced Calling Options RADVISION | User Guide for SCOPIA XT4000 Series Version 3.1 Making Calls | 45...
- Page 51 Call type Choose the call type: • Audio-Video • Audio Step 4 Using the XT Remote Control Unit, press , or select Call and press RADVISION | User Guide for SCOPIA XT4000 Series Version 3.1 Making Calls | 46...
-
Page 52: Dialing A Number From The Scopia Xt Series Web Interface
Select Advanced Calling Options > Direct call. If you are dialing from the Recent Calls page, select Edit next to the number you are calling. Modify the necessary call settings as described in Table 5-2 on page RADVISION | User Guide for SCOPIA XT4000 Series Version 3.1 Making Calls | 47... -
Page 53: Answering And Ending A Video Call
XT Remote Control Unit. • To reject the call, select the Reject option on the screen by pressing the right arrow key on the XT Remote Control Unit. RADVISION | User Guide for SCOPIA XT4000 Series Version 3.1 Making Calls | 48... -
Page 54: Changing The Video Layout During The Call
(Figure 5-6 on page 49). Figure 5-6 In-Call menu Use the arrows to browse through the layouts (Figure 5-7 on page 50), and select the desired layout. RADVISION | User Guide for SCOPIA XT4000 Series Version 3.1 Making Calls | 49... - Page 55 System menus automatically disappear from the display after a few seconds in a call. You can also remove them manually by pressing . To bring back the system menus, press again or Back key again. RADVISION | User Guide for SCOPIA XT4000 Series Version 3.1 Making Calls | 50...
-
Page 56: Making Videoconference Calls
You can add participants in one of several ways: • Call the next participant by pressing on the XT Remote Control Unit • Select Meeting > Add Participant RADVISION | User Guide for SCOPIA XT4000 Series Version 3.1 Making Videoconference Calls | 51... -
Page 57: Remotely Setting An End Time For The Videoconference
The SCOPIA XT Series has a number of available video layouts: full screen, Continuous Presence (CP) 2, CP3, CP4, CP7, CP8, and CP9. RADVISION | User Guide for SCOPIA XT4000 Series Version 3.1 Making Videoconference Calls | 52... -
Page 58: Moderating The Videoconference From The Scopia Xt Series Mcu Edition
You can manage meetings from the endpoint itself, or remotely using the web interface. Procedure Step 1 Access the meeting settings as follows: • From the endpoint, press > Meeting during a videoconference. RADVISION | User Guide for SCOPIA XT4000 Series Version 3.1 Making Videoconference Calls | 53... - Page 59 “Blocking Video From the SCOPIA XT Series” on page – Mute your microphone so that participants cannot hear you (for more information, “Muting the Microphone Pod” on page RADVISION | User Guide for SCOPIA XT4000 Series Version 3.1 Making Videoconference Calls | 54...
-
Page 60: Joining A Videoconference
Figure 6-5 Managing other participants from the endpoint Joining a Videoconference To join a videoconference, dial the number of the SCOPIA XT Series hosting the videoconference. RADVISION | User Guide for SCOPIA XT4000 Series Version 3.1 Making Videoconference Calls | 55... -
Page 61: Managing The Videoconference From An Scopia Xt Series Endpoint
Select Make Lecturer to broadcast the video of the endpoint like a lecturer. All participants see only the video of the selected endpoint. • Select Disconnect to disconnect the endpoint. RADVISION | User Guide for SCOPIA XT4000 Series Version 3.1 Making Videoconference Calls | 56... -
Page 62: Ending A Videoconference
Confirm disconnection (see “Confirming Call Disconnections” on page 25 for details). • From the web interface, select Disconnect. RADVISION | User Guide for SCOPIA XT4000 Series Version 3.1 Making Videoconference Calls | 57... - Page 63 Figure 6-8 Ending a videoconference Step 2 To disconnect a specific endpoint, choose the endpoint and select Disconnect. Figure 6-9 Disconnecting specific endpoints RADVISION | User Guide for SCOPIA XT4000 Series Version 3.1 Making Videoconference Calls | 58...
-
Page 64: Managing Calls And Videoconferences
You can change the volume of calls, call ringing, and the volume of the microphone pod. • Adjusting the System or Ringing Volume ..........page 60 • Muting the Microphone Pod ............... page 60 RADVISION | User Guide for SCOPIA XT4000 Series Version 3.1 Managing Calls and Videoconferences | 59... -
Page 65: Adjusting The System Or Ringing Volume
Muting the Microphone Pod You can mute the Microphone Pod in your room if you do not want participants at the remote site to hear you. RADVISION | User Guide for SCOPIA XT4000 Series Version 3.1 Managing Calls and Videoconferences | 60... -
Page 66: Blocking Incoming Calls
You can configure the XT Series to automatically block all incoming calls, if you want this to be the default behavior. For more information, see “Enabling Do Not Disturb” on page RADVISION | User Guide for SCOPIA XT4000 Series Version 3.1 Managing Calls and Videoconferences | 61... -
Page 67: Troubleshooting
Network, gatekeeper, and SIP settings Note If you need the system serial number, you can also look on the label at the back of the XT Codec Unit. RADVISION | User Guide for SCOPIA XT4000 Series Version 3.1 Troubleshooting | 62... -
Page 68: Viewing System Information
Step 2 To view additional system information such as IP addresses and the gatekeeper's registration status from the endpoint, press the back button and select System Status. RADVISION | User Guide for SCOPIA XT4000 Series Version 3.1 Troubleshooting | 63... -
Page 69: Resolving Monitor Display Problems
The screen layout appears to be cropped. Solution Configure the monitor layout: In the Main menu select Configure > Quick Setup. Select Next to navigate to the Configure Monitor page. RADVISION | User Guide for SCOPIA XT4000 Series Version 3.1 Troubleshooting | 64... -
Page 70: Resolving Problems With Pc Presentations
Verify that you have the four-digit PIN code required to make changes to the system settings. The default PIN code is 1234. Procedure Step 1 Select Configure > General. RADVISION | User Guide for SCOPIA XT4000 Series Version 3.1 Troubleshooting | 65... - Page 71 Step 6 Select Utilities > Restore System > Factory Defaults. Figure 8-4 Restoring factory default settings Step 7 Press , and select Yes. The default settings are restored. RADVISION | User Guide for SCOPIA XT4000 Series Version 3.1 Troubleshooting | 66...
- Page 72 This document is not part of a contract or license as may be expressly agreed. RADVISION is a registered trademark of RADVISION, Ltd. All product and company names herein may be trademarks of their registered owners. All rights reserved © 2012 RADVISION, Ltd.
Need help?
Do you have a question about the SCOPIA XT4000 Series and is the answer not in the manual?
Questions and answers