Sign In
Upload
Manuals
Brands
AudioCodes Manuals
Adapter
MewdiaPack MP-202
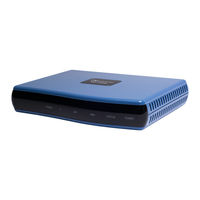
AudioCodes MewdiaPack MP-202 Manuals
Manuals and User Guides for AudioCodes MewdiaPack MP-202. We have
6
AudioCodes MewdiaPack MP-202 manuals available for free PDF download: User Manual, Release Notes, Quick Installation Manual, Quick Start Manual
AudioCodes MP-202 - FXS Telephone Adapter Quick Installation Guide
Brand:
AudioCodes
| Category:
Adapter
| Size: 0.36 MB
Table of Contents
Before Installing
Cabling and Installing the Device
Configuring Network Parameters
Configuring VoIP Parameters
Notice Information
Documents / Resources
References
Advertisement
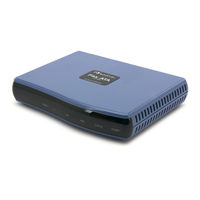
AudioCodes MewdiaPack MP-202 User Manual (270 pages)
MediaPack MP-20 Series Telephone Adapters with Integrated Router
Brand:
AudioCodes
| Category:
Adapter
| Size: 4.64 MB
Table of Contents
Table of Contents
3
Version 3.0.1
13
Abbreviations and Terminology
15
Customer Support
15
Regulatory Information
15
IC Radiation Exposure Statement
16
Related Documentation
16
1 Introducing Audiocodes' MP-20X Telephone Adapter
17
Table 1-1: MP-20X Models
17
Figure 1-1: Rear Panel of MP-20Xb Models
18
Figure 1-2: Rear Panel of MP-202C Models
18
2 Cabling the MP-20X Telephone Adapter
19
Figure 2-1: Cabling the Device (Example Using MP-202C-W)
19
Table 2-1: MP-20X Leds Description
20
3 Setting up a Network Connection
21
Defining Your Pc's Network Connection
21
Figure 3-1: IP and DNS Configuration
21
Linux
22
Windows XP
22
Figure 3-2: Available Wireless Networks
23
Wireless LAN Connection
23
Configuring the MP-20X's Network Connection
24
Logging in to MP-20X Web Interface
24
Figure 3-3: Logging in
24
Configuring 'Quick Setup' Screen Parameters
25
Figure 3-4: Quick Setup Screen
25
Configuring Your Internet Connection
26
Figure 3-5: Internet Connection - Automatic IP Address Ethernet Connection
26
Figure 3-6: Internet Connection - Manual IP Address Ethernet Connection
27
Figure 3-7: Internet Connection - Pppoe
28
Figure 3-8: Internet Connection - Point-To-Point Tunneling Protocol
28
Figure 3-10: Internet Connection - no Internet Connection
29
Figure 3-9: Layer 2 Tunneling Protocol
29
Enabling Wireless LAN Connection
30
Configuring Automatic Internet Dialer Detection
31
4 Using the MP-20X's Web Interface
33
Your Home Network Map
33
Figure 4-1: Network Map
33
Table 4-1: Network Map Icons
34
Web Interface Menus
35
Table 4-2: Sidebar Menu Description
35
Managing Tables
36
Figure 4-2: Typical Table Structure
36
Table 4-3: Table Action Icons Description
36
5 Configuring Voip Parameters
37
Configuring Signaling Protocol Parameters
38
Figure 5-1: Voip - Signaling Protocol
38
Table 5-1: Signaling Protocol Tab Parameters Description
39
Configuring Proxy Redundancy
42
Figure 5-2: Configuring Proxy Redundancy
43
Configuring Dialing Parameters
44
Figure 5-3: Voice over IP - Dialing Screen
44
Table 5-2: Dialing Tab Parameters Description
45
Configuring Media Streaming Parameters
48
Figure 5-4: Voip - Media Streaming - Advanced
48
Configuring Codecs
49
Supported Codecs
49
Table 5-3: Media Streaming Tab Parameters Description
49
Packetization Time
50
Configuring Voice and Fax Parameters
50
Figure 5-5: Voice over IP - Voice and Fax Screen
50
Table 5-4: Voice and Fax Tab Parameters Description
51
Configuring Services Parameters
54
Figure 5-6: Voice over IP - Services Screen
54
Table 5-5: Services Tab Parameters Description
55
Configuring Line Settings Screen
57
Figure 5-7: Voice over IP - Line Settings Screen
57
Figure 5-8: Voip - Line Settings - Defining a New Line
58
Table 5-6: Line Settings Tab Parameters Description
58
Configuring Speed Dial Settings
60
Figure 5-10: Voip - Speed Dial Settings
60
Figure 5-9: Voice over IP - Speed Dial Screen
60
Figure 5-11: Voip - Speed Dial - Local Line
61
Figure 5-12: Voip - Speed Dial Settings - Local Line
61
Table 5-7: Speed Dial Settings - Via Proxy
61
Figure 5-13: Voip - Speed Dial - Direct Call
62
Table 5-8: 'Speed Dial Settings' - Direct Call
62
Configuring Telephone Interfaces
63
Figure 5-14: Voice over IP - Telephone Interface Screen
63
6 Connecting MP-20X to a Voip Service Provider
65
Opening a SIP Account
65
Configuring Voip Parameters
65
Figure 6-1: Voice over IP - Line Settings Screen
65
Figure 6-2: Voip - Line Settings - Defining a New Line
66
7 Making Voip Calls
67
Placing a Call
67
Answering a Waiting Call
67
Putting a Call on Hold
68
Performing a Call Transfer
68
Establishing a 3-Way Conference
69
Forwarding Calls to Another Phone
70
8 Quality of Service (Qos)
71
Qos Wizard
71
Figure 8-1: Qos Wizard Tab Screen
71
Traffic Shaping
72
Device Traffic Shaping
73
Figure 8-2: Qos - Add Device Traffic Shaping
73
Figure 8-3: Qos - Edit Device Traffic Shaping
73
Shaping Classes
74
Table 8-1: Edit TraffiC Shaping - Parameter Descriptions
74
Figure 8-4: Qos - Edit Device Traffic Shaping - Add Class
75
Figure 8-5: Qos - Edit Device Traffic Shaping - Edit Class
75
Table 8-2: Edit Shaping Class - Parameter Descriptions
75
Class Rules
76
Traffic Priority
77
Figure 8-6: Qos - Traffic Shaping
78
Figure 8-7: Qos - Add Traffic Priority Rule
79
Table 8-3: Add TraffiC Priority Rule - Parameter Descriptions
79
DSCP Mapping
80
Figure 8-8: Qos - DSCP Settings
81
Mapping
82
Figure 8-9: Qos - Edit DSCP Settings
82
Table 8-4: Edit DSCP Settings- Parameter Descriptions
82
Figure 8-10: Qos - 802.1P Settings
83
Class Statistics
84
Configuring Basic Voip Qos
84
Figure 8-11: Qos - Class Statistics
84
Figure 8-12: Qos - Edit Device Traffic Shaping
85
Figure 8-13: Qos - Edit Device Traffic Shaping - Submitting the Configuration
86
9 LAN Wireless Connection
87
Figure 9-1: Network Connections Screen Listing LAN Wireless Interface
87
General Tab
88
Figure 9-2: 'LAN Wireless 802.11G Access Point Properties - General' Screen
88
Settings Tab
89
Figure 9-3: LAN Wireless 802.11G Access Point Properties - Settings Screen
89
Table 9-1: LAN Wireless Settings Tab Parameter Descriptions
89
Wireless Tab
90
Figure 9-4: LAN Wireless 802.11G Access Point Properties - Wireless Screen
90
Table 9-2: Wireless Tab Parameter Descriptions
91
Figure 9-5: MAC Filtering Settings Screen
92
Figure 9-6: MAC Address Added to MAC Filtering Table
92
MAC Filtering
92
Figure 9-7: Configuring WPA Security
93
Wireless Security
93
Figure 9-8: Configuring WPA2 Security
94
Figure 9-9: Configuring 802.1X WEP Security
94
Figure 9-10: Configuring Non-WEP Security
95
Figure 9-11: Configuring Encryption Key in Windows Wireless Client
96
Figure 9-12: Configuring Authentication Only Security
96
Figure 9-13: Wireless Qos (WMM)
97
Wireless Qos (WMM)
97
Figure 9-14: Transmission Properties
98
Table 9-3: Wireless Tab - Transmission Parameter Descriptions
98
Transmission Properties
98
Figure 9-15: Virtual Aps Table
99
Figure 9-16: Virtual AP Warning
99
Virtual Access Points
99
Figure 9-17: New Virtual AP
100
Figure 9-18: Firewall Blocking Access to All Other Lans
100
Figure 9-19: Example Virtual AP
101
Figure 9-20: Wireless WDS
102
Figure 9-21: WDS Settings Screen
102
Wireless Distribution System
102
Figure 9-22: New WDS in WDS List Table
103
Figure 9-23: LAN Wireless 802.11G WDS Properties Screen
103
Advanced Tab
104
10 WAN Settings
105
WAN Ethernet
105
Figure 10-1: WAN Ethernet Properties
105
Figure 10-2: WAN Ethernet Configuration
106
Table 10-1: Settings Tab - Parameter Descriptions
106
Figure 10-3: Automatically Obtaining an IP Address
107
Internet Protocol Settings
107
DNS Server
108
Settings Tab
106
Figure 10-4: Manually Defining DNS Server
108
Figure 10-5: Routing Tab (WAN)
108
Routing Tab
108
Table 10-2: Routing Parameters
108
Advanced Tab
109
Figure 10-6: Internet Connection Firewall
109
WAN Pppoe
110
General
110
Figure 10-7: General Pppoe Settings
110
Table 10-3: Pppoe Parameter Descriptions
110
PPP Tab
111
Table 10-4: PPP Configuration Parameter Descriptions
111
PPP Authentication
112
Table 10-5: PPP Authentication Parameter Descriptions
112
PPP Compression
113
PPP Encryption
113
Internet Protocol
113
DNS Server
113
Routing
113
Internet Connection Firewall
113
Table 10-6: PPP Encryption Parameter Descriptions
113
Table 10-7: PPP Compression Parameter Descriptions
113
Wan Pptp
114
Creating a PPTP Connection with the Connection Wizard
114
Document #: LTRT
114
Figure 10-8: Network Connections Screen
114
Figure 10-10: Advanced Connection
115
Figure 10-9: Connection Wizard Screen
115
Figure 10-11: Point-To-Point Tunneling Protocol (PPTP) Screen
116
Figure 10-12: Connection Summary
116
Figure 10-13: General PPTP Settings
117
General
117
Internet Protocol
117
PPP Authentication
117
PPP Configuration
117
PPP Encryption
117
Table 10-8: General PPTP Settings
117
DNS Server
118
Internet Connection Firewall
118
Routing
118
Wan L2Tp
118
Figure 10-14: VPN Client or Point-To-Point
119
Figure 10-15: Layer 2 Tunneling Protocol (L2TP)
119
Figure 10-16: Connection Summary
120
General
120
Table 10-9: General Settings
120
DNS Server
121
Internet Connection Firewall
121
Internet Protocol
121
PPP Authentication
121
PPP Compression
121
PPP Configuration
121
PPP Encryption
121
Routing
121
11 VLAN and Bridge Settings
123
Virtual LAN Interface (VLAN)
123
Creating with the Connection Wizard
123
Figure 11-1: Connection Wizard Screen
123
Figure 11-2: VPN Client or Point-To-Point
124
Figure 11-3: VLAN Interface
124
Settings Tab
125
Figure 11-4: Connection Summary
125
Table 11-1: VLAN Interface - General Communication Parameters
125
Table 11-2: IP Address Distribution Parameters
126
Figure 11-5: IP Address Distribution - DHCP Server
127
Figure 11-6: IP Address Distribution - DHCP Relay
127
Figure 11-7: DHCP Relay Server Address
127
Table 11-3: DHCP Relay
127
Figure 11-8: IP Address Distribution - Disable DHCP
128
Routing Tab
128
Figure 11-9: Advanced Routing Properties
128
Table 11-4: Assigning Static IP Addresses to Network Computers
128
Table 11-5: Routing Parameters
128
Advanced Tab
129
Figure 11-10: Internet Connection Firewall
129
Example of Configuring 3 Vlans: Voip, Data and Management
130
Figure 11-11: Using VLAN - Setup
130
Figure 11-12: Example of Using VLAN - VLAN Interface Screen
131
Figure 11-13: Verifying a New Interface on the WAN Side
131
Figure 11-14: Configuring WAN Ethernet
132
Figure 11-15: Use the Following IP Address
132
Figure 11-16: Routing
133
Figure 11-17: Route Settings
133
Figure 11-18: Input Rule Sets
134
Figure 11-19: Edit Advanced Filter
134
Figure 11-20: Testing the Setup
135
Figure 11-21: Testing the Setup
135
Figure 11-22: Testing the Setup
135
LAN-WAN Bridging
136
Creating with the Connection Wizard
136
Figure 11-23: Connection Wizard Screen
136
Figure 11-24: Advanced Connection Wizard Screen
137
Figure 11-25: Bridge Options
137
Figure 11-26: Network Bridging
138
Figure 11-27: WLAN-LAN - Network Bridging
138
Figure 11-28: Connection Summary - Configure Existing Bridge
139
Settings Tab
140
Bridge Tab
140
Figure 11-29: Bridge Settings
140
Examples of Configuring Vlans in Bridge Mode
141
Example 1 - Configuring 3 Vlans: Voip, Data and Management
141
Figure 11-30: Example of Using Bridge Mode and Configuring Vlans
141
Figure 11-31: Configuring WAN Ethernet
142
Figure 11-32: Network Bridging
143
Figure 11-33: no IP Address
143
Example 2: Configuring Tagged Voip, Untagged Data Traffic
144
Figure 11-34: Example of Tagging Voice and Untagging Data
144
Figure 11-35: WAN/LAN Bridge
145
Figure 11-36: VLAN Interface Screen
145
Figure 11-37: Bridge Section of the Screen
145
Figure 11-38: VLAN Settings
146
Figure 11-39: no IP Address
146
Figure 11-40: Configuring WAN Ethernet
146
Figure 11-41: Testing the Setup
147
Figure 11-42: Testing the Setup
147
Example 3 - Configuring Voip and Data in the same VLAN
148
Figure 11-43: Configuring WAN Ethernet
148
Figure 11-44: Voip and Data on same VLAN
148
Figure 11-45: no IP Address
149
12 Remote MP-20X Telephone Adapter Management
151
Overview
151
Remote Configuration
151
Figure 12-1: Remote Management Interfaces
152
Table 12-1: Main Configuration Parameter Groups
152
Remote Management
153
Firmware Upgrade
153
Figure 12-2: Firmware Upgrade Mechanism
153
Status and Performance Monitoring
154
Alarms, Notifications and Logging
154
Table 12-2: Status and Performance Monitoring Parameters
154
Table 12-3: Notifications and Logged Events
154
Remote Configuration and Management Interfaces
155
Table 12-4: Severity of Logged Events
155
Table 12-5: Operations Per Configuration/Management Interface
155
And TR-104 CPE WAN Management Protocol
156
Figure 12-3: TR-069 CPE WAN Management Protocol
157
Configuring MP-20X Via TR-069 and TR-104
158
Table 12-6: Internetgatewaydevice.wandevice.I.wanconnectiondevice.I.wanipconnection.I
158
Table 12-7: Internetgatewaydevice.landevice.I.lanethernetinterfaceconfig
160
Table 12-8: Internetgatewaydevice.landevice.I.lanhostconfigmanagement
160
Table 12-9: Internetgatewaydevice.services.voiceservice.I.capabilities
161
Table 12-10: Internetgatewaydevice.services.voiceservice.I.capabilities.codecs
164
Table 12-11: Internetgatewaydevice.services.voiceservice.I.voiceprofile
164
Table 12-12: Internetgatewaydevice.services.voiceservice.I.voiceprofile.I.sip
165
Monitoring MP-20X Status Via TR-069 and TR-104
166
Table 12-13: Internetgatewaydevice.deviceinfo
166
Table 12-14: Internetgatewaydevice.wandevice.I.wanconnectiondevice.I. Wanipconnection.I.stats
168
Table 12-15: Internetgatewaydevice.landevice.I.lanethernetinterfaceconfig.I.stats
168
Table 12-16: Internetgatewaydevice.services.voiceservice.I.voiceprofile.I.line.I.stats
169
Security Concerns and Measures
170
Embedded Web Server
156
Snmp
171
Configuring MP-20X Via SNMP
171
Figure 12-4: SNMP Network Architecture
171
Monitoring the MP-20X Via SNMP
172
Security Concerns and Measures
173
Table 12-17: Table 3-13: Information Elements Available Via MIB-II
173
Automatic File Download
174
Firmware File Download
174
Configuration File Download
174
Security Concerns and Measures
175
Syslog
174
Telnet CLI
176
13 Security
177
Figure 13-1: Firewall in Action
177
General Security Level Settings
178
Figure 13-2: General Security Level Settings
178
Table 13-1: Behavior for the Three Security Levels
179
Access Control
180
Figure 13-3: Access Control
180
Figure 13-4: Add Access Control Rule
181
Port Forwarding
182
Figure 13-5: Port Forwarding Screen
183
Figure 13-6: Add Port Forwarding Rule
183
Figure 13-7: Add a Specific Protocol
183
Figure 13-8: Add a Specific Protocol
184
Figure 13-9: Add Specific Ports
184
Figure 13-10: Port Forwarding Rule
184
DMZ Host
185
Port Triggering
186
Figure 13-11: DMZ Host
186
Figure 13-12: Port Triggering
187
Figure 13-13: Adding Port Triggering Rules
187
Figure 13-14: Edit Service Server Ports
188
Figure 13-15: Edit Service Server Ports
188
Figure 13-16: Edit Service Opened Ports
188
Figure 13-17: New Port Triggering Rule
189
Website Restrictions
190
Figure 13-18: Website Restrictions
190
Figure 13-19: Restricted Website
190
Figure 13-20: Add a Specific Host
191
Figure 13-21: Add a Specific Schedule
191
Nat
192
Figure 13-22: NAT Screen
193
Figure 13-23: Adding a NAT IP Address
193
Figure 13-24: Adding NAT/NAPT Rule
194
Connections
196
Figure 13-25: Connections Screen
196
Advanced Filtering
197
Figure 13-26: Advanced Filtering
197
Figure 13-27: Add Advanced Filter
198
Figure 13-28: Add a Specific Host
199
Figure 13-29: Set Priority Rule
199
Security Log
200
Figure 13-30: Security Log
200
Figure 13-31: Security Log Settings
201
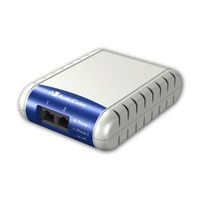
AudioCodes MewdiaPack MP-202 User Manual (206 pages)
Telephone Adapter
Brand:
AudioCodes
| Category:
Adapter
| Size: 7.4 MB
Table of Contents
Abbreviations and Terminology
3
Customer Support
3
Related Documentation
4
Table of Contents
5
1 Introducing Audiocodes' MP-202 Telephone Adapter
15
2 Cabling the MP-202 Telephone Adapter
17
Figure 2-1: Cabling the Device
17
3 Setting up a Network Connection
19
Defining Your Pc's Network Connection
19
Windows XP
20
Linux
20
Figure 3-1: IP and DNS Configuration
20
Configuring the MP-202'S Network Connection
21
Logging in
21
Figure 3-2: 'Welcome' Screen
21
Figure 3-3: Logging in
21
Configuring 'Quick Setup' Screen Parameters
22
Figure 3-4: Quick Setup
22
Configuring Your Internet Connection
23
Figure 3-5: Internet Connection - Automatic IP Address Ethernet Connection
23
Figure 3-6: Internet Connection - Manual IP Address Ethernet Connection
24
Figure 3-7: Internet Connection - Pppoe
25
Figure 3-8: Internet Connection - Point-To-Point Tunneling Protocol
25
Figure 3-10: Internet Connection - no Internet Connection
26
Figure 3-9: Layer 2 Tunneling Protocol
26
4 Using the MP-202'S Web Interface
27
Your Home Network Map
27
Figure 4-1: Network Map
27
Figure 4-2: Host Information
28
Table 4-1: Network Map Symbols
28
Table 4-2: Icons to Indicate the Interface Used for Connecting the PC
28
Web Interface Left Sidebar Icons
29
Navigational Aids
29
Table 4-3: Icons Indicating Web-Based Management Screens' Subject Areas
29
Table 4-4: Icons to Quickly Jump to Key Information about Your Home Network
29
Managing Tables
30
Figure 4-3: Typical Table Structure
30
Table 4-5: Managing Tables
30
5 Configuring Voip Parameters
31
Voice over IP Screen
31
Configuring Signaling Protocol Parameters
32
Figure 5-1: Voip - Signaling Protocol
32
Table 5-1: Voip - Signaling Protocol
32
Figure 5-2: Voip - Signaling Protocol - SIP Proxy and Registrar
33
Table 5-2: Voip - Signaling Protocol - Signaling Protocol
34
Table 5-3: Voip - Signaling Protocol - SIP Proxy and Registrar
34
Table 5-4: Voip - Signaling Protocol - SIP Timers
35
Figure 5-3: Voip - Signaling Protocol - SIP Proxy and Registrar
36
Table 5-5: Voip - Signaling Protocol - SIP Registrar SIP
36
Figure 5-4: Voip - Signaling Protocol - SIP Outbound Proxy
37
Table 5-6: Voip - Signaling Protocol - SIP Outbound Proxy
37
Figure 5-5: Voip - Signaling Protocol - NAT Traversal
38
Table 5-7: Voip - Signaling Protocol - NAT Traversal
38
Configuring Dialing Parameters
39
Figure 5-6: Voip - Dialing
39
Table 5-8: Voip - Dialing Parameters
39
Configuring Media Streaming Parameters
41
Figure 5-7: Voip - Media Streaming - Basic
41
Figure 5-8: Voip - Media Streaming - Advanced
42
Table 5-9: Voip - Media Streaming Parameters - Codecs
42
Configuring Codecs
43
Supported Codecs
43
Table 5-10: Voip - Advanced - Media Streaming Parameters
43
Table 5-11: Voip - Advanced - Quality of Service Parameters
43
Table 5-12: Voip - Advanced - G.723 Bitrate
43
Packetization Time
44
Configuring Voice and Fax Parameters
44
Figure 5-9: Voip - Voice and Fax
44
Table 5-13: Voip - Voice and Fax
45
Configuring Services Parameters
47
Figure 5-10: Voip - Services - Advanced
47
Table 5-14: Voip - Services
48
Configuring Line Settings Screen
49
Figure 5-11: Voip - Line Settings
49
Figure 5-12: Voip - Line Settings - Defining a New Line
49
Table 5-15: Voip - Line Settings
49
Configuring Speed Dial Settings
50
Figure 5-13: Voip - Speed Dial
50
Figure 5-14: Voip - Speed Dial Settings
50
Figure 5-15: Voip - Speed Dial - Local Line
51
Figure 5-16: Voip - Speed Dial Settings - Local Line
51
Table 5-16: 'Speed Dial Settings' - Via Proxy
51
Figure 5-17: Voip - Speed Dial - Direct Call
52
Table 5-17: 'Speed Dial Settings' - Direct Call
52
Configuring Telephone Interfaces
53
Figure 5-18: Voip - Telephone Interface
53
Figure 5-19: Voip - Telephone Interface - NW Map
53
6 Connecting the MP-202 to a Voip Service Provider
55
Opening a SIP Account
55
Configuring Voip Parameters
55
Figure 6-1: Voip - Line Settings
55
Figure 6-2: Voip - Line Settings - Defining a New Line
56
7 Making Voip Calls
57
Placing a Call
57
Answering a Waiting Call
57
Putting a Call on Hold
57
Performing a Call Transfer
58
Establishing a 3-Way Conference
58
Forwarding Calls to Another Phone
59
8 Quality of Service (Qos)
61
Traffic Shaping
61
Device Traffic Shaping
61
Figure 8-1: Qos - Add Device Traffic Shaping
61
Figure 8-2: Qos - Edit Device Traffic Shaping
62
Table 8-1: Edit Device Traffic Shaping - Parameter Descriptions
62
Shaping Classes
63
Figure 8-3: Qos - Edit Device Traffic Shaping - Add Class
63
Figure 8-4: Qos - Edit Device Traffic Shaping - Edit Class
63
Class Rules
64
Table 8-2: Edit Class - Parameter Descriptions
64
Figure 8-5: Qos - Edit Device Traffic Shaping - Edit Class - Add Traffic Priority Rule
65
Traffic Priority
66
Table 8-3: Add TraffiC Priority Rule - Parameter Descriptions
66
Figure 8-6: Qos - Traffic Shaping
68
Figure 8-7: Qos - Add Traffic Priority Rule
68
Table 8-4: Add TraffiC Priority Rule - Parameter Descriptions
69
DSCP Mapping
70
Figure 8-8: Qos - DSCP Settings
70
Figure 8-9: Qos - Edit DSCP Settings
71
Table 8-5: Edit DSCP Settings- Parameter Descriptions
71
Mapping
72
Figure 8-10: Qos - 802.1P Settings
72
Class Statistics
73
Configuring Basic Voip Qos
73
Figure 8-11: Qos - Class Statistics
73
Figure 8-12: Qos - Edit Device Traffic Shaping
74
Figure 8-13: Qos - Edit Device Traffic Shaping - Submitting the Configuration
75
9 WAN Settings
77
WAN Ethernet
77
Figure 9-1: WAN Ethernet Properties
77
Figure 9-2: WAN Ethernet Configuration
78
General
78
Figure 9-3: Internet Protocol Settings - no IP Address
79
Internet Protocol Settings
79
Table 9-1: General Connection Settings
79
DNS Server
80
Figure 9-4: Obtain DNS Server Address Automatically
80
Figure 9-5: DNS Server Settings
80
Routing
80
Table 9-2: Static or Dynamic Routing Parameters
80
Advanced Routing Properties
81
Figure 9-6: Internet Connection Firewall
81
Figure 9-7: Additional IP Addresses
81
Internet Connection Firewall
81
WAN Pppoe
82
General
82
PPP Configuration
82
Figure 9-8: General Pppoe Settings
82
Table 9-3: Pppoe Parameter Descriptions
82
PPP Authentication
83
Figure 9-9: PPP Configuration
83
Table 9-4: PPP Configuration Parameter Descriptions
83
PPP Encryption
84
Figure 9-10: PPP Authentication Settings
84
Table 9-5: PPP Authentication Parameter Descriptions
84
PPP Compression
85
Figure 9-11: PPP Encryption
85
Figure 9-12: PPP Compression
85
Table 9-6: PPP Encryption Parameter Descriptions
85
Table 9-7: PPP Compression Parameter Descriptions
85
Internet Protocol
86
DNS Server
86
Routing
86
Internet Connection Firewall
86
Wan Pptp
86
Creating a PPTP Connection with the Connection Wizard
86
Figure 9-13: Internet Cable Modem Connection
87
Figure 9-14: Point-To-Point Tunneling Protocol
88
Figure 9-15: Connection Summary
88
Creating a PPTP VPN Connection with the Connection Wizard
89
Figure 9-16: VPN Client or Point-To-Point
89
Figure 9-17: Point-To-Point Tunneling Protocol Virtual Private Network (PPTP VPN)
90
Figure 9-18: Connection Summary
90
General
91
PPP Configuration
91
PPP Authentication
91
Figure 9-19: General PPTP Settings
91
Table 9-8: General PPTP Settings
91
PPP Encryption
92
Internet Protocol
92
DNS Server
92
Routing
92
Internet Connection Firewall
92
Wan L2Tp
92
Creating an L2TP Ipsec VPN Connection with the Connection Wizard
92
Figure 9-20: VPN Client or Point-To-Point
93
Figure 9-21: Layer 2 Tunneling Protocol over Internet Protocol Security (L2TP Ipsec VPN)
94
Figure 9-22: Connection Summary
94
Creating an L2TP Ipsec VPN Connection with the Connection Wizard
95
Figure 9-23: VPN Client or Point-To-Point
95
Figure 9-24: Layer 2 Tunneling Protocol over Internet Protocol Security (L2TP Ipsec VPN)
96
Figure 9-25: Connection Summary
96
General
97
PPP Configuration
97
PPP Authentication
97
PPP Encryption
97
Table 9-9: General Settings
97
PPP Compression
98
Internet Protocol
98
DNS Server
98
Routing
98
Internet Connection Firewall
98
Figure 9-26: PPP Compression
98
Table 9-10: PPTP Compression Parameters
98
10 VLAN and Bridge Settings
99
Virtual LAN Interface (VLAN)
99
Creation with the Connection Wizard
99
Figure 10-1: VLAN Interface
99
General
100
Figure 10-2: Connection Summary
100
Table 10-1: VLAN Interface - General Communication Parameters
101
IP Address Distribution
102
Figure 10-3: Internet Protocol Settings - no IP Address
102
Figure 10-4: Internet Protocol Settings - Automatic IP
102
Figure 10-5: Internet Protocol Settings . Static IP
102
Figure 10-6: IP Address Distribution - DHCP Server
103
Table 10-2: IP Address Distribution Parameters
103
Table 10-3: DHCP Relay
103
Routing
104
Figure 10-7: IP Address Distribution - DHCP Relay
104
Figure 10-8: DHCP Relay Server Address
104
Figure 10-9: IP Address Distribution - Disable DHCP
104
Table 10-4: Assigning Static IP Addresses to Network Computers
104
Table 10-5: Routing Parameters
105
Internet Connection Firewall
106
Allow Unrestricted Administration
106
Figure 10-10: Advanced Routing Properties
106
Figure 10-11: Internet Connection Firewall
106
Figure 10-12: Allow Unrestricted Administration
106
Additional IP Addresses
107
Example of Configuring 3 Vlans: Voip, Data and Management
107
Figure 10-13: Additional IP Addresses
107
Figure 10-14: Using VLAN - Setup
107
Figure 10-15: Example of Using VLAN - VLAN Interface Screen
108
Figure 10-16: Verifying a New Interface on the WAN Side
109
Figure 10-17: Configuring WAN Ethernet
109
Figure 10-18: Use the Following IP Address
110
Figure 10-19: Routing - Advanced
110
Figure 10-20: Routing - Advanced - Extended Parameters
110
Figure 10-21: Route Settings
111
Figure 10-22: Input Rule Sets
111
Figure 10-23: Edit Advanced Filter
112
Figure 10-24: Testing the Setup
112
Figure 10-25: Testing the Setup
113
Figure 10-26: Testing the Setup
113
WAN-LAN Bridge
114
Creation with the Connection Wizard
114
Figure 10-27: Bridge Options
114
Figure 10-28: Network Bridging
115
Figure 10-29: WLAN-LAN - Network Bridging
115
General
116
Internet Protocol Settings
116
Figure 10-30: Connection Summary - Configure Existing Bridge
116
Bridge Settings
117
Figure 10-31: Bridge Settings
117
Examples of Configuring Vlans in Bridge Mode
118
Example 1 - Configuring 3 Vlans: Voip, Data and Management
118
Figure 10-32: Example of Using Bridge Mode and Configuring Vlans
118
Figure 10-33: Network Connections
119
Figure 10-34: Configuring WAN Ethernet
119
Figure 10-35: Network Bridging
120
Figure 10-36: no IP Address
120
Figure 10-37: System Monitoring
121
Example 2 - Configuring Tagged Voip, Untagged Data Traffic
122
Figure 10-38: Example of Tagging Voice and Untagging Data
122
Figure 10-39: WAN/LAN Bridge
123
Figure 10-40: VLAN Interface Screen
123
Figure 10-41: Bridge Section of the Screen
124
Figure 10-42: VLAN Settings
124
Figure 10-43: no IP Address
124
Figure 10-44: Configuring WAN Ethernet
125
Figure 10-45: System Monitoring
125
Figure 10-46: Testing the Setup
126
Figure 10-47: Testing the Setup
126
Example 3 - Configuring Voip and Data in the same VLAN
127
Figure 10-48: Voip and Data on same VLAN
127
Figure 10-49: no IP Address
128
11 CPE WAN Management Protocol
129
Overview
129
Parameter List
129
Figure 11-1: TR-069 CPE WAN Management Protocol
129
Viewing, Changing TR-069 Parameters Using the CLI
132
Table 11-1: TR-069 Parameter Descriptions
133
12 Security
135
Figure 12-1: Firewall in Action
135
General Security Level Settings
136
Figure 12-2: General Security Level Settings
136
Table 12-1: Behavior for the Three Security Levels
137
Access Control
138
Figure 12-3: Access Control
138
Figure 12-4: Add Access Control Rule
139
Port Forwarding
140
Figure 12-5: Port Forwarding
141
Figure 12-6: Add Port Forwarding Rule
141
Figure 12-7: Add a Specific Protocol
142
Figure 12-8: Forward to a Specific Port
142
Figure 12-9: Add a Specific Schedule
142
Figure 12-10: Port Forwarding Rule
142
DMZ Host
144
Figure 12-11: DMZ Host
144
Port Triggering
145
Figure 12-12: Port Triggering
145
Figure 12-13: Adding Port Triggering Rules
146
Figure 12-14: Edit Service Server Ports
146
Figure 12-15: Edit Service Server Ports
147
Figure 12-16: Edit Service Opened Ports
147
Figure 12-17: Edit Service Opened Ports
147
Website Restrictions
148
Figure 12-18: New Port Triggering Rule
148
Figure 12-19: Website Restrictions
149
Figure 12-20: Restricted Website
149
Figure 12-21: Add a Specific Host
150
Figure 12-22: Add a Specific Schedule
150
Advanced Filtering
151
Figure 12-23: Advanced Filtering
151
Figure 12-24: Add Advanced Filter
152
Figure 12-25: Specify Source Address
153
Figure 12-26: Specify Protocol
153
Figure 12-27: Set Priority Rule
154
Figure 12-28: Set DSCP Rule
154
Security Log
155
Figure 12-29: Security Log
155
Figure 12-30: Security Log Settings
156
Advertisement
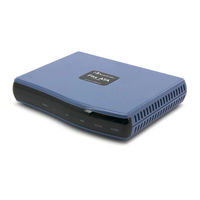
AudioCodes MewdiaPack MP-202 User Manual (212 pages)
MediaPack Series Telephone Adapters with Integrated Router
Brand:
AudioCodes
| Category:
Adapter
| Size: 7.83 MB
Table of Contents
Abbreviations and Terminology
3
Customer Support
3
Related Documentation
4
Table of Contents
5
1 Introducing Audiocodes' MP-202 Telephone Adapter
17
2 Cabling the MP-202 Telephone Adapter
19
Figure 2-1: Cabling the Device
19
3 Setting up a Network Connection
21
Defining Your Pc's Network Connection
21
Windows XP
22
Figure 3-1: IP and DNS Configuration
22
Windows 2000
23
Windows NT
23
Linux
23
Configuring the MP-202'S Network Connection
23
Logging in
24
Figure 3-2: 'Welcome' Screen
24
Figure 3-3: Logging in
24
Configuring 'Quick Setup' Screen Parameters
25
Configuring Your Internet Connection
25
Figure 3-4: Quick Setup
25
Figure 3-5: Internet Connection - Automatic IP Address Ethernet Connection
26
Figure 3-6: Internet Connection - Manual IP Address Ethernet Connection
26
Figure 3-7: Internet Connection - Pppoe
27
Figure 3-8: Internet Connection - Point-To-Point Tunneling Protocol
28
Figure 3-9: Layer 2 Tunneling Protocol
28
Figure 3-10: Internet Connection - no Internet Connection
29
4 Using the MP-202'S Web Interface
31
Your Home Network Map
31
Figure 4-1: Network Map
31
Table 4-1: Network Map Symbols
32
Table 4-2: Icons to Indicate the Interface Used for Connecting the PC
32
Figure 4-2: Host Information
32
Managing Tables
33
Table 4-3: Managing Tables
33
Figure 4-3: Typical Table Structure
33
5 Configuring Voip Parameters
35
Voice over IP Screen
35
Configuring Signaling Protocol Parameters
36
Table 5-1: Voip - Signaling Protocol
36
Figure 5-1: Voip - Signaling Protocol
36
Figure 5-2: Voip - Signaling Protocol - SIP Proxy and Registrar
37
Table 5-2: Voip - Signaling Protocol - SIP Proxy and Registrar
38
Table 5-3: Voip - Signaling Protocol - SIP Timers
39
Figure 5-3: Voip - Signaling Protocol - SIP Proxy and Registrar
39
Table 5-4: Voip - Signaling Protocol - SIP Registrar SIP
40
Table 5-5: Voip - Signaling Protocol - SIP Outbound Proxy
40
Figure 5-4: Voip - Signaling Protocol - SIP Outbound Proxy
40
Configuring Dialing Parameters
41
Table 5-6: Advanced Dialing Parameters
41
Table 5-7: Voip - Dialing Parameters
42
Configuring Media Streaming Parameters
43
Figure 5-5: Voip - Media Streaming - Basic
43
Figure 5-6: Voip - Media Streaming - Advanced
44
Table 5-8: Voip - Media Streaming Parameters - Codecs
44
Configuring Codecs
45
Supported Codecs
45
Table 5-10: Voip - Advanced - Quality of Service Parameters
45
Table 5-9: Voip - Advanced - Media Streaming Parameters
45
Packetization Time
46
Configuring Voice and Fax Parameters
46
Figure 5-7: Voip - Voice and Fax
46
Configuring Services Parameters
47
Table 5-11: Voip - Voice and Fax
47
Figure 5-8: Voip - Services - Basic
48
Figure 5-9: Voip - Services - Advanced
48
Table 5-12: Voip - Services
49
Configuring Line Settings Screen
50
Figure 5-10: Voip - Line Settings
50
Figure 5-11: Voip - Line Settings - Defining a New Line
50
Configuring Speed Dial Settings
51
Table 5-13: Voip - Line Settings
51
Figure 5-12: Voip - Speed Dial
51
Table 5-14: 'Speed Dial Settings' - Via Proxy
52
Figure 5-13: Voip - Speed Dial Settings
52
Figure 5-14: Voip - Speed Dial - Local Line
52
Table 5-15: 'Speed Dial Settings' - Direct Call
53
Figure 5-15: Voip - Speed Dial Settings - Local Line
53
Figure 5-16: Voip - Speed Dial - Direct Call
53
6 Connecting the MP-202 to a Voip Service Provider
55
Opening a SIP Account
55
Configuring Voip Parameters
55
Figure 6-1: Voip - Line Settings
55
Figure 6-2: Voip - Line Settings - Defining a New Line
56
7 Making Voip Calls
57
Placing a Call
57
Answering a Waiting Call
57
Putting a Call on Hold
57
Performing a Call Transfer
58
Establishing a 3-Way Conference
58
Forwarding Calls to Another Phone
59
8 Quality of Service (Qos)
61
Traffic Shaping
61
Device Traffic Shaping
61
Figure 8-1: Qos - Add Device Traffic Shaping
61
Figure 8-2: Qos - Edit Device Traffic Shaping
62
Shaping Classes
63
Table 8-1: Edit Device Traffic Shaping - Parameter Descriptions
63
Figure 8-3: Qos - Edit Device Traffic Shaping - Add Class
64
Figure 8-4: Qos - Edit Device Traffic Shaping - Edit Class
64
Table 8-2: Edit Class - Parameter Descriptions
65
Class Rules
66
Figure 8-5: Qos - Edit Device Traffic Shaping - Edit Class - Add Traffic Priority Rule
66
Table 8-3: Add TraffiC Priority Rule - Parameter Descriptions
67
Traffic Priority
68
Figure 8-6: Qos - Traffic Shaping
69
Figure 8-7: Qos - Add Traffic Priority Rule
69
DSCP Mapping
70
Table 8-4: Add TraffiC Priority Rule - Parameter Descriptions
70
Figure 8-8: Qos - DSCP Settings
71
Mapping
72
Table 8-5: Edit DSCP Settings- Parameter Descriptions
72
Figure 8-9: Qos - Edit DSCP Settings
72
Class Statistics
73
Figure 8-10: Qos - 802.1P Settings
73
Configuring Basic Voip Qos
74
Figure 8-11: Qos - Class Statistics
74
Figure 8-12: Qos - Edit Device Traffic Shaping
75
Figure 8-13: Qos - Edit Device Traffic Shaping - Submitting the Configuration
76
9 WAN Settings
77
WAN Ethernet
77
Figure 9-1: WAN Ethernet Properties
77
Figure 9-2: WAN Ethernet Configuration
78
General
78
Figure 9-3: Internet Protocol Settings - no IP Address
79
Internet Protocol Settings
79
Table 9-1: General Connection Settings
79
DNS Server
80
Figure 9-4: Obtain DNS Server Address Automatically
80
Figure 9-5: DNS Server Settings
80
Routing
80
Table 9-2: Static or Dynamic Routing Parameters
80
Advanced Routing Properties
81
Figure 9-6: Internet Connection Firewall
81
Figure 9-7: Additional IP Addresses
81
Internet Connection Firewall
81
WAN Pppoe
82
General
82
PPP Configuration
82
Table 9-3: Pppoe Parameter Descriptions
82
Figure 9-8: General Pppoe Settings
82
PPP Authentication
83
Table 9-4: PPP Configuration Parameter Descriptions
83
Figure 9-9: PPP Configuration
83
PPP Encryption
84
Table 9-5: PPP Authentication Parameter Descriptions
84
Figure 9-10: PPP Authentication Settings
84
PPP Compression
85
Table 9-6: PPP Encryption Parameter Descriptions
85
Table 9-7: PPP Compression Parameter Descriptions
85
Figure 9-11: PPP Encryption
85
Internet Protocol
86
DNS Server
86
Routing
86
Internet Connection Firewall
86
Wan Pptp
86
Creating a PPTP Connection with the Connection Wizard
86
Creating a PPTP VPN Connection with the Connection Wizard
89
General
91
PPP Configuration
91
Table 9-8: General PPTP Settings
91
PPP Authentication
92
PPP Encryption
92
Internet Protocol
92
DNS Server
92
Routing
92
Internet Connection Firewall
92
Wan L2Tp
93
Creating an L2TP Ipsec VPN Connection with the Connection Wizard
93
Creating an L2TP Ipsec VPN Connection with the Connection Wizard
96
General
99
PPP Configuration
99
Table 9-9: General Settings
99
PPP Authentication
100
PPP Encryption
100
PPP Compression
100
Internet Protocol
100
DNS Server
100
Routing
100
Table 9-10: PPTP Compression Parameters
100
Internet Connection Firewall
101
10 VLAN and Bridge Settings
103
Virtual LAN Interface (VLAN)
103
Creation with the Connection Wizard
103
General
104
Table 10-1: VLAN Interface - General Communication Parameters
105
IP Address Distribution
107
Table 10-2: IP Address Distribution Parameters
108
Routing
109
Table 10-3: Routing Parameters
110
Internet Connection Firewall
111
Allow Unrestricted Administration
111
Additional IP Addresses
112
Example of Configuring 3 Vlans: Voip, Data and Management
112
WAN-LAN Bridge
119
Creation with the Connection Wizard
119
General
122
Internet Protocol Settings
122
Bridge Settings
123
Examples of Configuring Vlans in Bridge Mode
124
Example 1 - Configuring 3 Vlans: Voip, Data and Management
124
Example 2 - Configuring Tagged Voip, Untagged Data Traffic
128
Testing the Setup
132
Example 3 - Configuring Voip and Data in the same VLAN
132
AudioCodes MewdiaPack MP-202 Release Notes (14 pages)
MewdiaPack Series Telephone Adapter with Integrated Router
Brand:
AudioCodes
| Category:
Adapter
| Size: 0.19 MB
Table of Contents
Release Notes
1
Table of Contents
3
Customer Support
4
Related Documentation
4
1 Introduction
5
2 Version 2.6.0
7
What's New in Version 2.6.0
7
Table 2-1: MP-202 Software Specifications
8
Resolved Constraints
9
Known Limitations
9
3 Previous Versions
11
Version 2.4.2
11
What's New in Version 2.4.2
11
Known Limitations in Version 2.4.2
11
Versions Prior to 2.4.2
12
Version 2.6.0
13
Version 2.6.0
14
AudioCodes MewdiaPack MP-202 Quick Installation Manual (2 pages)
FXS Telephone Adapter
Brand:
AudioCodes
| Category:
Adapter
| Size: 0.37 MB
Advertisement
Related Products
AudioCodes MediaPack MP-202B
AudioCodes MP-202C Series
AudioCodes MediaPack MP-202C-A
AudioCodes MediaPack MP-202C-R
AudioCodes MediaPack MP-202C-W
AudioCodes MediaPack MP-202B2FXS
AudioCodes MediaPack MP-202BSIP
AudioCodes MP-20x
AudioCodes MediaPack MP-204BSIP
AudioCodes MediaPack MP-204B4FXS
AudioCodes Categories
Gateway
IP Phone
Network Router
Controller
Adapter
More AudioCodes Manuals
Login
Sign In
OR
Sign in with Facebook
Sign in with Google
Upload manual
Upload from disk
Upload from URL