Sign In
Upload
Manuals
Brands
Lightware Manuals
Extender
WP-UMX-TPS-TX120-US White
Lightware WP-UMX-TPS-TX120-US White Video Manuals
Manuals and User Guides for Lightware WP-UMX-TPS-TX120-US White Video. We have
2
Lightware WP-UMX-TPS-TX120-US White Video manuals available for free PDF download: User Manual
Lightware WP-UMX-TPS-TX120-US White User Manual (124 pages)
Brand:
Lightware
| Category:
Transmitter
| Size: 33.48 MB
Table of Contents
Table of Contents
4
Introduction
7
Description
7
Compatible Devices
7
Model Denomination
7
Box Contents
8
UMX-TPS-TX100 Series
8
WP-UMX-TPS-TX100 Series
8
FP-UMX-TPS-TX100 Series
8
Features
9
Model Comparison
10
Typical Application
11
Installation
12
Mounting Options - Standalone Transmitters
12
Under-Desk Double Mounting Kit
12
High Rack Shelf
12
Mounting Options - Floor Plates
13
MKM Mounting Option
13
MKS Mounting Option
15
GES Mounting Option
16
Mounting Options - Wall Plates
20
Connecting Steps
21
FP/WP-UMX-TPS-TX100 Series
21
UMX-TPS-TX100 Series
21
Powering Options
22
Product Overview
23
Front View - UMX-TPS-TX100 Series
23
Rear View - UMX-TPS-TX100 Series
24
Front View - WP-UMX-TPS-TX100 Series
24
Rear View - WP-UMX-TPS-TX100 Series
25
Front View - FP-UMX-TPS-TX100 Series
25
Rear View - FP-UMX-TPS-TX100 Series
26
Electrical Connections
26
Locking 12V DC Connection
26
DC Connection
26
VGA Connector
26
HDMI Connector
26
Displayport Connector
26
DVI-I Connector
26
Analog Stereo Audio (Jack)
27
Analog Stereo Audio (Phoenix)
27
Ethernet Connector (TPS and LAN Ports)
27
Connector
27
IR Connector
27
IR Detector
27
GPIO - General Purpose Input/Output Ports
28
TPS Extender Concept
28
TPS Interface
29
Port Diagrams
29
Standalone Extenders
29
Wall Plate / Floor Plate Extenders
30
Video Interface
30
Video Input Modes
30
Input Source Selection Modes
30
The Autoselect Feature
30
Audio Interface
31
Audio Input Modes
31
Audio Options - Example
32
Serial Interface
32
Technical Background
32
Signal Transmission - Example
33
Recognizer
33
RS-232 Signal Transmission – Example
33
IR Interface
34
Technical Background
34
IR Signal Transmission - Example 1
34
IR Signal Transmission - Example 2
34
Advanced IR Functionality
35
GPIO Interface
35
Description
35
GPIO Options - Example
35
Ethernet Control Interface
35
Consuming Electronic Control (CEC) Interface
35
Further Built-In Features
36
Automatically Launched Actions - the Event Manager
36
Transmitter Cloning - Configuration Backup and Restore
36
Remote Firmware Upgrade of Connected Lightware Devices
36
Operation
37
Front Panel Leds
37
Video Input Leds
37
Audio Input Leds
37
Autoselect LED
37
Hdcp Led
37
Tps Link Led
38
Firmware Version Indication
38
Rear Panel Leds
38
Live Led
38
Led
38
Srvc Led
38
Link Led
38
Front Panel Buttons
39
Video Select Button
39
Audio Select Button
39
Port Legend
39
Programmable Show Me Button
39
Special Functions
39
Enable DHCP (Dynamic) IP Address
39
Reset to Factory Default Settings
40
Reseting the Device
40
Control Lock
40
Entering Firmware Upgrade Mode
40
Software Control Modes
40
Software Control - Lightware Device Controller
41
Install and Upgrade
41
Running the LDC
41
Connecting to a Device (Device Discovery Window)
42
Crosspoint Menu
43
Port Properties Windows
44
Analog Video Inputs
44
Digital Video Inputs
44
CEC Command Sending
45
TPS Video Output
46
Analog Audio Inputs
46
Digital Audio Inputs
47
TPS Audio Output
47
Diagnostic Tools
47
Cable Diagnostics
47
Test Pattern
48
Frame Detector
49
EDID Menu
49
EDID Operations
50
EDID Summary Window
50
Editing an EDID
51
Creating an EDID - Easy EDID Creator
51
Control Menu
52
Tab
52
Message Recognizer
52
GPIO Tab
53
Ethernet
54
Infra Tab
54
Event Manager
57
The Event Editor
57
Create or Modify an Event
58
Special Tools and Accessories
58
Clear One or more Event(S)
59
Export and Import Events
59
Event Creating - Example
59
Settings Menu
60
Status
60
Network
60
Backup
60
Front Panel
61
System
61
Configuration Cloning (Backup Tab)
62
Steps in a Nutshell
62
Save the Settings of a Device (Backup)
62
Upload the Settings to a Device (Restore)
62
Advanced View Window
63
Lw2 Programmer's Reference
64
LW2 Protocol Description
64
General LW2 Commands
64
View Product Type
64
Query Control Protocol
64
View Firmware Version of the CPU
65
Connection Test
65
View Serial Number
65
Compile Time
65
View Installed Board
65
View Firmware for All Controllers
65
Restart the Device
65
Query Health Status
65
Restore Factory Default Settings
65
AV Port Settings
66
Switch an Input to the Output
66
Mute Output
66
Unmute Output
66
Lock Output
66
Unlock Output
66
View Connection State on the Output
67
View Crosspoint Size
67
Change Video Autoselect Mode
67
Change Audio Autoselect Mode
67
Change the Video Input Priorities
68
Change Audio Input Priority
68
Network Configuration
68
Query the Current IP Status
68
Set the IP Address
68
Set the Subnet Mask
68
Set the Gateway Address
69
Apply Network Settings
69
GPIO Configuration
69
Set Level and Direction for each Pins
69
LW2 Commands - Quick Summary
70
Lw3 Programmers' Reference
71
Overview
71
Protocol Rules
71
LW3 Tree Structure and Command Structure (Examples)
71
General Rules
71
Command Types
72
Prefix Summary
72
Error Messages
72
Escaping
72
Signature
73
Subscription
73
Notifications about the Changes of the Properties
73
Legend for the Control Commands
73
System Commands
74
Query the Product Name
74
Set the Device Label
74
Query the Serial Number
74
Query the Firmware Version
74
Resetting the Device
74
Restore the Factory Default Settings
74
Lock the Front Panel Buttons
75
Disable the Default Function of the Front Panel Buttons
75
Dark Mode
75
Dark Mode Delay
75
Video Port Settings
76
Query the Status of Source Ports
76
Query the Status of Destination Port
77
Query the Video Crosspoint Setting
77
Switching Video Input
77
Query the Video Autoselect Settings
77
Change the Autoselect Mode
78
Query the Input Port Priority
78
Change the Input Port Priority
78
Mute an Input Port
78
Unmute an Input Port
78
Lock an Input Port
79
Unlock an Input Port
79
Mute Output
79
Unmute Output
79
Lock Output
79
Unlock Output
79
HDCP Setting (Input Port)
79
Test Pattern Generator Mode
80
Test Pattern Color
80
Test Pattern Resolution
80
HDCP Setting (Output Port)
81
HDMI Mode Settings (Output Port)
81
Color Space Setting (Output Port)
81
Query the Recent TPS Mode
81
TPS Mode Settings
82
Audio Port Settings
82
Query the Status of Source Ports
82
Query the Status of Destination Port
83
Query the Audio Crosspoint Setting
83
Switching Audio Input
83
Query the Audio Autoselect Settings
84
Change the Autoselect Mode
84
Query the Input Port Priority
85
Change the Input Port Priority
85
Mute an Audio Input
85
Unmute an Audio Input
85
Lock an Input Port
85
Unlock an Input Port
85
Mute Audio Output
86
Unmute Audio Output
86
Lock Output
86
Unlock Output
86
Analog Audio Input Level Settings
86
Volume
86
Balance
86
Network Configuration
87
Query the DHCP State
87
Change the DHCP State
87
Query the IP Address
87
Change the IP Address (Static)
87
Query the Subnet Mask
87
Change the Subnet Mask (Static)
87
Query the Gateway Address
87
Change the Gateway Address (Static)
88
Port Configuration
88
Protocol Setting
88
BAUD Rate Setting
88
Databits Setting
88
Stopbits Setting
89
Parity Setting
89
Operation Mode
89
Command Injection Enable
89
Recognizer
90
Enable the Recognizer
90
Set the Delimiter Hex
90
Set the Timeout
90
Query the Last Recognized Serial Message in String Format
90
Query the Last Recognized Serial Message in Hex Format
90
Query the Last Recognized Serial Message in Hash Format
90
RS-232 Recognizer
90
Clear the Stored Last Recognized Serial Message
91
Query the Last Recognized Serial Message in String Format
91
Query the Last Recognized Serial Message in Hex Format
91
Query the Last Recognized Serial Message in Hash Format
91
Set the Active Timeout
91
Infrared Port Configuration
91
Enable Command Injection Mode
91
Enable/Disable Output Signal Modulation
91
Sending Message Via the Communication Ports
92
Sending a TCP Message (ASCII-Format) Via TCP Port
92
Sending a TCP Text (ASCII-Format) Via TCP Port
92
Sending a TCP Binary Message (HEX-Format) Via TCP Port
92
Sending UDP Message (ASCII-Format) Via TCP Port
92
Sending a TCP Text (ASCII-Format) Via TCP Port
93
Sending a UDP Binary Message (HEX-Format) Via TCP Port
93
Sending a Message (ASCII-Format) Via Serial Port
93
Sending a Text (ASCII-Format) Via Serial Port
93
Sending a Binary Message (HEX-Format) Via Serial Port
93
Using Hexadecimal Codes
93
Sending Pronto Hex Codes in Little-Endian Format Via IR Port
94
Sending Pronto Hex Codes in Big-Endian Format Via IR Port
94
Sending CEC Commands
95
Sending an OSD String
95
Sending a CEC Command in Text Format
95
Sending a CEC Command in Hexadecimal Format
95
GPIO Port Configuration
96
Set the Direction of a GPIO Pin
96
Set the Output Level of a GPIO Pin
96
Toggle the Level of a GPIO Pin
96
EDID Management
96
Query the Emulated Edids
96
Query the Validity of a Dynamic EDID
97
Query the Preferred Resolution of an User EDID
97
Emulating an EDID to an Input Port
97
Emulating an EDID to All Input Ports
97
Copy an EDID to User Memory
97
Deleting an EDID from User Memory
97
Resetting the Emulated Edids
97
LW3 Commands - Quick Summary
98
Firmware Upgrade
102
About the Firmware Package (LFP2 File)
102
Short Instructions
102
Installation of LDU2
102
Detailed Instructions
102
Establish Connection
102
Start the LDU2 Application and Follow the Steps
102
Keeping the Configuration Settings
105
Remote Firmware Upgrade of Connected Lightware Devices
106
Troubleshooting
107
Use Cases
107
How to Speed up the Troubleshooting Process
109
Technologies
110
EDID Management
110
Understanding the EDID
110
Advanced EDID Management
110
HDCP Management
111
Protected and Unprotected Content
111
Disable Unnecessary Encryption
111
Pixel Accurate Reclocking
112
Appendix
113
Specification
113
Factory Default Settings
115
Content of Backup File
115
Cable Wiring Guide
116
Cable Wiring Guide for Serial Data Transmission
116
Audio Cable Wiring Guide
116
Mechanical Drawings
117
UMX-TPS-TX100 Series
117
WP-UMX-TPS-TX100 Series
118
FP-UMX-TPS-TX100 Series
118
Port Numbering
119
Wp-Umx-Tps-Tx120-Us
119
WP-UMX-TPS-TX130-US / WP-UMX-TPS-TX130-US-Plus
119
Umx-Tps-Tx120
119
Umx-Tps-Tx130
119
UMX-TPS-TX140 / UMX-TPS-TX140-Plus
120
Fp-Umx-Tps-Tx120
120
Fp-Umx-Tps-Tx130
120
Maximum Extension Distances
120
Factory EDID List
121
Release Notes of the Firmware Packages
122
Further Information
124
Advertisement
Lightware WP-UMX-TPS-TX120-US White User Manual (103 pages)
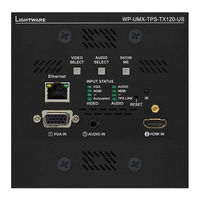
HDBaseT Multimedia Extender
Brand:
Lightware
| Category:
Extender
| Size: 36.73 MB
Table of Contents
Table of Contents
4
Introduction
7
Description
7
Compatible Devices
7
Model Denomination
7
Box Contents
8
Features
8
Model Comparison
9
Typical Application
10
Installation
11
Mounting Options - UMX-TPS-TX100 Series
11
Under-Desk Double Mounting Kit
11
High Rack Shelf
11
Mounting Options - WP-UMX-TPS-TX100 Series
12
Mounting Options - FP-UMX-TPS-TX130-MKM
12
Connecting Steps
13
WP-UMX-TPS-TX100 Series
13
UMX-TPS-TX100 Series
13
Powering Options
14
Product Overview
15
Front View - UMX-TPS-TX100 Series
15
Rear View - UMX-TPS-TX100 Series
16
Front View - WP-UMX-TPS-TX100 Series
16
Rear View - WP-UMX-TPS-TX100 Series
17
Front View - FP-UMX-TPS-TX130-MKM
17
Rear View - FP-UMX-TPS-TX130-MKM
17
Electrical Connections
18
Locking 12V DC Connection
18
DC Connection
18
VGA Connector
18
HDMI Connector
18
Displayport Connector
18
DVI-I Connector
18
Analog Stereo Audio (Jack)
18
Analog Stereo Audio (Phoenix)
18
Ethernet Connector (TPS and LAN Ports)
19
Connector
19
IR Connector
19
IR Detector
19
GPIO - General Purpose Input/Output Ports
19
TPS Extender Concept
20
TPS Interface
20
Port Diagram
21
Video Interface
22
Video Input Modes
22
Input Source Selection Modes
22
The Autoselect Feature
22
Audio Interface
23
Audio Input Modes
23
Audio Options - Example
23
Control Features
24
Serial Interface
24
IR Interface
25
Ethernet Control Interface
25
GPIO Interface
26
Further Built-In Features
26
Automatically Launched Actions - the Event Manager
26
Transmitter Cloning - Configuration Backup and Restore
26
Remote Firmware Upgrade of Connected Lightware Devices
26
Operation
27
Front Panel Leds
27
Video Input Leds
27
Audio Input Leds
27
Autoselect LED
27
Hdcp Led
27
Tps Link Led
28
Firmware Version Indication
28
Rear Panel Leds
28
Live Led
28
Led
28
Srvc Led
28
Link Led
28
Front Panel Buttons
29
Video Select Button
29
Audio Select Button
29
Port Legend
29
Programmable Show Me Button
29
Special Functions
29
Enable DHCP (Dynamic) IP Address
29
Reset to Factory Default Settings
30
Reseting the Device
30
Control Lock
30
Entering Firmware Upgrade Mode
30
Software Control Modes
30
Software Control - Lightware Device Controller
31
Install and Upgrade
31
Running the LDC
31
Connecting to a Device (Device Discovery Window)
32
Crosspoint Menu
33
Port Properties Windows
34
Analog Video Inputs
34
Digital Video Inputs
34
Analog Audio Inputs
35
Digital Audio Inputs
35
TPS Video Output
35
TPS Audio Output
36
Diagnostic Tools
37
Cable Diagnostics
37
Frame Detector
38
Test Pattern
38
EDID Menu
39
EDID Operations
39
EDID Summary Window
40
Editing an EDID
40
Creating an EDID - Easy EDID Creator
41
Control Menu
41
Gpio
42
Ethernet
42
Infra
43
Event Manager
44
The Event Editor
45
Create or Modify an Event
45
Special Tools and Accessories
46
Clear One or more Event(S)
46
Export and Import Events
46
Event Creating - Example
46
Settings Menu
47
Status
47
Network
48
Backup
48
Front Panel
48
System
49
Configuration Cloning (Backup Tab)
49
Steps in a Nutshell
49
Save the Settings of a Device (Backup)
50
Upload the Settings to a Device (Restore)
50
Advanced View Window
50
Lw2 Programmer's Reference
51
LW2 Protocol Description
51
General LW2 Commands
51
View Product Type
51
Query Control Protocol
51
View Firmware Version of the CPU
52
Connection Test
52
View Serial Number
52
Compile Time
52
View Installed Board
52
View Firmware for All Controllers
52
Restart the Device
52
Query Health Status
52
Restore Factory Default Settings
52
A/V Port Settings
53
Switch an Input to the Output
53
Mute Output
53
Unmute Output
53
Lock Output
53
Unlock Output
53
View Connection State on the Output
54
View Crosspoint Size
54
Change Video Autoselect Mode
54
Change Audio Autoselect Mode
54
Change the Video Input Priorities
55
Change Audio Input Priority
55
Network Configuration
55
Query the Current IP Status
55
Set the IP Address
55
Set the Subnet Mask
55
Set the Gateway Address
56
Apply Network Settings
56
GPIO Configuration
56
Set Level and Direction for each Pins
56
LW2 Commands - Quick Summary
57
Lw3 Programmers' Reference
58
Overview
58
Protocol Rules
58
LW3 Tree Structure and Command Structure (Examples)
58
General Rules
58
Command Types
59
Prefix Summary
59
Error Messages
59
Escaping
59
Signature
60
Subscription
60
Notifications about the Changes of the Properties
60
Legend for the Control Commands
60
System Commands
61
Query the Product Name
61
Set the Device Label
61
Query the Serial Number
61
Query the Firmware Version
61
Resetting the Device
61
Restore the Factory Default Settings
61
Lock the Front Panel Buttons
62
Disable the Default Function of the Front Panel Buttons
62
Dark Mode
62
Dark Mode Delay
62
Video Port Settings
63
Query the Status of Source Ports
63
Query the Status of Destination Port
64
Query the Video Crosspoint Setting
64
Switching Video Input
64
Query the Video Autoselect Settings
64
Change the Autoselect Mode
65
Query the Input Port Priority
65
Change the Input Port Priority
65
Mute an Input Port
65
Unmute an Input Port
65
Lock an Input Port
66
Unlock an Input Port
66
Mute Output
66
Unmute Output
66
Lock Output
66
Unlock Output
66
HDCP Setting (Input Port)
66
Test Pattern Generator Mode
67
Test Pattern Resolution
67
Test Pattern Color
67
HDCP Setting (Output Port)
67
HDMI Mode Settings (Output Port)
67
Color Space Setting (Output Port)
68
Query the Recent TPS Mode
68
TPS Mode Settings
68
Audio Port Settings
69
Query the Status of Source Ports
69
Query the Status of Destination Port
69
Query the Audio Crosspoint Setting
70
Switching Audio Input
70
Query the Audio Autoselect Settings
70
Change the Autoselect Mode
70
Query the Input Port Priority
71
Change the Input Port Priority
71
Mute an Audio Input
71
Unmute an Audio Input
71
Lock an Input Port
71
Unlock an Input Port
71
Mute Audio Output
72
Unmute Audio Output
72
Lock Output
72
Unlock Output
72
Analog Audio Input Level Settings
72
Network Configuration
73
Query the DHCP State
73
Change the DHCP State
73
Query the IP Address
73
Change the IP Address (Static)
73
Query the Subnet Mask
73
Change the Subnet Mask (Static)
73
Query the Gateway Address
73
Change the Gateway Address (Static)
74
Port Configuration
74
Protocol Setting
74
BAUD Rate Setting
74
Databit Setting
74
Stopbits Setting
74
Parity Setting
74
Operation Mode
75
Command Injection Enable
75
Infrared Port Configuration
75
Enable Command Injection Mode
75
Enable/Disable Output Signal Modulation
75
Sending Message Via the Communication Ports
76
Sending Message Via TCP Port
76
UDP Message Sending Via Ethernet
76
Message Sending Via RS-232 Serial Port
77
Using Hexadecimal Codes
77
GPIO Port Configuration
78
Set the Direction of a GPIO Pin
78
Set the Output Level of a GPIO Pin
78
Toggle the Level of a GPIO Pin
78
EDID Management
78
Query the Emulated Edids
78
Query the Validity of a Dynamic EDID
78
Query the Preferred Resolution of an User EDID
79
Emulating an EDID to an Input Port
79
Emulating an EDID to All Input Ports
79
Copy an EDID to User Memory
79
Deleting an EDID from User Memory
79
Resetting the Emulated Edids
79
LW3 Commands - Quick Summary
80
Firmware Upgrade
83
About the Firmware Package (LFP File)
83
Short Instructions
83
Install and Upgrade
83
Detailed Instructions
84
Establish the Connection
84
Start the LDU and Follow the Instructions
84
Keeping the Configuration Settings
87
Remote Firmware Upgrade of Connected Lightware Devices
88
Troubleshooting
89
Technologies
91
EDID Management
91
Understanding the EDID
91
Advanced EDID Management
91
HDCP Management
92
Protected and Unprotected Content
92
Disable Unnecessary Encryption
92
Pixel Accurate Reclocking
93
Appendix
94
Specification
94
Factory Default Settings
96
Content of Backup File
96
Audio Cable Wiring Guide
97
Mechanical Drawings
98
UMX-TPS-TX100 Series
98
WP-UMX-TPS-TX100 Series
99
Fp-Umx-Tps-Tx130-Mkm
99
Port Numbering
100
Wp-Umx-Tps-Tx120-Us
100
Wp-Umx-Tps-Tx130-Us
100
Umx-Tps-Tx120
100
Umx-Tps-Tx130
100
Umx-Tps-Tx140
101
Fp-Umx-Tps-Tx130
101
Maximum Extension Distances
101
Factory EDID List
102
Further Information
103
Advertisement
Related Products
Lightware WP-UMX-TPS-TX130-US White
Lightware WP-UMX-TPS-TX100 Series
Lightware WP-UMX-TPS-TX130-Plus-US
Lightware WP-UMX-TPS-TX120-US Black
Lightware WP-UMX-TPS-TX130-US Black
Lightware WP-UMX-TPS-TX130-US-Plus Black
Lightware WP-UMX-TPS-TX130-US-Plus White
Lightware 91540021
Lightware 91540070
Lightware DP-OPT-RX150
Lightware Categories
Extender
Matrix Switcher
Transmitter
Switch
Receiver
More Lightware Manuals
Login
Sign In
OR
Sign in with Facebook
Sign in with Google
Upload manual
Upload from disk
Upload from URL