Sign In
Upload
Manuals
Brands
Honeywell Manuals
Automobile Accessories
Thor VM2
Honeywell Thor VM2 Manuals
Manuals and User Guides for Honeywell Thor VM2. We have
8
Honeywell Thor VM2 manuals available for free PDF download: User Manual, Reference Manual, Quick Start Manual
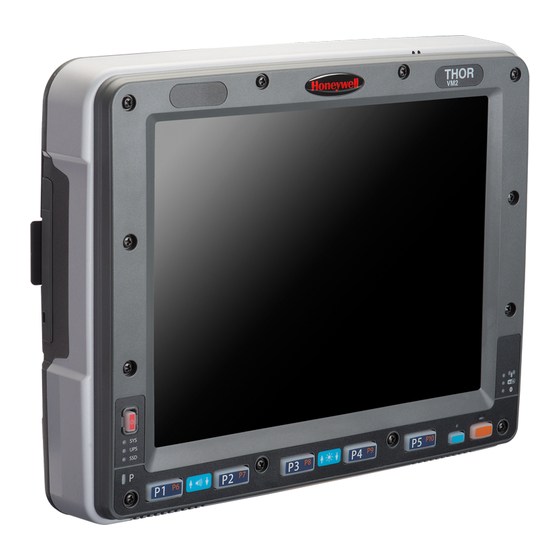
Honeywell Thor VM2 User Manual (308 pages)
vehicle-mount computer with Microsoft Windows Embedded CE 6.0
Brand:
Honeywell
| Category:
Automobile Accessories
| Size: 9.03 MB
Table of Contents
Table of Contents
3
Chapter 1 - Thor VM2 Agency Information
15
FCC Part 15 Statement
15
FCC 5Ghz Statement
15
EMC Directive Requirements
15
Canada, Industry Canada (IC) Notices
15
Cofetel
16
ANATEL (Brazil)
16
Vehicle Power Supply Connection Safety Statement
16
Li-Ion Battery
16
RF Safety Notice
17
Bluetooth
17
Honeywell Scanning & Mobility Product Environmental Information
17
CE Mark
17
Dealer License - Republic of Singapore
18
Oman
18
United Arab Emirates (UAE)
18
Chapter 2 - Getting Started
19
Overview
19
About this Guide
19
Out of the Box
19
Initial Setup for Thor VM2
20
Hardware Setup
20
Software
20
Languages and Fonts
20
First Boot
20
Software Setup
20
Dock
21
Additional Connectors
22
Components
22
Front View - Thor VM2
22
Back View - Thor VM2
23
Access Panels - Thor VM2
23
Front View - Dock
23
Back View - Dock
24
Backlights and Indicators
25
Display Backlight
25
Power Management
25
Backlight Brightness
25
Screen Blanking
25
Keypad Backlight
25
Speaker Volume
25
Power up
26
Rebooting the Thor VM2
27
Warmboot
27
Restart
27
Clearing Persistent Storage / Reset to Default Settings
27
Tapping the Touch Screen with a Stylus
27
Setup Terminal Emulation Parameters
28
Cleaning
28
Cleaning the Thor VM2 and the Dock
28
Cleaning the Touch Screen
28
Startup Help
29
Chapter 3 - Hardware Overview
31
System Hardware
31
802.11A/B/G Wireless Client
31
Central Processing Unit
31
Input/Output Components
31
System Memory
31
Video Subsystem
31
Audio Interface
31
Card Slots
31
Compactflash (CF) Slot
31
Wwan
32
Gps
32
Power
32
Vehicle DC Power Supply
32
External AC Power Supply
32
Uninterruptible Power Supply
32
Safe Charging Temperature Range
33
Charging Timeout
33
Charging and Power Management
33
Backup Battery
33
Fuse
33
Power Management Modes
33
On Mode (D0)
34
User Idle / Backlight off Mode (D1)
34
System Idle / Display off Mode (D2)
34
Suspend Mode (D3)
34
Shutdown / off Mode (D4)
34
Primary Events
34
Power Controls
36
Power Switch
36
Power Button
36
Power Configuration Mode
36
External Connectors
37
Serial Connector (COM1 and COM2)
37
Screen Blanking
37
USB Connector
38
Canbus / Audio Connector
38
Power Supply Connector
38
Antenna Connections
39
External Antenna Connector
39
Internal 802.11 Antenna
39
External 802.11 Antenna
39
Vehicle Remote Antenna
39
Keyboard Options
40
Integrated Keypad
40
Keypad Leds
40
USB Keyboards
40
95-Key USB Keyboard
40
PS/2 Keyboards
42
95-Key PS/2 Keyboard
42
60-Key PS/2 Keyboard
43
USB Keyboard / Mouse
44
LED Functions
44
System Leds
45
SYS (System Status) LED
45
UPS Status LED
46
SSD (Solid State Drive) LED
46
Connection Leds
47
Wwan Led
47
Wi-Fi LED
47
Bluetooth LED
47
Keyboard Leds
48
Blue LED
48
Orange LED
48
Programmable LED
48
Display
48
Touch Screen
48
Display Backlight Control
49
Chapter 4 - Vehicle Mounting and Accessory Installation
51
Introduction
51
Prepare for Vehicle Mounting
51
Quick Start
51
Maintenance - Vehicle Mounted Devices
52
Cleaning
52
Place Thor VM2 in the Dock
52
Dock I/O Pin Cover
53
Padlock
53
Laptop Security Cable
53
Install RAM Mount
54
Components - RAM Mounting Kits
54
Mounting Kits Without Keyboards
54
Mounting Kits with Integrated Keyboard Mounting
55
Procedure - RAM Mount Assembly
56
Torque Measurement
56
Install U Bracket Mount
63
Components - U Bracket Mounting Assembly
63
Procedure - U Bracket Assembly
63
Torque Measurement
63
Mounting Positions
64
Connect Cables
66
Strain Relief Cable Clamps
66
Connect Power
67
Power Cable Cautions
67
VDC Vehicles (10-60 VDC Direct Connection)
69
Power Cable Identification
69
VDC Vehicles (50-150 VDC Power Supply, Screws on Side of Lid)
74
Power Cable Identification
75
VDC Vehicles (50-150 VDC Power Supply, Screws on Top of Lid)
78
Power Cable Identification
79
VX6 / VX7 Adapter Cable
82
Thor VX8 / Thor VX9 Adapter Cable
83
CV61 Adapter Cable
84
Screen Blanking
85
Screen Blanking with Switch
87
External AC/DC Power Supply
88
Connect USB Keyboard
89
Connect PS/2 Keyboard
89
Connect USB Host
91
Host / Client y Cable
91
Connect USB Client
91
Connect Serial Device
91
Connect a Tethered Scanner
92
Connect Headset Cable
92
Adjust Headset / Microphone and Secure Cable
93
Connect Canbus Cable
94
Install External Antenna
94
Install Remote Antenna
95
802.11 Remote Mount Antenna
95
WAN Remote Mount Antenna
97
GPS Remote Mount Antenna
97
Apply Touch Screen Protective Film
98
Installation
98
Removal
98
Disconnect UPS Battery
99
Install SD Card
100
Equipment Required
100
Installation Procedure
100
Install SIM Card
101
Equipment Required
101
Installation Procedure
101
Replace Front Panel
103
Equipment Required
103
Replacement Procedure
103
Advertisement
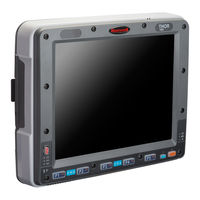
Honeywell Thor VM2 User Manual (398 pages)
Vehicle-Mounted Computer with Microsoft Windows Embedded CE 6.0
Brand:
Honeywell
| Category:
Automobile Accessories
| Size: 8.51 MB
Table of Contents
Table of Contents
3
Chapter 1 - Customer Support
13
Product Service and Repair
13
Send Feedback
13
Technical Assistance
13
Limited Warranty
14
Chapter 2 - Getting Started
17
Overview
17
About this Guide
18
Out of the Box
18
Initial Setup for Thor VM2
19
Hardware Setup
19
Software
19
Dock
21
VM1D Standard Dock
22
VM3D Enhanced Dock
23
VMXD Enhanced Dock
24
VMXD Enhanced Dock for Off-Vehicle Use
25
Thor VM2 and Enhanced Dock Support
26
Additional Connectors
27
Components
28
Front View - Thor VM2
28
Back View - Thor VM2
28
Access Panels - Thor VM2
29
Front View - Dock
29
Back View - Dock
30
Top View - Enhanced Dock
31
Backlights and Indicators
31
Display Backlight
31
Keypad Backlight
32
Speaker Volume
32
Power up
32
Rebooting the Thor VM2
33
Tapping the Touch Screen with a Stylus
34
Setup Terminal Emulation Parameters
35
Cleaning
35
Cleaning the Thor VM2 and the Dock
35
Cleaning the Touch Screen
36
Startup Help
36
Chapter 3 - Hardware Overview
37
System Hardware
37
802.11A/B/G Wireless Client
37
Central Processing Unit
37
Input/Output Components
37
System Memory
38
Video Subsystem
38
Audio Interface
38
Card Slots
38
Bluetooth Ezpair
38
Wwan
39
Gps
39
Power
39
Vehicle DC Power Supply
39
External AC Power Supply
39
Uninterruptible Power Supply
39
Backup Battery
42
Fuse
42
Power Management Modes
42
Power Controls
45
External Connectors
47
Serial Connector (COM1 and COM2)
47
USB Connector(S)
48
Ethernet Connector
48
Canbus / Audio Connector
49
Power Supply Connector
49
Antenna Connections
50
Keyboard Options
51
Integrated Keypad
51
USB Keyboards
52
PS/2 Keyboards
54
USB Keyboard / Mouse
57
LED Functions
58
System Leds
58
Connection Leds
60
Keyboard Leds
61
Display
62
Touch Screen
62
Screen Blanking
62
Display Backlight Control
62
Chapter 4 - Vehicle Mounting and Accessory Installation
65
Introduction
65
Prepare for Vehicle Mounting
66
Quick Start
66
Maintenance - Vehicle Mounted Devices
67
Cleaning
67
Place Thor VM2 in the Dock
67
Dock I/O Pin Cover
69
Padlock
69
Laptop Security Cable
69
Install RAM Mount
70
Components - RAM Mounting Kits
70
Procedure - RAM Mount Assembly
72
Install U Bracket Mount
83
Components - U Bracket Mounting Assembly
83
Procedure - U Bracket Assembly
84
Connect Cables
87
Strain Relief Cable Clamps
87
Connect Power
88
Connect USB Keyboard
124
Connect PS/2 Keyboard
125
Connect USB Host
127
Connect USB Client
128
Connect Serial Device
129
Connect Headset Cable
129
Connect Canbus Cable
131
Install External Antenna
131
Install Remote Antenna
132
Apply Touch Screen Protective Film
136
Installation
136
Removal
137
Disconnect UPS Battery
138
Equipment Required
138
Disconnect Procedure
138
Install SD Card
139
Equipment Required
139
Installation Procedure
139
Install SIM Card
141
Equipment Required
141
Installation Procedure
141
Replace Front Panel
143
Equipment Required
143
Replacement Procedure
143
Honeywell Thor VM2 User Manual (282 pages)
Brand:
Honeywell
| Category:
Automobile Accessories
| Size: 12.01 MB
Table of Contents
Table of Contents
3
Chapter 1 - Thor VM2 Agency Information
13
FCC Part 15 Statement
13
FCC 5Ghz Statement
13
EMC Directive Requirements
13
Canada, Industry Canada (IC) Notices
13
Cofetel
14
ANATEL (Brazil)
14
Vehicle Power Supply Connection Safety Statement
14
Li-Ion Battery
14
RF Safety Notice
15
Bluetooth
15
Honeywell Scanning & Mobility Product Environmental Information
15
CE Mark
15
Dealer License - Republic of Singapore
16
Oman
16
United Arab Emirates (UAE)
16
Chapter 2 - Getting Started
17
Overview
17
About this Guide
17
Out of the Box
17
Initial Setup for Thor VM2
18
Hardware Setup
18
Software
18
First Boot
18
Languages
18
Software Setup
19
Dock
19
Additional Connectors
20
Components
20
Front View - Thor VM2
20
Back View - Thor VM2
21
Access Panels - Thor VM2
21
Front View - Dock
21
Back View - Dock
22
Backlights and Indicators
23
Display Backlight
23
Backlight Brightness
23
Power Management
23
Screen Blanking
23
Keypad Backlight
23
Speaker Volume
23
Power up
24
Rebooting the Thor VM2
25
Restart
25
Tapping the Touch Screen with a Stylus
25
Setup Terminal Emulation Parameters
25
Cleaning
26
Cleaning the Thor VM2 and the Dock
26
Cleaning the Touch Screen
26
Startup Help
26
Chapter 3 - Hardware Overview
27
System Hardware
27
802.11A/B/G/N Wireless Client
27
Central Processing Unit
27
Input/Output Components
27
System Memory
27
Video Subsystem
27
Audio Interface
27
Card Slots
27
Compactflash (CF) Slot
27
Wwan
28
Gps
28
Power
28
Vehicle DC Power Supply
28
External AC Power Supply
28
Uninterruptible Power Supply
28
Charging and Power Management
29
Charging Timeout
29
Safe Charging Temperature Range
29
Backup Battery
29
Fuse
29
Power Management Modes
29
Full on Mode
29
Hibernate Mode
30
Off Mode
30
Standby/Sleep Mode
30
Power Controls
31
Power Button
31
Power Configuration
31
Power Switch
31
External Connectors
32
Serial Connector (COM1 and COM2)
32
Screen Blanking
32
USB Connector
33
Canbus / Audio Connector
33
Power Supply Connector
33
Antenna Connections
34
External 802.11 Antenna
34
External Antenna Connector
34
Internal 802.11 Antenna
34
Vehicle Remote Antenna
34
Keyboard Options
35
Integrated Keypad
35
Keypad Leds
35
USB Keyboards
35
95-Key USB Keyboard
35
PS/2 Keyboards
37
95-Key PS/2 Keyboard
37
60-Key PS/2 Keyboard
38
USB Keyboard / Mouse
39
LED Functions
39
System Leds
40
SYS (System Status) LED
40
SSD (Solid State Drive) LED
41
UPS Status LED
41
Connection Leds
42
Bluetooth LED
42
Wi-Fi LED
42
Wwan Led
42
Keyboard Leds
43
Blue LED
43
Orange LED
43
Programmable LED
43
Display
43
Touch Screen
43
Display Backlight Control
44
Chapter 4 - Vehicle Mounting and Accessory Installation
45
Introduction
45
Prepare for Vehicle Mounting
45
Quick Start
45
Maintenance - Vehicle Mounted Devices
46
Cleaning
46
Place Thor VM2 in the Dock
46
Dock I/O Pin Cover
47
Padlock
47
Laptop Security Cable
47
Install RAM Mount
48
Components - RAM Mounting Kits
48
Mounting Kits Without Keyboards
48
Mounting Kits with Integrated Keyboard Mounting
49
Procedure - RAM Mount Assembly
50
Torque Measurement
50
Install U Bracket Mount
57
Components - U Bracket Mounting Assembly
57
Procedure - U Bracket Assembly
57
Torque Measurement
57
Mounting Positions
58
Connect Cables
60
Strain Relief Cable Clamps
60
Connect Power
61
Power Cable Cautions
61
Power Cable Identification
63
VDC Vehicles (10-60 VDC Direct Connection)
63
VDC Vehicles (50-150 VDC Power Supply, Screws on Side of Lid)
68
Power Cable Identification
69
VDC Vehicles (50-150 VDC Power Supply, Screws on Top of Lid)
72
Power Cable Identification
73
VX6 / VX7 Adapter Cable
76
Thor VX8 / Thor VX9 Adapter Cable
77
CV61 Adapter Cable
78
Screen Blanking
79
Screen Blanking with Switch
81
External AC/DC Power Supply
82
Connect USB Keyboard
83
Connect PS/2 Keyboard
83
Connect USB Host
85
Host / Client y Cable
85
Connect USB Client
85
Connect Serial Device
85
Connect a Tethered Scanner
85
Connect Headset Cable
86
Adjust Headset / Microphone and Secure Cable
86
Connect Canbus Cable
88
Install External Antenna
88
Install Remote Antenna
89
802.11 Remote Mount Antenna
89
GPS Remote Mount Antenna
91
WAN Remote Mount Antenna
91
Apply Touch Screen Protective Film
92
Installation
92
Removal
92
Disconnect UPS Battery
93
Install SD Card
94
Equipment Required
94
Installation Procedure
94
Install SIM Card
95
Equipment Required
95
Installation Procedure
95
Replace Front Panel
96
Equipment Required
96
Replacement Procedure
96
Microsoft Windows Setup and Configuration
99
Drive C Folder Structure
99
Software Loaded on Drive C
99
Drive D Folder Structure
101
Advertisement
Honeywell Thor VM2 User Manual (366 pages)
Vehicle-Mounted Computer
Brand:
Honeywell
| Category:
Automobile Accessories
| Size: 9.97 MB
Table of Contents
Table of Contents
3
Chapter 1 - Customer Support
11
Technical Assistance
11
Product Service and Repair
11
Limited Warranty
11
Send Feedback
11
Chapter 2 - Getting Started
13
Overview
13
About this Guide
14
Out of the Box
14
Initial Setup for Thor VM2
15
Hardware Setup
15
Software
15
Dock
17
VM1D Standard Dock
18
VM3D Enhanced Dock
19
VMXD Enhanced Dock
20
VMXD Enhanced Dock for Off-Vehicle Use
21
Thor VM2 and Enhanced Dock Support
22
Additional Connectors
23
Scanners
23
Components
24
Front View - Thor VM2
24
Back View - Thor VM2
24
Access Panels - Thor VM2
25
Front View - Dock
25
Back View - Dock
26
Top View - Enhanced Dock
27
Backlights and Indicators
27
Display Backlight
27
Keypad Backlight
28
Speaker Volume
28
Power up
28
Rebooting the Thor VM2
29
Tapping the Touch Screen with a Stylus
29
Setup Terminal Emulation Parameters
30
Cleaning
31
Cleaning the Thor VM2 and the Dock
31
Cleaning the Touch Screen
31
Startup Help
31
Chapter 3 - Hardware Overview
33
System Hardware
33
802.11A/B/G/N Wireless Client
33
Central Processing Unit
33
Input/Output Components
33
System Memory
34
Video Subsystem
34
Audio Interface
34
Card Slots
34
Bluetooth Ezpair
34
Wwan
35
Gps
35
Power
35
Vehicle DC Power Supply
35
External AC Power Supply
35
Uninterruptible Power Supply
35
Backup Battery
38
Fuse
38
Power Management Modes
38
Power Controls
41
External Connectors
43
Serial Connector (COM1 and COM2)
43
USB Connector(S)
44
Ethernet Connector
44
Canbus / Audio Connector
45
Power Supply Connector
45
Antenna Connections
46
Keyboard Options
47
Integrated Keypad
47
USB Keyboards
48
PS/2 Keyboards
50
USB Keyboard / Mouse
53
LED Functions
54
System Leds
54
Connection Leds
57
Keyboard Leds
58
Display
59
Touch Screen
59
Screen Blanking
59
Display Backlight Control
59
Chapter 4 - Vehicle Mounting and Accessory Installation
61
Introduction
61
Prepare for Vehicle Mounting
62
Quick Start
62
Maintenance - Vehicle Mounted Devices
63
Cleaning
63
Place Thor VM2 in the Dock
63
Dock I/O Pin Cover
65
Padlock
65
Laptop Security Cable
65
Install RAM Mount
66
Components - RAM Mounting Kits
66
Procedure - RAM Mount Assembly
68
Install U Bracket Mount
79
Components - U Bracket Mounting Assembly
79
Procedure - U Bracket Assembly
80
Connect Cables
83
Strain Relief Cable Clamps
83
Connect Power
84
Connect USB Keyboard
120
Connect PS/2 Keyboard
121
Connect USB Host
123
Connect USB Client
125
Connect Serial Device
126
Connect Headset Cable
126
Connect Canbus Cable
128
Install External Antenna
128
Install Remote Antenna
129
Apply Touch Screen Protective Film
133
Installation
133
Removal
134
Disconnect UPS Battery
135
Equipment Required
135
Disconnect Procedure
135
Install SD Card
136
Equipment Required
136
Installation Procedure
136
Install SIM Card
137
Equipment Required
137
Installation Procedure
137
Replace Front Panel
139
Equipment Required
139
Replacement Procedure
139
Honeywell Thor VM2 Reference Manual (196 pages)
Vechicle-Mounted Computer
Brand:
Honeywell
| Category:
Automobile Electronics
| Size: 2.48 MB
Table of Contents
Limited Warranty
2
Table of Contents
3
Chapter 1 - Introduction
11
About this Guide
11
Components
12
Front View
12
Access Panels
13
Back View with Quick Mount Smart Dock
13
Chapter 2 - Hardware
15
System Hardware
15
802.11A/B/G/N Wireless Client
15
Central Processing Unit
15
Input/Output Components
16
System Memory
16
Video Subsystem
16
Audio Interface
16
Card Slots
16
Compactflash (CF) Slot
16
Secure Digital (SD) Slot
16
Bluetooth Ezpair
17
Wwan
17
Gps
17
Power
18
Vehicle DC Power Supply
18
External AC Power Supply
18
Uninterruptible Power Supply
18
Backup Battery
19
Fuse
19
Power Management Modes
20
Full on Mode
20
Hibernate Mode
20
Standby Mode
20
System Hibernate Wakeup Events
20
System Standby Wakeup Events
20
Ac/DC
21
Auto-On
21
Ignition Control
21
Off Mode
21
Power Configuration
21
Ups
21
External Connectors
22
Serial Connector (COM1 and COM2)
23
Pinout
23
Screen Blanking
24
Serial Cable
24
Screen Blanking Box
25
Screen Blanking with Switch
25
USB Connector
26
D9 Male Connector
27
USB Dongle Cable
27
USB Client Connector
28
USB Host Connector
28
Power Supply Connector
29
Canbus / Audio Connector
30
D15 Female Connector
31
Headset Adapter Cable
31
Quick Connect Headset Connector
32
Canbus Cable
33
D15 Female Connector
33
9-Pin J1939 (Deutsch) Connectors
34
Antenna Connections
35
Antenna Connector
35
External Wifi Antenna
35
Internal Wifi Antenna
35
Vehicle Remote Antenna
35
Keyboard Options
36
Integrated Keypad
36
Blue LED
36
Keypad Leds
36
Orange LED
37
95-Key Keyboard
37
Keyboard Backlight
37
USB Keyboard / Mouse
38
LED Functions
39
System Leds
39
SYS (System Status) LED
40
Charge Level
41
Charging State
41
SSD (Solid State Drive) LED
41
UPS Status LED
41
Connection Leds
42
Bluetooth LED
42
Wifi LED
42
Wwan Led
42
Keyboard Leds
43
Blue LED
43
Orange LED
43
Programmable LED
43
Display
44
Touch Screen
44
Screen Blanking
44
Display Backlight Control
44
Disconnect UPS Battery
45
Install SD Card
47
Install SIM Card
49
Field Replaceable Front Panel
51
Replace Front Panel
51
Chapter 3 - Software
53
Microsoft Windows Setup and Configuration
53
Drive C Folder Structure
54
Software Loaded on Drive C
54
Freefloat Access*One te (Optional)
55
Freefloat Key*One
55
Freefloat Link*One Wedge (Optional)
55
Honeywell Rfterm (Optional)
55
Programs Loaded on Drive C
55
Summit Client Utility
55
Control Panel
56
About
56
Bluetooth
57
Bluetooth Devices
59
Discover
60
Stop Button
60
Bluetooth Device List
61
Clear Button
61
Bluetooth Device Menu
62
Bluetooth Device Properties
62
Right-Click Menu Options
62
Settings
63
Turn off Bluetooth
63
Options
64
Reconnect
65
Options
66
About
68
Initial Configuration
69
Using Bluetooth
69
Subsequent Use
70
Bluetooth Indicators
71
Bluetooth Bar Code Reader Setup
72
Thor VM2 with Label
72
Thor VM2 Without Label
73
Bluetooth Beep and LED Indications
74
Bluetooth Printer Setup
74
Easy Pairing and Auto-Reconnect
74
Display
75
Options
76
5V on COM1
76
5V on COM2
76
Keyboard Backlight
76
Touch Screen Disable
76
USB Powered in Standby
76
Power Options
77
Power Schemes
77
Ac/DC
78
Thor VM2 Is off
78
Thor VM2 Is on
78
Ignition Control - Ignition on
79
Thor VM2 Is off and Vehicle Ignition Is Switched to on
79
Thor VM2 Is on and Vehicle Ignition Is Switched to on
79
Ignition Control - Ignition off
80
Thor VM2 Is off and Vehicle Ignition Is off
80
Thor VM2 Is on and Vehicle Ignition Is Switched to off
80
Auto-On
82
Thor VM2 Is off
82
Thor VM2 Is on
82
Thor VM2 Is off
83
Thor VM2 Is on
83
Ups
83
Power Meter
84
Advanced
85
Hibernate
86
Programmable Key
87
Keymap Tab
88
Remap a Key to a Unicode Value
88
Remap a Single Key
88
Remap a Key Sequence
89
Remap a Key to a Sequence of Unicode Values
89
Remap a Key to a Special Function
89
Remap a Command
90
Remap an Application
90
Launchapp Tab
91
Runcmd Tab
92
Screen Control
93
Screen Blanking
94
Screen Rotation
95
Sounds
96
User Accounts
97
Wi-Fi
97
Bar Code Readers
98
Scanner Wedge
98
Touch Screen Calibration
99
Bios
100
Accessing the BIOS Setup
100
Boot Order
100
Exiting BIOS Setup
100
The Thor VM2 Recovery DVD
101
Upgrading the Thor VM2
101
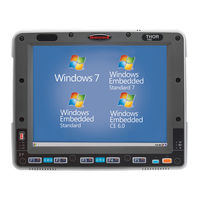
Honeywell Thor VM2 User Manual (64 pages)
Vehicle Mount Computer Microsoft Windows Embedded Standard Operating Systems
Brand:
Honeywell
| Category:
Automobile Accessories
| Size: 1.27 MB
Table of Contents
Limited Warranty
2
Table of Contents
3
Chapter 1 - Introduction
7
About this Guide
7
Components
8
Front View
8
Back View Quick Mount Smart Dock
9
Access Panels
9
Keyboard Options
10
Blue Key
10
Integrated Keypad
10
Orange Key
11
95-Key External Keyboard
12
Keyboard Backlight
12
USB Keyboard / Mouse
12
Chapter 2 - Set up a New Thor VM2
13
Hardware Setup
13
Software Setup
13
Quick Mount Smart Dock
14
Preparing the Dock
15
Place the Thor VM2 in the Dock
16
Removing the Thor VM2 from the Dock
16
Backlights and Indicators
17
Display Backlight
17
Backlight Brightness
17
Power Management
17
Screen Blanking
17
Keypad Backlight
17
LED Functions
18
System Leds
19
SYS (System Status) LED
19
Charge Level
20
Charging State
20
SSD (Solid State Drive) LED
20
UPS Status LED
20
Connection Leds
21
Bluetooth LED
21
Wifi LED
21
Wwan Led
21
Keyboard Leds
22
Blue LED
22
Orange LED
22
Programmable LED
22
Power up
23
Tapping the Touch Screen with a Stylus
24
Thor VM2 Configuration Options
25
Date and Time
25
Power Management
25
Speaker Volume
25
Connect Bluetooth Devices
25
Restart/Shutdown
26
Calibrate Touch Screen
26
Touch Screen
27
Apply the Touch Screen Protective Film
27
Installation
27
Removal
28
Setup Terminal Emulation Parameters
29
Cleaning the Touch Screen
30
Startup Help
31
Honeywell Thor VM2 Reference Manual (62 pages)
Vehicle-mount computer
Brand:
Honeywell
| Category:
Automobile Accessories
| Size: 1.63 MB
Table of Contents
Table of Contents
7
Chapter 1 - Introduction
9
About this Guide
9
Powered Vehicle Mounting
9
Preparing for Vehicle Mounting
9
Quick Start
10
Maintenance - Vehicle Mounted Devices
11
Cleaning
11
I/O Pin Cover
12
Place Thor VM2 in the Dock
13
Padlock
14
Laptop Security Cable
14
Fuse
15
Chapter 2 - Installation - RAM Mount
17
Components - RAM Mounting Assembly
18
Thor VM2 Mounting Kit
18
Procedure - RAM Mount Assembly
20
Torque Measurement
20
Step 1A - Attach RAM Ball to Vehicle
20
Mounting Dimensions
21
Step 1B - Mount RAM Clamp to Vehicle
22
Mounting Dimensions
23
Step 1C - Attach RAM Plate to Vehicle and Attach RAM Ball
24
Mounting Dimensions
25
Step 2 - Attach RAM Mount Ball to the Thor VM2 Quick Mount Smart Dock
26
Step 3 - Attach Thor VM2 Assembly to RAM Mount
27
Step 4 - Place the Thor VM2 into the Dock
27
Step 5 - Attach Keyboard to Mounting Plate
28
Step 6 - Attach Keyboard Assembly to Thor VM2 Assembly
29
Chapter 3 - Installation - U Bracket Mount
31
Components - U Bracket Mounting Assembly
32
Procedure - U Bracket Assembly
32
Torque Measurement
33
Mounting Positions
33
Step 1 - Install U Bracket to Vehicle
34
Mounting Dimensions
35
Step 2 - Remove RAM Ball
35
Step 3 - Attach Adapter Bracket
36
Step 4 - Place the Thor VM2 into the Dock
36
Chapter 4 - Connect Cables
37
Vehicle 10-60 VDC Power Connection
38
Connect Vehicle 10-60VDC
39
Ignition Control
40
Auto-On Control
41
Manual Control
42
VX6 / VX7 Adapter Cable
43
Vehicle 72-144 VDC Power Connection
44
Connect Vehicle 72-144VDC
45
Wiring Diagram
46
Thor Vm2Screen Blanking
47
Screen Blanking Box
47
Optional Honeywell Cable
48
Screen Blanking Cable
48
User-Supplied Cable
48
Screen Blanking with Switch
49
Cable
49
External Power Supply, Optional
50
Connect External Power Supply
50
Connect Power Cable
51
Strain Relief Cable Clamps
52
Keyboard Cable
53
Remote Antenna Installation Kit
54
802.11 Remote Mount Antenna
54
Components and Mounting Diagram
55
Mounting Instructions
55
Typical Installation
55
WAN Remote Mount Antenna
57
GPS Remote Mount Antenna
58
Honeywell Thor VM2 Quick Start Manual (12 pages)
Vehicle Mount Computer
Brand:
Honeywell
| Category:
Automobile Accessories
| Size: 0.11 MB
Table of Contents
Setting up the Radio
5
Rebooting the Thor VM2
10
Technical Assistance
12
Limited Warranty
12
User Documentation
12
Advertisement
Related Products
Honeywell THOR VM1
Honeywell Thor VM3
Honeywell Thor VM2W
Honeywell Thor VM2W01
Honeywell Thor VM2CG
Honeywell Thor VM2C02
Honeywell Thor VM2WG
Honeywell Thor VM2W02
Honeywell Thor VM2C
Honeywell Thor VM2C01
Honeywell Categories
Thermostat
Controller
Control Unit
Security Camera
Accessories
More Honeywell Manuals
Login
Sign In
OR
Sign in with Facebook
Sign in with Google
Upload manual
Upload from disk
Upload from URL