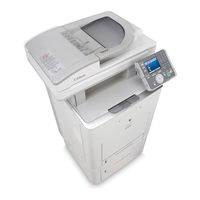
Sign In
Upload
Manuals
Brands
Canon Manuals
Copier
imageRUNNER C1030
Canon imageRUNNER C1030 Manuals
Manuals and User Guides for Canon imageRUNNER C1030. We have
2
Canon imageRUNNER C1030 manuals available for free PDF download: Service Manual, Starter Manual
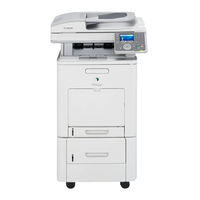
Canon imageRUNNER C1030 Service Manual (534 pages)
Brand:
Canon
| Category:
Copier
| Size: 17.76 MB
Table of Contents
7
Table of Contents
13
Table of Contents
17
Service Tools
19
Chapter 1 Introduction
21
Table of Contents
23
System Construction
23
System Configuration of Pickup/Delivery Options
24
System Configuration of Print/Send Options
25
Functions of Print/Send Options
27
Functions of Print/Send Options
28
Product Specifications
28
Names of Parts
28
External View
29
External View
30
Cross Section
31
Using the Machine
31
Turning On the Power Switch
32
Control Panel
33
User Mode Items
33
Overview
33
Paper Settings
34
Volume Settings
35
Volume Settings
36
Common Settings
37
Common Settings
38
Communications Settings *3
40
Communications Settings
42
Address Book Settings
43
Address Book Settings
46
Printer Settings
48
Printer Settings
52
Timer Settings
53
Timer Settings
54
Adjustment/Cleaning
54
Report Settings
56
Report Settings
57
System Management Set
65
System Management Settings
75
Maintenance By the User
75
Cleaning
78
Cleaning
81
Safety
81
Points to Note at Disassembly/Assembly
81
Cdrh Regulations
81
Safety of the Laser Light
81
Handling the Laser Unit
82
Safety of Toner
82
Notes When Handling a Battery
83
Product Specifications
83
Main Body Specifications
84
Main Body Specifications
86
ADF Specifications
87
ADF Specifications
88
FAX Specifications
89
FAX Specifications
90
Function List
91
Print Speed
92
Paper Type
95
Table of Contents
97
Making Pre-Checks
97
Checking Installation Environment
97
Points to Note before Installation
98
Checking Contents
99
Unpacking and Installation
99
Unpacking
100
Chapter 2 Installation
101
Installing Others
101
Securing Product
102
Cassette Settings
102
Points to Note When Turning OFF Host Machine
102
Connecting Cables
102
Auto Gradation Adjustment
103
Checking the Connection to the Network
103
Setting Up the Network
103
Procedure for Ping Operation
103
Checking with Remote Host Address
103
Troubleshooting Network Connection
104
Checking with Loopback Address
104
Checking with Local Host Address
104
Checking the Images/Operations
104
Checking Image Operation
104
Installing the Card Reader
104
Notice at Installation
105
Turning OFF the Power of the Host Machine
105
Installation Procedure
106
Card ID Registration
108
Installation Procedure in the Imageware Accounting Manager (Hereinafter Referred to Iwam) Environment
108
Installing the Hand Set
108
Points to Note at Installation
108
Checking the Contents
108
Turning OFF the Power of the Host Machine
108
Installation Procedure
109
Installing the Memory
109
Checking the Contents
110
Checking before Memory Expansion
110
Turning OFF the Power of the Host Machine
110
Installation Procedure
110
Checking After Memory Expansion
113
Construction/Basic Sequence
115
Construction
115
Functional Configuration
116
Connecting the Main Pcbs
117
Basic Sequence
117
Basic Sequence of Operation
118
Power-On Sequence
121
Table of Contents
123
Overview/Configuration
123
Overview
124
Configurations/Functions
126
Set-Up Sequence
126
Overview
127
Startup Sequence
128
Image Processing
128
Overview of the Image Flow
128
Construction of the Image Processing Module
128
Reader Unit Input Image Processing
129
Reader Unit Input Image Processing
130
Printer Unit Output Image Processing
131
Image Data Flow
131
Flow of Image Data According to Copy Functions
132
Flow of Image Data for the SEND Function
132
Flow of Image Data for the Fax Transmission
133
Flow of Image Data for the Fax Reception Function
134
Parts Replacement Procedure
134
Main Controller PCB
134
Before Removing the Main Controller PCB
134
Removing the Main Controller PCB
134
Procedure After Replacing the Main Controller PCB
137
Table of Contents
139
Basic Construction
139
Overview
139
Major Components
141
Basic Sequence
141
Basic Sequence of Operation at Power-On
142
Basic Sequence of Operation in Response to a Press On the Start Key (Book)
143
Basic Sequence of Operation in Response to a Press On the Start Key (Book)
144
Various Control
144
Lamp Control
144
Overview
145
Enlargement/Reduction
145
Overview
145
Detecting the Size of Originals
146
Dirt Sensor Control
146
Overview
146
Stream Reading Position Shift
147
Parts Replacement Procedure
147
ADF Unit + Reader Unit
147
Before Removing the ADF Unit + Reader Unit
147
Removing the ADF Unit + Reader Unit
149
Procedure After Replacing the ADF Unit
149
Procedure After Replacing the Reader Unit
149
Reader Unit
149
Before Removing the Reader Unit
149
Removing the Reader Unit
150
Procedure After Replacing the Reader Unit
153
Table of Contents
155
Basic Construction
155
Overview
157
Chapter 3 Basic Operation
157
Operation Mode
159
Document Size Detection
160
Detection Jams
160
Overview
161
Adf/Dadf
161
Removing the ADF Unit
162
Procedure After Replacing the ADF Unit
162
Pickup Feed Unit
162
Removing the ADF Pickup Feed Unit
164
Pick-Up Roller
164
Removing the ADF Pickup Roller
165
Separation Roller
165
Removing the ADF Separation Roller
166
Pick-Up Motor
166
Before Removing the ADF Pickup Motor
166
Removing the ADF Pickup Motor
167
Pick-Up Solenoid
167
Before Removing the ADF Pickup Solenoid
167
Removing the ADF Pickup Solenoid
168
Separation Pad
168
Removing the ADF Separation Pad
173
Table of Contents
175
Overview/Configuration
175
Overview
177
Chapter 10 Fixing System
177
Overview
179
Controlling the Laser
179
Overview
180
Overview
181
Laser Light Intensity Control
181
Image Masking Control
181
Failure Detection
182
Controlling the Laser Scanner Motor
182
Overview
182
Failure Detection
183
Parts Replacement Procedure
183
Laser/Scanner Unit
183
Before Removing the Laser Scanner Unit
183
Removing the Laser Scanner Unit
177
Chapter 11 External and Controls
187
Table of Contents
189
Overview/Configuration
189
Overview
190
Print Process
190
Electrostatic Latent Image Formation Block
191
Electrostatic Latent Image Formation Block
192
Development Block
192
Transfer Block
194
Fixing Block
194
Cleaning Block
195
Image Stabilization Control
195
Overview
196
Environmental Change Corrective Control
197
D-Half Control
199
Color Displacement Corrective Control
201
Auto Gradation Correction Control
202
Toner Cartridge
202
Overview
203
Toner Level Detection
203
Memory Tag Control
203
Toner Cartridge Detection
204
New Toner Cartridge Detection
205
Developing Cylinder Engagement/Disengagement Control
206
Transfer Unit
206
ETB Unit
207
Automatic Bias Control
208
ETB Cleaning
209
Transfer Roller Engagement/Disengagement Control
213
Parts Replacement Procedure
213
Drum Motor
213
Before Removing the Drum Motor
213
Removing the Drum Motor
213
Main Drive Unit
213
Before Removing the Main Drive Unit
215
Point to Note When Installing the Main Drive Unit
217
Developing Estrangement Solenoid
217
Before Removing the Developing Disengage Solenoid
217
Removing the Developing Disengage Solenoid
218
Points to Note When Installing the Developing Disengage Solenoid
218
ETB Unit
218
Removing the ETB Unit
219
ETB Motor
219
Before Removing the ETB Motor
219
Removing the ETB Motor
220
ETB Estrangement Solenoid
220
Before Removing the ETB Disengage Solenoid
220
Removing the ETB Disengage Solenoid
221
Color Displacement/Image Density Sensor
221
Before Removing the Color Displacement/Density Sensor
221
Removing the Color Displacement/Density Sensor
225
Table of Contents
227
Overview/Configuration
227
Overview
229
Interval Speed Increase Control
230
Interval Speed Increase Control
231
Other Control
231
Cassette Pickup Mechanism
232
Manual Feed Pickup Mechanism
233
Skew Correction
234
Throughput-Down Control
235
Throughput-Down Control
236
Feeding Speed Control
237
Warp Control
238
Delivery
240
Detection Jams
240
Jam Detection Outline
240
Overview
240
Delay Jams
240
Pickup Delay JAM
240
Delivery Delay JAM
241
Stationary Jams
241
Pickup Stationary JAM
241
Delivery Stationary JAM
241
Other Jams
241
Wrapping JAM
241
Residual JAM
242
Duplex Feeding
242
Overview
243
Duplexing Feed Control
246
Duplexing Pickup Operation
247
Parts Replacement Procedure
248
Cassette Pickup Roller
248
Before Removing the Cassette Pickup Roller
248
Removing the Cassette Pickup Roller
249
Pickup Motor
249
Before Removing the Pickup Motor
249
Removing the Pickup Motor
250
Cassette Pickup Solenoid
250
Before Removing the Cassette Pickup Solenoid
250
Removing the Cassette Pickup Solenoid
252
Cassette Separation Pad
252
Removing the Cassette Separation Pad
252
Manual Pickup Roller
252
Before Removing the Manual Feed Pickup Roller
252
Removing the Manual Feed Pickup Roller
252
Manual Pickup Solenoid
254
Manual Separation Roller
254
Before Removing the Manual Feed Separation Pad
254
Removing the Manual Feed Separation Pad
255
Duplexing Feed Motor
255
Before Removing the Duplex Feed Motor
255
Removing the Duplex Feed Motor
255
Reverse Unit
255
Before Removing the Reversal Unit
255
Removing the Reversal Unit
257
Reverse Motor
257
Reverse Solenoid
261
Table of Contents
263
Overview/Configuration
263
Overview
264
Various Control Mechanisms
264
Controlling the Temperature of the Fixing Unit
264
Fixing Temperature Control
265
Throughput Down Control
266
Fixing Pressurizing/Release Control
266
Fixing Sleeve Pressuring/Releasing Control
267
Fixing Sleeve Pressuring/Releasing Control
269
Protection Function
269
Overview
269
Failure Detection
270
Parts Replacement Procedure
270
Fixing Unit
270
Removing the Fixing Assembly
270
Fixing Sleeve Unit
270
Before Removing the Fixing Sleeve Unit
270
Removing the Fixing Sleeve Unit
274
Fixing Drive Unit
274
Before Removing the Fixing Drive Unit
274
Removing the Fixing Drive Unit
276
Fixing Motor
276
Before Removing the Fixing Motor
277
Removing the Fixing Motor
281
Table of Contents
283
DC Controller
283
Overview
284
Operation of Each Block
284
Fan/Motor Control
285
Drum Motor Failure Detection
285
ETB Motor Failure Detection
285
Fixing Motor Failure Detection
285
Main Unit Fan Failure Detection
285
Duplex Fan Failure Detection
286
Control Panel
286
Overview
287
Counter
288
Overview
288
Timing of Increasing the Count
289
Power Supply
289
Low-Voltage Power Unit
290
Overview
290
Energy-Saving Function
290
Protection Function
290
Protective Function
292
Parts Replacement Procedure
292
Front Cover
292
Before Removing the Front Cover Unit
292
Removing the Front Cover Unit
293
Front Upper Cover 1
294
Rear Cover
294
Right Cover
296
Left Cover
296
Before Removing the Left Cover
296
Removing the Left Cover
297
Delivery Tray Cover
297
Before Removing the Delivery Tray Cover
297
Removing the Delivery Tray Cover
298
Power Station Cover
298
Before Removing the Electrical Components Cover
298
Removing the Electrical Components Cover
298
Controller Box
298
Before Removing the Controller Box
298
Removing the Controller Box
299
Laser Scanner Cover
299
Before Removing the Laser Scanner Cover
299
Removing the Laser Scanner Cover
302
Upper Frame Unit
302
Before Removing the Upper Frame Unit
302
Removing the Upper Frame Unit
304
Operation Panel Unit
304
Removing the Control Panel Unit
305
Procedure After Replacing the Control Panel
305
NCU Board
305
Before Removing the NCU PCB
305
Removing the NCU PCB
306
DC Controller PCB
306
Before Removing the DC Controller PCB
306
Removing the DC Controller PCB
306
Procedure After Replacing the DC Controller PCB
306
Memory Controller PCB
306
Before Removing the Memory Controller PCB
307
Duplexing Driver PCB
307
Before Removing the Duplex Driver PCB
307
Removing the Duplex Driver PCB
307
Low-Voltage Power Supply PCB
307
Before Removing the Low-Voltage Power Supply PCB
307
Removing the Low Voltage Power Supply PCB
308
High-Voltage Power Supply PCB
308
Before Removing the High Voltage Power Supply PCB
309
Removing the High Voltage Power Supply PCB
309
Cooling Fan
309
Before Removing the Cooling Fan
309
Off Hook PCB
309
Before Removing the Off Hook PCB
309
Removing the Off Hook PCB
310
Duplex Fan
310
Before Removing the Duplex Fan
310
Removing the Duplex Fan
313
E-Maintenance/Imageware Remote
315
E-Maintenance/Imageware Remote
315
Overview
315
Setting Procedure
324
Troubleshooting Guide
326
Service Cautions
327
Overview
328
Service Cautions
329
Setting Procedure
342
Faq
343
Troubleshooting
346
Error Code and Strings
351
Chapter 13 Maintenance and Inspection
351
Periodically Replaced Parts
353
Periodically Replaced Parts
357
Table of Contents
359
Electrical Components
360
Procedure After Replacing the Control Panel
359
Fixing System
359
Checking the Nip Width (Fixing Pressure Roller)
359
Scanning System
359
Procedure After Replacing the Copyboard Glass
359
Procedure After Replacing the Reader Unit
360
Adf
360
Outline
360
Procedure After Replacing the ADF Unit
363
Table of Contents
365
Initial Checkup
365
Initial Check
366
Test Printing
370
Outline of Electrical Components
370
Clutch/Solenoid
370
Solenoids
371
Motor/Fan
371
Motors
372
Fans
373
Sensor
373
Sensors
375
Switch
375
Switches, Speaker, and Thermistors
377
Pcbs
379
Location of Convectors
379
Location of Connectors
387
Table of Contents
389
Error Code Table
390
Error Code Details
396
Jam Code
396
Jam Code (Main Body)
396
Jam Code (ADF)
397
Alarm Code
397
Alarm Code (ADF)
397
Fax Error Codes
397
Outline
397
Error Code Outline
397
User Error Code
405
Overview
406
Menu List
407
Troubleshooting
415
Table of Contents
417
Outline
417
Service Mode Configuration
419
Service Mode Configuration
420
Print
421
Exiting Service Mode
421
Service Mode Backup
422
Service Mode Backup
423
Service Mode Screen Operation
425
Chapter 16 Error Code
420
Scan
425
Chapter 17 Special Management Mode
425
Chapter 18 Service Mode
425
Service Mode Screen Operation
427
Copier
427
Display
427
DISPLAY List
428
R-Con
428
Adjust
428
ADJUST List
433
ADJUST List
437
Function
440
Function
442
FUNCTION List
448
Adjustment of the ACS Identification Level
449
OPTION List
449
Adjustment of the ACS Identification Level
459
OPTION List
469
Counter
469
COUNTER List
470
COUNTER List
472
Feeder
472
Adjust
472
ADJUST List
472
Function
472
FUNCTION List
473
Fax
473
SSSW List
474
SSSW List
475
Menu
475
MENU List
476
Num
476
NUM List
477
Ncu
477
NCU List
481
Testmode
481
System
481
SYSTEM List
482
SYSTEM List
483
Scan
484
Print
485
FAX List
485
PRINT List
486
FAX List
487
Panel
487
PANEL List
489
PANEL List
497
Outline
497
Overview of Upgrade
498
Making Preparations
498
Required System Environment
498
Before Upgrade
499
Downloading System Software
499
Downloading the System Software
499
Downloading Procedure
503
Downloading Procedure
511
Service Tools
512
Special Tools
513
Solvent/Oil List
511
Chapter 19 Upgrading
511
Chapter 20 Service Tools
Advertisement
Canon imageRUNNER C1030 Starter Manual (58 pages)
Brand:
Canon
| Category:
All in One Printer
| Size: 19.33 MB
Table of Contents
2
Table of Contents
3
Overview of Machine Functions
3
Manuals for the Machine
4
1 Set Up the Machine to Suit Your Purposes
5
2 Set Up the Machine
5
Turn On the Machine
7
Set Date and Time
12
Make Fax Settings
12
Register User Telephone Number and Unit Name
12
Information about the Keys
15
About Sender Information
16
Select the Receive Mode That Suits Your Needs
16
About the Receive Modes
19
If You Need to Use Pulse Dialing
20
Set Up Network Connection
21
Specify the IP Address Settings
23
Set IP Address Automatically
24
Check IP Address Setting
26
3 Set Up Computers and Software
26
Types of Connection Between Computers and the Machine
27
About User Software CD-ROM
30
Network Connection
30
Installation Procedure
39
Check Installation
39
Setting the Scangear Tool
41
USB Connection
41
Installation Procedure
47
Check Installation
48
4 Appendix
48
User Manual CD-ROM (E-Manual)
48
System Requirements
48
Using the User Manual CD-ROM (E-Manual)
50
Symbols Used in This Manual
50
Keys and Buttons Used in This Manual
50
Important Safety Instructions
53
Installation Requirements and Handling
54
Legal Notices
Share and save
Advertisement
Related Products
Canon Color imageRUNNER C2880i
Canon COLORPASS-Z6000 PS-NX6000
Canon Color imageRUNNER C3380i
Canon ColorPASS-Z20e
Canon ColorPASS-Z40e
Canon CLC 4000
Canon Color imageRUNNER C4080i
Canon Color ImageRUNNER C2058
Canon CLC1000
Canon CLC 10
Canon Categories
Printer
Digital Camera
All in One Printer
Camcorder
Scanner
More Canon Manuals
×
Login
Sign In
OR
Sign in with Facebook
Sign in with Google
×
Upload manual
Upload from disk
Upload from URL