FingerTec AC900 User Manual
Access control & time attendance system
Hide thumbs
Also See for AC900:
- Installation manual (3 pages) ,
- Installation diagram (2 pages) ,
- User manual (31 pages)

Related Manuals for FingerTec AC900


Summary of Contents for FingerTec AC900
-
Page 1: User Guide
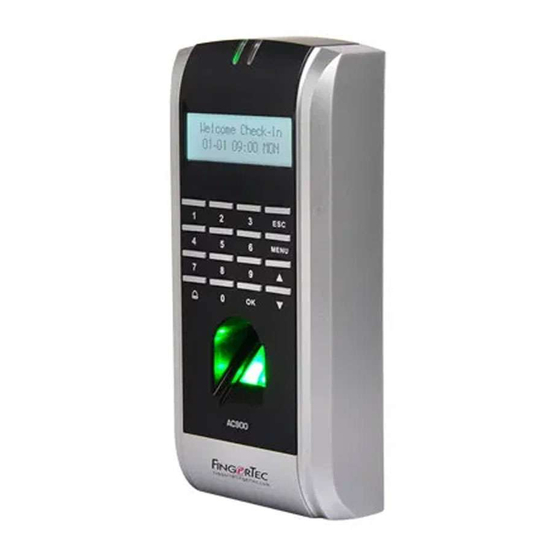
We Make Things Easy WelcomeCheck-In 01-01 09:00 MENU AC900 R2/M2 Access Control & Time Attendance System User Guide... -
Page 2: Table Of Contents
CONTENTS Chapter 4 • USER Chapter 1 • GETTING STARTED 17 Enrolling User 5 Viewing the User Guide in the Internet • Fingerprint Enrollment 5 Fingerprint Terminal Included Accessories • Card Enrollment 6 Included Printed Materials • Password Enrollment 6 Activating Fingerprint Terminal •... - Page 3 FUNCTION Chapter 14 • OTHER RESOURCES 31 Enrollment of RFID Card 31 Verification Using RFID Card Only 38 Information About FingerTec® 31 Multi Verification Methods Using RFID 38 Copyright Notice & Disclaimer 31 Deleting RFID Card 31 Changing Card ID...
-
Page 4: Chapter 1 • Getting Started
The User Guide is available in the package when you purchased the fingerprint terminal. The User Guide is also available online at fingertec.com and user.fingertec.com. Choose the language that you prefer for your User Guide. Fingerprint Terminal Included Accessories AC900 MODEL... -
Page 5: Included Printed Materials
Overview of the FingerTec system NOTE user.fingertec.com All FingerTec resources are available at Activating Fingerprint Terminal To activate fingerprint terminal, connect the terminals to a standard power outlet and turn on the on/off button (Refer to page 8). To download the data from the terminal, you need to have the product key and activation code for the TCMS. -
Page 6: Chapter 2 • Basics
FingerTec® is a renowned brand name for commercial fingerprint products for door access and time attendance systems. FingerTec® offers a wide range of products to cater to the growing needs for biometrics products in office/home automation as well as in security industry. -
Page 7: Power On/Off Button
Restart the terminal as and when required. Power On/Off Button MODEL HOW TO TURN ON/OFF AC900 Push on the ‘0’ button R2 or M2 There is no power button available. Restart using the reset button shown on the bottom of the terminal. -
Page 8: Keypad
Fingerprint terminals operate using power supply from a standard power outlet. Mini UPS: Mini UPS 12V can also to provide power supply to power on the terminals. Refer accessory.fingertec.com for more information about accessories. Date/Time The terminals display date and time at the home screen. Choose date and time format based on your preference. -
Page 9: Security Features
Clean the fingerprint prism with a cellophane tape for (silicon coated prism). View the vid- eo on how to clean the fingerprint prism at this link fingertec.com/newsletter/enduser/ cleanfinger.html. For the non-coated prism, please use microfiber cloth. Restarting and Resetting Terminal If something isn’t working right, try restarting or resetting the terminals... -
Page 10: Chapter 3 • Connection - Syncing Terminals
The installation guides are for installer reference only Communication Diagrams At the rear of every terminal, there are connections available for power, communication and door access. Refer to the following diagrams for the terminals you require. AC900 MODEL Output Voltage TCP/IP Port... - Page 11 R2 or M2 MODEL ALM+ ALM- BEEP GLED RLED For NC or NO INWD0 Wiegand door lock INWD1 system 3rd party controller Power with 26 bits +12V wiegand BEL+ output BEL- +12V DC12V Power Supply RJ45-1 RJ45-2 TCP/IP RJ45-3 TCP/IP RJ45-6 1.
- Page 12 For NC (normally closed) door lock system ALM+ EM lock ALM- (NC) Emergency break glass (NC) Key switch (NC) Release button Door sensor BEL+ Doorbell BEL- +12V DC12V Power Supply For NO (normally open) door lock system ALM+ EM lock ALM- (NO) Emergency...
-
Page 13: Descriptions Of Available Connections
Linking with USB flash disk for remote data transfer. This feature is not available NOTE in AC900 TCP/IP PORT Connect with CAT 5 cable for LAN connection, one end to this port and another end to the computer’s TCP/IP Port. -
Page 14: Checking The Genuine Tcms V2
001010 2008-2009 HRM System All right reserved. TCMS V2 is genuine software by FingerTec®. Check the genuine sticker on top of TCMS V2 software manual booklet to retrieve product and activation code. The serial number of the terminal must match with the serial number printed on the booklet in order to activate the system. -
Page 15: Using Rs232
USB flash disk is useful in cases where the terminal is installed far from a PC or there is a connection problem. To determine the type of USB compatible by the terminal, please refer to this link at fingertec.com/newsletter/HL_74.html USING USB Press Menu > PenDrive Mgmt > Choose the operation that you want to carry via USB... -
Page 16: Chapter 4 • User
4 • USER Enrolling User The terminals can enroll fingerprint templates, passwords and card information. This chap- ter covers all possible user enrollments in the terminals. Caution: Enrollment of supervisor or administrator is important to making sure of the ter- minals data safety. -
Page 17: Fingerprint And Password Enrollment
FINGERPRINT AND PASSWORD ENROLLMENT The terminals offer a combination of fingerprint and password enrollment for better se- curity. Enrolling FP and password: Press Menu > User Manage > Enroll User > FP & Pwd > New Enroll? > OK > Key in User ID (PIN) > OK > Input your fingerprint > Input your password and confirm the password one more time >... -
Page 18: Password Verification
Some precautions have to be taken to get a good read every time. · Make sure the center point of your finger is placed in the middle of the scanner for a good read. Center point · Recommended to use index finger. The terminal accepts other fingers but index is the most convenient. -
Page 19: Adding User Information
Go to Chapter 8: Access Options to learn more about Grouping and Group Definition. Adding User Information User information can be added into FingerTec fingerprint terminals through the TCMS V2 software. After the information is updated, sync TCMS V2 and the terminal to display the information. -
Page 20: Chapter 5 • System
5 • SYSTEM General Settings ADJUSTING DATE/TIME The terminal functions to record time attendance and door access activities of employ- ees. Precision in time and date cannot be compromised for the system to work efficiently. Adjust Date/Time according to your time zone. Press Menu > Options > System Opt > Date/Time >... -
Page 21: Two Sensor
Menu > Options > System Opt > Adv Option > Work Code > OK > Select Preference > OK Update Firmware FingerTec® offers update of the terminal regularly through software in a PC. Please always consult your local reseller before you update firmware of the terminal or alternatively you can contact us at support@fingertec.com. -
Page 22: System Information
System Information The terminals keep information of the system and this information is available for viewing by administrators. NUMBER OF USERS IN THE TERMINAL (USER COUNT) Every model of the terminal has different user capacity depending on the number of tem- plates a user has in a terminal. -
Page 23: Log Information (Log Opt)
The serial number of the terminal is important to activate the software and to liaise with FingerTec Worldwide in support issues. The Se- rial number is pasted on the back of the terminal but in case the sticker is damaged, this is where you can retrieve the serial number. -
Page 24: Chapter 6 • Data
6 • DATA Every time an enrollment is performed or a veri- DESCRIPTION CODE fication is done, a transaction log is stored inside Terminal ID the terminal. The data contains Terminal ID, date, time, userID and transaction activity. For exam- Date (ddmmyy) 050210 ple, 0105021009000000000010000:... -
Page 25: Chapter 7 • Usb
USB flash disks that support minimum Linux Kernel 2.4.x, working fine with Imation, Tran- scend and Pen Drive (minimum support Linux Kernel 2.4.x) To determine the type of USB compatible by FingerTec terminal, please refer to this link at fingertec.com/newsletter/ HL_74.html... -
Page 26: Chapter 8 • Access
Using The Terminal as Door Access The terminals can be connected to door access accessories like electromagnetic lock, doorbolt, exit button, etc to control access to doors. FingerTec provides all kinds of door- lock accessories which can be viewed at accessory.fingertec.com. -
Page 27: Grouping
GROUPING When a group of users having almost similar time zones assignment, they can be grouped together. For example, Time Zone 2 and Time Zone 3 are suitable for one group where us- ers in this group checks in at 8:00 until 12:00, break time from 12:00 to 14:00 and continue from 14:00 to 18:00, and no one is allowed access during weekends. -
Page 28: Lock
To configure Access Combo: press Menu > Options > Access Options > Access Comb > Select the combination you want for example Comb1 > OK > input the number, in this case 123 to represent GRP TP1, GRP TP2, GRP TP3> OK Lock The opening period of electromagnetic lock or door bolt can be controlled according to your requirement or preference. -
Page 29: Management Of Duress Fingerprint
This function offers various verification type(s) for every group that can be set accord- ing to time. Description of verification types available in FingerTec fingerprint terminal is explained in Chapter 4: User. Press Menu > Options > Access Options > Group VerType >... -
Page 30: Chapter 9 • Rfid Card Function
RFID CARD FUNCTION NOTE This feature is NOT available in AC900 & M2 The fingerprint terminals are versatile and it can accept card verifications. Refer to page 8. This chapter covers the Radio Frequency Identification or better known as RFID system. -
Page 31: Chapter 10 • Mifare Card Function
This feature is not a default function and it’s made upon request. Check your terminal card NOTE system to identify the type of card the terminal is using. This feature is NOT available in AC900 and M2 This chapter covers the MiFare card system or better known in MC system. The terminals accept MiFare card with specifications MF1S50/S70, 13.56MHz. -
Page 32: Registering Fpcard
Registering FPCard Register FPCard is a function whereby you want to use your FP Card in other terminals in the company. Menu > User Manage > FPCard Mng > Reg FPCard > Show the Mifare Card at the induction area > The LCD will display “Write Succ” to indicate that the process is suc- cessful. -
Page 33: Chapter 11 • Hid Card Function
This feature is not a default function and it’s made upon request. Check your terminal card NOTE system to identify the type of card the terminal is using. This feature is NOT available in AC900 and M2. The terminals accept HID card with specifications 1325, 26-bit, 125kHz. The Prox II card support 26-bit and it comes with unique programming information into its contents, which include card reading bits, card number range, facility code, site code, etc. -
Page 34: Chapter 12 • Auto Test
Run All Tests At Once The Auto Test contains 6 tests and to run all of them at once, Press Menu > Options > Auto Test >... -
Page 35: Chapter 13 • Troubleshooting
When this message appears, it means that the settings for the terminals and the computer are not properly done. Find out which method you are using to connect. FingerTec offers LAN, RS232, RS485 and USB communication methods. Refer to Chapter 3: Connection - Syncing Terminal, page 11 to further understand the topic. -
Page 36: 37 "Duplicate Finger" Appears
“Duplicate Finger” Appears FingerTec is an intelligent terminal. It will not accept the same fingerprint twice into its system. If you have registered a finger into FingerTec, the system would prompt, “Duplicate Finger” when you try to enroll that finger for another time. Choose a different finger to proceed. -
Page 37: Chapter 14 • Other Resources
All rights reserved. No part of this book may be reproduced or transmitted in any form or by any means, electronic or mechanical, including photocopying, recording, or by any information storage and retrieval system, without written permission from FingerTec Worldwide Sdn Bhd. Every precaution has been made to supply complete and accurate information. Information in this document is subject to change without prior notice. - Page 38 For technical tips and manuals in other languages, refer to © 2010 FingerTec Worldwide Sdn. Bhd. All rights reserved. • Printed in Malaysia. 042010...
Need help?
Do you have a question about the AC900 and is the answer not in the manual?
Questions and answers