Table of Contents
Advertisement
Quick Links
Advertisement
Table of Contents

Related Manuals for FingerTec Kadex+


Summary of Contents for FingerTec Kadex+
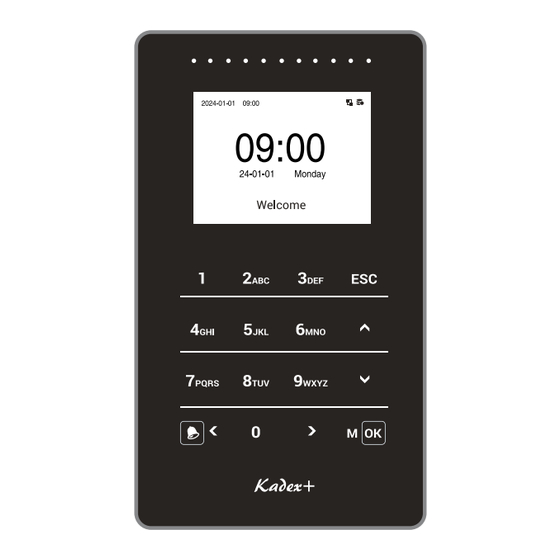
- Page 1 w w w . f i n g e r t e c . c o m w w w . f i n g e r t e c . c o m User Guide...
- Page 2 Copyright Notice Disclaimer All rights reserved. No part of this book may No person should rely on the contents of this be reproduced or transmitted in any form publication without first obtaining advice or by any means, electronic or mechani- from a qualified professional person.
-
Page 3: Table Of Contents
Contents Chapter 5 23-25 Chapter 1 SYSTEM GETTING STARTED Setup Date and Time Viewing the User Guide on the Internet Access Log / Attendance Log Settings Included Accessories Device Type Settings Activating Terminal Reset Options Registering Terminal Chapter 6 26-29 Chapter 2 7-12 PERSONALIZE... - Page 4 Chapter 11 WORK CODE * for ATT mode only. Adding a Work Code All Work Codes Work Code Options Chapte 12 AUTOTEST Test All Test LCD Test Voice Test Keyboard Test Clock RTC Chapter 13 SYSTEM INFO Device Capacity Device Info Firmware Info Chapter 14 TROUBLESHOOTING...
-
Page 5: Getting Started
Viewing the User Guide in the Internet The User Guide is available in the package when you purchase the terminal. The user guide is also available online at https://product.fingertec.com/userguide.php. The user guide on our website will support different languages, so you can also choose and download the user guide based on the language you prefer. -
Page 6: Activating Terminal
Ingress reads the serial number of your terminal and sends it for verification at the FingerTec server via the Internet. In case you do not have an internet connection, you would need to do offline activation. You can do that by sending the serial number and models of your terminals to your local resellers or support@fingertec.com... -
Page 7: Basics
Chapter 2 Basics Introduction to Terminal Introducing Terminal, the latest product with Push technology (ADMS). A terminal can be used as both an attendance and access device. All data will be stored in the device and pushed to the server. Kadex+ supports both PC and cloud-based systems. For PC- based systems, Kadex+ will use Ingress AWDMS software as Attendance Mode or Access Mode. -
Page 8: Installation
Installation FingerTec terminals offer several connections for power and communications. Installing FingerTec’s terminals is as simple as ABC. Firstly, measure the height accordingly and make relevant markings on the wall. Once you have your ideal height, drill the screws into the wall to secure the back plate. At- tach the terminal to the back plate following the diagram above and finally tighten the screws. - Page 9 Wiring Diagrams POWER CONNECTION 1. Recommended power supply 12V dc 3 A 2. Please use a separate power supply for lock purposes Emlock, Emergency Break glass, Overwrite Key switch, Door sensor and push button. 1. 12V Em lock will connect series to device NC and COM, 12V DC supply, Emergency break glass and Overwrite Key Switch.
- Page 10 WIEGAND CONNECTION Model k-Kadex & i-Kadex 1. Wiegand connection is used for Slave connec- tion. Fingertec i-Kadex, k-Kadex, or any master reader that supports Weigand Out will support a Master-Slave connection. 2. Kadex + will receive Weigand input as card number or user ID in Weigand 26 –...
-
Page 11: Battery
UPS sufficiently for optimum performance. Refer to for more information about accessories. http://accessory.fingertec.com Cleaning Terminal To keep and maintain the terminal new, use a dry cloth to clean the terminal’s body. Do not use any liquids, household cleaners, aerosol spray, solvents, alcohol, ammo- nia, or abrasive solutions to clean the body of the terminal as it might damage the terminal. -
Page 12: Main Menu
WIFI Connection Status 1. Connected and signal strength is based on green bars. 2. Disconnected when a red cross is present. Ethernet Connection 1. Green shows that the connection to Ethernet has been established. 2. Red shows that the Ethernet is disconnected. Bell Show when the Schedule Bell is set. -
Page 13: Connection
Chapter 3 Connection Including Ethernet parameters such as IP address etc., serial Comm, PC connection, ADMS and Wiegand settings. PC Connection Communication Key Create a password for a specific terminal here. The security password known as COM Key is intended for extra security. To connect the terminal with the software, the COM Key inserted in the Software must be the same as the one inserted in the terminal or else the connection will not be established even though the activation key and product key are correctly inserted. -
Page 14: Configure Wifi Settings
The Wi-Fi icon appears on the main menu Configure Cloud Server Connection This setting is based on your software, either Fingertec Ingress AWDMS or TimeTec solu- tion. Menu > COMM. > Cloud Server Settings Ingress AWDMS (ATT and ACC mode) -
Page 15: Serial Comm
Server Address already predefined when selecting Best Protocol in Device Type Setting Serial Comm Serial Comm is used as a bridge between FingerTec devices and the Slave Unit or Printer Master–slave: Serial port = Master Unit required for R2c, R3c or i-Kadex pairing. -
Page 16: Ingress Online Activation
To start using the terminal with Ingress, you must connect the terminal to Ingress and perform an online activation. Ingress reads the serial number of your terminal and sends it for verification at the FingerTec server via the Internet. - Page 17 Ingress AWDMS Example: Local Area Network for the PC installed with the software Ingress and AWDMS. Server IP Address = 192.168.1.230 Server Port = 8088 HTTPS = no Proxy = no ATTENDANCE MODE (ATT) Step 1: Device Type Setting (configure manually in the device setting) Menu >...
- Page 18 HTTPS = Disable Step 3: Add device in TimeTec Attendance Device > Terminal > Smart DBS (Fingertec) > click + > Insert Serial Number, Terminal ID, ✔ Terminal Group, Location, Timezone, Work Location > Click to save the changes to add the device >...
-
Page 19: Users
Chapter 4 Users Privileges can be assigned accordingly based on individual permissions. Likewise, a Sys- tem Administrator can have his rights restricted or be given full control. Access controls such as the ability to modify settings within the menu will be barred when a System Ad- ministrator has been assigned to a device. -
Page 20: User Mgt ( Add / Edit And Delete User )
Assign Role To define the role of new employees Step 1: Menu > User Mgt > New user > User Role Step 2: Select the role assigned to the employee > Save the changes. To define roles for existing employees Step 1: Menu >... -
Page 21: Method Of Enrolment
Password verifications have a lessened security presence in Attendance Reporting and Access control systems. Despite this, passwords are generally the primary preference for enrolment. FingerTec devices can accept up to 8-digit passwords in numeric format. Follow the steps below to enroll password Step 1: Press Menu >... -
Page 22: Verification Mode
Verification Mode Security can be enhanced with a terminal which offers the option of using multiple forms of verification methods. Select one of the following five verification modes. • Password/Card • User ID Only • Password • Card Only • Password + Card... -
Page 23: System
Chapter 5 System Setup Date and Time Menu > System > Date Time The Date & Time is a very crucial aspect for accurate logging of attendance and the record of door activity in each company. The date and time of the terminal will be displayed on the home screen. -
Page 24: Device Type Settings
The amount of time taken to display a successful verification message. Valid value: 1 to 9 seconds. Device Type Settings Please choose a device type according to your needs. You can either choose Fingertec Ingress or TimeTec solutions. Menu > System > Device Type Setting Ingress AWDMS (ACC mode) Communication protocol = PUSH protocol. -
Page 25: Reset Options
Ingress AWDMS (ATT Mode) Communication protocol = PUSH protocol. Device type = T&A Mode TimeTec Attendance / TA Communication protocol = PUSH protocol. Device type = T&A Mode TimeTec Access Communication protocol = Best Protocol Device type = not required Reset Options By resetting the device, you will restore the terminal to its factory settings. -
Page 26: User Interface
Chapter 6 Personalization You can manage the display style of your FingerTec device according to your prefer- ence. These include the user interface, voice, bell schedules, punch state options, and shortcut key mapping. User Interface The user interface is designed as such so that users can interact with the device. These include the appearance of the device, response time, and the content that is presented to the user. -
Page 27: Voice
Voice You can choose to enable or disable the voice prompts, keyboard sound or adjust the volume of the device. To enable or disable the options: > > > > Go to Menu Personalize Voice Press OK to Enter Press arrow and OK button •... -
Page 28: Punch State Options
Punch State Options *only for ATT mode In the event you want your employees to choose an option to confirm his/her attendance status (for example Check-In, Overtime Check-Out, Taking a Break etc) before checking in, you can do so by enabling the punch state options from the device keypad’s ESC, ˄, ˅, M/OK, and >... - Page 29 • Set the Switch Time: The switch time is set according to the punch state options. When the Punch State Mode is set to Auto Mode, users will need to set the switch time. On the Shortcut Key interface, tap Set Switch Time to set the switch time. •...
-
Page 30: Data Manager
Chapter 7 Data Manager Data stored in the terminal can be utilized to establish management rights or have specific logs removed. Delete Data [ Menu > Data Mgt > Delete Data] Data stored in the terminal can be deleted within your Data Management function. Below is a list of available options in your terminal: •... -
Page 31: Access Control
Chapter 8 Access Control Access Control Options Access Control options are used to set the Door Lock setting, Time Zone, Holidays and Access Group. To set the Access Control: Press Menu icon > Access Control > Access Control Options Gate Control Mode: Select to turn on the gate control mode. If ‘ON’ is selected, the interface will remove the Door lock relay, Door sensor relay and Door sensor type function. -
Page 32: Time Rule Settings
• In: A record of verification on the slave device is a check-in record • Verify Mode by RS485: set the verification method used by R2c or R3c when the device acts as a master reader for R2c/R3c. since R2c / R3c does not support Password, please select Card Only. -
Page 33: Combined Verification
Edit Holidays Press Menu > Access Control > Holidays > All Holidays > select Holiday > Edit Delete Holidays Press Menu > Access Control > Holidays > All Holidays > select Holiday > Delete Access Groups *Attendance mode Only Access Group is used to control users’ access time zones, verification method and Hol- iday validity. -
Page 34: Anti-Passback Setup
Anti-Passback Setup This function is optional and can be activated to resolve existing security problems. Of- ten, users may be followed by some outsiders while entering the door and these outsid- ers do not have verification. This setup can make sure that all check-in record matches the check-out record with traceable door access activities. -
Page 35: Attendance Search
Chapter 9 Attendance Search The device stores attendance records, which can be processed by our software to produce payroll calculations and other reports. This search function is an easy-to-use module that allows you to check and browse records at your convenience at any time. You can choose to display photos together with attendance records. -
Page 36: Data Field Setup
Chapter 10 Printer * Upon Request Data Field Setup You can select your preferred data field to be printed out and choose to enable/disa- ble ‘Paper Cut’ in the printer options. Menu > Print > Data Field Setup > ON or OFF your preferred field •... -
Page 37: All Work Codes
Work Code *for ATT mode only A majority of FingerTec Terminals is incorporated with a feature which allows users to select a reason for re-entry during verification by selecting a work code (for example, work code 13 – Onsite at Customers). -
Page 38: Test Voice
Chapter 12 Auto Test The Diagnostics page allows you to analyze the condition of your terminal(s) by utiliz- ing a series of tests. Only administrators are authorized to perform these tests. To view the status of your terminal, you can select Go to Menu > Autotest: To automatically test whether all modules in the device function properly, including the LCD, audio, keyboard and real-time clock (RTC). -
Page 39: System Info
Chapter 13 System Info This option allows you to check your terminal’s storage, firmware, algorithm etc. To access your system information: Menu > System Info Device Capacity The number of enrolled users, administrators, passwords, cards, and attendance records will be displayed. Device Info The Device name, serial number, MAC address, Platform Information, MCU version, Man- ufacturer and Manufactured Date and Time will be shown in this section. -
Page 40: Troubleshooting
Menu. Any attempt of a normal user to access the Menu will prompt an ‘Admin Affirm’ message on the screen. In case the administrator has resigned from the company, kindly contact your FingerTec authorized reseller to access the terminal. - Page 41 Chapter 15 Appendix Ticket Sample from Thermal Printer – Refer to Chapter 10...
- Page 42 w w w . t i m e t e c c l o u d . c o m TimeTec © 2024, All rights reserved • 042024...
Need help?
Do you have a question about the Kadex+ and is the answer not in the manual?
Questions and answers