Table of Contents
Advertisement
Quick Links
Advertisement
Table of Contents

Subscribe to Our Youtube Channel
Related Manuals for Network Technologies PRIMUX-16X64


Summary of Contents for Network Technologies PRIMUX-16X64
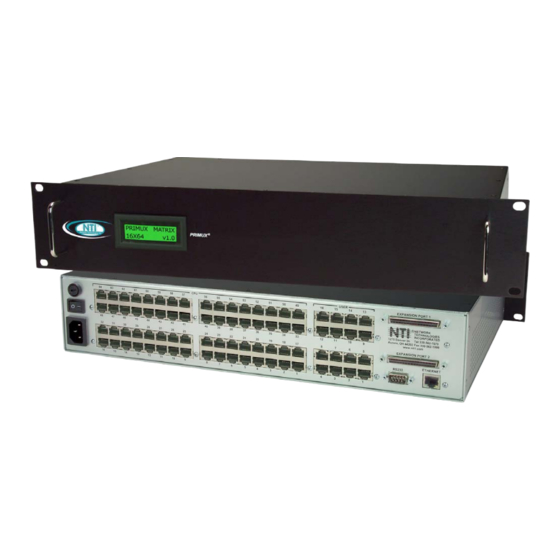
- Page 1 ® PRIMUX Series PRIMUX-16X64 PRIMUX-8X32 KVM Matrix Switch via CATx Installation and Operation Manual PRIMUX-16X64 (Front and Rear View) HA-UNV PS/2 and USB Host PRIMUX-UZR User Station Adapter (sold separately) (sold separately) MAN105 Rev 3/14/13...
- Page 2 Network Technologies Inc, 1275 Danner Drive, Aurora, Ohio 44202. CHANGES The material in this guide is for information only and is subject to change without notice. Network Technologies Inc reserves the right to make changes in the product design without reservation and without notification to its users.
-
Page 3: Table Of Contents
TABLE OF CONTENTS Introduction..................................1 Materials ..................................2 Features And Functions ............................... 3 Preparation For Installation............................5 Installation..................................6 Install The Host Adapter .............................. 6 Installation of a HA-UNV to a PS/2 CPU ........................6 Installation of a HA-UNV to a USB CPU........................7 Installation of a Legacy SUN CPU.......................... - Page 4 Select Hosts to Scan .............................. 25 Favorite Hosts................................. 26 Video Quality Adjustment ............................27 Test Patterns for Color Skew Adjustment....................... 27 Administrator Controls ............................... 28 Administration Menu ............................... 28 System Configuration Menu ........................... 29 Configure Host Adapters ............................31 Edit Host Adapter..............................31 Configure Users ..............................
- Page 5 Technical Specifications ............................59 Interconnection Cable Wiring Method ........................60 PC-To-Matrix Switch Crossover Cable........................60 Null Modem Cable Pinouts ............................61 Menu Quick-Find Keystroke Table ..........................62 Warranty Information ..............................63 Index ..................................... 63 TABLE OF FIGURES Figure 1- Connect a HA-UNV Host Adapter to a PS/2 CPU ......................6 Figure 2- Connect a HA-UNV Host Adapter to a USB CPU.......................
- Page 6 Figure 36- Host Access Controls list ..............................36 Figure 37- User Station Configuration screen..........................36 Figure 38- Select user for Auto-logIn ............................... 37 Figure 39- Firmware Configuration Menu ............................38 Figure 40- Update Host Adapters ..............................39 Figure 41- Select Keyboard Language menu ..........................39 Figure 42- Network Configuration page ............................
-
Page 7: Introduction
INTRODUCTION The PRIMUX-16X64 KVM Matrix Switch via CAT5 is designed to enable the relocation of up to 16 VGA monitors, PS/2 or USB keyboards and mice from up to 64 non-blocking PS/2, SUN, or USB CPUs by as much as 1000 feet. The PRIMUX is comprised of at least one PRIMUX KVM Matrix Switch (SWITCH), at least one PRIMUX-UZR User Station and at least one Host Adapter (HA-UNV,HA-SUN-MTX, or HA-RS-M) connected to a CPU to be controlled by the user. -
Page 8: Materials
NTI RJ45MF-RS232-CO serial crossover adapter will be required if an HA-RS-M is installed and connected to a DCE type serial device (see page 8) Cables can be purchased from Network Technologies Inc by calling 800-RGB-TECH (800-742-8324) or (330)-562-7070 or by visiting our website at www.networktechinc.com. -
Page 9: Features And Functions
NTI PRIMUX MATRIX KVM SWITCH VIA CAT 5 Front View of PRIMUX-8X32 PRIMUX Network Technologies In c Rear View of PRIMUX-8X32 USER EXPANSION PORT ETHERNET RS232 USER NETWORK TECHN OLOGIES INC Tel:330-562-7070 1275 Dan ner Dr, Au ro ra, OH 44202 www.nti1.com... - Page 10 NTI PRIMUX MATRIX KVM SWITCH VIA CAT 5 CAT5 - RJ45 female- for connection of CAT5 cable between Host Adapter and Matrix Switch 11a. Yellow LED- power indicator- illuminates when power has been supplied to the unit 11b. Green LED- traffic indicator- illuminates when there is communication between the User Station and Host Adapter. Monitor- for connecting the video monitor Video Connector- blue 15HD male- for connecting to the video port on the CPU Keyboard Connector- purple male 6 miniDIN (HA-UNV only)- for connecting to the keyboard port on a PS2 CPU...
-
Page 11: Preparation For Installation
NTI PRIMUX MATRIX KVM SWITCH VIA CAT 5 PREPARATION FOR INSTALLATION • Choose a secure location for the Matrix Switch, such that cables from User Stations and Host Adapters will reach it. This location should be secure enough to restrict personnel access. •... -
Page 12: Installation
NTI PRIMUX MATRIX KVM SWITCH VIA CAT 5 INSTALLATION Install The Host Adapter The PRIMUX HA Host Adapter is designed to support PS/2, SUN and USB CPUs, in addition to serial devices with an RS232 port. For PS/2 or USB CPUs use HA-UNV, for SUN CPUs use HA-SUN-MTX, and for serially-controlled servers or devices use HA-RS-M. -
Page 13: Installation Of A Ha-Unv To A Usb Cpu
NTI PRIMUX MATRIX KVM SWITCH VIA CAT 5 Installation of a HA-UNV to a USB CPU Plug the cables of the HA-UNV Host Adapter into the back of the USB CPU after disconnecting the power cord from the CPU. (See Figure 2.) Connect the cable with the USB Type A male cable end on it to a USB Type A female port on the back of the CPU. -
Page 14: Installation Of A Serial-Controlled Server Or Device
NTI PRIMUX MATRIX KVM SWITCH VIA CAT 5 Installation of a Serial-Controlled Server or Device Plug the cables of the HA-RS-M Host Adapter into the serial port on a server (DTE) or other serially-controlled data terminal equipment (DTE) device. If the device is a data communication equipment (DCE) type device, a crossover adapter (NTI RJ45MF-RS232-CO- sold separately) will be required. -
Page 15: Connecting The Cat5 Cable To The Host Adapter
NTI PRIMUX MATRIX KVM SWITCH VIA CAT 5 Connecting the CAT5 cable to the Host Adapter Connect CAT5 cable to the “OUT” port on the Host Adapter (Figure 6). When properly inserted, the cable end should snap into place. Cable to CPU NOTE: If an RJ45 wall outlet is being used, connect the other end of the extension cable to the RJ45 wall outlet. -
Page 16: Install The User Station
NTI PRIMUX MATRIX KVM SWITCH VIA CAT 5 Install The User Station The PRIMUX-UZR User Station can be used with either PS/2 or USB devices. NOTE: If the user keyboard connected is PS/2 (6mD connector), then the mouse must also be PS/2. If the user keyboard is USB (USB Type A connector), then the mouse must also be USB. -
Page 17: Installation With Usb Devices
NTI PRIMUX MATRIX KVM SWITCH VIA CAT 5 Installation with USB devices Position the User Station such that the CAT5 cable, the monitor cable, device cables, and the AC adapter power connector can each reach the User Station without cable strain. Connect the monitor cable to the female 15HD video connector on the User Station. -
Page 18: Install The Matrix Switch
NTI PRIMUX MATRIX KVM SWITCH VIA CAT 5 Install The Matrix Switch The PRIMUX KVM Matrix Switch is designed to connect multiple User Stations to multiple Host Adapters. Installation Position the SWITCH such that the CAT5 cables from User Stations and Host Adapters, and the AC power cord can each reach the SWITCH without cable strain. -
Page 19: Figure 13- Connect A Terminal To Use Rs232 Serial Interface
NTI PRIMUX MATRIX KVM SWITCH VIA CAT 5 4. To control the Matrix Switch using RS232 serial interface via a control terminal (page 41), connect a serial cable between the control terminal and the "RS232" port on the Matrix Switch. This cable is supplied with your PRIMUX-UZR (DINT-6-FF) and you can also see page 61 for specifications of the pinout for this cable. -
Page 20: Power Up For The First Time
NTI PRIMUX MATRIX KVM SWITCH VIA CAT 5 Power Up for the First Time NOTE: The user devices, monitor, and CAT5 cable should already be connected before powering up the User Stations and the Switch. Connect the AC power cord to the IEC power connector and turn ON the power to the unit. The LCD will display the boot status after approximately 2 seconds. -
Page 21: Using The Primux User Station
NTI PRIMUX MATRIX KVM SWITCH VIA CAT 5 USING THE PRIMUX USER STATION The NTI PRIMUX Matrix Switch is designed to be controlled either via OSD menus from a PRIMUX-UZR User Station, via RS232, or remotely via Telnet. The following describes control via a User Station. The PRIMUX-UZR User Station must first be installed as decribed under “Install the User Station”... -
Page 22: Enable Matrix Mode
NTI PRIMUX MATRIX KVM SWITCH VIA CAT 5 User Rights Include: The ability to connect the Users Station’s keyboard, mouse, and monitor to CPUs (only those CPUs that have been granted access by the administrator). The ability to enable/disable and configure Scan Mode The ability to assign a list of favorite CPUs The ability to fine tune the video quality Enable Matrix Mode... -
Page 23: Change Or Disable "Root" Auto-Login
NTI PRIMUX MATRIX KVM SWITCH VIA CAT 5 Change or Disable “root” Auto-login For security purposes, it is recommended that the Auto-login feature either be disabled or the Auto-login user be changed to a user with fewer rights than the administrator. To disable the Auto-login, from the main menu, press <A>... -
Page 24: Guidelines For Navigating Osd Menus
NTI PRIMUX MATRIX KVM SWITCH VIA CAT 5 Guidelines for Navigating OSD Menus Throughout this manual, various rules apply for navigating the menus used to control and operate the PRIMUX. • OSD menus can be navigated using the mouse, the up and down arrows on the keyboard, and the <Page Up>, <Page Down>, <Home>,<Tab>... -
Page 25: Keypad Control
NTI PRIMUX MATRIX KVM SWITCH VIA CAT 5 Favorites Network Technologies Inc Search PRIMUX Down Figure 18- PRIMUX-UZR front panel Keypad Control The keypad on the front panel of the PRIMUX User Station enables a user to quickly set the User Station to connect to the desired CPU. -
Page 26: Security
NTI PRIMUX MATRIX KVM SWITCH VIA CAT 5 Security The PRIMUX CAT5 KVM System is designed with security to prevent unauthorized use of the CPUs connected as determined by the administrator. Up to 16 users may be given access to the system, each with individual limitations of use. Only the administrator or user with administrative privileges can activate or deactivate the security features on each user port. -
Page 27: User Osd Menus
NTI PRIMUX MATRIX KVM SWITCH VIA CAT 5 User OSD Menus Command Mode In order to control the User Station with the keyboard, Command Mode must be enabled. To enable Command Mode from the keyboard: (ACCENT/TILDE Ctrl KEY) Press All the status lights on the keyboard will illuminate to indicate that Command Mode is enabled. At this point, the Command Mode menu will be displayed. -
Page 28: Scan Mode
NTI PRIMUX MATRIX KVM SWITCH VIA CAT 5 Function Keystroke Display first 8 Host Adapters and move selection bar to the first Home Display last 8 Host Adapters and move selection bar to the last Press to toggle enable/disable Scan Mode Enter Settings Menu Enter Administration Mode (Administrator only- see page 28) -
Page 29: Settings Menu
NTI PRIMUX MATRIX KVM SWITCH VIA CAT 5 Settings Menu The Settings Menu provides controls for how the current logged-in user will view and make the best use of the PRIMUX. Note: Changes to Video Quality settings will effect all users of this User Station. To enter the Settings Menu, press <T>... -
Page 30: Osd Settings Menu
NTI PRIMUX MATRIX KVM SWITCH VIA CAT 5 OSD Settings Menu To enter the OSD Settings Menu, press <O> from the Settings Menu. (From the Command Mode menu press <T> - <O>.) Using the OSD Settings, the user can resize and reposition the OSD window on the monitor as desired. Changes to the OSD settings will only affect the logged-in user. -
Page 31: Select Hosts To Scan
NTI PRIMUX MATRIX KVM SWITCH VIA CAT 5 Select Hosts to Scan From the Settings Menu, press <S> for the list of Host Adapters to select for scanning. (From Command Mode press <T> - <S>) Figure 24- Host Adapters to Scan list Scan Mode enables the user to scan through selected ports and to have full device control of the connected port. -
Page 32: Favorite Hosts
NTI PRIMUX MATRIX KVM SWITCH VIA CAT 5 Favorite Hosts From the Settings Menu, press <F> for the list of Host Adapters to select as favorites. (From Command Mode press <T> - <F>) The favorite hosts are typically those that a user connects to the most frequently. All accessible Host Adapters are listed and up to 8 can be numbered 1-8. -
Page 33: Video Quality Adjustment
NTI PRIMUX MATRIX KVM SWITCH VIA CAT 5 Video Quality Adjustment Video quality adjustment is done automatically to assure the image is as clear as possible. However, due to the different twisting rates of each pair of wires in the CAT5 cable, variations in the signal delays between the red, green, and blue channels will occur when the cable is longer than 300 feet. -
Page 34: Administrator Controls
NTI PRIMUX MATRIX KVM SWITCH VIA CAT 5 Administrator Controls Administration Menu Note: The Administration menu will only be accessible if the administrator is logged in (page 20) or if the user has administration rights. Press <A> from the Command Mode menu (page 21) to display the Administration menu. Figure 27- Administration Menu The table below describes the functions of the Administration menu. -
Page 35: System Configuration Menu
NTI PRIMUX MATRIX KVM SWITCH VIA CAT 5 System Configuration Menu Press <A> -<S> from the Command Mode menu to display the System Configuration menu. Figure 28- System Configuration menu Function Description Keystroke Logoff Timeout Open an edit field to set the time in minutes after which a user will L –... -
Page 36: Figure 29- Configure Ddc
NTI PRIMUX MATRIX KVM SWITCH VIA CAT 5 Alternate OSD Key This function enables the administrator to assign a key in addition to the <`> (accent/tilde key) to use with <Ctrl> to enter into OSD Command Mode. The default factory setting for this option is “Accent“ (disabling the option). To assign an Alternate OSD key press <A>... -
Page 37: Configure Host Adapters
NTI PRIMUX MATRIX KVM SWITCH VIA CAT 5 Configure Host Adapters From the Administration Menu, press <H> to display the Configure Host Adapters menu from which the adminstrator can select Host Adapters to edit (From Command Mode type <A> - <H>.) Figure 30- Host Adapter List Function Description... -
Page 38: Figure 32- User Access Controls List
NTI PRIMUX MATRIX KVM SWITCH VIA CAT 5 To edit the Host Adapter enter the desired parameter values as defined in the chart below: Suggestion: Use the <Tab> key to quickly jump between editable fields for easy configuration management. Function Description Keystroke Name... -
Page 39: Figure 33- Share Mode Option (Matrix Mode Only)
NTI PRIMUX MATRIX KVM SWITCH VIA CAT 5 Function Description Keystroke Move selection Bar Up arrow or Down arrow Spacebar Select specific user to access the Host Adapter Allow All Users to access the Host Adapter None Allow No Users to access the Host Adapter Help Display topic specific help page Exit... -
Page 40: Configure Users
NTI PRIMUX MATRIX KVM SWITCH VIA CAT 5 Configure Users From the Administration Menu, press <U> to display the Configure Users menu from which the adminstrator can select Users to add or edit (From Command Mode type <A> - <U>.) The Configure User menu displays from left to right 1) the name of each user, 2) whether or not the user has been assigned administrative rights and 3) whether they are enabled to login or not. -
Page 41: Add New User
NTI PRIMUX MATRIX KVM SWITCH VIA CAT 5 Function Description Keystroke Name Modify the name (of the selected User)- opens an edit field to enter a character string- 16 characters max., case sensitive. Press <Enter> or <Tab> to save Press <Esc> to cancel Enabled Allows the administrator to enable a user to login or not to login to the User Spacebar... -
Page 42: User Station Configuration
NTI PRIMUX MATRIX KVM SWITCH VIA CAT 5 Function Description Keystroke ---- Toggle Specific selection Spacebar Find Locate Host Adapter by name Allow user access to all Host Adapters None Allow user access to no Host Adapters Help Display topic specific help page ---- Figure 36- Host Access Controls list User Station Configuration... -
Page 43: Select Auto-Login User
NTI PRIMUX MATRIX KVM SWITCH VIA CAT 5 Select Auto-login User From the User Station Configuration menu, press <A> to bring up the Auto-login User list. (From Command Mode type <A> - <R> - <A>.) Figure 38- Select user for Auto-logIn To select a user to be automatically logged-in when the User Station is powered-up, choose one of the actions listed below: Function Description... -
Page 44: Firmware Configuration Menu
NTI PRIMUX MATRIX KVM SWITCH VIA CAT 5 Firmware Configuration Menu The Firmware Configuration Menu is provided to enable the administrator to update the firmware inside the PRIMUX User Station and Host Adapters as new or improved features are available. The updated code can be downloaded from the NTI website at www.networktechinc.com\kvmswitch-cat5.html . -
Page 45: Select Keyboard Language
NTI PRIMUX MATRIX KVM SWITCH VIA CAT 5 Update Host Adapter Firmware To use the “Update Host Adapters” command, the image downloaded using the bootloader (previous page) must be for either a HA_UNV, HA_SUN, or HA_RS. The type of image downloaded into the bootloader will be shown. If the image is not for a Host Adapter, the word “INVALID”... -
Page 46: Network Configuration
NTI PRIMUX MATRIX KVM SWITCH VIA CAT 5 The Select Keyboard Language menu enables the user to select a specific language (country code) to be used. Typically only SUN CPUs require a specific country code to be registered at boot up. (For other types of CPUs this feature may have no effect.) A list of available languages is displayed and can be scrolled using the mouse (scroll wheel) and/or <up arrow>, <down arrow>, <Page up>, <Page down>, <Home>... -
Page 47: Rs232 Or Telnet Connection
NTI PRIMUX MATRIX KVM SWITCH VIA CAT 5 RS232 OR TELNET CONNECTION The NTI PRIMUX Matrix Switch is designed to be controlled either via OSD menus from User Station, via RS232, or remotely via Telnet. The following describes control via RS232 and Telnet. For control using the PRIMUX-UZR User Station, see page 15. -
Page 48: Rs232 Command Protocol
NTI PRIMUX MATRIX KVM SWITCH VIA CAT 5 RS232 Command Protocol Host controller commands supported by the unit are defined below. RS232 Command Protocol Quick Reference Legend: (All numbers must be two digits) BR : Baud Rate Code (12,24,48,96,19,38,57,11) OP : Output/User Port (01-MAXOUTPUTS) Input Port/CPU (01-MAXINPUTS) <CR>:... -
Page 49: Telnet Connection
NTI PRIMUX MATRIX KVM SWITCH VIA CAT 5 Telnet Connection To use Telnet, the SWITCH must first be installed as described on pages 6-11. The user may connect to the SWITCH using a Telnet client either 1) through HyperTerminal or 2) from a command prompt. Before Telnet can be used, two conditions must be met: A terminal must first be connected to the SWITCH through the ETHERNET port (page 13). -
Page 50: Log In To The Main Menu
NTI PRIMUX MATRIX KVM SWITCH VIA CAT 5 Telnet>set term vt100 (to configure Telnet for proper terminal emulation) C:\>Microsoft Press <Enter> The screen will return: Will term type Preferred term type is vt100 Microsoft Telnet> (to configure Telnet to handle the <Enter> key properly within the menu) C:\>Microsoft Telnet>... -
Page 51: System Configuration Menu
NTI PRIMUX MATRIX KVM SWITCH VIA CAT 5 The Main Menu shown below will be displayed. Figure 46- Telnet- Main menu System Configuration Menu The System Configuration menu provides settings that will effect how the OSD menu system and Host Sharing will behave when the user is not actively using them. -
Page 52: Host Configuration Menu
NTI PRIMUX MATRIX KVM SWITCH VIA CAT 5 Host Configuration Menu The Configure Hosts menu allows you to configure host adapter settings. Select “Host Configuration” in the Main Menu and press <Enter> to open the Configure Hosts submenu. Figure 48- Telnet- Configure Hosts From the Configure Hosts list, move the selection bar (using the up/down arrow keys) to a listing to be edited and press <Enter>... -
Page 53: Share Mode
NTI PRIMUX MATRIX KVM SWITCH VIA CAT 5 Share Mode From the Edit Host Adapter menu, press <Tab> to move the cursor to Share Mode and press <Spacebar> to toggle between three possible settings: None- only one user can access a host adapter at a time. Other users that try will receive a “Host in use” error message. Limited- the first user to connect to the Host Adapter will gain control of the keyboard/mouse for the connected CPU until they logout, disconnect from that Host Adapter, or change to a different Host Adapter. -
Page 54: User Configuration Menu
NTI PRIMUX MATRIX KVM SWITCH VIA CAT 5 User Configuration Menu Select “User Configuration” in the Main Menu and press <Enter> to open the User Configuration submenu. Select by pressing <Enter> to create a new user Figure 50- Telnet- Configure Users From the Configure Users list, move the selection bar (using the up/down arrow keys) to a listing to be edited and press <Enter>... -
Page 55: User Station Configuration Menu
NTI PRIMUX MATRIX KVM SWITCH VIA CAT 5 User Station Configuration Menu Select “User Station Configuration” in the Main Menu and press <Enter> to open the User Station Configuration submenu. Figure 52- Telnet- Configure User Station From the Configure User Stations list, move the selection bar (using the up/down arrow keys) to a listing to be edited and press <Enter>... -
Page 56: Firmware Configuration
NTI PRIMUX MATRIX KVM SWITCH VIA CAT 5 Firmware Configuration New improved versions of firmware may become available for the PRIMUX Matrix KVM Switch. The Firmware Configuration menu is provided to enable the user to initiate a firmware update. Select “Firmware Configuration” in the Main Menu and press <Enter>... -
Page 57: View Kvm Connections
NTI PRIMUX MATRIX KVM SWITCH VIA CAT 5 View KVM Connections Select “View KVM Connections” in the Main Menu and press <Enter> to see a detailed listing of all connections between users and the system. No changes can be made here. This page is for information purposes only. Figure 56- Telnet- View KVM Connections View System Info Select “View System Info”... -
Page 58: Restore Settings To Defaults
NTI PRIMUX MATRIX KVM SWITCH VIA CAT 5 Restore Settings to Defaults Select “Restore Settings to Defaults” in the Main Menu and press <Enter> if you want to remove all custom configuration settings and restore the PRIMUX Matrix Switch back to the settings it came with from the factory. Before this selection will take effect, you will be prompted (as shown in the image below) to confirm this selection. -
Page 59: Ha-Rs Configuration
NTI PRIMUX MATRIX KVM SWITCH VIA CAT 5 HA-RS Configuration The HA-RS Serial Host Adapter enables a user to remotely connect to a serial device and control the device using the PRIMUX User Station as a terminal. The HA-RS is compatible with most serial devices with an RS232 port. The HA-RS emulates a VT100 terminal –... -
Page 60: Help Menu
NTI PRIMUX MATRIX KVM SWITCH VIA CAT 5 Help Menu Press <Ctrl>-<F1> to view a list of information that will help you to navigate the features of the HA-RS host adapter. Figure 60- HA-RS Help Screen Setup Screen Press <Ctrl>-<F2> to access a list of connection parameters and window color controls. The connection information shown must match the required connection criteria of the serial device in order to connect to it. -
Page 61: Programmable Keys
NTI PRIMUX MATRIX KVM SWITCH VIA CAT 5 Programmable Keys A list of <Fx> keys that when used in conjunction with the <Alt> key can be programmed to be used as macro keys to send commands to the connected serial device. When applicable commands are associated with an <Fx>... -
Page 62: Update Primux Matrix Switch Firmware
NTI PRIMUX MATRIX KVM SWITCH VIA CAT 5 UPDATE PRIMUX MATRIX SWITCH FIRMWARE This procedure is provided to enable the administrator to update the firmware inside the PRIMUX Matrix Switch if needed. The updated code can be downloaded from the NTI website at www.networktechinc.com\kvmswitch-cat5.html . Download the latest version of code for the PRIMUX Matrix and unzip it to a location on your computer you will remember (perhaps the Desktop). -
Page 63: Keyboard Mapping
NTI PRIMUX MATRIX KVM SWITCH VIA CAT 5 KEYBOARD MAPPING Key Equivalents Using the chart below, find the character needed to be typed on the CPU being accessed, then follow the row across for the equivalent on the keyboard being used. (See Figure 63 on page 58 for reference.) USB 101 PS/2 (Windows) -
Page 64: Figure 63- Keyboard Layouts
NTI PRIMUX MATRIX KVM SWITCH VIA CAT 5 Backspace Lock Enter Caps Lock Shift Shift Enter Ctrl Ctrl Typical 101 Keyboard Print Scroll Screen Pause Lock SysRq Break Backspace Lock Enter Caps Lock Shift Shift Enter Ctrl Ctrl Windows Logo Key Application Key Windows Logo Key Windows Keyboard... -
Page 65: Technical Specifications
NTI PRIMUX MATRIX KVM SWITCH VIA CAT 5 TECHNICAL SPECIFICATIONS Common Specifications Video Compatibility SVGA, XGA, VGA Video Quality Adjustment Automatic, for up to 1000 feet of CAT5 cable Video Coupling Maximum Input/Output Levels 1.45Vp-p (no offset) Input / Output Impedance 75 ohms Input Horizontal Frequency Range 15kHz to 130 kHz... -
Page 66: Interconnection Cable Wiring Method
NTI PRIMUX MATRIX KVM SWITCH VIA CAT 5 Distances and Resolutions for CAT5/CAT5e and CAT6 Cables (Continued) CABLE DISTANCE (feet) RESOLUTION CAT6 (UTP) 1000 1024x768 at 60Hz CAT6 (UTP) 1024x768 at 60Hz CAT6 (UTP) 1280x1024 at 60Hz CAT6 (UTP) 1280x1024 at 60Hz CAT6 (UTP) 1600x1200 at 60Hz CAT6 (UTP) -
Page 67: Null Modem Cable Pinouts
NTI PRIMUX MATRIX KVM SWITCH VIA CAT 5 NULL MODEM CABLE PINOUTS A 6 foot null modem cable (NTI # DINT-6-FF) was supplied with your PRIMUX User Station. This cable is also used to connect the PRIMUX Matrix KVM Switch to a terminal. The information below is provided should you need to make a longer cable. -
Page 68: Menu Quick-Find Keystroke Table
NTI PRIMUX MATRIX KVM SWITCH VIA CAT 5 MENU QUICK-FIND KEYSTROKE TABLE Function Source Page Keystroke Sequence Command Mode <Ctrl> + < > Return to Command Mode <F10> Administration Menu <Ctrl> + < > - <A> Activate Scan Mode <Ctrl> + < >... -
Page 69: Warranty Information
NTI PRIMUX MATRIX KVM SWITCH VIA CAT 5 Please Note: The PRIMUX User Station and Host Adapters used in conjunction with the PRIMUX Matrix Switch must all be running firmware version 2.0 or later in order to be compatible with the PRIMUX Matrix Switch. For updated firmware with instruction for upgrading, go to http://www.networktechinc.com/download/d-kvmswitch-cat5.html...
Need help?
Do you have a question about the PRIMUX-16X64 and is the answer not in the manual?
Questions and answers