Sharp MX-M700U Operation Manual
Digital multifunctional system
Hide thumbs
Also See for MX-M700U:
- Operation manual (200 pages) ,
- Software setup manual (44 pages) ,
- Service manual (413 pages)
Table of Contents
Advertisement
Quick Links
MX-M550U
MX-M620U
MX-M700U
MX-M550N
MX-M620N
MX-M700N
DIGITAL MULTIFUNCTIONAL
SYSTEM
OPERATION MANUAL
(for general information and copier operation)
PART 1: GENERAL INFORMATION
• BEFORE USING
THE PRODUCT
• MANAGING THE MACHINE
• PERIPHERAL DEVICES
PART 2: COPIER OPERATION
• MAKING COPIES
• CONVENIENT COPY
FUNCTIONS
• MACHINE MAINTENANCE
(FOR COPYING)
• DOCUMENT FILING
FUNCTION
• SPECIFICATIONS
Be sure to become thoroughly familiar with this manual to
gain
the
maximum
Before installin g this product, be sure to read the
installatio n requirement s and caution s sections .
Be sure to keep all operation manuals handy for reference
including this manual, the "Operation manual (for general
information and copier operation)" and operation manuals
for any optiona l equipmen t which has been installed .
MODEL
benefi t
from
the
Page
1-1
2-1
3-1
4-1
5-1
6-1
7-1
8-1
product .
Advertisement
Table of Contents
Troubleshooting

Related Manuals for Sharp MX-M700U


Summary of Contents for Sharp MX-M700U
-
Page 1: Document Filing
MODEL MX-M550U MX-M620U MX-M700U MX-M550N MX-M620N MX-M700N DIGITAL MULTIFUNCTIONAL SYSTEM OPERATION MANUAL (for general information and copier operation) Page PART 1: GENERAL INFORMATION • BEFORE USING THE PRODUCT • MANAGING THE MACHINE • PERIPHERAL DEVICES PART 2: COPIER OPERATION • MAKING COPIES •... - Page 2 Each instruction also covers the optional units used with these products. In some areas, the "POWER" switch positions are marked "I" and " " on the copier instead of "ON" and "OFF". The symbol " " denotes the copier is not completely de-energized but in a stand-by condition at this "POWER"...
-
Page 3: Trademark Acknowledgments
• PCL is a registered trademark of the Hewlett-Packard Company. • IBM, PC/AT, and PowerPC are trademarks of International Business Machines Corporation. • Sharpdesk is a trademark of Sharp Corporation. • All other trademarks and copyrights are the property of their respective owners. - Page 5 Part 1: General Information...
-
Page 7: Operation Manuals
While every effort has been made to make this document as accurate and helpful as possible, SHARP Corporation makes no warranty of any kind with regard to its content. All information included herein is subject to change without notice. SHARP is not responsible for any loss or damages, direct or indirect, arising from or related to the use of this operation manual. -
Page 8: Installation Requirements
INSTALLATION REQUIREMENTS Improper installation may damage this product. Please note the following during initial installation and whenever the machine is moved. 1.The machine should be installed near an accessible power outlet for easy connection. 2.Be sure to connect the power cord only to a power outlet that meets the specified voltage and current requirements. -
Page 9: Cautions
With the exception of instances provided for by law, Sharp Corporation bears no responsibility for any damages or loss due to the loss of stored document data. -
Page 10: Laser Information
CAUTIONS Laser Information Wave length +10 nm 785 nm -15 nm Pulse times North America: 55 cpm / 62 cpm model: (3.1 µs ± 3.1 ns)/7 mm 70 cpm model: (2.7 µs ± 2.7 ns)/7 mm Europe: 55 cpm / 62 cpm model: (3.7 µs ± 3.7 ns)/7 mm 70 cpm model: (3.2 µs ±... -
Page 11: Table Of Contents
TURNING THE POWER ON AND OFF ....... 1-17 ● Misfeed removal ...........3-17 AUDITING MODE ............1-18 ● Troubleshooting inserter problems .......3-18 ● Using the machine when the auditing mode is SHARP OSA..............3-19 enabled..............1-18 APPLICATION COMMUNICATION MODULE (MX- CHAPTER 2 AMX2)................3-19 ●... -
Page 12: Contents
CONTENTS CHAPTER 5 CHAPTER 8 CONVENIENT COPY FUNCTIONS SPECIFICATIONS SPECIAL MODES ............5-2 SPECIFICATIONS ............8-2 ● General procedure for using special functions ..5-2 INDEX ................8-4 ● Margin shift ............5-3 ● Erase ..............5-4 ● Dual page copy.............5-5 ● Pamphlet copy ............5-6 ●... - Page 13 CHAPTER 1 BEFORE USING THE PRODUCT This chapter contains basic information that should be read before using the product. Page INTRODUCTION..................1-2 MAIN FEATURES ................... 1-3 PART NAMES AND FUNCTIONS............1-10 ● Exterior.................... 1-10 ● Interior ..................... 1-11 ● Operation panel................1-13 ●...
-
Page 14: Introduction
INTRODUCTION Thank you for purchasing a SHARP digital multifunction copier. Please read this manual before using the machine. In particular, be sure to read "INSTALLATION REQUIREMENTS" before using the machine. Please keep this manual close at hand for reference whenever necessary. -
Page 15: Main Features
(When the Finisher or Saddle stitch finisher is installed.) ● Saddle stitch (When using the MX-M550U, MX-M620U, or See page 1-8 MX-M700U, the network expansion kit is required.) (When the Saddle stitch finisher is installed.) ● Covers/inserts ● Hole punching... -
Page 16: Main Features
MAIN FEATURES Reduction / Enlargement See page 4-15 Erase See page 5-4 Copies can be enlarged or reduced to the desired Shadows that appear around the edges of copies of size. books or thick originals can be erased. Original Copy Original Copy Edge erase... - Page 17 50 sets of 50 sets of copies copies copies *When using the MX-M550U, MX-M620U, or MX-M700U, the network expansion kit is required. Covers/inserts See page 5-12 Book Copy See page 5-26 Front covers, back covers, and inserts can be Books and other bound originals can be copied added.
- Page 18 MAIN FEATURES Tab Copy See page 5-27 Mirror Image See page 5-31 Copying is possible on the tabs of tabbed paper. A mirror image copy can be made. Original Tab paper Copy Original Copy Tab width A4 : Maximum of 20mm (51/64") 8-1/2"...
- Page 19 MAIN FEATURES Stamp See page 5-36 Interrupting a copy run See page 5-46 Reverse text can be added to copies ("stamp"). A copy job in progress can be interrupted for a rush job. INTERRUPT AUTO ORIGINAL CONFIDENTIAL AUTO EXPOSUR AUTO Offset mode See page 3-4 Page numbering...
- Page 20 MAIN FEATURES Saddle stitch See page 3-5 Document filing function See chap. 7 When a saddle stitch finisher is installed, copies A document image can be stored on the hard disk. can be automatically folded in half and stapled at A stored file can easily be called up and printed or the fold.
- Page 21 MAIN FEATURES Energy saving features This product has the following two power reducing modes that conform to the Energy Star guidelines to help conserve natural resources and reduce environmental pollution. Preheat mode The preheat mode is the first level of power reduction. The power is reduced Products that have earned to the fuser unit a preset time after the machine has completed a job and no the ENERGY STAR...
-
Page 22: Part Names And Functions
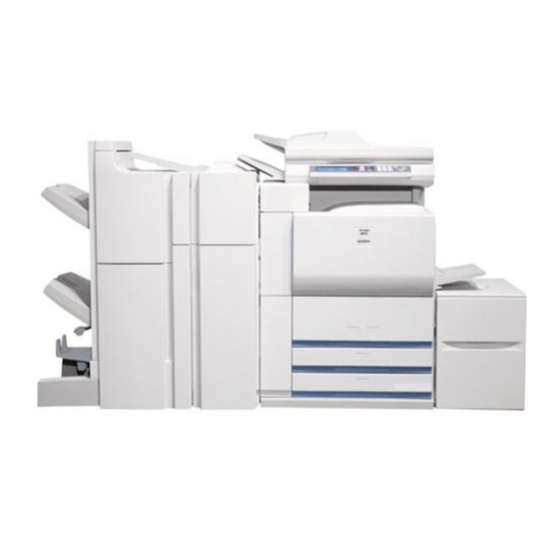
PART NAMES AND FUNCTIONS Exterior (AR-F15) Saddle stitch finisher (AR-F16) Power switch (See page 1-17) Finisher (AR-F15) (See page 3-2) Turns the power on and off. If the power does not come on when the power switch is turned on, check the main power switch to Punch module (AR-PN4A) (See page 3-2) see if it is turned on. -
Page 23: Interior
PART NAMES AND FUNCTIONS Interior Duplex unit Right side cover Open this cover to remove a misfeed from the Open when a misfeed has occurred in the bypass fusing unit area. tray or large capacity tray. Upper cover of large capacity tray Fusing unit Open when a misfeed has occurred in the large Toner images are fused here. - Page 24 When this expansion kit is installed, the machine feature. can be used as a network printer. To add the network scanner function to the MX-M550U, MX-M620U, or MX-M700U, the ●Barcode font kit (AR-PF1) network expansion kit is required. This kit adds bar code fonts to the machine.
-
Page 25: Operation Panel
PART NAMES AND FUNCTIONS Operation panel PRINT DOCUMENT READY FILING DATA LINE IMAGE SEND DATA COPY SYSTEM JOB STATUS SETTINGS LOGOUT Touch panel [SYSTEM SETTINGS] key The machine status, messages and touch keys are This is used to store, edit, and delete user names displayed on the panel. -
Page 26: Touch Panel
PART NAMES AND FUNCTIONS Touch panel ■ Selecting a function The touch panel screens shown in this manual are printed images, and may appear different from the [Example 1] actual screens. If a key is highlighted in a OCK ONTO setting screen at the ■... - Page 27 PART NAMES AND FUNCTIONS ■ Job status screen (common to print, scan, fax and Internet fax) This screen is displayed when the [JOB STATUS] key on the operation panel is pressed. This screen can be used to display the "JOB QUEUE" (showing stored jobs and the current job) or the "COMPLETE"...
- Page 28 PART NAMES AND FUNCTIONS [PRINT JOB] key [PRIORITY] key This displays the print job list of print mode A stored job in the "JOB QUEUE" job list can be (copying, printing, fax reception, Internet fax printed ahead of all other stored jobs by selecting reception, and self printing).
-
Page 29: Turning The Power On And Off
TURNING THE POWER ON AND OFF The machine has two power switches. The main power switch can be found at the upper right after the front cover is opened. The power switch is located at the upper left of the right side of the machine. The two switches are normally used as follows: CAUTION Before turning off the main power switch, make sure... -
Page 30: Auditing Mode
AUDITING MODE Auditing mode can be enabled to keep track of the number of pages printed and transmitted (scanned) by each account (up to 500 accounts can be established). The page counts can be viewed and totaled as needed. <This mode is enabled in the administrator settings separately for the copy, printer, fax, Internet fax, network scanner, and document filing functions (page 7 of the administrator settings guide)>... -
Page 31: Managing The Machine
CHAPTER 2 MANAGING THE MACHINE This chapter explains how to load paper, replace the toner cartridge, and remove paper misfeeds. It also contains information about supplies. Page LOADING PAPER ................... 2-2 ● Identifying the trays ................. 2-2 ● Loading paper in paper tray 1 - tray 2 ..........2-2 ●... -
Page 32: Loading Paper
A4 or 8-1/2" x 11" size paper can be loaded in tray 1. A4 or 8-1/2" x 11" size paper can be loaded in tray 2. These are parallel large-capacity trays that allow a total of approximately 2000 sheets of SHARP standard paper (80 g/m (20 lbs.)) to be loaded. -
Page 33: Changing The Paper Size In Paper Tray 1 - Tray 2
LOADING PAPER Gently push tray 1-tray 2 into the machine. Set the paper type. If the paper size was changed from an AB size to an Push the tray firmly all inch size, or from an inch size to an AB size, or if the into paper type was changed, be sure to change the machine. - Page 34 LOADING PAPER Push in the paper guide so that it locks Set the paper type and paper size. into place. For the procedure for configuring these settings, see "Setting the paper type and paper size" (page 2-14). An incorrect paper type or paper size setting may cause automatic selection of the wrong type or size of paper, and result in a misfeed or otherwise prevent printing.
-
Page 35: Loading Paper In Paper Tray 3
(no more appropriate settings as explained in "Setting the than sheets paper type and paper size" (see page 2-14). SHARP standard paper (80 g/m (20 lbs.)). Loading paper in paper tray 3 is now To change the paper complete. -
Page 36: Changing The Paper Size In Paper Tray 4
LOADING PAPER ■ Loading tabbed paper When using tabbed paper, follow the steps below to attach the special guide to the divider plate at the bottom edge of the tabbed paper. (Tabbed paper cannot be used in tray 4.) Take out the tabbed paper guide. Place the tabbed paper in the tray. -
Page 37: Loading Paper In Paper Tray 5 (Optional Large Capacity Tray Ar-Lc6)
AR-LC6) The large capacity tray can hold up to 3,500 sheets of A4 size (8-1/2" x 11") SHARP standard paper (80 g/m (20 lbs.)). If you wish to change the paper size, please consult your dealer (the paper size must be changed by a service technician). -
Page 38: Loading Paper In Paper Tray 5 (Optional Large Capacity Tray Ar-Lc7)
LOADING PAPER Loading paper in paper tray 5 (optional large capacity tray AR-LC7) An optional large capacity tray (AR-LC7) is available for the machine. The AR-LC7 can hold up to 3000 sheets of 80 g/m (20 lbs.) paper. (See the following "Specifications" for the types of paper that can be used in the large capacity tray.) When installed, the AR-LC7 operates as "Tray 5". - Page 39 ● Use SHARP-recommended paper (page 2-22). Place the paper on the paper table. Special paper cannot be used. The paper stack must...
-
Page 40: Loading Paper In The Bypass Tray
The bypass tray can be used to print on plain paper, postcards, label sheets, tabbed paper, and other special papers. When using SHARP standard paper, up to 100 sheets can be loaded (up to 20 postcards) for continuous printing similar to the other trays. For the paper types that can be used in the bypass tray, see "Specifications of paper trays (Types and sizes of paper that can be used in the trays)"... -
Page 41: Bypass Tray
(1) horizontal loading in the diagram below. (1):Horizontal loading (2):Vertical loading ● When loading plain paper other than SHARP standard paper, special media other than postcards, SHARP-recommended transparency film, or paper to be printed on the back, the paper must be loaded one sheet at a time. -
Page 42: Specifications Of Paper Trays (Types And Sizes Of Paper That Can Be Used In The Trays)
LOADING PAPER Specifications of paper trays (Types and sizes of paper that can be used in the trays) The specifications for the types and sizes of paper that can be loaded in the paper trays are shown below. Tray No. Applicable paper types Applicable paper sizes Paper weight... - Page 43 ● The image quality and toner fusibility of special papers may change due to ambient conditions, operating conditions, and paper characteristics, resulting in image quality inferior to that of SHARP standard paper. 2-13...
-
Page 44: Setting The Paper Type And Paper Size
LOADING PAPER Setting the paper type and paper size Follow these steps to change the paper type setting when the paper type has been changed in a paper tray. For the paper types that can be used in each tray, see page 2-12. Press the [SYSTEM SETTINGS] key. - Page 45 LOADING PAPER NOTE SYSTEM SETTINGS CANCEL TRAY 3 TYPE/SIZE SETTING Sizes that can be selected vary depending on the SELECT THE PAPER TYPE selected paper type. USER TYPE 1 USER TYPE 2 USER TYPE 4 USER TYPE 3 USER TYPE 5 USER TYPE 6 USER TYPE 7 Touch the [OK] key in the size setting...
-
Page 46: Programming And Editing Paper Types
LOADING PAPER ■ Programming and editing paper types To program or edit the name of a paper type or set paper attributes, follow the steps below. Touch the [PAPER TYPE REGISTRATION] Set the paper attributes. key. Touch the checkboxes to the left of the items to select them. -
Page 47: Setting The Paper Size When A Special Size Is Loaded
LOADING PAPER Setting the paper size when a special size is loaded NOTE Special sizes of paper cannot be loaded in trays 1, 2, 4 and 5. Trays 3 and the bypass tray Inserter (option) Perform steps 1 through 5 of "Setting the Perform steps 1 through 5 of "Setting the paper type and paper size"... -
Page 48: System Settings
SYSTEM SETTINGS The system settings can be used as needed to meet the needs of your workplace. The items that can be set with the system settings are shown below. ● Total count ....The number of pages processed by the machine and optional equipment can be displayed. - Page 49 SYSTEM SETTINGS Touch the [DATE FORMAT] key. More information on setting procedures In the following type of screen, a setting is selected The following screen appears. by touching the key so that a checkmark ( SYSTEM SETTINGS appears. The settings below are configured to DATE FORMAT allow use of tray 1 in print, copy, and fax modes.
-
Page 50: About The Settings
SYSTEM SETTINGS About the settings ■ Total count ■ List print This displays the following sheet counts (the This is used to print lists of machine settings and a counts that can be displayed vary depending on test page to check resident fonts. the options installed): The following lists and pages are available: ●All custom setting list... -
Page 51: Replacing The Toner Cartridges
REPLACING THE TONER CARTRIDGES When toner runs low, a message will appear to inform you that the toner cartridge must be replaced. NOTE To view the approximate amount of toner remaining, hold down the [COPY] key during printing or when the machine is on standby. -
Page 52: Storage Of Supplies
Standard supplies for this product that can replaced by the user include paper, toner cartridges, and staple cartridges for the finisher. For best copying results, be sure to use only Sharp Genuine Supplies which are designed, engineered, and tested to maximize the life and performance of Sharp products. Look for the Genuine Supplies label on the toner package. -
Page 53: Misfeed Removal
MISFEED REMOVAL When a misfeed has occurred during printing, the message "A MISFEED HAS OCCURRED". will appear in the touch panel display of the operation panel and printing including copying and facsimile output will stop. The approximate misfeed locations are indicated with " "... -
Page 54: Misfeed In The Transport Area, Fusing Area, And Exit Area
MISFEED REMOVAL Misfeed in the transport area, fusing area, and exit area Misfed in the fusing area CAUTION Turn roller rotating knob The fusing unit is hot. Take care in removing paper. B in the direction of the (Do not touch the metal parts.) arrow to remove the misfed paper. -
Page 55: Misfeed In The Duplex Unit
MISFEED REMOVAL Misfeed in the duplex unit Remove the duplex unit. Close the cover of the duplex unit. Grasp the finger hold and gently open the unit. Open the cover of the duplex unit. Gently close the duplex unit. After closing the duplex unit, confirm that the misfeed message has been cleared and the... -
Page 56: Misfeed In The Paper Feed Area
MISFEED REMOVAL Misfeed in the paper feed area NOTE Be sure to follow the misfeed removal sequence. Do not pull the tray out immediately as the misfeed may have occurred with paper partially fed out of the tray. Open the left cover and see if there is misfed paper first (steps 1 and 2). - Page 57 MISFEED REMOVAL ■ Misfeed in paper tray 3 Remove the duplex unit. Close the lower cover on the left side of the machine. Grasp the finger hold and gently open the unit. Remove the misfed paper. If misfed paper is not found in step 3, pull out paper tray 3 and remove the misfed paper.
-
Page 58: Misfeed In The Bypass Tray
MISFEED REMOVAL ■ Misfeed in the bypass tray Remove the misfed paper from the bypass Remove the misfed paper. tray. Check paper Be careful not to tear the transfer unit inside the misfed paper during tray and remove any removal. misfed paper. - Page 59 MISFEED REMOVAL ■ Misfeed in the tray 5 (AR-LC6) Open the side cover. Open the top cover and remove the misfed paper. After removing misfed paper, close the top cover. Remove the misfed paper. Remove tray 1 - tray 2. Be careful not to tear the Grasp the finger hold misfed...
- Page 60 MISFEED REMOVAL ■ Misfeed in the tray 5 (AR-LC7) If a paper misfeed occurs, follow the steps below to remove the misfeed. Open the side cover. Remove the misfed paper. Be careful not to tear misfed paper during removal. After removing misfed paper, close the top cover.
-
Page 61: Removing An Original Misfeed
REMOVING AN ORIGINAL MISFEED Removing a misfed original from the automatic document feeder If an original misfeed occurs in the automatic document feeder, follow the steps below to remove the misfed original. NOTES ● For misfeed removal in the main unit and other peripheral devices, see page 2-23 ●... -
Page 62: Troubleshooting
In this event, stop using the machine, unplug the power cord, and contact your Sharp dealer. Note: Letters and numbers appear in "**-**". When you contact your Sharp dealer, please tell your dealer what letters and numbers appear. - Page 63 SHARP- Use SHARP-recommended paper. (Page 2-22) recommended paper being used? Do not use curled or crimped paper. If you will not use the paper for a long time, remove the Paper curled or damp? paper from the tray and store it in the wrapper in a cool and dark location so that it will not absorb moisture.
- Page 64 Problem Check Solution or cause paper other than SHARP- Use SHARP-recommended paper. (Page 2-22) recommended paper being used? Is the paper size or weight outside the Use paper within the specifications. specifications? Printed paper Be sure to store paper in the wrapper in a dry...
-
Page 65: Peripheral Devices
CHAPTER 3 PERIPHERAL DEVICES This chapter explains the procedures for using the optional finisher, saddle stitch finisher, and inserter, as well as Sharp OSA (application communication module and external account module). Page FINISHER AND SADDLE STITCH FINISHER........3-2 ● Part names..................3-2 ●... -
Page 66: Finisher And Saddle Stitch Finisher
FINISHER AND SADDLE STITCH FINISHER The finisher and the saddle stitch finisher include the offset function, which offsets each set of copies from the preceding set for easy separation. Each set of sorted copies can also be stapled. The saddle stitch finisher can automatically staple a set of copies at the centre line and fold the pages to create a pamphlet. - Page 67 FINISHER AND SADDLE STITCH FINISHER Upper paper tray/Middle paper tray: Upper paper tray/Middle paper tray: A3, B4, A4, A4R, B5, B5R, A5R, 11" x 17", A3, B4, A4, A4R, B5, B5R, A5R, 11" x 17", 8-1/2" x 14", 8-1/2" x 13", 8-1/2" x 11", 8- 8-1/2"...
-
Page 68: Finishing Methods
FINISHER AND SADDLE STITCH FINISHER Finishing methods ■ Sort mode ■ Offset mode Sorted sets will be delivered. Offset mode Non-offset mode Original Printouts ■ Group mode Each set of copies is offset from the preceding set to Groups of copies of the same page will be allow easy separation. - Page 69 FINISHER AND SADDLE STITCH FINISHER ■ Original orientation when using the staple sort or punch function When using the staple sort or punch function, the original must be placed in the following orientations to enable stapling or punching in the desired position on the paper. Staple sort Punch Document feeder...
-
Page 70: Finishing Modes And Finisher Functions
FINISHER AND SADDLE STITCH FINISHER Finishing modes and finisher functions Touch the [OUTPUT] key on the main screen of copy mode to display the screen that allows selection of sort, staple sort, group function, centreline stapling, and the output tray. OUTPUT FINISHER CENTRE... -
Page 71: Staple Cartridge Replacement And Staple Jam Removal
FINISHER AND SADDLE STITCH FINISHER Staple cartridge replacement and staple jam removal When a finisher is installed, a message will appear when the staple cartridge runs out of staples or a staple jam occurs. Follow the procedure below to replace the staple cartridge or remove jammed staples. ■... - Page 72 FINISHER AND SADDLE STITCH FINISHER ■ Replacing the cartridge in the saddle stitch finisher Only when the saddle stitch finisher (AR-F16) is installed. Return the saddle stitch holder and the Open the lower cover of the saddle stitch saddle stitch unit to their respective finisher.
- Page 73 FINISHER AND SADDLE STITCH FINISHER ■ Removing a staple jam in the finisher Holding the knob, return part (A) to its Perform steps 1 to 2 of the procedure for original position. "Replacing the cartridge in the finisher" on page 3-7. Holding the knob, lower part (A).
- Page 74 FINISHER AND SADDLE STITCH FINISHER ■ Removing a staple jam in the saddle stitch finisher Return the staple case to its original Perform steps 1 to 3 of the procedure for position. "Replacing the cartridge in the saddle stitch finisher" on page 3-8. Remove the empty staple case.
-
Page 75: Removing A Misfeed
FINISHER AND SADDLE STITCH FINISHER Removing a misfeed When a misfeed occurs, remove the misfed paper as explained below. ■ General procedure for the finisher and saddle stitch finisher Gently move the finisher/saddle stitch Remove any misfed paper from the paper finisher away from the machine while exit area. - Page 76 FINISHER AND SADDLE STITCH FINISHER Remove the misfed paper. Close the lower cover of the saddle stitch finisher. Be careful not to tear the misfed paper during removal. Close the front cover of the inserter (only Close the entrance cover of the saddle when an inserter is installed).
-
Page 77: Troubleshooting Finisher/Saddle Stitch Finisher Problems
FINISHER AND SADDLE STITCH FINISHER Troubleshooting finisher/saddle stitch finisher problems Check the list below before calling for service. Problem Check Solution or cause Stapling position is correct Check the stapling position setting. (See page Stapling position not set properly? (including saddle 3-4.) stitch). -
Page 78: Inserter
INSERTER The inserter enables blank sheets or printed sheets to be added to copy and print output as covers or inserts without printing. The inserter also allows feeding of heavy paper that cannot be fed from the other trays. Printed output can also be fed one set at a time from the inserter for stapling or punching without performing stapling or staple sorting finishing (see "Manual operation of the inserter"... -
Page 79: Loading Paper
INSERTER Loading paper When loading paper in the inserter, load the paper face up. If the paper has a top edge and bottom edge, load in the same top-bottom orientation as the original. Adjust the paper guide on the paper tray to the width of the paper. When using tabbed paper, place the paper as follows: Load the paper back side up. - Page 80 INSERTER ■ Alarm display If the [START] key indicator on the inserter operation panel is blinking and the [PUNCH] key or [STAPLE] key indicator is also blinking or solidly lit, operation will not start when the [START] key is pressed. Resolve the problem as indicated below, depending how the indicators are lit or blinking.
-
Page 81: Misfeed Removal
INSERTER Misfeed removal When a misfeed occurs in the inserter, remove the misfed paper following the procedure below. ■ Misfeed in the inserter Remove the misfed paper. Gently move the inserter away from the machine while pressing the button. Be careful not to tear the misfed paper during... -
Page 82: Troubleshooting Inserter Problems
INSERTER Troubleshooting inserter problems Check the list below before calling for service. Problem Check Solution or cause Select the desired staple mode at the The desired staple mode is not selected. operation panel of the inserter (page 3-15). Stapling position is correct The paper is not loaded in the correct Load the paper correctly (page 3-16). -
Page 83: Sharp Osa
There are two methods for selecting a standard application that has been registered in the machine's Web pages. ■ Selecting a standard application from the job status screen The Sharp OSA icon will appear in the lower left-hand corner of the job status screen. Follow the steps below to select a standard application. -
Page 84: Operation In Osa Mode
APPLICATION COMMUNICATION MODULE (MX-AMX2) ■ Selecting the standard application from document filing mode The [Sharp OSA] key appears in the upper right-hand corner of the document filing screen. Follow the steps below to select a standard application. Touch the [Sharp OSA] key. -
Page 85: External Account Module (Mx-Amx3)
When the [ENABLE AUTHENTICATION BY EXTERNAL SERVER] checkbox is selected in "External account setting" of "Sharp OSA settings" in the administrator settings, the machine enters external authentication mode. When the machine is powered on in external authentication mode, the machine accesses the external account application and displays the login screen. - Page 87 Part 2: Copier Operation...
-
Page 89: Making Copies
CHAPTER 4 MAKING COPIES This chapter explains the basic procedures for making copies, including selection of the copy ratio and other copy settings. Page AUTOMATIC DOCUMENT FEEDER ............4-2 ● Acceptable originals ................ 4-2 PLACING ORIGINALS................4-3 CHECKING THE SIZE OF A PLACED ORIGINAL ......... 4-5 ●... -
Page 90: Automatic Document Feeder
AUTOMATIC DOCUMENT FEEDER The automatic document feeding function automatically feeds originals into the machine, making continuous copying possible. In addition, both sides of two-sided sheet originals can be simultaneously scanned. This function is convenient when you have a large number of original pages to scan. Acceptable originals Up to 150 originals (80 g/m (20 lbs.)) of the same size, or an overall stack height of no more than 19.5 mm (49/64"),... -
Page 91: Placing Originals
PLACING ORIGINALS ■ Using ■ Using the document glass automatic document feeder Open the document cover, make sure that Open the document cover, place the an original has not been left on the original face down on the document glass, document glass, and then gently close the and then gently close the document cover. -
Page 92: Standard Original Placement Orientations
PLACING ORIGINALS ■ Standard original placement orientations [Example 1] Document feeder tray Document glass Place originals document feeder tray or on the document glass so that the top and bottom of the original positioned shown in the illustration. If not, staples will be incorrectly positioned and some special features may not give the... -
Page 93: Checking The Size Of A Placed Original
CHECKING THE SIZE OF A PLACED ORIGINAL If the placed original is a standard size, the size will be automatically detected (automatic original detection function) and displayed in the touch panel. Make sure that the correct size has been detected. AUTO (A) : The original size is displayed. -
Page 94: Storing, Deleting, And Using Original Sizes
STORING, DELETING, AND USING ORIGINAL SIZES Up to 9 special original sizes can be stored. Stored sizes can be easily called up and are not erased if the power is turned off. Storing a frequently used original size saves you the trouble of manually setting the size each time you copy that size of document. -
Page 95: Normal Copying
NORMAL COPYING This section describes the normal copying procedure. Making copies with the automatic document feeding function ■ 1-sided copies of 1-sided originals Original Copy Place the originals in the document feeder Touch the [OK] key. tray. (pages 4-3 to 4-6) Ensure that paper of the same size as the originals is automatically selected*. - Page 96 NORMAL COPYING Select the desired output mode (page 4-9). Press the [START] key. The sort mode is the If the [C] key is pressed 2-SIDED COPY default mode. while originals are being select group scanned, scanning will OUTPUT mode, touch stop.
- Page 97 NORMAL COPYING ■ Copy output (sort and group) Example: Making five sets or five copies each of three originals ● Sorting copies into sets Original Five sets of copies OUTPUT SORT SPECIAL MODES 2-SIDED COPY OUTPUT GROUP LOGOUT Press the [START] Touch the Touch the Set the...
-
Page 98: Document Feeding Function
NORMAL COPYING Automatic two-sided copying using automatic document feeding function The machine can automatically copy two-sided originals, saving you the trouble of manually turning over each original page. Original Copy 1. Automatic two-sided copying from one-sided originals 2. Automatic two-sided copying from two-sided originals 3. -
Page 99: Copying From The Document Glass
NORMAL COPYING Copying from the document glass When copying originals which cannot be fed from the automatic document feeder such as thick originals, open the document cover and copy the originals from the document glass. ■ 1-sided copies of 1-sided originals Original Copy Place the original on the document glass. - Page 100 NORMAL COPYING Select the desired output mode. (page 4- Press the [START] key. Replace the original with Group mode the next original and 2-SIDED COPY default mode. press the [START] key. To select sort mode, Repeat this operation OUTPUT touch [OUTPUT] until all originals have key, touch the [SORT]...
-
Page 101: Automatic Two-Sided Copying From The Document Glass
NORMAL COPYING Automatic two-sided copying from the document glass The following two-sided copying function is possible. The copy paper is turned over automatically, allowing easy two- sided copying. Original Copy Place an original on the document glass. Touch the [1-sided to 2-sided copy] key. (pages 4-3 to 4-6) Example of a Example of a... -
Page 102: Adjusting The Exposure
ADJUSTING THE EXPOSURE Select an appropriate exposure mode for the original to be copied. The selections are AUTO, TEXT, TEXT/PHOTO and PHOTO. ■ Automatic exposure adjustment AUTO The default exposure ORIGINAL setting is "AUTO", which automatically adjusts AUTO the exposure for the EXPOSURE original. -
Page 103: Reduction/Enlargement/Zoom
REDUCTION/ENLARGEMENT/ZOOM Reduction and enlargement ratios can be selected automatically or manually. ● Automatic selection: Auto image (see below) ● Manual selection: Preset copy ratios/zoom (see page 4-16) Automatic selection (auto image) The reduction or enlargement ratio will be selected automatically based on the original size and the selected paper size. Place the original in the document feeder Touch the [AUTO IMAGE] key. -
Page 104: Manual Selection (Preset Copy Ratios/Zoom)
REDUCTION/ENLARGEMENT/ZOOM Manual selection (preset copy ratios/zoom) Five preset enlargement and five preset reduction copy ratios (max. 400%, min. 25%) can be selected. In addition, the zoom keys can be used to select any ratio from 25% to 400% in increments of 1%. <The administrator settings on page 16 of the administrator settings guide can be used to set two additional enlargement ratios and two additional reduction ratios.>... - Page 105 REDUCTION/ENLARGEMENT/ZOOM Make sure that an appropriate paper size Press the [START] key. has been selected based on the selected ratio. If you placed the original ORIGINAL on the document glass, AUTO set the output to "Sort", EXPOSURE pressed Auto paper select display AUTO [START] key, you must PAPER SELECT...
-
Page 106: Xy Zoom
REDUCTION/ENLARGEMENT/ZOOM XY ZOOM The XY ZOOM feature allows the horizontal and vertical copy ratios to be changed separately. The ratios can be set from 25% to 400% in increments of 1%. Example: Selecting 100% for the length and 50% for the width Copy Original Place the original in the document feeder... - Page 107 REDUCTION/ENLARGEMENT/ZOOM Use the reduction, enlargement, and Select any desired copy settings such as ZOOM ([ ], [ ]) keys to change the the exposure or number of copies, and copy ratio in the vertical (Y) direction. then press the [START] key. A fixed ratio key will not become highlighted...
-
Page 108: Special Papers
SPECIAL PAPERS Special papers including transparency film, postcards and tabbed paper must be fed through the bypass tray. Place the original in the document feeder Select the bypass tray. tray or on the document glass. (pages 4-3 to 4-6) AUTO ORIGINAL AUTO HEAVY PAPER... - Page 109 CHAPTER 5 CONVENIENT COPY FUNCTIONS This chapter explains special-purpose functions, storing of copy settings, and other convenient functions. Please select and read sections of this chapter as needed. Page SPECIAL MODES................... 5-2 ● General procedure for using special functions ........ 5-2 ●...
-
Page 110: Special Modes
SPECIAL MODES Touch the [SPECIAL MODES] key in the main screen of copy mode to open the special modes screen. The following functions can be selected in the special modes screen. Touch the [SPECIAL MODES] key in the main screen. READY TO SCAN FOR COPY. -
Page 111: Margin Shift
SPECIAL MODES Margin shift The margin shift function will automatically shift the text or image on the copy paper approximately 10 mm (1/2") in its initial setting. This function is convenient when stapling or binding copies with a string. NOTE The initial setting for the margin width can be changed in the administrator settings to any value from 0 to 20 mm (0"... -
Page 112: Erase
SPECIAL MODES Erase The erase function is used to erase the shadow lines on copies produced when copying thick originals or books. The erase modes that can be selected are shown below. The erase width is approximately 10 mm (1/2") in it's initial setting. -
Page 113: Dual Page Copy
SPECIAL MODES Dual page copy The dual page copy function produces separate copies of two documents placed side by side on the document glass. This function is especially useful when copying books and other bound documents. [Example] Copying right and left pages of a book Book original Dual page copy ●The dual page copy function can be used only... -
Page 114: Pamphlet Copy
SPECIAL MODES Pamphlet copy The pamphlet copy function is used to arrange copies in proper order for eventual centre-stapling and folding into a booklet. Two original pages are copied onto each side of copy paper. Four pages are, therefore, copied onto one sheet. This function is convenient for arranging copies into an attractive booklet or pamphlet. - Page 115 SPECIAL MODES Select whether or not you wish to copy on Place the original in the document feeder the cover ("YES" or "NO"). or on the document glass. (page 4-3) PRINT ON COVER Ensure that the desired paper size has been automatically selected based on the original size.
-
Page 116: Job Build
SPECIAL MODES Job build Use job build mode when you need to copy more original pages than can be loaded at once in the document feeder (the maximum number of pages that can be loaded is 150). This function allows the original pages to be scanned in sets. - Page 117 SPECIAL MODES ■ Changing the copy settings for each set of originals When using job build mode, you can change the copy settings each time you place a set of originals. After performing step 4 on page 5-8, follow the steps below. Touch the [CHANGE] key.
-
Page 118: Tandem Copy
SPECIAL MODES Tandem copy Two machines connected to the same network can be used to run a large copy job in parallel. By dividing the job in half, approximately half the time is required to complete the job. To use this function, two machines must be connected to your network as network printers. Even if more machines are connected to the network, this function can only be used to have one other machine share a job. - Page 119 SPECIAL MODES Press the [START] key. To cancel the tandem copy function, touch the [TANDEM COPY] key on the special modes screen (step 1). The highlighted display will be cancelled. NOTES ● To perform tandem copying, the server machine and client machine must meet certain conditions. After the [START] key is pressed on the server machine, the server machine verifies that the conditions have been met.
-
Page 120: Covers/Inserts
SPECIAL MODES Covers/inserts A different type of paper can be inserted in positions corresponding to front and back covers of a copy job when the automatic document feeding function is used. A different type of paper can also be automatically added as an insert at specified pages. - Page 121 SPECIAL MODES ■ Procedure for inserting front and back cover paper The paper for the front cover is called the front cover paper ("FRONT COVER" in the touch panel). The paper for the back cover is called the back cover paper ("BACK COVER" in the touch panel). ●Examples of insertion methods for the front and back cover paper are given on pages 5-18 to 5-21.
- Page 122 SPECIAL MODES ■ Procedure for adding inserts You can have different paper automatically inserted as an insert at a specified pages. Two types of insert paper can be used. These are specified with the [INSERTION TYPE A SETTING] key and [INSERTION TYPE B SETTING] in the touch panel.
- Page 123 SPECIAL MODES Touch the [INSERTION SETTINGS] key to If you wish to insert a different paper with specify the pages where you wish to insert the [INSERTION TYPE B SETTING] key, the insert papers of [INSERTION TYPE A repeat steps 2 through 6. Use the SETTING] [INSERTION TYPE...
- Page 124 SPECIAL MODES ■ Checking, editing, and deleting cover/insert pages The [PAGE LAYOUT] key appears after covers/inserts settings are configured (the settings of step 1 through step 7 on pages 5-13 and 5-14). The [PAGE LAYOUT] key is used for the following: ●...
- Page 125 SPECIAL MODES ■ Examples of covers and inserts The relations between the originals and finished copies when covers or inserts are inserted are shown on the following pages. Covers ●One-sided copying of one-sided originals ●Two-sided copying of one-sided originals (page 5-18) (page 5-19) ●One-sided copying of two-sided originals ●Two-sided copying of two-sided originals...
- Page 126 SPECIAL MODES ■ Covers (One-sided copying of one-sided originals) One-sided copies are made of the following one-sided originals. 1st page 2nd page 3rd page 4th page 5th page 6th page Copying on cover Resulting copies Front cover Back cover No copying No copying One-sided No copying...
- Page 127 SPECIAL MODES ■ Covers (Two-sided copying of one-sided originals) Two-sided copies are made of the following one-sided originals. 1st page 2nd page 3rd page 4th page 5th page 6th page Copying on cover Resulting copies Front cover Back cover No copying No copying One-sided No copying...
- Page 128 SPECIAL MODES ■ Covers (One-sided copying of Two-sided originals) One-sided copies are made of the following two-sided originals. 1st page 2nd page 3rd page Copying on cover Resulting copies Front cover Back cover No copying No copying One-sided No copying copying Two-sided No copying...
- Page 129 SPECIAL MODES ■ Covers (Two-sided copying of two-sided originals) Two-sided copies are made of the following two-sided originals. 1st page 2nd page 3rd page Copying on cover Resulting copies Front cover Back cover No copying No copying One-sided No copying copying Two-sided No copying...
- Page 130 SPECIAL MODES ■ Inserts (One-sided copying of one-sided originals) One-sided and two-sided copying is performed using the following one-sided originals. The insert is added as the third page. 1st page 2nd page 3rd page 4th page 5th page 6th page Copying on Resulting copies Resulting copies (one-sided copying)
-
Page 131: Transparency Film With Insert Sheets
SPECIAL MODES Transparency film with insert sheets When copying onto transparency film, blank insert sheets can be placed between transparent sheets. Example: Inserting insert sheets between transparencies ● This function only operates in "one-sided to one- Originals (1-sided) sided" and "two-sided to one-sided" modes. ●... -
Page 132: Multi Shot
SPECIAL MODES Set the insertion conditions for the insert Touch the outer [OK] key in the screen of paper. step 7. You will return to the main screen of copy mode. CANCEL NOTE PRINT ON INSERT SHEETS INSERTION SHEET TRAY5 If insert paper is fed from an inserter, the output will PLAIN be delivered to the finisher (or saddle stitch finisher). - Page 133 SPECIAL MODES Touch the [OK] key (inside [OK] key) on To display the special modes screen... the multi shot setting screen. See "General procedure for using special You will return to the special modes screen. functions" on page 5-2. Touch the [OK] key in the special modes Touch the [MULTI SHOT] key in the special screen.
-
Page 134: Book Copy
SPECIAL MODES Book copy This function is convenient when you wish to compile copies of books or other bound originals into an attractive pamphlet format. The two pages of the open book are scanned as a set, and two pages each are copied onto the front and back sides of the copy paper (four pages are copied onto one sheet of copy paper). -
Page 135: Tab Copy
SPECIAL MODES Tab copy Copying is possible on the tabs of tabbed paper. Prepare appropriate originals for the tab captions. [Example] Original Tabbed paper Copy Area A Area B Tab width A4 : Maximum of 20 mm (8-1/2" x 11" : Maximum of 5/8") ●The tab caption is shifted by the amount of the tab width setting, so keep areas A and B blank. - Page 136 SPECIAL MODES Select "TAB PAPER" for the paper type To display the special modes screen... setting. See "General procedure for using special The paper type setting is explained in “Setting the functions" on page 5-2. paper type and paper size” (page 2-14). If you are using tray 3, see “Setting the paper size Touch the [TAB COPY] key in the special when a special size is loaded”...
-
Page 137: Card Shot
SPECIAL MODES Card shot When copying a card, this function allows you to combine the front and back sides on a single sheet of paper. ● Copying is only possible on standard size paper. ● A copy ratio cannot be selected when using this function. - Page 138 SPECIAL MODES Touch the outer [OK] key. Place the back side of the original face down on the document glass (see step 5). You will return to the main screen of copy Press the [START] key. CANCEL mode. SIZE RESET The back side of the card is scanned.
-
Page 139: Mirror Image
SPECIAL MODES Mirror image This function is used to print a mirror image of the original. The images will be inverted in the right to left direction on the copies. Original Copy Touch the [OK] key on the special modes To display the special modes screen... -
Page 140: Print Menu
SPECIAL MODES Print menu The date, a stamp, page numbers, and entered text can be printed on copies. Four selections are available for the PRINT MENU: • Date print (page 5-35) • Stamp (page 5-36) This prints the date on the paper. Print a message such as "CONFIDENTIAL"... - Page 141 SPECIAL MODES ■ Common operation procedure for using the print menu To select print menu settings at another To display the special modes screen... print position, repeat steps 2 and 3. See "General procedure for using special functions" on NOTES page 5-2.
- Page 142 SPECIAL MODES Check the print layout if needed (page 5- NOTE 43). To cancel print menu... Touch the [CANCEL] key in the screen of step 3. To display the layout and print content of the LAYOUT CANCEL configured print menu, 2-SIDED ORIGINAL TYPE touch the [LAYOUT] key.
- Page 143 SPECIAL MODES ■ Printing the date on copies The date can be printed on copies. Four selections each are available for the date format and the character that separates the year, month, and day. NOTE The date must be previously set in the system settings. (See page 2-18.) Follow steps 1 and 2 of "Common Select the pages to be printed on.
- Page 144 SPECIAL MODES ■ Printing a stamp (reverse text) on copies A message such as "CONFIDENTIAL" can be printed in reverse text on copies. The following 12 messages are available. CONFIDENTIAL PRIORITY PRELIMINARY FINAL FOR YOUR INFO. DO NOT COPY IMPORTANT COPY URGENT DRAFT...
- Page 145 SPECIAL MODES ■ Printing the page number on copies The page number can be printed on copies. One of 6 formats can be selected for the page number. Follow steps 1 and 2 of "Common If you need to change the starting or ending number of page numbering, the first page operation procedure for using the print printed on, or the print settings for covers/...
- Page 146 SPECIAL MODES When covers/inserts are added and you Touch the [OK] key. wish to include the covers/inserts in the page number count, touch the [COVERS/ INSERTS COUNTING] key. LAST NUMBER AUTO COVERS/INSERTS COUNTING LAST NUMBER AUTO COVERS/INSERTS COUNTING Touch the [OK] key. Select the checkboxes of the items that you wish to include in the page number CANCEL...
- Page 147 SPECIAL MODES Examples of page number printing Page number printing during one-sided copying (5 originals) Setting Value 1st page 2nd page 3rd page 4th page 5th page TOTAL PAGE AUTO FIRST NUMBER LAST NUMBER AUTO PRINTING STARTS FROM SHEET FIRST NUMBER: 11 11/15 12/15 13/15...
- Page 148 SPECIAL MODES Page number printing during two-sided copying of body pages with covers (one-side copying) inserted (9 originals) 1st page 2nd page 3rd page 4th page 5th page (front cover) Setting Value Front Back Front Back Front Back Front Back Front Back TOTAL PAGE...
- Page 149 SPECIAL MODES ■ Printing entered text on copies Entered text can be printed on copies. Up to 50 characters can be printed. Up to 30 sequences of frequently used text can be stored. See "Storing text sequences" (page 5-42). NOTE When the machine is connected to a network, the printed text sequences can be stored and deleted in the Web page.
- Page 150 SPECIAL MODES Storing text sequences Editing and deleting stored text Follow steps 1 and 2 of "Common Follow steps 1 and 2 of "Common operation procedure for using the print operation procedure for using the print menu" (page 5-33). menu" (page 5-33). Touch the [TEXT] key.
- Page 151 SPECIAL MODES ■ Checking and changing the print layout You can check the print layout after the print items have been selected. If needed you can change the print position or delete print content. Touch the [LAYOUT] key on the print menu Touch the key of the new position.
-
Page 152: Storing, Using And Deleting Job Programs
STORING, USING AND DELETING JOB PROGRAMS The steps of up to 10 copy jobs can be stored as job programs. Job programs can be called up with ease, and are retained even when the power is turned off. By storing frequently used copy settings in a job program, you can eliminate the bother of selecting the settings each time you use them for a copy job. -
Page 153: Calling Up A Job Program
STORING, USING AND DELETING JOB PROGRAMS Calling up a job program Press the [#/P] key. Set the number of copies if needed and then press the [START] key. Copying will begin using the settings of the job program. LOGOUT Touch the number key of the desired job program. -
Page 154: Interrupting A Copy Run
INTERRUPTING A COPY RUN The copy of the original scanned in interrupt mode is output before the remainder of the interrupted copy job. Touch the [INTERRUPT] key. Place the original for the interrupt copy job in the document feeder or on the If interrupt copying is document glass (page 4-3). -
Page 155: Machine Maintenance (For Copying)
CHAPTER 6 MACHINE MAINTENANCE (FOR COPYING) This chapter explains procedures for cleaning the machine, and troubleshooting. Page USER MAINTENANCE ................6-2 ● Cleaning the document glass and the automatic document feeder ..6-2 TROUBLESHOOTING ................6-3... -
Page 156: User Maintenance
USER MAINTENANCE To ensure good service from this product over a long period of time, it is recommended that the following maintenance procedures be performed on a regular basis. CAUTION Do not use flammable spray to clean the machine. If gas from the spray comes in contact with hot electrical components or the fusing unit inside the machine, fire or electrical shock may result. -
Page 157: Troubleshooting
TROUBLESHOOTING Check the following troubleshooting list before requesting service as many problems can be fixed by the user. If you are unable to solve the problem by checking the list, turn off the main power switch and the power switch, and unplug the power cord. -
Page 159: Document Filing Function
CHAPTER 7 DOCUMENT FILING FUNCTION Page OVERVIEW ..................... 7-2 ● Document filing function..............7-2 TO USE THE DOCUMENT FILING FUNCTION........7-4 ● A look at the operation panel ............7-4 ● Saving files..................7-4 ● Main screen of document filing ............7-5 ●... -
Page 160: Overview
OVERVIEW Document filing function The document filing function allows you to save a document image in the machine's hard disk as a data file. The image can be called up and printed or transmitted as needed. The scanned document image is saved when printing or transmitting a document in copy mode, printer mode, or image send mode ("QUICK FILE"... -
Page 161: Quick File Folder
● Except in cases provided for by law, SHARP Corporation bears no responsibility for any damages that result from the leaking of sensitive information due to 1) manipulation by a third party of any data saved using the Quick File function or... -
Page 162: To Use The Document Filing Function
TO USE THE DOCUMENT FILING FUNCTION A look at the operation panel PRINT DOCUMENT READY FILING DATA LINE IMAGE SEND DATA COPY SYSTEM JOB STATUS SETTINGS LOGOUT Touch panel (see the next page) Numeric keys This displays messages and keys. Keys can be Use these keys to enter a password or a numeric touched to select and enter settings. -
Page 163: Main Screen Of Document Filing
TO USE THE DOCUMENT FILING FUNCTION Main screen of document filing Document filing icons To display the main screen of document filing, press Main Icon of Icon of Meaning the [DOCUMENT FILING] key when the touch panel icon confidential protected shows the copy mode screen, image send mode, or the file or folder file... -
Page 164: Saving A Document Image File
SAVING A DOCUMENT IMAGE FILE Quick File When printing or transmitting a document in copy mode, printer mode, or fax/image transmission mode,"QUICK FILE" can be selected to save an image of the document to the Quick File folder. The image can be called up at a later time, allowing you to print or transmit the document without having to locate the original. -
Page 165: Filing
SAVING A DOCUMENT IMAGE FILE Filing When printing or transmitting a document in copy mode, printer mode, or image send mode, "FILE" can be selected to save an image of the document to the main folder or a previously created custom folder. The image can be called up at a later time, allowing you to print or transmit the document without having to locate the original. - Page 166 SAVING A DOCUMENT IMAGE FILE Touch the [OK] key. You will return to the screen of step 4. The set password is displayed with " ". The touched folder is selected and you return FOLDER to the screen of step 5. CANCEL selected folder...
-
Page 167: Print Jobs
SAVING A DOCUMENT IMAGE FILE Print jobs Print jobs sent to the machine using the machine's Touch the key of the folder that contains printer driver can be saved in the main folder or a the desired file. previously created custom folder when printed. The If a password is set for CUSTOM FOLDER MAIN FOLDER... -
Page 168: Scan Save
SAVING A DOCUMENT IMAGE FILE Scan Save Scan save is used to save a scanned document image in the main folder or the custom folder without copying or transmitting it. Press the [DOCUMENT FILING] key on the Perform any of the following steps 7 to 16 operation panel. - Page 169 SAVING A DOCUMENT IMAGE FILE Touch the [RESOLUTION] key. Touch the [OK] key. You will return to the AUTO screen of step 14. EXPOSURE 300x300dpi RESOLUTION MANUAL AUTO ORIGINAL Place the original and touch the [START] Touch the key of the desired resolution. key.
- Page 170 SAVING A DOCUMENT IMAGE FILE ■ Using special functions for scan save Touch the [SPECIAL MODES] key in the main scan save screen to display the special modes screen. The functions below can be selected in this screen. Touch the [SPECIAL MODES] key in the main screen.
-
Page 171: Calling Up And Using A File
CALLING UP AND USING A FILE Searching for and calling up a saved file When calling up a file, you can enter the file name, folder name, or user name to quickly search for the file. To search for a file, touch the [SEARCH] key in the main screen of document filing mode or in a screen that shows folders or files in a folder. - Page 172 CALLING UP AND USING A FILE The results of the user name search The results of the file or folder name appear. Touch the desired file name or search appear. Touch the desired file folder name. name or folder name. CANCEL SEARCH AGAIN CANCEL...
-
Page 173: Calling Up And Using A Saved File
CALLING UP AND USING A FILE Calling up and using a saved file A file saved with the document filing function can be called up and printed or manipulated as needed. The following operations can be performed: ● [Print] : Print the file (page 7-17). ●... -
Page 174: File Selection Screen
CALLING UP AND USING A FILE Touch the key of the operation that you (1) [PRINT] key (see page 7-17) wish to perform. (2) [SEND] key (see page 7-20) (3) [PROPERTY CHANGE] key (see page 7-21) (4) [MOVE] key (see page 7-22) CANCEL JOB SETTINGS Basic specifications... - Page 175 CALLING UP AND USING A FILE ■ [Print] A saved file can be printed. The screen below appears when the [PRINT] key is selected in the operation selection screen. To begin printing, touch the [PRINT] ( ) key. Printing settings can be selected in this screen before printing. The settings that were in effect when the file was saved appear initially.
-
Page 176: Batch Printing
CALLING UP AND USING A FILE ■ Batch printing All files in a folder that have the same user name and password can be printed at once. Touch the [BATCH P.] key in the file list If a password has been established, touch screen of document filing mode. - Page 177 CALLING UP AND USING A FILE Touch the [OK] key. Touch the [PRINT AND DELETE THE DATA] key or the [PRINT AND SAVE THE DATA] key. CANCEL [PRINT DELETE THE DATA] key PRINT AND DELETE THE DATA is touched, the files will be automatically deleted PRINT AND SAVE THE DATA after printing.
- Page 178 CALLING UP AND USING A FILE ■ [Send] A saved file can be transmitted by Scan to E-mail, Scan to FTP, Scan to Network Folder, fax, or Internet fax. These transmission methods require installation of the appropriate options. The following screen appears when the [SEND] key is touched. Select the destination and other settings required for transmission and then touch the [SEND] ( ) key to transmit the file.
- Page 179 CALLING UP AND USING A FILE [SEND SETTINGS] key [SUB ADDRESS] key or [ADDRESS ENTRY] key ● Touch this key to directly enter the destination for The [SEND SETTINGS] key is displayed in scanner mode and in Internet fax mode. a Scan to E-mail, Scan to FTP, Scan to Network Touch this key to set the subject and file name.
- Page 180 CALLING UP AND USING A FILE ■ [Move] ■ [Delete] This operation is used to move a file to a different This operation is used to delete the selected file. Touch the [DELETE] key in the operation select folder. screen. A message asking you to confirm the The following screen appears when the [MOVE] deletion will appear.
- Page 181 CALLING UP AND USING A FILE ■ Calling up and manipulating a file from the job status screen Files saved using the "FILE" and "QUICK FILE" functions appear as keys in the finished job status screen. You can view information on a file that appears in this screen and manipulate the file. Press the [JOB STATUS] key.
-
Page 182: System Settings
SYSTEM SETTINGS Creating, editing, and deleting user names and folders This section explains how to create, edit, and delete user names and custom folders for saving files with the document filing function. User names and custom folders are created and edited at the operation panel of the machine or in the Web page. -
Page 183: Programming A User Name
SYSTEM SETTINGS ■ Programming a user name To program a user name, follow steps 1 and 2 on page 7-24, touch the [USER NAME REGISTRATION] key in step 3, and then follow these steps: Touch the [USER NAME] key. If you wish to specify a folder for the user name, touch the [STORED TO:] key. -
Page 184: Numeric Keys
SYSTEM SETTINGS ■ Editing and deleting a user name To edit or delete a user name, follow steps 1 and 2 on page 7-24 and then follow these steps: Touch the [AMEND/DELETE USER NAME] [Editing] key. Touch the key of each item that you wish to edit (edit as explained in steps 1 to 9 in "Programming a user name"... - Page 185 SYSTEM SETTINGS ■ Creating a custom folder Up to 500 custom folders can be created. When no further folders can be created, delete unneeded folders (page 7-28) and then create a new folder. A password can be omitted when creating a folder. To create a custom folder, follow steps 1 and 2 on page 7-24, touch the [CUSTOM FOLDER REGISTRATION] key in step 3, and then follow the steps below.
- Page 186 SYSTEM SETTINGS Touch the [OK] key. To exit, touch the [EXIT] key. To create another folder, touch the [NEXT] key. If you touched the [EXIT] key, you will return to the screen of step 3 on page NEXT EXIT 7-24. If you touched the [NEXT] key, a new folder screen will...
-
Page 187: Entering Characters
To enter or edit characters in setting screens such as auto dial key programming screens, follow the steps below. Characters that can be entered are alphabetical characters, special characters, numbers, and symbols. ■ Entering alphabetical characters (Example: Sharp äÄ) Touch the [S] key. Touch the [ ÃÄÂ/ãäâ] key. - Page 188 ENTERING CHARACTERS ■ Entering numbers and symbols Touch the [AB/ab 12#$%] key. When have finished entering characters, touch the [OK] key. 1&1 When the characters "12#$%" are highlighted, You will exit the character entry screen and return number/symbol entry mode is selected. to the programming screen.
-
Page 189: Troubleshooting
TROUBLESHOOTING This section explains problems frequently encountered when using the document filing function. If you experience any difficulty, refer to the following table. For information on general machine problems, printer problems, fax problems, and network scanner problems, please see the troubleshooting sections of the appropriate manuals. Problem Check Cause and solution... - Page 191 CHAPTER 8 SPECIFICATIONS This chapter contains useful information about the machine. Page SPECIFICATIONS................... 8-2 INDEX ..................... 8-4...
- Page 192 120 seconds or less First-copy time MX-M550U/MX-M620U/MX-M550N/MX-M620N 4.0 seconds or less* MX-M700U/MX-M700N 3.5 seconds or less* * When A4 (8-1/2" x 11") size paper is fed horizontally from tray1 Copy ratio Variable: 25 to 400% in 1% increments, total 376 steps...
- Page 193 SPECIFICATIONS Continuous copying speed (when the offset function is not used) MX-M550U/MX-M550N MX-M620U/MX-M620N MX-M700U/MX-M700N Copy paper size 100% / Reduced / Enlarged A3 (11" x 17") 30 copies/min. 34 copies/min. 39 copies/min. B4 (8-1/2" x 14") 35 copies/min. 39 copies/min.
- Page 194 INDEX ] key..............1-13 Calling up and using a saved file......7-15 [#/P] key ............... 1-13 -Delete............... 7-22 -Detail..............7-22 ■ Numerics -Move ..............7-22 -Print..............7-17 1-sided copy ..........4-7, 4-11 -Property change ..........7-21 1-sided copy-Automatic document feeder ....4-7 -Send..............
- Page 195 INDEX Examples of covers and inserts ....5-17 to 5-22 Loading paper ............2-2 -Covers..........5-18 to 5-21 -bypass tray ............2-10 -Inserts .............. 5-22 -tray 1 - tray 2 ............2-2 External account module......1-12, 3-20 -tray 3 ..............2-5 -tray 5 ............
- Page 196 -Inserter............. 3-14 Setting the paper type ......2-14 to 2-16 -Interior.............. 1-11 Sharing..............7-3 -Operation panel ....... 1-13, 3-15, 7-4 Sharp OSA ............3-19 -Trays..............2-2 Sort............1-3, 3-4, 4-9 Password..............7-8 [SORT] key ............. 3-6 Peripheral devices ........1-10, 1-12 Special modes (Copier operation)......
- Page 197 INDEX Troubleshooting -Copier operation ..........6-3 -Document filing function........7-31 -Finisher/saddle stitch finisher......3-13 -General information ......2-32 to 2-34 -Inserter............. 3-18 Types and sizes of paper ......2-12 to 2-13 Types and sizes of paper that can be used ..2-12 ■...
- Page 199 The wire which is coloured BROWN must be connected to the terminal which is marked with the letter L or coloured red. If you have any doubt, consult a qualified electrician. WARNING: THIS APPARATUS MUST BE EARTHED. ➣➢➣➢➣➢➣➢➣➢➣➢➣➢➣➢➣➢➣➢➣➢➣➢➣➢➣➢➣➢➣➢➣➢➣➢➣➢➣➢➣➢➣➢➣➢➣➢➣➢➣➢ SHARP ELECTRONICS (Europe) GmbH Sonninstraße 3, D-20097 Hamburg...
- Page 200 PRINTED IN FRANCE TINSE3587GHZZ...
Need help?
Do you have a question about the MX-M700U and is the answer not in the manual?
Questions and answers