
Related Manuals for Rigol DG2052


Summary of Contents for Rigol DG2052
- Page 1 User Guide DG2000 Series Function/Arbitrary Waveform Generator Dec. 2020 RIGOL TECHNOLOGIES CO., LTD.
- Page 3 Notices RIGOL products are covered by P.R.C. and foreign patents, issued and pending. ⚫ RIGOL reserves the right to modify or change parts of or all the specifications ⚫ and pricing policies at the company’s sole decision. Information in this publication replaces all previously released materials.
-
Page 4: Safety Requirement
RIGOL Safety Requirement General Safety Summary Please review the following safety precautions carefully before putting the instrument into operation so as to avoid any personal injury or damage to the instrument and any product connected to it. To prevent potential hazards, please follow the instructions specified in this manual to use the instrument properly. - Page 5 Do Not Operate with Suspected Failures. If you suspect that any damage may occur to the instrument, have it inspected by RIGOL authorized personnel before further operations. Any maintenance, adjustment or replacement especially to circuits or accessories must be performed by RIGOL authorized personnel.
-
Page 6: Safety Notices And Symbols
RIGOL Safety Notices and Symbols Safety Notices in this Manual: WARNING Indicates a potentially hazardous situation or practice which, if not avoided, will result in serious injury or death. CAUTION Indicates a potentially hazardous situation or practice which, if not avoided, could result in damage to the product or loss of important data. -
Page 7: Care And Cleaning
RIGOL Care and Cleaning Care Do not store or leave the instrument where it may be exposed to direct sunlight for long periods of time. Cleaning Clean the instrument regularly according to its operating conditions. Disconnect the instrument from all power sources. -
Page 8: Dg2000 Series Function/Arbitrary Waveform Generator Overview
RIGOL DG2000 Series Function/Arbitrary Waveform Generator Overview As a multi-functional signal generator, DG2000 series function/arbitrary waveform generator integrates many instruments into 1, such as function generator, arbitrary waveform generator, noise generator, pulse generator, harmonic generator, analog/digital modulator, and frequency counter. As a multi-functional and portable instrument, it offers you a new choice in education, R&D, production, measurement,... -
Page 9: Document Overview
DG2000 series function/arbitrary waveform generator includes the following models. This manual takes DG2102 as an example to illustrate the operation methods of the DG2000 series. Model No. of Channels Max. Output Frequency DG2052 50 MHz DG2072 70 MHz DG2102 100 MHz... - Page 10 Manuals of this Product The manuals of this product mainly include the quick guide, user guide, programming guide, data sheet, and etc. For the latest version of this manual, download it from the official website of RIGOL (www.rigol.com). VIII DG2000 User Guide...
-
Page 11: Table Of Contents
Contents RIGOL Contents Guaranty and Declaration ................ 1 Safety Requirement ................II General Safety Summary ................II Safety Notices and Symbols ..............IV Care and Cleaning ..................V Environmental Considerations ..............V DG2000 Series Function/Arbitrary Waveform Generator Overview ..VI Document Overview ................ - Page 12 Contents RIGOL To Set Fundamental Waveform Parameters ........2-24 To Select Harmonic Type ..............2-24 To Set Harmonic Order ..............2-24 To Select Harmonic Amplitude ............2-25 To Set Harmonic Phase ..............2-25 Example: To Output Harmonic ............2-25 DC ...................... 2-28 To Output Dual-tone Waveform .............
- Page 13 Contents RIGOL File Operation ................2-75 Seamless Interconnection with Oscilloscope ........2-79 Channel Setting ..................2-81 Output Setting ................2-81 Sync Setting .................. 2-83 Coupling Setting ................2-85 Waveform Combination ..............2-89 Common Settings ................. 2-90 System Setting ................2-90 Interface ..................
-
Page 15: Chapter 1 Quick Start
Chapter 1 Quick Guide RIGOL Chapter 1 Quick Start This chapter briefly introduces the appearance and dimensions of DG2000 series function/arbitrary waveform generator, its front/rear panel, and user interface. Contents in this chapter: General Inspection ◼ Appearance and Dimensions ◼... -
Page 16: General Inspection
The consigner or carrier shall be liable for the damage to the instrument resulting from shipment. RIGOL would not be responsible for free maintenance/rework or replacement of the instrument. 2. Inspect the instrument In case of any mechanical damage, missing parts, or failure in passing the electrical and mechanical tests, contact your RIGOL sales representative. -
Page 17: Appearance And Dimensions
Chapter 1 Quick Guide RIGOL Appearance and Dimensions Front View Unit: mm Side View Unit: mm DG2000 User Guide... -
Page 18: Front Panel Overview
USB storage device in the format of an image (*.Bmp). TMC DS: seamlessly interconnects with the RIGOL DS that meets the TMC ⚫ standard. Reads and stores the waveform data collected by the DS and rebuilds waveforms without distortion. - Page 19 Chapter 1 Quick Guide RIGOL 5. Channel Control Area It is used to control the output of CH1. — Press this key to enable the output of CH1, the backlight turns on. At this time, the [CH1] connector outputs the waveforms according to the current configuration of CH1.
- Page 20 Chapter 1 Quick Guide RIGOL move the cursor down (clockwise) or up (counterclockwise). — It can be used to increase (clockwise) or decrease (counterclockwise) the value marked by the cursor when you use the knob to set the parameters (pressing down the knob can enter the editing mode). Press down the knob again to exit the editing mode.
- Page 21 Chapter 1 Quick Guide RIGOL Sine Outputs Sine waveform. When you select the function, you can set Freq/Period, Ampl/HiLevel, Offset/LoLevel and Start Phase of sine waveform. Preset Restores the instrument to its preset state. At most 10 states can be preset.
- Page 22 Chapter 1 Quick Guide RIGOL Store Stores or recalls the instrument state or the user-defined arbitrary waveform data. The instrument has a non-volatile memory (Disk C), and a USB storage device (Disk D) can be externally connected to the instrument.
-
Page 23: Rear Panel Overview
Chapter 1 Quick Guide RIGOL Rear Panel Overview Figure 1-2 Rear Panel 1. [10MHz In/Out] BNC female connector, with 50 Ω nominal impedance. Its function is determined by the clock type used by the instrument. 1) When internal clock source is selected, this connector (as 10MHz Out) outputs the 10 MHz clock signal generated by the internal crystal oscillator inside the generator. - Page 24 Chapter 1 Quick Guide RIGOL 3) FSK When ASK, FSK, or PSK of CH1 is enabled and external modulation source is selected, this connector receives an external modulation signal whose polarity can be set by users. Its input impedance is 1000 Ω. For details, refer to descriptions in "Modulation".
- Page 25 Chapter 1 Quick Guide RIGOL 45-440 Hz) or (100-240 V, 45-65 Hz), and its maximum input power shall not exceed 30 W. The specification of the fuse is 250 Vac, T4.0 A. 6. LAN Connects the signal source to the network through this LAN interface to realize remote control over the instrument.
-
Page 26: To Prepare For Use
Chapter 1 Quick Guide RIGOL To Prepare for Use To Connect to AC Power Please use the power cord provided in the accessories to connect the signal generator to the AC power source, as shown in the figure below. The rated AC power source supported by the signal generator is (100-127 V, 45-440Hz) or (100-240 V, 45-65Hz), and its maximum input power shall not exceed 30 W. -
Page 27: User Interface
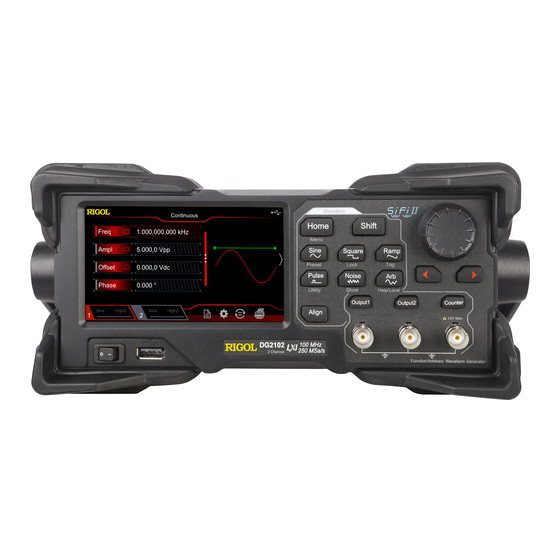
Chapter 1 Quick Guide RIGOL User Interface The DG2000 user interface is shown in the following figure. Figure 1-1 User Interface 1. Channel Output Configuration Status Bar Displays the current output configuration of the channel. Selected Waveform: Sine/Square/Ramp/Pulse/Noise/Prbs/Dualtone/Harm /Rs232/DC/Arb/Sequence Modulation Type:... - Page 28 Chapter 1 Quick Guide RIGOL 2. Up and Down Scroll Bar Prompts you to move up and down with your fingers on the screen to view and set parameters. 3. Information Setting : opens the Store interface. : opens the Utility interface.
- Page 29 Chapter 1 Quick Guide RIGOL 11. Phase Displays the phase of the current waveform of each channel. Tap the Phase parameter input field to modify the parameter with the pop-up numeric keypad. You can also use the arrow keys and the knob to modify the parameter.
-
Page 30: To Use The Built-In Help System
Chapter 1 Quick Guide RIGOL To Use the Built-in Help System DG2000 series provides the help information for each front-panel function menu and the current display interface. You can view the help information if you have any questions during the operation process. -
Page 31: Chapter 2 Front Panel Operations
Chapter 2 Front Panel Operations RIGOL Chapter 2 Front Panel Operations Introduces the main functions and operation methods of DG2000. Contents in this chapter: To Output Basic Waveform ◼ To Output the Arbitrary Waveform ◼ To Output Harmonic ◼ ◼... -
Page 32: To Output Basic Waveform
Chapter 2 Front Panel Operations RIGOL To Output Basic Waveform DG2000 series can output basic waveforms (including Sine, Square, Ramp, Pulse, and Noise) from one channel or from both two channels at the same time. At start-up, the dual channels are configured to output a sine waveform with 1 kHz frequency and 5 Vpp amplitude by default. -
Page 33: To Select Basic Waveform
Chapter 2 Front Panel Operations RIGOL To Select Basic Waveform DG2000 can output 5 basic waveforms, including Sine, Square, Ramp, Pulse and Noise. Press the Shift key and its backlight turns on. Then press Home/Menu on the front panel, then tap the touch screen to select the desired waveform. You can also press the waveform function key on the front panel to directly select the desired waveform. -
Page 34: To Set Frequency/Period
Square Ramp Pulse Noise (-3 dB) 1 μHz to 1 μHz to 1 μHz to 1 μHz to 100 MHz DG2052 50 MHz 15 MHz 1.5 MHz 15 MHz Bandwidth 1 μHz to 1 μHz to 1 μHz to 1 μHz to... -
Page 35: To Set Amplitude/High Level
Chapter 2 Front Panel Operations RIGOL To Set Amplitude/High Level The amplitude setting range is limited by the "Impedance" and "Freq/Period" settings. By default, it is 5 Vpp. The amplitude displayed on the screen is the default value or the amplitude previously set. - Page 36 Chapter 2 Front Panel Operations RIGOL According to the figure above, the conversion relation between Vpp and Vrms fulfills the following equation: Vpp = Vrms For example, if the current amplitude is 5 Vpp, input a decimal point in the numeric keypad, and then select a unit Vrms.
-
Page 37: To Set Offset/Low Level
Chapter 2 Front Panel Operations RIGOL To Set Offset/Low Level The DC offset setting range is limited by the "Impedance" and "Amplitude/High Level" settings. The default value is 0 V The DC offset voltage displayed on the screen is the default value or the offset previously set. -
Page 38: To Set Start Phase
Chapter 2 Front Panel Operations RIGOL To Set Start Phase The setting range of start phase is from 0° to 360°. The default is 0°. The start phase displayed on the screen is the default value or the phase previously set. -
Page 39: To Set Duty Cycle (Square)
Chapter 2 Front Panel Operations RIGOL To Set Duty Cycle (Square) Duty cycle is defined as the percentage that the high level takes up in the whole period (as shown in the figure below). This parameter is only available when Square or Pulse is selected. -
Page 40: To Set Symmetry (Ramp)
Chapter 2 Front Panel Operations RIGOL To Set Symmetry (Ramp) Symmetry is defined as the percentage that the rising period of the ramp takes up in the whole period (as shown in the figure below). This parameter is only available when Ramp is selected. -
Page 41: To Set Pulse Width/Duty Cycle (Pulse)
Chapter 2 Front Panel Operations RIGOL To Set Pulse Width/Duty Cycle (Pulse) Pulse width is defined as the time from the 50% threshold of a pulse's rising edge to the 50% threshold of the next falling edge (as shown in the figure below). -
Page 42: To Set Rising/Falling Edge (Pulse)
Chapter 2 Front Panel Operations RIGOL To Set Rising/Falling Edge (Pulse) The rising edge time is defined as the duration of the pulse amplitude rising from 10% to 90% threshold, while falling edge time is defined as the duration of the pulse amplitude moving down from 90% to 10% threshold (as shown in the figure below). -
Page 43: To Enable Channel Output
Chapter 2 Front Panel Operations RIGOL To Enable Channel Output After configuring the parameters of the waveform selected, enable the channel to output the waveforms. Before enabling channel output, you can also tap then tap the corresponding menu label in the channel setting interface to set the parameters related with the channel output. -
Page 44: Align Phase
Chapter 2 Front Panel Operations RIGOL Align Phase DG2000 series dual-channel function/arbitrary waveform generator enables you to align the phases of the two channels. Press Align on the front panel, then the instrument will re-configure the two channels and enable the generator to output with specified frequency and start phase. -
Page 45: Example: To Output Sine
Chapter 2 Front Panel Operations RIGOL Example: To Output Sine This section mainly introduces how to output Sine waveforms (frequency 20 kHz, amplitude 2.5 Vpp, offset 500 mV , start phase 90°) from the [CH1] connector. 1. Select the output channel: Press Output1 on the front panel or tap the channel output configuration status bar to select CH1. - Page 46 Chapter 2 Front Panel Operations RIGOL Figure 2-3 Sine Waveform 2-16 DG2000 User Guide...
-
Page 47: To Output The Arbitrary Waveform
Chapter 2 Front Panel Operations RIGOL To Output the Arbitrary Waveform DG2000 can output built-in waveforms from a single channel or from two channels at the same time. The 160 kinds of built-in arbitrary waveforms are stored in the internal non-volatile memory. - Page 48 Chapter 2 Front Panel Operations RIGOL Built-in Waveform DG2000 has 160 built-in arbitrary waveforms, as shown in Table 2-2. In the arbitrary waveform selection interface, tap the Engineering, Medical, AutoElec, or Maths menu label to select the corresponding type. Tap or rotate the knob (pressing the right arrow key will locate the cursor to the right of the interface) to select the desired waveform (the selected waveform is highlighted).
- Page 49 Chapter 2 Front Panel Operations RIGOL Chshev1 Chebyshev1 filter Chshev2 Chebyshev2 filter TV signal Voice Voice signal Surge Surge signal Radar Radar signal DualTone Dual-tone signal Ripple Power ripple Quake Analog quake waveform Gamma Gamma signal StepResp Step-response signal BandLim...
- Page 50 Chapter 2 Front Panel Operations RIGOL ECG15 Electrocardiogram 15 Waveform of the low frequency pulse LFPulse electrotherapy Waveform 1 of the nerve stimulation Tens1 electrotherapy Waveform 2 of the nerve stimulation Tens2 electrotherapy Waveform 3 of the nerve stimulation Tens3...
- Page 51 Chapter 2 Front Panel Operations RIGOL HavSin HaverSine function Laguerre 4-times Laguerre polynomial Legend 5-times Legend polynomial Versiera Versiera ARB_X2 Square function Gaussian distribution or normal Gauss distribution Weibull Weibull distribution LogNorm Logarithmic normal distribution Laplace Laplace distribution Maxwell Maxwell distribution...
-
Page 52: To Set Parameters
Chapter 2 Front Panel Operations RIGOL ASecCon Concave arc secant ASecPro Protuberant arc secant ASecH Arc hyperbolic secant ASin Arc Sinc ASinH Arc hyperbolic sine ATan Arc tangent ATanH Arc hyperbolic tangent Bartlett Bartlett window BarWin Modified Bartlett-Hann window Blkman... -
Page 53: To Output Harmonic
Chapter 2 Front Panel Operations RIGOL To Output Harmonic DG2000 can be used as a harmonic generator to output harmonic with specified order, amplitude and phase. It is usually used in the test of harmonic detector device or harmonic filter device. This section introduces how to configure the generator to output harmonic. -
Page 54: To Set Fundamental Waveform Parameters
Chapter 2 Front Panel Operations RIGOL To Set Fundamental Waveform Parameters DG2000 allows users to set various fundamental waveform parameters such as frequency, period, amplitude, DC offset voltage, high level, low level, and start phase. It also supports align phase operation. To set the above fundamental waveform parameters, refer to descriptions in "To Output Basic Waveform". -
Page 55: To Select Harmonic Amplitude
Chapter 2 Front Panel Operations RIGOL frequency, an integer. The maximum is 8. ⚫ You can also use the arrow keys and the knob to set the parameter value: press down the knob to enter the editing mode, use the arrow keys to move the cursor to select the digit to be edited, and then rotate the knob to modify the value. - Page 56 Chapter 2 Front Panel Operations RIGOL 2. Set fundamental waveform parameters: In this example, various parameters of the fundamental waveform take the default values. You can also refer to descriptions in "To Output Basic Waveform" to set various fundamental waveform parameters such as frequency/period, amplitude/high level, offset/low level, and start phase.
- Page 57 Chapter 2 Front Panel Operations RIGOL Figure 2-5 Harmonic DG2000 User Guide 2-27...
- Page 58 Chapter 2 Front Panel Operations RIGOL DG2000 can output DC signal with amplitude range from -10 V to 10 V (HighZ) or from -5 V to 5 V (when the load is 50 Ω). The figure below shows a sketch of the DC signal.
-
Page 59: To Output Dual-Tone Waveform
Chapter 2 Front Panel Operations RIGOL To Output Dual-tone Waveform When the Shift key is illuminated, press Home/Menu → Continuous → "Dualtone" to enter the dual-tone signal parameter setting interface. Freq1/CentFreq: sets the output frequency/period of Signal 1 in the dual-tone signal. -
Page 60: To Output Advanced Waveform
Chapter 2 Front Panel Operations RIGOL To Output Advanced Waveform DG2000 provides three advanced waveforms: PRBS, RS232, and Sequence. Note: When one channel is set to one of the advanced waveforms, the other channel will automatically switch to the set advanced waveform from other waveform. -
Page 61: Rs232
Chapter 2 Front Panel Operations RIGOL RS232 In RS232 serial protocol, a character is transmitted as a frame of data. The frame consists of 1 start bit, 5-8 data bits, 0-1 check bit, and 1-2 stop bits. Its format diagram is as shown in the figure below. RS232 uses "Negative Logic", i.g. high level is logic "0"... -
Page 62: Sequence
Chapter 2 Front Panel Operations RIGOL Sequence You can self-define the sequence, and the edited waveforms can be stored in the internal or external memory of the instrument in "*.SEQ" format. When the Shift key is illuminated, press Home/Menu → Advanced →... - Page 63 Chapter 2 Front Panel Operations RIGOL 4. Offset/LowL: sets the output offset/low level of Sequence. 5. Phase: sets the output start phase of Sequence. 6. Edge Time: sets the edge time of Sequence. Please refer to "To Output Basic Waveform" to configure the parameters and output for the channel.
-
Page 64: Modulation
Chapter 2 Front Panel Operations RIGOL Modulation DG2000 can output modulated waveforms from a single channel or from dual channels at the same time. Modulation is the process of modifying certain parameters (e.g. amplitude, frequency, or phase) of the carrier waveform signal according to the changes of the modulating signal. - Page 65 Chapter 2 Front Panel Operations RIGOL different (the ranges are related to the instrument model that you are using and the currently selected carrier waveform). For all carrier waveform shapes, the default values are 1 kHz frequency, 5 Vpp amplitude, 0 Vdc offset, and 0° start phase.
- Page 66 Chapter 2 Front Panel Operations RIGOL Key Points: How to realize the intermodulation between dual channels? The following example takes the output signal of CH2 as the modulating waveform. Connect the CH2 output terminal to the rear-panel [CH1/Sync/Ext Mod/Trig/FSK] connector by using the dual BNC cable.
- Page 67 Chapter 2 Front Panel Operations RIGOL and double sideband suppressed carrier (DSSC) amplitude modulation. In the normal amplitude modulation, the modulated waveform contains carrier waveform components. Because carrier waveform components carry no information, the modulation is less efficient. In order to improve the modulation efficiency, the carrier waveform components are suppressed on the basis of the normal amplitude modulation.
-
Page 68: Frequency Modulation (Fm)
Chapter 2 Front Panel Operations RIGOL Frequency Modulation (FM) For frequency modulation (FM), the frequency of the carrier waveform varies with the instantaneous voltage of the modulating waveform. To Select FM Modulation When the Shift key is illuminated, press Home/Menu → Modulation → "FM" to enable the FM function. - Page 69 Chapter 2 Front Panel Operations RIGOL To Select Modulation Source DG2000 can receive modulating waveform from the internal or external modulation source. Tap the Source parameter selection field to select an "Internal" or "External" modulation source. 1. Internal Source When internal modulation source is selected, tap the Mod.Wave parameter selection field to select Sine, Square, Triangle, UpRamp, DnRamp, Noise, or Arb as modulating waveform.
- Page 70 Chapter 2 Front Panel Operations RIGOL The frequency deviation must be smaller than or equal to the carrier frequency. ⚫ The sum of frequency deviation and carrier frequency must be smaller than or ⚫ equal to the the upper limit of the current carrier frequency plus 1 kHz.
-
Page 71: Phase Modulation (Pm)
Chapter 2 Front Panel Operations RIGOL Phase Modulation (PM) For phase modulation (PM), the phase of the carrier waveform varies with the instantaneous voltage of the modulating waveform. To Select PM Modulation When the Shift key is illuminated, press Home/Menu → Modulation → "PM" to enable the PM function. - Page 72 Chapter 2 Front Panel Operations RIGOL Note: After the PM function is enabled, the start phase of the carrier waveform cannot be set. To Select Modulation Source DG2000 can receive modulating waveform from the internal or external modulation source. Tap the Source parameter selection field to select an "Internal" or "External"...
- Page 73 Chapter 2 Front Panel Operations RIGOL To Set Phase Deviation Phase deviation indicates the deviation of the modulating waveform phase from the carrier waveform phase. Tap the Phas.Dev parameter input field and use the numeric keypad to set the PM phase deviation.
-
Page 74: Amplitude Shift Keying (Ask)
Chapter 2 Front Panel Operations RIGOL Amplitude Shift Keying (ASK) When using ASK (Amplitude Shift Keying), you can configure the generator to "shift" its output amplitude between two preset amplitude values ("carrier amplitude" and "modulating amplitude"). To Select ASK Modulation When the Shift key is illuminated, press Home/Menu →... - Page 75 Chapter 2 Front Panel Operations RIGOL To Select Modulation Source Tap the Source parameter selection field to select an "Internal" or "External" modulation source. 1. Internal Source When the internal source is selected, the modulating waveform is set as a Square with 50% duty cycle.
- Page 76 Chapter 2 Front Panel Operations RIGOL To Set the Modulation Polarity Tap the Polarity parameter selection field to select "Positive" or "Negative" polarity of the modulating waveform to control the output amplitude. In the internal modulation, set the polarity to "Positive", and the generator will output an amplitude whichever is smaller between the carrier amplitude and modulating amplitude when the modulating waveform is a logic low level.
-
Page 77: Frequency Shift Keying (Fsk)
Chapter 2 Front Panel Operations RIGOL Frequency Shift Keying (FSK) When using FSK (Frequency Shift Keying), you can configure the generator to "shift" its output frequency between two preset frequency values ("carrier amplitude" and "hop frequency"). To Select FSK Modulation When the Shift key is illuminated, press Home/Menu →... - Page 78 Chapter 2 Front Panel Operations RIGOL To Select Modulation Source Tap the Source parameter selection field to select an "Internal" or "External" modulation source. 1. Internal Source When the internal source is selected, the modulating waveform is set as a Square with 50% duty cycle.
- Page 79 Chapter 2 Front Panel Operations RIGOL To Set the Modulation Polarity Tap the Polarity parameter selection field to select "Positive" or "Negative" polarity of the modulating waveform to control the output frequency. In the internal modulation, set the polarity to "Positive", and the generator will output the carrier frequency when the modulating waveform amplitude is a logic low level.
-
Page 80: Phase Shift Keying (Psk)
Chapter 2 Front Panel Operations RIGOL Phase Shift Keying (PSK) When using PSK (Phase Shift Keying), you can configure the generator to "shift" its output phase between two preset phase values ("carrier phase" and "modulating phase"). To Select PSK Modulation When the Shift key is illuminated, press Home/Menu →... - Page 81 Chapter 2 Front Panel Operations RIGOL To Select Modulation Source Tap the Source parameter selection field to select an "Internal" or "External" modulation source. 1. Internal Source When the internal source is selected, the modulating waveform is set as a Square with 50% duty cycle.
- Page 82 Chapter 2 Front Panel Operations RIGOL To Set Modulation Polarity Tap the Polarity parameter selection field to select "Positive" or "Negative" polarity of the modulating waveform to control the output phase. In the internal modulation, set the polarity to "Positive", and the generator will output the carrier phase when the modulating waveform amplitude is a logic low level.
-
Page 83: Pulse Width Modulation (Pwm)
Chapter 2 Front Panel Operations RIGOL Pulse Width Modulation (PWM) For PWM (Pulse Width Modulation), the pulse width of the carrier waveform varies with the instantaneous voltage of the modulating waveform. To Select PWM Modulation PWM can only be used to modulate pulse. To select PWM modulation, first select Pulse, when the Shift key is illuminated, press Home/Menu →... - Page 84 Chapter 2 Front Panel Operations RIGOL To Select Modulation Source Tap the Source parameter selection field to select an "Internal" or "External" modulation source. 1. Internal Source When internal modulation source is selected, tap the Mod.Wave parameter selection field to select Sine, Square, Triangle, UpRamp, DnRamp, Noise, or Arb as modulating waveform.
- Page 85 Chapter 2 Front Panel Operations RIGOL To Set Width/Duty Deviation If "Width" is currently selected in the pulse of the specified channel, "Width Dev" is displayed in the interface when the PWM modulation function is enabled; if the "Duty" is currently selected in the pulse of the specified channel, "Duty Dev" is displayed in the interface when the PWM modulation function is enabled.
-
Page 86: Sweep
Chapter 2 Front Panel Operations RIGOL Sweep DG2000 can output sweep waveforms from a single channel or from dual channels at the same time. In sweep mode, the generator outputs a signal variably from the start frequency to stop frequency within the specified sweep time. DG2000 supports linear, log, and step sweep modes;... - Page 87 Chapter 2 Front Panel Operations RIGOL Log Sweep In Log Sweep type, the output frequency of the instrument varies in a logarithmic fashion, that is, the output frequency changes in the way of "octave per second" or "decade per second". The variation is controlled by "Start Frequency", "Stop Frequency", and "Sweep Time".
-
Page 88: Sweep Time
Chapter 2 Front Panel Operations RIGOL the output frequency varies with a stepwise increase. At this point, tap to slide the screen or use the knob to page up or down. Tap the Step parameter input field and use the numeric keypad to set the step. You can also use the arrow keys and the knob to set the step. -
Page 89: Start Frequency And Stop Frequency
Chapter 2 Front Panel Operations RIGOL Start Frequency and Stop Frequency Start frequency and stop frequency are the upper and lower limits of the frequency for frequency sweep. The generator always sweeps from the start frequency to the stop frequency, and then returns back to the start frequency. -
Page 90: Sweep Trigger Source
Chapter 2 Front Panel Operations RIGOL Ramp: 1 μHz to 2 MHz Arb: 1 μHz to 25 MHz The range of the frequency span is affected by the center frequency. ⚫ Center frequency < : the range of the frequency span is ± 2× (center frequency –... -
Page 91: Marker Freq
Chapter 2 Front Panel Operations RIGOL 3. Manual Trigger In the Manual trigger, when the Shift key is illuminated, each time you press Ramp/Trig on the front panel, one sweep is immediately launched for the corresponding channel. Key Points: When "External" trigger is selected, tap the Trig In to select "RisEdge" or "FallEdge". -
Page 92: Start Hold
Chapter 2 Front Panel Operations RIGOL Start Hold Start hold is the duration that the output signal outputs with the "Start Frequency" after the sweep starts. After the start hold time expires, the generator will continue outputting with varied frequencies according to the current sweep type. -
Page 93: Burst
Chapter 2 Front Panel Operations RIGOL Burst DG2000 can output the waveforms with a specified number of cycles (Burst) from a single channel or from dual channels at the same time. DG2000 supports control of burst output by internal, manual or external trigger source; supports three kinds of burst types, including N cycle, Infinite, and Gated. - Page 94 Chapter 2 Front Panel Operations RIGOL Figure 2-11 N Cycle Burst For N cycle burst, "Internal", "External", or "Manual" trigger source could be selected. Besides, you can also set the parameters of "Period" (internal trigger), "Delay", "Trig In" (external trigger) and "Trig Out" (internal and manual trigger).
-
Page 95: Burst Delay
Chapter 2 Front Panel Operations RIGOL Gated Burst In Gated Burst Mode, the generator controls the waveform output according to the external signal level input from the rear-panel [CH1/Sync/Ext Mod/Trig/FSK] connector. When the Shift key is illuminated, press Home/Menu → Burst → "Gated" to enable the gated burst. -
Page 96: Burst Period
Chapter 2 Front Panel Operations RIGOL Burst Period Burst period is only available for N cycle burst in the internal trigger. It is defined as the time from the start of a burst to the time when the next burst starts. -
Page 97: Burst Trigger Source
Chapter 2 Front Panel Operations RIGOL Tap the User menu label, and input the desired value by using the numeric keypad. You can also use the arrow keys and the knob to input a desired value. Its range is from 0 to 65535. -
Page 98: Gated Polarity
Chapter 2 Front Panel Operations RIGOL Gated Polarity Gated polarity is only available in gated burst mode. The instrument outputs the burst when the gated signal on the rear-panel [CH1/Sync/Ext Mod/Trig/FSK] connector is "High Level" or "Low Level". When the Shift key is illuminated, press Home/Menu → Burst → "Gated" to enable the gated burst. -
Page 99: Frequency Counter
Chapter 2 Front Panel Operations RIGOL Frequency Counter DG2000 provides a frequency counter which can measure various parameters (e.g. frequency, period, duty cycle, positive pulse width, and negative pulse width) of the external input signal and make statistics of measurement results. When the... -
Page 100: To Set The Frequency Counter
Chapter 2 Front Panel Operations RIGOL To Set the Frequency Counter 1. Gate Time Tap the GateTime parameter selection field to select the gate time for the measurement system. The default is "100ms". When "Auto" is selected, the instrument will select an appropriate gate time automatically according to the characteristics of the signal to be measured. - Page 101 Chapter 2 Front Panel Operations RIGOL (1) To Clear the Statistics Results Tap the "Clear" menu label, and the signal generator clears the current statistics results. (2) Operating Status Tap the Status parameter selection field to select the running status of the frequency counter.
- Page 102 Chapter 2 Front Panel Operations RIGOL 7. High Frequency Rejection High frequency rejection can be used to filter out the high-frequency components and improve the measurement accuracy in low-frequency signal measurement. Tap the High Freq Rejection parameter selection field to enable or disable the high frequency rejection function.
-
Page 103: Store And Recall
DG2000 can store the current instrument state and user-defined Sequence waveforms in the internal or external memory. You can recall them when needed. DG2000 can also seamlessly interconnect with RIGOL's oscilloscopes that support USB-TMC; rebuild and output the waveform data collected by the oscilloscope losslessly. -
Page 104: File Type
Chapter 2 Front Panel Operations RIGOL input interface. If other characters are used to name the file, the name might not be normally displayed in the store and recall interface. File Type The file types supported by DG2000 include State File, Arb File, Csv File, and Bmp File. -
Page 105: File Operation
Chapter 2 Front Panel Operations RIGOL You can also use the Left arrow key to locate the cursor to the left side of the user interface, and then rotate the knob to select the "Arb File" or the "State File"... - Page 106 Chapter 2 Front Panel Operations RIGOL 3. To Input a Filename The length of the filename is limited to 7 characters. Input English Letters: ⚫ in the filename input interface to select English input method (EN is highlighted). Tap to switch between the upper-case and lower-case letters.
- Page 107 Chapter 2 Front Panel Operations RIGOL Filename Input Area Pinyin Input Area Chinese Character Display Area Figure 2-21 Filename Input Interface (Chinese) Tap the desired character, and the selected character will be displayed in the Pinyin input area. After inputting the Pinyin for a Chinese character, tap...
- Page 108 Chapter 2 Front Panel Operations RIGOL only be read when you self-define splash screen. 3. Read a file Press Read, and the generator will read the currently selected file and display the corresponding prompt message when the file is read successfully.
-
Page 109: Seamless Interconnection With Oscilloscope
Chapter 2 Front Panel Operations RIGOL Seamless Interconnection with Oscilloscope DG2000 can also seamlessly interconnect with RIGOL's oscilloscopes that support USB-TMC; rebuild and output the waveform data collected by the oscilloscope losslessly. The connection method between the instruments is as shown in the figure below. - Page 110 Chapter 2 Front Panel Operations RIGOL is set to "Ram Data"), and its available choices include "Head Pos", "Trig Pos", and "Tail Pos". Tap or use the knob to select the channel to be read, and then set the parameters of the corresponding channel. Tap Read. At this time, DS1 will enter the "Stop"...
-
Page 111: Channel Setting
Chapter 2 Front Panel Operations RIGOL Channel Setting The function and setting methods of CH2 are the same as that of CH1. This section takes CH1 as an example to introduce the channel setting method. To set the CH2 channel output parameters, select CH2 (refer to "To Select Output Channel") and then set the channel according to the descriptions in this section. - Page 112 Chapter 2 Front Panel Operations RIGOL Note: When the waveform is inverted, the sync signal related to the waveform is not inverted. To set the invert of the sync signal, tap SyncSet → Polarity to select "Negative". 3. Output Impedance The output impedance setting affects the output amplitude and DC offset.
-
Page 113: Sync Setting
Chapter 2 Front Panel Operations RIGOL Sync Setting DG2000 can output the basic waveforms (except Noise and DC), arb waveforms, harmonics, sweep waveforms, burst waveforms, and the sync signal of the modulated waveforms from a single channel or the dual channels at the same time. - Page 114 Chapter 2 Front Panel Operations RIGOL is (the basic waveform frequency÷ 2 ). Wherein, n represents the frequency dividing coefficient and it is 1 when the frequency of the basic waveform is greater than 30 MHz and less than or equal to 60 MHz.
-
Page 115: Coupling Setting
Chapter 2 Front Panel Operations RIGOL this marker frequency. When external trigger source is selected: The terminal is used to receive the external trigger signal, and there is no sync signal output. 6. Burst Waveform When the internal or manual trigger source is selected: Infinite burst: the sync signal is the same as that of the basic ⚫... - Page 116 Chapter 2 Front Panel Operations RIGOL desired value by using the numeric keypad, the arrow keys, or the knob. Freq Deviation: indicates the frequency deviation between CH1 and CH2. ⚫ The relations among the parameters are as follows: F (take CH1 as the reference source);...
- Page 117 Chapter 2 Front Panel Operations RIGOL Then, tap the Phase Dev or Phase Ratio parameter input field to input the desired value by using the numeric keypad. Phase Deviation: indicates the phase deviation between CH1 and CH2. The ⚫ relations among the parameters are as follows: P (take CH1 as the reference source);...
- Page 118 Chapter 2 Front Panel Operations RIGOL Figure 2-24 Channel Coupling Key Points: Channel coupling is only available when both the waveforms of the two ⚫ channels are basic waveforms (Sine, Square, Ramp, or Arbitrary waveform). The generator will adjust the frequency, phase, or amplitude of the channel to ⚫...
-
Page 119: Waveform Combination
Chapter 2 Front Panel Operations RIGOL outputs the inverted signal of the output signal of CH1 (if channels are currently enabled). Off: disables the track function. This is the default state. ⚫ Note: When the track function is enabled, the coupling function is disabled. -
Page 120: Common Settings
Chapter 2 Front Panel Operations RIGOL Common Settings When the Shift key is illuminated, press Pulse/Utility on the front panel or tap the icon in the information setting area at the lower-right corner of the user interface to open the following operation interface. The interface displays the system parameters of the currently selected channel. - Page 121 Chapter 2 Front Panel Operations RIGOL Clock Source DG2000 provides an internal 10MHz clock source and receives the external clock source from the rear-panel [10MHz In/Out] connector. It can also output clock source from the [10MHz In/Out] connector for other devices.
-
Page 122: Interface
Chapter 2 Front Panel Operations RIGOL Decimal Point When the Shift key is illuminated, press Pulse/Utility → System Setting → Decimal to set the display format of the decimal point in the number parameter. It can be set to a decimal "." or a comma ",". By default, it is a decimal ".". This setting is stored in non-volatile memory and will not be affected by the "restore to defaults"... - Page 123 Chapter 2 Front Panel Operations RIGOL then use the numeric keypad to set the GPIB address to any value ranging from 0 to 30. The default is "2". The selected address is stored in the non-volatile memory. To Set the LAN Parameters When the Shift key is illuminated, press Pulse/Utility →...
- Page 124 Chapter 2 Front Panel Operations RIGOL In Auto IP mode, the generator acquires IP address within the range from ⚫ 169.254.0.1 to 169.254.255.254, and gets the subnet mask 255.255.0.0 automatically according to the current network configuration. Tap the AutoIP parameter selection field to select "On" or "Off" to turn the ⚫...
- Page 125 Chapter 2 Front Panel Operations RIGOL To Set the Subnet Mask In ManualIP mode, the subnet mask can be manually set. The format of the subnet mask is nnn.nnn.nnn.nnn. Wherein, the range of "nnn" ⚫ is from 0 to 255. You are recommended to ask your network administrator for a subnet mask available.
-
Page 126: System Info
Chapter 2 Front Panel Operations RIGOL Apply Tap Apply to apply the currently set network parameters. System Info When the Shift key is illuminated, press Pulse/Utility → System Info, and the model, serial number, and software version number of the current instrument are displayed in the system information interface. -
Page 127: Print Setting
Chapter 2 Front Panel Operations RIGOL Print Setting You can store the contents displayed on the screen in the external USB storage device in picture format. Insert a USB storage device into the USB HOST interface on the rear panel. -
Page 128: System Utility Function
Chapter 2 Front Panel Operations RIGOL System Utility Function To Restore Preset When the Shift key is illuminated, press Sine/Preset to restore the preset status interface, as shown in the figure below. Figure 2-27 Preset Status Restore Interface Factory: Tap the Def icon, then a dialog box is displayed, tap "Apply" to restore ⚫... - Page 129 Chapter 2 Front Panel Operations RIGOL Sync Polarity Negative Freq Cpl FreqCplMode Deviation Freq Dev 0 μHz Freq Ratio Ampl Cpl AmplCplMode Deviation Ampl Dev 0 Vpp Ampl Ratio Phase Cpl PhaseCplMode Deviation Phase Dev 0° Phase Ratio Trig Coupling...
- Page 130 Chapter 2 Front Panel Operations RIGOL PRBS Bit Rate 2 kbps PRBS Data PRBS7 RS232 Baud Rate 9600 RS232 Data Bits RS232 Stop Bits RS232 Parity Bit None RS232 Data Sequence Filter Interpolation Sequence Sample Rate 1 MSa/s Sequence Phase 0°...
- Page 131 Chapter 2 Front Panel Operations RIGOL Source Internal Mod.Wave Sine Mod.Freq 100 Hz Width Deviation 200 μs Duty Deviation Sweep Sweep Time Return Time 0 ms Start Freq 100 Hz Stop Freq 1 kHz Center Frequency 550 Hz Frequency Span...
-
Page 132: Channel Copy
Chapter 2 Front Panel Operations RIGOL Sensitivity Trig Level Coupling High Freq Rejection System Parameter System Setting Language* Determined by Factory Delivery Setting Power-on Default Clk Source Internal Beeper Decimal Delimiter Comma System Log DispSet Screen Saver Brightness* Print Setting... -
Page 133: To Lock The Keyboard
Chapter 2 Front Panel Operations RIGOL To Lock the Keyboard You can lock any key or all the keys on the front panel by using the keyboard lock command. 1. Keyboard Lock Command Introduction :SYSTem:KLOCk <key>,{ON|OFF|0|1} /*Locks or unlocks the specified key.*/ :SYSTem:KLOCk? <key>... -
Page 135: Chapter 3 Remote Control
For details about the SCPI commands and programming, refer to Programming Guide 2. PC software You can use the RIGOL PC software (Ultra Sigma) to send the SCPI commands to remotely control the instrument. This chapter will illustrate how to use the Ultra Sigma software to remotely control the signal generator (take DG2102 as an example) via the various interfaces. -
Page 136: Remote Control Via Usb
PC. You can also click to search the resources. 3. View the device resource The resources found will appear under the "RIGOL Online Resource" directory, and the model number and USB interface information of the instrument will also be displayed. - Page 137 Chapter 3 Remote Control RIGOL 4. View the device resource The resources found are shown under the "RIGOL Online Resource" directory. For example, DG2102 (TCPIP::172.16.3.82::INSTR). 5. Communication test Right-click the resource name "DG2102 (TCPIP::172.16.3.82::INSTR)" and select "SCPI Panel Control" to turn on the remote command control panel, through which you can send commands and read data.
-
Page 138: Remote Control Via Gpib
Chapter 3 Remote Control RIGOL Remote Control via GPIB 1. Connect the device Connect the generator to your computer by using a USB-GPIB interface converter. Note: Please make sure that a GPIB card has been installed to your PC. Connect the USB terminal of the USB-GPIB interface converter to the USB HOST interface on the rear panel of the generator. - Page 139 5. View the device resource Click to go back to the main interface of Ultra Sigma. The GPIB resources found will appear under the "RIGOL Online Resource" directory. For example, DG2102 (GPIB0::16::INSTR). 6. Communication test Right-click the resource name "DG2102 (GPIB0::16::INSTR)", and select "SCPI Panel Control"...
-
Page 141: Chapter 4 Troubleshooting
The commonly encountered failures of DG2000 and their solutions are listed below. If the following problems occur, locate and resolve the problems according to the following steps. If the problems still persist, contact RIGOL and provide your instrument information to us. (For instrument information, press Pulse/Utility →... - Page 142 After restarting the instrument, insert the USB storage device again to check whether it can work normally. If the USB storage device still cannot work normally, please contact RIGOL. 6. How do you set the amplitude of the waveform in dBm? Select the desired channel.
-
Page 143: Chapter 5 Appendix
Chapter 5 Appendix RIGOL Chapter 5 Appendix Appendix A: Accessories and Options Description Order No. DG2052 (50MHz, Dual-channel) DG2052 Model DG2072 (70MHz, Dual-channel) DG2072 DG2102 (100MHz, Dual-channel) DG2102 1 Power Cord conforming to the standard of the destination country Standard... -
Page 144: Appendix B: Warranty
If a product proves defective within the warranty period, RIGOL guarantees free replacement or repair for the defective product. To get repair service, please contact with your nearest RIGOL sales or service office. There is no other warranty, expressed or implied, except such as is expressly set forth herein or other applicable warranty card. -
Page 145: Index
Index RIGOL Index *.RAF ........2-74 Harmonic Phase ......2-25 *.RSF ........2-74 Harmonic Type ......2-24 Align Phase ......2-14 High Frequency Rejection ... 2-72 AM .......... 2-34 Idle Level ......... 2-66 Amplitude ........2-5 Infinite Burst ......2-64 Amplitude Coupling .... - Page 146 Index RIGOL VISA Address ......2-94 Width Deviation ......2-55 Waveform Combination ..... 2-89 DG2000 User Guide...
Need help?
Do you have a question about the DG2052 and is the answer not in the manual?
Questions and answers