Table of Contents
Advertisement
Quick Links
Advertisement
Table of Contents

Related Manuals for Formax FD 3200


Summary of Contents for Formax FD 3200
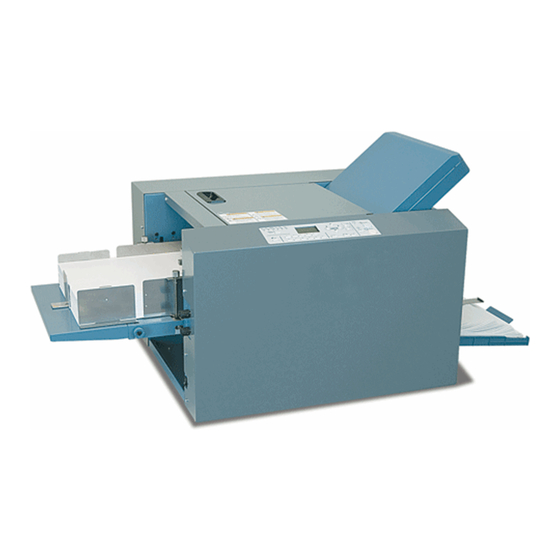
- Page 1 Formax FD 3200 Air- Suction Document Folder Instruction Manual...
- Page 2 FD 3200 Tabletop Air Feed Folder MyBinding.com 5500 NE Moore Court Hillsboro, OR 97124 Toll Free: 1-800-944-4573 OPERATOR MANUAL Local: 503-640-5920 8/2013...
- Page 3 Introduction Be sure to read this manual prior to using the product. After reading, leave the manual at the site of use for easy reference whenever questions related to the product arise in the future. Symbols In this manual, several symbols are used to indicate important warnings. Please make sure to read instructions accompanied by these symbols.
- Page 4 For North America Note: This equipment has been tested and found to comply with the limits for a Class B digital device, pursuant to Part 15 of the FCC Rules. These limits are designed to provide reasonable protection against harmful interference in a residential installation.
-
Page 5: Safety Precautions
Safety Precautions Safety Precautions In this manual, operations and handling of the unit which are hazardous are described using the following marks to prevent personal injury or property damage to the user and others. Ignoring this mark could result in the possibility of serious injury or even death. - Page 6 Safety Precautions Operating environment Operate this unit in the following environment. • where the temperature range is between 5 and 35°C/41 and 95°F (-10 to 50°C/14 to 122°F in storage) • where the humidity range is between 20 and 80% RH (10 to 90% RH in storage, however no condensation) •...
-
Page 7: Maintenance / Others
Safety Precautions Maintenance / others Do not damage the power cord or power plug. Do not scratch, alter, bend, twist, pull or place heavy objects on the power cord or power plug. This could result in damage, a ire or an electrical shock. Do not touch the power switch with wet hands. -
Page 8: Warning / Caution Labels
Safety Precautions WARNING / CAUTION labels "WARNING" and "CAUTION" labels are pasted on the machine to ensure user safety. Do not remove or change them. When the labels become dirty or are lost, be sure to contact your dealer for a new one. MyBinding.com 5500 NE Moore Court Hillsboro, OR 97124... -
Page 9: Table Of Contents
Contents Contents Safety Precautions ..........i Chapter 3 Power supply .................i Advanced Operation Operating environment ............ii Maintenance / others .............. iii 1. Correcting Folding Misalignment ..3-1 WARNING / CAUTION labels ..........iv 1-1. Adjustment the folding misalignment in the right and left direction .......... 3-1 Chapter 1 1-2. - Page 10 Contents Chapter 4 Cleaning the Unit Cleaning the folding roller and conveyance roller ................4-1 Cleaning the LCD ............. 4-2 Cleaning the belt ............. 4-3 Cleaning the sensor ..........4-4 Chapter 5 Trouble Guide 1. Error Code ..........5-1 1-1. Warning error ............
-
Page 11: Before Operation
Chapter 1 Before Operation Chapter1 Before Operation Features • This machine is a desktop paper folder. Standard folding of standard paper can be easily controlled and operated from the control panel. • This machine is designed to fold paper into six popular folds. Single fold Double fold Irregular... -
Page 12: Names And Functions Of Components
Chapter1 Before Operation Names and Functions of Components 2-1. External parts [14] [13] [12] [11] [10] Name Function Fold plate 1 Guide plate for deciding the paper folding position. (p.1-7) Control panel Use this panel to enter information to operate the machine Separating air adjustment For adjusting the separating air amount. -
Page 13: Internal Parts (Paper Feed Section)
Chapter1 Before Operation 2-2. Internal parts (paper feed section) Name Function Stack height sensor adjustment For adjusting the distance between the paper and suction belt. Suction belt Sucks and conveys paper. Separating-air duct Blows out air for separating paper stacked on the paper feed tray. Separator Prevents double-feed. -
Page 14: Internal Parts (Top Cover Section)
Chapter1 Before Operation 2-3. Internal parts (top cover section) Name Function Jam correction knob For rotating the folding rollers when paper has jammed inside the unit or when cleaning the unit. Folding roller These rollers are used to fold paper. This machine is equipped with four rollers to make six types of folds. -
Page 15: Internal Parts (Paper Ejection Section)
Chapter1 Before Operation 2-4. Internal parts (paper ejection section) Name Function Stacker roller lever This lever suppors the stacker roller. The height of the roller can be adjusted. Ejecting section For receiving folded paper ejected out. Power inlet Connector for the power cord. For stacking folded paper. -
Page 16: Accessories
Chapter1 Before Operation 2-5. Accessories [10] [11] Name Function Fold plate 1 Fold plate 2 Auxiliary paper output guide Auxiliary paper feed tray Trail edge guide unit Side guide unit Plate unit Scale label Instruction manual This manual [10] Power cord Applicable for 220 to 240 V [11] Power cord... -
Page 17: Names Of Control Panel
Chapter1 Before Operation Names of Control Panel [15] [14] [13] [12] [11] [10] Name Function LCD display Displays the menus or error messages. Used to change a value. On the top screen use the key to change processing speed and the key to raise or lower the paper feed tray. -
Page 18: Screen Descriptions
Chapter1 Before Operation Screen Descriptions 4-1. Top screen The top screen is a screen displayed irst when you turn on the power. +0.0/+0.0 Ready Information displayed Details Paper size Displays the detected paper size. [A3][A4][A5][B4][B5][B6]/ [LGR][LGL][LTR][INV][STMT] The following will be displayed when custom folding is set.(*: Memory number) [IR *] Set values are displayed when paper size is manually set. -
Page 19: Menu List
Chapter1 Before Operation 4-2. Menu list The function menu is displayed if you press the menu key with the top screen displayed. Press the menu key to change setting windows. The function screen can be switched with the key or key. - Page 20 Chapter1 Before Operation Item Details Other Setting Oper Mode [Normal] [Last Fold][Stopper Fixed] Default: [Normal] (Operation Mode Sets operations of folding stopper on the folding plates 1 and 2, Settings) when the power is turned on. [Normal] : Start up the machine in the normal setting state, when the power is turned on.
-
Page 21: Stopper Adjust Screen
Chapter1 Before Operation 4-3. Stopper adjust screen +0.0/ +0.0/+0.0 Screen Item Display Details Folding plate 1 stopper correction ** * : Settings (-5.0 to 5.0/-0.20 to 0.20) Folding plate 2 stopper correction 4-4. Operation on the menu screen The basic operation on the menu screen is as follows. Here how to open [Air Adjust] window is explained as an example. -
Page 22: Classiication Of Buzzer Sounds
: At the start of folding operation or end of normal folding operation In conirmation of change of various settings : An error such as a paper jam “piipii” : An error, contact Formax service technician for assistance “piipiipii” Paper Types and Sizes Paper type Fine quality paper, Rough paper, Stencil paper, Recycle paper : 52.3 to 157 g/m... -
Page 23: Handling Paper
Chapter1 Before Operation Handling Paper 6-1. Paper used • Make sure that the printing ink on the paper has dried completely prior to use. • Wet ink or ink that is not completely dried may stain the folding roller causing trouble such as smearing on paper. -
Page 24: Precautions On Stacking Paper
Chapter1 Before Operation 6-2. Precautions on stacking paper • Stack paper striking the leading edge of paper Shutter lightly at the shutter. If there is some clearance between the Striking leading edge of paper and shutter, the paper detecting sensor does not function Paper properly. - Page 25 Chapter1 Before Operation Workflow The lowchart below illustrates the low of basic operation. For details, refer to the text and relevant pages. (p.2-1) Turning on the power (p.2-2) Stacking paper (p.2-6) Selecting fold mode (p.2-6) Adjusting air (p.2-8) Checking the separating air adjustment knob (p.2-8) Checking the separator adjustment knob (p.2-8)
- Page 26 Memo Chapter1 Before Operation 1-16...
-
Page 27: Basic Operation
Chapter 2 Basic Operation Chapter 2 Basic Operation Turning On/Off the Power • Be sure to use the attached power cord. • Make sure that the power plug is connected to the wall socket. 1-1. Turning on the power Set the power switch to the “ I ” side. Do not touch the power switch with wet hands. -
Page 28: Stacking The Paper
Chapter 2 Basic Operation Stacking the Paper 2-1. Before stacking paper Checking the front/back,top/end of paper Check the “front/back” and “top/end” of paper when stacking paper on the paper feed tray. Check for folding misalignment, and check “front/back” and “top/end” of paper when checking the inished fold after test folding. - Page 29 Chapter 2 Basic Operation Adjust the paper feed guide to match the paper size. Set the paper feed guide in such a way that it touches the paper lightly. • Do not press the paper with the paper feed guides too strongly. Otherwise, paper feed errors such as mis-feed will occur.
- Page 30 Chapter 2 Basic Operation When processing long paper, use the plate unit and side guide unit. Range of paper length: A3 (LGR) or more, or back edge of paper is positioned at more than two-third of auxiliary paper feed tray. Set the plate unit onto the auxiliary paper feed tray.
-
Page 31: Standard Folding Of Standard Paper
Chapter 2 Basic Operation Standard Folding of Standard Paper Method to fold standard paper by setting a mode among standard folding modes displayed on the control panel. For the standard paper sizes, refer to Chapter 1 “5. Paper Types and Sizes” (p.1-12). Six standard folds are available as shown below. - Page 32 Chapter 2 Basic Operation Check the paper size display. +0.0/ Ready The paper size is not displayed if the paper feed guide is not positioned as speciied even though the size of standard paper is used. If not, reset the paper feed guide to a correct position.
- Page 33 Chapter 2 Basic Operation Set [Pickup Air] by following the same procedures as step 4 to 7. Setting range: 20 to 99 Refer to “Air Adjustment Table” for appropriate volume of [Pickup Air]. Press the key. Returns to the top screen. Also use the menu key to return to the top screen when [Air Adjust] is set in the idling state.
- Page 34 Chapter 2 Basic Operation Check that the separating air adjustment knob is set to [2]. • Larger settings increase and smaller settings decrease the amount of air. • Set the air volume to [4] to [5] as paper is heavy when handling large size paper. •...
- Page 35 Chapter 2 Basic Operation Press the key to set the +0.0/+0.0 processing speed. Ready The default of processing speed is [5]. Folding misalignment, etc. may occur depending on the paper used and folding mode. If so, lower the processing speed. When paper jam or abnormal folding occurs by using thin and limsy paper, adjust the processing (p.3-18) speed referring to “Thin paper mode”.
- Page 36 Chapter 2 Basic Operation Select the method of using the counter. • The counter can be used in two ways “Count +0.0/ +0.0/ Down” and “Count Up”. Ready Ready Count up : Press the clear key and set the counter to “0” to start operation.
-
Page 37: Storage Of Machine
Chapter 2 Basic Operation Storage of Machine Store the machine as follows, when it is not being used. Turn of the power switch. Do not touch the power switch with wet hands. Otherwise electric hazards may occur. Disconnect the power plug from the outlet. - Page 38 Chapter 2 Basic Operation Loosen the setting screws. Remove the auxiliary paper feed tray. 2-12...
-
Page 39: Advanced Operation
Chapter 3 Advanced Operation Chapter 3 Advanced Operation Correcting Folding Misalignment Folding misalignment consists of “folding misalignment along the sides of the paper” and “folding misalignment along the vertical length of the paper”. Other than this, “deformed folding” may also occur due to paper characteristics, etc. - Page 40 Chapter 3 Advanced Operation Remove the paper stacked on the paper feed tray. Adjustments cannot be made efectively by adjusting folding misalignment with skew correction knob when the leading edge of paper is in contact with the shutter. Rotate the skew correction knob and adjust. Rotate the skew correction knob by a quarter to half turn to adjust.
-
Page 41: Adjustment The Folding Misalignment In The Up And Down Direction
Chapter 3 Advanced Operation 1-2. Adjustment the folding misalignment in the up and down direction When the folded paper is misaligned along the vertical length, adjust the positions of the folding stopper of folding plates 1 and 2 to Ejection correct the misalignment. - Page 42 Chapter 3 Advanced Operation Adjustment folding misalignment along vertical length of paper by folding mode Adjust folding misalignment along the vertical length of the paper in standard folding using the folding stopper Adjustment keys of folding plates 1 and 2. Folding plate 1 Folding plate 2 Folding mode...
- Page 43 Chapter 3 Advanced Operation The folding stopper moves by 0.1 mm/0.004 inch every time the stopper adjustment key is pressed. While holding down the stopper adjustment key, the value will continue to increase/decrease within the setting range. The value adjusted with the stopper Folding plate 1 Folding plate 2 adjustment key will be displayed on the top...
-
Page 44: Deformed Folding
Chapter 3 Advanced Operation Registering the adjusted value Adjustment values of folding misalignment in the vertical direction of thirty-six registration types including six standard folding modes x six types of standard paper sizes can be registered. (Thirty registration types in total including ive types of standard paper sizes for North America) Once adjustment values are registered, folding operation can be performed in the same condition as the registration is made without registering the same adjustment. -
Page 45: Standard Folding Of Non-Standard Paper
Chapter 3 Advanced Operation Standard Folding of Non-Standard Paper Standard folding of non-standard paper is a method to register the paper length of paper other than standard paper, select the standard folding mode, and fold paper. Paper other than the six standard paper is called non-standard paper. (Five standard paper sizes for North America) The foldable sizes are as follows. -
Page 46: Custom Folding
Chapter 3 Advanced Operation Input the paper length on the keypad. Setting range :182.0 to 457.2 mm/7.17 to 18.00 inches When the numerical value has been input, press the clear key to clear the value before inputting. Example of inputting a value: Input [2500] when the paper length is 250 mm. Press the key. -
Page 47: Operation
Chapter 3 Advanced Operation The length of the folded plane (see igure on the right) which can be folded by folding plates 1 and 2 is restricted. Length of folded plane Folding plate 1 : 42 to 325 mm/1.65 to 12.80 inches Folding plate 2 : 0 * or 47 to 217 mm/0 * or 1.85 to 8.54 inches * As folding plate 2 is not used in single folding, it is 0 mm/0 inch. -
Page 48: Using The Registered Data
Chapter 3 Advanced Operation Press the key. Irreg Set P Length 297.0 Input numerical value is set, and [Fold1] Fold1 can be changed. Fold2 Input [Fold1] using the numerical keypad. Input [850]. Press the key. Irreg Set P Length 297.0 Input numerical value is set, and [Fold2] Fold1 85.0... -
Page 49: Locking The Registered Data
Chapter 3 Advanced Operation 3-3. Locking the registered data Lock the registered data to keep the value unchanged so that the registered data will be saved without being deleted mistakenly. Press the menu key to display the [Irreg Set] screen. Select the registration number to be locked on the keypad or with the key. -
Page 50: Registering The Folding Value Directly While Processing
Chapter 3 Advanced Operation 3-5. Registering the folding value directly while processing The current folding settings can be registered for later reference when performing operations under the same conditions. Test fold or perform folding process, check folding misalignment, and ine-adjust when registering the value. Press the menu key to display the [Irreg Set] screen. -
Page 51: Cross Fold Of Standard Paper
Chapter 3 Advanced Operation 4-1. Cross fold of standard paper Do not put ngers inside during operation. Keep away long hair, ties, jewelry and loose clothing. It could cause injury. The following describes the cross fold of standard paper, using cross single folding Cross folding shown in the igure as an example. - Page 52 Chapter 3 Advanced Operation Stack the single-folded paper on the Paper feed direction paper feed tray with the folded edge toward the non-operator’s side. The stacking amount is equivalent to about half (25 mm/ 0.98 inch) of the height of the paper feed guide on the folding side.
- Page 53 Chapter 3 Advanced Operation Set the stack height sensor adjustment knob to the scale between the irst one and second one. Press the key to set the +0.0/+0.0 processing speed to [4]. Ready Set the processing speed for cross fold to [4] or less.
-
Page 54: Cross Fold Of Non-Standard Paper
Chapter 3 Advanced Operation 4-2. Cross fold of non-standard paper Single fold non-standard paper according to the procedure of Chapter 2 “3. Standard Folding of Standard Paper” (p.2-5). Press the menu key to display [Paper Size Set]. Paper Size Set Auto Press the key. -
Page 55: Cross Fold Paper At The Desired Folding Position
Chapter 3 Advanced Operation 4-3. Cross fold paper at the desired folding position This is a method to cross-fold standard or non-standard paper at any desired positions. Standard paper or non-standard paper is handled in the same way and cross-folded by using a method to register the fold position as a custom fold. -
Page 56: Stacking The Folded Paper
Chapter 3 Advanced Operation Stacking the Folded Paper The angle of the paper receiving tray of this machine can be changed. If the angle is changed, the folded paper can be stacked in the following two ways according to the purpose. Diagonal stacking: Basic paper stacking method Straight stacking: Used when the folded paper in folding modes such as gate fold with thick paper (81.4 g/m... -
Page 57: Interval Function
Chapter 3 Advanced Operation Interval (batch counting) function 7-2. Interval (batch) function specifies the number of sheets to be folded and suspend folded paper by interrupting paper folding operation for a certain period of time. Take out ejected paper during interruption, and another operation after paper folding such as distribution or enclosure can be prepared. -
Page 58: Double-Feed Detection Setting
Chapter 3 Advanced Operation Press the key. +0.0/ Ready The display returns to the top screen, an icon will be displayed on the LCD display. [Interval Setting] will be cleared by turning of the power. 7-3. Double-feed detection setting Double-feed detection reads the thickness of paper on test folding and detects when more than one sheet of paper is fed into the machine at a time. - Page 59 Chapter 3 Advanced Operation Press the key. +0.0/ Ready The display returns to the top screen, an icon will be displayed on the LCD display. • Be sure to test fold before starting paper +0.0/ folding when the double-feed detection setting is set to [ON].
-
Page 60: Paper Feed Interval Time Setting
Chapter 3 Advanced Operation 7-4. Paper feed interval time setting By changing feed interval the time lag that exits after one sheet is fed and until the next is fed can be changed. Set the feed interval to [Slow] if [Feed Err Misfeed] occurs with thick, heavy paper even after air volume, etc. -
Page 61: Stacker Roller Adjustment
Chapter 3 Advanced Operation 7-5. Stacker roller adjustment The position of the stacker roller is set automatically to match the paper size and folding mode. The position can be changed if thick paper, or paper processed in cross fold tends to unfold, stack unevenly, or jam on ejection. - Page 62 Chapter 3 Advanced Operation When sheets of paper processed the gate fold mode unfold and a sheet processed later slips into the one processed before: Depending on the type and size of paper, the adjustable range in the gate fold mode is limited.
-
Page 63: Setting Ejection Conveyance Amount
Chapter 3 Advanced Operation 7-6. Setting ejection conveyance amount Set the output tray amount to [Large] if double folded thick paper tends to unfold on output, stack unevenly, or jam at the paper output section. Other Setting1/5 Press the menu key to display [Other Feed Interval Setting]. -
Page 64: Operation Mode Settings
Chapter 3 Advanced Operation 7-7. Operation mode settings The operation mode setting is used to set the fold stopper function of the folding plates 1 and 2 when the power is turned on. The following modes can be set. Normal mode [Normal] : When the power is turned on, use the normal mode to start up in the normal setting state. -
Page 65: Test Feed Setting
Chapter 3 Advanced Operation Press the key. +0.0/ 148.5/ Ready Ready Returns to the top screen. When [Last Fold] or [Stopper Fixed] is set, an icon will be displayed on the LCD display. [Last Fold] [Stopper Fixed] When the [Stopper Fixed] is set, folding misalignment in the vertical direction occurs by removing the folding plate with the power turned of. -
Page 66: Power Saving Setting
Chapter 3 Advanced Operation 7-9. Power saving setting If the machine is not used for a certain period of time, the backlight of the LCD display will automatically go of by setting to Backlight Automatic Off mode. Press the menu key to display [Other Other Setting1/5 Setting]. -
Page 67: 7-10. Alarm Setting
Chapter 3 Advanced Operation 7-10. Alarm setting When this machine remains unused for the speciied period of time, the buzzer sounds to remind that the power remains turned on. When the [Alarm setting] is set to [ON], the buzzer sounds “pii” at the speciied time. After this stage, when the machine remains unused, the buzzer sounds “pii”... -
Page 68: 7-11. Detection Off Setting
When [No Paper] is displayed although paper is stacked on the paper feed tray, set paper detection to [OFF]. This setting will return to [ON] when the power is turned of. Contact Formax dealer if detection error remains displayed even if the sensor is cleaned. Press the menu key to display [Other Other Setting1/5 Setting]. -
Page 69: Default Setting
Chapter 3 Advanced Operation 7-12. Default setting The setting contents such as speed or double-feed detection can be changed when [Normal] is set in the [Oper Mode] setting. Press the menu key to display [Other Other Setting1/5 Setting]. Feed Interval Stack Roll Adj Belt Convey Vol Select [Default Setting] with the... -
Page 70: 7-13. Idling Setting
Chapter 3 Advanced Operation Press the key. Returns to [Other Setting]. Press the key. Returns to the top screen. 7-13. Idling setting Selecting [ON] on idling setting allows the machine to stand by idling when double-feed or mis-feed occurs, or when paper processing operation is stopped by pressing the start key. Folding operation can be resumed immediately by pressing the start key again as the machine’s functions other than the conveyance drive have not been shut down completely. - Page 71 Chapter 3 Advanced Operation 7-14. Tone setting The buzzer setting (key operational sound on the control panel) can be set to ON or OFF. The buzzer sounds when a problem has occurred, whether the buzzer setting is [OFF] or not. Press the menu key to display [Other Other Setting1/5 Setting].
- Page 72 Chapter 3 Advanced Operation 7-15. mm/inch setting According to the using environment, the unit used for inputting numerical values of paper size, folding dimensions (folding stopper adjusting value), and cross folding registration can be changed. Press the menu key to display [Other Other Setting1/5 Setting].
-
Page 73: 7-16. Paper Feed Tray Descent Distance Setting
Chapter 3 Advanced Operation 7-16. Paper feed tray descent distance setting If a feeding error occurs, or the stop key is pressed, the paper feed tray will descend. The descent distance can be set. (If [No Paper] is detected, the tray will descend to the lower limit regardless of the setting.) The following modes can be set. - Page 74 Memo Chapter 3 Advanced Operation 3-36...
-
Page 75: Cleaning The Unit
Chapter 4 Cleaning the Unit Chapter 4 Cleaning the Unit • Be sure to disconnect the power cord from the wall outlet before cleaning the unit. • Before you use the machine after cleaning, make sure that its surface is completely dry. Do not use ammable sprays and solvents during cleaning, etc. -
Page 76: Cleaning The Lcd
Chapter 4 Cleaning the Unit Wipe with a cloth moistened with alcohol, while rotating the jam Conveyance roller correction knob on the folding roller by hand. Wipe the conveyance roller with a cloth moistened with alcohol while rotating it by hand. Cleaning the LCD Wipe the LCD on the control panel with the dry cloth. -
Page 77: Cleaning The Belt
Chapter 4 Cleaning the Unit Cleaning the belt Suction belt Wipe the belt with a cloth moistened with alcohol while rotating it by hand. Sensor lever Make sure that the cloth does not get caught on the sensor lever. Stacker belt Remove the auxiliary paper ejection guide. -
Page 78: Cleaning The Sensor
Chapter 4 Cleaning the Unit Cleaning the sensor Sensor attachment position Paper feed inlet sensor upper Paper feed inlet sensor lower Home sensor of Folding plate 1 Paper sensor (Only for North America) Paper ejection inlet sensor upper Paper sensor Home sensor of Folding plate 2 Paper ejection inlet sensor lower... - Page 79 Chapter 4 Cleaning the Unit Keep in mind the following notes when using compressed air for cleaning. • Use a non-lammable air duster. Read the cautions for use, and be sure to keep the descriptions in mind. • The sensors and metallic section are cooled by gas in the air duster, and may be temporarily condensed.
- Page 80 Chapter 4 Cleaning the Unit Insert the nozzle of air duster into the hole shown in the igure to blow air. Paper ejection inlet sensor lower, Home sensor of Folding plate 2 Remove the folding plate 2. Attach the folding plate 2 holding with both hands.
-
Page 81: Trouble Guide
Chapter 5 Trouble Guide Chapter 5 Trouble Guide Error Code When an error occurs, error codes will be displayed on the LCD window as follows. U*** Error Code Top Cover Open Error Message Check the error code or the error message and solve the problem by following the list below. If the error persists or occurs frequently, contact your dealer. -
Page 82: Motor Error
Chapter 5 Trouble Guide 1-2. Motor error Error Error Message Cause Solution Code E010 Convey Motor Err Abnormal load on the motor due to Remove jammed paper and press the clear paper jamming, etc. key to release the error. E020 E140 Tray Motor Err Abnormal load on the motor for... -
Page 83: Errors Requiring A Service Call
Chapter 5 Trouble Guide 1-4. Errors requiring a service call When the following error codes are displayed, turn the power of and on. If the error is not cleared, contact Formax dealer. E130 E240 E340 E840 E910 E930 E940 MyBinding.com... -
Page 84: Paper Jam
Chapter 5 Trouble Guide Paper Jam Do not put ngers inside during operation. Keep away long hair, ties, jewelry and loose clothing. It could cause injury. When paper jams, remove the paper in the following way. 2-1. Paper feed section Pull out jammed paper slowly. -
Page 85: Folding Plate 1
Chapter 5 Trouble Guide 2-2. Folding plate ncel key, press the clear key. Eject forcibly the paper inside the folding plate. Forcible ejection in the folding plate will not stop until the folding stopper returns to the home position, as the folding stopper moves, even if the key is not held. - Page 86 Chapter 5 Trouble Guide Attach the folding plate 1 along the set guides. Attach the folding plate 1 holding with both hands. Check that the gear on the reverse side of the folding plate 1 rotates in the front-back direction, if it is not easy to attach the folding plate 1.
- Page 87 Chapter 5 Trouble Guide Folding plate 2 Take out the folding plate 2. Attach the folding plate 2 holding with both hands. Open the top cover. Open or close the top cover gently. Hands or ngers may be caught in the cover section.
-
Page 88: Folding Roller
Chapter 5 Trouble Guide When having diiculty in inserting the folding plate 2, make sure that the stopper of the folding plate 2 does not protrude beyond the cover. The folding plate cannot be inserted properly as it bumps into interior parts if the stopper protrudes beyond the cover. -
Page 89: Ejecting Section
Chapter 5 Trouble Guide Open the top cover. Open or close the top cover gently. Hands or ngers may be caught in the cover section. Doing so may result in injury. Pull out the paper rotating the jam correction knob. Close the top cover. -
Page 90: Troubleshooting
Chapter 5 Trouble Guide Troubleshooting Do not use a ammable static electricity removal spray. Doing so could cause build-up of gas inside the machine, which in turn could cause ignition, resulting in re and explosion. Condition Cause Solution Power can not be turned The power cord is not connected. - Page 91 Chapter 5 Trouble Guide Condition Cause Solution (p.1-13) Paper feed interval is not Paper is curled. Correct the paper curl before use. stable. Thick paper is used. Set the stack height sensor to irst scale (p.2-8) from the bottom. The leading edge of paper Paper is sticking and diicult to separate.
- Page 92 Chapter 5 Trouble Guide Condition Cause Solution Miss-feed occurs. The suction belt is stained. Clean the belt with a cloth moistened with (p.4-3) alcohol. Paper is sticking and diicult to separate. Check that the printing ink of the paper has dried and there is no static electricity, and (p.1-13) then separate the paper well.
- Page 93 Chapter 5 Trouble Guide Condition Cause Solution When large paper is Too many sheets of paper are stacked. Reduce the paper amount. stacked on the paper feed Heavy paper is used. tray, the tray does not rise even when the start key is pressed.
- Page 94 Chapter 6 Appendix Chapter 6 Appendix Specifications Depending on the system coniguration, the speciication may vary. Ask your dealer for details. Model DF-1200 Type Desktop-type Paper feed method Fan motor belt suction method Paper size Length 182 to 457.2 mm/7.17 to 18 inches Width 120 to 311 mm/4.73 to 12.24 inches Regular size...
Need help?
Do you have a question about the FD 3200 and is the answer not in the manual?
Questions and answers