Table of Contents
Advertisement
Quick Links
Advertisement
Table of Contents

Related Manuals for Formax FD 3302


Summary of Contents for Formax FD 3302
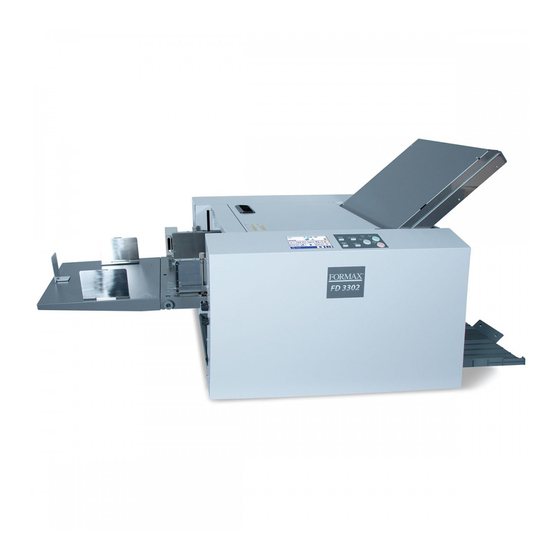
- Page 1 FD 3302 Tabletop Air Suction Document Folder OPERATOR MANUAL 2/2022...
- Page 2 Introduction Thank you for purchasing the FD 3302 Air-Feed Folder. Be sure to read this manual and "Safety Guide A" supplied with this product before use. "Safety Guide A" contains information for correct and safe use of this product. After reading, leave the manual and "Safety Guide A" at the site of use for easy reference whenever questions related to the product arise in the future.
-
Page 3: Operating Environment
Safety Precautions Power supply • Make sure the power supply used is always within the following range. Power supply : 100 to 240 V AC, 50/60 Hz • When you power other appliances from the same AC outlet, make sure that the combined power consumption does not exceed the power supply capacity. - Page 5 Safety Precautions For North America &CAUTION � & KHpawa,ho.,.,o,,;., plrlJ. ltcouldcM1sr injury....... &ATTENTION V01.1sriSQUit.tlud1 "°usbluut.
- Page 6 Memo...
-
Page 7: Table Of Contents
Contents Safety Precautions ..........i 2-1. Before stacking paper ..........34 2-2. Stacking paper ............34 Power supply .................i 3. Standard Folding of Standard Paper ..38 Operating environment ............i 4. Storage of Machine ........ 45 WARNING/CAUTION labels .............ii Chapter 1 Chapter 3 Before Operation Advanced Operation 1. Features ............3 1. - Page 8 Contents 9-12. Language ..............74 9-13. Power saving ...............75 9-14. Alarm ................76 9-15. Operation mode when turned on ......77 9-16. Initial screen ..............78 9-17. Custom screen ............79 9-18. mm/inch ................80 Chapter 4 Maintaining the Machine Cleaning folding roller and conveyance roller ................81 Cleaning LCD ...............82 Cleaning belts .............82 Cleaning sensors ............83 Chapter 5 Trouble Guide 1. Error Code ..........86 1-1.
-
Page 9: Before Operation
Chapter 1 Before Operation Features • This machine is a desktop paper f o lder. Standard f o lding of standard paper can be easily controlled and operated from the control panel • This machine is designed to fold paper into six popular folding modes. Doublefold Single fold Irregular... -
Page 10: Names And Functions Of Components
Chapter 1 Before Operation Names and Functions of Components 2-1. External parts [15] [14] [13] [16] [12] [11] [10] Name Function Folding plate 1 Guide plate for deciding the paper folding position. Control panel Use this panel to enter information to operate the machine (p.9) Separating air adjustment For adjusting the separating air amount. -
Page 11: Internal Parts (Paper Feed Section)
Chapter 1 Before Operation 2-2. Internal parts (paper feed section) Name Function Stack height sensor adjustment For adjusting the distance between the paper and suction belt. Suction belt Sucks and conveys paper. Separating-air duct Blows out air for separating paper stacked on the paper feed tray. Separator Prevents double-feed. Shutter Adjusts the amount of separating air blown out. Use the separating air adjusting knob to adjust the amount. Folding plate 2 Guide plate for deciding the paper folding position. Safety lever This lever prevents fingers from getting caught when the paper tray is lowered. -
Page 12: Internal Parts (Top Cover Section)
Chapter 1 Before Operation 2-3. Internal parts (top cover section) Name Function Jam correction knob For rotating the folding rollers when paper has jammed inside the unit or when cleaning the unit. Folding roller These rollers are used to fold paper. This machine is equipped with four rollers to make six types of folding. -
Page 13: Internal Parts (Paper Ejecting Section)
Chapter 1 Before Operation 2-4. Internal parts (paper ejecting section) Name Function Stacker roller lever This is the lever that supports the stacker roller. The height of the roller can be adjusted. Ejecting section For receiving folded paper ejected out. Power inlet Connector for the power cord. Paper receiving tray For stacking ejected paper. Stacker belt For ejecting folded paper. -
Page 14: Accessories
Chapter 1 Before Operation 2-5. Accessories [10] [11] [12] [13] Name Function Folding plate 1 Folding plate 2 Auxiliary paper ejection guide Auxiliary paper feed tray Trail edge guide unit Side guide unit Plate unit Scale label Instruction manual This manual [10] Safety Guide A Contains information for correct and safe use of this machine. [11] Power cord For EU... -
Page 16: Lcd Touch Panel
Chapter 1 Before Operation LCD Touch Panel Cautions in using the touch panel • The touch panel is designed to touch lightly with a fingertip (its tip radius is 0.8 or smaller). Do not press the panel strongly with a finger or push it with any sharp objects (such as a fingernail, ball point pen, or pin). -
Page 17: Screen Configuration
Chapter 1 Before Operation Screen Configuration 5-1. [Ready] screen/[Processing] screen The following are the first screen displayed when the power is turned on, and the processing screen. When [Initial] is set to other than [Ready], the screen that you set is displayed. [Ready] screen [Processing] screen Name Function Touch panel display Icons and numerical values of the specified paper size, folding mode, etc. are displayed (p.11) Touch panel operation section Contains keys to change settings such as processing speed and folding mode. (p.14) Page name The name of the displayed page. - Page 18 Chapter 1 Before Operation [Processing] screen (Custom fold) [Processing] screen [11] [11] [10] [10] Name Function Paper size Displays the detected standard paper size. A3/B4/A4/B5/A5/B6 (For EU) LGR (double letter)/LGL (legal)/LTR (letter)/STMT (statement)/INV (invoice) (For North America) When non-standard paper or custom folding is set, the paper length is displayed. Memory number of custom Displays the memory number currently used. folding When data is newly created but not saved, [00] is displayed. Available memory number: 01 to 30 Memory lock Displayed when saved custom folding data is locked. Folding plate A position Displays the position adjustment value of the folding plate A.
- Page 19 Chapter 1 Before Operation Name Function Processing speed Displays processing speed currently set. The processing speed is not displayed during [Ejecting Paper). Setting range: 1- to 7 (speed) �(1-) ► ►► ( 2) ► ►► ►►►► ( 4 ) ►►►►► ►►►►►►...
- Page 20 Chapter 1 Before Operation 5-1-2. Touch panel operation section [Ready] screen [Processing] screen [12] [11] [10] Name Function The processing speed is slowed each time the key is touched. (Processing speed down) When processing speed is set to “1-”, the key is grayed out and cannot be operated. Adjustable range: 1- to 7 The processing speed is sped up each time the key is touched. (Processing speed up) When processing speed is set to [7], the key is grayed out and cannot be operated.
- Page 21 Chapter 1 Before Operation Name Function [10] Touching the key displays the [Fold Position] screen. (Adjustment) key Locked custom fold and stopper fixed mode can also be adjusted [11] Touching the key displays the screen to select a paper size. (Paper size) key When the standard folding (with paper size detection set to off ) is selected, the [Standard Size] screen is displayed. When the standard folding or non- standard paper is selected, the [Paper Length] screen is displayed. [12] Displays icons set in the custom screen. The set screen is displayed when the key is touched. However, it is not displayed when stopper fixed mode (Custom screen) is selected. (Standard folding) The [Folding Mode] screen of [Standard Fold] is displayed. However, when automatic paper size detection is turned off, the [Standard Size] screen is displayed. (Standard folding of non-standard paper). The [Paper Length] input screen of [STD Fold for Non-STD Size] is displayed.
-
Page 22: Basic Settings] Screen
Chapter 1 Before Operation 5-2. [Basic Settings] screen r--;, G'.,_, 1- - [2) STD Fold for l ___ _, s,..,,., ""' :: = =============::::: :: = =============::::: �I Non-STD Size ,i;::::: Custom fold wi!h Custom Fold [4)----l finishing size set IIIIIIII I - [S) Basic Setting... -
Page 23: Paper Length] Input Screen (Non-Standard Paper)
Chapter 1 Before Operation Name Function Returns to the previous screen. (Cancel) key Press and hold to return to the [Ready] screen. 5-4. [Paper Length] input screen (non-standard paper) Name Function Paper length setting value Displays the currently set paper length. Preview screen Displays the position of the input value. Saves the input value and transits to the next screen. (Return) key When you touch the key when the input value is outside the specification range, the value that you can specify is displayed on the preview screen. -
Page 24: Of Sheet] Input Screen
Chapter 1 Before Operation Name Function Paper size display Displays the currently set standard size. When non-standard size paper is set, the paper length is displayed. Sets the folding mode as single fold. (Single fold) key Sets the folding mode as double fold. (Double fold) key Sets the folding mode as irregular accordion fold-out. (Irregular accordion fold) Sets the folding mode as letter fold. (Letter fold) key Sets the folding mode as accordion fold. (Accordion fold) key Sets the folding mode as gate fold. -
Page 25: Fold Position] Screen
Chapter 1 Before Operation 5-7. [Fold Position] screen Standard fold/standard folding of non-standard paper Custom folding [10] [10] [11] [11] [12] [12] Name Function Folding A reversal Reverses [+] and [-] of folding dimension A. When the value after being reversed is outside the specification range, it is corrected to the nearest value within the specification range. When in custom folding or stopper fixed mode, it is not displayed. Folding A position adjustment Standard folding: The folding A position adjustment value is displayed. value/Folding dimension A Custom folding: The folding dimension A is displayed. position (*) When you touch the key, the numeric keypad is displayed, which enables you to input values. -
Page 26: Stacker Roller] Screen
Chapter 1 Before Operation Name Function Warning message When the input value is outside the specification range, a warning message is displayed. [10] Outline of folding dimension The outline of folding position for the selected folding form is displayed. [11] Returns to the [Ready] screen without saving the input content. (Cancel) key [12] The [Stacker Roller] screen is displayed. (Stacker roller) key When the combination of position adjustment values is invalid, a warning message is displayed and the [Stacker Roller] screen is not displayed. (*) This is not displayed depending on the folding mode selected. 5-8. [Stacker Roller] screen Name Function Stacker roller position Displays the position of the stacker roller. -
Page 27: Custom Fold]/[Slct Fin Size] Screen
Chapter 1 Before Operation 5-9. [Custom Fold]/[Slct FIN Size] screen The [Slct FIN Size] screen is displayed when [Custom Fold with Finishing Size Set] is selected at [Basic Settings]. Saved data selection screen [Custom Fold] [Slct FIN Size] [5] [6] [5] [6] [10] [11] [10] [11] Name Function Saved data number/Saved data “5-1-1. Touch panel display” (p.11) lock display Selection frame Touch to select the saved data you want to use. The color of the frame of the selected saved data changes. - Page 30 Chapter 1 Before Operation Name Function Folding A setting Displays currently set folding A length. When the key is touched, the [Edit] screen of folding A is displayed. Setting range: 42.0 to *** mm/ 1.65 to *** inch ***: 442.0 mm/17.40 inches or "Paper length + 5.0 mm/+0.197 inch", whichever is shorter. Folding B setting Displays the currently set folding B length. When the key is touched, the [Edit] screen of folding B is displayed. When folding B is not used, set as 0.0 mm. Setting range: 0.0/47.0 to *** mm/ 1.85 to *** inches ***: 223.0 mm/8.78 inches or "paper length + 5.0 mm/+0.197 inch", whichever is shorter. When the key is touched, the [Folding Mode] screen is displayed. (Folding mode selection) When folding mode is set, value of the folding A and folding B is input automatically according to the paper size and folding form, and display returns to this screen. Displays the estimated value of the finishing length based on the input Finishing length value and folding form.
-
Page 33: Folding A/Folding B Input Screen
Chapter 1 Before Operation Name Function Saves the input value and returns to the [Ready] screen. (Return) key When you touch the key while the input value is outside the specification range, the value within the range that you can input is displayed in the Outline of folding dimension. Executes test fold before saving the adjusted value of the folding stopper (Test) key position. It is not displayed when in manual feed mode (option). Returns to the [Ready] screen without saving the input content. (Cancel) key [10] The [Stacker Roller] screen is displayed. (Stacker roller) key When the combination of position adjustment values is invalid, a warning message is displayed and the [Stacker Roller] screen is not displayed. 5-10. Folding A/Folding B input screen Name Function Folding A setting value display... -
Page 34: Function Setting Screen
Chapter 1 Before Operation Name Function Returns to the previous screen without saving the input content. (Cancel) key Press and hold to return to the [Ready] screen. 5-11. Function Setting screen [1/3 FUNC Setting] screen Name Function Interval Sets whether to use the interval (division) function or not. (p.66) D-Feed Detect Sets whether to perform double-feed detection or not. (p.68) (Double Feed Detect) Detection Sets whether to perform paper stacked/standard size/lead edge detection or not. (p.69) Feed Interval Sets a feed interval. (p.70) Belt Convey Vol Sets the amount of conveyance. - Page 35 Chapter 1 Before Operation [2/3 FUNC Setting] screen Name Function Idling Sets whether or not to perform idling operation. (p.71) Tray Desc Amount Sets the tray descended amount. (p.72) Tone Sets whether to enable or disable the buzzer (key operation sound on the control panel). However, the buzzer that sounds when an abnormality occurs will sound even if the setting is disabled. (p.73) LCD Bright Sets the brightness of the LCD touch panel screen. (p.73) Test Sheets Sets the number of test feed sheets.
-
Page 36: Classification Of Buzzer Sounds
“pii”: At the start of folding operation or end of normal folding operation. When saving changes in various settings. “piipii”: An error such as paper jam “piipiipiipii”: An error indicating operator should contact Formax Dealer Technical Support Paper Types and Sizes Paper type Paper length 457.2 mm/18.00 inches or less Fine quality paper : 52.3 to 157 g/m... -
Page 38: Workflow
Chapter 1 Before Operation Workflow The following flowchart illustrates the flow of basic operation. For details, refer to the text and relevant pages. (p.33) Turning on the power (p.34) Stacking paper (p.38) Selecting folding mode (p.40) Adjusting air (p.40) Checking the separating air adjustment knob (p.40) Checking the separator adjustment knob Checking stack height sensor adjustment knob (p.41) (p.42) Setting processing speed (p.42) Test feed Starting paper folding (p.43) Ending paper folding Removing processed paper (p.33) Turning off the power... - Page 50 Chapter 2 Basic Operation Air Adjustment Table The air adjustment table is a guide to set numerical values. The setting range of each setting is the following numerical value ±5. Depending on paper, the numerical values in ( ) in the table will be the appropriate setting range. Set each air volume to a smaller value than that of the table, when handling thin and flimsy paper such as rough paper and recycled paper. The larger the air volume, the more folding misalignment may occur. Change the numerical value when double-feed or mis-feed occurs even though the values are set according to the air adjustment table. A3 / LGR A4 / LGL,LTR A5 / INV, STMT Paper Paper ream [Separating...
- Page 52 Chapter 2 Basic Operation Hang the auxiliary paper ejection guide on the paper receiving tray. Loosen the setting screws. Remove the auxiliary paper feed tray.
-
Page 55: Adjusting Folding Misalignment In Up And Down Direction
Chapter 3 Advanced Operation 1-2. Adjusting folding misalignment in up and down direction When the folded paper is misaligned along the vertical length, adjust the positions of the folding stopper of folding plates 1 and 2 to Ejection correct the misalignment. direction Adjustable range and correction restrictions • Adjustable range of folding position A Example: for single fold adjustment key/folding position B adjustment Center key on the [Fold Position] screen during standard folding is within ±5.0 mm/0.20 inch. • The positions of the folding stoppers of Paper folding plates 1 and 2 may not be adjustable Conveyance to ± 5.0 mm/0.20 inch according to the length direction of the paper used. -
Page 59: Operation
Chapter 3 Advanced Operation 3-1. Operation As an example of accordion fold, operation procedures for custom folding are described with the following setting. Paper size: A4 (210.0 x 297.0 mm/8.27 x 11.69 inches) Fold A: 85.0 mm/3.35 inches (length A) Fold B: 95.0 mm/3.74 inches (length B) Prepare a folding sample manually using the paper to be folded. Measure the length of the folding Paper feed position of the sample. -
Page 60: Editing Saved Data
Chapter 3 Advanced Operation The procedures taken after that will be the same as the steps 8 to 13 in Chapter 2 “3. Standard Folding of Standard Paper” (p.38). The stacker roller position moves automatically according to the paper set. Adjust the stacker roller position, if the paper flaps or misaligns at the time of ejection, or paper jam occurs in the paper ejecting section. “6-2. Adjusting stacker roller position” (p.62) 3-2. Editing saved data When the custom fold data that you want to edit is opened Touch the key on the top screen. -
Page 61: Locking Saved Data
Chapter 3 Advanced Operation 3-4. Locking saved data To prevent accidentally deleting data you want to be saved, you can lock saved data and prevent the numerical value from being changed. Touch the key on the [Ready] screen-> Touch [Custom Fold]. The [Custom Fold] saved data selection screen is displayed. - Page 63 Chapter 3 Advanced Operation ..,. Touch the key. The F position setting screen is displayed. Touch the F position setting key at the side F position to set. The editing screen is displayed. Touch [X: xx:xx.x mm], input the length [105] of side X using the numeric keypad and touch the key.
-
Page 64: Cross Fold
Chapter 3 Advanced Operation Cross Fold Cross fold is folding single-folded paper another time as shown in the figure. The maximum paper thickness is fine quality paper 104.7 g/m /71.20 lbs and coated paper 157 g/m /106.76 lbs. Rough paper, which is thin and flimsy, is not suitable for cross fold. •... - Page 65 Chapter Advanced Operation Loosen the guide fixing screw. Stack the single-folded paper on the paper feed tray with the folded line toward the non-operator's side. The stacking amount is equivalent to about half (25 mm/0.98 inch) [a] of the height of the paper feed guide on the folding side.
- Page 66 Chapter 3 Advanced Operation Set the separating air adjustment knob to [2]. Set the separator adjustment knob to [3]. lf'O Set the stack height sensor adjustment knob to the scale between the first one and second one. 1-+I ►►►► Touch the� or key on the [Ready] screen to set the speed to ►►►►...
-
Page 67: Cross Fold Of Non-Standard Paper
Chapter 3 Advanced Operation 5-2. Cross fold of non-standard paper Single fold non-standard paper according to the procedure of “2. Standard Folding of Non-Standard Paper” (p.51). Measure the length of the finished single folded paper [a]. Touch the key on the [Ready] screen —> Touch [Standard Fold for Non-Standard Size]. -
Page 68: Stacker Roller Adjustment
Chapter Advanced Operation Stacker Roller Adjustment 6-1. Changing stacker roller height Some thick and stiff paper may not be ejected smoothly because the paper may open after folding. Change the stacker roller height and widen the space for the paper to pass in ejection. Remove the auxiliary paper ejection guide. - Page 69 Chapter 3 Advanced Operation Guide for the setting position of stacker roller Settings Applicable standard paper size and folding mode For EU For North America Double fold STMT, Double fold, Letter fold, Accordion fold Double fold, Letter fold, Accordion fold Double fold, Letter fold, Accordion fold, Gate fold Double fold Double fold...
-
Page 70: Stacking Folded Paper
Chapter Advanced Operation When sheets of paper folded in the gate fold mode, a sheet processed later slips into the one processed before: Depending on the type and size of paper, the adjustable range in the gate fold mode is limited. -
Page 71: Adjusting Spring Pressure
Chapter 3 Advanced Operation Adjusting Spring Pressure When feeding thick paper or slippery paper, the paper may stop at the conveyance roller without reaching to the folding roller. In this case, increase the spring pressure for the conveyance roller. On the other hand, when feeding thin paper or flimsy paper, the paper may get wrinkled lengthways. In this case, decrease the spring pressure for the conveyance roller. -
Page 72: Function Settings
Chapter Advanced Operation Function Settings The function settings screen is used to set detecting functions such as double-feed, paper feed interval and buzzer sounds according to paper used and operation environment. On the function settings screen, the functions of the (Return) key and (Cancel) key are as �... - Page 73 Chapter 3 Advanced Operation Name Function Default value Interval Sets on/off of the interval function. — No. of Sheet The [Interval_No. of Sheets] screen is displayed. When the interval setting is turned off, the key is grayed out and cannot be operated. Setting range: 1 to 999 (sheets) The No. of Sec. The [Interval_No. of Seconds] screen is displayed. When the interval setting is turned off, the key is grayed out and cannot be operated. Setting range: 3 to 30 (seconds) Interval_No. of Sheets Displays the currently set interval sheets number. — setting value Interval_No. of Seconds Displays the currently set interval time. —...
-
Page 74: Double-Feed Detection
Chapter Advanced Operation 9-3. Double-feed detection Double-feed detection refers to a function that reads the thickness of paper on test folding and detects when more than one sheet of paper is fed into the machine at a time. When the ultrasonic sensor is set, there is no need to perform test folding. Touch the key on the top screen->... -
Page 75: Detection
Chapter Advanced Operation When mis-detection occurs Double-feed or miss-feed may sometimes be detected although the paper is fed normally. • If false double-feed detection occurs when paper thickness is set to [Th in], repeat test folding after setting paper thickness to [Thick]. If double-feed is detected mistakenly after selecting [Thick], double-feed detection function cannot be used. -
Page 76: Paper Feed Interval Time
Chapter Advanced Operation 9-5. Paper feed interval time Paper feed interval is a paper feed time lag between one sheet and the next sheet Set the feed interval to [Slow] if [Feed Err Misfeed] occurs with thick, heavy paper even after air volume, etc. has been adjusted. Setting the feed interval to [Fast] will raise processing performance, but feed error may be more likely to occur with large sheets of paper such as B4, A3, etc. -
Page 77: Idling
Chapter Advanced Operation c:,:> [Belt Convey Vol] is not reset until the power is turned off. However, it returns to [Normal] under the following conditions. - When folding mode is changed from custom folding to standard folding. - When turning off the machine with [Oper Mode] set to [Normal]. 9-7. -
Page 78: Tray Descend Amount
Chapter 3 Advanced Operation 9-8. Tray descend amount You can specify the descend amount of paper feed tray when pressing the@ key during paper feed or operations. Touch the key on the [Ready] screen-> Touch the� key-> Touch the key-> Touch [Tray Desc Amount]. The [Tray Desc Amount] screen is displayed. -
Page 79: Tone
Chapter 3 Advanced Operation 9-9. Tone The on/off of the buzzer (key operational sound on the control panel) can be set. The buzzer sound s with the setting off when a trouble has occurred. Touch the key on the top screen-> Touch the� key-> Touch the ->... -
Page 80: Number Of Test Sheets
Chapter 3 Advanced Operation 9-11. Number of test sheets The number of sheets is set when performing test feeding. Touch the key on the [Ready] screen-> Touch the� key-> Touch the key-> Touch [Number of Test Sheets]. The [Number ofTest Sheets] screen is displayed. 1 Shi Q3Shl The Number of Test Sheets... -
Page 81: Power Saving
Chapter 3 Advanced Operation Name Function Default value Saves the number of test sheets setting and returns to the [Function l!l(Return)key Settings) screen. When ID 7'1':J:J�ml is turned off the text keys are displayed in the □ [Ready) screen. When 7'1':J'.:l�ml is turned on, the icon keys are displayed. -
Page 82: Alarm
Chapter 3 Advanced Operation 9-14. Alarm When this machine remains unused for the specified period of time, the buzzer sounds to remind that the power remains turned on. When the machine is not operated after the alarm sounds, the alarm will continue to sound every 1 minute. Touch the key on the [Ready] screen->... -
Page 83: Operation Mode When Turned On
Chapter 3 Advanced Operation 9-15. Operation mode when turned on Set the state of the following functions when the power is turned on. • Operation mode • Double-feed detection • Interval • Processing speed Touch the key on the top screen —> Touch the key —> Touch [When Turned On]. -
Page 84: Initial Screen
Chapter 3 Advanced Operation Name Function Default value Interval Sets whether to enable the interval. Processing speed up/down Sets the processing speed when turned on with [Oper Mode) set to (4 ) [Normal). Processing speed display Displays the processing speed currently set. ' When [Stopper Fixed] is set to on, folding misalignment in the vertical direction occurs by •... -
Page 85: Custom Screen
Chapter 3 Advanced Operation 9-17. Custom screen move You can add custom keys to display the screen you want to immediately to from the top screen. However, the screen is not displayed when stopper fixed mode is set. Touch the Ikey on the [Ready] screen->... -
Page 86: Mm/Inch
Chapter 3 Advanced Operation 9-18. mm/inch According to the usage environment, units of numerical input saved f o r the paper size, f o lding dimensions (folding stopper adjustment value), and custom f o lding can be changed. Touch the key on the [Ready] screen->... -
Page 87: Maintaining The Machine
Chapter 4 Maintaining the Machine • Make sure that you disconnect the power cord from the wall outlet before cleaning . • Before you use the machine after cleaning, make sure that its surface is completely dry. &CAUTION ,<:ij!J\ Do not use flammable sprays and solvents during cleaning, etc. of internal \Q),' parts of the machine and in the vicinity of the machine. -
Page 88: Cleaning Lcd
Chapter 4 Maintaining the Machine Wipe with a cloth moistened with alcohol, while rotating the jam correction knob on the folding roller by hand. [a] Wipe the conveyance roller with a cloth moistened with alcohol while rotating it by hand. [b] Cleaning LCD Wipe the LCD on the control panel with the dry cloth. -
Page 89: Cleaning Sensors
Chapter 4 Maintaining the Machine Cleaning sensors Adhesion of dust to a sensor may cause a false detection. Clean the sensors using an air duster. ' • Use a non-flammable air duster. Read the cautions for use well, and be sure to keep the •... - Page 90 Chapter 4 Maintaining the Machine Insert the nozzle of air duster into the hole shown in the figure to blow air. [a] Paper exit sensor upper [b] Home sensor of folding plate 1 Paper exit sensor lower, home sensor of folding plate 2 Remove the folding plate 2.
- Page 91 Chapter 4 Maintaining the Machine Optical ultrasonic detection sensor, optical double-feed detection sensor, and paper feed timing sensor Clean the sensors using an air duster. [al Ultrasonic double-feed detection sensor [ bl Optical double-feed detection sensor [ cl Paper feed timing sensor...
-
Page 92: Trouble Guide
Chapter 5 Trouble Guide Error Code Check the error code or error message and solve the problem by following the guide displayed on the screen or by referring to list below. If the error cannot be solved by the following methods, contact your dealer. Depending on the content of the error, the �... -
Page 93: Motor Error
Chapter STrouble Guide 1-2. Motor error Follow the guide content to solve the error. Error code and error message--------,' Guide Error Code Cause Solution E2002 Paper jam caused the motor, which Remove jammed paper and touch the� key to clear the automatically elevates the paper feed error. -
Page 94: Other Errors
Chapter 5 Trouble Guide Error Code Cause Solution J1001 Double-feed occurs at the paper feed Remove the double-fed paper. section. JlO0S J1006 Paper jam has occurred in the paper Remove the jammed paper. feed section. J3002 Paper jam has occurred inside the Remove the jammed paper. -
Page 95: Paper Jam
Chapter 5 Trouble Guide Paper Jam &CAUTION � Do not put fingers inside during operation. & Keep away long hair, ties, jewelry and loose clothing. _& It could cause injury. When paper jams, remove the paper in the following way. 2-1. - Page 96 Chapter 5 Trouble Guide Folding plate 1 Take out the folding plate 1. ' Attach the folding plate 1 holding with • both hands. Open the top cover. &WARNING Open or close the top cover gently. Hands or fingers may be caught in the �o_ v er section.
- Page 97 Chapter STrouble Guide Attach the folding plate 1 along the set guides. ' Attach the folding plate 1 holding with both hands . � Check that the gear on the reverse side of the folding plate 1 rotates in the front-back direction, if it is not easy to attach the folding plate 1.
- Page 98 Chapter 5 Trouble Guide Open the top cover. &WARNING Open or close the top cover gently. Hands or fingers may be caught in the cover section. Doing so may result in injury. Pull out the paper rotating the jam correction knob. Close the top cover.
-
Page 99: Folding Roller
Chapter 5 Trouble Guide 2) Check that the f o lding plate 2 will be inserted in the direction of 2 in the figure. Be sure to check that the f o lding plate 2 is attached properly as shown in the figure. ' Attach the folding plate 2 holding with both hands . -
Page 100: Ejecting Section
Chapter 5 Trouble Guide Close the top cover. Insert the folding plate 1 and folding plate 2. 0'"2-2. Folding plate" (p.89). 2-4. Ejecting section Press the 12'.f'-.J'e.. key on the control panel. The paper is forcibly ejected. Paper is ejected forcibly as long as the key is held down. Forcible ejection will stop by r eleasing the key. Troubleshooting &WARNING Do not use a flammable static electricity removal spray. - Page 101 Chapter 5 Trouble Guide Condition Cause Solution Paper jam occurs. Paper is not separated well. Separate the paper well. (p.31) Paper is curled. Correct the paper curl before use. (p.27) The folding roller is stained. Clean with a cloth moistened with alcohol. (p.81) The stacker roller is not positioned Re-set the position of the stacker roller.
- Page 102 Chapter 5 Trouble Guide Condition Cause Solution Double-feed occurs with Paper out of specifications is used. Do not use paper outside the specifications. the leading edge of paper (p.30) misaligned largely. Paper is not stacked in alignment. Stack the paper in alignment. (p.31) Loaded paper is more than 50 mm/ Load paper so that it is less than 1.96 inches in height. 50 mm/1.96 inches in height. (p.34) When the paper length exceeds 457.2 mm/ When the paper length exceeds 457.2 mm/ 18.00 inches, the paper stacking height is 18.00 inches, load paper so that it is less...
- Page 103 Chapter STrouble Guide Condition Cause Solution Paper does not reach the When using thick paper or slippery paper, Adjust the spring pressure of the folding roller. the spring pressure of the conveyance conveyance roller to increase spring roller is low. pressure.
- Page 104 Chapter 5 Trouble Guide Condition Cause Solution Paper jam occurs in cross The trail edge guide unit is pressed against Set the trail edge guide unit leaving some fold. the paper strongly. clearance between the trail edge guide unit and paper. (p.59) The set values of separating air and pickup Set the values of each air applicable to cross air are not proper.
-
Page 105: Appendix
Chapter 6 Appendix Specifications Design and specifications are su bject to change without notice. Basic specifications Model DF-1300L Item Unit Paper feed tray paper loading capacity 50 (*1 )(*2) inch 1.96 (*1 )(*2) Power supply Voltage 100 to 240 Frequency 50/60 Current consumption 1.9 to 0.8... - Page 106 Chapter 6 Appendix Media Model DF-1300L Item Unit Paper size Maximum 311.0 x 648.0 (W x L) inch 12.24 x 25.51 Minimum 120.0 x 182.0 inch 4.73 x 7.17 Standard paper A3/ B4/ A4/ B5/ A5/ B6 LGR (double letter)/LGL (legal)/ LTR (letter)/ STMT (statement)/INV (invoice) Paper type Sheet Single fold Paper quality Fine quality paper Paper length 457.2 mm/18.00 inches or less : (thickness) 52.3 to 157.0 (*1) Paper length more than 457.2 mm/18.00 inches : 81.4 to 157.0 (*1) Paper length 457.2 mm/18.00 inches or less : 35.56 to 106.76 (*1) Paper length more than 457.2 mm/18.00 inches : 55.35 to 106.76 (*1) Art paper/ coated...
- Page 107 Chapter 6 Appendix Performance and functions Model DF-1300L Item Unit Processing Maximum Sheets/ 310 (*1) speed min. Folding form (*2) Single fold/ Double fold/ Irregular accordion fold/ Letter fold/ Accordion fold/ Gate fold (*3)/ Specified cross fold (*4)/ Other deformed folding (*5) Folding speed 6 speed Sheets/ adjustment (*6) min. 7 speed (*1) Fine quality paper 81.4 g/m /21.6 lbs (long grain) Paper quality: Paper size: A4 (lengthways) Folding mode: Single fold (*2) The type of folding modes available may be limited depending on the paper quality and size. Only single fold is applicable to thick paper 157 g/m /106.76 lbs or heavier and larger than B4.
Need help?
Do you have a question about the FD 3302 and is the answer not in the manual?
Questions and answers