
Related Manuals for Landoll Brilllion Till'N Seed BPSB-8


Summary of Contents for Landoll Brilllion Till'N Seed BPSB-8
- Page 1 ‘ Till 'N Seed ® Models BPSB-8, BPSBP-8, BPSBA-8, BPSBAP-8 Operator’s Manual LANDOLL COMPANY, LLC 1900 North Street Marysville, Kansas 66508 (785) 562-5381 800-428-5655 ~ WWW.LANDOLL.COM F-1097-2305...
- Page 2 Manuals for Till 'N Seed - BPSB-8, BPSBP-8, BPSBA-8, BPSBAP-8 ® Manual Number Manual Type F-1097 Operator’s Manual F-1096 Parts Manual...
- Page 3 DANGER DO NOT operate or perform any maintenance tasks on this equipment until you have completed the following: 1. Receive proper training to operate this equipment safely. 2. Read and understand the operator’s manual. 3. Be thoroughly trained on inspection and repair procedures. Failure to comply with this warning may result in serious injury or possibly death.
- Page 5 Table of Contents Safety Information Introduction ........... . 1-1 Description of Unit .
- Page 6 TABLE OF CONTENTS Micro-Meter and Large Meter Box - Seed Rate Adjustment....3-8 Micro-Meter Box Calibration for Unlisted Seeds......3-9 Micro-Meter Box - Seed Rate Chart .
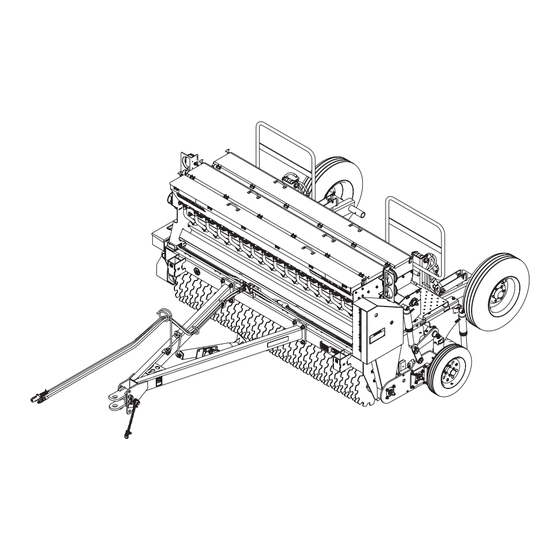
- Page 7 Brillion Farm Equipment, by Landoll, shall have no Description of Unit warranty obligation unless each product is registered within 10 days of retail purchase, using the Landoll BPS8 Till 'N Seed Seeder features a 2.5-bushel capacity Company, LLC Ag Products on-line registration process.
- Page 8 TABLE OF CONTENTS SAFETY INFORMATION Safety • When applying decals to the implement, be sure to clean the surface to remove any dirt or residue. Where possible, sign placement should protect the sign from NOTE abrasion, damage, or obstruction from mud, dirt, oil etc. Investigation has shown that nearly 1/3 of all farm accidents are caused by careless use of machinery.
- Page 9 TABLE OF CONTENTS SAFETY INFORMATION Safety Instructions for Towing • Make sure all moving parts have stopped. • Keep all guards in place. Replace any that become Vehicles damaged. The maximum travel speed is the lesser of • Understand the procedure before doing the work. Use proper tools and equipment.
- Page 10 TABLE OF CONTENTS SAFETY INFORMATION High Pressure Fluid Safety Safety Chain 1. Use the Safety Chain to help control drawn machinery Escaping fluid under pressure can be nearly invisible and should it separate from the tractor drawbar. have enough force to penetrate the skin causing serious injury.
- Page 11 TABLE OF CONTENTS SAFETY INFORMATION Decals ITEM 1 - 193500 ITEM 2 - 3P157 ITEM 4 - 528933 ITEM 3 - 528934 ITEM 5 - 528938 NOTICE ACRE METER, DO NOT PRESSURE CLEAN WITH AIR OR WATER 9K740 ITEM 6 - 9K740 WARNING Note: * Some cracked seeds were observed at this setting ITEM 10 - 24290...
- Page 12 181166 ITEM 18 ITEM 15 232190 8J310 MEMBER WARNING WARNING Landoll Company, LLC Marysville, Kansas www.landoll.com CRUSH HAZARD! ENGAGE PARKING PINS FOR REAR MODEL # DO NOT GO NEAR LEAKS ROLLER ARMS AND SET PARKING High pressure oil easily punctures...
- Page 13 TABLE OF CONTENTS SAFETY INFORMATION Front View Back View Figure 1-5: Seeder Decals F-1097-2305...
- Page 14 TABLE OF CONTENTS SAFETY INFORMATION Front View Shield has been removed Back View Figure 1-6: 3-PT Seeder with Agitator Box Decals F-1097-2305...
- Page 15 TABLE OF CONTENTS SAFETY INFORMATION Figure 1-7: Drawbar Seeder Decals F-1097-2305...
- Page 16 TABLE OF CONTENTS SAFETY INFORMATION Front View Back View Figure 1-8: Drawbar Seeder Decals 1-10 F-1097-2305...
- Page 17 TABLE OF CONTENTS SAFETY INFORMATION Front View Shield has been removed Back View Figure 1-9: Drawbar Seeder with Agitator Box Decals F-1097-2305 1-11...
- Page 18 TABLE OF CONTENTS SAFETY INFORMATION Table provided for general use. NOTES: 1-12 F-1097-2305...
- Page 19 Chapter 2 TABLE OF CONTENTS Assembly CAUTION Do not work on or under this machine unless securely blocked and supported by a hoist or tractor or by other sufficient means. WARNING Do not attempt to lift heavy parts manually. Use a hoist or a fork lift to move these parts into position.
- Page 20 TABLE OF CONTENTS ASSEMBLY 3-PT Hitch IMPORTANT All harnesses must be firmly attached to machine The 3-PT Model Till 'N Seed comes shipped completely frame members, so they don’t sag or become torn assembled. loose by field debris. Use the tie wraps provided. 1.
- Page 21 TABLE OF CONTENTS ASSEMBLY Drawbar Installation 1. Untie the two rolled up Drawbar Hydraulic Hoses near the center of the Frame Tube. Ensure the hoses are not interfering with where the Drawbar is to be WARNING attached. 2. Center Drawbar on the front Frame Tube. Attach Do not attempt to lift heavy parts manually.
- Page 22 TABLE OF CONTENTS ASSEMBLY Rockshaft Installation 5. Tighten RH and LH Lift Mount Hardware. 6. Install a 3 x 8 Hydraulic Cylinder Rod end along with 1. Loosen RH and LH Lift Mount Hardware so that they a Transport Lock onto each Lift Rockshaft Lug. Place can be slid onto each end of the Lift Rockshaft a 1"...
- Page 23 TABLE OF CONTENTS ASSEMBLY Tire and Wheel Installation WARNING Use a torque wrench to assure proper torque. Insufficient torque can cause stud breakage and damage the wheel pilots. Over torque can stress the bolts and strip the threads. NOTE The tire/wheel assembly is mounted with the valve stem facing outward from Hub and Spindle.
- Page 24 TABLE OF CONTENTS ASSEMBLY Hydraulic Installation 5. Using 2 wrenches to prevent twisting, rotate the Swivel Nut 2 wrench flats (1/3 turn). 6. For reassembly, follow the same procedure but WARNING tighten only 1 wrench flat (1/16 turn). Tightening Procedure for Swivel O-Ring Fittings. Escaping hydraulic fluid can cause serious personnel injury.
- Page 25 TABLE OF CONTENTS ASSEMBLY Purge the Hydraulic Lift System Hydraulic Cylinder The Hydraulic System is not filled with oil and should be purged of air before transporting and field operations. Wheel Arm 1. Tractor must be hitched to the Till 'N Seed Drawbar and Hydraulic Lift Hoses connected.
- Page 26 TABLE OF CONTENTS ASSEMBLY Drawbar Model Warning IMPORTANT Lamps Installation All harnesses must be firmly attached to machine frame members, so they don’t sag or become torn loose by field debris. Use the tie wraps provided. IMPORTANT Check to be sure the harnesses at center of machine Cords are marked Yellow Tape for Left and Green is slack enough so as not to be stretched or Tape for Right.
- Page 27 TABLE OF CONTENTS ASSEMBLY Agitator Installation 4. If applicable, orient and place the Agitators inside the Seed Box. Place Square Bore Washers on each end of the Agitators to prevent seed leakage and to CAUTION reduce Agitator end play between the Agitator Bearings.
- Page 28 TABLE OF CONTENTS ASSEMBLY Dual Wheel Kit - Optional Additional Tire and Wheel Assemblies can be added to the Rockshaft Wheel Arms. Tires are 9.5L-15, 8 Ply Rating and should be inflated to 44 PSI. WARNING 1. Lower the Till 'N Seed. 2.
- Page 29 TABLE OF CONTENTS ASSEMBLY Acre Meter Kit - Optional The Acre Meter consists of three main parts: the Acre Pick-Up Switch Acre Meter Cord Meter, the Pick-Up Switch and the Magnet Wheel Angle Assembly. 1. Install Acre Meter Angle to LH Support with 5/16-18 x Ground Wire 1 Flange Bolts and Locknuts.
- Page 30 TABLE OF CONTENTS ASSEMBLY Large Meter Seed Box Jackshaft Nut,3/8-11 Flange Locknut, Lock Washer,3/8 #8-32 Flat Washer,3/8 Tie Wrap Magnet Wheel Assembly Set Screw Acre Meter Assembly Bolt,3/8-11 x 1 Flange Bolt, Pick-Up Switch 5/16-18 x 1 Flat Washer,#8 Acre Meter Angle Nut,#8-32 Lock Washer,#8...
- Page 31 TABLE OF CONTENTS ASSEMBLY Large Meter Seed Box Flange Locknut, #8-32 Agitator Jackshaft Seed Box Pick-Up Switch Tie Wrap Nut,3/8-11 Magnet Wheel Assembly Lock Washer,3/8 Set Screw Flat Washer,3/8 Acre Meter Assembly Flat Washer,#8 Flange Bolt, 5/16-18 x 1 Bolt,3/8-11 x 1 Nut,#8-32 Lock Washer,#8 Flat Washer,#8...
- Page 32 TABLE OF CONTENTS ASSEMBLY Table provided for general use. NOTES: 2-14 F-1097-2305...
- Page 33 Chapter 3 TABLE OF CONTENTS Operation DANGER DANGER DANGER DANGER Never allow anyone to ride on the Seeder at any Always lock the Tractor Drawbar in the center time. Allowing a person to ride on the machine can position when transporting the unit. Failure to do inflict serious personal injury or death to that so can result in serious injury or death and cause person.
- Page 34 TABLE OF CONTENTS OPERATION Tractor Preparation DANGER DANGER The Brillion Till 'N Seed is available as a Pull-Type Hitch Do not allow any bystanders to stand between the or 3-PT Hitch version. tractor and the machine while backing up to the •...
- Page 35 TABLE OF CONTENTS OPERATION Pin 1-1/8" Dia Upper Pin Lower Pin Pin 1" Dia 19" Category 2 Free Link Pin 1-1/4" Dia Upper Pin 23" Category 3 Free Link Lower Pin Pin 1-7/16" Dia Pin 1-1/4" Dia Upper Pin 15" alternative position 15"...
- Page 36 TABLE OF CONTENTS OPERATION Attaching/Detaching 3-PT Hitch 3/4" Rear Roller Till 'N Seed Locking Pin WARNING To prevent the implement from tipping forward on the frame, disengage parking stand only when the seeder is fully attached to the tractor. Be sure to observe the following sequences.
- Page 37 TABLE OF CONTENTS OPERATION 5. Disengage each Transport Lock so the Transport Lock rests on the Wheel Arm. Secure with Clevis Pin Hydraulic and Hair Pin Cotter into the Wheel Arm Tab. See Cylinder Transport Figure 3-5. Lock Till 'N Seed is parked raised Clevis Pin, 1.
- Page 38 TABLE OF CONTENTS OPERATION Hydraulic Lift System Air Shock The Drawbar Till 'N Seed is equipped with a Hydraulic Lift DANGER DANGER System to raise and lower the unit in the field. WARNING Wear Protective Gloves And Safety Glasses Or Goggles When Working With Air Shock.
- Page 39 TABLE OF CONTENTS OPERATION • Check and adjust air pressure when machine is raised. Calibration Crank • Recommended starting Air Shock pressure is 50 psi. Assembly Typical air pressure range for this machine is 20-100 psi. In some instances more air pressure may be necessary, but do not exceed 120 psi.
- Page 40 TABLE OF CONTENTS OPERATION Micro-Meter and Large Meter On the right side, the Seed Rate for the Seed Meters can be set by adjusting the Seed Rate Adjusting Nut and Box - Seed Rate Adjustment Adjusting Screw. See Figures 3-13 and 3-14. WARNING Seed Rate 1-8 Nut...
- Page 41 TABLE OF CONTENTS OPERATION Micro-Meter Box Calibration for Unlisted Seeds Calibration Tray Storage Opening NOTE Calibration Crank Assembly used for Calibration is stored in the toolbox. Brillion assumes no liability pertaining to Seeding Rates achieved with this Seeder. Rates listed are general in Calibration Tray nature and should be used as starting points only.
- Page 42 TABLE OF CONTENTS OPERATION Micro-Meter Box - Seed Rate Chart PLANTING RATES FOR BPS8 MICRO-METER BOX IN POUNDS PER ACRE RATES ARE INTENDED AS A GUIDE ONLY. VARIATIONS IN SIZE AND CLEANLINESS WILL AFFECT RATES. CHECK ACREAGE AND POUNDS OF SEED USED FOR BEST RESULTS. Note: * Some cracked seeds were observed at this setting Figure 3-19: Seed Rate Chart - Micro-Meter Box 3-10...
- Page 43 TABLE OF CONTENTS OPERATION Large Meter Box Calibration Micro-Meter for Unlisted Seeds Calibration Hex 19 Tooth NOTE Agitator Calibration Crank Assembly used for Calibration is stored Shaft Large Meter in the toolbox. Drive Pin Brillion assumes no liability pertaining to Seeding Rates achieved with this Seeder.
- Page 44 TABLE OF CONTENTS OPERATION Large Meter Box - Seed Rate Chart Figure 3-21: Seed Rate Chart - Large Meter Box 3-12 F-1097-2305...
- Page 45 TABLE OF CONTENTS OPERATION Agitator Box - Seed Rate Adjustment The Seed Rate Chart is located inside the Seed Box Cover and in this manual. See Figure 3-28. It should be used as a general guide only. Because of seed variations, a more accurate rate can be determined by turning the Agitator Shaft Calibration Hex on the Transmission to Calibrate the Seeder.
- Page 46 TABLE OF CONTENTS OPERATION Agitator Box Calibration for Calibration Unlisted Seeds Opening Cover NOTE Calibration Crank Assembly used for Calibration is stored in the toolbox. Agitator Box Wing Nut, RH Support Brillion assumes no liability pertaining to Seeding Rates 5/16-18 Plate Calibration achieved with this Seeder.
- Page 47 TABLE OF CONTENTS OPERATION Calibration Tray Calibration Opening Cover Wing Nut, 5/16-18 Agitator Box RH Support Plate Figure 3-27: Calibration Tray Storage Position - Agitator Box Agitator Box - Seed Rate Chart PLANTING RATES FOR BPS8 AGITATOR BOX IN POUNDS PER ACRE RATES ARE INTENDED AS A GUIDE ONLY.
- Page 48 TABLE OF CONTENTS OPERATION Electronic Acre Meter Kit - Total Acres Press the /FUNC button until the “TOTAL” LED is lit. Optional The digits indicate the acres covered since the total acre counter was cleared. IMPORTANT To clear the total acre count, press and hold the UP and Acre Meter is dust and splash resistant, under no DOWN buttons for two seconds.
- Page 49 TABLE OF CONTENTS OPERATION If the display shows “Ent”: You must enter your password using the UP and DOWN buttons. When your password is displayed, press the /FUNC button to test the password. If the password is correct, you will be able to change the acre counter settings.
- Page 50 TABLE OF CONTENTS OPERATION Pulses Width MODEL per 400 Ft SSPT604 SSP4 SSP5 SSP6 SSP8 SSBP8 SSB8 SSP10 SSBP10 SS10 SSB10 10.0 SSP12 SSBP12 SS12 SSB12 12.0 SSP16 16.0 SSP108 SS108 SSP110 SS110 10.0 SSP112 SS112 12.0 SSP208/2081 SS208/2081 SSP210/2101 SS210/2101 10.0 SSP212/2121...
- Page 51 TABLE OF CONTENTS OPERATION General Operation • The Safety Chain should have a tensile strength equal to or greater than the gross weight of the 1. The Till 'N Seed minimum horsepower requirement is implement. The chain is attached to the lower based on Hitch Style.
- Page 52 TABLE OF CONTENTS OPERATION • Check all tires for proper inflation, and that lug nuts are properly torque. See “Tires” on page 4-3. • Verify that all warnings lights, SMV sign, reflectors, and safety decals are clearly visible and functioning properly. •...
- Page 53 Chapter 4 TABLE OF CONTENTS Maintenance General Torque Specifications (rev. 4/97) This chart provides tightening torques for general purpose applications when special torques are not specified on process or drawing. Assembly torques apply to plated nuts and capscrews assembled without supplemental lubrication (as received condition).
- Page 54 TABLE OF CONTENTS MAINTENANCE Hydraulic Fitting Torque Specifications 37 degree JIC, ORS, &ORB (REV. 10/97 This chart provides tightening torques for general purpose applications when special torques are not specified on process or drawing. Assembly torques apply to plated nuts and capscrews assembled without supplemental lubrication (as received condition).
- Page 55 TABLE OF CONTENTS MAINTENANCE Tires Wheel Hub Bearing Maintenance Recommended Lift Tire Size: 9.5L-15, 8 Ply Rating Lift Tire Inflation Pressure: 44 PSI Wheel Bearing maintenance should be performed at the beginning of every season of use. Check the Wheel When Re-Installing the 1/2-20 x 1 Wheel Bolts tighten to Bearings periodically for excessive end play.
- Page 56 TABLE OF CONTENTS MAINTENANCE Lubrication • Oil #80-2 Roller Chain immediately after each use while chain is still warm for best penetration. See The Till 'N Seed is equipped with maintenance free Figure 4-4. Bearings. These areas require no lubrication. •...
- Page 57 TABLE OF CONTENTS MAINTENANCE #80-2 #40 Large Meter Rotor Drive Chain Box Agitator Chain #40 Agitator Box Drive Chain #40 Seed Box Drive Chain #60 Primary Drive Chain Figure 4-4: Chain Lubrication Maintenance F-1097-2305...
- Page 58 TABLE OF CONTENTS MAINTENANCE Hydraulic Maintenance Firming Roller IMPORTANT IMPORTANT Lower the unit to the ground, and relieve hydraulic Always replace worn or damaged Firming Roller pressure before attempting to service any hydraulic Rubber Press Wheels. component. The Firming Roller rotates as one roller. The individual Rubber Press Wheel typically don’t rotate independently.
- Page 59 TABLE OF CONTENTS MAINTENANCE Drive and Tillage Rotors times (less than 10 percent of wrench movement). Thereafter check Drive and Tillage Rotors every 50-100 hours or annually. IMPORTANT Always clean undesired foreign material that may have Always replace worn, broken or bent Rotor Blades. wrapped around the Rotors.
- Page 60 TABLE OF CONTENTS MAINTENANCE Rotor Blade Replacement 7. Remove chain access Cover from the RH Swing Arm, #80-2 Drive Chain, Sprockets, 1/2 Keys and 11ga Procedure Washers. 8. LH side, open Seed Box Drive Chain Upper Shield WARNING and remove the Lower Shield. 9.
- Page 61 TABLE OF CONTENTS MAINTENANCE Rockshaft Link Bearing,1.535 LH Swing Chain Front Gauge Shield Wheel Arm Washer, Carriage Bolt, Flat Top 1/2-13 x 1-1/4 Bolt, 3/4-10 x 2 Key,3/8 Washer, Lock 3/4 Bearing Washer, Shield,1-1/2 3/4 x 2-1/16 x 3/8 Drive Sprocket,#60 Washer, 1.547 ID x 11ga...
- Page 62 TABLE OF CONTENTS MAINTENANCE Tillage Rotor 8. Remove LH Drive and Tillage Rotor 3/4-10 x 2 Bolts, Lock Washers, Thick Washers and Flat Top Washers 1. Raise Machine. Install Transport Lock if applicable. from the end of the Rotor Shafts. See Figure 3-4.
- Page 63 TABLE OF CONTENTS MAINTENANCE Rockshaft Link LH Swing Gauge Wheel Arm Washer, Flat Top Bolt, 3/4-10 x 2 Washer, U-Shape Lock 3/4 Support Plate Washer, 3/4 x 2-1/16 x 3/8 Front Tillage Rotor Washer, Spacer,1.563 x 1.547 ID x 11ga 2.000 x 3.188 Bearing Shield,1-1/2...
- Page 64 TABLE OF CONTENTS MAINTENANCE Chain Tension The #80-2 Rotor Drive Chain tension should have about 3/16" to 1/4" slack. See Figure 4-14. The Transmission #40 Seed Meter Boxes Drive Chain To adjust, loosen the 1/2-13 Hardware that mounts the and #40 Agitator Box Drive Chain tension should have Adjuster Plates to the RH and LH Swing Arms.
- Page 65 TABLE OF CONTENTS MAINTENANCE #40 Seed Meter Boxes Drive Chain Micro-Meter #40 Agitator Box #40 Large Meter Drive Shaft Drive Chain Box Agitator Chain Tension Idler 1/4" 1/8" Slack Agitator Box Idler Hardware Drive Shaft 1/4" 1/8" Slack Tension Idler Large Meter Drive Shaft Idler Hardware...
- Page 66 TABLE OF CONTENTS MAINTENANCE Seed Meter Adjustment Feed Roll Seed Meter IMPORTANT All the Seed Meters MUST BE CLOSED! It may be necessary to individually adjust Seed Meter Cups. All Seed Meters must be set the same to ensure uniform seeding.
- Page 67 TABLE OF CONTENTS MAINTENANCE Servicing Metered Seed 3. Micro-Meter Box: Individual Seed Meter Cups can be adjusted as required. Adjustments can be made by Shafts loosening the 1/4-20 x 5/8 Machine Screws that mount the Seed Meter Cup to the Seed Box. Adjust After you have serviced a Seed Shaft, Seed Meters or the affected Seed Meter Cup so the Feed Shutoff is related components you will need to Zero out the Seed...
- Page 68 TABLE OF CONTENTS MAINTENANCE Agitator Box Slide Indicator Mount Indicator Adjustment Hardware Mount When the Agitator Box Slide is properly adjusted, the Agitator Pointer following should occur. • When the Pointer is set to “0” (closed), the Agitator Box bottom opening end edge is aligned with the Slide Slide opening end edge.
- Page 69 TABLE OF CONTENTS MAINTENANCE Warning Lamps When plugging in the 7-Pin Warning Lamp Connector: 1. Make sure the Tractor has a good clean Receptacle, free of dirt and corrosion. 2. Make sure the 7-Pin Connector is inserted ALL the way in. With tighter fitting pins, operator may think the Connector is all the way in, but it really isn’t.
- Page 70 TABLE OF CONTENTS MAINTENANCE Acre Meter Troubleshooting Acre Meter cannot change the width or pulse count settings or clear the field and total acres. 1. Check to see if a password needs to be entered by IMPORTANT pressing the *(FUNC) key until the “P-Word” Acre Meter is dust and splash resistant, under no indicator LED is lit.
- Page 71 TABLE OF CONTENTS MAINTENANCE Troubleshooting Problem Solution Machine is shaking or Tillage Rotor is bouncing Reduce operating depth of Tillage Rotor Increase air pressure in Air Shock Machine is shaking and Drive Rotor is not Turning Check if rotors are plugged Check rotor drive chain Drive Rotor is skidding Check for items that maybe plugging rotors...
- Page 72 TABLE OF CONTENTS MAINTENANCE Table provided for general use. NOTES: 4-20 F-1097-2305...
- Page 73 Chapter 5 TABLE OF CONTENTS Specifications Product Attributes BPSB 8 BPSBA 8 Approximate Weight 5,070 lbs. (2,300 kg) 5,287 lbs. (2,398 kg) Working Width 8 ft. 0 in. (2.4 m) 8 ft. 0 in. (2.4 m) Working Overall Height 5 ft. 5 in. (1.7 m) 5 ft.
- Page 74 TABLE OF CONTENTS SPECIFICATIONS Product Attributes BPSBP 8 BPSBAP 8 Approximate Weight 4454 lbs. (2,020 kg) 4671 lbs. (2,119 kg) Working Width 8 ft. 0 in. (2.4 m) 8 ft. 0 in. (2.4 m) Working Overall Height 5 ft. 5 in. (1.7 m) 5 ft.
- Page 75 Document Control Revision Log: Date Form # Improvement(s): Description and Comments 05/2023 F-1097-2305 Initial Release (Revision Format “Year/Month”)
- Page 76 Equipment from Landoll Company, LLC is built to exacting standards ensured by ISO 9001 registration at all Landoll manufacturing facilities. Till 'N Seed ® Models BPSB-8, BPSBP-8, BPSBA-8, BPSBAP-8 Operator’s Manual Re-Order Part Number F-1097 LANDOLL COMPANY, LLC 1900 North Street...
Need help?
Do you have a question about the Brilllion Till'N Seed BPSB-8 and is the answer not in the manual?
Questions and answers