
Related Manuals for Landoll Brillion Turfmaker II


Summary of Contents for Landoll Brillion Turfmaker II
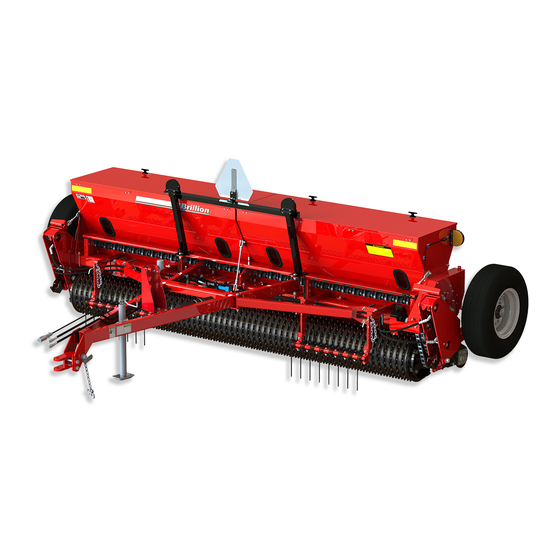
- Page 1 Turfmaker II Models SL2081/SL2101/SL2121 SLP2081/SLP2101/SLP2121 SLB2081/SLB2101/SLB2121 SLPB2081/SLPB2101/SLPB2121 Operator’s Manual LANDOLL COMPANY, LLC 1900 North Street Marysville, Kansas 66508 (785) 562-5381 800-428-5655 ~ WWW.LANDOLL.COM 9K998-0522...
- Page 2 Manuals for Turfmaker II, Models SL2081/SL2101/SL2121, SLP2081/SLP2101/SLP2121, SLB2081/SLB2101/SLB2121 and SLPB2081/SLPB2101/SLPB2121 Manual Number Manual Name 9K998 Operator’s Manual 9K997 Parts Manual...
- Page 3 Table of Contents Safety Information Introduction ..............1-1 Description of Unit .
- Page 4 Console w/Clutch Control Installation - Optional ........2-24 Console w/Clutch Control - Seed Shaft Sensor - Optional .
- Page 5 Speed Source Icon Features ........... . . 4-3 Pulses Per Revolution .
- Page 7 Failure to comply with this warning can result in within 10 days of retail purchase, using the Landoll to the machine personal injury or death, damage Company, LLC Ag Products on-line registration process.
- Page 8 SAFETY INFORMATION Safety • When applying decals to the implement, be sure to clean the surface to remove any dirt or residue. Where possible, sign placement should protect the sign from NOTE abrasion, damage, or obstruction from mud, dirt, oil etc. Investigation has shown that nearly 1/3 of all farm ...
- Page 9 SAFETY INFORMATION Transporting Safety Attaching, Detaching and Storage • Do not stand between the tractor and machine when IMPORTANT attaching or detaching machine unless both are not moving. It is the responsibility of the owner/operator to • Before applying pressure to the hydraulic system, be comply with all state and local laws.
- Page 10 SAFETY INFORMATION Tire Safety NOTE Tire changing can be dangerous and should be performed Relieve hydraulic pressure by shifting the control valve by trained personnel using correct tools and equipment. lever to float. • When inflating tires, use a clip-on chuck and extension Wear protective gloves and safety glasses or goggles hose long enough to allow you to stand to one side, when working with hydraulic systems.
- Page 11 224188 - (Rear) Seed Chart (After 01/2020) ITEM 13 ITEM 15 5K395 5K285 - (Rear) Seed Chart (Before 01/2020) 2P151 CAUTION Landoll Company, LLC Marysville, Kansas ITEM 20 BE SURE TO ENGAGE LANDSCAPE www.landoll.com SEEDER PARKING PIN ON LEFT END OF...
- Page 12 SAFETY INFORMATION Figure 1-4: Decal Placement - Hitch 9K998-0522...
- Page 13 SAFETY INFORMATION Figure 1-5: Decal Placement - Single Box, 8FT and 10FT 9K998-0522...
- Page 14 SAFETY INFORMATION Figure 1-6: Decal Placement - Single Box, 12FT 9K998-0522...
- Page 15 SAFETY INFORMATION 8FT AND 10FT SEEDER SL2 DecalsDoubleBox 12FT SEEDER Figure 1-7: Decal Placement - Double Box 9K998-0522...
- Page 16 SAFETY INFORMATION Table provided for general use. NOTES: 1-10 9K998-0522...
- Page 17 Chapter 2 Assembly IMPORTANT CAUTION All harnesses must be firmly attached to machine Do not work on or under this machine unless frame members, so they don’t sag or become torn securely blocked and supported by a hoist or loose by field debris.
- Page 18 ASSEMBLY 3-PT Seeder Assembly CAUTION When shipped, seeder comes assembled except for Do not disengage pin unless seeder is fully Lights and 3-PT Hitch. attached to a tractor. Seeder may be rear-heavy 1. Support Seeder Assembly with a hoist or by similar and tip backward on frame.
- Page 19 ASSEMBLY Frame Locknut,5/8-11 Lock Washer,5/8 Hose Clamp Manual Holder U-Bolt,5/8-11 SL2 Op3PtHitch 3-PT Hitch Figure 2-4: 3-PT Hitch 9K998-0522...
- Page 20 ASSEMBLY Pull Type Seeder Assembly SMV Support When shipped, Seeder comes assembled except for Lights, Hub and Spindle Assemblies, Tire and Wheels Assemblies and Drawbar. Seed Box 8FT and 10FT Assembly 1. Untie the two rolled up Drawbar Hydraulic Hoses near the center of the Frame Tube.
- Page 21 ASSEMBLY U-Bolt,5/8-11 Nut,5/8-11 Lock Washer,5/8 Manual Holder Hose Clamp Hose Holder Drawbar Bolt,5/8-11 x 1-1/2 Lock Washer,5/8 Nut,5/8-11 Figure 2-6: 8FT and 10FT Drawbar U-Bolt,1/2-13 Nut,5/8-11 Lock Washer,5/8 Flat Washer,1/2 U-Bolt,5/8-11 Locknut,1/2-13 RH Brace Hose Clamp Manual Holder Hose Holder Drawbar Bolt,5/8-11 x 1-1/2 LH Brace...
- Page 22 ASSEMBLY Tire and Wheel Installation WARNING Use a torque wrench to assure proper torque. Insufficient torque can cause stud breakage and damage the wheel pilots. Over torque can stress the Bolts and strip the threads. NOTE All tire/wheel assemblies are mounted with the valve stem facing outward from Hub and Spindle.
- Page 23 ASSEMBLY Hydraulic Installation Hydraulic Assembly 1. Restrictors installed in Cylinder Ports, connect 45 Degree Fitting so they are free to swivel. Connect top WARNING Hydraulic Hose to the Cylinder Base and bottom Hydraulic Hose to the Cylinder Rod End. Position the Escaping fluid under pressure can be nearly Hydraulic Hoses so that the Cylinder Base End invisible and have enough force to penetrate the...
- Page 24 ASSEMBLY Hose Clamp Frame Pair Hose Assembly Bolt,1/4-20 x 1-1/2 Top Plate Op SeederHyd Drawbar Figure 2-12: 8FT and 10FT Drawbar Hydraulics Frame Hose Clamp Pair Hose Assembly Bolt,1/4-20 x 1-1/2 Top Plate Drawbar Op SeederHyd12ft Figure 2-13: 12FT Drawbar Hydraulics 9K998-0522...
- Page 25 ASSEMBLY Purge the Hydraulic Lift System Bolt,5/8-11 The Hydraulic system is not filled with oil and should be purged of air before transporting and field operations. Flat Washer,5/8 Lift Circuit approximate oil requirement: 0.4 gallons. 1. Carefully Hitch the Seeder to the Tractor and connect Locknut,5/8-11 the Hydraulic Lift Hoses.
- Page 26 ASSEMBLY Warning Lamp Installation, 8FT 8. Attach the SMV sign to the SMV Support with 5/16-18 x 1" Bolts, Flat Washers, and Locknuts. and 10FT 9. Attach the Connector Holder to the Drawbar Hose Holder or 3-PT Hitch with 1/4-20 x 1 Bolts, Flat NOTE Washers, and Locknuts.
- Page 27 ASSEMBLY Amber Lamp Light Bracket Bolt,1/4-20 x 1-1/4 Locknut,1/4-20 Red Lamp Tie Wrap Support Bolt,5/16-18 x 1 Flat Washer,5/16 Connector Locknut, Holder 5/16-18 Bolt, 1/4-20 x 1 Flat Washer,1/4 Locknut,1/4-20 Lamp Harness 7-Pin Harness Light Bracket Locknut, 1/4-20 Bolt,1/4-20 Adhesive x 1-1/4 Mount 7-Pin...
- Page 28 ASSEMBLY Warning Lamp Installation, 12FT 8. Attach the SMV sign to the SMV Mount located on the center on the Light Bar with 5/16-18 x 1 Bolts, Flat Washers, and Locknuts. NOTE Attach the Connector Holder to the 3-PT Hitch or 12FT 3-PT model is shown, Drawbar model similar.
- Page 29 ASSEMBLY Amber Lamp Bolt,1/4-20 Bolt,1/4-20 x 1-1/4 x 1-1/4 Red Lamp Flat Washer, 5/16 Bolt, 5/16-18 x 1 Tie Wrap Light Locknut, 5/16-18 Locknut, 1/4-20 7-Pin Harness Light Bar Connector Holder Lamp Harness Bolt, 1/4-20 x 1 Flat Washer,1/4 Locknut,1/4-20 Locknut,1/4-20 7-Pin Harness Tie Wrap...
- Page 30 ASSEMBLY Latch Installation Cover Gas Spring Installation Large Seed Box Cover with Latches and Gas Springs NOTE 1. Place the gasket on latch base and place on Seed Gas Spring rod end must be down for proper Box Cover. functionality. 2.
- Page 31 ASSEMBLY Electric Clutch Kit - Optional Mini Monitor, 3-Pin Power Plug to 12 Volt Tractor Convenience Outlet and 6-Pin Connector to the 240" Extension Harness. 4-Pin Connector is not used at IMPORTANT this time. Connect 240" Extension Harness to Seeder At no time use high pressure water or air to clean the Harness.
- Page 32 ASSEMBLY Acre Meter Kit, 5K275 - Optional Not Used with Brillion Elite Mini Monitor Magnet Wheel Assembly NOTE Clutch Shaft The Acre Meter Kit consists of three main parts, the Acre Meter, the Pick-Up Switch and the Magnet Wheel 1/8" Max Assembly.
- Page 33 ASSEMBLY Nut,3/8-16 Seed Box Lock Washer,3/8 Flat Washer,3/8 Acre Meter Acre Meter Assembly Mount Bolt,3/8-16 x 1 Extension Harness Transmission Clutch Bracket Adhesive Screw,#8-32 x 1-1/4 Mounting Plate Flat Washer,#8 Tie Wrap Magnet Wheel Assembly Screw,#6-32 x 1/2 Clutch Shaft Screw,#10-24 x 3/4 Pick-Up Nut,#10-24...
- Page 34 ASSEMBLY Brillion Elite Mini Monitor - the Seed Shaft. See Figure 2-29. Connect the Smart Seed Shaft Sensor to the Seeder Harness. Optional Assembly instruction for models with Clutch. Smart Shaft Pick-up Switch Sensor Bracket IMPORTANT Transmission The Brillion Elite Mini Monitor System by Loup utilizes a MUX communication line.
- Page 35 ASSEMBLY outside of the Seed Box. To get the Sensor Connector 8. Connect the 240" Extensions Harness to the Seeder outside the Seed Box, feed the terminals through the Harness. Route the 240" Extension Harness along Cord Grip. Install the terminals into the 3-Pin Shroud the Seeder Frame and down the Drawbar/3-PT Hitch labeled “A”, “B”...
- Page 36 ASSEMBLY Brillion Elite Mini Monitor Electrical Schematic - Single Seed Box Brillion Elite Mini Monitor 4-Pin Radar/GPS Plug Monitor Mount Elite Mini Tractor Bin Level Harness Smart Shaft Sensor #2 3-Pin Sensor #1 Power Plug 6-Pin Connection Smart Clutch Relay 240"...
- Page 37 ASSEMBLY Brillion Elite Mini Monitor - Ground Speed Sensor Smart Shaft Sensor Transmission Screw,Rnd Hd #8-32 x 1-1/4 Bearing Flangette Washer,Flat #8 Quill Shaft Input Shaft Clutch Bolt,1/2-13 x 1-1/4 Nut,1/2-13 Locknut, Flange #8-32 Washer, Actuator Lock 1/2 Pick-up Assembly Set Screw, Switch Bracket Hex 3/8-16 x 1/2...
- Page 38 ASSEMBLY Brillion Elite Mini Monitor - Rear Seed Box Seed Shaft Sensor Seed Shaft,3/8 Square Screw,Rnd Hd, 1/4-20 X 3/4 Sensor Mount, 4.25 Spacing Screw,Rnd Hd Washer, #8-32 x 1-1/4 Flat 1/4 Locknut, Washer,Flat #8 Washer, Flange#8-32 Lock 1/4 Smart Nut,1/4-20 Shaft Sensor Magnet...
- Page 39 ASSEMBLY Brillion Elite Mini Monitor Tractor 4. Attach the Monitor Mount to the Straight Bracket with #10-24 x 1 Machine Screws, Flat Washers, Lock Installation - Optional Washers, and Nuts, provided with Monitor Mount. 5. With the Brillion Elite Mini Tractor Harness, plug the 1.
- Page 40 ASSEMBLY Console w/Clutch Control 6. Route Seeder Harness along Frame of Seeder. Ensure plug labeled Electric Clutch Power is on the Installation - Optional left side. 7. On left side connect plug labeled “Electric Clutch 1. If equipped with Clutch Switch Bar, remove from Power”...
- Page 41 ASSEMBLY Console w/Clutch Control - Seed 8. Position Seed Shaft Sensor so it is 1/8" from the Magnet Wheel Assembly. See Figure 2-40. Tighten Shaft Sensor - Optional both Seed Shaft Sensor Retaining Nuts. Seed Shaft Sensor and Magnet Wheel Assembly Installation Shaft Sensor Bracket...
- Page 42 ASSEMBLY Console w/Clutch Control 4. Plug Console 3-Pin Power Cord into the Tractor Convenience Outlet and 9-Pin Cord into the Seeder Tractor Installation - Optional Harness. 5. Check clutch operation: Clutch will disengage when 1. Mount Angle Bracket onto Tractor where convenient power is applied.
- Page 43 ASSEMBLY Table provided for general use. NOTES: 9K998-0522 2-27...
- Page 44 ASSEMBLY Rear Seed Box Installation - 7. Remove Seed Rate Adjuster Bearing Carrier Plate with Bearing still assembled to it, from the Seed Box Optional (After 01/2020) RH Support and Seed Rate Adjusting Screw. 8. At the center of the Seeder where the RH and LH 1.
- Page 45 ASSEMBLY 11. Remove the Mount Plate Hardware and slide the LH Seed Box far enough to the right to remove the Transmission Mount Plate from the Seed Box and Transmission. Shield Complete removal of the Seed Box is not required, the Seed Shaft will slide in the 37 Tooth Sprocket and Bearing.
- Page 46 ASSEMBLY 15. Install 5/8-11 x 1 Bolt into Drive Tube Threaded End. 20. While supporting the RH Front Seed Box, position Slide Square Bore End of Drive Tube, towards the Seed Box against Double Box Center Bracket. Seed Box, through the 3/4" Bearings while installing Assemble Seed Boxes and Center Bracket together 23 Tooth Sprocket and secure Sprocket to Drive with Hardware but do not tighten at this time.
- Page 47 ASSEMBLY 30. Assemble onto the Rear Seed Box Seed Shaft the 31. Adjust Front and Rear Seed Box Seed Meters so that Seed Rate Adjusting Screw, 1-8 Nut, Bearing, Seed all the Seed Meters are closed. Perform Seed Meter Rate Adjusting Nut and 1/2-13 Locknut. Place “0”...
- Page 48 ASSEMBLY Rear Seed Box Installation - 7. Remove Seed Rate Adjuster Bearing Carrier Plate with Bearing still Assembled to it, from the Seed Box Optional (Before 01/2020) RH Support and Seed Rate Adjusting Screw. 8. At the center of the Seeder where the RH and LH 1.
- Page 49 ASSEMBLY 11. Remove the Mounting Plate Hardware and slide the 18. Assemble RH Rear Seed Box onto RH Double Box LH Seed Box far enough to the right to remove the Support with two 1/2-13 x 1-1/4 Bolts and a 3/8-16 x Mounting Plate from the Seed Box and 1 Bolt, Flat Washers, Lock Washers and Nuts.
- Page 50 ASSEMBLY 27. Install Front Seed Shaft Coupler and tighten Rear 29. 8FT and 10FT Seeders: Install RH and LH Light Seed Box Feed Roll Coupler Assembly Set Screws Brackets. against the Seed Shaft and tighten Jam Nuts against 12FT Seeders: Install Turnbuckles to Double Box Feed Roll Coupler.
- Page 51 ASSEMBLY Table provided for general use. NOTES: 9K998-0522 2-35...
- Page 52 ASSEMBLY Scraper Kit - Optional 2. Attach the LH and RH Angle Brackets to the Brackets with 1/2-13 x 3-1/4 x 4-9/16 U-Bolts, Lock Washers and Nuts. Do Not tighten at this time. IMPORTANT 3. Attach the Scraper Angle to the LH and RH Angle Cannot be used with Coil Tine Track Remover Kit.
- Page 53 ASSEMBLY U-Bolt,1/2-13 x Lock Washer,1/2 7-1/2 x 4-1/2 Nut,1/2-13 Bracket U-Bolt,1/2-13 x Nut,3/8-16 Center 3-1/4 x 4-9/16 Scraper Lock Washer,3/8 Flat Washer,3/8 Seeder Frame Tube Scraper LH Angle Bracket Carriage Bolt, 3/8-16 x 1-1/4 Scraper Angle LH Angle Bracket SeederScraperKit Lock Washer,1/2 Nut,1/2-13 U-Bolt,1/2-13 x...
- Page 54 ASSEMBLY S-Tine Tire Track Remover Kit - 2. Attach the Tooth Tube to the S-Tine Brackets approximately 5 inches from each end of the Tooth Optional Tube with Straps, 1/2-13 x 6 Bolts, Lock Washers and Nuts. See Figure 2-61. IMPORTANT 3.
- Page 55 ASSEMBLY Lock Washer,1/2 U-Bolt,1/2-13 x Nut,1/2-13 7-1/2 x 4-1/2 S-Tine Bracket Strap Clamp Nut,1/2-13 Carriage Bolt, Lock Washer,1/2 7/16-14 x 3-1/2 Bolt,1/2-13 x 6 Tooth Tube Locknut,7/16-14 S-Tine Reversible Point Flange Locknut, SeederS-TineTrackRemoverKit 3/8-16 Duck Foot Point Plow Bolt 3/8-16 X 1-3/4 Seeder Frame Tube Figure 2-62: S-Tine Track Remover Kit - Optional...
- Page 56 ASSEMBLY Coil Tine Track Remover Kit - Optional IMPORTANT Cannot be used with the Scraper Kit 1. Slide the Coil Tines onto the Round Bar so that the straight leg is frontward.See Figure 2-63. 2. Mount an Arm Weldment and a Coil Tine to the Round Bar second hole from the right end and the third hole from the left end with 3/8-16 x 3 Bolts, Flat Washers, Lock Washers and Nuts.
- Page 57 ASSEMBLY Bolt,3/8-16 x 1-1/4 Hair Pin Cotter Adjusting Angle Place Chain in Adjusting Angle Slot Clevis Pin, 1/2 x 1-1/4 Flat Washer,3/8 Lock Screw Nut,1/2-13 Chain Lock Washer,3/8 Lock Washer,1/2 Nut,3/8-16 Bracket Bolt, Seeder Frame 1/2-13 x 1-3/4 Tube Bolt, Bolt, 3/8-16 x 2-1/2 3/8-16 x 3...
- Page 58 ASSEMBLY Turfmaker Sprockets - Optional Turfmaker Sprockets provide extra traction in certain soil types. See your Landoll/Brillion dealer for more information. 1. Position the Wheel Spacer between each Sand Wheel. See Figure 2-64. 2. At the end of the process slide a Half Wheel onto the Drum Pipe next to the last Wheel Spacer.
- Page 59 Chapter 3 Operation DANGER DANGER Never allow anyone to ride on the seeder at any Always lock the tractor drawbar in the center time. Allowing a person to ride on the machine position when transporting the unit. Failure to do can inflict serious personal injury or death to that so can result in serious injury or death and cause person.
- Page 60 OPERATION Tractor Preparation DANGER The Turfmaker Seeder is available as a Pull Type or Do not allow any bystanders to stand between 3-PT mounted version. the tractor and the implement while backing up to • A Pull Type Seeder is equipped to be pulled by a the implement.
- Page 61 OPERATION Figure 3-1: 3 Point Hitch 9K998-0522...
- Page 62 OPERATION Attaching/Detaching 3-PT Hitch Seeder Klik Pin WARNING Disengaged To prevent the implement from tipping backward on the frame, disengage parking pin only when the seeder is fully attached to the tractor. Be sure to observe the following sequences. Parking Pin Klik Pin Figure 3-3: Parking Pin Disengaged...
- Page 63 OPERATION Tractor Preparation/Attaching of Frame Pull Type Seeder Cylinder DANGER Engaged Do not allow any bystanders to stand between Transport Lock the tractor and the implement while backing up to the implement. Hair Pin Cotter 1. Align the Tractor Drawbar with the machine. Raise or lower the Drawbar, as needed, using the Jack.
- Page 64 OPERATION Attaching/Detaching Pull Type Seeder Frame Cylinder Attaching the Seeder for Field Operations: Seeder parked lowered Hair Pin 1. Attach Seeder to the Tractor. Cotter 2. Raise the Seeder fully to extend the Hydraulic Lift Cylinders and rotate the Transport Locks in the engaged position over the Cylinder Rod.
- Page 65 OPERATION Hydraulic Lift System Transmission Electric Clutch The Drawbar Seeder is equipped with a Hydraulic Lift IMPORTANT System to raise and lower the unit in the field. At no time use high pressure water or air to clean the WARNING Electric Clutch as damage could occur.
- Page 66 OPERATION Brillion Elite Mini Monitor • Brillion Elite Mini Monitor is operated on a 12-Volt DC negative ground system. The monitor should be Brillion Elite Mini Monitor provides information to the connected using the existing convenience plug operator and acts as an interface for clutch control. The connection.
- Page 67 OPERATION Seed Box Rate Adjustment Because of seed variation, a more accurate rate can be determined by turning the 11/16 Hex Seed Shaft on the Transmission to Calibrate the Seeder. See “Calibration WARNING for Unlisted Seeds” on Page 3-12. On the right side, the Seed Rate for the Seed Meters can •...
- Page 68 OPERATION Figure 3-13: Seed Chart, Front Box NOTES Brillion assumes no liability pertaining to seeding rates achieved with this seeder. Rates listed are general in nature and should be used as starting points only. Seed varieties and blends listed represent those calibrated through in-house test meters. Variations in actual rates may be realized due to differences in seed lots.
- Page 69 OPERATION Figure 3-14: Seed Chart, Rear Box NOTES Brillion assumes no liability pertaining to seeding rates achieved with this seeder. Rates listed are general in nature and should be used as starting points only. Seed varieties and blends listed represent those calibrated through in-house test meters. Variations in actual rates may be realized due to differences in seed lots.
- Page 70 Clutch. 3. Close Meters of Front Seed Box if they contain Seed. Landoll assumes no liability pertaining to Seeding Rates 4. Place a Canvas or Tarp under the Machine to catch achieved with this Seeder. Rates listed are general in Seed.
- Page 71 OPERATION Idler 22 Tooth Driven 11 Tooth Driver Clutch Idler Shaft 37 Tooth Driven 22 Tooth 11/16 Hex Driver Seed Shaft Figure 3-15: Front Seed Box Transmission Drive (After 01/2020) Idler 22 Tooth Driven 23 Tooth Driven Idler 11 Tooth Driver Clutch Idler...
- Page 72 OPERATION OPTIONAL TIGHTENER 22 TOOTH DRIVER 23 TOOTH DRIVEN 11/16 HEX 37 TOOTH 11 TOOTH DRIVEN DRIVER Figure 3-17: Transmission Drive (Before 01/2020) 3-14 9K998-0522...
- Page 73 OPERATION Speed-Up Kit - Optional 3. Remove Roll Pin in the 11-22 Tooth Sprocket. 4. Move the 11-22 Sprocket to new position and replace Seed Rate shown on Seed Rate Charts can be doubled Roll Pin. by using the 22 Tooth Sprocket provided in the 5.
- Page 74 OPERATION Open Chain at Connector Roll Pin 22T Sprocket 11T Sprocket 4 Pitch Roller Chain Roll Pin 22T Sprocket Figure 3-19: Drive Chain Set for 11 & 22 Tooth Seed Rate (Before 01/2020) 3-16 9K998-0522...
- Page 75 OPERATION Loup Acre Meter - Optional (After Total Acres 05/15/2012) Press the /FUNC button until the “FIELD” and “TOTAL” LEDs are lit. The digits indicate the acres covered since the total acre counter was cleared. IMPORTANT To clear the total acre count, press and hold the UP and Acre Meter is dust and splash resistant, under no DOWN buttons for two seconds.
- Page 76 OPERATION If the display shows “dIS”: The password is disabled. 3. Press the function button to set the pulses. (If screen The total acre count, pulses/400 feet, width, and goes blank before you press the function button, password settings can be adjusted using the UP and repeat steps 1 and 2).
- Page 77 OPERATION Table 3-1: Acre Meter Settings (After 05/15/2012) Pulses Width MODEL per 400 FT (Feet) SSPT604 SSP4 SSP5 SSP6 SSP8 SSBP8 SSB8 SSP10 SSBP10 SS10 SSB10 10.0 SSP12 SSBP12 SS12 SSB12 12.0 SSP16 SS16 16.0 SSP108 SS108 SSP110 SS110 10.0 SSP112 SS112 12.0...
- Page 78 OPERATION Table 3-2: Acre Meter Settings (Prior to 05/15/2012) MODEL PULSES WIDTH SSP T604 SSP4 SSP5 SSP6 SSP8 SSP10 SS10 SSP12 SS12 SSP108 SS108 SSP110 SS110 SSP112 SS112 SSP208 SSP2081 SS208 SS2081 SSP210 SSP2101 SS210 SS2101 SSP212 SSP2121 SS212 SS2121 SSP308 SS308 SSP310...
- Page 79 OPERATION Transporting the Seeder 6. Before transporting: • Know the height and width of the implement being 1. Check and follow all federal, state, and local towed. Markers, tanks, attachments, etc. can requirements before transporting the Seeder. increase the height and width of the implement. 2.
- Page 80 OPERATION Table provided for general use. NOTES: 3-22 9K998-0522...
- Page 81 Chapter 4 TABLE OF CONTENTS Brillion Elite Mini Monitor Overview • Field Acres and Total Acres • Clutch Control The Brillion Elite Mini Monitor is a full featured display • (Up to 6) Six Seed Shaft Rotation Sensors designed to provide accurate information to the operator •...
- Page 82 TABLE OF CONTENTS BRILLION ELITE MINI MONITOR 9:30AM SETTINGS BACK APP VER: 2.1.1 SPEED CLUTCH SCROLL UP SETTINGS SETTINGS INSTALL SHAFT SETUP SETTINGS DIAGNOSTICS SETTINGS DISPLAY SCROLL DOWN SETTINGS Figure 4-2: Settings Menu Display (Landscape Seeder) Settings Menu - Source: Shaft Sensor Speed SHAFT SHAFT SPEED...
- Page 83 TABLE OF CONTENTS BRILLION ELITE MINI MONITOR Speed Source Displays Speed Source Icon Features Pulses Per Revolution SPEED SETTINGS BACK Pulses Per Revolution are the PULSES PER IMP. SWITCH: SOURCE: number of magnets the implement REV: SHAFT SPEED DISABLED mounted speed sensor sees in one revolution of the shaft being monitored.
- Page 84 TABLE OF CONTENTS BRILLION ELITE MINI MONITOR Speed Calibration Implement Switch Setup All new systems require a ground Implement Switch SPEED SWITCH speed calibration to ensure Setup tells the CALIBRATION SETTINGS accurate area totals and accurate monitor if the ground speed readings. To complete the calibration, Implement Switch IMP.
- Page 85 TABLE OF CONTENTS BRILLION ELITE MINI MONITOR Settings Menu - Remove A Sensor INSTALL Install Setup Select this option to remove a SETUP REMOVE A sensor from your existing system. RECEIVER SENSOR Select “Install Setup” icon to Learn New System, Add A Sensor, or Remove A Sensor to your machine.
- Page 86 TABLE OF CONTENTS BRILLION ELITE MINI MONITOR Settings Menu - Settings Menu - SHAFT DIAGNOSTICS Shaft Settings Diagnostics RECEIVER SETTINGS The Diagnostics screen can help in identifying issues with Seed Shaft Settings sensors, harnessing or other items. Status reports for The Seeder can have up to six Smart Shaft Sensors that Battery Voltage, Sensors Learned, MUX Communication indicate shaft rotation.
- Page 87 TABLE OF CONTENTS BRILLION ELITE MINI MONITOR Settings Menu - Settings Menu - DISPLAY GPS Settings Display Settings RECEIVER SETTINGS SETTINGS “GPS Settings” defines any Baudrate, Speed Corrections or the current GPS Status. DISPLAY SETTINGS BACK UNITS GPS SETTINGS BACK VOLUME BRIGHTNESS GPS BAUDRATE...
- Page 88 TABLE OF CONTENTS BRILLION ELITE MINI MONITOR Service And Technical System Update Support The system update screen is used SYSTEM to update to newer versions of UPDATE Contact: Loup Electronics Inc. software or reset to factory default Address: 2960 N. 38th Street settings.
- Page 89 Chapter 5 Maintenance General Torque Specifications (rev. 4/97) This chart provides tightening torques for general purpose applications when special torques are not specified on process or drawing. Assembly torques apply to plated nuts and capscrews assembled without supplemental lubrication (as received condition). They do not apply if special graphite moly-disulfide or other extreme pressure lubricants are used.
- Page 90 MAINTENANCE Hydraulic Fitting Torque Specifications 37 degree JIC, ORS, &ORB (REV. 10/97 This chart provides tightening torques for general purpose applications when special torques are not specified on process or drawing. Assembly torques apply to plated nuts and capscrews assembled without supplemental lubrication (as received condition). They do not apply if special graphite moly-disulfide or other extreme pressure lubricants are used.
- Page 91 MAINTENANCE Tires 7. Slide the hub, bearing, and seal onto a clean spindle. 8. Install the Outer Bearing Cone and Slotted Nut. 8FT Seeder recommended Tire Size: 9. Tighten the Slotted Nut while rotating the Hub until 9.5L x 15, 8Ply Implement Rib Rating there is a slight resistance to wheel rotation.
- Page 92 MAINTENANCE Pull Type Frame Wheel Arm Tire and Wheel Assembly Wheel Hub Repack Annually Rear Roller Bearing Rear Arm Rear Roller Pull Type Bearing Seeder Frame Front Roller Bearing 3-PT Seeder Front Roller Frame Bearing Figure 5-2: Lubrication Intervals 9K998-0522...
- Page 93 MAINTENANCE Hydraulic Maintenance NOTE Failure to position the Clamp Band Socket Head Bolt IMPORTANT (Clamp Band open section) over the Roller Drum weld Lower the Drawbar Seeder to the ground, and relieve seam will cause Clamp Band to loosen and slide. hydraulic pressure before attempting to service any After an initial run of 5-10 hours, check the Front and hydraulic component.
- Page 94 MAINTENANCE Chain Tension Transmission (After 01/2020) Each #40 Drive Chain tension can be adjusted by loosening and adjusting their Tension Idler Sprockets to obtain about 1/8"-1/4" Slack. See Figure 5-4. Adjust the #550 Drive Chain between the Front Roller and Transmission by adjusting the Nylatron Tension Idler to allow approximately 2"...
- Page 95 MAINTENANCE Transmission (Before 01/2020) To adjust the Transmission Chain, loosen the 5/8" Idler Sprocket Axle Bolt and adjust the Clevis Drawbolt Locknut to obtain about 1/8"-1/4" sag. Re-tighten the Idler Sprocket Axle Bolt. Be careful not to over-tighten this chain. See Figure 5-5. Adjust the #550 Drive Chain between the Front Roller Sprocket and Transmission by adjusting the Nylatron Tension Idler to allow approximately 2"...
- Page 96 MAINTENANCE Seed Meter Adjustment Seed Meter Feed Roll IMPORTANT The Clutch must be disengaged when Seed Shafts are turned manually for Calibration. IMPORTANT All the Seed Meters MUST BE CLOSED! All Seed Meters must be set the same to ensure seeding uniformity.
- Page 97 MAINTENANCE 4. Front Seed Box: Individual Seed Meter Cups can be adjusted as required. Adjustments can be made Seed Shaft Coupling Half by loosening the 1/4-20 x 5/8 Machine Screws that Bolt,1/4-20 mount the Seed Meter Cup to the Seed Box and the x 1-3/4 1/4-20 Nut that attaches the Seed Meter Support to the Seed Meter Cups.
- Page 98 MAINTENANCE Warning Lamps When plugging in the 7-Pin Warning Lamp Connector: 1. Make sure the Tractor has a good clean Receptacle, free of dirt and corrosion. 2. Make sure the 7-Pin Connector is inserted ALL the way in. With tighter fitting pins, operator may think the Connector is all the way in, but it really isn’t.
- Page 99 MAINTENANCE Electric Clutch display harness connector. You should see the display increment +1 with each contact of the connector terminals. IMPORTANT 4. If step 3 works then wave a magnet in front of the If your machine is equipped with an Electric Clutch at Pick-Up Switch face with it re-connected to the no time use high pressure water or air to clean it, as display and see if the display increments up.
- Page 100 MAINTENANCE Table provided for general use. NOTES: 5-12 9K998-0522...
- Page 101 Chapter 5 Specifications *Specifications subject to change with or without notice. 9K998-0522...
- Page 102 SPECIFICATIONS 9K998-0522...
- Page 103 SPECIFICATIONS 9K998-0522...
- Page 104 SPECIFICATIONS 9K998-0522...
- Page 105 SPECIFICATIONS 9K998-0522...
- Page 106 SPECIFICATIONS 9K998-0522...
- Page 107 Document Control Revision Log: Date Revision Improvement(s) Description and Comments 03/2007 9K998 Initial Release 01/2020 9K998-0120 Updated Seed Boxes, Seed Box Calibration, Chain Tension Adjustment 06/2021 9K998-0621 ECN 47093 - Hub & Spindle Asm Update to 6 Bolt 05/2022 9K998-0522 ECN 46900, 47696 - Add Brillion Elite Mini Monitor by Loup ECN 47474 - Add QR Code Decal Add Seed Shaft Decal...
- Page 108 Equipment from Landoll Company, LLC is built to exacting standards ensured by ISO 9001 registration at all Landoll manufacturing facilities. Turfmaker II Models SL2081/SL2101/SL2121 SLP2081/SLP2101/SLP2121 SLB2081/SLB2101/SLB2121 SLPB2081/SLPB2101/SLPB2121 Operator’s Manual Re-Order Part Number 9K998 LANDOLL COMPANY, LLC 1900 North Street Marysville, Kansas 66508 (785) 562-5381 800-428-5655 ~ WWW.LANDOLL.COM...
Need help?
Do you have a question about the Brillion Turfmaker II and is the answer not in the manual?
Questions and answers