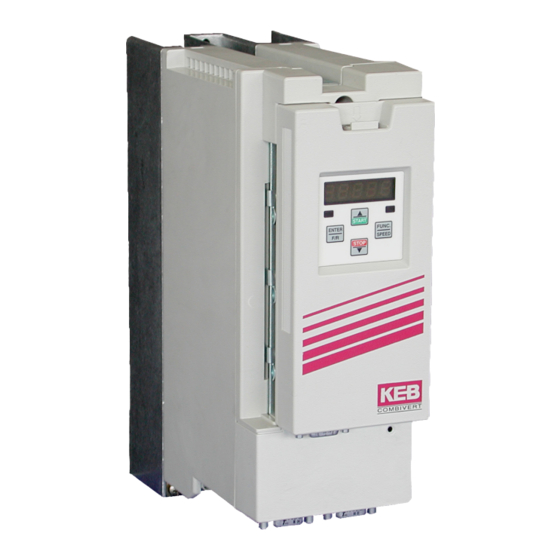
KEB COMBIVERT F5 Operation Manual
Elevator drive
Hide thumbs
Also See for COMBIVERT F5:
- Applications manual (378 pages) ,
- Reference manual (349 pages) ,
- Instruction manual (196 pages)
Table of Contents
Advertisement
Advertisement
Table of Contents
Troubleshooting

Subscribe to Our Youtube Channel
Related Manuals for KEB COMBIVERT F5


Summary of Contents for KEB COMBIVERT F5
- Page 1 COMBIVERT F5 ELEVATOR DRIVE Operation Manual Version 3.33...
- Page 2 This instruction manual describes the COMBIVERT F5 ELEVATOR DRIVE. Before working with the unit the user must become familiar with it. This especially applies to the knowledge and observance of the following safety and warning indications. The icons used in this instruction manual have the following meaning: ...
-
Page 3: Table Of Contents
Table of Contents 1. Technical Information ......6 3.3. Backward Compatibility........54 3.4. Menus and Navigation Overview .....54 1.1. Mounting Instruction ..........6 3.11. Home Screen ............54 1.1.1. Classification ..............6 3.5. Languages ............55 1.1.2. Physical Mounting ............6 3.6. - Page 5 READ FIRST - SAFETY PRECAUTIONS AC motor controls and servo drives contain dangerous voltages which can cause death or serious injury. During operation they can have live Danger to Life "energized" un-insulated parts, moving parts, as well as hot surfaces. Care should be taken to ensure correct and safe operation in order to minimize risk to personnel and equipment.
-
Page 6: Technical Information
Technical Information 1. Technical Information 1.1. Mounting Instruction 1.1.1. Classification The elevator drive is classified as an “Open Type” inverter with an IP20 rating and is intended for “use in a pollution degree 2 environment.” The unit must be mounted inside of a control cabinet offering proper environmental protection. -
Page 7: Harsh Environments
Mounting Instruction 1.1.3. Harsh For extended life, prevent dust and other contaminants from getting into the Environments inverter. When installing the unit inside a sealed enclosure, make sure the enclosure is sized correctly for proper heat dissipation or that a cooling system has been installed in the panel. -
Page 8: Electrical Connections
Electrical Connections 1.2. Electrical Connections CAUTION - RISK OF ELECTRIC SHOCK! Always disconnect supply 1.2.1. Safety First voltage before servicing the F5 Elevator Drive. After disconnecting the supply voltage, always wait 5 minutes before attempting to change the wiring. The internal DC BUS capacitors must discharge. -
Page 9: Fusing
Electrical Connections Integral solid state short circuit protection does not provide branch circuit 1.2.4. Fusing protection. Branch circuit protection must be provided in accordance with the Manufacturer Instructions, National Electrical Code (NFPA70 or CSA22.1) and any additional local codes. The minimum voltage rating for protection devices used with 240V inverters shall be 250VAC. - Page 10 Electrical Connections Table 1.2.4.2 - 480V Units SCCR UL 248 Semiconductor UL 489 Unit Size / [kA] Class J Fuse Number* / MCCB [A] / Housing Rating [A] Rating [A] Siemens Cat. No. 13 / E 50 140 06 40 / 40 14 / E 50 140 06 50 / 50 14 / G...
-
Page 11: Line Chokes
80-100% THiD to around 45% THiD. If lower values of line current distortion are required, Contact KEB regarding an applicable harmonic filter. With such a device it is possible to reduce the harmonic distortion below 8% THiD. -
Page 12: Motor Cable Length
Electrical Connections 1.2.7. Motor Cable In some conventional installations and many MRL applications, the mo- Length tor can be a considerable distance (greater then 40 feet) from the elevator drive. Under these circumstances the long cable length can cause high voltage peaks or high dV/dt (rate of voltage rise) on the motor windings. -
Page 13: High Voltage Connections
Electrical Connection 1.2.8. High Voltage Always note inverter voltage. Select appropriate over current protection Connections devices, select disconnect device, and select proper wire size before beginning the wiring process. Wire the drive according to NFPA 70 Class 1 requirements. The correct wire gauge for each size inverter can be selected from the charts in Sections 1.4-1.5. -
Page 14: Ground Connections
Electrical Connection When working with high frequencies ( > 1kHz ) and power semiconductors 1.2.9. Ground Connections it is recommended to make all ground connections with large exposed metal surfaces to minimize the ground resistance. The metal sub-plate the inverter is mounted on is regarded as the central ground point for the machine or the equipment. - Page 15 Electrical Connection Rigid metal conduit can be used as the shield of the motor wires. Always observe the following points: • Remove all paint from the control cabinet and motor housing where the conduit is fastened. • Securely fasten all conduit fittings. •...
-
Page 16: Storage Of Unit
Storage of Unit 1.2.11. Storage of Unit The DC bus of the KEB F5 is equipped with electrolytic capacitors. If the electrolytic capacitors are stored de-energized, the oxide film working as a dielectric fluid reacts with the acidic electrolyte and destroys itself slowly. -
Page 17: Dielectric Testing
Dielectric Testing 1.2.12. Dielectric Testing The KEB Elevator drive is dielectric tested after assembly as part of the factory end test routine. This dielectric test is harmonized and in accordance with the requirements set forth in UL 508C, CSA C22.2 No. 274-17, ASME A17.5-2019, CSA B44.1-19, EN81, IEC61800-5 and EN 60204-1. -
Page 18: Brake Transistor Monitor
Contactors are not included with the drive and must be purchased separately. Contact KEB for assistance on selecing the right contactor option for your application. See below for sizing. No Monitor Circuit... -
Page 19: Monitor Circuit Wiring Diagrams
Brake Transistor Monitor The DC contactor shall be rated for a minimum of 1000VDC and have a resistive current rating not less than the maximum braking transistor current of the connected F5 elevator drive. The control voltage is typically either 120VAC or 24VDC depending on the coil voltage of the contactors, I/O on the elevator control, and the ratings of the temperature sensor on the resistor. - Page 20 Brake Transistor Monitor Brake Transistor Monitor with Elevator Controller Supervision: Line Contactor Branch Circuit Fuses Line Choke EMI Filter Brake Resistor Line Contactor Elevator Control +PA PT Control Voltage Motor Power Terminal ++ for housings E,G,H +PA for housings R,U,W Out LC In BRT Brake Transistor...
-
Page 21: Temperature Sensor Wiring Diagrams
Brake Transistor Monitor Brake Transistor Monitor without Elevator Controller Supervision: Line Contactor Branch Circuit Fuses Line Choke EMI Filter Brake Resistor Line Contactor Elevator Control +PA PT Control Voltage Motor Reset Contactor Reset Reset Button Power Terminal ++ for housings E,G,H +PA for housings R,U,W Brake Transistor Watchdog... - Page 22 Brake Transistor Monitor Temperature Sensor Monitor Circuit; Elevator Controller Supervision: Line Contactor Branch Circuit Fuses Line Choke EMI Filter Brake Resistor Line Contactor Elevator Control Control Voltage Motor Power Terminal ++ for housings E,G,H +PA for housings R,U,W Out LC In BRT Temperature Sensor Monitor Circuit;...
-
Page 23: Model Number Information
V = SSi ........TTL output 9 = UVW ........TTL output *Additional interfaces types and channel configurations available Application L = KEB Elevator Drive Voltage Ident. R = 480V, 3-Phase P = 230V, 3-Phase Housing Type E, G, H, R, U, W... -
Page 24: Technical Data 230V (Size 13 To 23)
Technical data 230V (size 13 to 23)* 1.4. Technical data 230V (size 13 to 23)* Inverter Size [hp] Max Motor Power Housing Size Unit Hardware Input Input Ratings Supply voltage [V] 180...260 +/- 0 (240V Nominal Voltage) Supply voltage frequency [Hz] 50 / 60 +/- 2 Input phases Rated input current [A]... - Page 25 4) This is the power dissipation at the rated carrier frequency, rated voltage and rated load. Operation at reduced carrier frequencies or reduced load will decrease this value. 5) Max motor cable length when using shielded cable, KEB EMI filter, and the installation must conform to EN55011 / EN55022.
-
Page 26: Technical Data 480V (Size 13 To 28)
Technical data 480V (size 13 to 28)* 1.5. Technical data 480V (size 13 to 28)* Inverter Size Max Motor Power [hp] 18.5 Housing Size Unit Hardware Input Ratings Supply voltage [V] 305...528 ±0 (480 V Nominal voltage ) Supply voltage frequency [Hz] 50 / 60 +/- 2 Input phases Rated input current 400VAC [A]... - Page 27 3K3 in accordance with EN 50178 1) The 28 W housing can either be fed with one large set of wires or two smaller sets of wires, double feed. See Mat. No. 00F50EB-KW00 from KEB. 2) The wire gauge is based on the maximum fuse rating, copper wire with a 75°C insulation rating, THHW or equivalent. If circuit protection is selected based on the actual input current, the wire size could be reduced.
-
Page 28: Dimensions And Weight
Dimensions and weight 1.6. Dimensions and weight H Housing G Housing E Housing 31lb / 14kg 22lb / 10kg 11lb / 5kg R Housing R Housing (peak unit) 55lb / 25kg 71lb / 32kg W Housing U Housing 166lb / 75kg 353lb / 160kg See next page for dimension tables. - Page 29 Dimensions and weight Dimensions in inches Dimensions in mm Housing Housing 5.12 11.4 8.75 0.28 10.8 13.4 10.0 0.28 13.0 11.7 13.4 10.0 0.28 13.0 13.5 20.5 14.0 0.394 11.8 19.5 13.5 20.5 10.9 0.394 11.8 19.5 13.5 31.5 14.0 0.394 11.8 30.5 26.4 37.0 14.5 0.512 24.8 35.8 Mounting Holes G,H,R,U,W...
-
Page 30: Power Circuit Terminal Summary
Power Circuit Terminal Summary 1.7. Power Circuit Terminal Summary Housing Size E Verify input voltage with name plate for proper connection 230V or 480V L1, L2, L3 3 phase supply voltage ++, - - Connection for DC supply ++, PB Connection for braking resistor N/L2 U, V, W... - Page 31 Power Circuit Terminal Summary Verify input voltage with name plate for proper connection 230V or 480V Housing Size R Note always verify input voltage with name plate for proper connection K1 K2 T1 T2 L1, L2, L3 T1, T2 3 phase supply voltage Connection for temperature sensor +PA, -...
-
Page 32: Connection Of The Power Circuit
Motor Choke or Output Filter Line Choke Motor Interference Suppression Filter Sub-Panel in Control Cabinet COMBIVERT F5 External motor temperature sensor (for all units) Don't install sensor wires with control wires! Must use double shield when running these No jumper required, when... -
Page 33: Ferrite Ring Installation
Ferrite Ring Installation 1.8.1. Ferrite Ring All PWM type frequency inverters generate high frequencies as a result of Installation fast switching of the IGBT output transistors. As these high frequencies trav- el along the motor wires they can easily be coupled to other wires in proxim- ity to the motor leads. - Page 34 Ferrite Ring Installation Installation The ferrite rings are to be installed on the motor wires as close to the in- verter as possible. Take the ferrite(s) and pass all three motor phases through the center. Use a wire tie to secure the ferrite(s) to the wire. Note: Do not pass the earth ground wire through the ferrite(s).
- Page 35 DC bus to be installed should be the same as the number of regen units. Each KEB R6 regen unit is provided with a ferrite ring with the following part number and dimension: Part Number Overall Dimensions in mm (inches) 00.90.390-K000...
-
Page 36: Control Connections
Control Connections 2. Control Connections 2.1. Control Circuit 1 2 3 4 5 6 7 8 9 10 11 12 13 14 15 16 17 18 19 20 21 22 23 24 25 26 27 28 29 2.1.1. Terminal Strip Connections F5-A Terminal tightening torque = 0.5 Nm PIN Function... -
Page 37: Connection Of The Control Signals
Control Connections 2.1.2. Connection of To prevent a malfunction caused by interference voltages on the control the control signals inputs, the following steps should be observed: • Establish a true earth ground for all ground connections! • Do not connect drive signal commons to earth ground! •... -
Page 38: Voltage Input / External Power Supply
Control Connections 2.1.5. Voltage Input The supply to the control circuit through an external voltage source keeps / External Power the control in operational condition even if the power stage is switched off. Supply The external power supply should have the 0VDC connected to ground, preferably at the supply device itself. -
Page 39: Control Circuit - Sto
- STO cordance to IEC 61800-5-2. These inverter units with a safety control card can be identified by the KEB part number and will have a “K” in the 5th placeholder (e.g. xx.F5.Kxx-xxxx) The KEB STO card meets performance levels (ISO13849-1) and SIL 3 (IEC 61508 and IEC62061). -
Page 40: Assembly Of The Wires (F5-K)
Control Circuit - STO D, E Housings G, H, R, U, W Housings Terminal Description Control terminal strip STO terminal block Encoder Interface channel 1 Encoder Interface channel 2 HSP5 interface 2.2.1. Assembly of the The STO control card uses a spring-loaded terminal strip. Use the following wires (F5-K) instructions when wiring the control terminals Required Tools:... -
Page 41: Terminal Strip Connections (F5-K)
Control Circuit - STO X2A - Control 2.2.2. Terminal Strip Connections (F5-K) Pin Function Name Description Digital Common Reference potential for digital inputs/outputs 20 ...24V Input Voltage input when an external 24VDC V = 24VDC +20%/-15% supply is used = 1A Digital Common Reference potential for digital inputs/outputs 24V-Output... - Page 42 Control Circuit - STO Pin Function Name Description Relay 2 Common See pin 29 Relay 1 Common See pin 30 Relay 2 NC See pin 29 Contact = 30VDC Relay 1 NC See pin 30 Contact I = 0.01...1A Relay 2 NO Programmable Output LO20 Contact Default = Brake Control...
-
Page 43: Digital Inputs (F5-K)
Control Circuit - STO 2.2.3. Digital Inputs Use of internal voltage supply Use of external voltage supply (F5-K) 6 8 10 6 8 10 Current Voltage Potentiometer 2.2.4. Analog Inputs (F5-K) R = 0…3/5/10kΩ 2022 2022 0…±20mA 4…20mA 0…±10Vdc 2.2.5. Digital Outputs (F5-K) 2.2.6. -
Page 44: Analog Outputs (F5-K)
Control Circuit - STO 2.2.7. Analog Outputs 0…10Vdc 0…10Vdc (F5-K) 10mA 10mA max= max= 2224 X2B - Safety Control 2.2.8. STO Connections (F5-K) Name Description STO1+ STO1+ Input STO Channel 1 STO1- STO1- STO2+ STO2+ Input STO Channel 2 STO2- STO2- STO-OUT Output STO... -
Page 45: Sto Inputs (F5-K)
Control Circuit - STO 2.2.9. STO Inputs Specification of the STO inputs (F5-K) Status 0 Status 1 STO Inputs UL (V) IL (mA) UH (V) IH (mA) max. min. not defined The maximum short-term starting current of the input is limited to 300 mA. 2.2.10. -
Page 46: Incremental Ttl Encoder Interface X3A Screw Terminals
2.2.3. Incremental Connect the incremental encoder mounted on the motor to the 8 posi- TTL Encoder tion terminal connector at X3A. This connection provides speed feed- Interface X3A back and is imperative to the proper operation of the F5. Screw Terminals ... - Page 47 The following specifications apply to encoder interface X3A, channel 1 • Max. operating frequency: 300 kHz. = 120 Ω • Internal terminating resistance: • RS422 or TTL level square wave voltage level: 2...5 Vdc Input equivalent circuit approx. approx. 34 Ω 120 Ω...
-
Page 48: Endat Encoder Interface X3A
EnDat Encoder Interface X3A 2.2.4. EnDat Encoder The EnDat encoder provides two differential analog channels for incremen- Interface X3A tal position and one serial data channel with clock for communication with the encoder. This serial data channel can provide the drive with the abso- lute position of the motor as well as other operating data. - Page 49 The cables come in standard lengths of 5m, 10m, 15m, 20m, 25m and 30m. Specially designed cables are available for applications 40m, 50, 75, 85 and 110m. The maximum length of KEB cable offered is 110m. Cable Part Number 00F50C1-40xx xx = length in meters, 10 = 10 meters For lengths above 30 m a different cable is used.
- Page 50 V = voltage supply of the drive = 5.25V Vmin = minimum supply voltage of the encoder R = cable resistance (0.07 Ω/m) for Standard KEB cables (0.03 Ω/m) for type "L" KEB cables The following ENDAT encoders have been tested for use: Heidenhain ECN 1313, 413, 113 single turn •...
-
Page 51: X3B Output Ttl Incremental
X3B Output TTL Incremental ONLY when the inverter is switched off and the volt- 2.2.5. X3B Output age supply is disconnected may the feedback con- TTL Incremental nectors be removed or connected! The second incremental encoder connection serves as a buffered output of the motor encoder. -
Page 52: Operation Of The Unit
3.1. LCD Operator The KEB Elevator drive uses a special operator keypad which provides a user interface and functionality specific to elevator applications. The opera- tor must be plugged into the drive in order for the drive to function properly. -
Page 53: Serial/Can Hardware Version
Serial/CAN Hardware Version 3.2. Serial/CAN Hardware Version Hardware CAN | RS 485 RS 232/485 Bus Communications Diagnostics Signal Signal CAN V+ CAN L TxD, RS232 CAN H RxD, RS232 RxD A -, RS485 RxD B +, RS485 RxD B +, RS485 RxD A -, RS485 CAN GND ) VP +5V (10mA) -
Page 54: Backward Compatibility
Backward Compatibility The Serial LCD v3.33 is supported by control card v4.3 or higher. The F5 3.3. Backward control card software version can be found in Diagnostics Screen #9 (See Compatibility section 3.8 for more information on Diagnostics). v3.33 can upload and synchronize with drives that have been programmed with previous versions, beginning with v3.21. -
Page 55: Languages
Languages 3.5. Languages The LCD Keypad supports 7 different languages: • English • Spanish • French • Portuguese • Italian • German • Russian The language can be adjusted in several ways: • During boot-up, if the operator & keypad are not synchronized, the user can access the language menu via the (F4) Hotkey •... -
Page 56: Programming Menu
Programming Menu 3.6. Programming The programming menu is where all manual parameter adjustments are made and can be accessed at Home > Prog (F3). Menu The Parameter menu contains the following groups: • Operator System (OS) • Basic Setup (US) •... -
Page 57: Parameter Adjustment
Programming Menu When adjusting a parameter, press “ENTER” to access Edit Mode. 3.6.1. Parameter Parameter values can only be changed in Edit Mode. Adjustment • Up/Down - Can be used to increment or decrement the number. Press the ENTER key to save the change. Edit Mode Active •... -
Page 58: Setting The Password
Password write privileges. If you expect to see more parameters or need higher access to change parameters, please contact KEB. A user can change the password by: • Parameter OS01 at Home > Prog > Operator System > OS01 • Home > Prog (F3) > Pass (F2) - Page 59 Programming Menu Temporary OEM Password Access A unique, temporary password can be generated to provide OEM level access for a period of one day for troubleshooting purposes. Using the program Elevator Password Generator.exe, enter the date set in the keypad operator. This can be changed at: Home > Prog > Setup > Date. The program will generate a unique password based on the date set in the keypad operator which will provide temporary OEM password access which is valid until the date in the keypad operator changes.
-
Page 60: Units
Programming Menu 3.6.3. Units The KEB LCD operator supports both imperial and metric units. Toggling between unit settings only scales the parameters and does not change any internal values. The units can be changed at Home > Prog > Basic Setup > US02... -
Page 61: Diagnostics Screen
Programming Menu 3.7. Diagnostics The LCD operator has split-view diagnostic screens. The diagnostics are grouped together which makes it easier to view several related parameters. Screen The screens can be accessed at Home > Diag If a malfunction occurs during operation, the drive shuts down operation and 3.7.1. -
Page 62: Fault Data Logging
Programming Menu 3.7.2. Fault Data The fault data logging function can be used to capture a scope trace of up to Logging four parameters in high resolution before and after a drive fault is triggered. The scope file is then saved to flash memory on the keypad operator and the file can be transferred from the keypad operator via FTP and be imported within Combivis 6 to evaluate the scope trace. -
Page 63: Date & Time
Date & Time 3.8. Date & Time The LCD keypad has a real-time clock and stores the date. This allows the operator to keep time stamps of faults and track total run hours. The Serial/CAN operator does keep track of the time/date and will do so for several weeks without power. -
Page 64: Customizing Parameter Lists
Customizing Parameter Lists 3.9. Customizing Custom parameter lists can be made to mask off parameters from view, depending on user access password level. Parameter Lists The OEM password level provides read and write access to all applicable keypad operator parameters. A custom parameter list applies to all lower password levels, although whether a parameter is viewable or has write access also depends on each password level which has precedence over the custom parameter list. - Page 65 Customizing Parameter Lists LC41 will not be accessible in the User or Basic password Levels LS02 will be accessible in the OEM password level only. LS01 will be accessible in all password levels: OEM, Adjuster, User, Basic. LS01 will read-only in the Basic password level Once the text file for a custom parameter list has been created, it must be saved as the following: para_dis.txt.
-
Page 66: Customizing Defaults
Customizing Defaults 3.10. Customizing A pre-saved parameter file can be used to create custom defaults settings. Defaults The pre-saved parameter file can either be created using the Combivis computer program or taken as an upload from a drive already programmed. The file type needs to be .dw5. -
Page 67: Initial Start Up
Initial Start Up 4. Initial Start Up 4.1. Connecting The drive and operator must be “synched” before being able to operate. When the operator/drive are initially booted up, the parameters of each are the drive and compared and it is determined if the units are synched. If they are not, the operator user will be given programming options. -
Page 68: Manual Programming
“idle” and the Ready / Stop / Error light will be green to indicate that the drive is ready for operation. 4.2. Manual This section serves as a quick guide to manually program a KEB Elevator Programming drive from default. Please note that advanced functionality or settings might not be listed in this section. - Page 69 Manual Programming 4.2.2. KEB Elevator The KEB drive can also be programmed via the mobile lift app. The KEB El- evator app works connects to the F5 elevator drive via a phone’s bluetooth connection. Setup, adjustment and troubleshooting of the F5 drive can be done using the mobile app.
-
Page 70: Basic Setup
• US04 - Control Type (i.e. Binary, Serial, Analog) Next, the configuration must be loaded using US05. This step serves to load the KEB drive with the correct limits and internal settings according to the application: • US05 - Load Configuration (Write config. to drive) If loaded successfully, US05 should change from Not configured to Configuration OK, indicating the drive and operator are synched. -
Page 71: Inputs
Inputs/Output Configuration 4.4.1. Inputs Enter the following input parameters (Home > Prog > Inputs) depending on the controller requirements. • LI01 - Type of Input (PNP or NPN logic) • LI04-11 - Input Function SETUP OF THE INPUTS IS NOW COMPLETE! Enter the following output parameters (Home >... -
Page 72: Motor Data
Next, the basic motor parameters must be entered before doing an automatic motor learn (Home > Prog > Motor Data). The KEB F5 inverter is capable of driving either AC induction motors or AC permanent magnet motors. From here on, induction motors will be referred to as “IM”... -
Page 73: Encoder Data
Encoder Data Torque units will change depending on which units are set in US02. For reference, here are the equations to convert between Imperial and Metric units provided different nameplate information: HP * 5252 kW * 7051 lb-ft Rated Motor Speed Rated Motor Speed 1.355 Further PM motor data parameters will be determined during the Motor Tune... -
Page 74: Speed Profile
Adjustment the profile and these settings can only be used to limit the rates). The KEB LCD operator can approximate all relevant profile parameters depending on the aggressiveness of the application. A user can select either a soft, medium, or hard profile. The adjustments can be made with: •... - Page 75 Speed Profile Accel Jerk Decel Jerk Acceleration Deceleration Stop Jerk Final Stop Start Jerk One Floor Emergency High (Short Runs - Inspection (Intermediate Speed Intermediate Speed 3) Speeds 1,2) Acceleration LS20 LS30 LS50 LS40 Start Jerk LS21 LS31 LS51 LS41 Accel Jerk LS22 LS32...
-
Page 76: Motor Learn
Motor Learn Next, the complete motor data must be learned with the automated learn 4.9. Motor Learn function. The motor characteristics, including the motor’s inductance and resistance, can be learned with the drive’s tuning function. The Motor Learn function can be found under the Tune Parameters group from the Programming menu (Home >... -
Page 77: Encoder Learn
IM machines. Knowing the motor pole position relative to the encoder allows the KEB drive to apply the proper stator magnetic field commutation angle for maximum torque. For absolute encoders on PM motors, if at any time the physical relation between the motor shaft and encoder changes (i.e. -
Page 78: Spi Encoder Learn
Encoder Learn SPI can be done with the ropes on and the brake set. To start the SPI 4.10.1. SPI Encoder functionality go to LL05 and follow the instructions on the LCD: Learn • LL05 - SPI (“START”) The user will be prompted to: 1. -
Page 79: Encoder Pole Position Learn
Encoder Learn 4.10.2. Encoder Pole As an alternative to using the SPI function, a user can use the Encoder Position Learn Pole Position Learn. The advantage of the Encoder Pole Position Learn is that it learns the correct A/B channel phasing in addition to the pole position. -
Page 80: Encoder Synchronization
Running the Motor The Encoder Synchronization process will determine the correct A/B 4.10.3. Encoder Synchronization encoder channel phasing and direction of rotation for both IM and PM motors. For PM motors, the Encoder Synchronization process immediately follows either method of learning the encoder pole position. Begin the process by setting: •... -
Page 81: Inertia Learn
Advanced Ride 4.12. Advanced Ride 4.12.1. Inertia Learn For optimum control of the elevator, it is recommended to learn the system inertia and activate the feed forward torque controller (FFTC). FFTC reduces the dependence on the speed feedback from the motor by predicting what the system will do and providing the required torque command based on that prediction. -
Page 82: Internal Pretorque
Advanced Ride 4.12.2. Internal Internal pre-torque is a feature of the drive which can be used to minimize, if Pretorque not totally eliminate, the rollback which may occur at brake pick, without the need for external load weighing devices. Pretorque is available when the LC01 Control Mode is set for Closed Loop FOC or Closed Loop Synthetic Pretorque. -
Page 83: Closed Loop Analog Pretorque
Advanced Ride 4.12.5. Closed Loop Setting the Control Mode LC01 = 3, Closed Loop Analog Pretorque allows the Analog Pretorque drive to use an external pretorque input signal via AN2+ and AN2- on terminal strip X2A for use with an analog load weighing device. The first step is to ensure the load-weigher is calibrated according to the manufacturer’s instructions. -
Page 84: Closed Loop Digital Pretorque
Advanced Ride 4.12.7. Closed Loop By setting the Control Mode LC01 = 4, Closed Loop Digital Pretorque, a Digital Pretorque fixed digital pretorque value (% of the motor rated torque) is set with LC34 Digital Pretorque. This applies to US04 Control Types Digital (0), Binary (1), Absolute Analog (2), Bi-Polar Analog (3) and Serial Binary Speed DIN66019 Service 50 (6). - Page 85 Advanced Ride Pre-torque Timing Chart Enable Direction + Speed Current Check Brake Release Delay LT01 Control Hold O LT02 Speed Start Delay LT03 Brake Drop Delay LT10 Current Hold Time LT12 Current Ramp LT13 Down Time Pretorque LC05, LC10 Accel. LC03, LC08, LC11 Decel.
-
Page 86: Diagnostics And Troubleshooting
Diagnostics and Troubleshooting 5. Diagnostics and Troubleshooting 5.1. Diagnostics Screens Home Screen Inverter Status Mode Motor Speed Command Speed Elevator Speed Motor Current Diagnostic Screen # 1 Inverter Status Motor Current DC Bus Voltage Peak Current Peak DC Volts Magnetizing Current Diagnostic Screen # 2 Inverter Status Command Speed... - Page 87 Diagnostics and Troubleshooting Diagnostic Screen # 9 Operator Software Date (ddmm.y) Operator Software Version Drive Software Version Drive Config ID Drive Software Date (ddmm.y) Enc. Interface Software Date Diagnostic Screen # 10 Inverter Status Active Profile Elevator Speed Active Speed Elevator Position Leveling Distance Diagnostic Screen # 11...
-
Page 88: Drive Faults
Drive Faults 5.2. Drive Faults Faults and errors, listed alphabetically. Additional troubleshooting of operational problems is listed in Section 5.3 and diagnostics solutions in Section 5.4. Error/Message Alt. Description Cause/Solution/Troubleshoot (NUM) Abnormal Stop EBus Indicates no Parameters FB50 - 53 show the error count, service, and serial communi- value of both serial ports X6C and X6D. - Page 89 Drive Faults Error/Message Alt. Description Cause/Solution/Troubleshoot (NUM) Data Unspeci- When LE12 = Encoder memory has not been formatted. To fix, enter fied Data Unspeci- 2503 into Password to access drive parameters. Next, fied, the encoder from the Program menu, hit F4 for File. Select Inverter memory is not parameter and then scroll down to user definition param- formatted.
- Page 90 Drive Faults Error/Message Alt. Description Cause/Solution/Troubleshoot (NUM) Error Charge ELSF Load shunt fault Load-shunt relay has not picked up, occurs for a short Relay Fault (15) time during the switch-on phase, but would automatically be reset immediately. If the error message remains the following causes may be applicable: Load-shunt defective - Replace inverter Input voltage incorrect or too low...
- Page 91 Drive Faults Error/Message Alt. Description Cause/Solution/Troubleshoot (NUM) Error Encoder1 EEnC1 Loss of incremen- For an incremental encoder interface, the recognition of (32) tal encoder chan- encoder channel breakage or defective track triggers a nel or differential fault if the voltage between two signal pairs (A+/A-, B+/B- voltages for the , N+/N-) is smaller than 2V.
- Page 92 Drive Faults Error/Message Alt. Description Cause/Solution/Troubleshoot (NUM) Error Encoder EHyb Invalid encoder Check for correct encoder connections/pinout. Incorrect Card (52) interface identifier pinout may drag the encoder board power supply down. Check encoder card connection to control board for bent or missing pins and proper connection.
- Page 93 Drive Faults Error/Message Alt. Description Cause/Solution/Troubleshoot (NUM) Error Initializa- EInI Control card pro- Replace control card. tion MFC (57) cessor unable to boot. Error Low Mo- Error current Possible causes for low motor current error during cur- tor Current (56) check.
- Page 94 Drive Faults Error/Message Alt. Description Cause/Solution/Troubleshoot (NUM) Error Low EOL2 Occurs if the low The cause of the Low Speed Overload would be due Speed Over- (19) frequency, stand- to excessive current at low speed (typically below 3Hz). load still constant cur- The following may be causes of excessive current: rent is exceeded (see Technical...
- Page 95 Drive Faults Error/Message Alt. Description Cause/Solution/Troubleshoot (NUM) Error Motor EOH2 Electronic Motor Excessive RMS motor current according to the LM08 Protection (30) Overload protec- Electric Motor Protection overload curve or if the LM11 tion was acti- Peak Motor Current Factor is exceeded for more than 3 vated.
- Page 96 Drive Faults Error/Message Alt. Description Cause/Solution/Troubleshoot (NUM) Error Over Cur- Occurs when the The current and peak current may be viewed in Diagnos- rent specified peak tic Screen #1 or DG06 and DG31. To reset the logged output current is peak value, press the F4 Reset key from the Diagnostic exceeded or if Screen.
- Page 97 Drive Faults Error/Message Alt. Description Cause/Solution/Troubleshoot (NUM) Error Over Cur- Meg tests to check motor winding insulation can rent (continued) only be performed with the motor disconnected from the inverter. Failure to do so will result in damage to the output section of the inverter due to high voltage from the meg tester.
- Page 98 If the heatsink temperature read by the drive diagnostics seems unreasonably high for a heatsink cool to the touch, then the heatsink temperature sensor may be faulty and would need to be repaired by KEB.
- Page 99 Drive Faults Error/Message Alt. Description Cause/Solution/Troubleshoot (NUM) Error Overload Time dependent Cause of excessive motor overload may include: (16) overload (See overload curves Excessive current. under Technical Data, Section Verify correct motor data. 2.9). Verify correct encoder settings including: Error cannot be reset until display LE02 Encoder Pulse Number shows E.nOL!
- Page 100 Drive Faults Error/Message Alt. Description Cause/Solution/Troubleshoot (NUM) Error Over- The internal The inverter internal overspeed is dictated as 110% of speed (58) overspeed limit is the US06 Contract Speed. This level is fixed and cannot exceeded. be adjusted, except for when performing the Overspeed Test function (refer to parameters LL15, LL16 for further information).
- Page 101 Drive Faults Error/Message Alt. Description Cause/Solution/Troubleshoot (NUM) Error Over- Excessive current speed (contin- (58) ued) Incorrect motor data, specifically the motor rated speed and frequency relationship for PM Synchronous Motors (see Section 4.5.2, LM02 or LM04 for details). Incorrect Encoder Pole Position for PM Synchro- nous Motors.
- Page 102 Drive Faults Error/Message Alt. Description Cause/Solution/Troubleshoot (NUM) Error Over Volt- The DC bus volt- The DC bus voltage DG08 and the peak DC bus voltage age rises above can be monitored in the Diagnostic screen #1 or DG08 the permissible and DG30.
- Page 103 Test the braking transistor. (See Appendix) If there is an issue due to high frequency noise: Verify proper mains grounding. Error Power General power Inverter must be inspected and repaired by KEB or re- Unit (12) circuit fault placed. Error Power...
- Page 104 Drive Faults Error/Message Alt. Description Cause/Solution/Troubleshoot (NUM) Error Rotor (169) When Error Rotor Learn Deviation occurs 10 times. Refer Learn COM to Error Rotor Learn Deviation Causes for additional information. Error Under The DC bus volt- Causes for under voltage include: Voltage age drops below the permissible...
- Page 105 If reseating the ribbon cable does not resolve the issue, then there may be a failure of the switching power supply and the drive would need to be re- placed or inspected and repaired by KEB. Serial Com- (166) Serial speed...
- Page 106 Drive Faults Error/Message Alt. Description Cause/Solution/Troubleshoot (NUM) Speed Follow- The encoder speed deviates from the command speed ing Error (152) by more than the amount set in LX14 Speed Difference for more than 1 second (fixed). The Speed Following Er- ror can be ignored as a drive fault by setting LX13 Speed Following Error = Warning - Digital Output (if any of the outputs LO05, 10, 15, or 20 are set for At Speed, the...
- Page 107 Drive Faults Error/Message Alt. Description Cause/Solution/Troubleshoot (NUM) Speed Follow- Speed gains set too low. ing Error (152) (continued) If the speed following error occurs during accel- eration or deceleration, the speed tracking may lag if the speed control gains are too low. Increase corresponding proportional speed gain for acceleration or deceleration.
-
Page 108: Additional Information
Additional Information 5.2.1. Additional Information Analog Signal Failure The Analog Signal Failure event will occur when no speed command is given within a certain time period at the beginning of a run with external profile pattern generation US04 Control Type = Analog (2,3) modes, and Serial (4,5) modes The timer is defined as: t = 2.5 x (LT01 + LT03) - Page 109 Additional Information Direction Selection Failure The Direction Selection Failure will occur if both direction inputs are signaled when the Drive Enable is initially signaled at the beginning of a run. Drive Enable Dropped Whenever the drive enable is dropped, output current will instantly be shut off. If the drive enable is dropped any time during the course of a normal run a Drive Enable Dropped event is logged.
- Page 110 Additional Information Speed Selection Error The Speed Selection Error event will occur when no speed command input is given within a certain time period at the beginning of a run with US04 Control Type = Binary Speed (1), Digital Speed (0), or Serial Binary Speed (6).
- Page 111 Additional Information Unintended Movement The Unintended Movement event occurs when the difference between the motor position during idle after a normal run, changes by more than the value set in parameter LX25 Unintended Motion Distance. The event is logged and requires a forced reset. A normal run is considered any run profile that is not inspection.
-
Page 112: Operation Problems
Operation Problems 5.3. Operation Problems Troubleshooting Operation Problems and potential solutions. Refer to Section 5.4 for additional Diagnos- tics Solutions. Additional troubleshooting of learn procedures are listed as well at the end of this section. Problem Cause/Solution/Troubleshoot Check the Motor Current. Refer to Motor Draws High Current for Motor Does Not Move additional troubleshooting. - Page 113 Operation Problems Problem Cause/Solution/Troubleshoot Motor Draws High Current Verify correct motor data. For PM motors, verify the correct relationship between the Motor Rated Speed, Motor Rated Frequency and the number of motor poles (Diagnostic Screen #12). Refer to the text for further description. Perform a Motor Learn if this has not already been completed.
- Page 114 Operation Problems Problem Cause/Solution/Troubleshoot Encoder slippage/mounting The position of the rotor must be known for synchronous (PM) motors (PM motors) for the drive to properly commutate the stator magnetic field and gener- ate torque. Performing a encoder/rotor position learn (LL05 SPI or LL06 Encoder Pole Position Learn) determines a corresponding encoder po- sition offset value for a given rotor position.
- Page 115 Operation Problems Problem Cause/Solution/Troubleshoot Check whether the Command Speed and Encoder Speed match Motor does not go the correct speed or cannot reach high (Home Screen or Diagnostics Screen #1). . speed. Verify whether the Motor (Encoder) Speed is tracking the Command Speed.
- Page 116 Operation Problems Problem Cause/Solution/Troubleshoot Check the motor current. Refer to Motor Draws High Current for Motor only moves one direc- tion; direction of weighting additional troubleshooting. (e.g. counterweights pulling up for empty car) Check the Command Speed for dictated speed direction and whether it changes between directions.
- Page 117 Operation Problems Problem Cause/Solution/Troubleshoot Motor noise (Vibration) Increase the Sample Rate for Encoder (LE04) from 4ms (default) to 8ms. Verify correct motor data and whether motor learn has been performed. Reduce speed control gains (KP Proportional, KI Integral, KI Offset). Note, the default settings for an unroped PM motor may be too high.
- Page 118 Operation Problems Problem Cause/Solution/Troubleshoot Verify correct wiring of the motor, in particular with motors which (Voltage) Modulation Grade limit Reached have multiple voltage winding arrangements (eg. dual rated 230/460V motors, wye-star/delta) For IM motor, reduce the Field-Weakening Corner LM24 to 60% of syn- chronous speed (720-480 rpm for 6-pole/60 Hz motor).
-
Page 119: Diagnostic Solutions
Diagnostic Solutions 5.4. Diagnostic Solutions Typical solutions in reference to operational problems in section 5.3. Item # Check/Solution Monitor the Input Status to For the given combination of inputs selected, verify which speed com- Determine Active Speed and/ mand is selected according to the Control Type (US04) and Special or Active Profile (digital input Input Functions (LI03). - Page 120 Diagnostic Solutions Item # Check/Solution Monitor the Command Speed If the Command Speed and Motor (Encoder) Speed match, but the and Motor (Encoder) Speed elevator does not travel at the correct speed: Check Active Speed and Active Profile from Diagnostics and check whether the corresponding speed setting in the LS parameters is correct.
- Page 121 Diagnostic Solutions Item # Check/Solution Verify correct Machine Data The Machine Data parameters are used as a scalar to translate the (LN) parameter settings. command speeds programmed in FPM to an rpm value used by the drive. Incorrect setting of the machine data parameters may cause the command speed in rpm to be too high or too low.
- Page 122 Diagnostic Solutions Item # Check/Solution Check whether Maximum The LC30 Maximum Torque is used to limit the output current to the mo- Torque setting is reached tor. It is primarily to protect the motor from extreme or prolonged high and high enough for normal currents, which may occur during initial setup or troubleshooting.
- Page 123 Diagnostic Solutions Item # Check/Solution Check whether Inverter Maxi- The drive will limit the maximum current to the inverter’s peak current mum Current Limit is being rating. Refer to Section 2.4 and 2.5 for ratings. reached. If the peak current limit is being reached, this may be due to: Incorrect Motor Data.
-
Page 124: Learn Procedure Troubleshooting
Learn Procedure Troubleshooting 5.5. Learn Procedure Troubleshooting Problem: Troubleshoot: Unable to start learn procedure. Check input signals: The Motor Tune, SPI, and the Encoder Pole Position Learn only require the Drive Enable (I7) to begin (for serial speed control modes, this includes the enable of the Control Word). The Encoder Synchronization and Inertia Learn require a run command (Drive Enable, Direction, and speed command). - Page 125 Learn Procedure Troubleshooting Problem: Troubleshoot: Unable to complete SPI proce- Ensure correct motor data and that a Motor Tune has been com- dure successfully pleted. During the procedure, if a ‘Values are not consistent’ is displayed, then a learned value falls out of range of the average of previous values and the process will not complete successfully, but can be done again as necessary.
- Page 126 Learn Procedure Troubleshooting Problem: Troubleshoot: Unable to complete Encoder Pole Ensure brake picks and the sheave is free to move relatively easily; Position Learn successfully should be able to rotate by hand. If the displayed position does not appear to change and the sheave does not move back and forth by a few inches, then the sheave is unable to move freely and the procedure cannot be complete.
-
Page 127: V1.72 Crossover Reference
v1.72 Crossover Reference 5.6. v1.72 Crossover Reference v1.72 Pa- Description v3.33 Pa- v3.33 Description rameter rameter LF.2 Steering Mode US04 Control Type LF.3 Drive Configuration LL01-10 Tuning Parameters config Stop (Econfig) S Lrn LL01 Motor Tuning I Lrn LL10 Inertia Learn P Lrn LL06 Encoder Pole Position Learn... - Page 128 v1.72 Crossover Reference v1.72 Pa- Description v3.33 Pa- v3.33 Description rameter rameter P.LF.31 KP Speed (Pre-torque) LC05 KP Speed Pretorque A.LF.32 KI Speed (Accel) LC08 KI Speed Acceleration d.LF.32 KI Speed (Decel) LC09 KI Speed Deceleration P.LF.32 KI Speed (Pre-torque) LC10 KI Speed Pretorque A.LF.33...
- Page 129 v1.72 Crossover Reference v1.72 Pa- Description v3.33 Pa- v3.33 Description rameter rameter 2.LF.54 Deceleration LS43 Deceleration Emergency (Emergency) 0.LF.55 Flare Jerk LS25 Stop Jerk High Speed (High, Int.1-3 Speeds) LS35 Stop Jerk One Floor 1.LF.55 Flare Jerk LS55 Stop Jerk Inspection (Inspection, High Level) 2.LF.55 Flare Jerk...
- Page 130 v1.72 Crossover Reference v1.72 Pa- Description v3.33 Pa- v3.33 Description rameter rameter LF.97 Actual Output Frequency Diag. #3 Output Frequency LF.98 Last Fault Diag. Log LF.99 Inverter State Diag #1-6,10 Inverter Status Ld.18 Field Weakening Corner LM25 Field Weakening Speed Ld.19 Field Weakening Curve Ld.20...
- Page 131 v1.72 Crossover Reference v1.72 Pa- Description v3.33 Pa- v3.33 Description rameter rameter US.35 Reference Splitting LX11 Reference Splitting US.36 External Serial Comm. Baud Rate Fb11/LX12 Baud Rate US.37 Test Function LX06 Function Test US.83 Encoder 2 Output PPR LE35 Encoder Output PPR US.84 Analog Out 2 Signed LA36...
- Page 132 v1.72 Crossover Reference v1.72 Pa- Description v3.33 Pa- v3.33 Description rameter rameter ru.30 AN2 Post Amplifier Display DG34/Diag. #5 Processed Pretorque ru.34 ANOUT1 Post Amplified Display DG35/Diag. #6 Analog Output 1 ru.36 ANOUT2 Post Amplified Display DG36/Diag. #6 Analog Output 2 ru.38 Power Module Temperature DG37/Diag.
-
Page 133: Transistor Tests
Transistor Tests 5.7. Transistor Tests The input and output circuits of the inverter can be checked externally with the inverter power off and the motor leads disconnected by use of a multi-meter set to diode check. Note: Different drive housings will have different readings. Measured values per housing are given in tables below. - Page 134 Transistor Tests Testing the IGBTs, output circuit measurement Positive Side Negative lead of meter to positive DC terminal. E, G, and H Housings Positive lead of meter to U/V/W terminals. Measurement Value Measurement Value + Terminal 0.3 - 0.4 - Terminal 0.3 - 0.4 + Terminal 0.3 - 0.4...
-
Page 135: Appendix
In this case the operator may need to take corresponding measures. UL Marking Acceptance according to UL is marked at KEB inverters with the adjacent logo on the type plate. This device has been investigated by UL according to United States Standard UL508C, Third Edition (Power Conversion Equipment) and to the Canadian Standard CSA C22.2 No.14-2010, 11th Edition... - Page 136 Notes:...
- Page 138 KEB AMERICA INC. 5100 Valley Industrial Blvd. © KEB Shakopee, MN 55379 Document 20219297 Phone: 952-224-1400 Part/Version Elevator Drives: kebblog.com/elevator-drives Date 3/2021 Elevator Support: kebblog.com/elevator-support...
Need help?
Do you have a question about the COMBIVERT F5 and is the answer not in the manual?
Questions and answers