Table of Contents
Advertisement
Quick Links
Advertisement
Table of Contents
Troubleshooting

Related Manuals for Barco MCM-100S


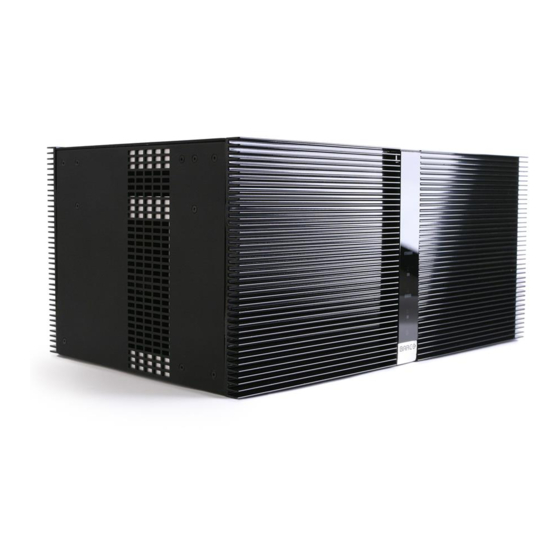
Summary of Contents for Barco MCM-100S
- Page 1 MCM-100S User guide R9898505 R5905187/00 05/06/2012...
- Page 2 Barco nv Control Rooms & Simulation Division Noordlaan 5, B-8520 Kuurne Phone: +32 56.36.82.11 Fax: +32 56.36.84.86 Support: www.barco.com/esupport Visit us at the web: www.barco.com Printed in Belgium...
- Page 3 The period of guarantee begins on the date of transfer of risks, in the case of special systems and software on the date of commissioning, at latest 30 days after the transfer of risks. In the event of justified notice of complaint, Barco can repair the fault or provide a replacement at its own discretion within an appropriate period.
- Page 4 This exception does not invalidate any other reasons why a work based on this file might be covered by the GNU General Public License. The eCos source used to build the software used in the Barco iCon is available on request from Barco.
-
Page 5: Table Of Contents
10.1.6 Phase (on analog RGB signals only)..................55 R5905187 MCM-100S 05/06/2012... - Page 6 12.2.5 Common color values......................124 R5905187 MCM-100S 05/06/2012...
- Page 7 Index........................173 R5905187 MCM-100S 05/06/2012...
- Page 8 Table of contents R5905187 MCM-100S 05/06/2012...
-
Page 9: Safety Instructions
The part number and serial number can be found on the label at the back side of the device. Record these numbers in the table below. Refer to them whenever you call your Barco dealer regarding this product. Part Number:... -
Page 10: Warnings
Power cord with NEMA 5/15 plug up to 15 A NEMA 5/15 Image 1-2 The wires of the power cord are colored in accordance with the following code. Green or yellow + green: Earth (Ground) Blue or white: Neutral Brown or black: Line (Live) R5905187 MCM-100S 05/06/2012... -
Page 11: Heat And Fire Hazard
In the event of fire, use sand, CO2, or dry powder fire extinguishers; never use water on an electrical fire. Always have service performed on this device by authorized Barco service personnel. Always insist on original Barco replacement parts. Never use non-Barco replacement parts as they may degrade the safety of this device. -
Page 12: Environment Condition Check
If the product exhibits a distinct change in performance, indicating a need for service. • Replacement parts: When replacement parts are required, be sure the service technician has used original BARCO replace- ment parts or authorized replacement parts which have the same characteristics as the BARCO original part. Unauthorized substitutions may result in degraded performance and reliability, fire, electric shock or other hazards. -
Page 13: Cleaning
On Repacking Save the original shipping carton and packing material; they will come in handy if you ever have to ship your equipment. For maxi- mum protection, repack your set as it was originally packed at the factory. R5905187 MCM-100S 05/06/2012... - Page 14 1. Safety instructions R5905187 MCM-100S 05/06/2012...
-
Page 15: Compliancy
Image 2-1 EMC finger clip Image 2-2 EMC finger clips The use of a shielded Network cable (Cat5) A shielded Network cable must be used when connecting the device to a network. R5905187 MCM-100S 05/06/2012... - Page 16 2. Compliancy R5905187 MCM-100S 05/06/2012...
-
Page 17: Introduction
3. Introduction 3. INTRODUCTION About this chapter This chapter is an overview of the manual’s layout, symbols and fonts used in this manual. It also introduces you to the Barco MCM-100S external warp box and describes its features and controls. Overview •... -
Page 18: Key Features And Benefits
Procedure related notes, tips, warnings and cautions are printed in bold between 2 lines preceded by an icon. Key features and benefits Key features and benefits The MCM-100S external warp box offers following key features and benefits: • Real time warping with minimal latency;... - Page 19 10. Power input : to connect the power adaptor, which is delivered with the device. • 11. Fuse : main AC input fuse. Remote Control Unit Image 3-3 Remote Control unit Use the Remote Control Unit (RCU) to operate the device through the OSD (On Screen Display). R5905187 MCM-100S 05/06/2012...
- Page 20 3. Introduction R5905187 MCM-100S 05/06/2012...
-
Page 21: Packaging
The items listed in the table below are delivered along with the device. Ensure that everything is present and intact. Contact your local dealer or Barco if anything is missing or damaged. Never use a damaged unit (e.g. MCM-100S, power cord, power adaptor, RCU). -
Page 22: Unpacking
Save the original packaging for future shipment. For maximum protection while shipping the unit, always pack it as it was packed during first delivery. Unpacking the MCM-100S 1. Carefully cut the tape on the top lid of the box Warning: Follow the relevant safety precautions while using a knife. - Page 23 4. Packaging Image 4-1 Unpacking R5905187 MCM-100S 05/06/2012...
- Page 24 4. Packaging R5905187 MCM-100S 05/06/2012...
-
Page 25: Facility And System Requirements
The air intake is at the back side of the device, the air exhaust is at the left side. It is necessary to keep these areas unblocked. A free area of at least 40 cm should be available at the back side of the device. A free area of at least 5 cm should be available at the sides of the device. R5905187 MCM-100S 05/06/2012... - Page 26 5. Facility and system requirements Image 5-1 Air intake and exhaust R5905187 MCM-100S 05/06/2012...
-
Page 27: Physical Installation And Connections
2. Insert the two AA size batteries, making sure the polarities match the + and - marks inside the battery compartment. Image 6-2 3. Insert (1) the lower tab of the battery cover in the gap at the bottom of the remote control, and press (2) the cover until it clicks in place. R5905187 MCM-100S 05/06/2012... -
Page 28: Installing The Rack Mount Brackets
Disposal of used batteries must be done according to the manufacturer’s instruction. Installing the rack mount brackets Introduction The rack mount brackets which are delivered with the MCM-100S can be mounted to enable installation in a 19” rack. Device height is 4.6U. Installing the rack mount brackets 1. -
Page 29: Installing The Soft Adhesive Pads
Introduction If the MCM-100S is installed on a table or other surface, four soft adhesive pads are delivered with the unit to stick on the device’s feet. This will prevent the MCM-100S box from scratching the supporting surface (e.g. table surface). -
Page 30: Dvi Connection
1. Connect the DVI cable to one of the device’s DVI inputs (L3A or L3B) XDS-100 L1 L1 L2 L2 L3 L3 STEREO INPUT STEREO INPUT STEREO OUTPUT STEREO OUTPUT Image 6-10 DVI connection 2. Tighten the securing bolts of the plug if available. R5905187 MCM-100S 05/06/2012... -
Page 31: Connecting The Display
6. Physical installation and connections Connecting the display Description The signal from the MCM-100S to the external display is digital only. It is transmitted using a single link or dual link DVI cable. For specifications, see the concerning appendix. Connecting an external display 1. - Page 32 The BNC connectors are the stereo output sync signals. These signals will drive the emitters in case of active stereo projection using active stereo glasses. The fact that the MCM-100S is providing two BNCs is to allow the linking (stereo synchronization) of several devices in a multichannel system (see Multichannel installation).
-
Page 33: Power Connection
Do not use power supplies or power cables that are damaged. Replace it by a new original one. Connecting power 1. Connect the 8–pin DIN of the supplied power adaptor to the power connector on the rear side of the MCM-100S. R5905187 MCM-100S 05/06/2012... -
Page 34: Network Connection
The connection to the device can be done via a crossed cable or via a HUB on the local network (LAN). Connecting the device to a network 1. Connect the RJ 45 male plug to the device’s RJ 45 female connector R5905187 MCM-100S 05/06/2012... - Page 35 STEREO INPUT STEREO INPUT STEREO OUTPUT STEREO OUTPUT Image 6-16 Ethernet connection See Network settings to set the communication port. The linking of devices is treated in the section “Setup of the linked devices in a multichannel system”. R5905187 MCM-100S 05/06/2012...
- Page 36 6. Physical installation and connections R5905187 MCM-100S 05/06/2012...
-
Page 37: Setup And Configuration
Network configuration • Linking MCM-100S devices in a multi-channel system Basic setup (example) The drawing below is a representation of a random basic setup of a display system using the MCM-100S external warp box. L1 L1 L2 L2 L3 L3... -
Page 38: Switching To The Correct Resolution
To establish communication, the RCU (Remote Control Unit) address must be set to the same value as the MCM-100S IR (or RC5) address. The user can change the IR address of the MCM-100S at any time. If he/she does so, the RCU address must be repro- grammed accordingly. - Page 39 The default address for the RCU is 0. The RCU address can be set in the range 0..9. See "Setting the MCM-100S address", page 37 to learn how to check/set the MCM-100S address. Setting the RCU address 1. Use a pencil to press the sunk-down Address button on the RCU.
-
Page 40: Powering The Mcm-100S
As soon as the power supply is connected to both the MCM-100S unit and the wall outlet, the MCM-100S starts configuring and goes to active state. If the MCM-100S is part of a full display system - which will be the case - a specified power-on sequence must be followed to allow EDID communication. -
Page 41: Setting The Mcm-100S Address
IR address. The Device address is used to address one MCM-100S at a time. This address can be set in the range 0..255 (default is 1). It must be taken into account however that a standard RCU can only communicate with devices having their address set in the range 0..9. -
Page 42: Network Configuration
3. Exit the menu. Network configuration Description The MCM-100S can be connected to a network allowing it to be accessed from and controlled by a device within the same (local) network. The network connection can be used for following: •... -
Page 43: Configure The Mcm-100S For A Private Subnet
MCM-100S to the network; • in the MCM-100S, enter a fixed IP address, Subnet Mask and optionally a Gateway IP address; • set the network configuration of any device that is connected to the same subnet to a fixed IP address within the same subnet range. -
Page 44: Configuring The Mcm-100S For A Dhcp Network
Description In DHCP setup, the IP address is assigned automatically. No network settings except for Host name have to be entered manually. To configure the MCM-100S for a DHCP enabled network, the following steps are required: • connect the MCM-100S to the DHCP network;... -
Page 45: Linking Mcm-100S Devices In A Multi-Channel System
100S devices. In this case, all MCM-100S devices of the display system must be linked through Ethernet and one of them must be assigned to be the Master. The Linked Devices dialog box of the MCM-100S allows to link up to 50 (Slave) MCM-100S devices to a single Master. The way to link MCM-100S devices is as follows: •... - Page 46 This can only be done by a Barco trained and qualified technician. Setting an MCM-100S to be Master 1. In the OSD of the MCM-100S to be Master, navigate to Installation > Linked devices... and press ENTER to select. Image 7-13 2.
- Page 47 Note: To clear an IP address or Host name from the edit box, click the C button. 4. Set the Dynacolor checkbox if the color settings of the Slave MCM-100S should be controlled by the master during color align- ment.
- Page 48 7. Setup and configuration Image 7-17 2. In the dialog box that appears, clear the Master check box. Image 7-18 R5905187 MCM-100S 05/06/2012...
-
Page 49: Getting Started
8. Getting started 8. GETTING STARTED About this chapter This chapter is a guideline to get a source displayed on your MCM-100S, without getting lost in advanced settings and details. Overview • Starting the MCM-100S • Displaying a source Starting the MCM-100S Power up the MCM-100S See "Powering the MCM-100S", page 36. - Page 50 8. Getting started R5905187 MCM-100S 05/06/2012...
-
Page 51: Osd Preferences
9. OSD preferences 9. OSD PREFERENCES About this chapter This chapter describes the tools available to treat pop up messages and to customize the MCM-100S OSD to your preferences: • Setting warning messages ON/OFF; • Hiding text boxes to avoid pop-ups during a mission or session;... -
Page 52: Menu Bar Position
The Status bar can be moved vertically, the range being from the bottom of the screen to almost the middle of the screen. This can be useful in applications where the bottom image content is not visible on the screen (e.g. blended region). R5905187 MCM-100S 05/06/2012... -
Page 53: Slider Box Position
1. In the OSD, navigate to Display setup > Sliderbox position... and press ENTER to select. Image 9-5 A slider box is displayed. 2. Use the arrow keys on the RCU to position the Slider box. You can toggle between large and small steps by pressing ENTER while slider box is displayed. R5905187 MCM-100S 05/06/2012... - Page 54 9. OSD preferences R5905187 MCM-100S 05/06/2012...
-
Page 55: Basic Operation
10. BASIC OPERATION About this chapter This chapter describes the steps to make basic use of your MCM-100S in the best way. The first section of this chapter describes the ways to adjust the image to your preferences: brightness, contrast, color, gamma, sharpness, noise reduction and phase. -
Page 56: Brightness
Contrast can be adjusted within the range 0..255. Default value is 128. Adjusting Contrast 1. In the OSD, navigate to Image > Settings > Contrast... and press ENTER to select. R5905187 MCM-100S 05/06/2012... -
Page 57: Color (On Video Signals Only)
Adjust Color to change the color saturation of video signals. It can be adjusted within the range 0..127. Default value is 80. Adjusting Color 1. In the OSD, navigate to Image > Settings > Color... and press ENTER to select. Image 10-5 2. Change the value to your wishes, while looking at the displayed image. R5905187 MCM-100S 05/06/2012... -
Page 58: Tint (On Ntsc Signals Only)
2. Change the value to your wishes, while looking at the displayed image. Image 10-8 3. Exit the menu. You can use the direct - TINT + key on the RCU to adjust the red and the green tones of the displayed image. R5905187 MCM-100S 05/06/2012... -
Page 59: Sharpness (On Video Signals Only)
On analog RGB signals, the sample signal can be shifted in relation to the source signal. Align Phase to get a good image repro- duction. It can set in the range 0..63. Default value is 8. Setting the Phase 1. In the OSD, navigate to Image > Settings > Phase... and press ENTER to select. R5905187 MCM-100S 05/06/2012... -
Page 60: Gamma
Gamma setting of the source (e.g. graphical card of a computer that is used as a source). In case of doubt, leave the gamma to its default setting. Adjusting Gamma 1. In the OSD, navigate to Image > Settings > Gamma... and press ENTER to select. Image 10-13 2. Change the value to your wishes. R5905187 MCM-100S 05/06/2012... -
Page 61: Noise Reduction (On Analog Signals Only)
Gain control is only available in case of video signals. In case of a video or S-video source, the gain (amplitude) of the source signal is automatically controlled by the MCM-100S (= default setting). The incoming signal is adjusted depending on the incoming signal strength. -
Page 62: Enabling / Disabling Automatic Gain Control
2. In the OSD, navigate to Image > Settings > Gain Control on Video... > Manual Adjustment... and press ENTER to select. Image 10-18 3. Change the value to your wishes. Image 10-19 4. Exit the menu. R5905187 MCM-100S 05/06/2012... -
Page 63: Aspect Ratio
1. In the OSD, navigate to Image > Aspect ratio > 4:3 or 16:9 or 16:10 or 5:4 and press ENTER to select on of them. Image 10-22 2. Exit the menu. Setting a custom aspect ratio 1. In the OSD, navigate to Image > Aspect ratio > Custom... and press ENTER to select. R5905187 MCM-100S 05/06/2012... -
Page 64: Color Temperature
Setting Color temperature? 1. In the OSD, navigate to Image > Settings > Color temperature > Default or Computer or Video or Film or Broadcast and press ENTER to confirm your selection. Image 10-25 2. Exit the menu. R5905187 MCM-100S 05/06/2012... -
Page 65: Input Balance (On Analog Rgb Signals Only)
Enabling or disabling Automatic black level 1. In the OSD, navigate to Image > Input balance > Automatic Black level > On or Off and press ENTER to confirm your selection. Image 10-28 2. Exit the menu. R5905187 MCM-100S 05/06/2012... -
Page 66: Adjusting The Black Level
6. Move the slider to adjust the Green black level to the center of the range (approximately. 512). 7. Move the slider to adjust the Green black level until bright spots appear/disappear on the black areas of the displayed pattern. R5905187 MCM-100S 05/06/2012... -
Page 67: Adjusting The White Level
While adjusting the White level, the white areas on the pattern must be considered. Adjusting the White level 1. From the source, launch a checkerboard pattern (black and white rectangles). 2. In the OSD, navigate to Image > Input balance > White Level... and press ENTER to select. R5905187 MCM-100S 05/06/2012... - Page 68 7. Move the slider to adjust the Green white level until bright spots appear/disappear on the white areas of the displayed pattern. If the white areas look dark green, increase the value. If they look pale green, decrease the value. R5905187 MCM-100S 05/06/2012...
-
Page 69: Auto Image
Description If a connected source signal has never been plugged to a particular connector of the MCM-100S before and it is selected to be displayed for the first time, the device tries to display the content as good as possible (resolution, refresh rate, timings). To do so, Auto Image will fully scan the signal, make a copy of the best fitting Standard Image file, thus creating a Custom Image file, and... -
Page 70: Enabling Or Disabling Auto Image
Setting the Limited scan level 1. In the OSD, navigate to Display setup > Auto Image setup... and press ENTER to select. Image 10-40 2. In the dialog box, set or clear the check boxes according to your wishes. R5905187 MCM-100S 05/06/2012... -
Page 71: Starting An Auto Image Scan (Full Scan Or Limited Scan)
With Swapped Fields we can swap the left and right fields of the stereo image at the input stage i.e. the left field will be processed in the projector as left field or as right field and the right field processed as left field or right field. R5905187 MCM-100S 05/06/2012... - Page 72 6. Use ↓ or ↑ to select Swapped Fields Image 10-44 7. Press ENTER A white bullet shows the active setting How to select a field ? 1. Press MENU to activate the Tool bar 2. Press → to select the Image item R5905187 MCM-100S 05/06/2012...
-
Page 73: General Settings
Serial no: serial number of the device; • Runtime: runtime of the MCM-100S; this counter is only active while the device is in active state. Viewing MCM-100S identification data 1. In the OSD, navigate to General > Identification... and press ENTER to select. -
Page 74: Pause
Description The full screen image processed by the MCM-100S can be “frozen”: when selecting Freeze, the actual screenshot of the image content is continuously displayed until you resume from Freeze. Freezing the image can be done through the OSD or via the direct FREEZE key on the RCU. -
Page 75: Standby Timer
10.8.4 Standby timer Description If no source sync signal is present at the MCM-100S and the standby timer is enabled, the MCM-100S automatically switches to standby after a specified delay. The delay between the disappearance of the sync and the switching to standby can be set in a range from 180 to 3600 seconds. -
Page 76: Desktop On-Off
1. In the OSD, navigate to Installation > Change password... and press ENTER to select. Image 10-55 2. In the Change password dialog box, fill out the following fields and press ENTER to confirm. Enter old password; Enter new password; Confirm new password. R5905187 MCM-100S 05/06/2012... -
Page 77: Source Alignment: Timings
Introduction An Image file contains the main characteristics of a source signal. The MCM-100S needs that data to display the source in the best way. The MCM-100S has a library of Standard Image files that covers most of the commonly used source signal formats and timings. -
Page 78: Editing A Custom File
Use a native outline pattern generated by Horizontal Start pixels the source: both the left side and the right side of the outline pattern must be visible. Horizontal Period Do not change this value. Vertical Total lines Do not change this value. R5905187 MCM-100S 05/06/2012... - Page 79 The Comb filter is by default enabled. The AGC hold interval is the time interval in which the AGC is inhibited (AGC hold = no update in video amplitude measurement); the advanced parameter allows to choose a short or long hold interval. R5905187 MCM-100S 05/06/2012...
-
Page 80: Saving A Custom Image File
The Custom Image file of a selected source can be saved under a new name. Basically this is done to create a new Custom Image file. To achieve this, the Save as... menu is to be used. R5905187 MCM-100S 05/06/2012... -
Page 81: Renaming A Custom Image File
Renaming a Custom Image file 1. In the OSD, navigate to Image files > Rename... and press ENTER to select. Image 10-68 2. In the list of the dialog box, navigate to the Custom Image file that needs to be renamed. R5905187 MCM-100S 05/06/2012... -
Page 82: Copying A Custom Image File
Copying a Custom Image file 1. In the OSD, navigate to Image files > Copy... and press ENTER to select. Image 10-70 2. In the list of the dialog box, navigate to the Custom/Standard Image file that needs copying. Image 10-71 R5905187 MCM-100S 05/06/2012... -
Page 83: Deleting A Custom Image File
Forced file load is used to force a certain Custom Image file to be loaded when the source on a specified input connector is selected to be displayed. Whatever the source signal is like, the forced Image file will be used to display it. R5905187 MCM-100S 05/06/2012... - Page 84 2. Navigate through the submenus to select the Layer (1, 2, 3 or 4) and the connector. Image 10-76 3. Confirm by pressing ENTER. 4. In the dialog box, navigate to the desired Image file and press ENTER to select. R5905187 MCM-100S 05/06/2012...
-
Page 85: Color Alignment: Dynacolor
Dynacolor settings can be stored in one single MCM-100S. Enabling Dynacolor changes the MCM-100S native color range to the color range as specified in the active Dynacolor set. This section explains how to enable and disable a Dynacolor set. In the Advanced operation chapter we learn how to select a Dynacolor set and in the Expert operation chapter it is explained how to fine tune colors, how to match colors and full black in a... -
Page 86: True Motion Reproduction (Tmr)
3. Use ↓ or ↑ to go to enable (ON) or disable (OFF) True motion reproduction and press ENTER to select. A confirmation message will be displayed. Image 10-80 4. Confirm within 30 seconds if you want to activate. If not confirmed, everything remains as it was. A white bullet indicates the selection. R5905187 MCM-100S 05/06/2012... -
Page 87: Advanced Operation
About this section The Geometry feature of the MCM-100S makes it possible to use it as an external warp box for Barco projectors that don’t have geometry correction features. This allows the use of rather basic projectors to project their image on a wide variety of curved and flat-screen applications, ranging from flat or straightforward cylindrical displays to the wildest shapes that can be imagined. - Page 88 7 and lower. In 2 x 2 mode, we only have one level, including all four (2 x 2) anchor points, being the image corners. This mode is especially used to correct horizontal and vertical keystone. R5905187 MCM-100S 05/06/2012...
- Page 89 1 1 1 Image 11-5 Geometry adjustment: 5 x 5 mode This logic can be extrapolated for the lower models and levels, being level seven to level 21, however in practice these modes and levels are rarely used. R5905187 MCM-100S 05/06/2012...
-
Page 90: Keystone Correction Workflow
8. Repeat 2 to 7 until the geometry is fully adjusted to the specifications. 11.1.4 The Geometry edit dialog The images below show adjustments performed on a hatch pattern generated internally by the MCM-100S (see Internal patterns). The Geometry edit dialog In the OSD, browse to Geometry >... - Page 91 In table front mode, and if Axislink is set define the new position of the anchor to off, a positive value moves the anchor point along the Y axis, relative to its point down. original position. High values can introduce some clipping effects. R5905187 MCM-100S 05/06/2012...
-
Page 92: Selecting The Geometry Level
In the OSD, navigate to Geometry > Edit > 2x2 or 3x3 or 5x5 or 9x9 or 15x15 or 33x33 and press ENTER to select. Image 11-10 The Geometry Distortion edit dialog of the selected level appears and Select Mode is enabled. R5905187 MCM-100S 05/06/2012... -
Page 93: Selecting An Anchor Point
Selecting an anchor point 1. After selecting the level from the Geometry Distortion edit dialog, by default, Select Mode is enabled and the top/left (row = 0 ; column = 0) corner is selected. R5905187 MCM-100S 05/06/2012... -
Page 94: Moving An Anchor Point In Small Steps
Adjust mode is used to do small geometry adjustments using the arrow keys on the RCU. Each step is only 1/32 of a pixel. For larger adjustments the Adjust mode is not the ideal method. In that case the use of the Edit mode and Change mode is advised. R5905187 MCM-100S 05/06/2012... -
Page 95: Moving An Anchor Point In Large Steps
Editing the values of X and Y coordinates 1. In the Geometry edit dialog, navigate to Edit Mode by pressing ENTER. 2. Press ▲ or ▼ to select the edit box of PixelsX or the edit box of PixelsY. R5905187 MCM-100S 05/06/2012... -
Page 96: Geometry Reset
Resetting all levels or restoring to a mode 1. In the OSD, navigate to Geometry > Edit > Reset > Restore to 3x3 or 5x5 or 9x9 or 17x17 or Reset all levels and press ENTER to select. R5905187 MCM-100S 05/06/2012... - Page 97 11. Advanced operation Image 11-20 The following diagram illustrates the geometry adjustment restored to mode 9x9. Image 11-21 Restore to 9x9 2. Exit the menu. R5905187 MCM-100S 05/06/2012...
-
Page 98: Color Alignment: Dynacolor Sets
To apply the color corrections previously saved in a Dynacolor set, make sure that Dynacolor is enabled. Description Depending on the MCM-100S settings two different Dynacolor sets can be defined and selected: Set 1 and Set 2. Selecting a Dynacolor set 1. -
Page 99: Combining Passive Stereo Inputs Into An Active Stereo Image
1. Connect each active stereo DVI input signal to a different input layer on the device. 2. Check the presence of the input signals in the Source selection menu: select a different source. A Barco logo is visible in front of both corresponding DVI input connectors if the signals are present and detected. - Page 100 A message can be read: Please select a stereo display mode! 3. Click OK to store the Status On setting and leave the dialog box. 4. Browse to Display setup > Stereo mode and select Always active. R5905187 MCM-100S 05/06/2012...
- Page 101 Source selection L1 PC L1 DVI L3 DVI-1 L3 DVI-2 Image 11-30 Two sources displayed simultaneously (bullet); one source available (Barco logo) 3. Browse to Installation > Scaled patterns and select Moving Hatch... R5905187 MCM-100S 05/06/2012...
-
Page 102: Stereo Display Settings
Following illustrations give an overview on how (how = synchronous or asynchronous and which refresh rate) a mono source will be displayed in function of its vertical refresh rate and for the different settings mentioned above. A mono source means that no stereo sync is connected. R5905187 MCM-100S 05/06/2012... - Page 103 Mono source : Full screen synchronous representation ON and Stereo Mode = Auto Stereo mode auto is only available if the stereo option is enabled. If stereo option is not enabled, then by default auto, but only mono sources can be displayed. R5905187 MCM-100S 05/06/2012...
- Page 104 Switching the stereo mode to Always active or switching true motion reproduction to On will need an extra confirmation within 30 seconds in order to avoid that the OSD menus of the device are not accessible any more when the projector is not stereo compliant. Image 11-38 R5905187 MCM-100S 05/06/2012...
-
Page 105: Stereo Mode
3. Use ↓ or ↑ to select Auto or Always active. Image 11-39 4. Press ENTER A white bullet shows the active setting 11.5 Full screen synchronous representation Overview • Full screen synchronous representation • Asynchronous frequency • Black burst L1 Video R5905187 MCM-100S 05/06/2012... -
Page 106: Asynchronous Frequency
In the asynchronous mode, the display will be refreshed at a fixed vertical frequency (50/100 Hz or 60/120 Hz) depending on the OSD setting, instead of the vertical frequency of the displayed source. The low asynchronous frequency values are 50 Hz or 100 Hz. The high asynchronous frequency values are 60 Hz or 120 Hz. R5905187 MCM-100S 05/06/2012... -
Page 107: Black Burst L1 Video
How to synchronize 1. In the OSD, navigate to Display setup > Full-screen synchronous representation > Mode 2. Press → to open the menu 3. Use ↑ or ↓ to select Black Burst L1 Video. Image 11-42 R5905187 MCM-100S 05/06/2012... -
Page 108: Stereo System Setup
Normal Left Stereo Sync Right Inverted Left Stereo Sync Right Image 11-43 stereo sync output The Stereo output sync function acts at the output (stereo emitters) while the Swapped fields (see Image) acts on the input stage. R5905187 MCM-100S 05/06/2012... -
Page 109: Stereo Phase
With Stereo Phase it is possible to apply an adjustable time delay on the stereo emitter signal. Image Frame Left Frame Right Frame Left Without Stereo Phase Adjustment Left Stereo Sync Right Delay Time With Stereo Phase Adjustment Left Stereo Sync Right Image 11-45 Stereo Phase Adjustment R5905187 MCM-100S 05/06/2012... -
Page 110: Stereo Sync Out
1. In the OSD, navigate to Installaton > Stereo sync out. Image 11-48 2. Press → to open the menu 3. Use ↑ or ↓ to select ON or OFF 4. Press ENTER The active selection is shown with a white bullet R5905187 MCM-100S 05/06/2012... -
Page 111: Expert Operation
12. EXPERT OPERATION About this chapter This chapter discusses the highest level features of the MCM-100S. In the geometry section we explain how the coordinate system can be changed to enable a different way of adjusting the geometry, how the geometry data can be managed, how the image can be shifted and how to manually set the time that can be used for geometry adjustment processing. - Page 112 Following procedure illustrates a basic 2 x 2 adjustment with Axislink set On and Off. 1. Start with a non-distorted image. 2. Set Axislink to On. 3. Adjust the value of PixelsX (row 0; col 0) to +300 to move the left top corner to the right. Image 12-3 R5905187 MCM-100S 05/06/2012...
-
Page 113: Loading A Geometry File
When a source is displayed, the operator can manually load a Standard or Custom Geometry file to display the source image with the geometry adjustments as defined in the selected file. Loading a Geometry file 1. In the OSD, navigate to Geometry > Load... and press ENTER to select. R5905187 MCM-100S 05/06/2012... -
Page 114: Renaming A Geometry File
Renaming a Geometry file 1. In the OSD, navigate to Geometry > Rename... and press ENTER to select. Image 12-9 2. In the dialog box, navigate to the Geometry file to be renamed and press ENTER to select. R5905187 MCM-100S 05/06/2012... -
Page 115: Copying A Geometry File
Image 12-11 2. In the dialog box, navigate to the Geometry file to be copied and press ENTER to select. Image 12-12 The selected file name appears in the edit box at the bottom of the dialog box. R5905187 MCM-100S 05/06/2012... -
Page 116: Deleting A Geometry File
The same dialog box is used as for the Geometry edit. Since this shift is an electronic shift, image content will be lost at the side(s) to where the image is shifted and black borders will appear at the opposite sides. R5905187 MCM-100S 05/06/2012... - Page 117 If yes, Use the arrow keys on the RCU to shift the image and go to the last step of this procedure. If no, Perform the steps below. 3. Press ENTER to navigate to Edit mode if you want to shift the image over a wider range. R5905187 MCM-100S 05/06/2012...
-
Page 118: Sharpness Adjustment
In some extreme warping conditions digital noise may appear in the warped regions. The sharpness adjustment in the Geometry menu allows to reduce these perturbations. Adjusting the geometry sharpness 1. In the OSD, navigate to Geometry > Edit > Sharpness... and press ENTER to select. R5905187 MCM-100S 05/06/2012... -
Page 119: Color Alignment: Dynacolor
Concept Dynacolor allows setting a desired color reproduction - within the limits of the projector or display connected to the MCM-100S - by digitally changing the primary and secondary color coordinates. In multiple channel display systems, Dynacolor is used to match the colors of all channels to create color uniformity all over the full image. - Page 120 If the color impression of a channel in a multiple channel display system is slightly different from the color impression of the other channels, you can manually fine tune the desired X and Y value of the white point in the active Dynacolor set of the MCM-100S of that channel to match its colors to the colors of the other channels.
- Page 121 Starting from the Measured values (i.e. the values of the native primary colors and white of the display channel as measured by a Barco trained and qualified engineer) of each MCM-100S in a multiple channel display system, we can mathematically calculate a common color triangle.
-
Page 122: The Dynacolor Dialog
Dynacolor set can only be performed by Barco trained and qualified engineers. Dynacolor sets If you use your MCM-100S external warp box(es) in different sceneries where different Dynacolor sets are used; you need to perform the Dynacolor adjustment (i.e. Color fine tuning, Calculating common triangles) for each of the sets. - Page 123 12. Expert operation Desired values Description Cyan, Yellow, Magenta Desired secondary colors of the display channel of this MCM-100S. L value Luminance (relative value). Lmax value Maximum available luminance (relative value). Button Description Resets the desired parameters to the measured values.
-
Page 124: Color Fine Tuning
12.2.3 Color fine tuning AUTION Color fine tuning may only be done by Barco trained and qualified engineers. Introduction if some color fine tuning is required to come to a fully color matched overall image, the x and y coordinates of the white point of the active Dynacolor set can be slightly changed to come to the desired color reproduction. - Page 125 For example, if you increase the x-value of the white point in the Desired field from 0.3260 to 0.3560, the white point will shift towards the red region and the overall look of the image will be more reddish. R5905187 MCM-100S 05/06/2012...
-
Page 126: Color Calibration
If not successful, it might be required to measure the native colors of the display per channel and enter them as measured values in the according MCM-100S. This is color calibration. After that, the color coordinates for a common color triangle can be calculated. - Page 127 8. The values are finally updated in the Measured values of the Dynacolor set. 9. Click Default desired to copy the Measured values for Red, Green and Blue and White to the Desired values and to calculate the secondary colors Cyan, Yellow and Magenta. R5905187 MCM-100S 05/06/2012...
-
Page 128: Common Color Values
In case of a multiple channel display system where the color has been calibrated for all channels, the common color triangle can be calculated and stored as Desired coordinates in the MCM-100S of all channels to come to the same color gamut for all channels. - Page 129 This is the advised way to calculate the common color triangle in a multiple channel display system. It is assumed that the MCM- 100Ses have been linked through network and that the appropriate linking configuration is set. 1. In the OSD of the Master MCM-100S, browse to Installation > Linked devices... and press ENTER open the Linked Devices dialog box.
-
Page 130: Black Color Matching
The common color values are automatically calculated based on the Measured values of all MCM-100S devices and these cal- culated values are entered in the Desired values of all MCM-100S devices. All MCM-100S devices will now operate within the same color gamut. -
Page 131: Soft Edge And Black Level
(especially used in case of dark sceneries) or with the Electronic Soft Edge Matching (ESEM) feature of the MCM-100S (especially used in case of bright images). -
Page 132: Soft Edge Area Shape
While adjusting Soft Edge a bitmap is created, having the native resolution of the display channel to which the MCM-100S is connected. The value of each pixel of the image to be projected is multiplied by the value of the corresponding pixel on the bitmap before it is displayed. - Page 133 The anchor points are numbered from 0 to 24 and can be moved to the desired location to determine the size and shape of the Soft Edge area on the selected edge. By moving anchor points zero to four, a blanked area is created. Image 12-41 Anchor point numbering: top and bottom edges R5905187 MCM-100S 05/06/2012...
- Page 134 Level 6, only a smaller part of the whole area is affected. The images below show the levels and corre- sponding anchor points in the left side Soft Edge area and an example of a weirdly shaped left side Soft Edge + blanking. R5905187 MCM-100S 05/06/2012...
- Page 135 Green square: anchor point(s) belonging to the same level as the selected anchor point; White square: anchor point(s) belonging to a different level than the selected one. • An anchor point cannot be moved beyond another anchor point. R5905187 MCM-100S 05/06/2012...
-
Page 136: General Soft Edge Workflow
Edges: set the check boxes of the edges where you want to create a Soft Edge; Adjustment guide: click On; Hierarchy levels: select the lowest level you expect to need. Image 12-46 3. Press Adjust to open the Soft Edge Edit dialog. R5905187 MCM-100S 05/06/2012... - Page 137 5. Select Level 1. See "Selecting an anchor point", page 137. 6. Adjust the position of anchor points zero and four. See "Selecting an anchor point", page 137, "Moving an anchor point in small steps", page 137 and "Moving an anchor point in large steps", page 138. R5905187 MCM-100S 05/06/2012...
-
Page 138: The Soft Edge Selection Dialog
OSD; Alpha plane: to enable an external Alpha plane that • has been uploaded to the MCM-100S. Source The procedures in this manual are explained • Image: to display the image of the selected source(s) using a full white background. -
Page 139: The Soft Edge Edit Dialog
Explains the controls in Select mode. In Select mode, you can select an edge (or side), a level or an anchor point. The levels that can be selected are limited by the Hierarchy level setting in the Soft Edge selection dialog. R5905187 MCM-100S 05/06/2012... - Page 140 In Edit mode, the edit box of Position X or Position Y can be enabled. Help / Change mode Explains the controls in Change mode. In Change mode, the value in the enabled Position edit box can be changed. Image 12-51 Image 12-52 Image 12-53 R5905187 MCM-100S 05/06/2012...
-
Page 141: Selecting An Anchor Point
For larger adjustments the Adjust mode is not ideal. In this case the use of the Edit mode and Change mode is more appropriate. Using the arrow keys to move an anchor point 1. From the Soft Edge edit dialog, press ENTER or BACK to navigate to Adjust mode. R5905187 MCM-100S 05/06/2012... -
Page 142: Moving An Anchor Point In Large Steps
1. From the Soft Edge edit dialog, press ENTER or BACK to navigate to Edit mode. Image 12-57 2. Use the arrows ▲ or ▼ to select the Position X or Position Y edit box. 3. Press ENTER to navigate to Change mode. Image 12-58 R5905187 MCM-100S 05/06/2012... -
Page 143: Black Level Adjustment
See "Soft Edge and Black Level explained", page 127. Uploading an alpha plane file Use an FPT Client (e.g. Filezilla) or Internet Explorer to upload the Alpha plane to the following directory on the MCM-100S: /D/display/Softedge The file must be named as follows : alpha.tiff... -
Page 144: Beta Planes
Beta plane specification See "Soft Edge and Black Level explained", page 127. Uploading a Beta plane file Use an FPT Client (e.g. Filezilla) or Internet Explorer to upload the Beta plane to the following directory on the MCM-100S: /D/display/Softedge R5905187 MCM-100S 05/06/2012... -
Page 145: Sync Variance Limit
It is expressed in source lines. The reason why this delay is needed is because the signal processing in the MCM-100S is faster than the source signal itself. If the Sync Variance Limit value is set too low, the previous frame will be processed. This implies that the delay between incoming signal and display of it will be more than one frame. - Page 146 3. In the dialog box that appears, starting at the lowest value, increase the value in steps of 25 until you get to the range where frame tearing is clearly visible. 4. Further increase the value until this frame tearing disappears again. 5. Increase the actual value by 25 or 50. 6. Exit the menu. R5905187 MCM-100S 05/06/2012...
-
Page 147: Maintenance And Troubleshooting
Basic troubleshooting flowchart 13.1 Maintenance timing Check on first use of a MCM-100S Before you power on the MCM-100S for the very first time, it is required to perform some checks. Description To be performed by Visually check the MCM-100S housing on damage... -
Page 148: Visual Checks
If they can not solve the issue or if they are not sure about the way to proceed, they can escalate the issue to a Product Specialist, a Product Expert or to Barco Helpdesk (http://www.barco.com/esupport). Visual check of the MCM-100S housing 1. -
Page 149: Firmware Upgrade
Upgrading the firmware 1. Download the latest MCM-100S software version from My.barco.com (https://my.barco.com). 2. Save this upgrade file on a computer which is connected to the same (local) network as the MCM-100S. 3. Make sure that the MCM-100S0 is powered. -
Page 150: Twin Dual Link Dvi Upgrade
5. Exit the menu. 13.6 Diagnostics through the OSD Description In the OSD, several menu items can be helpful to troubleshoot the MCM-100S or to collect some information that can be sent to Barco’s helpdesk in case of a problem. Overview •... -
Page 151: Identification
Lock mode: indicates to which clock the output signal is locked (always asynchronous: an internally generated clock is used); • Diagnostic code (e.g. 0280): can help Barco engineers to know the exact system status. Displaying the Display mode window 1. In the OSD, navigate to Service> Diagnostics > Display mode... and press ENTER to select. -
Page 152: Board Identification
A dialog box pops up, showing some information. Image 13-8 2. Exit the menu. 13.6.4 Board identification Description The Board identification window lists the boards in the MCM-100S, together with their article number. Some examples of existing boards: • PMP (Pixel Map Processor): image processing board; •... -
Page 153: Diagnostic Leds
Introduction The MCM-100S can be used to generate a list of patterns. The Scaled patterns are generated right after the input boards of the MCM-100S, whereas the Internal patterns are generated at the end of the image processing board, just before the signal is transferred to the output board. - Page 154 2. Open the drop-down menu and select the pattern of your choice. If you want to remove the scaled pattern, you need to select None in the Scaled patterns menu. Displaying an internal pattern 1. In the OSD, navigate to Installation > Internal patterns. R5905187 MCM-100S 05/06/2012...
-
Page 155: Basic Troubleshooting Flowchart
2. Open the drop-down menu and select the pattern of your choice. The selected Internal pattern disappears on exiting the Internal patterns menu. 13.9 Basic troubleshooting flowchart Troubleshooting flowchart The basic troubleshooting flowchart can be found on the next page. R5905187 MCM-100S 05/06/2012... - Page 156 13. Maintenance and troubleshooting Image 13-15 Basic troubleshooting flowchart R5905187 MCM-100S 05/06/2012...
-
Page 157: Specifications
• Analog input layer • SDI/HDSDI input layer • Desktop input • Stereo inputs and stereo linking A.2.1 Twin dual link DVI input layer Twin dual link DVI input layer Image A-1 Twin dual link DVI input R5905187 MCM-100S 05/06/2012... -
Page 158: Dvi Single Link + Analog Input Layer
Analog pins are not supported D–sub 15 connector • Analog RGB signal • Pixel clock max. 270 MHz Only one of the two inputs can be displayed! A.2.3 Analog input layer Analog input layer Image A-3 Analog input R5905187 MCM-100S 05/06/2012... -
Page 159: Sdi/Hdsdi Input Layer
• Pixel clock max. 165 MHz • 1920 x 1080 @ 60 Hz or 1920 x 1200 @ 60 Hz • Equalizer present • Cable length max. 15 m (copper cable) • Analog pins are not supported R5905187 MCM-100S 05/06/2012... -
Page 160: Stereo Inputs And Stereo Linking
1920 x 1200 @ 60 Hz • 1920 x 1200 @ 100 Hz Non standard timing • 1920 x 1200 @ 120 Hz (incompatible with some displays) A.5 Dimensions Description The MCM-100S is 19” rack mount, 4.6U R5905187 MCM-100S 05/06/2012... - Page 161 A. Specifications 430 mm 274 mm Image A-6 MCM-100S: dimensions R5905187 MCM-100S 05/06/2012...
- Page 162 A. Specifications R5905187 MCM-100S 05/06/2012...
-
Page 163: Rcu Control
About this chapter It is possible to control the MCM-100S through Remote Control Unit (RCU) and for that the RCU must be in the range of the IR receivers of the MCM-100S and vice versa. The commands are sent from the RCU though IR signals. -
Page 164: Osd Navigation And Selection
2. Press the arrow key ► a multiple times until Installation is highlighted (dark background) 3. Press the arrow key ▼ to open the drop down menu 4. Press the arrow key ▼ a multiple times until Network address... is highlighted (dark background) 5. Press ENTER to open the dialog box R5905187 MCM-100S 05/06/2012... -
Page 165: Data Input
0 .. 9: buttons to enter a numerical value Example: how to enter a new Standby timer value? Assume that we want to change the timer value from 300 to 180 seconds. 1. In the OSD, navigate to General > Standby timer... R5905187 MCM-100S 05/06/2012... -
Page 166: Mcm-100S Control
Image B-7 8. Press ENTER to confirm 9. Press BACK to go one step back in the menu or press MENU to exit the menu B.4 MCM-100S control Buttons on the RCU used to control the MCM-100S Pause MENU BACK... -
Page 167: Image Settings
Example: two DVI sources are connected to the MCM-100S: on to the DVI-D connector on input layer 3, the other to the DVI-D connector on input layer 4. Pressing 5 on the RCU will launch the DVI source which is connected to the DVI-D connector of input layer 3. - Page 168 B. RCU Control R5905187 MCM-100S 05/06/2012...
-
Page 169: Operating The Osd (On Screen Display)
C. OPERATING THE OSD (ON SCREEN DISPLAY) About this chapter The OSD is a menu bar, generated by the MCM-100S, that can be shown on the display. Navigation through the OSD and control of it is done via the RCU. -
Page 170: Opening A Drop Down Menu
How to enable or disable a check box in a dialog box? 1. Navigate to the check box: a border around the text joining the check box indicates a selected item. 2. Press ENTER to check or uncheck (depending on the actual status). Image C-3 R5905187 MCM-100S 05/06/2012... -
Page 171: Moving A Slider In A Slider Box
◄ and ► to select the character to be changed: a highlighted character (blue background color) can be changed; use ▲ and ▼ to change the value of the highlighted character, or press the desired digit button on the RCU. 4. Press ENTER to confirm. R5905187 MCM-100S 05/06/2012... - Page 172 C. Operating the OSD (On Screen Display) R5905187 MCM-100S 05/06/2012...
-
Page 173: Optional Feature Keys
D. Optional feature keys D. OPTIONAL FEATURE KEYS About this chapter Before an additional option can be activated, a purchased Barco software key must be uploaded. Overview • Option key activation D.1 Option key activation AUTION This menu is only intended for authorized personnel! Only to be used to activate your option key... - Page 174 D. Optional feature keys R5905187 MCM-100S 05/06/2012...
-
Page 175: Environmental Information
According to the “China Administration on Control of Pollution Caused by Electronic Information Products” (Also called RoHS of Chinese Mainland), the table below lists the names and contents of toxic and/or hazardous substances that Barco’s product may contain. The RoHS of Chinese Mainland is included in the MCV standard of the Ministry of Information Industry of China, in the section “Limit Requirements of toxic substances in Electronic Information Products”. - Page 176 Pollution Control Labeling Standard” of Chinese Mainland, marked with the Environmental Friendly Use Period (EFUP) logo. The number inside the EFUP logo that Barco uses (please refer to the photo) is based on the “Standard of Electronic Information Products Environmental Friendly Use Period” of Chinese Mainland.
-
Page 177: Index
Black color matching 115, 126 Load black level Rename Black Level Save Description Black level adjustment Blanked area Blanking Blending Delete 79, 112 Soft Edge Custom Image file Board identification Geometry file brackets Desktop input rack mount Desktop on-off R5905187 MCM-100S 05/06/2012... - Page 178 Soft edge Sync Variance Limit Identification 69, 147 Image 59–61 Features Aspect ratio fire hazard Color temperature firmware Input balance upgrade Image file 73–74, 76–79 Forced file load Copy Freeze Delete Frequency Edit Asynchronous Load Front panel Rename R5905187 MCM-100S 05/06/2012...
- Page 179 Custom Image file Scaled Geometry file Pause Phase Adjust Physical installations Maintenance 143–144 plug types Cleaning powering Timing Preferences Visual checks On Screen Display MCM-100S housing MCM-100S support Prevent Projected image Battery explosion manual gain control Private subnet MCM-100S R5905187 MCM-100S 05/06/2012...
- Page 180 Select Mode Positioning Service 147–148 stereo 95, 106 Board identification passive to active Diagnostics sync out Display mode Stereo 27, 67, 94, 98, 104–105 Connection servicing Input stereo sync Introduction Axis link Output sync Passive to active R5905187 MCM-100S 05/06/2012...
- Page 181 Stereo sync out unpacking Stereo system upgrade Setup StereoCreator switch resolution Video 1 BNC symbols Sync Variance Limit 107, 141 Warning messages White level Table mount Workflow 86, 132 Text box Geometry adjustment Disable Soft Edge Enable R5905187 MCM-100S 05/06/2012...
- Page 182 Index R5905187 MCM-100S 05/06/2012...
- Page 183 Revision Sheet Barco nv Control Rooms & Simulation Division Noordlaan 5, B-8520 Kuurne Phone: +32 56.36.82.11, Fax: +32 56.36.84.86 Support: www.barco.com/esupport, Web: www.barco.com From: Date: Please correct the following points in this documentation (R5905187/00): page wrong correct R5905187 MCM-100S 05/06/2012...
Need help?
Do you have a question about the MCM-100S and is the answer not in the manual?
Questions and answers