Table of Contents
Advertisement
Advertisement
Table of Contents

Related Manuals for Barco Medea series


Summary of Contents for Barco Medea series
- Page 1 Medea series Installation Manual ENABLING BRIGHT OUTCOMES...
- Page 2 Barco Fredrikstad AS Habornveien 53, N-1630 Gamle Fredrikstad, Norway Support.fre@barco.com www.barco.com Registered address: Barco NV President Kennedypark 35, 8500 Kortrijk, Belgium www.barco.com/en/support www.barco.com...
- Page 3 Barco. If the purchaser or a third party carries out modifications or repairs on goods delivered by Barco, or if the goods are handled incorrectly, in particular if the systems are operated incorrectly or if, after the transfer of risks, the goods are subject to influences not agreed upon in the contract, all guarantee claims of the purchaser will be rendered invalid.
- Page 4 FCC responsible: Barco Inc. 3059 Premiere Parkway Suite 400 30097 Duluth GA, United States Tel: +1 678 475 8000 Patent protection Please refer to www.barco.com/about-barco/legal/patents EMC statements EN55032/CISPR32 Class A MME (MultiMedia Equipment) Warning : This equipment is compliant with Class A of CISPR 32. In a residential environment this equipment may cause radio interference.
-
Page 5: Table Of Contents
Installing the power cord................................34 Alignment of a table mounted projector..........................35 Medea Multifunctional Frame (Rigging frame).........................36 5 Lenses ...........................................37 Available lenses....................................38 Lens selection.....................................38 Replace a lens....................................39 Lens Shift Calibration ..................................44 Lens Calibration....................................45 Scheimpflug (Boresight) adjustment............................45 Scheimpflug adjustment procedure............................46 R5906141 /02 Medea series... - Page 6 Controlling the projector.............................64 7.10 Quick setup via Direct access..............................65 8 Maintenance ........................................67 Cleaning the lens ....................................68 Cleaning the exterior of the projector.............................68 Filters ........................................68 A Specifications........................................69 Specifications of the Medea-M..............................70 Dimensions of a Medea ................................72 Technical Regulations ..................................72 R5906141 /02 Medea series...
-
Page 7: Safety
Ensure that you understand and follow all safety guidelines, safety instructions and warnings mentioned in this chapter before installing the Medea projector. Clarification of the term “Medea” used in this document When referring in this document to the term “Medea” means that the content is applicable for following Barco products: •... -
Page 8: General Considerations
• Before operating this equipment please read this manual thoroughly and retain it for future reference. • Installation and preliminary adjustments should be performed by qualified Barco personnel or by authorized Barco service dealers. • All warnings on the projector and in the documentation manuals should be adhered to. -
Page 9: Important Safety Instructions
HIGH BRIGHTNESS PROJECTORS) in performing a task, and of measures to minimize the potential risk to themselves or other persons. Only Barco authorized SERVICE PERSONNEL, knowledgeable of such risks, are allowed to perform service functions inside the product enclosure. The term USER and OPERATOR refers to any person other than SERVICE PERSONNEL. - Page 10 Never use water on an electrical fire. Always have service performed on this projector by authorized Barco service personnel. Always insist on genuine Barco replacement parts. Never use non-Barco replacement parts as they may degrade the safety of this projector.
- Page 11 On servicing • Do not attempt to service this product yourself. This product contains no user serviceable parts except parts describe in the User manual. Attempts to modify/replace mechanics or electronics inside the housing R5906141 /02 Medea series...
-
Page 12: Product Safety Labels
• Remove all power from the projector and refer servicing to Barco authorized repair center under the following conditions: When the power cord or plug is damaged or frayed. -
Page 13: Risk Group 3 Safety
Do not open or disassemble the projector as this may cause damage by the exposure of laser radiation. FOR PROFESSIONAL USE ONLY means installation can only be carried out by Barco AUTHORIZED PERSONNEL familiar with potential hazards associated with high intensity light beams. -
Page 14: Safety Training Provided By The Installer
Users definition The Medea projector is intended for persons who have been instructed and trained by Barco authorized personnel to identify energy sources that may cause injury and to take precautions to avoid unintentional contact with or exposure to those energy sources. - Page 15 (RZ) in the theater must be established. This can be done by using physical barrier, like a red rope as illustrated in Image 1-2. The restricted area sticker can be replaced by a sticker with only the symbol. R5906141 /02 Medea series...
-
Page 16: Hd For Fully Enclosed Projection Systems
As displayed in Image 1-3 two areas should be considered: the restricted enclosed projection area (RA) and the observation area (TH). RESTRICTED AREA DIFFUSE REFLECTION Image 1-3 Restricted Access location (enclosed projection Restriction Zone. area). Projection Distance. Projector. SWSeparation Width. Must be minimum 1 meter. Theater (observation area). R5906141 /02 Medea series... -
Page 17: Hd In Function Of The Lens Throw Ratio (Tr)
TR (Throw Ratio) The ratio of the distance to the screen (throw) to the screen width. HD versus Throw Ratio Medea-M Throw Ra o Image 1-4 Graph shows Hazard Distance in meters versus Throw ratio of the lens R5906141 /02 Medea series... - Page 18 Safety R5906141 /02 Medea series...
-
Page 19: General
Barco provides a guarantee relating to perfect manufacturing as part of the legally stipulated terms of guarantee. Observing the specification mentioned in this chapter is critical for projector performance. -
Page 20: Overview
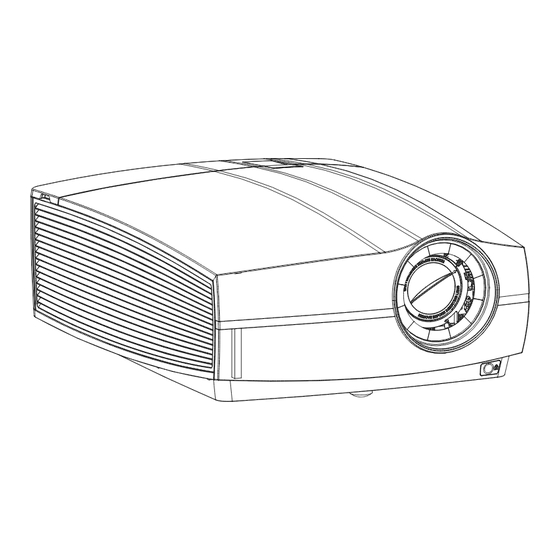
Keypad Front IR Receiver: for remote control Connector panel communication Adjustable feet Projector lens 2.2 Installation requirements Environment conditions Table below summarizes the physical environment in which the Medea may be safely operated or stored. R5906141 /02 Medea series... -
Page 21: Unpacking The Projector
What has to be done ? The projector is delivered in a cardboard box on a foam tray (pallet) and is secured with glued plastic straps. Furthermore, to provide protection during transportation, the projector is surrounded with polymeric foam. R5906141 /02 Medea series... - Page 22 A plastic lens holder cover is placed into the lens opening of the projector. It's recommended to reuse this cover each time you transport the projector. This to prevent intrusion of dust and foreign particles. R5906141 /02 Medea series...
-
Page 23: Initial Inspection
This check should confirm that there are no broken knobs or connectors, that the cabinet and panel surfaces are free of dents and scratches, and that the operating panel is not scratched or cracked. The Barco Sales and Service office should be notified as soon as possible if this is not the case. - Page 24 Image 2-6: Front projection, Ceiling mounted, in table position Rear projection The projector is installed, either in a table mount or ceiling mount configuration, at the other side of the screen opposite the audience. AUDIENCE BACKSTAGE Image 2-7: Rear projection R5906141 /02 Medea series...
- Page 25 Off-Axis projection is obtained by shifting the lens up, down, left or right. Several parameters can be calculated determining the position in any installation. Formula to calculate the distance CD for On-Axis projection: CD = SH/2 + B - A R5906141 /02 Medea series...
- Page 26 The projector can be rotated and mounted at any angle. In other words, you can tilt the projector as much as desired for your application. In comparison to lamp-based projectors, the laser phosphor projector also has no limit on side to side tilt. 360° 360° Image 2-11 R5906141 /02 Medea series...
-
Page 27: Projector Air Inlets And Outlets
2.7 Free download of Projector Toolset About Projector Toolset Projector Toolset is a software tool to set up, configure, manage and control Barco projectors. The Projector Toolset software works with configurations that can be loaded. Several configurations can be controlled simultaneously. Even when the configurations are connected via different ways. - Page 28 General Installation Download first the reference manual and follow the installation instructions as written in this manual. R5906141 /02 Medea series...
-
Page 29: Installation Process
Installation process Overview • Installation process projector R5906141 /02 Medea series... -
Page 30: Installation Process Projector
Adjust the system and setup the image. For more information about setup see chapter “Getting Started”, page Note: Do not hesitate to refer to the user manual to obtain more information concerning the Graphical User Interface (GUI). R5906141 /02 Medea series... -
Page 31: Physical Installation
• Using the mini-jack connector of the RCU • Remote control, protocol setup • Remote control, on/off button • Installing the power cord • Alignment of a table mounted projector • Medea Multifunctional Frame (Rigging frame) R5906141 /02 Medea series... -
Page 32: Remote Control, Battery Installation
Insert (1) both lower tabs of the battery cover in the gaps at the bottom of the remote control, and press (2) the cover until it clicks in place. Image 4-3 When replacing batteries, the broadcast address of the RCU will be reset to its default value '0'. R5906141 /02 Medea series... -
Page 33: Using The Mini-Jack Connector Of The Rcu
Depending on the projector to control the remote control can be switched between these protocols. Which protocol to use • The NEC protocol has to be used for Barco projectors based on the Pulse platform: F70, F80, F90, HDX 4K, UDX, XDL, etc. •... -
Page 34: Remote Control, On/Off Button
Remarks when using the RC5 protocol Due to new or updated functionality not all buttons of the Pulse RCU are one-to-one compatible with the legacy Barco RCU and projectors. Take the following limitations into account: • Buttons Shutter open and Shutter close emit the same code when in RC5 mode. This because the legacy RCU’s only had 1 button for Shutter functionality. -
Page 35: Alignment Of A Table Mounted Projector
Turn the adjustable feet in or out until the projected hatch pattern has a perfect rectangle shape and is leveled. Image 4-8: Level alignment When this is achieved, the projector is set horizontal and vertical at right angles to the screen. Image 4-9: Angle adjustment R5906141 /02 Medea series... -
Page 36: Medea Multifunctional Frame (Rigging Frame)
Image 4-10: Stacking or hanging multiple projectors How to install Installation manual of the Medea Multifunctional Frame is available online at www.barco.com/td. CAUTION: Read the installation instructions attentively and follow all safety recommendations given in this manual before use Multifunctional Frame to handling, stacking or hanging one or multiple projectors. -
Page 37: Lenses
This chapter describes the lenses available for this projector, and explains how to remove and mount them safely. With some types of lens, an adaptor is mandatory. The Lens Calculator, available on the Barco website, allow you to determine the possible lenses for your configuration. -
Page 38: Available Lenses
How to select the right lens Determine the required screen width (SW). Determine the approximate position of the projector in the room. Start up the Lens Calculator on the Barco website: https://lenscalculator.barco.com/ to determine the possible lenses for your configuration. -
Page 39: Replace A Lens
The lens button (reference 1) is located at the bottom right of the lens mount (reference 2). The button can switch between two positions: • default position, the lens mechanism is locked. • pressed, the lens mechanism is unlocked. R5906141 /02 Medea series... - Page 40 The "turn and click" system to hold the lens on the adapter is similar to the mechanism to hold the standalone lens on the projector. Align the lens (reference 2) with the adaptor (reference 3) and turn the lens to the right (CW) until it is locked. Image 5-3 R5906141 /02 Medea series...
- Page 41 Make sure to remove all protective caps present on the lens and lens holder. Align the lens in order to that the marking (red) on the bayonet is facing upwards, then insert the lens in the projector lens holder (Image 5-6, Action arrow 1). R5906141 /02 Medea series...
- Page 42 Make sure to remove all protective caps present on the lens, lens adapter and lens holder. Align the lens top marking (red) with the top marking on the lens adapter and insert the lens (Image 5-8, Action arrow 1). R5906141 /02 Medea series...
- Page 43 Use the other hand to push the lens button in order to release the lens mount mechanism (Image 5-10, Action arrow 1). Note: The lens button needs to be kept pushed in until the lens assembly has rotated about 10° with respect to the lens holder. R5906141 /02 Medea series...
-
Page 44: Lens Shift Calibration
How to calibrate First lens shift calibration is done in Production, but execute this operation at any time is possible by using the OSD interface (System Settings → Maintenance → Lens Calibration). R5906141 /02 Medea series... -
Page 45: Lens Calibration
Scheimpflug adjustment points Scheimpflug adjustment points are located on the lens mount. The F90 has three (3) set screws and three (3) adjustment screws. R5906141 /02 Medea series... -
Page 46: Scheimpflug Adjustment Procedure
Allen key, hex size 5 Preparation Prepare the test area. Barco recommends a projector-screen distance of 2 metres be used for all Scheimpflug adjustments. Verify that the throw ratio of the installed lens matches the requirements of the installation area (projection distance and screen size). - Page 47 Adjust the bottom Scheimpflug adjustment screw (reference 3) until the test image in the top half of the screen is in focus. Use a size 4 hex key to do this. Note: This process may cause the other areas of the image to slide out of focus. This is totally normal. R5906141 /02 Medea series...
- Page 48 Tighten the three set screws in the following order: left (1b), right (2b) and then top (3b). Use a size 5 hex key to do this. Put back in place the plastic lid removed during the preparation step. R5906141 /02 Medea series...
-
Page 49: Input & Communication
Input & Communication Overview • Introduction • Connection Panel • Making connections • Connector specifications • Control interfaces • LED and Button indication chart R5906141 /02 Medea series... -
Page 50: Introduction
Mini jack 3,5mm connector for For Projector Control wired remote USB 2.0 type A, 4 pin( 2x For Software upgrade Rear and 1x Front) Standard RJ45 connector For Projector Control R5906141 /02 Medea series... -
Page 51: Making Connections
• DVI-I • Display Port 1.2 • HDMI 2.0 • • HDBase T 6.4.1 DVI-I Specifications Parameter Value Connector DVI-I female digital RGB Signal characteristics DVI 1.0, Digital, TMDS Max. cable length 25 m (24 AWG) R5906141 /02 Medea series... -
Page 52: Display Port 1.2
Standard HDMI Signal characteristics Digital, TMDS Max. cable length 2 m (24 AWG) Max. pixel rate 594MHz Max. input data resolution 3840x2160 @60Hz Bit depth 8, 10, 12 bits EDID Supported HDCP Supported Ethernet Audio return R5906141 /02 Medea series... -
Page 53: Sdi
LEDs - HD Base Status Operation: Green, Left Link/Mode: Yellow, Right 6.5 Control interfaces About The following control interfaces are available on the projector: • 1x RS-232 (for projector control) • 1x LAN/Ethernet (for projector control R5906141 /02 Medea series... -
Page 54: Lan/Ethernet
Projector is ON Blinking RED Error condition Shutter button Off (no color) Projector is OFF, starts up, or is in Standby mode. Solid WHITE Projector is ON, shutter is open Solid RED Projector is ON, shutter is closed R5906141 /02 Medea series... - Page 55 If the reason for the error persist, the projector will again go to critical error status. By high temperature, the projector will restart when it has cooled down, and temperatures are back within the normal operating limitations. R5906141 /02 Medea series...
- Page 56 Input & Communication R5906141 /02 Medea series...
-
Page 57: Getting Started
Power modes • Power mode transitions • Status overview • Power off projector • Increasing the projector life time • Operation in 24/7 Mode • Using the RCU • Projector Address • Quick setup via Direct access R5906141 /02 Medea series... -
Page 58: Local Keypad And Lcd Panel
Toggle between the two indications by using the Menu button on the keypad, or on the remote control. The LCD Display will fade out 30 seconds after the last key operation. 7.2 Power modes General The table below details the Medea power modes. R5906141 /02 Medea series... -
Page 59: Power Mode Transitions
Press power On/Off button, remote On/Off button 7.3.2 Power on projector If not already connected, connect the female side of the power cord with the power input socket of the projector. For more details see section dedicated to the power cord installation. R5906141 /02 Medea series... -
Page 60: Going From Ready To On
Used alone, the WOL command allows to switch in READY mode. A JSON command must be performed in addition to make the projector turn in to ON mode: Send WOL. Wait for connection to façade/prospector (the unit does provide feedback when it’s ready). Wait for ready state. Sleep 5 seconds. R5906141 /02 Medea series... -
Page 61: Status Overview
CAUTION: Never switch off the projector by means of unplugging mains cord or by cut down of mains power. Barco advises to keep the projector always powered and use the ECO mode for low power consumption. R5906141 /02... -
Page 62: Increasing The Projector Life Time
25°C temp condition. 7.7 Operation in 24/7 Mode General When the projector is destined to be operated continuously 24 hours a day / 7 days a week, Barco has a number of recommendations to increase the projector life time: •... - Page 63 When using the wireless remote control, make sure you are within the effective operating distance (30m, 100ft in a straight line). The remote control unit will not function properly if strong light strikes the sensor window or if there are obstacles between the remote control unit and the projector IR sensor. R5906141 /02 Medea series...
-
Page 64: Projector Address
Broadcast Address Every projector has a broadcast (common) address '0' or '1'. The default address is '0'. The choice between '0' and '1' can be selected in the GUI: “System Settings” → “Communication” →“IR Control “. R5906141 /02 Medea series... -
Page 65: Quick Setup Via Direct Access
The Source selection menu opens on the LCD display. Image 7-8: Input selection Use the arrow keys to select the desired source. Quick test pattern selection Press the Test pattern button on the remote control or local keypad. R5906141 /02 Medea series... - Page 66 Getting Started Image 7-9 The Test pattern menu opens on the LCD display. Use the arrow keys to select the desired test pattern. R5906141 /02 Medea series...
-
Page 67: Maintenance
Maintenance About this chapter This chapter contains general maintenance procedures. Overview • Cleaning the lens • Cleaning the exterior of the projector • Filters R5906141 /02 Medea series... -
Page 68: Cleaning The Lens
The Medea is shipped without any filters. The air intake is just protected by a mesh. This mesh has to be vacuum cleaned occasionally when needed. There is no specific interval for this operation. Pressurized air cans are not efficient if there is too much dust on the surface, the pressure is too low R5906141 /02 Medea series... -
Page 69: A Specifications
Specifications Overview • Specifications of the Medea-M • Dimensions of a Medea • Technical Regulations R5906141 /02 Medea series... -
Page 70: Specifications Of The Medea-M
Up to 64% vertical lens shift & up to 20% horizontal lens shift (depending on lens selection) Motorized zoom, focus, shutter and lens shift (depending on lens selection) Visit the Barco Residential Lens Calculator for further information Optical dowser Color correction P7 RealColor™... - Page 71 10 to 90% (relative humidity) Accessories Power cord(s), wireless remote control Certifications FCC Class A Warranty Limited 3 years parts and labor Extendable up to 5 years Firmware upgradable Please contact an authorized Barco representative for details R5906141 /02 Medea series...
-
Page 72: Dimensions Of A Medea
Use a torque of 4 Nm for the M8 screws and the M6 screws. A.3 Technical Regulations Certificates Image A-5: Image A-2: Image A-4: CE Nemko mark Image A-6: CCC Image A-7: FCC Image A-3: Rohs EAC mark mark 60950 mark label Image A-8: RCM mark R5906141 /02 Medea series... - Page 73 Specifications R5906141 /02 Medea series...
- Page 74 R5906141 /02 | 2018-12-13 Barco Fredrikstad AS | Habornveien 53, N-1630 Gamle Fredrikstad, Norway Registered address: Barco NV | President Kennedypark 35, 8500 Kortrijk, Belgium www.barco.com...
Need help?
Do you have a question about the Medea series and is the answer not in the manual?
Questions and answers