Table of Contents
Advertisement
Quick Links
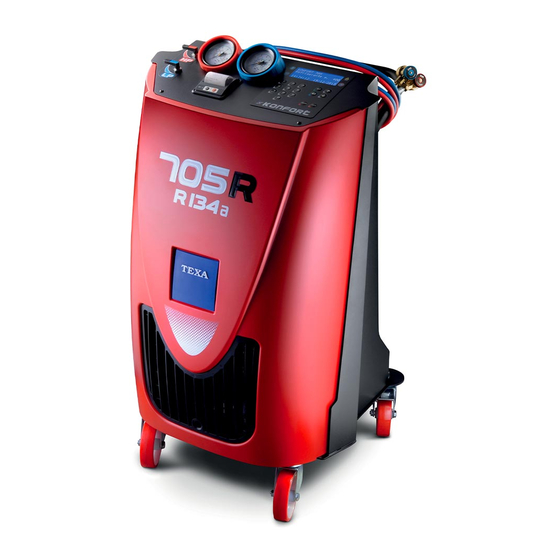
Konfort Series 700R Service Manual
TABLE OF CONTENTS
INTRODUCTION ...........................................................................
GENERAL SAFETY .........................................................................
REFRIGERANTS ...........................................................................
1.1 Introduction to the Greenhouse Effect ................................................
1.2 The Directive 2006/40/CE ........................................................................
1.3 Features of the new refrigerant R1234yf ..........................................
1.4 The TEXA solution: Konfort series 700R .............................................
CHAPTER 2 - GENERAL WORKING PRINCIPLE .........................
2.1 Introduction ................................................................................................
2.2 Detailed description of the single phases ..........................................
2.2.1 Refrigerant Recovery .....................................................................
2.2.3 Vacuum .............................................................................................
2.2.4 Leak Test ..........................................................................................
2.2.5 Oil Injection ....................................................................................
2.2.7 Refrigerant Injection .....................................................................
2.3 The Evolution of the BiGas management: refrigerant recovery
and injection into Konfort 780R units .............................................
2.3.4 Refrigerant R1234yf injection ......................................................
2.4 Refrigerant Recovery on Konfort 705R ................................................
THE MENU ....................................................................................
3.1.1 The AC maintenance menu ............................................................
3.1.2 The Additional functions menu ...................................................
3.1.4 The Service menu ...........................................................................
color display ..........................................................................................
3.2.1 The AC maintenance menu ............................................................
3.2.2 The Additional functions menu ...................................................
3.2.3 The Settings menu ...........................................................................
CHAPTER 4 - THE SERVICE MENU ..............................................
4.1 The Service menu .......................................................................................
780R BiGas .......................................................................................
Copyright © 2014 - TEXA S.p.A.
.......................................................................................
....................................................................................
.....................................................................
........................................................................
I
TEXA Technical Assistance
................................................
.............................................
......................................................
1
2
4
4
4
5
7
9
9
11
11
13
13
15
15
16
17
18
18
20
22
23
24
26
......
26
27
28
29
30
31
32
33
36
37
38
38
......
42
48
52
52
............
58
58
58
Advertisement
Table of Contents

Related Manuals for TEXA Konfort 700R Series


Summary of Contents for TEXA Konfort 700R Series
-
Page 1: Table Of Contents
1.1 Introduction to the Greenhouse Effect ………………………………………… 1.2 The Directive 2006/40/CE ……………………………………………………………… 1.3 Features of the new refrigerant R1234yf …………………………………… 1.4 The TEXA solution: Konfort series 700R ……………………………………… CHAPTER 2 – GENERAL WORKING PRINCIPLE ……………………. 2.1 Introduction …………………………………………………………………………………… 2.2 Detailed description of the single phases ……………………………………... - Page 2 7.7 The unit does not inject UV additive …………………………………………… 7.8 Too much oil and/or UV additive is injected ……………………………… 7.9 The equipment does not inject refrigerant ……………………………… 7.10 The unit injects a larger amount of refrigerant ……………………… Copyright © 2014 – TEXA S.p.A.
- Page 3 7.14 The main pressure sensor is not properly calibrated …………… APPENDX 1 – SPARE PARTS PORTAL ………………………………… APPENDX 2 – ELECTRICAL AND SIGNAL CONNECTIONS ……….. APPENDIX 3 – FLOW DIAGRAMS ………………………………………… APPENDIX 4 – SOLENOID VALVES LOCATION ……………………… Copyright © 2014 – TEXA S.p.A.
-
Page 4: Introduction
The first chapter of this manual will aim to compare the features of the two refrigerants R134a and R1234yf in relation to their use in air- conditioning systems and, therefore, in the new Konfort 700R series equipments. Since any type of assistance operation is not possible without an... -
Page 5: General Safety
Konfort 700R series units are equipped with the following safety devices: Safety pressure switch: it stops the compressor when action pressure (19 Bars) has been reached. - Page 6 Caution: When the hoses are rolled onto their lateral support and the rapid connectors are attached to their supports, be sure that the connectors themselves will not be open. Copyright © 2014 – TEXA S.p.A.
-
Page 7: Chapter 1 - Comparison Between R1234Yf And R134A Refrigerants
, 2011, all the Member States will no longer have the chance to grant EC type-approvals or national type- approvals for vehicles which are equipped with air conditioning systems designed to contain fluorinated greenhouse gases with a GWP> 150. Copyright © 2014 – TEXA S.p.A. -
Page 8: Features Of The New Refrigerant R1234Yf
R134a (through appropriate conversion kits). slight flammability: R1234yf is classified as a slightly-flammable liquid. However, even if ignited, this refrigerant would burn only weakly, with very limited effects. That flammability would therefore, absolutely manageable. Copyright © 2014 – TEXA S.p.A. - Page 9 Table 1.2 – Comparative table of the properties of the two refrigerants Image 1.1 – Comparative graph of the pressure-temperature characteristic of the two refrigerants Image 1.2 – Diagram showing the combustion levels of the different types of refrigerant Copyright © 2014 – TEXA S.p.A.
-
Page 10: The Texa Solution: Konfort Series 700R
Konfort Series 700R Service Manual TEXA Technical Assistance The TEXA solution: Konfort series 700R In order to face up to the advent of the new refrigerant R1234yf, TEXA has developed a new line of innovative air-conditioning recharging units: Konfort series 700R. - Page 11 Olio and UV electronic scales resolution Refrigerant electronic scale resolution SD card size Table 1.3 (Continue) – Technical features of the various models of Konfort series 700R units ((**) – Device orderable as optional) Copyright © 2014 – TEXA S.p.A.
-
Page 12: Chapter 2 - General Working Principle
600mBars relative (1600mBars absolute), the unit proceeds with the next step, otherwise it restarts the compressor for a further recovery. This architecture allows the equipment to recover all Copyright © 2014 – TEXA S.p.A. - Page 13 Before ending the cycle, the unit performs a final recovery with the HP and LP fittings disconnected from the vehicle’s A/C system: this allows the equipment to recover the residual refrigerant from the service pipes. Copyright © 2014 – TEXA S.p.A.
-
Page 14: Detailed Description Of The Single Phases
(which is in the liquid phase and, therefore, tends to settle in the bottom of the separator filter). The refrigerant, now completely in the gaseous phase, passes through a dryer filter DF, where it is purified from any residual moisture. Copyright © 2014 – TEXA S.p.A. - Page 15 (2), which allows the transit of the refrigerant to the liquid phase. The fluid, now completely in the liquid state, is then pumped into the bottle of the equipment. Image 2.2 – Part of the hydraulic circuit involved into the refrigerant recovery phase Copyright © 2014 – TEXA S.p.A.
-
Page 16: Oil Drain
LP electro-valves (only for 760R, 760R Bus and 780R BiGas); HP electro-valves (only for 760R, 760R Bus and 780R BiGas); EVP01 and EVP02 electro-valves; Vacuum pump PO; Heating band. Component available only on 760R, 760R Bus and 780R BiGas models Copyright © 2014 – TEXA S.p.A. - Page 17 STOP button (this anomaly, in fact, could be indicative of a possible leak of the vehicle’s A/C system) or to continue the service. Image 2.4 – Part of the hydraulic circuit involved into the vacuum phase Copyright © 2014 – TEXA S.p.A.
-
Page 18: Leak Test
During this phase, the equipment activates the following electrical components: Pressure sensor (1); LP electro-valves (only for 760R, 760R Bus and 780R BiGas); HP electro-valves (only for 760R, 760R Bus and 780R BiGas); EVIO electro-valve; Copyright © 2014 – TEXA S.p.A. -
Page 19: Uv Injection
UV fluid into the A/C system of the vehicle. Once again, the electro-valve opening is temporized in Konfort 710R and 720R units, Component available only on 760R, 760R Bus and 780R BiGas models Component available only on 760R, 760R Bus and 780R BiGas models Copyright © 2014 – TEXA S.p.A. -
Page 20: Refrigerant Injection
EVCA1 electro-valve. The closure of this electro-valve is managed by the microcontroller board of the unit according to the weight decrease measured by the load cell located under the equipment’s bottle. Copyright © 2014 – TEXA S.p.A. -
Page 21: And Injection Into Konfort 780R Units
A/C system operating with R1234yf, then Konfort starts an automatic clean-up process of the hydraulic circuit, in order to avoid Copyright © 2014 – TEXA S.p.A. - Page 22 The cooling and condensation of R134a are then completed into the condenser (2), which allows the full refrigerant transition to the liquid phase. The refrigerant, now completely in the liquid state, is finally conveyed into the upper tank, dedicated to the R134a. Copyright © 2014 – TEXA S.p.A.
-
Page 23: Recovery Of R1234Yf Refrigerant
Once the clean-up will be completed, the equipment will start the recovery phase, during which the following electrical components will be activated: Pressure sensor (1); LP electro-valves; HP electro-valves; EVREC electro-valve; Compressor CO; Lower condenser fan (3); EVREF2 electro-valves; Refrigerant load cell (4). Copyright © 2014 – TEXA S.p.A. - Page 24 The cooling and condensation of R1234yf are then completed into the condenser (3), which allows the full refrigerant transition to the liquid phase. The refrigerant, now completely in the liquid state, is finally conveyed into the lower tank, dedicated to the R1234yf. Copyright © 2014 – TEXA S.p.A.
-
Page 25: Refrigerant R134A Injection
The closure of these electro-valves is controlled by the firmware of the management board of the equipment depending on the weight decrease revealed by the load cell located under the two bottles of the unit. Copyright © 2014 – TEXA S.p.A. -
Page 26: Refrigerant R1234Yf Injection
Also in this case, the closure of these electro-valves is controlled by the firmware of the management board of the equipment depending on the weight decrease revealed by the load cell located under the two bottles of the unit. Copyright © 2014 – TEXA S.p.A. -
Page 27: Refrigerant Recovery On Konfort 705R
Therefore, in this case, the unit is not using an auxiliary separator filter. Copyright © 2014 – TEXA S.p.A. - Page 28 Konfort Series 700R Service Manual TEXA Technical Assistance Image 2.13 – Part of the hydraulic circuit involved in the refrigerant recovery phase on Konfort 705R units Copyright © 2014 – TEXA S.p.A.
-
Page 29: Chapter 3 - Konfort Series 700R: New Architecture Of The Menu
Image 3.2 – Main page of the menu of Konfort 705R, 710R and 720R The desired option can be selected by pressing the UP and DOWN buttons and by confirming the selection with the green ENTER button. Copyright © 2014 – TEXA S.p.A. -
Page 30: The Ac Maintenance Menu
This quantity depends on the capacity of the internal flash memory of the unit. Copyright © 2014 – TEXA S.p.A. -
Page 31: The Additional Functions Menu
VDC control: It allows to perform the control, from the Konfort command panel, variable displacement compressor systems which are equipped with dedicated electronic control unit. This control action can be done by using the TEXA VDC device, available optional (only Konfort 720R, refer corresponding instruction manual for further details). -
Page 32: The Settings Menu
It is possible to scroll the different pages/options of the menu by using the UP and DOWN buttons on the keyboard Usually, the non-condensable gases check and/or discharge is performed automatically by the unit at the first ignition of the day. Copyright © 2014 – TEXA S.p.A. -
Page 33: The Service Menu
Image 3.6 – Request for password insertion from the Service menu of Konfort 705R, 710R and 720R Because of the importance of this menu, it will be detailed described into Chapter 4. Copyright © 2014 – TEXA S.p.A. -
Page 34: Konfort 760R, 760R Bus And 780R Bigas: Graphic Menu On Color Display
In the black top part of the screen the amount of the various fluids (refrigerant(s), injection oil, UV tracer) is shown in grams. A colored icon is reported next to each fluid. When this icon is red: it means that the corresponding fluid is insufficient. Copyright © 2014 – TEXA S.p.A. -
Page 35: The Ac Maintenance Menu
UV to be injected. This option could be very useful, because it provides the operator the chance to add new vehicles to his liking, if not already included in the latest database release. Copyright © 2014 – TEXA S.p.A. -
Page 36: The Additional Functions Menu
Image 3.10 – The Additional functions menu on Konfort 760R, 760R Bus and 780R BiGas. It is possible to scroll the various pages/options of the menu by using the UP and DOWN buttons on the keyboard Copyright © 2014 – TEXA S.p.A. - Page 37 VDC control: It allows to perform the control, from the Konfort command panel, variable displacement compressor systems which are equipped with dedicated electronic control unit. This control action can be done by using the TEXA VDC device, Copyright © 2014 – TEXA S.p.A.
- Page 38 (refer to the corresponding instruction manual for further details). Non-condensable gas: This function allows to force the automatic check and/or discharge of the non-condensable gases from the inside of the vessel of the unit. Copyright © 2014 – TEXA S.p.A.
-
Page 39: The Settings Menu
Date and time: It allows to change the date and time inside the equipment. Language: It allows to change the display language for the menu and for the various functions of the equipment. Copyright © 2014 – TEXA S.p.A. -
Page 40: The Service Menu
Image 3.12 – Request for password insertion from the Service menu of Konfort 760R, 760R Bus and 780R BiGas Because of the importance of this menu, it will be detailed described into Chapter 4. Copyright © 2014 – TEXA S.p.A. -
Page 41: Chapter 4 - The Service Menu
Image 4.1 – Request for password insertion from the Service menu of Konfort 705R, 710R and 720R Image 4.2 – Request for password insertion from the Service menu of Konfort 760R, 760R Bus and 780R BiGas Copyright © 2014 – TEXA S.p.A. - Page 42 710R and 720R by means of the password 1236 Image 4.4 – Access to the Service menu with user level on Konfort 760R, 760R Bus and 780R BiGas by means of the password 1236 Copyright © 2014 – TEXA S.p.A.
- Page 43 Such extended access can be performed by means of the dealer password provided annually by TEXA S.p.A. and it allows the display of the following functions:...
- Page 44 Konfort Series 700R Service Manual TEXA Technical Assistance Image 4.6 – Access to the Service menu with the dealer level on Konfort 760R, 760R Bus and 780R BiGas units by using the dealer password (annually renewed) Copyright © 2014 – TEXA S.p.A.
-
Page 45: The "Power Outputs" Function On K705R, K710R, K720R
CO = Compressor; PO = Vacuum pump; SO = Oil discharge electro-valve; UV = UV injection electro-valve (not available on K705R); IO = Oil injection electro-valve; C1 = Refrigerant injection electro-valve; C2 = (not available) Copyright © 2014 – TEXA S.p.A. - Page 46 (load cells, pressure transducers, temperature sensors) which connected to the inputs of the ACE Micro board. These values give the possibility to make an estimation of the dynamic operation of each sensor. Copyright © 2014 – TEXA S.p.A.
- Page 47 1. Although not related to any sensor, the punctual value of this input could be in any case different from zero, as the ACE Micro board is characterized by floating inputs. Copyright © 2014 – TEXA S.p.A.
- Page 48 (hence, for example, TA=258 indicates a temperature of 25,8°C); TV is not used; TU indicates the temperature (in Celsius degrees) measured by the microcontroller temperature sensor of the Konfort unit. The last Copyright © 2014 – TEXA S.p.A.
- Page 49 FAN3 is not used on Konfort 705R, 710R and 720R. The possible statuses of the fans are: status 1: the fan is working properly; status 0: the fan is in overload; status 3: the fan is in open circuit. Copyright © 2014 – TEXA S.p.A.
- Page 50 (on), it will be activate and deactivate consecutively every second. This function can be very useful to check the status of operation of the electronic drivers (relays and triacs) of the ACE Power board which control the various actuators of the unit. Copyright © 2014 – TEXA S.p.A.
-
Page 51: The "Power Outputs" Function On Konfort 760R, 760R Bus Or 780R Bigas
UP and DOWN keys of the equipment’s keyboard: then, it will be enough to press the green ENTER button to activate (a flag on correspondent square will appear) or deactivate (the flag will disappear) each actuator. The actuators powered from this section are: Copyright © 2014 – TEXA S.p.A. - Page 52 The parameters shown in this section of the Power outputs page are: PRE: punctual values and absolute pressure (in mBars) measured by the main pressure sensor of the equipment; Copyright © 2014 – TEXA S.p.A.
- Page 53 Power outputs menu is shown (similarly to what described for Konfort K720R): Image 4.15 – Setup of the timing for the manual powering of the actuators in Konfort 760R, 760R Bus and 780R BiGas Copyright © 2014 – TEXA S.p.A.
- Page 54 K780R BiGas. The possible statuses of the fans are: status 1: the fan is working properly; status 0: the fan is in overload; status 3: the fan is in open circuit. Copyright © 2014 – TEXA S.p.A.
-
Page 55: The "Sensor Calibration" Function On K705R, K710R, K720R
In order to proceed with the calibration, the user must first of all remove the front panel of the Konfort unit and release the cylinder from the scale, in order to easily make the steps required during the calibration procedure. Copyright © 2014 – TEXA S.p.A. - Page 56 Image 4.20 – Removal of the four screws on the rear side of the Konfort unit lift the top panel and remove the plastic front panel of the equipment, in order to open it completely; Copyright © 2014 – TEXA S.p.A.
- Page 57 (with the help of a 8-millimiters hexagonal wrench) the screw of the bracket which blocks the tank on the scale. Then remove the bracket: Image 4.22 – Removal of the bracket that blocks the tank to the structure of the scale Copyright © 2014 – TEXA S.p.A.
- Page 58 Image 4.25 – Lifting of the refrigerant tank during the calibration of the load cell in a Konfort 705R, 710R or 720R Copyright © 2014 – TEXA S.p.A.
- Page 59 Image 4.29 – Request for placement of the sample weight Copyright © 2014 – TEXA S.p.A.
- Page 60 We recommend to perform the scale calibration by using the magnetic 1-kilogram sample weight included into the new sample weight kit for Konfort 700R. The kit is available for purchase from the Electronic Spare Parts website (part no. 4800103). Copyright © 2014 – TEXA S.p.A.
-
Page 61: Uv Additive" Calibration On K710R And K720R
EVIO electro-valve. 4.4.4 “MAIN SENSOR” calibration on K705R, K710R and K720R The Main Sensor function available in the Sensor calibration menu allows user to calibrate the main pressure sensor of equipment. Copyright © 2014 – TEXA S.p.A. - Page 62 Image 4.37 – Request for removal of the LP and HP fittings from service pipes Copyright © 2014 – TEXA S.p.A.
- Page 63 L P / H P c o u p l e r s h o s e s Image 4.40 – Request for reconnection of the HP and LP fittings to the service pipes Copyright © 2014 – TEXA S.p.A.
-
Page 64: Secondary Sensors" Calibration On K705R, K710R, K720R
4.4.5 “SECONDARY SENSORS” calibration on K705R, K710R, K720R The Secondary sensors function in the Sensor calibration menu allows user to calibrate the auxiliary pressure sensors of the equipment, if installed. Refer, for further information, to the VDC device installation manual. Copyright © 2014 – TEXA S.p.A. -
Page 65: The "Sensor Calibration" Function On Konfort 760R, 760R Bus And 780R Bigas
760R, 760R Bus and 780R BiGas units will be passed in review. 4.5.1 “REFRIGERANT” calibration on Konfort 760R and 760R Bus The Refrigerant function, available in the Sensor calibration menu, allows user to calibrate the refrigerant load cell of the equipment. Copyright © 2014 – TEXA S.p.A. - Page 66 760R or 760R Bus unit will display the following screenshot: Image 4.44 – Waiting message during calibration of the main load cell followed, after few seconds, by the following screenshot: Image 4.45 – Request for locking of the refrigerant scale Copyright © 2014 – TEXA S.p.A.
- Page 67 8-millimiters hex wrench: Image 4.46 – Refrigerant scale lock then press the ENTER button to confirm. The unit will show the following screenshot: Image 4.47 – Waiting message during calibration of the main load cell Copyright © 2014 – TEXA S.p.A.
- Page 68 Image 4.48 - Request for unlocking of the refrigerant scale Proceed with the unlock of the refrigerant scale, by pushing and rotating the lock/unlock mechanism counterclockwise: Image 4.49 - Refrigerant scale unlock then press the ENTER button to confirm. Copyright © 2014 – TEXA S.p.A.
- Page 69 Image 4.51 – Positioning of a sample weight over the tank then press the ENTER button to confirm. Also in this case, the 1-Kilogram magnetic sample weight included into the sample weight kit (spare part no. 4800103) can be used Copyright © 2014 – TEXA S.p.A.
- Page 70 1000), then press ENTER button to confirm. The unit will show the following screenshot: Image 4.53 – Confirmation message of the correctness of the calibration thus certifying the correctness of the main load cell calibration. Copyright © 2014 – TEXA S.p.A.
-
Page 71: Refrigerant" Calibration On Konfort 780R Bigas
780R BiGas unit will display the following screenshot: Image 4.54 – Waiting message during calibration of the main load cell followed, after few seconds, by the following screenshot: Image 4.55 – Request for scale lock Copyright © 2014 – TEXA S.p.A. - Page 72 Image 4.56 – Scale lock on a Konfort 780R BiGas then press the ENTER button to confirm. The unit will show the following screenshot: Image 4.57 – Waiting message during calibration of the main load cell Copyright © 2014 – TEXA S.p.A.
- Page 73 Image 4.58 – Request for scale unlock Proceed with the unlock of the refrigerant scale, by pushing and rotating the lock/unlock mechanism counterclockwise: Image 4.59 – Scale unlock on a Konfort 780R BiGas then press the ENTER button to confirm. Copyright © 2014 – TEXA S.p.A.
- Page 74 780R BiGas then press the ENTER button to confirm. Also in this case, the 1-kilogram magnetic sample weight included into the sample weight kit (spare part no. 4800103) can be used Copyright © 2014 – TEXA S.p.A.
- Page 75 Type the value in grams of sample weight (for example, in case of a 1Kg sample weight, type 1000), then press ENTER button to confirm. The unit will show the following message: Image 4.63 – Request for removal of the upper tank on Konfort 780R BiGas Copyright © 2014 – TEXA S.p.A.
- Page 76 (with the help of a 8-millimiters hexagonal wrench). Then remove the bracket: Image 4.65 – Removal of the blocking bracket from the upper tank of the Konfort 780R BiGas Copyright © 2014 – TEXA S.p.A.
- Page 77 Image 4.66 – Raising of the upper tank from the lower one of the Konfort 780R BiGas Then, press the ENTER button to proceed. The unit will show the following message: Image 4.67 – Waiting message during calibration of the main load cell Copyright © 2014 – TEXA S.p.A.
- Page 78 Replace the upper tank of the unit on its original position, by locking it clockwise. Then, press ENTER button to confirm. The unit will show the following message: Image 4.69 – Waiting message during calibration of the main load cell Copyright © 2014 – TEXA S.p.A.
-
Page 79: Recovered Oil" Calibration On Konfort 760R, 760R Bus And 780R Bigas
By pressing the ENTER button on this option, the following screenshot will be shown: Image 4.71 – Waiting message during calibration of the drained oil load cell Copyright © 2014 – TEXA S.p.A. - Page 80 Remove the bottle for the oil drain from the back of Konfort, then press the ENTER button to confirm. The equipment will then display the following screenshot: Image 4.73 – Waiting message during calibration of the drained oil load cell Copyright © 2014 – TEXA S.p.A.
- Page 81 Then press ENTER button to confirm. This sample weight is included, together with the 1-kilogram magnetic one, into the sample weight kit for Konfort 700R (spare part no. 4800103) Copyright © 2014 – TEXA S.p.A.
- Page 82 Type the value in grams of the sample weight (for example, in case of a 400-grams sample weight, type 400), then press ENTER to confirm. The unit will show the following message: Image 4.77 – Waiting message during calibration of the drained oil load cell Copyright © 2014 – TEXA S.p.A.
-
Page 83: Uv Additive" Calibration On Konfort 760R, 760R Bus And 780R Bigas
When requested, place the appropriate sample weight to the UV injection plug on the back of the unit: Image 4.79 – Connection of the 400-grams sample weight to the plug of the UV injection Copyright © 2014 – TEXA S.p.A. -
Page 84: Bigas
4.5.6 “MAIN SENSOR” calibration on Konfort 760R, 760R Bus and 780R BiGas The Main sensor function, available from the Sensor calibration menu, allows user to calibrate the main pressure sensor of the equipment. Copyright © 2014 – TEXA S.p.A. - Page 85 Image 4.82 – Request for removal of the HP and LP fittings from the service tubes Unscrew the fittings from the HP and LP service pipes (see Image 4.38), then press ENTER to confirm. Copyright © 2014 – TEXA S.p.A.
- Page 86 Image 4.84 – Request for reconnection of the HP and LP fittings to the service tubes Reconnect the fittings to the HP and LP service pipes, then press ENTER to confirm. Copyright © 2014 – TEXA S.p.A.
- Page 87 Finally, the display of the Konfort unit will show the following message: Image 4.86 – Confirmation message of the correctness of the calibration of the main pressure sensor thus confirming the fact that the main sensor calibration has been successful. Copyright © 2014 – TEXA S.p.A.
-
Page 88: Secondary Sensors" Calibration On Konfort 760R, 760R Bus And 780R Bigas
ENTER button. WARNING! The private parameters change implies a modification of the behavior of the unit. Please, contact TEXA Technical Assistance for being instructed in any parameter change. 4.6.1 List of the private parameters for Konfort 705R... -
Page 89: List Of The Private Parameters For Konfort 710R
REFR. IDENTIFIER CALIBRATION THRESHOLD T(h) MAX FAILED DRAIN RETRIES LEAK TIME FOR FLUXING min. 3 FORCE DISCHARGE BEFORE RECOVERY ANALYZE GAS PRE VACUUM TIME min. 15 Table 4.2 – List of the private parameters for Konfort 710R Copyright © 2014 – TEXA S.p.A. -
Page 90: List Of The Private Parameters For Konfort 720R
20 RECOVERY PHASE FINAL TIME sec. 20 CHECK WAITING TIME sec. 2 IO/UV DELAY TIME (0.01 sec.) REFR. IDENTIFIER CALIBRATION THRESHOLD T(h) Table 4.4 – List of the private parameters for Konfort 760R Copyright © 2014 – TEXA S.p.A. -
Page 91: List Of The Private Parameters For Konfort 760R Bus
REFR. IDENTIFIER CALIBRATION THRESHOLD T(h) MAX FAILED DRAIN RETRIES LEAK TIME FOR FLUXING min. 3 FORCE DISCHARGE BEFORE RECOVERY ANALYZE GAS PRE VACUUM TIME min. 15 Table 4.5 – List of the private parameters for Konfort 760R Bus Copyright © 2014 – TEXA S.p.A. -
Page 92: List Of The Private Parameters For Konfort 780R Bigas
ENTER button. WARNING! The public parameters change implies a modification of the behavior of the unit. Please, contact TEXA Technical Assistance for being instructed in any parameter change. Copyright © 2014 – TEXA S.p.A. -
Page 93: List Of The Public Parameters For Konfort 705R
50 UV/NEW OIL PHASE THRESHOLD mbar. 400 BOTTLE CHECK MODE FAN CHECK MODE VACUOMETER OFFSET mbar. 0 DEBUG ON SD CARD 0=OFF, 1=ON Table 4.7 – List of the public parameters for Konfort 705R Copyright © 2014 – TEXA S.p.A. -
Page 94: List Of The Public Parameters For Konfort 710R
50 UV/NEW OIL PHASE THRESHOLD mbar. 400 BOTTLE CHECK MODE FAN CHECK MODE VACUOMETER OFFSET mbar. 0 DEBUG ON SD CARD 0=OFF, 1=ON Table 4.8 – List of the public parameters for Konfort 710R Copyright © 2014 – TEXA S.p.A. -
Page 95: List Of The Public Parameters For Konfort 720R
50 UV/NEW OIL PHASE THRESHOLD mbar. 400 BOTTLE CHECK MODE FAN CHECK MODE VACUOMETER OFFSET mbar. 0 DEBUG ON SD CARD 0=OFF, 1=ON Table 4.9 – List of the public parameters for Konfort 720R Copyright © 2014 – TEXA S.p.A. -
Page 96: List Of The Public Parameters For Konfort 760R
50 UV/NEW OIL PHASE THRESHOLD mbar. 400 BOTTLE CHECK MODE FAN CHECK MODE VACUOMETER OFFSET mbar. 0 DEBUG ON SD CARD 0=OFF, 1=ON Table 4.10 – List of the public parameters for Konfort 760R Copyright © 2014 – TEXA S.p.A. -
Page 97: List Of The Public Parameters For Konfort 760R Bus
UV/NEW OIL PHASE THRESHOLD mbar. 400 BOTTLE CHECK MODE FAN CHECK MODE VACUOMETER OFFSET mbar. 0 DEBUG ON SD CARD 0=OFF, 1=ON Table 4.11 – List of the public parameters for Konfort 760R Bus Copyright © 2014 – TEXA S.p.A. -
Page 98: List Of The Public Parameters For Konfort 780R Bigas
“CALIBRATION STATUS” function on Konfort 700R units The Calibration status function, available from the Service menu, allows user to get a quick overview of the status of the calibration of each sensor of the equipment. Copyright © 2014 – TEXA S.p.A. - Page 99 L = Auxiliary LP pressure sensor This sensor can be installed as an accessory on the equipment (for example, in case of use of the VDC device) This sensor can be installed as an accessory on the equipment Copyright © 2014 – TEXA S.p.A.
-
Page 100: Select Refrigerant" Function On Konfort 700R Units
The Stored errors function, available from the Service menu both with the user password 1236 and with the dealer one (provided every year by TEXA S.p.A), allows to display the history of the functioning faults of the unit: Image 4.89 – Example of the Stored errors function on Konfort 700R units Copyright ©... - Page 101 CANCEL button on the keyboard of the unit: and then confirm the deletion of the stored error by pressing the ENTER button: Image 4.91 – Request for stored error deletion by pressing the ENTER button Copyright © 2014 – TEXA S.p.A.
-
Page 102: Default Parameters" Function On Konfort 700R Units
By selecting this option, the unit will ask to confirm the restore of the default values of the parameters, by showing the following screenshot: Image 4.93 – Request for restoring the default values of the working parameters of the unit Copyright © 2014 – TEXA S.p.A. -
Page 103: Customised Service" Function On Konfort 700R Units
AC maintenance working mode of the Konfort unit under specific request of the final user. By choosing this function, the following options will be displayed: Image 4.95 – Options available in the Customised service function of the Konfort 700R units Copyright © 2014 – TEXA S.p.A. - Page 104 Image 4.96 – Possibility to enable or disable the UV injection in the Konfort 700R units Copyright © 2014 – TEXA S.p.A.
- Page 105 Image 4.98 – Selection of a priority brand for the vehicle database (by pressing the ENTER button on it the priority brand will be marked with a blue symbol) Copyright © 2014 – TEXA S.p.A.
- Page 106 50mBars, the countdown will be reset to the initial time value and it will remain blocked until the pressure will come again under the above mentioned threshold. Copyright © 2014 – TEXA S.p.A.
-
Page 107: Chapter 5 - Ordinary Maintenance
The Konfort unit will start to advice about the imminent need to replace the main filter once the 80% of its total consumption will be reached: Image 5.1 – Warning message about the imminent exhaustion of the main filter Copyright © 2014 – TEXA S.p.A. - Page 108 During this phase, the unit will perform an automatic depressurization of its internal hydraulic circuit, in order to allow the removal of the main filter in safety conditions. Copyright © 2014 – TEXA S.p.A.
- Page 109 In case of Konfort 710R, remove the protection cover for the main filter from the back side of the unit. Use a 3mm Allen wrench in order to remove the four screws: Image 5.6 – Opening the back compartment on Konfort 710R Copyright © 2014 – TEXA S.p.A.
- Page 110 Image 5.8 – Location of the main filter on Konfort 705R In all the other models of Konfort 700R, the main filter is located horizontally on the upper part of the recovery group (see Image 5.9, element c): Copyright © 2014 – TEXA S.p.A.
- Page 111 WARNING: On all the other models of Konfort 700R, the new filter will have to be installed so that the arrow depicted on the label will point to the right (see Image 5.9, element d). Screw the two bolts of the filter. Copyright © 2014 – TEXA S.p.A.
- Page 112 In case of Konfort 710R, re-install the metal cover on the back side of the unit. For all the other models of Konfort 700R, close the back door of the unit. Then, press the ENTER button to continue. Copyright © 2014 – TEXA S.p.A.
-
Page 113: Vacuum Pump Oil Replacement
The vacuum pump oil replacement has to be performed when it will be automatically requested by the unit (i.e., once the pump will reach 90 hours of functioning): Image 5.13 – Request to replace the vacuum pump oil Copyright © 2014 – TEXA S.p.A. - Page 114 Once the oil will be completely come out, replace the o-ring on the cap of the pump for the oil discharge; then, replace it by paying attention not to screw it too tight, otherwise it could come out from its location. Copyright © 2014 – TEXA S.p.A.
- Page 115 Screw again the red cap for the oil charge. Restart the Konfort unit. Access the Reset counters function from the Additional functions menu of the unit, then proceed with the erase of the Pump Working Time counter. Copyright © 2014 – TEXA S.p.A.
-
Page 116: Chapter 6 - Software Update
Database: from this folder the zip archive containing the database version for which the user owning a Konfort 700R series unit has right for can be downloaded. Konfort 700 Updater: from this folder the PC setup package for the Konfort 700 Updater program can be downloaded. -
Page 117: Manual Update Of The Software Packages In The Sd Card
In order to proceed with the update, the operator has first of all to switch off the unit, to remove the SD card from the equipment’s reader: Image 6.3 – SD card removal from the Konfort 700R Copyright © 2014 – TEXA S.p.A. - Page 118 Konfort Series 700R Service Manual TEXA Technical Assistance insert it into the TEXA SD card reader (provided together with the Konfort unit) and to connect the card reader to the PC: Image 6.4 – SD card insertion into TEXA card reader and...
-
Page 119: Automatic Update By Means Of Konfort 700 Updater
Automatic update by means of Konfort 700 Updater As an alternative to the manual procedure described in the previous paragraph, the software of a Konfort 700R series unit can be updated by using the Konfort 700 Updater program. The installation package of this program can be downloaded from the Konfort 700 Updater folder of the Service Code website (as previously described). - Page 120 Konfort 700 Updater icon on the desktop of the PC to start it up: Image 6.8 – Double click on the Konfort 700 Updater icon located on the desktop in order to start the update program Copyright © 2014 – TEXA S.p.A.
- Page 121 In order to proceed with the update, the operator has first of all to switch off the unit, to remove the SD card from the equipment’s reader: Image 6.10 – SD card removal from the Konfort 700R Copyright © 2014 – TEXA S.p.A.
- Page 122 Konfort Series 700R Service Manual TEXA Technical Assistance insert it into the TEXA SD card reader (provided together with the Konfort unit) and to connect the card reader to the PC: Image 6.11 – card insertion into TEXA card reader...
- Page 123 Once the update will be completed, the following confirmation message will be displayed: Image 6.14 – Confirmation of the completion of the update. It is possible to remove the SD card from the PC Copyright © 2014 – TEXA S.p.A.
- Page 124 Image 6.15 – Flashing green REC led during the firmware update of the unit The update process will last few seconds; once finished, the unit will normally start up, by showing the initial page of its menu. Copyright © 2014 – TEXA S.p.A.
-
Page 125: Chapter 7 - Trouble Shooting
Konfort 700R equipments, will be listed. For each individual critical situation, all the steps needed for the quick identification of the cause of the problem and for its correct solution will be described. Copyright © 2014 – TEXA S.p.A. -
Page 126: The Equipment Does Not Switch On
Image 7.1 – Removal of the cap of the network filter on Konfort 720R, 760R, 760R Bus and 780R BiGas Image 7.2 – Check the voltage (~ 230V - 50Hz) between the blue and the brown wires Copyright © 2014 – TEXA S.p.A. - Page 127 Image 7.4 – With the help of a multimeter in diode test mode, check the continuity of each of the two fuses In the case that one of the two fuses would be interrupted, replace it with a new one with proper value (250V - T10A). Copyright © 2014 – TEXA S.p.A.
- Page 128 (about 14V AC) and then between the two blue wires (about 15,5 V AC) of the cable: Image 7.6 – Between the two red wires of the cable there must be an alternate voltage of about 14V Copyright © 2014 – TEXA S.p.A.
-
Page 129: The Display Of The Konfort Unit Does Not Visualize Correctly
If, while powering the unit up, no “beeps” are emitted and the display shows one of the following situations: Image 7.8 – Request for SD insertion and no “beep” while starting up a Konfort 705R, 710R or 720R unit Copyright © 2014 – TEXA S.p.A. - Page 130 If, while powering up a Konfort 720R unit, a “beeps” is emitted, but the backlight of the display stays off: Image 7.10 - Backlight off accompanied by a “beep” while starting up a Konfort 720R Copyright © 2014 – TEXA S.p.A.
- Page 131 If, while switching on a Konfort 760R, 760R Bus or 780R BiGas unit, a “beep” is emitted, but the display remains black: Image 7.12 – Black display accompanied by a “beep” while starting up a Konfort 760R, 760R Bus or 780R BiGas Copyright © 2014 – TEXA S.p.A.
- Page 132 (only backlight) on Konfort 705R, 710R or 720R try to adjust again the backlight of the display, by keeping the orange INFO button pressed and by adjusting the brightness with the UP and DOWN buttons. Copyright © 2014 – TEXA S.p.A.
-
Page 133: The Unit Does Not Recover Refrigerant
(especially by the LP gauge, which can better make the user appreciate the low values of relative pressure). If the difference of the two values would Copyright © 2014 – TEXA S.p.A. - Page 134 HP and LP hoses to the mechanic filter: Image 7.16 – Removal of the small tube that leads the refrigerant from the HP/LP hoses to the mechanic filter Copyright © 2014 – TEXA S.p.A.
- Page 135 Connect that pipe to the inlet of a vacuum gauge: Image 7.18 – Connection of the silicone tube coming from the HP/LP hoses to the inlet of a vacuum gauge Copyright © 2014 – TEXA S.p.A.
- Page 136 Then check that the depression measured by the pointer of the vacuum gauge will be appropriate: Image 7.20 – Depression level showing that the suction capability is appropriate Copyright © 2014 – TEXA S.p.A.
- Page 137 Konfort 720R, 760R, 760R Bus and 780R BiGas models). Pull the manual valve with the ring located on the refrigerant tank of the unit for about 15-20 seconds in order to speed-up the non- condensable gases discharge. Copyright © 2014 – TEXA S.p.A.
- Page 138 Ensure that all conductors of the cable J1 of the ACE Power board (see Appendix 2) will be fully inserted into the corresponding connector. In case that the conductors insertion would be correct, proceed with the replacement of the complete ACE Power board. Copyright © 2014 – TEXA S.p.A.
-
Page 139: The Unit Does Not Perform The Vacuum
In case it would be blocked, proceed with the replacement of the vacuum pump. Copyright © 2014 – TEXA S.p.A. - Page 140 On the other hand, in case of Konfort 760R, 760R Bus or 780R BiGas units, activate the HP and LP solenoid valves from the Power outputs menu, in order to open the two high and low pressure branches to the air flow: Copyright © 2014 – TEXA S.p.A.
- Page 141 VACUUM" would occur, replace the two HP and LP valves. Check that the rubbers of the actuators of EVPO1 and EVPO2 solenoid valves will not be deformed or deteriorated. In case, replace the actuators of these electro-valves. Copyright © 2014 – TEXA S.p.A.
- Page 142 UV additive, check the silicone tubes which connect the bottles group to the manifold: Image 7.26 – Silicone tubes which connect the oil and UV injection bottles to the manifold Copyright © 2014 – TEXA S.p.A.
-
Page 143: The Unit Does Not Inject Oil
In case of Konfort 705R, 710R or 720R units, ensure that the liquid outlet of the oil bottle will not be obstructed. Copyright © 2014 – TEXA S.p.A. - Page 144 Power outputs menu, the linearity of the oil injection load cell. If necessary, proceed with the calibration of the load cell. In case that the calibration will not be successful, replace the load cell. Copyright © 2014 – TEXA S.p.A.
-
Page 145: The Unit Does Not Inject Uv Additive
UV additive. In case of Konfort 705R, 710R or 720R units, ensure that the liquid outlet of the UV bottle will not be obstructed. Copyright © 2014 – TEXA S.p.A. -
Page 146: Too Much Oil And/Or Uv Additive Is Injected
Too much oil and/or UV additive is injected Check that the tube which connects the bottle to the manifold will allow the free movement of the load cell (see Image 7.26). If necessary, restore its correct position. Copyright © 2014 – TEXA S.p.A. - Page 147 Image 7.32 – The cable which comes to the oil-injection bottle recognition connector (the same for the UV) could be too tight Copyright © 2014 – TEXA S.p.A.
- Page 148 (for example, 400 grams) to it and check that the corresponding value on the Power outputs menu will vary from about 400 to about 0 by simply removing the sample weight from the cell: Image 7.34 (A) – See below Copyright © 2014 – TEXA S.p.A.
-
Page 149: The Equipment Does Not Inject Refrigerant
In case of Konfort 705R, 710R and 720R units, ensure that both the HP and LP valves located on the side panel of the equipment will be open. Copyright © 2014 – TEXA S.p.A. - Page 150 In case of Konfort 780R BiGas units, this check will have to be performed on the CA1 solenoid valves in case of R134a refrigerant injection, otherwise on the CA2 solenoid valves in case of R1234yf refrigerant injection Copyright © 2014 – TEXA S.p.A.
-
Page 151: The Unit Injects A Larger Amount Of Refrigerant
In order to prevent this abnormal contact, loosen the two screws which block the safety bar and lift the bar completely: Image 7.37 – Lifting of the internal safety bar in order to prevent any abnormal contact between the cone and the tank(s) Copyright © 2014 – TEXA S.p.A. - Page 152 Image 7.39 – Use the holes on the top and on the bottom of the scale to center the load cell into the mechanic structure of the scale If necessary, replace the mechanic structure of the scale. In case, proceed with the replacement of the main load cell. Copyright © 2014 – TEXA S.p.A.
-
Page 153: The Recovered Oil Is Not Discharged Into The Drain Bottle
Image 7.41 – Checking of the quick connector on the oil drain bottle of a Konfort 705R, 710R or 720R Try, from the Power outputs menu, to manually activate the EVSO oil drain solenoid valve, in order to verify its functionality. Copyright © 2014 – TEXA S.p.A. -
Page 154: The Main Load Cell Is Not Properly Calibrated
0. Place a sample weight on the plate of the scale, unlock it by turning the pin clockwise and check whether the weight value on the Power outputs menu has increased. If, under these Copyright © 2014 – TEXA S.p.A. -
Page 155: The Auxiliary Load Cells Are Not Properly Calibrated
(refer to the information reported on Chapter 4 regarding these calibration processes). Use always the 400-grams sample weight provided by TEXA S.p.A. Remove the bottle from the back of the equipment. Check from the Power outputs menu that, when the sample weight is inserted, the value of the corresponding load cell will be increased. - Page 156 Image 7.45 – Message of a calibration fault in Konfort 760R, 760R Bus and 780R BiGas try again to perform the calibration, by meticulously following the corresponding procedure. In case that the problem would persist, proceed with the replacement of the pressure sensor. Copyright © 2014 – TEXA S.p.A.
-
Page 157: Appendx 1 - Spare Parts Portal
Konfort Series 700R Service Manual TEXA Technical Assistance APPENDIX 1 – SPARE PARTS PORTAL In order to purchase any Konfort spare part, use the Electronic Spare Parts website: Copyright © 2014 – TEXA S.p.A. -
Page 158: Appendx 2 - Electrical And Signal Connections
Konfort Series 700R Service Manual TEXA Technical Assistance APPENDIX 2 – ELECTRICAL AND SIGNAL CONNECTIONS KONFORT 705R Image A2.1 – Actuators connection to the ACE Power board on Konfort 705R Copyright © 2014 – TEXA S.p.A. - Page 159 Konfort Series 700R Service Manual TEXA Technical Assistance Image A2.2 – Sensors connection to the ACE Micro board on Konfort 705R Copyright © 2014 – TEXA S.p.A.
- Page 160 Konfort Series 700R Service Manual TEXA Technical Assistance KONFORT 710R Image A2.3 – Actuators connection to the ACE Power board on Konfort 710R Copyright © 2014 – TEXA S.p.A.
- Page 161 Konfort Series 700R Service Manual TEXA Technical Assistance Image A2.4 – Sensors connection to the ACE Micro board on Konfort 710R Copyright © 2014 – TEXA S.p.A.
- Page 162 Konfort Series 700R Service Manual TEXA Technical Assistance KONFORT 720R Image A2.5 – Actuators connection to the ACE Power board in Konfort 720R Copyright © 2014 – TEXA S.p.A.
- Page 163 Konfort Series 700R Service Manual TEXA Technical Assistance Image A2.6 – Sensors connection to the ACE Micro board in Konfort 720R Copyright © 2014 – TEXA S.p.A.
- Page 164 Konfort Series 700R Service Manual TEXA Technical Assistance KONFORT 760R AND 760R Bus Image A2.7 – Actuators connection to the ACE Power board in Konfort 760R and 760R Bus Copyright © 2014 – TEXA S.p.A.
- Page 165 Konfort Series 700R Service Manual TEXA Technical Assistance Image A2.8 – Sensors connection to the ACE Micro board in Konfort 760R and 760R Bus Copyright © 2014 – TEXA S.p.A.
- Page 166 Konfort Series 700R Service Manual TEXA Technical Assistance KONFORT 780R BiGas Image A2.9 – Actuators connection to the ACE Power board in Konfort 780R BiGas Copyright © 2014 – TEXA S.p.A.
- Page 167 Konfort Series 700R Service Manual TEXA Technical Assistance Image A2.10 – Sensors connection to the ACE Micro board in Konfort 780R BiGas Copyright © 2014 – TEXA S.p.A.
-
Page 168: Appendix 3 - Flow Diagrams
Konfort Series 700R Service Manual TEXA Technical Assistance APPENDIX 3 – FLOW DIAGRAMS KONFORT 705R Image A3.1 – Flow diagram for the Konfort 705R Copyright © 2014 – TEXA S.p.A. - Page 169 Konfort Series 700R Service Manual TEXA Technical Assistance KONFORT 710R AND 720R Image A3.2 – Flow diagram for the Konfort 710R and 720R Copyright © 2014 – TEXA S.p.A.
- Page 170 Konfort Series 700R Service Manual TEXA Technical Assistance KONFORT 760R AND 760R Bus Image A3.3 – Flow diagram for the Konfort 760R and 760R Bus Copyright © 2014 – TEXA S.p.A.
- Page 171 Konfort Series 700R Service Manual TEXA Technical Assistance KONFORT 780R BiGas Image A3.4 – Flow diagram for the Konfort 780R BiGas Copyright © 2014 – TEXA S.p.A.
-
Page 172: Appendix 4 - Solenoid Valves Location
Konfort Series 700R Service Manual TEXA Technical Assistance APPENDIX 4 – SOLENOID VALVES LOCATION KONFORT 705R Image A4.1 – Solenoid valves location on Konfort 705R Copyright © 2014 – TEXA S.p.A. - Page 173 Konfort Series 700R Service Manual TEXA Technical Assistance KONFORT 710R AND 720R Image A4.2 – Solenoid valves location on Konfort 710R and 720R Copyright © 2014 – TEXA S.p.A.
- Page 174 Konfort Series 700R Service Manual TEXA Technical Assistance KONFORT 760R AND 760R Bus Image A4.3 – Solenoid valves location on Konfort 760R and 760R Bus Copyright © 2014 – TEXA S.p.A.
- Page 175 Konfort Series 700R Service Manual TEXA Technical Assistance KONFORT 780R BiGas Image A4.4 – Solenoid valves location on Konfort 780R BiGas Copyright © 2014 – TEXA S.p.A.
Need help?
Do you have a question about the Konfort 700R Series and is the answer not in the manual?
Questions and answers