Table of Contents
Advertisement
Advertisement
Chapters
Table of Contents

Related Manuals for Weinmann ACCUVAC Rescue WM 10600


Summary of Contents for Weinmann ACCUVAC Rescue WM 10600
- Page 1 Service and Repair Instructions ACCUVAC Rescue Aspirator WM 10600...
-
Page 2: Table Of Contents
© Copyright Weinmann GmbH & Co. KG. The content and presentation are copyright protected and may only be used by authorised Weinmann Service Partners in the course of their service operations. The content must not be reproduced or passed on to third parties. The complete documents... -
Page 3: Introduction
(invoice) with the material. appliance. In stable positioning of injured patients the Repairs may only be carried out by Weinmann or ACCUVAC Rescue aspirator can be used for de- by expert personnel. flating vacuum mattresses and inflatable splints. -
Page 4: Overview
1. Overview Overview... -
Page 5: Safety Instructions
2. Safety instructions 2.1 Special symbols on the appliance The symbol on the filter cover draws attention to the built-in bacteria filter . This must be changed or sterilized after use to prevent the risk of infection (see “5. Cleaning and disinfecting” in the opera- tion manual). -
Page 6: Description
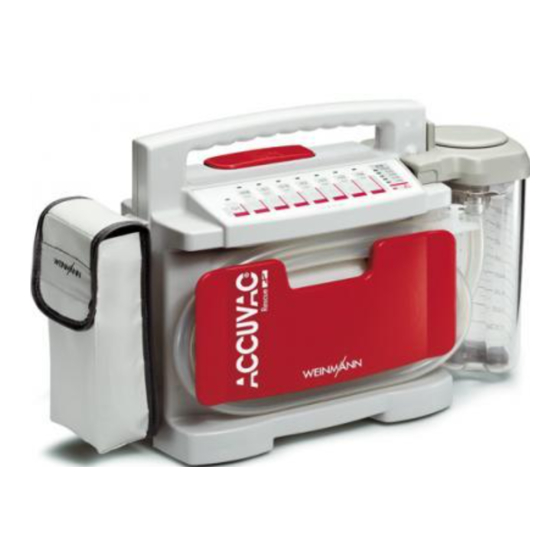
3. Description 3.1 Purpose ACCUVAC Rescue is a mobile and portable electrically powered aspirator (suction pump). It is used for: • can optionally be powered – by a rechargeable internal power pack; • aspirating accumulations of blood, secretions – or by an external DC source supplying and food from the oral cavity, the nose and 12.0 - 13.8 V;... -
Page 7: Operation
Important: Do not immerse the bacteria filter in dis- infectant liquid, as this adversely affects its hydro- phobic properties. An overfill system prevents secretions from entering the motor unit. The ball floats on the surface of the secretion until it blocks the exit. Power supply Power can be drawn from: •... -
Page 8: Operating And Display Elements
5. Operating and Display Elements 5.1 Operation Capacity indicator Adequate external voltage available Membrane Main switch Keys for desired keyboard suction level 5.2 Service Bring up service display by pressing keys –0.2 and –0.3 simultaneously. Charging was Charging was Charging was Power pack was terminated due to terminated due to... -
Page 9: Maintenance
To maintain battery operation and service life we as inspections and repair work, carried out by the recommend performing calibration every 8 weeks manufacturer – Weinmann – or by expert according to item 7.1.2 of the description and personnel. 6.1 Disposal Do not dispose of the unit with domestic waste. -
Page 10: Performing The Function Check
7.2 Performing the function check 1. Assemble ACCUVAC Rescue ready for use. 3. Check that all tubes are securely connected and that the secretion cover is firmly in 2. Check that all tubes, the collection canister place. secretion cover and filter cover are in perfect condition. - Page 11 9. Open the suction opening of the nozzle The aspirator must start running again. 10. Preselect a vacuum of –0.3 bar. 11. Close the end of the nozzle again. 12. As soon as the pump stops, select a vacuum of –0.2 bar without opening the fingertip.
-
Page 12: Troubleshooting
8. Troubleshooting Troubleshooting... - Page 13 Troubleshooting...
- Page 14 Troubleshooting...
-
Page 15: Repairs: Information And Instructions
An ESD workplace is essential for making repairs to When replacing components or individual parts, the ACCUVAC Rescue. be sure to use only original Weinmann parts. No work should be performed on the appliance A function check (see ”7.2 Performing the function without a thorough knowledge of the Operating In- check“... -
Page 16: Closing The Device
9.3 Closing the device Tools and equipment required: • Phillips screwdriver size 2 1. Carefully put the front and rear case elements together again. 2. Screw the case together again, making sure that the silicone sealing cord is correctly inserted and is not jammed or otherwise damaged. -
Page 17: Replacing Membrane Keyboard
9.5 Replacing membrane keyboard Tools and equipment required: • Phillips screwdriver size 1; • 7mm open-end wrench. 1. Open the device (see ”9.2 Opening the de- vice“ on page 15). 2. Carefully detach electrical power pack con- nector from the circuit board. 3. - Page 18 14. Pull the protective film off the new membrane keyboard. 15. Insert the circuit board again and screw it up firmly. 16. Carefully restore electrical connections 17. Carefully attach electrical connector 18. Fit tube onto the board again. 19. Insert the power pack again and screw it firmly in place.
-
Page 19: Changing The Power Pack
9.6 Changing the power pack The ACCUVAC Rescue is fitted with a high-grade nickel-cadmium power pack. Tools and equipment required: • Phillips screwdriver size 2. 1. Open the device (see ”9.2 Opening the de- vice“ on page 15). 2. Carefully disconnect the power pack connec- from the circuit board. -
Page 20: Initializing The Power Pack
9.7 Initializing the power pack Initialization matches the capacity indicator the energy content of the power pack. The power pack must be initialized: • every time a new power pack is fitted; • every time fuse F2 is changed; • if the 10 % LED is flashing. -
Page 21: Changing Fuse F1 Or F2
9.8 Changing fuse F1 or F2 Important Never touch the circuit board, as this can damage the electronic system. Tools and equipment required: • Phillips screwdriver size 2. 1. Open the device (see ”9.2 Opening the de- vice“ on page 15). 2. -
Page 22: Fitting New Circuit Board Wm 10680
9.10 Fitting new circuit board WM 10680 Important! For this operation it is essential to use an ESD work- place because of the risk of damage to the circuit board by static electricity. Tools and equipment required: • Phillips screwdriver size 2. 1. - Page 23 8. Carefully open up cable grip of ribbon cable connector . Then carefully remove ribbon cable (do not touch the ribbon cable contacts with your fingers, as this can cause oxidation.) 9. Unscrew 4 retaining screws from the circuit board. 10.
-
Page 24: Fitting New Pump
9.11 Fitting new pump The pump is only available as a complete replacement unit. Tools and equipment required: • Phillips screwdriver size 2. 1. Open the device (see ”9.2 Opening the de- vice“ on page 15). 2. Carefully detach electrical power pack con- nector from the circuit board. -
Page 25: Changing Fuse In Vehicle Plug
9.12 Changing fuse in vehicle plug Tools and equipment required: • Phillips screwdriver size 2. 1. Use a screwdriver to open the vehicle plug. : The central contact of the plug is the plus Note pole. The plus lead of the cable has either a square cross-section or colored markings. -
Page 26: Electrical Circuit Diagram
4. Refit the cover plate Note that there is a projecting lug on the back of the cover plate. Be sure to fit the cover plate so that this lug locates the muffler in position. 5. Perform a function check (see ”7.2 Performing the function check“... -
Page 27: Spare Parts
10. Spare Parts 10.1 Spare parts list Note: The item numbers in the following table are identical with the numbers used in these Service and Repair Instructions and the Operating Instructions. Item No. Spare Part Order No. Membrane keyboard ACCUVAC Rescue WM 10645 Re-usable canister, complete WM 10630... - Page 28 Item No. Spare Part Order No. Vacuum pump, complete (exchange unit)* WM 10605 PCB Rescue WM 10680 PCB Rescue, exchange unit WM 10604 Oval head screw M3x14 WM 53032 Pressure measurement tube WM 10661 consisting of: – Tube, silicone fabric 3x3; 220 mm long WM 10761 –...
-
Page 29: Tools And Test Equipment
Following is a list of tools and test equipment men- Special tools can be obtained from the tioned in these Service and Repair Instructions. manufacturer, Weinmann. • Cross-head screwdriver, size 1 See the relevant chapter for details of the tools and •... -
Page 30: Technical Data
13. Technical Data ACCUVAC Rescue ACCUVAC Rescue Product category according EN 60601-1, EN ISO 10079- II b Norms complied with to 93/42/EEC 1, EN 1789 Dimensions 8 A, DIN 72581, 370x280x140 Vehicle plug fuse WxHxD in mm identification color white Weight approx. -
Page 31: Safe Distances
13.1 Safe distances The ACCUVAC Rescue is intended for operation in an electromagnetic environment in which high-frequency interference variables are controlled. The customer or user of the ACCUVAC Rescue can help avoid electro- magnetic interference by maintaining the minimum safe distance between portable and mobile high-frequen- cy telecommunication devices (transmitters) and the ACCUVAC Rescue depending on the rated output of the transmitter as given below. -
Page 32: Repair And Test Report
14. Repair and Test Report Keep a record of all tests or repairs performed (please copy attached form for use). Repair and Test Report... - Page 36 For decades Weinmann has been developing, producing and marketing medical devices for markets around the world. In cooperation with our partners we design economic health systems for diagnosis and therapy in Sleep Medicine, Home Mechanical Ventilation, Oxygen Medicine and Emergency Medicine.
Need help?
Do you have a question about the ACCUVAC Rescue WM 10600 and is the answer not in the manual?
Questions and answers