RADWAG WPY series User Manual

RADWAG WPY series User Manual

Hide thumbs Also See for WPY series:
Table of Contents

Advertisement

Quick Links

User Manual
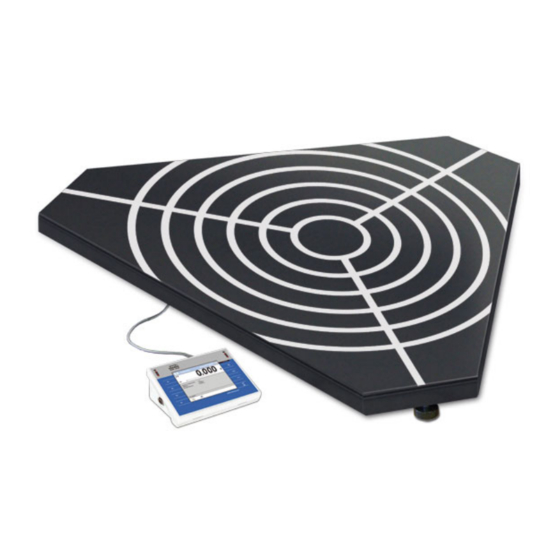
Scales of WPY/KO series
Manual number:
ITKU-47-09-01-11-A
Mass Comparator
M A N U F A C T U R E R O F E L E C T R O N I C
W E I G H I N G I N S T R U M E N T S
RADWAG Wagi Elektroniczne, 26–600 Radom Bracka 28 Street - POLAND
Phone +48 48 38 48 800, phone/fax. +48 48 385 00 10
Selling department +48 48 366 80 06
www.radwag.com

Advertisement

Table of Contents
loading

Summary of Contents for RADWAG WPY series

  • Page 1 W E I G H I N G I N S T R U M E N T S RADWAG Wagi Elektroniczne, 26–600 Radom Bracka 28 Street - POLAND Phone +48 48 38 48 800, phone/fax. +48 48 385 00 10 Selling department +48 48 366 80 06 www.radwag.com...
  • Page 2 JANUARY 2011...
  • Page 3: Table Of Contents

    Table OF CONTENTS 1. INTENDED USE ..........................7 2. PRECAUTIONARY MEASURES ....................7 3. WARRANTY CONDITIONS ......................7 ACKING AND MOUNTING....................8 5. CONSTRUCTION ........................9 5.1. Main dimensions ........................9 5.2. Description of connectors....................10 5.2.1. Connectors’ description in PUE 7 ................10 5.2.2. Connectors’ description in PUE 7P ................10 5.2.3.
  • Page 4 15. COMMUNICATION........................34 15.1. RS 232 settings .........................35 15.2. ETHERNE T setting ......................35 1 .3. TCP protocol setting ......................36 16. DEVICES ..........................36 16.1. Computer ..........................36 16.1.1. Computer port ......................36 16.1.2. Computer addre ss ....................37 16.1.3. Continuous trans mission ..................37 16.1.4. Weighing printou t pattern..................38 16.1.5.
  • Page 5 22. SPECIAL FUNCTIONS OF WORKING MODES..............62 22.1. Recording mode ........................63 22.2. wn-weighing .........................63 22.3. Checkw eighing........................64 22.4. Tare mo de.........................64 22.5. Labelling mode........................65 22.5.1. Setting of the nu mber of labels to print ..............65 22.5.2. Setting of the nu mber of cumulative labels to print..........66 22.5.3.
  • Page 6 28.3. Respond message format ....................94 28.4. Command’s description ....................94 28.4.1. Zeroi ng........................94 28.4.2. Tarri ng........................94 28.4.3. Get ta re value ......................95 28.4.4. Set tare value ......................95 28.4.5. Send the stable r esult in basic unit .................96 28.4.6. Send the result i mmediately in basic unit ...............96 28.4.7.
  • Page 7: Intended Use

    G. Devices that are to be withdrawn from usage should be utilized according to the law. 3. WARRANTY CONDITIONS A. RADWAG is obliged to repair or change those elements that appears to be faulty because of production and construction reason, B. Defining defects of unclear origin and outlining methods of elimination...
  • Page 8: Unpacking And Mounting

    • Inappropriate cleaning. E. Forfeiture of warranty appears after: • Access by an unauthorized service, • Intrusion into mechanical or electronic construction of unauthorized people, • Installing another operating system, • Removing or destroying protection stickers. F. The detailed warranty conditions one can find in warranty certificate. G.
  • Page 9: Construction

    Every foot can be screwed in or out. This way only a smal range of level regulation is achievable. Basic levelling should be performed by putting steel pads under legs and observing the level on external level device. 5. CONSTRUCTION 5.1.
  • Page 10: Description Of Connectors

    5.2. Description of connectors 5.2.1. Connectors’ description in PUE 7 1 – Ethernet RJ45 1 – power supply socket 2 – RS232 (COM1) 2 – I/O, RS232 (COM2) 3 – USB 5.2.2. Connectors’ description in PUE 7P 1 – Ethernet RJ45 1 –...
  • Page 11: Connector With Rs232 And I/O

    • Press to start the operating system loading procedure. Windows CE together with RADWAG software loading is signalled by blinking the red diode ON/LOAD. • When the loading procedure is completed the main software window appears.
  • Page 12: Keypad Overlay

    7. KEYPAD OVERLAY 8. FUNCTIONS OF KEYS Description Turning on/off the scale Zeroing Tarring Printing out the result or confirming some entered data Function key (entering the menu) Selecting products Selecting contractors Inscribing a tare value...
  • Page 13: Program Structure

    9. PROGRAM STRUCTURE The main menu has been divided into three functional groups. In every group there are parameters of similar use. 9.1. Main menu items The main menu comprises three functional groups: Parameters Databases Info 9.1.1. Parameters Icon Description Scale Working Modes Communication...
  • Page 14: Databases

    9.1.2. Databases Icon Description Products Operators Weighings / Alibi Contractors Packages Warehouses Labels Universal variables Delete older data Export database weighings to a file 9.1.3. Scale Info Submenu < Info> is for viewing information: • Scale factory number, • Program version, •...
  • Page 15: Inventory Of Parameters

    9.2. Inventory of parameters 9.2.1. Scale parameters - weighing Icon Description Value Platform 1 Median Filter Filter Fast Autozero LO threshold 9.2.2. Working modes Icon Description Value Weighing Manual, each Save Mode stable Down-weighing Checkweighing Tare mode Labelling mode Number of labels No.
  • Page 16 Threshold CC label automatic triggering Mode None Threshold Statistics Global Counting pieces Manual, each Save Mode stable Down-weighing Checkweighing Tare mode Labelling mode Number of labels No. of cumulative labels No. of CC labels C label automatic triggering Mode None Threshold CC label automatic triggering Mode...
  • Page 17 Deviations Manual, each Save Mode stable Down-weighing Checkweighing Tare mode Labelling mode Number of labels No. of cumulative labels No. of CC labels C label automatic triggering Mode None Threshold CC label automatic triggering Mode None Threshold Statistics Global Comparator Manual, each Save Mode stable...
  • Page 18: Communication

    9.2.3. Communication Icon Description Value COM1 Baud Rate 9600 Data bits Stop bits Parity None COM2 Baud Rate 9600 Data bits Stop bits Parity None Ethernet DHCP IP Address 192.168.0.2 Subnet mask 255.255.255.0 Gateway 192.168.0.1 Port 4001 9.2.4. Devices Icon Description Value Computer...
  • Page 19 Port None Address Continuous transmission Weighing Printout Pattern E2R System System is active Lock selecting products Printer Port COM1 Code page 1250 Printouts Weighing printout pattern See ch. 16.2.3 Product printout pattern See ch. 16.2.3 Cumulative printout pattern See ch. 16.2.3 Cumulative printout pattern See ch.
  • Page 20: Display

    Offset Code length Transponder card reader Port None Additional display Port None Pattern See ch. 16.2.3 *) Not related to „Comparator”. 9.2.5. Display Icon Description Value Text information Displaying pattern See ch. 17.1.1 Font Arial Font size Small Bold Actions F1 Button Choose product F2 Button...
  • Page 21: Inputs / Outputs

    Screen button 3 Statistics C: Print Screen button 4 CCStatistics : Print Screen button 5 C Statistics : Zero Screen button 6 Choose package Screen button 7 Edit batch number Screen button 8 None Screen button 9 None Left proximity sensor None Right proximity sensor None...
  • Page 22: Authorizations

    Output 2 None Output 3 None Output 4 None 9.2.7. Authorizations Icon Description Value Anonymous operator Operator Date & Time Administrator Printouts Administrator Databases Products Administrator Contractors Administrator Packages Administrator Warehouses Administrator Labels Administrator Delete older data Advanced Operator 9.2.8. Other Icon Description Value...
  • Page 23: User Calibration

    Beep Buttons Touch screen calibration 9.2.9. User Calibration An option only for non-verified scale Icon Description Value Platform 1 Setting of start mass Calibration 10. INDICATING WINDOW Main view:...
  • Page 24 In the main application window one can see four separate parts: • In the top part of the window there is a status bar where a work mode, logged-in user and time&date are displayed and active connection with a computer are displayed. •...
  • Page 25: Logging On

    • In operating mode <Weighing> 9buttons are at ones disposal displayed subsequently from 1 to 9 starting from the left side, • In operating modes: <Counting pieces> or <Deviations> one can define up to 7 screen buttons displayed subsequently from 1 to 7 starting from the left side.
  • Page 26: Authorization Access Levels

    11.3. Authorization access levels Weighing software uses four access levels: administrator, advanced operator, operator, none. Every user with any attributed access level can perform weighings and select data from in databases to be used during weighing. Access to user parameters, databases and working modes depending on the authorization access level attributed: Operator type Access level description...
  • Page 27: Navigating Within The Menu

    It can be declared in submenu < Authorizations>, which is accessable only for users with the <Administrator> authorization level (see ch. 19 of this manual). 2. A user logged in as <Administrator> in submenu Authorizations> (see ch. 19 of this manual) can change <...
  • Page 28: Return To Weighing

    Searching a database according to a name Searching a database according to a code Printing on item from a database Clearing an editing field Screen keyboard on / off Reading a printout pattern from a *.lb file (active after connecting a pendrive) Variables for a printout pattern One level up 12.2.
  • Page 29: Weighing

    13. WEIGHING Put a load on the weight pan. When pictogram is displayed the indication is ready to read. Notice: A weighing can be saved after stabilising a measurement over zero (pictogram 13.1. Conditions of operational use In order to assure a long term operating period with appropriate measurements following principles should be adhered to: •...
  • Page 30: Zeroing

    • Avoid side loads, particularly side strokes: 13.2. Zeroing In order to zero the indication choose a platform on the touch panel and press . After zeroing is performed the indication is equal zero and following symbols usually appear: Zeroing is possible only when the indication is stable. Notice: Zeroing is possible only within ±2% of full range around zero.
  • Page 31: Inscribing Tare

    13.4. Inscribing tare It is possible to inscribe a tare value. Procedure: • While in any work mode press then the screen keyboard is displayed, • Inscribe tare and press • The program returns to weighing and the and the display shows the entered value with the „–”...
  • Page 32: Scale Parameters

    Notice: The procedure of attributing functions to buttons and proximity sensors is described in ch. 17.2 of this manual. Possible selection: • gram [g] • kilogram [kg] • carat [ct] • pound [lb] • ounce [oz] • Newton [N] 14. SCALE PARAMETERS Users can set the scale according to the ambient conditions (filtering level) or own needs (autozero) and set the LO threshold for minimum load that enables operation of some functions.
  • Page 33: Median Filter

    14.1. Median filter The median filter is intended for eliminating short-lasting mechanical shocks. Procedure: • Enter < Weighing> according to ch. 14 of the manual, select Median Filter> and then set an appropriate value. < Accessible settings: None - median filter is off 0.5, 1, 1.5, 2, 2.5 - filtering level to choose 14.2.
  • Page 34: Minimum Weight For Different Functions (Lo)

    If AUTOZERO is disabled zero is not corrected automatically. However, in particular cases, this function can disrupt the measurement process e.g. slow pouring of liquid or powder on the weighing pan. In this case, it is advisable to disable the autozero function. Procedure: •...
  • Page 35: Rs 232 Settings

    In order to enter < Communication>, press and then „ Parameters / Communication”. 15.1. RS 232 settings Procedure: • Enter < Communication> according to ch.15 of the manual, select COM1> or < COM2>, and then set an appropriate value. < For RS 232 following parameters are accessible: •...
  • Page 36: Tcp Protocol Setting

    • Go back to weighing saving parameters and restart the device. 15.3. TCP protocol setting TCP (Transmission Control Protocol) is a protocol for communication between two computers. It operates in mode client-server. Server awaits on connection iniciation on a specified port while client initiates connection to the server.
  • Page 37: Computer Address

    The scale can communicate with a computer via following ports: • RS 232 (COM1), • RS 232 (COM2), • Tcp. 16.1.2. Computer address Procedure: • Enter < Devices> parameter group as described in chapter 16 of the manual, • Choose „ Computer / Address”...
  • Page 38: Weighing Printout Pattern

    16.1.4. Weighing printout pattern Users in parameter < Weighing Printout Pattern> can define variables included in the printout from the scale to a computer. Procedure: • Enter < Devices> parameter group as described in chapter 16 of the manual, • Choose „ Computer / Weighing Printout Pattern”...
  • Page 39: Printe

    Procedure: • Enter < Devices> parameter group as described in chapter 16 of the manual, • Choose „ Computer / E2R System / System is active” and then set an appropriate value. Accessible settings: System is not active System is active •...
  • Page 40: Printer Code Page

    Printers can be attached to: • RS 232 (COM1), • RS 232 (COM2), • USB, • Tcp. 16.2.2. Printer code page Procedure: • Enter parameters < Devices> as described in chapter 16 of the manual, • Choose „ Code Page” then the screen keyboard Printer / will be displayed, •...
  • Page 41 Screen keyboard on/off Reading a printout pattern from a *.lb file (button active while connecting a USB pendrive) List of variables for printout patterns (see the list in APPENDIX A of this manual) Clear the editing field Default printouts’ settings: Weighing Printout Pattern Product Printout Pattern {50}...
  • Page 42: Barcode Scanner

    16.3. Barcode scanner Cooperating with a barcode scanner allows immediate finding of the product in the assortment database the wanted product immediately. Configuration of communication can be configured in < Barcode reader>. Users can set the following things: • Communication port for a barcode scanner, •...
  • Page 43: Code Length

    • Write a new offset and confirm it by pressing 16.3.3. Code length Number of characters that is considered while searching the assortment database. Procedure: • Enter < Devices> according to ch.16 of the manual, • Choose „ Barcode Scanner / Code Length”...
  • Page 44: Procedure Of Attributing The Card Number To An Operator

    The scale can communicate with the reader via following ports: • RS 232 (COM1), • RS 232 (COM2). 16.4.2. Procedure of attributing the card number to an operator To use a transponder card to log on an operator the card needs to be ascribed to the operator in the database of operators.
  • Page 45: Communication Protocol Frame

    Communication with additional displays can be performed via following ports: • RS 232 (COM1), • RS 232 (COM2), • Tcp. 16.5.2. Communication protocol frame PUE 7 weighing indicator with following displays: • WD display, • WWG display. To start cooperation of PUE 7 with displays go to parameter < Sample>...
  • Page 46: Display

    17. DISPLAY Users can adapt the main display and visible information to their needs. All parameters of the display can be found in the parameters’ group < Display>. Entering < Display> can be made in two ways: • Direct pressing in the work area of the main display, •...
  • Page 47: Display Patterns

    17.1.1. Display patterns The main application window comprises a work area including information that can be freely configured by a user. Procedure: • Enter < Display> according to ch. 17 of this manual, • Choose: „ Displaying pattern”, then an Text information / editing field with prompted value is displayed together with the screen keyboard,...
  • Page 48: Screen Font

    17.1.2. Screen font The font type can be changed in the display workspace. Procedure: • Enter < Display> according to ch. 17 of this manual, • Choose: „ Font” and set the required font Text information / type. Accessible fonts: •...
  • Page 49: Function Keys

    • Choose: „ Bold” and choose a setting. Text information / Accessible settings: Bold is off Bold is on 17.2. Function keys In submenu < Actions> users can set actions following keys: function keys, screen keys, proximity sensors. If a button has been attributed a function it has been activated at the same time.
  • Page 50: Bargraph Type

    • By pressing a formerly defined button or proximity sensor < Change platform>. • By activating in parameters all platforms that will be separately placed in the main window of the program. In that case platforms can be activated by pressing the area of this platform. Notice: The procedure of attributing functions to buttons and proximity sensors is described in ch.
  • Page 51: Bargraf "Quick Weighing

    17.4.1. Bargraf “Quick weighing” • The bargraph consists of 8 red fields and three green fields. • The green fields signal weighings between MIN and MAX threshold, where: MIN = the minimum threshold of acceptable weighing - LO MAX = the maximum threshold of acceptable weighing - HI •...
  • Page 52: Inputs / Outputs

    • The central green field – signals that the load on the pan is within the set required interval for the weighed product (OK value between Min and Max thresholds); • The right red field – signals that the load on the pan is greater than the maximum weighing threshold (Max threshold).
  • Page 53: Configuration Of Outputs

    18.2. Configuration of outputs Ascribing a function to the output enables the output at the same time. If an output has no ascribed function it is disabled. Procedure: • Enter < Inputs / Outputs> according to ch. 18 of this manual, •...
  • Page 54: Authorization

    19. AUTHORIZATION The submenu < Authorization> is accessible only while being logged in as the Administrator. In this group of parameters access levels can be outlined. To enter submenu < Authorization>, press and then „ Parameters / Authorization”. 19.1. Anonymous Operator The program allows to attribute the authorization access level to an operator who does not perform the log-in procedure (anonymous operator).
  • Page 55: Printouts

    Accessible authorization levels: None, Operator, Advanced Operator, Administrator. Notice: Setting <None> allows free access to settings of date and time (without the need of logging in). 19.3. Printouts Default settings of the scale allows a logged on Administrator to edit printout patterns.
  • Page 56: Delete Older Data

    Procedure: • Enter parameters’ group < Authorization> according to ch. 19 of the manual, choose < Databases>, and then set the parameter. Accessible authorization levels: None, Operator, Advanced Operator, Administrator. Notice: Setting <None> allows free access to settings of date and time (without the need of logging in).
  • Page 57: Languages

    20.1. Languages Procedure: • Enter submenu < Others> according to ch. 20 of this manual, choose < Language> and set the parameter. Accessible languages: • Polish, • English, • German, • French, • Russian, • Spanish, • Czech, • Hungarian. 20.2.
  • Page 58: Sound Signal

    20.3. Sound signal Procedure: • Enter < Others> according to ch. 20 of this manual, < Beep> and set accordingly. Settings: - Sound for buttons and proximity sensors disabled None - Sound for buttons enabled Buttons - Sound for proximity sensors enabled Sensors - Sound for buttons and proximity sensors enabled 20.4.
  • Page 59: Calibration Procedure

    To enter < Customer Calibration>, press and then „ Parameters / Customer Calibration”. 21.1. Calibration procedure • Enter submenu < Customer Calibration> according to ch. 21 and select: “ Platform 1 / Calibration”, • After entering the parameter the following message box appears: •...
  • Page 60 • After the procedure of calibration factor determination following command appears: • Return to weighing, saving parameters. < Setting of start mass> parameter allows to adjust start mass of platform 1. Notice: The factory calibration process for platforms 2, 3, 4 is analogical to the one described above.
  • Page 61: Start Mass Adjustment

    21.2. Start mass adjustment It is possible to adjust only a start mass, it helps to correct the start zero when the span does not change. Procedure: • Enter submenu < Customer Calibration> according to ch. 21 and select: “ Platform 1 / Setting of start mass”, •...
  • Page 62: Special Functions Of Working Modes

    22. SPECIAL FUNCTIONS OF WORKING MODES WPY/KO scales can operate in following work modes: Weighing Counting pieces Deviations Comparator In settings of different working modes special functions that allows adopting the operation to the customers’ needs: Counting Special functions: Weighing Deviations Comparator pieces...
  • Page 63: Recording Mode

    2. The change in on mode results in the same change for other working modes working modes. 22.1. Recording mode Depending on setting parameter < Save Mode> users can send data from the scale to an external device. Procedure: • Enter parameters group < Working modes>...
  • Page 64: Checkweighing

    22.3. Checkweighing In case of enabling the checkweighing mode, printouts are performed only when a weighing is between MIN and MAX thresholds that have been defined before. Procedure: • Enter parameters group < Working Modes> according to ch. 22 of this manual, •...
  • Page 65: Labelling Mode

    Summing up all subsequently entered tare values Total sum Automatic tare mode together with mode Autotare <Sum of all> 22.5. Labelling mode The labelling system is intended to print labels for marking weighed goods e.g. a packing process. The program can print standard labels for single products, cumulative labels for sticking to bulk containers and cumulative labels for cumulative labels for sticking to the large transport containers holding bulk containers.
  • Page 66: Setting Of The Number Of Cumulative Labels To Print

    • Enter the required working mode and choose: „ Labelling mode / Number of labels” then the editing field <Number of labels> with the screen keyboard is opened, • Choose the required number of labels and confirm by pressing 22.5.2. Setting of the number of cumulative labels to print In the parameter <...
  • Page 67: Automatic Triggering Of Cumulative Labels

    • Enter the required number od cumularive labels and confirm by pressing 22.5.4. Automatic triggering of cumulative labels Users have access to the function of automatic triggering of printing cumulative labels after setting parameters < Mode> and < Threshold>. Procedure: •...
  • Page 68: Automatic Triggering Cumulative Labels Of Cumulative Labels

    By default setting button is accessible in the bottom part of the display but activating the button can be done in subm enu: „ Parameters / Display / Actions” (see ch. 17.2 of the manual). For automatic printout of cumulative labels counters and total mass variables are always zeroed.
  • Page 69 Cumulative label of cumulative labels printout is initiated None by pressing Cumulative label of cumulative labels printout is initiated by Mass exceeding the value set in parameter < Threshold>. The value is treated as the total from single weighings, Cumulative label of cumulative labels printout is initiated by Number exceeding the value set in parameter <...
  • Page 70: Statistics

    • Confirm the changes introduced by pressing 22.6. Statistics All statistics are continuously updated after each measurement is saved in the scale memory. Statistics can be calculated globally (does not depend on the selected product) or separately for every product from the assortment database.
  • Page 71: Minimum Reference Mass

    Options: Automatic correction of reference mass disabled Automatic correction of reference mass enabled Function < Automatic correction of reference mass> in mode Counting Pieces> is enabled at the moment of estimating the sample < quantity and signalled by displaying <PCS> and <SMP> (single piece mass) on the top part of the display.
  • Page 72: Selecting The Series Type

    • Choose „ Counting pieces / Minimum reference mass” and then set an appropriate value. Accessible settings: 1 d, 2 d, 5 d, 10 d. Notice: While the procedure of evaluation the mass of single piece the the mass of all pieces put on the pan is lower than the value declared in parameter „...
  • Page 73: Work Mode - Weighing

    23. WORK MODE - WEIGHING The < Weighing> mode is the standard working mode allowing to perform weighings and saving them in the database < Weighings / Alibi>. 23.1. Starting the working mode The < Weighing> mode is the standard working mode. If a user has changed the operating mode to another follow the actions below: •...
  • Page 74: Setting A Reference Unit By Entering Known Piece Mass

    • The weight unit is automatically changed to „pcs” and two screen buttons on the right side appear: Enter piece mass Estimate piece mass 24.2. Setting a reference unit by entering known piece mass Procedure: • Enter mode < Counting Pieces> according to ch. 24.1 of this manual, •...
  • Page 75: Setting The Reference Mass By Entering Single Piece Mass Directly To The Database

    • Enter a value and confirm it by pressing , then the following message is displayed: <Put pieces: xx> (where xx – the value entered before), • Put the declared quantity of pieces on the pan and when the result is stable (symbol ) confirm it by pressing •...
  • Page 76: Working Modes - Deviations

    a) Estimate the unit mass (see 24.2 and 24.3), b) Enter the products database c) Keep the finger pressed on the required position then a context menu is displayed, d) Choose option <Ascribe standard>, then the standard unit mass is attributed to the product in the field <Mass>. Notice: Attributing a standard to a selected product is also possible by programmable button.
  • Page 77: Reference Unit Mass Estimated By Weighing

    25.2. Reference unit mass estimated by weighing Procedure: • Enter < Deviations> according to ch. 25.1 of this manual, • If the standard is to be weighed in a container, the container needs to be put on the pan and tarred, •...
  • Page 78 The results are calculated according the tables below: For an ABBA series D = B – A ….. … For an ABA series D = B – A ….. … The standard deviation is calculated as follows: • Differences ABBA or ABA series is calculated: −...
  • Page 79: Starting The Working Mode

    • Standard deviation: ∑ − 26.1. Starting the working mode Procedure: • While in the main window press in the top bar, then you will see a submenu <Working modes> comprising a list of modes, • Choose mode < Comparator>, program automatically returns to the main window displaying in the top bar the name of selected working mode, •...
  • Page 80 Caution: Users can terminate testing anytime by pressing the screen button (stop process) situated in the bottom part of the scale display. During testing the rest of screen buttons, function keys, are not active. • Put the “A” standard mass on the pan, •...
  • Page 81: Databases

    • After pressing a final report is printed out comprising subsequent measurements and final calculations. An example report: 27. DATABASES PUE 7 databases hold different data: Products Operators Weighings / Alibi Contractors...
  • Page 82: Searching Databases

    Packages Warehouses Labels Universal variables In order to enter < Databases>, press and choose < Databases>. 27.1. Searching databases Users can quickly search databases according to the following criteria: • Name, • Code. The quick search according to the criteria above is applicable for databases of: operators, products, contractors, packages, warehouses and labels.
  • Page 83: Quick Code Search

    27.1.2. Quick code search Procedure: • Enter < Databases> according to ch. 27 of the manual, • Enter < Products>, • Press , then an editing field appears <Search by code> with the screen keyboard, • Inscribe the name of a product or its part and press •...
  • Page 84: Deleting Items In Databases

    Notice: Adding new records in databases is possible only by logged-in administrators. It does not concern the database of weighings. 27.3. Deleting items in databases Procedure: • Enter < Databases> according to ch. 27 of the manual, • Enter < Products>, •...
  • Page 85: Printing Items From Databases

    • Give a date before which data need to be removed and confirm it by pressing Caution: If a user enters a date from the protected period the program displays a message box: <Wrong value>. • After entering a date beside protected period the program displays a message box: <Are you sure you want to delete?>, •...
  • Page 86: Database Edition

    • Enter submenu < Databases> according to ch. 27 of this manual, • Enter option < Export database of weighings to a file>, the program automatically starts saving the database on the pendrive, Notice: In case a pendrive is not recognized after entering < Export database of weighings to a file>...
  • Page 87: Operators' Database

    27.7.1. Operators’ database Procedure: • Enter < Databases> according to ch. 27 of this manual, • Enter < Operators> and press the required position. Record of operator: Operator name Name Operator code Code Password to log on (max. 16 characters) Password Authorization access level Access level...
  • Page 88: Database Of Weighings / Alibi

    Maximum mass for checkweighing Tare value (it is preset automatically after Tare selecting a product) Unit price Price Number of validity Number of days to calculate expiery date dates Constant product date Date Value Added Tax in [%] Dialogue box for entering ingredients Ingredients Basic label pattern attributed to a product Label...
  • Page 89: Database Of Contractors

    Weighing record: Weighing date Date Weighing result Mass Tare value Tare Product name Product Operator name Operator Contractors name Contractor Number of produced batch Batch number Source warehouse name Source warehouse Target warehouse name Target warehouse Package name Package A weighing threshold (MIN, OK or MAX) Checkweighing Platform number to perform weighings Platform number...
  • Page 90: Database Of Packages

    Contractor record: Contractor’s name Name Contractor’s code Code Contractor’s tax ID Tax ID Contractor’s address Address Contractor’s postal code Postal code Town/City of contractor City Contractor’s discount Discount Contractor’s label pattern Label 27.7.5. Database of packages Procedure: • Enter < Databases>...
  • Page 91: Database Of Warehouses

    27.7.6. Database of warehouses Procedure: • Enter < Databases> according to ch. 27 of this manual, • Enter < Warehouses> and press the required position. Warehouse record: Warehouse name Name Warehouse code Code Additional warehouse description Description 27.7.7. Database of labels The database comprises patterns of labels which users can attribute to products or contractors to operate in labelling mode.
  • Page 92: Database Of Universal Variables

    28. COMMUNICATION PROTOCOL 28.1. General information A. A character protocol scale-terminal has been designed for communication between RADWAG scales and external devices via RS-232 interface. B. It consists of commands sent from an external device to the scale and a responses from a scale.
  • Page 93: Inventory Of Rs Commands

    28.2. Inventory of RS commands Commands Description of commands Zeroing Tarring Get tare value Set tare value Send the stable result in basic unit Send the result immediately in basic unit Send immediate results from all platforms in basic units Send the stable result in current unit Send the result immediately in current unit Switch on continuous transmission in basic unit...
  • Page 94: Respond Message Format

    28.3. Respond message format After sending a request message you can receive: command accepted and in progress XX_A CR LF command completed (appears only after XX_A) XX_D CR LF command comprehended but cannot be executed XX_I CR LF command comprehended but time overflow error appeared XX _ ^ CR LF command comprehended but the indication below the XX _ v CR LF...
  • Page 95: Get Tare Value

    - command accepted and in progress T_A CR LF - command completed T_D CR LF - command accepted and in progress T_A CR LF - command comprehended but tare range overflow appeared T_v CR LF - command accepted and in progress T_A CR LF - time limit for stable result exceeded T_E CR LF...
  • Page 96: Send The Stable Result In Basic Unit

    28.4.5. Send the stable result in basic unit Syntax: S CR LF Possible answers: - command accepted and in progress S_A CR LF - time limit for stable result exceeded S_E CR LF - command comprehended but cannot be executed S_I CR LF - command accepted and in progress S_A CR LF...
  • Page 97: Send Immediate Results From All Platforms In Basic Units

    Example: S I CR LF – computer command S I _ ? _ _ _ _ _ _ _ 1 8 . 5 _ k g _ CR LF - command done, mass value in basic unit is returned immediately. 28.4.7.
  • Page 98: Send The Result Immediately In Current Unit

    Possible answers: - command accepted and in progress SU_A CR LF - timeout while waiting for stable results SU_E CR LF - command comprehended but cannot be executed SU_I CR LF - command accepted and in progress SU_A CR LF - mass value in current unit is returned MASS FRAME Frame format:...
  • Page 99: Switch On Continuous Transmission In Basic Unit

    28.4.10. Switch on continuous transmission in basic unit Syntax: C1 CR LF Possible answers: - command comprehended but cannot be executed C1_I CR LF - command comprehended and in progress C1_A CR LF - mass value in basic unit is returned MASS FRAME Frame format: 7-15...
  • Page 100: Switch Off Continuous Transmission In Current Unit

    28.4.13. Switch off continuous transmission in current unit Syntax: CU0 CR LF Possible answers: - command comprehended but cannot be executed CU0_I CR LF - command comprehended and executed CU0_A CR LF 28.4.14. Set lower threshold Syntax: DH_XXXXX CR LF, where: XXXXX – mass format Possible answers: - command executed DH_OK CR LF...
  • Page 101: Read Upper Threshold

    - 9 characters justified to the right Mass - 3 characters justified to the left Unit 28.4.17. Read upper threshold Syntax: OUH CR LF Possible answers: UH_MASA CR LF - command executed Frame format: 4-12 space mass space unit space - 9 characters justified to the right Mass - 3 characters justified to the left...
  • Page 102: Connecting External Devices

    Format frame: 4 -12 stability space sign mass space unit [space] if stable Stability character [?] if not stable [^] if an indication over the range [v] if fan indication below the range [space] for positive values or sign [-] for negative values 9 characters justified to the right mass 3 characters justified to the left...
  • Page 103 Scale – computer cable Scale – Kafka printer cable Scale – printer (CITIZEN, EPSON) cable...
  • Page 104: Technical Parameters

    Scale – I/O cable 31. TECHNICAL PARAMETERS Scale type: WPY 500/KO WPY 1000/KO Maximal range 510kg 1100kg Readability Comparation range 0..510kg 0..1100kg Repeatability * Linearity M1: 500 kg, M1: 1000 kg, Recommendations for rating M2: 200 - 500 kg, M2: 500 - 1000 kg, weights OIML R111 M3: 100 - 500 kg M3: 100 - 1000 kg...
  • Page 105: Error Messages

    32. ERROR MESSAGES Value beyond the zero range, Err2 Value beyond the tare range, Err3 Tarring / zeroing operation time exceeded, Err8 Zero value from the AD converter, NULL Measurement range overflow, FULL Display range overflow, Start mass error, the mass on the weighing platform is beyond the acceptable range (-5% to +15% of start mass) 33.
  • Page 106: Appendix A - Variables For Printouts

    34. APPENDIX A – Variables for printouts 34.1. Inventory of variables Notice: Every variable needs to be included in brace brackets e.g. {x}, where x – variable number. A list of variables accessible in the system for defining printout patterns and data displayed in the workspace of scale’s screen: Description Symbol Standard printout in calibration unit...
  • Page 107 {22} Cumulative of Cumulative Statistics: Average {23} Cumulative of Cumulative Statistics: Minimum {24} Cumulative of Cumulative Statistics: Maximum {25} Mass: lb {26} Checkweighing {27} Value to pay {28} C Value (cumulative amount to pay) {29} CC value (cumulative of cumulatives amount to pay) {30} Gross (amount to pay + VAT) {31}...
  • Page 108 {63} Product: Density {64} Product: Ingredients {65} Product: Description {75} Operator: Name {76} Operator: Code {77} Operator: Access level {80} Package: Name {81} Package: Code {82} Package: Mass {85} Contractor: Name {86} Contractor: Code {87} Contractor: Tax ID {88} Contractor: Address {89} Contractor: Postal code {90}...
  • Page 109 {115} CPG Report: Limit of the average {116} CPG Report: Standard deviation {117} CPG Report: Measurements {118} CPG Report: Unit {119} CPG Report: Report Number {120} Average Tare Report: Date {121} Average Tare Report: Result {122} Average Tare Report: Standard deviation {123} Average Tare Report: 0.25T1 {124}...
  • Page 110: Formatting Variables

    34.2. Formatting variables Users can format numeric, text and date variables intended for displaying or printing out. Different format commands: • Justification to the left, • Justification to the right, • Setting the number of characters for printout / display, •...
  • Page 111 Date separator between days, {2:yy/MM/dd} – Present date formatted as: months and years year - month - day, where yy represents two less significant digits of year. „Escape” character removing {2:yy\/MM\/dd} – Present date formatted as yesr / month / day; {2:yy\:MM\:dd} –Present formatting function form next character to allow it to be used as date formatted as: year : month : day.
  • Page 112: Ppendix B - Functions Of Programmable Buttons

    35. APPENDIX B – Functions of programmable buttons Icon Function name Print Zero Tare Enter tare Parameters Local Parameters Set MIN and MAX Statistics (cumulative) : Print and zero Statistics (cumulative) : Print Statistics (cumulative) : zero Statistics (cumulative of cumulative) : Print and zero Statistics (cumulative of cumulative) : Print...
  • Page 113 Statistics (cumulative of cumulative) : zero Edit batch number Start Stop Choose an operator Choose an operator by name Choose an operator by code Choose a product Choose a product by name Choose a product by code Choose a package Choose a package by name Choose a package by code...
  • Page 114 Choose a contractor Choose a contractor by name Choose a contractor by code Choose a source warehouse Choose a source warehouse by name Choose a source warehouse by code Choose a target warehouse Choose a target warehouse by name Choose a target warehouse by code Change working mode Counting pieces: Specify piece mass Counting pieces: Estimate piece mass...
  • Page 115 Deviations: Specify sample mass Deviations: Estimate sample mass Emergency stop Chute permission Disable tare Restore tare Change unit Change platform Edit universal variable 1 Edit universal variable 2 Edit universal variable 3 Edit universal variable 4 Edit universal variable 5...
  • Page 116: Appendix C - Label Pattern

    36. APPENDIX C – Label pattern A label pattern can be created in 2 ways: • From the terminal level using variables, • Using PC software EDYTOR ETYKIET R01. A created project needs to be saved as an „lb” file then copied on a pendrive that can be connected to the terminal.
  • Page 117: Designing A Label On A Computer

    Let us create a label pattern for the label below: Notice: The installer of EDYTOR ETYKIET R01 is accessible to download on website: www.radwag.com. on the overlap: Products / Measuring indicators / PUE7. Procedure: 1. Run software EDYTOR ETYKIET R01, 2.
  • Page 118 Notice: Before starting the design process the label and printer parameters need to be set. The settings are described in the file: Help / Help / Program options / Settings. 4. To add a text in the label click on .
  • Page 119 6. Click on the key and in the field <Text> inscribe: {4} (date & time), confirm by pressing and place it in the right place, 7. Place other texts and variables on the label in the same way as the one shown above. 8.
  • Page 120: Saving Label Patterns In The Scale

    11. In place <Codebar value> write variable: {7:V6.3} (net mass for EAN13, 6-character code with three decimal characters), confirm it by pressing then place the code in the right place in the label. 12. Record the design of the label by selecting <File> in software menu and then <Save as lb –...
  • Page 121: Attributing A Label To A Product

    36.4. Attributing a label to a product Procedure: • Enter < Databases> according to ch. 27 of this manual, • Enter < Products> and press the required item. • Enter < Label>, then the database of labels is open with the list of all labels, •...
  • Page 122: Appendix D - Citizen Printer Setting

    2. Users can perform the test label printout – see ch. 27.5 of this manual. 37. APPENDIX D - CITIZEN printer setting Baud rate : 9600b/sec Parity control : No Number of data bits : 8bit Number of stop bits : 1 bit Flow control : No...
  • Page 123: Appendix F - Communication With Barcode Scanners

    39. APPENDIX F - Communication with barcode scanners 1. For communication with barcode scanners RADWAG scales use RS232 interfaces and simplex transmission (one direction) without handshaking. Only two wires are required for assuring such a transmission. Used scanners should be equipped in such interface with disabled both hardware and software handshaking.
  • Page 124 O F E L E C T R O N I C W E I G H I N G I N S T R U M E N T S RADWAG WAGI ELEKTRONICZNE 26 – 600 Radom, Bracka 28 Street POLAND Phone +48 48 38 48 800, phone/fax.

This manual is also suitable for:

Ko series

Table of Contents