
Related Manuals for FLIR Elara FR-345-EST


Summary of Contents for FLIR Elara FR-345-EST
- Page 1 Installation and User Guide Elara™ FR-345-EST Camera 427-0108-00-10 - Revision 100 - December 2020 1.800.561.8187 information@itm.com This document does not contain any export-controlled information. www. .com...
- Page 2 © 2020 FLIR Systems, Inc. All rights reserved worldwide. No parts of this manual, in whole or in part, may be copied, photocopied, translated, or transmitted to any electronic medium or machine readable form without the prior written permission of FLIR Systems, Inc..
-
Page 3: Table Of Contents
Table of Contents 1. Camera Overview ........................1 Accessing Product Information from the FLIR Website ............1 Camera Dimensions ......................3 Camera Specifications ......................3 2. Installation ........................... 5 Supplied Components ......................5 Site Preparation ........................5 Hardware Description ......................7 Supplying Power to the Camera .................. - Page 4 Table of Contents 4.6.3 TLS/HTTPS ......................39 4.6.4 Services ....................... 39 Boresight Page ........................40 Firmware & Info Page ......................41 5. Maintenance and Troubleshooting Tips ................. 43 Cleaning ..........................43 Troubleshooting ......................... 43 427-0108-00-10 - Revision 100 - December 2020 1.800.561.8187 information@itm.com This document does not contain any export-controlled information.
-
Page 5: Camera Overview
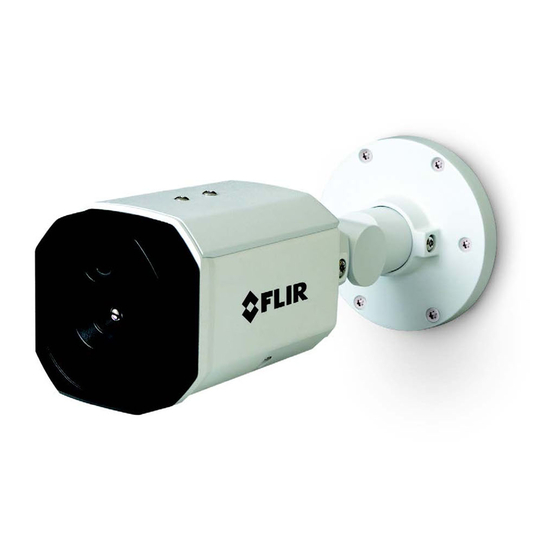
The Elara FR-345-EST camera includes a thermal sensor; a Full HD 1080p visible light camera; and digital I/O. When the camera is connected to an IP network, it functions as a server, providing services such as camera control, video streaming, and network communications. - Page 6 Camera Overview To access product information from the FLIR website: 1. Open and then select Products > Security > FLIR EST Thermal Screening Solutions. FLIR EST Thermal Screening Solutions Page 2. Find and click Elara FR-345-EST. The camera’s product information page appears.
-
Page 7: Camera Dimensions
Camera Overview 5. Click Resources. 6. Download the resource you need. Click the relevant Download link. Camera Dimensions The Elara FR-345-EST camera’s dimensions are: Side View Front View Camera Specifications Array Format 320 x 256 Sensor Technology Long-Life, Uncooled VOx Microbolometer Pixel Pitch 17 µm... - Page 8 Camera Overview 12-30 VDC (±10%) Input Voltage 24 VAC (21-28 VAC) 802.3at (PoE+) General Power Consumption 17 W IP Rating (Dust & IP54 Water Ingress) Operating 15°C to 45°C (60°F to 110°F) Temperature Range Environmental Storage Temperature -40°C to 70°C (-40°F to 158°F) Range Humidity 0-95% relative...
-
Page 9: Installation
This camera is designed to be installed indoors. The camera can be mounted directly on a wall or a ceiling, or it can be mounted using the CB-WLBX-G4 Wall & Surface Mount Kit, which includes a junction box. For the full list of accessories available for the camera, see the FLIR Security Cameras - Accessory Guide. - Page 10 For the full list of accessories available for the camera, see the FLIR Security Cameras - Accessory Guide. In addition, prior to installing the unit and for proper installation and operation, the following requirements need to be properly addressed: Ambient Environment Conditions: Avoid positioning the unit near heaters or heating system outputs.
-
Page 11: Hardware Description
Installation Hardware Description Component Description 1 RJ-45 connector 2 Power connector System Cable. 3 Digital I/O connectors 4 Mounting bracket To install the camera directly on a wall or ceiling. 5 Camera body Provides access to the camera’s Internal Interfaces. To open the 6 Access cover access cover, use the Torx wrench supplied with the camera to loosen the four screws securing the cover to the camera body. -
Page 12: Supplying Power To The Camera
Installation Interface Description 1 Micro SD card slot To be supported in a future release. 2 USB To be supported in a future release. 3 RESET (R) To reboot the camera, press the button for at least one second. To reset the camera to its factory defaults, press the button for at least six 4 DEFAULT (D) seconds. -
Page 13: Initial Configuration
Configure more than one camera at the same time • Notes FLIR recommends using the DNA tool to discover the camera on the network. It does not require a · license to use and version 2.3.0.19 or higher is a free download from the product's web page on . -
Page 14: Discover The Camera And Configure For Networking
· server, the VMS automatically assigns the camera an IP address. If the camera is managed by FLIR’s Latitude VMS or is on a network with static IP addressing, you can · manually specify the camera’s IP address using the DNA tool or the camera's web page. -
Page 15: Mount And Connect The Camera
Installation In the DNA Discover List, verify that the camera's status is Authenticated. 3. Change the camera’s IP address. Right-click the camera and select IP Setup. In the DNA - IP Setup window, clear Use DHCP and specify the camera's IP address. You can also specify the Mask (default: 255.255.255.0) and Gateway. -
Page 16: Aim And Boresight The Camera
Installation Side Cable Exit 5. Attach an Ethernet cable from the network switch to the RJ45 connector for a 10/100 Mbps Ethernet and IEEE 802.3at PoE+ connection. Ethernet is required for streaming video and for configuring the camera. 6. Connect the alarm connectors, if needed. 7. -
Page 17: Additional Configuration
Temperature is stable. Additional Configuration Depending on how you are using the Elara FR-345-EST camera, along with the network and VMS to which it is connected, initial configuration using the camera's web page can also consist of: Configuration task... -
Page 18: Attach The Camera To A Supported Vms
Installation Configuration task Camera's default admin user Any user or any user assigned the admin or expert role Enable or disable the camera's alarms • Enable and configure external I/O devices • Adjust the camera's live video and video stream •... -
Page 19: Operation
To log in to the camera's web page: 1. Do one of the following: In the FLIR Discovery Network Assistant (DNA) tool — version 2.3.0.19 or higher — double-click the camera in the Discover List. The DNA tool does not require a license to use and version 2.3.0.19 or higher is a free download from the product's web page on . -
Page 20: Video Page
The view selected and the Live Video Refresh Rate setting only affect the live video; they do not affect the camera's video streams. Full Screen The Elara FR-345-EST camera web page supports full-screen mode in browsers. Clicking enables full-screen mode. Enabling your browser's full-screen mode does not enable or disable the camera web page's full-screen mode. - Page 21 Operation In general, it is not necessary to modify the default parameters. In some cases, such as when an IP video stream is sent over a wireless network, it can be useful to tune the video streams to reduce the bandwidth requirements. To modify the parameters for a particular video stream, click the relevant button (V1, V2, or T1).
-
Page 22: Visible Page
Operation Visible 1 Visible 2 Thermal 1 If more than one camera is providing multicast streams on the network, make sure the Destination Network IP address is unique for each camera (the Destination Port can be reused). By default, the port assignment is unique per stream. - Page 23 Operation You can adjust the following visible video settings: Brightness (Gamma) · Contrast (Max Gain) · · Saturation · Sharpness · The camera immediately applies changes to settings on the Visible page, affecting the live visible video images and streams. To save those changes, click Save. To discard changes and restore previously saved settings or the factory default settings, click Reset.
- Page 24 Operation result in unnatural images. The 3D Noise Reduction and 2D Noise Reduction settings should be configured after configuring Color Noise Reduction. o Color Noise Reduction—Controls the noise appearing as red, green and blue dots between light and dark areas. Four settings are available: Off, Low, Mid, High. High maximizes the blending of the color noise with the image, effectively removing the dots, while Low minimizes the blending.
- Page 25 Operation Minimum Shutter Speed—Select the slowest shutter speed based on the amount of light in the § scene. A slower shutter speed increases the amount of light entering the sensor and results in a brighter, more-detailed image. The Video Format determines the minimum shutter speeds available, listed in the following table from slowest to fastest, in fractions of a second: Minimum Shutter Speed - Auto Shutter Mode NTSC...
-
Page 26: Thermal Page
Operation Shutter Speed - Shutter Priority and Manual Exposure Modes NTSC 1/7.5 1/500 1/10000 1/250 1/8000 1/15 1/800 1/12500 1/400 1/10000 1/30 1/1000 1/16000 1/500 1/12500 1/60 1/2000 1/20000 1/6.25 1/800 1/16000 1/120 1/2500 1/25000 1/12.5 1/1000 1/20000 1/200 1/4000 1/32000 1/25 1/2000... - Page 27 Operation AGC ROI The camera's Automatic Gain Control (AGC) algorithm adjusts the thermal video according to the region of interest (ROI). By default, the ROI is Full screen; the camera's AGC algorithm considers the entire image. In some cases, defining an ROI that excludes a portion of the screen can improve the image. For example, if there is an air conditioning vent in the image.
-
Page 28: Input/Output (I/O) Page
AGC. This excludes outliers and the most extreme portions of the scene that might be of less interest. To avoid excluding important scene content, FLIR recommends specifying tail rejection less than 1%. Range 0 to 100. -
Page 29: Screening Page
Operation For external I/O connections, set the current state · for the input and output pins, as shown at right. You can configure the external I/O connections, including the number of external input and output pins, on the I/O Devices Page in System Settings. - Page 30 Operation Advanced Settings Temperature Units—Select Celsius (default) or Fahrenheit. · Temperature Offset—Select On or Off (default). · When you enable temperature offset, you can specify the number of degrees the camera uses to calculate the alarm threshold, in positive whole numbers. The alarm threshold is the sum of the reference temperature average and the configured offset.
- Page 31 Operation Acoustic warning on web—The camera generates audio signals through its web page when: · o The measured skin temperature of the person being screened is higher than the Temperature Offset specified. o The camera detects a person being screened is not wearing a face covering and is not attempting to fool the camera by covering his or her face with another object.
- Page 32 Operation Screening Enabled Examples Eyeglasses Prevent Measurement Pending Measurement Normal Temperature Measured Full-Screen Mode Screening Overlay On Display Temperature On Visible Video Portrait Orientation Not in Full-Screen Mode Not Looking at Camera Prevents Distance from Camera Prevents Elevated Temperature Measured Measurement Measurement For information about full-screen mode, see...
-
Page 33: Osd Page
Operation OSD Page The camera can provide an on-screen display of the camera's name as defined on the Firmware & Info page, and the date and time. For each stream (V1, V2, and T1), you can: Enable or disable the OSD ·... -
Page 34: Full-Screen Mode
3.10 Full-Screen Mode When the Elara FR-345-EST camera's web page will be shown to people being screened, you do not want them to be able to access View Settings menus and System Settings. Therefore, you can enable camera web page's full-screen mode by clicking theView Settings Home Page. - Page 35 Operation Picture-in-Picture Click You can move the picture-in-picture around the screen; click the top bar of the picture-in-picture and drag it. Before locking the camera web page in full-screen mode, position the picture-in-picture. You can close the picture-in-picture by clicking the close window icon , including when the camera web page is locked in full-screen mode.
-
Page 36: Configuration
Configuration Configuration Users assigned the admin or expert role can click System Settings on the View Settings Home Page configure: Networking I/O devices · · Date and time Cybersecurity · · User accounts and passwords Boresight Page · · Alarm settings ·... -
Page 37: Date & Time Page
Configuration Caution After changing the camera's IP address, the PC you are using to access the camera's web page might no longer be on the same network as the camera and can no longer access the camera's web page. To access the camera web page again, change the PC's IP address to be on the same network as the camera. -
Page 38: Users Page
Configuration To apply any change to settings on the Date & Time page, click Save. Applying these changes requires rebooting the camera. To restore previously saved settings, click Discard Changes. Users Page Only users assigned the admin role can add users and change or set all passwords. Users assigned the expert role only see the user currently logged in, and cannot add, edit, or delete a user. -
Page 39: Alarm Page
Configuration Delete User Alarm Page You can enable or disable the following alarms: Output On Normal Temp—When the measured skin temperature of the person being screened is · within the offset specified on the Screening Page, the camera generates an output signal at the local I/O connector. -
Page 40: I/O Devices Page
Configuration I/O Devices Page The I/O Devices page provides configuration settings for external I/O connections and the device managing those connections with the camera. The following settings for the device managing the external I/O connections are available: Enabled or Disabled ·... -
Page 41: Cyber Page
Configuration Cyber Page The Cyber page provides security configuration settings for: Certificates · IEEE 802.1X-compliant communication · Transport Layer Security (TLS) and secure HTTP (HTTPS) communication · Other cybersecurity services · To apply any change to the security configuration settings on the Cyber page, click Save. Applying these changes requires rebooting the camera. - Page 42 Configuration To generate and install a self-signed certificate for TLS/HTTPS: 1. In the Certificates section and Certification area, select TLS/HTTPS and Self-Signed. 2. Enter information such as country code, city name, and organization name. 3. Click Create Certificate. 4. Allow 15 seconds for the camera to generate the certificate, at which point a confirmation appears.
-
Page 43: 802.1X
Enable or disable camera control using Transport Layer Security (TLS)/secure HTTP (HTTPS). Enable or disable HTTPS redirect. 4.6.4 Services Enable or disable digest authentication for the FLIR CGI control interface. The default setting is On (enabled). 427-0108-00-10 - Revision 100 - December 2020 1.800.561.8187 information@itm.com... -
Page 44: Boresight Page
Configuration Firewall Settings For enhanced security, the camera has a firewall that you can enable by clicking On. By default, when you enable the firewall, the following services are set to Allow, which means they remain enabled and their default ports remain open: Nexus Discovery ·... -
Page 45: Firmware & Info Page
Configuration Both cameras' focus is fixed at one meter (39.4") and the camera uses digital zoom to adapt the visible camera's field of view (FOV) to the thermal sensor's FOV. Firmware & Info Page On the Firmware & Info page, you can: Specify a unique name for the camera ·... - Page 46 3. On your computer or network, browse to and select the firmware file. Caution Only upgrade firmware developed for the Elara FR-345-EST camera. 4. Click Upgrade. The camera uploads and installs the firmware, which takes a minute or two. After installing firmware, the camera requires a reboot.
-
Page 47: Maintenance And Troubleshooting Tips
If a fuse was used, be sure the fuse is not blown. If the camera still does not produce an image, contact the FLIR dealer or reseller who provided the camera, or contact FLIR directly. - Page 48 Maintenance and Troubleshooting Tips Unable to View Video Stream If the video stream from the camera is not displayed, it could be that the packets are blocked by the firewall, or there could be a conflict with video codecs that are installed for other video programs. When displaying video with a VMS for the first time, the Windows Personal Firewall may ask for permission to allow the video player to communicate on the network.
Need help?
Do you have a question about the Elara FR-345-EST and is the answer not in the manual?
Questions and answers