Vitek Transcendent VT-TTR Series Manual
4, 8, or 16 channel tribrid hd tvi/ip digital video recorders
Hide thumbs
Also See for Transcendent VT-TTR Series:
- Quick start manual (4 pages) ,
- Quick start manual (4 pages)
Table of Contents
Advertisement
Quick Links
FEATURES:
• Full Tribrid Operation with 4, 8, or 16 Channel HD-TVI/Analog BNC Inputs
• 1-Channel (VT-TTR410), 4-Channel (VT-TTR820), or 8-Channel (VT-TTR1620) IP
Camera Support
• 30fps @ 720p / 15fps @ 1080p Recording Per Channel
• Simple plug and play, point-to-point connection from camera to DVR
• H.264 Compression
• HDMI & VGA Video Outputs
• 2 Internal SATA2/SATA3 HDD Slots (VT-TTR820/VT-TTR1620) supporting up to 8TB (2
x 4TB HDD) using Advanced HDD Format
• Supports 4TB Hard Drives
• 2-Way Audio
• Pentaplex: Live Display / Record / Playback / Backup / Remote Access
• PTZ Control over RS-485
• Applications for iPhone, iPad, iTouch and Android Devices
• Remote Viewing over the Internet via Web Browser or LAN
• Mac OSX Client & CMS Central Management Software Included
• Supports both Dynamic and Static IP Addresses
• Control locally via Front Panel Controls, USB Mouse, or with the Included IR Remote
control
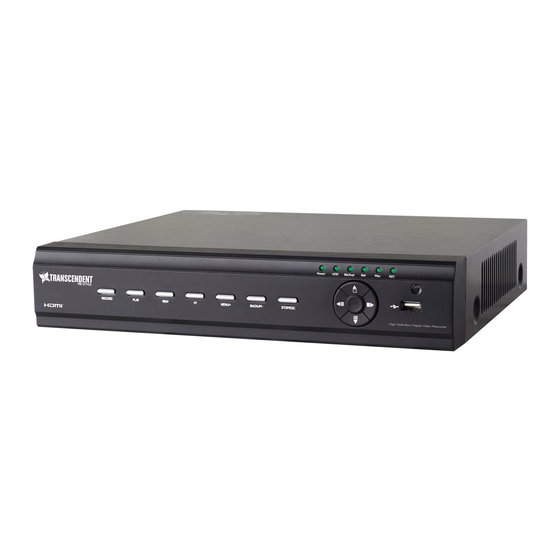
VT-TTR Series
Transcendent 4, 8, or 16 Channel
Tribrid HD TVI/IP Digital Video
Recorders
Advertisement
Table of Contents

Related Manuals for Vitek Transcendent VT-TTR Series


Summary of Contents for Vitek Transcendent VT-TTR Series
- Page 1 VT-TTR Series Transcendent 4, 8, or 16 Channel Tribrid HD TVI/IP Digital Video Recorders FEATURES: • Full Tribrid Operation with 4, 8, or 16 Channel HD-TVI/Analog BNC Inputs • 1-Channel (VT-TTR410), 4-Channel (VT-TTR820), or 8-Channel (VT-TTR1620) IP Camera Support • 30fps @ 720p / 15fps @ 1080p Recording Per Channel •...
- Page 2 Transcendent DVR Series Notes Please read this user manual carefully to ensure that you can use the DVR correctly and safely. Use only specified power source. Do not install this device near any heat sources such as radiators, heat registers, stoves ...
-
Page 3: Table Of Contents
Transcendent DVR Series Table of Contents Introduction ......................5 1.1 F ....................5 EATURES 1.2 F ..............6 RONT ANEL ESCRIPTIONS 1.3 R ..............7 ANEL ESCRIPTIONS 1.4 C ..................7 ONNECTIONS Basic Operation ....................8 2.1 S ................. 8 TARTUP AND HUTDOWN 2.1.1 Startup ..................... - Page 4 Transcendent DVR Series Alarm ........................31 9.1 S ..................32 ENSOR LARM 9.2 M ..................33 OTION LARM 9.3 V ................35 IDEO LARM 9.4 O ..................35 THER LARM 9.5 A .................... 36 LARM 9.6 M ..................36 ANUAL LARM 10 P.T.Z ........................
- Page 5 Transcendent DVR Series 14.4 R ................56 EMOTE 14.5 R & B .............. 58 EMOTE LAYBACK ACKUP 14.6 R ............61 EMOTE YSTEM ONFIGURATION 14.7 T ....................62 OOLS 14.8 R ................ 62 EMOTE ANAGEMENT 15 Appendix A FAQ ....................63 16 Appendix B Calculate Recording Capacity ..........
-
Page 6: Introduction
Transcendent DVR Series Introduction 1.1 Features Live Surveillance Support VGA/HDMI output Support (HD-TVI signal) 1080P/720P, (analog signal) 960H/D1 video inputs & IP cameras up to 8 2MP (model dependent) Supports channel security by hiding live display ... -
Page 7: Front Panel Descriptions
Transcendent DVR Series The following descriptions are for reference only. 1.2 Front Panel Descriptions Type I: When recording, light is blue Name Descriptions When access to network , the light is blue Power Power indicator, when connected , light is blue Switch the resolution of the VGA/HDMI output Type II: Power... -
Page 8: Rear Panel Descriptions
Transcendent DVR Series 1.3 Rear Panel Descriptions AUDIO OUT Audio output Name Descriptions AUDIO IN Audio input HD TVI VIDEO IN (HD-TVI signal) 1080P/720P, (analog signal) 960H/D1 video inputs HDMI Connect to high definition display Connect to monitor Network port Connect USB storage device or USB mouse DC12V DC12V power input... -
Page 9: Basic Operation
Transcendent DVR Series Audio Output: Connect PTZs via RS485 interfaces: PTZ Connection Type 1: The B (Tx-) /A (Tx+) interface are used to connect speed dome (PTZ). Basic Operation Make sure that all connections are properly connected. Proper startup and shutdown are 2.1 Startup and Shutdown crucial to expending the life of the DVR. - Page 10 Transcendent DVR Series Key points to check in case the remote doesn’t work. 1. Check batteries polarity. 2. Replace batteries. 3. Check IR controller sensor for any blockage. 4. Check the ID of the remote with respect to the HD TVI Hybrid DVR. Switch off—to stop the device Power Button Button...
- Page 11 Transcendent DVR Series Record manually Button Function Search Enter search mode MEUN Enter menu Exit Exit the current interface ENTER Confirm the choice or setup Direction Move cursor in setup button ZOOM Zoom into the image Enter picture in picture setting mode Control playback.
-
Page 12: Using A Mouse
Transcendent DVR Series devices with multiple remote controls, you will need to configure the device ID, please refer to ① Activate remote control to control the device: Point the IR sensor of the remote control below steps: towards the IR receiver on the front panel, press the number 8 key twice on the remote, input device ID of the HD TVI Hybrid DVR to be controlled (Range from: 0-65535;... -
Page 13: Common Buttons
Transcendent DVR Series Enter: Confirm. Backspace: Delete the previous letter. Shift: Switch between lower case and upper case. ESC: Exit. 【Default】 :Restore the settings to the factory default setting. 2.4 Common Buttons 【Apply】 :Apply and save the settings. 【Copy】 :Copy button. Click this button to copy the settings of one channel to other channels quickly. -
Page 14: Live View
Transcendent DVR Series ③ Set the disk management. You can format the HDDs and set their properties. Then click “Next” button to continue. ④ Click “Next” button to complete the wizard setup. Live View You can login or logoff the HD TVI Hybrid DVR system. Once logged off the user cannot do 4.1 Login any other operation except changing the multi-screen display. -
Page 15: Live View
Transcendent DVR Series The default username is “admin” and the default password is “123456”. Please input the default username and password for the first time to log in. 4.2 Live View Green Manual record Sensor Alarm record Symbol Meaning Symbol Meaning Motion detection... - Page 16 Transcendent DVR Series Click the icon between each Display Mode to select custom channel view interface. Channels can be arranged to any place on grid by left click and drag in the live interface Screen Mode: You can choose a screen display mode to show live images. Dwell: Dwell means to display live images from different cameras in a sequence.
-
Page 17: Sequence View
Transcendent DVR Series You can view channel or channel group in sequence. 4.3 Sequence View ① Go to Main MenuSetupLiveMain Monitor interface. ② Select display mode and channel. ③ Select dwell time. Click button to set up the previous channel groups of dwell picture. -
Page 18: Add Ip Cameras
Transcendent DVR Series ③ Press and drag the left mouse button to set mask area as shown below. ④ Right click to exit the mask setting interface. ⑤ Click “Apply” button to save the setting. Set up Mask Area ① Click “Setting”... - Page 19 Transcendent DVR Series If the IP Camera is not the same address range, click SETUP to modify Information. Note: If the network of IP cameras and HD TVI Hybrid DVR are in LAN, their IP address must be in the same network segment. For example: If the IP address of HD TVI Hybrid DVR is 192.168.011.007, the IP address of IP camera must be 192.168.011.XXX.
- Page 20 Transcendent DVR Series You may also select the added device and click “Setup” button to modify channel, IP address of the device. ① Please go to Main Menu IP Camera tab. To add IP cameras via WAN: ② Click “Add” button to pop up a window as shown below. You need to check “Enable” ...
-
Page 21: Record
Transcendent DVR Series Before recording, please format your HDD first. Go to Main MenuDisk Management to Record access disk management settings. In this interface, you can format your disk. Go to Main MenuSetupRecordEnable for record settings. 6.1 Record Settings ① Enable record and audio. Then click “Apply” to save the settings. ②... - Page 22 Transcendent DVR Series Set up rate, resolution, quality, encode and max bit stream according to the actual situation. Then apply the settings. Resolution: The higher the resolution is, the clearer the image is. FPS: The higher the frame rate is, the more fluency the video is. However, more storage room will be taken up.
-
Page 23: Schedule/Continuous Recording
Transcendent DVR Series and the time stamp on the video and choose a position for the stamp on the screen. Checkmark camera name and time stamp. Click “Setting” button to set the position of the stamp. You can drag the camera name and time stamp to random positions. Refer to below figures: Before drag After drag... -
Page 24: Motion Based Recording
Transcendent DVR Series ② Select channel and click button to add a certain day schedule. Click button to delete the selected schedule. If you want to apply the schedule setting of a certain channel to other or all channels, you need to select channel and click “Copy”... -
Page 25: Sensor Based Recording
Transcendent DVR Series ③ Go to alarm handling setting by click “Setting” button under Trigger. Then go to “To Record” tab. You can select the recording channel and click “OK” button to confirm the settings. ④ Set schedule for motion alarm. The setting steps are similar to normal schedule recording (See Chapter 6.3 Schedule Recording for details). -
Page 26: Playback
Transcendent DVR Series ③ Go to Alarm Handling tab. Then click “Setting” button under Trigger. An alarm trigger box will pop up. Select “To Record” tab to choose the recording channel and click “OK” button to confirm the settings. ④ Set schedule for sensor alarm. The setting steps are similar to normal schedule recording (See Chapter 6.3 for details). -
Page 27: Playback By Time Search
Transcendent DVR Series 【Previous/next section】 : Select the previous hour or the next hour to play recorded files 【FF/Rewind】: Forward /rewind the recording. 【Pause/play】: Pause/play the recording. 【Stop】: Stop the recording. 【Audio】: Click to enable audio. Click again to disable audio. 【Frame】: Click “Pause”... -
Page 28: Playback By Event Search
Transcendent DVR Series ② Select date and channels on the right hand side and press the “Search” button. A date with highlighted borderline indicates presence of data. ③ Set the start time by clicking a particular grid or by entering the specific value in the start time field. -
Page 29: Snap Setting And Playback By Picture Search
Transcendent DVR Series ② Select date and channels. The date with highlighted borderline indicates presence of data. ③ Click “Search” button to display the searched files in the file list box. ④ Use “All” button to lock/unlock or delete all files in the file management column. ⑤... -
Page 30: Playback By Picture Search
Transcendent DVR Series ① Go to Main MenuSetupAlarmMotion. Enable motion alarm and then set the Taking Snapshots on Motion Alarm motion detection area (see Chapter 9.2 Motion Alarm for details). ② Go to alarm handling setting by click “Setting” button under Trigger. Then checkmark the snapshot channel and click “OK”... -
Page 31: Backup
Transcendent DVR Series You can use a USB storage device (Thumb Drive, removable HDD, USB DVD writer) to do Backup backup. There are two types of backup--Backup and Clip Backup. ① Go to Main MenuBackup. 8.1 Backup ② Set the start & end time, select channels and click “Search” button to display the searched data in the data backup list box. -
Page 32: Clip Backup
Transcendent DVR Series ④ In the backup information interface, you can check the relevant information of backup files, such as, storage type, save file type, etc. Then click “Start” button to start backup. Note: If the backup files are saved in DVR format, please check backup player. Only this player can play these files in DVR format. -
Page 33: Sensor Alarm
Transcendent DVR Series setting. . Operate the following steps to 9.1 Sensor Alarm configure sensor based alarm: Some models may not support this function ① Go to Main MenuSetupAlarmSensorBasic tab. ② Enable channels by checking the checkboxes beside the desired channels. ③... -
Page 34: Motion Alarm
Transcendent DVR Series Buzzer: If selected, the local buzzer would be activated on an alarm. Show Full Screen: If selected, there will pop up the chosen channel on the monitor on an alarm trigger. To Alarm Out: If selected, this would trigger external relay output on an alarm. Email: If selected, the HD TVI Hybrid DVR will send an email alert to the preconfigured email address in case of a sensor based alarm from the particular input. - Page 35 Transcendent DVR Series ② Enable motion alarm, set alarm hold time which refers to the time utill which the system will wait for further detection of motion. e.g. If the holding time is set to 10 seconds, once the system detects motion, it will go to alarm but would not detect any other motion alarm (specific to channel) until 10 seconds.
-
Page 36: Video Loss Alarm
Transcendent DVR Series icon to clear the existing field and set fresh. ⑥ Select “All” to set the same settings for all channels. ⑦ Click “Apply” button to save the setting. ⑧ Go to Schedule tab. The setting steps for schedule motion based alarm are similar to normal schedule setup (see Chapter 6.3 Schedule Recording for more details). -
Page 37: Alarm Out
Transcendent DVR Series ④ Click “Apply” to save the setting. 9.5 Alarm Out Some models may not support this function ① Go to Main MenuSetupAlarmAlarm Out. To set up alarm out: ② Input relay name and select hold time. ③ Go to Schedule tab. -
Page 38: T.z
Transcendent DVR Series Choose alarm out and click “Alarm” button to trigger alarm manually. Click “Clear” button to clear the alarm. Before you can control the speed dome, please make sure the speed dome is connected to P.T.Z the DVR. P.T.Z configuration includes two submenus: serial port and advanced. Serial port settings are as follows: ①... - Page 39 Transcendent DVR Series ① In the Advanced interface, click preset “Setting” button to see a dialog box. To set up preset: ② In the preset setting tab, enable preset, set the preset name and then click preset “Setting” button. ③ Control the dome by rotating up, up left, down, right down, left, left down, right and up right and adjust the rotate speed and the value of zoom, focus and iris of the dome.
- Page 40 Transcendent DVR Series Note: PTZ must support wiper and light button and these two buttons are only available when selecting PELCO-P or PELCO-D. ⑤ Click Save button to save the setting. Click icon to hide the tool bar. Right click to view this bar again.
-
Page 41: Network Settings
Transcendent DVR Series ① In the Advanced interface, click track “Setting” button to see a dialog box as below. ② Control the dome by rotating up, up left, down, right down, left, left down, right and up right and adjust the rotate speed and the value of zoom, focus and iris of the dome. -
Page 42: Sub Stream
Transcendent DVR Series ② Set HTTP port. The default HTTP port is 80. If the value is changed, you shall add the port number when typing IP address in IE address. E.g. If HTTP port is set to 82 and IP address is http://192.168.11.61, you should input http://192.168.0.61:82 into IE browser. -
Page 43: Email
Transcendent DVR Series 11.3 Email ① Go to Main MenuSetupNetworkEmail interface. To set up Email: ② Set SMTP Server and port. SMTP Server/Port: The name and port number of SMTP server. You can set up SSL check (such as Gmail) according to actual needs. ③... -
Page 44: Other Settings
Transcendent DVR Series If your device is set to use PPPoE as its default network connection, you may set up DDNS 11.5 Other Settings to be used in connection. The setting steps are as follows: ① Enable DDNS server and then select the DDNS server type. ②... - Page 45 Transcendent DVR Series You can use UPnP function to enable the fast connection of the DVR to WAN via router UPnP settings: without port mapping. Before setting UPnP, please configure the correct local IP address, subnet mask, gateway and DNS according to the router. Make sure the HTTP port and data port are correctly set.
-
Page 46: Other Settings
Transcendent DVR Series ① Go to Main MenuSetupNetworkOther Settings, checkmark DDNS, select Application “dvrdydns” at the DDNS Sever pull down list box and input user name and password. ② Map the server port and IP address in the router (if the user enables UPnP function, he can skip this step). -
Page 47: Time & Date
Transcendent DVR Series Show System Time: If selected, the current time will be displayed during live monitoring. Max Online Users: To set the max number of concurrent user logins in the HD TVI Hybrid DVR. Video Output: The resolution of live display interface. Language: Set up the menu language. -
Page 48: Advanced Settings
Transcendent DVR Series ② In this interface, enable daylight saving time, time offset, mode, start & end month/week/date, etc. ③ Click “Apply” button to save the setting. Advanced configuration includes three submenus: reset, import/export and block/allow 12.2 Advanced Settings list. Restore the DVR to factory default settings. -
Page 49: Device Management
Transcendent DVR Series address range. If it is required that computer users within a certain IP address range access the HD TVI Hybrid DVR, they can checkmark Allow List option and then do the required configuration. Device Management 13.1 User Management To add user and set up user authority: ①... -
Page 50: Online Users
Transcendent DVR Series ③ In General tab, input username, password and select user type. You can also check “Binding PC MAC Address” and input this address. Note: When the default value of binding PC MAC Address is 0, the user is not bound with the specified computer. -
Page 51: Logoff
Transcendent DVR Series 【Refresh】: Refresh the current online user. 【Disconnect】: Set the time, choose the online user and click “Disconnect” button. Then this user will be prohibited accessing the device within the set time. After that time, the user can access the device by clicking “Refresh” button or logging in again. If you want to change the login account, you can click Main MenuLogoff. -
Page 52: View Information
Transcendent DVR Series After you go to Disk ManagementAdvanced tab, you can check model, S/N, firmware, health status of the disk in this interface. You also can monitor the temperature, internal circuit, dielectric material of the disk, analysis the potential problems of the disk and warn so as to protect its data. -
Page 53: Remote Surveillance
Transcendent DVR Series ③ Go to Main MenuUpgrade tab. You will see the upgrade software name displaying in the upgrade list box. ④ Select that software and then click Upgrade button. The system will be upgraded automatically. Remote Surveillance In order to access the device remotely over LAN/WAN, the network should be set up 14.1 IE Remote Surveillance by NAT accordingly. -
Page 54: Ie Remote Surveillance Via Lan & Wan
Transcendent DVR Series Serial No: The MAC address of the HD TVI Hybrid DVR (Go to Main MenuInformationNetwork to check the MAC address of the HD TVI Hybrid DVR). User Name: The login username of HD TVI Hybrid DVR. The default username is admin. Password: The login password of HD TVI Hybrid DVR. -
Page 55: Wan
Transcendent DVR Series name and password. Input name and password correctly, and enter to view. Note: If you cannot download and install ActiveX, please refer to FAQ Q8. ① Go to Main MenuSetupNetwork interface to enable PPPoE and then input user 2. -
Page 56: Wan
Transcendent DVR Series router. ④ After the above information is completed, you can enter LAN IP and HTTP port in the Safari browser. For example: input http://192.168.1.100:81(here 192.168.1.100 is LAN IP of HD TVI Hybrid DVR, 81 is the http port of the device), and click “ ”... -
Page 57: Remote Live View
Transcendent DVR Series surveillance. ② Enter WAN IP and http port in the Safari browser to install the WebkitPlugin control. 14.4 Remote Live View Symbol and function definitions: Channel indicator Screen display mode Audio Start recording Snapping picture Bidirectional talk Start IE record Playback Master/sub stream status... - Page 58 Transcendent DVR Series Please connect speed dome to the device via RS485 first, make sure the protocol of the speed dome is supported by the device and set the relative parameters manually. User can control the dome up, down, right, left or stop rotating on Control Center, adjust rotation speed, Iris and zoom, focus on the dome, and set the presets, etc.
-
Page 59: Remote Playback & Backup
Transcendent DVR Series every channel, it requires low network bandwidth. Therefore, you can select the stream according to your bandwidth. All to master/sub stream: Set all channel to master stream or sub stream. Enable audio: Enable or disenable audio Full screen: In full screen status, the live preview picture will display with full screen and the tool bar will be hidden. - Page 60 Transcendent DVR Series The highlighted date in area ② indicates recorded data. Select the date in area ② and record channels in area ③. Click “Search” button. The record data will be displayed in the data information list box. Set the data playing time and display mode in area ① as required. Click “Play”...
- Page 61 Transcendent DVR Series Click the highlighted date and select record channels. Checkmark the event type: motion and/or sensor. Click “Search” button. Double-click file to play. Go to SearchFile Management interface. File Management: Select highlighted date and channels. Click “Search” button to search the recorded files. Lock: Select certain file item in the file list box and then click “Lock”...
-
Page 62: Remote System Configuration
Transcendent DVR Series Click Backup button to go to backup interface. Remote Backup ① Select channels, set the start and end time and then click “search’ button to display the file information in the file list box. ② Select backup files and click “Browse” button to set the save path. Then click “Backup”... -
Page 63: Tools
Transcendent DVR Series Click on the tool’s tab to access the Disk Management tool. Here you can view the status 14.7 Tools of the hard drive(s), view/change the read write properties and format the hard drive(s). The Info interface provides a web based interface to access the general information 14.8 Remote Management pertaining to the settings of the device. -
Page 64: Appendix A Faq
Transcendent DVR Series Appendix A FAQ Q1. Why does the HD TVI Hybrid DVR start abnormally even after connecting the a. The power adapter could have gone bad. Please change to a new power adapter. power? b. The power from the adapter may be not enough for operating the HD TVI Hybrid DVR. Please use the power adapter supplied along with the HD TVI Hybrid DVR. - Page 65 Transcendent DVR Series a. The mouse should be connected to the USB port on the rear panel. b. After connecting the mouse, allow the HD TVI Hybrid DVR to detect the mouse. If not detected, try restarting the HD TVI Hybrid DVR. c.
- Page 66 Transcendent DVR Series Click the password or the input box to pop up a small keyboard. Please select characters Q10: How to input password and numbers in the interface? to be input (the initial password is 123456), or you can use the digital keys on the front panel, or the digital keys on the remote control.
- Page 67 Transcendent DVR Series Fig 13-1 Fig 13-2 Insert your USB device where the backup files are saved in the USB port of PC. If Q14. How to play backup files? your files are saved in HD TVI Hybrid DVR format, you must have already downloaded the backup player before doing backup.
-
Page 68: Appendix B Calculate Recording Capacity
Transcendent DVR Series Appendix B Calculate Recording Capacity You can calculate the size of hard disk according to the storage time and HD TVI Hybrid DVR recording settings. The formula is as follows in full frame rate condition. Used space per hour (MB/h) = Bitrate (kbps) ÷... - Page 69 Transcendent DVR Series Detailed Specifications VT-TTR410 TVI Video Inputs 4 Channels TVI via BNC (1080P) IP Camera Support 1 (6 Mbps) Compression H.264 High profile Recording (720P) 120fps: 30fps per channel Recording (1080P) 60fps: 15fps per channel Local Playback 4 CH Embedded Linux Video Output VGA x 1CH : 1080P / HDMI x 1CH :1080P...
- Page 70 Transcendent DVR Series Detailed Specifications VT-TTR820 TVI Video Inputs 8 Channels TVI via BNC (1080P) IP Camera Support 4 (12Mbps) Compression H.264 High profile Recording (720P) 240fps: 30fps per channel Recording (1080P) 120fps: 15fps per channel Local Playback 8 CH Embedded Linux Video Output VGA x 1CH : 1080P / HDMI x 1CH :1080P...
- Page 71 Transcendent DVR Series Detailed Specifications VT-TTR1620 TVI Video Inputs 16 Channels TVI via BNC (1080P) IP Camera Support 8 (24Mbps) Compression H.264 High profile Recording (720P) 480fps: 30fps per channel Recording (1080P) 240fps: 15fps per channel Local Playback 8 CH Embedded Linux Video Output VGA x 1CH : 1080P / HDMI x 1CH :1080P...
- Page 72 Transcendent DVR Series ConSIDeR THeSe oTHeR GReaT PRoDuCTS fRom Transcendent HD-TVI Camera Series 2.1 Megapixel Outdoor HD-TVI Cameras with IR LED Illumination • 1/3” 2.1 Megapixel Progressive Scan CMOS image sensor • HD-TVI Technology for cable distances of up to 1500’ over COAX •...
- Page 73 Transcendent DVR Series...
- Page 74 Transcendent DVR Series...
- Page 75 Transcendent DVR Series LIMITED PRODUCT WARRANTY VITEK products carry a three (3) year limited warranty. VITEK warrants to the purchaser that products manufactured by VITEK are free of any rightful claim of infringement or the like, and when used in the manner intended, will be free of defects in materials and workmanship for a period of three (3) years, or as otherwise stated above, from the date of purchase by the end user.
- Page 76 Version 1.0 June 2015 28492 Constellation Road ValenCia, Ca 91355 WWW.ViteKCCtV.CoM...
Need help?
Do you have a question about the Transcendent VT-TTR Series and is the answer not in the manual?
Questions and answers