Table of Contents
Advertisement
Quick Links
Advertisement
Table of Contents

Related Manuals for Oracle MICROS Workstation 5A


Summary of Contents for Oracle MICROS Workstation 5A
- Page 1 Oracle MICROS ® Workstation 5A Setup Guide Release 1.0 F22801-01 January 2020...
- Page 2 If you use this software or hardware in dangerous applications, then you shall be responsible to take all appropriate fail-safe, backup, redundancy, and other measures to ensure its safe use. Oracle Corporation and its affiliates disclaim any liability for any damages caused by use of this software or hardware in dangerous applications.
- Page 3 Declarations Warranties Although the best efforts are made to ensure that the information contained in this manual is complete and correct, MICROS Systems, Inc. makes no warranty of any kind with regard to this material, including but not limited to the implied warranties of marketability and fitness for a particular purpose.
-
Page 4: Table Of Contents
Table of Contents Preface Why Read This Manual? ........vii Purpose . - Page 5 Table of Contents Workstation 5A ........1-13 Workstation 5A Platform Software .
- Page 6 Table Of Contents Boot ............2-10 System Boot Configuration .
- Page 7 Table of Contents J20 - CMOS Reset ........3-11 J5 - TFT Panel Mode .
- Page 8 Table Of Contents Chapter 4 - Installing and Operating the Workstation 5A Care and Handling ..........4-2 Equipment Placement .
- Page 9 Table of Contents Starting the Workstation for the First Time ..... 4-16 Using the Client Application Loader (CAL) on WINCE ..4-17 Using the Search Feature .
- Page 10 Cash Drawer Extension Cable....... . B-13 Appendix C: FCC/DOC Statement Appendix D: Oracle Linux for MICROS General Information...
- Page 11 Table of Contents...
- Page 12 Preface NOTE For information about running Oracle Linux for MICROS on the Workstation 5A, refer to Appendix D, Oracle Linux for MICROS General Information. In this preface, you’ll find information about this manual. Refer to the preface if you have questions about the organization, conventions, or contents of this manual.
-
Page 13: Preface
Why Read This Manual? Purpose This guide is intended for those who will be setting up, installing and operating the MICROS Workstation 5A hardware. It is not specific to a particular software application. viii Workstation 5A Setup Guide - Fourth Edition... -
Page 14: How This Manual Is Organized
Preface How This Manual is Organized How This Manual is Organized This manual is divided into five Chapters, briefly discussed below. Chapter 1 describes the Workstation 5A and each of its hardware and software components. The chapter also provides detailed product specifications. -
Page 15: Notation Conventions
Preface Notation Conventions Notation Conventions Symbols NOTE This symbol brings special attention to a related item. WARNING This symbol indicates that specific handling instructions or procedures are required to prevent damage to the hardware or loss of data. SHOCK HAZARD This symbol calls attention to a potential hazard that requires correct procedures in order to avoid personal injury. -
Page 16: In This Chapter
Chapter 1 What is the WS5A? This chapter describes the Workstation 5A and optional accessories, then goes on to describe the memory, storage architecture and power management support. Complete specifications are provided at the end of this chapter. In addition, the differences and similarities of the Workstation 5 and Workstation 5A features, peripheral support, and connectivity are examined. -
Page 17: The System
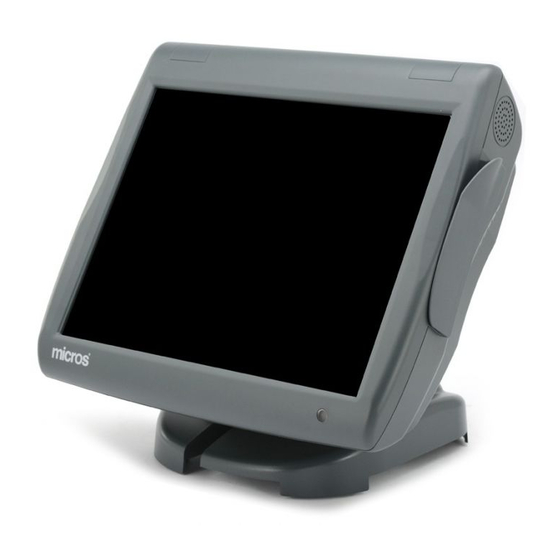
Workstation 5A. Workstation 5A The MICROS Workstation 5A is a diskless Windows Embedded CE 6.0 client, and is also capable of running WIN32 operating systems such as Windows Embedded POS Ready 2009. It uses the same casework, LCD and touchscreen as the original Workstation 5, but the system board, chassis and power supply are new. -
Page 18: Casework
What is the WS5A? The System Casework The Workstation 5A is a low profile design that consists of a base to house the chassis, system board, internal power supply, LCD Touchscreen Assembly and Mag Stripe Reader. Operator LCD and Touchscreen The Operator LCD consists of 15”... -
Page 19: Recovery Button
What is the WS5A? The System In a Workstation 5A with Windows Embedded CE 6.0 R3, DMA is used to move the large bit-maps used by the application from the CF card to display memory. This results in a perceived improvement in the performance of the workstation. -
Page 20: Workstation 5A Options
What is the WS5A? The System Workstation 5A Options The following options are available for the Workstation 5A. Hard Disk The Workstation 5A can support a single optional SATA 2.5” SSD. The drive mounts to a plate which in attaches to the rear of the LCD plate. A SATA data cable and custom power cable are provided connect the drive to the System board. -
Page 21: Powered Usb
What is the WS5A? The System Powered USB Powered USB, also known as Retail USB, or USB Plus Power, is an addition to the Universal Serial Bus standard that allows for higher-power devices to obtain power from the workstation instead of an external power supply. Powered USB is a proprietary variant of USB, developed by IBM, NCR, and FCI/Berg, and not endorsed by the USB Implementers Forum (USB-IF). -
Page 22: Finger Print Reader
What is the WS5A? The System • +24V/0.4A (9.6W) - not capable of supporting the TM-T88 printer. Support for the TMT-88V is planned for the Revision F or later System Board. Intelligent MICROS peripherals such as the Protégé Customer Display System are equipped with a custom interface cable that attaches directly to the USB6 IO Panel connector, bypassing the traditional Powered USB cables and connectors. -
Page 23: Workstation Mounting Options
What is the WS5A? The System Workstation Mounting Options All of the mounting options available for the Workstation 5 also apply to the Workstation 5A. The Workstation 5A Adjustable Stand The Adjustable Stand converts the low profile WS5A into an adjustable display design. -
Page 24: Power Supply Compartment
What is the WS5A? The System Power Supply Compartment Figure 1-6, below shows a view of the stand base plate and the compartment for housing an optional Printer Power Supply. AC power is connected to a receptacle in the throat of the stand using a low profile angled connector. -
Page 25: Lcd Customer Display Options
What is the WS5A? The System LCD Customer Display Options Integrated, Pole and Adjustable Stand Mounted LCD Customer Display options are available. The Workstation 5A features two customer display outputs - integrated and pole. The LCD Customer Display is based on a 240x64 monochrome STN LCD and companion controller board. -
Page 26: Lcd Pole Mount Customer Display
What is the WS5A? The System LCD Pole Mount Customer Display Figure 1-8 below, is an example of the Pole Mount LCD Customer Display. This display receives power and data from an IO panel Mini-DIN connector and can be placed on a counter surface up to four feet from the workstation. -
Page 27: Protégé Customer Display System
What is the WS5A? The System Protégé Customer Display System The MICROS Protégé Customer Display System is a customer facing 7” LCD, providing a greater level of detail than the traditional 2x20 VFD or MICROS 264x64 graphical LCD. It is available in both integrated and pole configurations and connects to the custom USB6 connector located on the IO Panel. -
Page 28: Software Components
What is the WS5A? Software Components Software Components The WS5A is hardware platform shipped with Operating System, a collection of platform specific drivers, configuration files, BIOS and utilities. These components are pre-installed on each unit to create a foundation upon which MICROS POS applications are installed through the Client Application Utility (CAL). -
Page 29: Workstation 5A Platform Software
What is the WS5A? Software Components Workstation 5A Platform Software In addition to the Operating System, Platform Software consists of several key components developed by MICROS specifically for the workstation. Each component listed below is pre-loaded on the workstation when shipped. •... -
Page 30: Recovery
What is the WS5A? Recovery Recovery This section describes the recovery capabilities of both Windows Embedded CR 6.0 R3 and the supported WIN32 operating systems on the Workstation 5 and 5A. Recovery Button One Button Recovery describes a process where the operating system image and platform files can be restored by pressing the Recovery Button shown in Figure 1-2 at specific times. -
Page 31: Power Management States
What is the WS5A? Power Management States Power Management States Introduction This section introduces the Workstation 5A power management states in all operating system configurations. References to power management states are specified in bold capitol letters, e.g., , and . See chapter 4 for more information about operating NOPOWER the Workstation. - Page 32 What is the WS5A? Power Management States WS5A Power Management State Table Current Event Source Scenario New State State AC Power AC Power becomes UNPLUGGED NOPOWER available and the last recorded state was not the state. Operator The operator presses the NOPOWER power button for less than 1 seconds.
-
Page 33: Specifications
What is the WS5A? General Specifications General Specifications The following table provides details about the Display, Network and I/O capabilities of the Workstation 5A. Specification Parameters Intel Atom N450, Single Core, 1.6GHz and Processor and Chipset Intel ICH8M I/O Controller Hub Display 15”... - Page 34 What is the WS5A? General Specifications Specification Parameters Case Material PC-ABS Plastic Physical Dimensions See Appendix A Workstation 5A Setup Guide - Fourth Edition 1-19...
-
Page 35: Approvals
What is the WS5A? Approvals Approvals The WS5A meets the following safety and environmental certifications. Directive Specification Year Safety EN 60950-1:2006+A11 2006 IEC 60950-1:2005 2005 EMC: EN 55022:2006+A1 2007 EN 55024:1998+A1+A2 2003 EN 61000-3-2:2006 2006 EN 61000-3-3:2008 2008 1-20 Workstation 5A Setup Guide - Fourth Edition... - Page 36 Chapter 2 Workstation 5A BIOS This chapter describes the Workstation 5A System Configuration Utility, highlights user settings and discusses BIOS Updates and the Windows CE Factory Restore Feature. In this chapter The BIOS System Configuration Utility ........... 2-2 Main ....................2-7 Boot....................
-
Page 37: The Bios Configuration Utility
Workstation 5A BIOS The BIOS System Configuration Utility The BIOS System Configuration Utility In 2008, Phoenix Technologies purchased General Software which provided the BIOS for the Workstation 5 and Workstation 4 LX. The General Software Embedded BIOS 2000 (EB2K) is now called the Phoenix EB(SF) Embedded ®... -
Page 38: System Summary Bios Q1000G
Workstation 5A BIOS The BIOS System Configuration Utility • BIOS Version Q2011d released as part of a separate BIOS upgrade to improve detection of 8GB uDOCs using a Toshiba flash chip. When you press [Del] enter the BIOS System Configuration Utility, each displays a System Summary screen displaying the MICROS BIOS Version and build date as shown in the following pages. -
Page 39: System Summary Bios Q2010G
Workstation 5A BIOS The BIOS System Configuration Utility System Summary BIOS Q2010g The BIOS Version Q2010g System Summary screen in shown below. Figure 2-4: BIOS Q2010g System Configuration Utility Main Screen System Summary BIOS Q2011d The BIOS Version Q2011d System Summary screen in shown below. Figure 2-5: BIOS Q2011d System Configuration Utility Main Screen Workstation 5A Setup Guide - Fourth Edition... -
Page 40: Bios Q2010G Features
Workstation 5A BIOS The BIOS System Configuration Utility BIOS Q2010g Features The major features of BIOS Versions Q2010g and Q2011d are highlighted below. • The ‘Golden’ (Final) release of the Embedded BIOS with StrongFrame Technology (EBSF) BIOS. • Merges the Pineview M (Mobile) and Pineview D (Desktop) platforms, previously a separate BIOS. -
Page 41: Tips For Using The System Configuration Utility
Workstation 5A BIOS The BIOS System Configuration Utility Should this configuration be upgraded to 2G of RAM, the workstation may fail to start POSReady 2009, display BSODs at start-up, and or a ‘Windows Failed to Start Properly Menu. In other cases, POSReady 2009 may start, but fail to properly shut down, displaying a light blue screen. -
Page 42: Main
Workstation 5A BIOS Main Main The first page that appears when you enter the System Configuration Utility is the System Summary screen. It provides information about the MICROS and Phoenix BIOS Versions, Processor type and amount of main memory, and lets you set the system RTC date and time. -
Page 43: Exit
Workstation 5A BIOS Exit Exit From the Exit screen, you can save or discard any BIOS change or select the workstation Boot Defaults. Note that Versions Q2010g and Q2011d shown in the lower half of the Figure, adds WIN32 boot defaults for a USB hard drive or optional SATA disk drive. -
Page 44: Reload Wince Factory Cmos Defaults (Q1000G/Q1010M)
Workstation 5A BIOS Exit NOTICE Selecting any of the factory defaults re-enables some fields in the ODM Tab including the IO Panel USB Ports, and the Recovery Password. In BIOS Version Q2011d, if the CF Interface is disabled, resetting defaults will re-enable it. -
Page 45: Boot
Workstation 5A BIOS Boot Boot System Boot Configuration This tab includes the Boot Device Prioritization order, and enables the ICH8M SATA and PATA controllers. The Figure below shows the Windows Embedded CE Configuration. Figure 2-7: BIOS System Configuration Utility - Boot Tab Boot Device Prioritization - BIOS Boot Specification (BBS) This section contains the device boot order for the supported operating systems. -
Page 46: Windows Posready Boot Configuration
Workstation 5A BIOS Boot Windows POSReady 2009 Boot Configuration (Q1000g and Q1010m) Reload USB WIN32 Factory Default Settings (Q2010g and Q2011d) This selection populates the boot order for WIN32 operating systems such as POSReady 2009 when installed on a USB Hard Drive. 0 - [SMART eUSB USB Device] <- USB Hard Drive Brand/Model 1 - [IDE 0/Pri Master] CF Card Optional (not installed) 2 - [PXE Boot]... -
Page 47: Post
Workstation 5A BIOS POST POST The POST screen can be used to configure many aspects of the BIOS Power On Self Test including how the system memory is tested during start-up. Normally memory testing is held to a minimum in order to decrease boot time. Figure 2-8: BIOS System Configuration Utility POST Selection 2-12 Workstation 5A Setup Guide - Fourth Edition... -
Page 48: Pnp
Workstation 5A BIOS This selection enables or disables PnP support for legacy operating systems such as Windows 95, Windows 98, and Windows NT. It also allows the IRQ and DMA (Direct Memory Access) resources to be individually reserved for Plug and Play. The Advanced Configuration and Power Interface (ACPI) replaces PnP in recent operating system such as POSReady 2009 or Windows 7. -
Page 49: Sio
Workstation 5A BIOS The SIO selection displays the WS5A COM and LPT Port resources. The COM port resources are factory configured and should not be changed. Figure 2-10: BIOS System Configuration Utility - SIO Tab The table below describes the WS5A COM Port assignments and identifies the IO Panel Connector. -
Page 50: Features
Workstation 5A BIOS Features Features The BIOS Features tab enables or disables features such as ACPI, APM, PnP, MP, quick boot options, and Intel VT. Figure 2-11: BIOS System Configuration Utility - Features Tab Workstation 5A Setup Guide - Fourth Edition 2-15... -
Page 51: Firmbase
Workstation 5A BIOS Firmbase Firmbase The Firmbase menu configures the Firmbase Technology component of the BIOS. The menu consists of several parts, with the most basic user-oriented options located at the top, and the more technical parameters located in the lower sections. -
Page 52: Misc
Workstation 5A BIOS Misc Misc This selection enables or disables the System Cache, and provides several settings to control a USB keyboard (if attached). Figure 2-13: BIOS System Configuration Utility - Misc Tab Cache Control We recommend that you do not change this setting. Keyboard Control Several keyboard configuration settings can be found in this section. -
Page 53: Video
Workstation 5A BIOS Video Video The Video tab allows some video configuration of the workstation, including selecting the default boot display device. Figure 2-14: BIOS System Configuration Utility - Video Tab Display Device Configuration The Display Device Configuration settings are factory configured and should not be changed. -
Page 54: Odm
Workstation 5A BIOS The Original Device Manufacturers (ODM) Special Configuration Tab contains the Workstation 5A custom fields. This includes external USB port control, Cash Drawer voltage selection, and recovery options. The ODM Tab for BIOS Version Q1000g is shown in Figure 2-15, below. Figure 2-15: BIOS ODM Menu - Version Q1000g and Q1010m BIOS Version Q2010g adds several new fields and by default requires a Recovery Password to start WINCE Factory Restore or a WIN32 Factory... -
Page 55: Special Configuration
Workstation 5A BIOS BIOS Version Q2011d, shown below adds the ‘Compact Flash’ field. Figure 2-17: BIOS ODM Menu - Version Q2011d Special Configuration Each field and the supported BIOS Versions are listed below. Boot Test Image (All BIOS Versions) On a Windows Embedded CE 6.0 R3 Workstation 5A, the default of [Normal] causes the BIOS to boot from the USB Hard Drive installed on 2x5 header J8. -
Page 56: Wince Image Update (All Bios Versions)
Workstation 5A BIOS WINCE Image Update (All BIOS Versions) When set to [Enabled], each time the workstation starts, a Firmbase application called FlashCE checks the CF Card for a file called NK.BIN. The file is placed on the CF card by the CAL as part of a Windows CE or platform update. -
Page 57: Enable Password For Restore (Q2010G And Q2011D)
Workstation 5A BIOS See Chapter 4 for more information about Workstation 5A Recovery options. Enable Password For Restore (Q2010g and Q2011d) This field is not available in BIOS Version Q1000g or Q1010m. Starting with BIOS Version Q2010g, a pre-assigned password is required to start WINCE Factory Restore or use the optional POSReady 2009 CF Recovery CF. -
Page 58: Chipset
Workstation 5A BIOS Chipset Chipset This tab displays the workstation processor temperature and contains the system power fail recovery selection. Figure 2-18: BIOS Power Failure Restoration Intel Pineview Information (Q1000g or Q1010m) The read-only field displays the Pineview temperature as reported by an on-die thermal diode. -
Page 59: Advancedcpu
Workstation 5A BIOS AdvancedCPU AdvancedCPU This read-only screen displays the CPU Model, Stepping, and Microcode Version. Figure 2-19: BIOS System Configuration Utility - AdvancedCPU Tab 2-24 Workstation 5A Setup Guide - Fourth Edition... -
Page 60: Upgrading The Ws5A Bios
Workstation 5A BIOS Upgrading the BIOS Upgrading the BIOS Should it be required, this section describes how the BIOS is upgraded on Windows Embedded CE 6.0 or POSReady 2009 configurations. Windows Embedded CE 6.0 For Windows Embedded CE 6.0, a BIOS upgrade is handled by the CAL through a Platform Update. -
Page 61: Posready 2009
Workstation 5A BIOS Upgrading the BIOS BIOS Update in Progress A sample of the BIOS Update screen is shown in Figure 2-20, below. Figure 2-20: BIOS Update in Progress - Do Not Remove Power! WARNING When the screen shown above is visible, pressing the power button or experiencing a sudden loss of AC Power, could result in a corrupt BIOS chip. -
Page 62: Windows Ce Factory Restore
Workstation 5A BIOS Win CE Factory Restore Win CE Factory Restore For Windows Embedded CE 6.0 R3, a custom pre-boot firmware application we call WINCE CE Factory Restore is available. Should the OS Image or platform files become corrupt or otherwise unusable, Factory Restore replaces all files on the USB hard drive and erases the CF card, returning the unit to the ‘out-of-box’... - Page 63 Workstation 5A BIOS Win CE Factory Restore 2-28 Workstation 5A Setup Guide - Fourth Edition...
- Page 64 Chapter 3 What’s Inside? This chapter describes how to open the workstation, provides a description of the system board and peripheral boards, shows how to install available options. In this chapter Disassembling the Workstation 5A............ 3-2 System Board Components..............3-7 System Block Diagrams..............
-
Page 65: Disassembling The Workstation 5A
What’s Inside? Disassembling the Workstation 5A Disassembling the Workstation 5A The following procedure describes how to disassemble the unit and access the system board and peripheral components. CAUTION: DOUBLE POLE/NEUTRAL FILTERING The Workstation 5A Power Supply contains a permanently connected fuse in the neutral line. After fuse operation, parts of the power supply remain energized and present a shock hazard as long as the AC Power Cord is connected. - Page 66 What’s Inside? Disassembling the Workstation 5A 4. Remove the screw that fastens the LCD/Touchscreen assembly to the base as shown at the top of Figure 3-2. 5. Lift up the front of the LCD/Touchscreen assembly and place it to the right of the base.
- Page 67 What’s Inside? Disassembling the Workstation 5A 7. If required, remove the LCD/Touchscreen cables from the WS5A System Board. o The WS5A entered production with a 5-Wire Resistive Touchscreen and 15” LCD /w CCFL backlights and is shown on the left side of the Figure below.
- Page 68 What’s Inside? Disassembling the Workstation 5A o A small number of Workstation 5As used a 15” AUO V2 LCD with LED Backlights and Resistive Touchscreen shown in the illustration below. Figure 3-4: Workstation 5A with LED Backlights (AUO V2 LCD) o A DC-to-DC converter residing on the System Board powers the LED Backlights through connector J31.
- Page 69 What’s Inside? Disassembling the Workstation 5A With the LCD/Touchscreen removed, the upper half of Figure 3-5 below, displays the Workstation 5A base. For comparison, the original Workstation 5 is shown in the lower half of the image. The Workstation 5A uses the same plastic base, mag card reader assembly, and speakers as the original Workstation 5.
-
Page 70: System Board Components
What’s Inside? System Board Components System Board Components This section displays the WS5A System Board components, connectors and jumpers, and includes Revisions C, D, and F System Boards. The Revision E System Board did not enter production. Revision F System Boards will appear in mid 2012. WS5A System Board - Primary Components (Revisions C, D, and F) The Processor and ICH8M are mounted on the underside of the system board to contact the thermal pads and copper heat sink. -
Page 71: Ws5A System Board - Connectors
What’s Inside? System Board Components WS5A System Board Connectors (Revisions C, and D) Please note that J14 is reserved for the IO Panel Powered USB Connection and is not intended for options such as the finger print reader or WiFi. Figure 3-7: System Board Revision C or D Connectors Workstation 5A Setup Guide - Fourth Edition... -
Page 72: Ws5A System Board - Jumpers And Switches
What’s Inside? System Board Components WS5A System Board Jumpers and Switches (Revisions C, D and F) The Figure below applies to all System Board Revisions. See the page 3-12 for details and a procedure for using the CMOS clear jumper. Figure 3-8: System Board Jumpers and Switches (All Revisions) Workstation 5A Setup Guide - Fourth Edition... -
Page 73: Ws5A System Board Connectors (Revision F)
What’s Inside? System Board Components WS5A System Board Connectors (Revision F) The Figure below displays System Board Revision F Connectors. Figure 3-9: WS5A System Board Revision F Connectors J1, the backlight connector now supports either CCFL or LED backlights. As of mid-2012, the CCFL backlight version remains in production. -
Page 74: System Board Jumper Configuration
What’s Inside? System Board Components System Board Jumper Configuration All revisions of the Workstation 5A System Board include the following configuration jumpers. J12 - Touch Screen Select J12 is a 2x3 header consisting of two jumpers. This pair of jumpers selects between the System Board resistive touchscreen controller and the optional off-board capacitive touchscreen interface. -
Page 75: System Board Block Diagrams
What’s Inside? System Block Diagrams System Block Diagrams Workstation 5A Block Diagram (CCFL Backlights/Resistive Touchscreen) Figure 3-10, shows a block diagram of the Workstation 5A, with CCFL backlights and resistive touchscreen. Figure 3-10: WS5A Block Diagram (CCFL Backlights and Resistive Touch Screen) 3-12 Workstation 5A Setup Guide - Fourth Edition... - Page 76 What’s Inside? System Block Diagrams Workstation 5A Block Diagram (LED Backlights/Resistive Touchscreen) A small number of WS5As shipped with LED backlights and resistive touchscreen, as shown in the diagram below. This configuration uses a System Board DC-to-DC converter to drive the LED backlights. Figure 3-11: WS5A Block Diagram (LED Backlights and Resistive Touch Screen) Workstation 5A Setup Guide - Fourth Edition 3-13...
-
Page 77: System Board Description
What’s Inside? System Board Description System Board Description The Workstation 5A System Board uses a single-core Atom N450 processor called Pineview M, part of the Intel Luna Pier platform. Luna Pier is a two-chip solution consisting of a processor core with integrated memory and graphics controller. -
Page 78: Integrated Memory Controller (Icm)
What’s Inside? System Board Description Interfaces The Pineview-M N450 integrates Memory Controller, Graphics Controller, Direct Media Interface and single or dual core CPU housed in a single die. Integrated Memory Controller (ICM) The Integrated Memory Controller supports DDR2 protocols and a single 64-bit wide channel to access two SO-DIMMs. -
Page 79: Direct Media Interface
What’s Inside? System Board Description Increase the Graphics Controller clock speed from 166Mhz to 200Mhz. Direct Media Interface (DMI) Direct Media Interface is the chip-to-chip connection between the Processor and IO Controller Hub. This high-speed interface integrates priority based servicing allowing for concurrent traffic and true isochronous transfer capabilities. -
Page 80: Usb 2.0 Ports
What’s Inside? System Board Description The ICH8M provides most IO support as shown in Figure 3-12. Figure 3-12: ICH8M I/O Port Summary USB 2.0 Ports The ICH8M contains two Enhanced Host Controller Interface (EHCI) host controllers supporting up to ten USB 2.0 high speed ports. The ICH8M contains port-routing logic that determines whether a USB port is controlled by the UHCI (USB 1.1) controller or EHCI (USB 2.0) controller. -
Page 81: Ide
What’s Inside? System Board Description IO Panel Four USB 2.0 connectors are located on the IO Panel designated USB1 through USB4. A fifth USB Port, USB6 is available through a custom connector to deliver a form of powered USB, using individual +5V, +12V, and +24V dongles. -
Page 82: Spi
What’s Inside? System Board Description SPI (Serial Peripheral Interface) The Serial Peripheral Interface is a 4-pin interface that provides a lower cost alternative for system BIOS flash than the Firmware Hub and LPC Bus. The ICH8M supports up to two SPI devices with speeds of up to 33Mhz. One SPI interface is dedicated to U55, the WS5A BIOS. -
Page 83: Gpio
What’s Inside? System Board Description The WS5A System Board uses a Realtek ALC268-VB1 HDA Codec. The WS5A includes two internal speakers mounted to the left and right side of the base. A two watt per channel amplifier drives the speakers. In addition, the I/O panel includes Microphone Input and Line Output connectors. -
Page 84: Lcd/Touchscreen Assembly - Resistive Touchscreen
What’s Inside? System Board Description LCD Touchscreen Assembly - Resistive Touchscreen The WS5A and LCD/Touchscreen assembly carries over from the original Workstation 5. It is composed of a 15” resistive touch surface, bracket, 15” AUO LCD with CCFL Backlights, LCD Plate and Backlight Inverter Board. Figure 3-13: The LCD/Touchscreen Assembly /w Resistive Touchscreen Twenty Workstation 5A were produced with LED Backlights. -
Page 85: Ccfl Backlight Inverter Board
What’s Inside? System Board Description CCFL Backlight Inverter Board The CCLF Backlight Inverter Board is mounted to the rear of the LCD Plate as shown in the Figure 3-14 below. The inverter includes jumpers J4 and J5, used to select the LCD Panel model. The jumper settings are routed through the interface cable to GPIO ports on the system board. -
Page 86: Lcd/Touchscreen Assembly - Optional Capacitive Touchscreen
What’s Inside? System Board Description LCD Touchscreen Assembly - Optional Capacitive Touchscreen The Capacitive Touchscreen option adds the Capacitive Interface Board and Interface Cable as shown in the Figure below. Figure 3-15: Optional Capacitive Touchscreen Components (CCFL Backlights) Workstation 5A Setup Guide - Fourth Edition 3-23... -
Page 87: Installing Options
What’s Inside? Installing Options Installing Options This section includes procedures for removing and replacing Workstation 5A internal components and options. Magnetic Card Reader The Workstation 5A uses the same Magnetic Card Reader Assembly as the original Workstation 5. The reader head is mounted to a plastic channel located along the right side of the base. -
Page 88: Usb Hard Drive
What’s Inside? Installing Options USB Hard Drive This procedure describes how to remove and replace the USB Hard Drive used for Windows CE and most POSReady 2009 configurations. 1. Remove the LCD/Touchscreen Assembly as previously described. 2. Refer to Figure 3-17 below. Use a pair of needle nose pliers to pinch the stand-off and remove the device. -
Page 89: Ddr2 So-Dimm
What’s Inside? Installing Options DDR2 SO-DIMM This section specifies the approved memory devices and describes how to remove and replace them. The Workstation 5A System Board includes a pair of SO-DIMM sockets CN17 (DIMM0) and CN18 (DIMM1). Up to 2G of main memory is supported. For best results, memory should be composed of 2 x 1G SO-DIMMs as shown in Figure 3-20. -
Page 90: Installation And Removal
What’s Inside? Installing Options DIMM0 DIMM1 Total Operating System 512MB 512MB Windows Embedded CE 6.0, R3 POSReady 2009 POSReady 2009 Figure 3-20: SO-DIMM Configuration Installation and Removal To install a SO-DIMM, line up the notch in the SO-DIMM with the land in the socket and insert the device into the socket at a 30°... -
Page 91: Dma Enabled Cf Riser Card
What’s Inside? Installing Options DMA Enabled CF Riser Card The Figure below show the DMA Enabled CF card installed in the Workstation 5A. Direct Memory Access (DMA) is a method of moving large amounts of data from an IDE device such as the CF card to main memory with minimal CPU intervention. -
Page 92: Usb Wireless Module
What’s Inside? Installing Options USB Wireless Module The optional USB Wireless Module is based on a Sagrad WiFi module with USB Interface. The Sagrad Wireless Module mounts to a bracket located between the power supply and IO panel. This wireless kit can be used in both the Workstation 5 and Workstation 5A. Refer to MD0019-004 for installation instructions. -
Page 93: Workstation 5A Hard Disk Kit
What’s Inside? Installing Options Workstation 5A Hard Disk Kit Instructions for installing the kit can be found in MD0019-003. To configure the Workstation 5A with BIOS version Q1000g to boot from a SATA disk, see below. BIOS Versions Q2010g and Q2011d support SATA drive boot options. 1. -
Page 94: Lcd Customer Display - Integrated
What’s Inside? Installing Options LCD Customer Display - Integrated This procedure describes how to attach the Rear LCD Customer Display to the Workstation 5A. The display is provided as a complete assembly, ready to install. 1. Remove the AC power cable from the unit. 2. - Page 95 What’s Inside? Installing Options 4. Feed the interface cable through the cut-out then insert the LCD customer display bracket until the side clips snap into place as shown in Figure 3-26. 5. Connect the interface cable to the IO panel ‘Rear Display’ connector as shown in Figure 3-26.
-
Page 96: Pole Lcd Customer Display
What’s Inside? Installing Options LCD Customer Display - Pole Mount This procedure describes how to install and connect the Pole LCD Customer Display to the Workstation 5A. The pole version is provided as a kit consisting of the LCD Display Assembly /w 5 ft. cable, pole, base, extension cable, and nut. -
Page 97: Protégé Customer Display System - Integrated
What’s Inside? Installing Options Protégé Customer Display System - Integrated This procedure describes how to install the Protégé on the Workstation 5A. 1. Power Off the workstation, remove cables, then place the unit face down to access the IO panel. 2. -
Page 98: Protégé Customer Display System - Pole Mount
What’s Inside? Installing Options Protégé Customer Display System - Pole Mount The Pole Mount Protégé is shipped pre-assembled with a 19” interface cable, 6” Pole, base and nut. The Interface cable is designed for the custom powered USB interface on the IO panel called USB6. 1. - Page 99 What’s Inside? Installing Options Workstation 5 or 5A Adjustable Stand and Pole Display The kit consists of a the LCD customer display, 6” Pole, mounting bracket and hardware. 1. Determine the location of the mounting bracket on the base plate. It can be mounted to the left, right, or rear of the base plate.
-
Page 100: Reassembling The Ws5A
What’s Inside? Reassembling the WS5A Reassembling the WS5A The following procedure describes how to connect the top cover cables and reassemble the WS5A casework. Procedure: 1. Refer to Figure 3-31, below. If the finger print reader or other option is installed in the top cover, place it directly behind the base. - Page 101 What’s Inside? Reassembling the WS5A o A small number of units were produced using a LED backlight LCD from AUO. The Figure below shows how to connect the LED backlights and resistive touchscreen (Revision D). Figure 3-33: Installing LCD/Touchscreen Cables (LED-Resistive Touchscreen) o The Figure below shows how to connect the optional capacitive touchscreen interface and CCFL Inverter.
- Page 102 What’s Inside? Reassembling the WS5A 4. Install the LCD/Touchscreen Assembly in the base. The top of Figure 3-35, below shows the tabs at the rear of the assembly and the slots in the base. Insert the tabs into the base. 5.
- Page 103 What’s Inside? Reassembling the WS5A 7. Before installing the top cover, examine the gasket to ensure it is seated in the groove. Install the cover by attaching it to the hooks at the rear of the base then rotate the front of the cover downward to snap into place. Figure 3-36: Installing the Top Cover 8.
- Page 104 Chapter 4 Installing and Operating the Workstation 5A This chapter describes the environmental requirements for the workstation, describes the IO Panel, and covers the basic operational procedures. In this Chapter Care and Handling ..................4-2 The IO Panel ....................4-4 Installation ....................4-11 Operation ....................
-
Page 105: Care And Handling
Installing and Operating the Workstation 5A Care and Handling Care and Handling Tips for placing the unit in an environmentally sound location and instructions for cleaning the workstation cabinet are presented in this section. Equipment Placement The following pages present considerations for placement of the workstation and related peripheral equipment. -
Page 106: Electrostatic Discharge
Installing and Operating the Workstation 5A Care and Handling Electrostatic Discharge (ESD) The occurrence of electrostatic discharge (ESD) usually takes the form of a discharge from the operator’s hand to cash drawers, the workstation, the magnetic stripe card reader or other peripherals. ESD is more common in dry climates during the winter, and less common in moist climates. -
Page 107: The Io Panel
Installing and Operating the Workstation 5A The IO Panel The IO Panel Figure 4-1 displays the Workstation 5A IO Panel connectors. Figure 4-1: The Workstation 5A I/O Panel Workstation 5A Setup Guide - Fourth Edition... -
Page 108: Idn
Installing and Operating the Workstation 5A The IO Panel The Workstation 5A IO Panel is similar in appearance to the original Workstation 5, but adds a DB15 VGA connector, modular COM2 port, four standard USB Ports USB1 through USB4 and one powered USB port, USB6. Working from left to right in the illustration, each connector is detailed below. -
Page 109: 12V/+24V Select - Usb6
Installing and Operating the Workstation 5A The IO Panel +5V/+12V/+24V Select - USB 6 This is the powered USB connector. Like the other USB ports on the IO Panel, USB6 port data can be disabled through the BIOS or the Diagnostics Utility. The IO Panel connector supports three voltages, +5V, +12V and +24V along with USB6, a standard USB 2.0 compatible port. -
Page 110: Usb1 - Usb4
Installing and Operating the Workstation 5A The IO Panel USB1 - USB4 In addition to a powered USB port, the I/O Panel includes four standard USB 2.0 compatible ports, labeled USB1 through USB4. When the unit is shipped, all USB ports are enabled. For PCI compliance, external USB ports can be managed through the BIOS or the Workstation Diagnostics Utility. -
Page 111: Cf Card Cover Slot
Installing and Operating the Workstation 5A The IO Panel CF Card Cover Slot The Figure below shows CF Card Cover and factory installed (For Windows Embedded CE 6.0) CF Card Label that allows its size to be determined at a glance. Sizes of 256MB, 512MB and 4GB are currently in the field. -
Page 112: Removing A Cf Card
Installing and Operating the Workstation 5A The IO Panel Removing a CF Card • Always power off the workstation before removing the CF Card. Figure 4-4. Use your thumbnail to catch the lip on the card and remove it from the socket. Figure 4-4: Removing the CF Card Disabling the CF Card •... -
Page 113: Installing The Cf Card
Installing and Operating the Workstation 5A The IO Panel Installing the CF Card • Figure 4-5, displays the custom CF labels that can assist you in orienting the card when you install it. • As you face the IO Panel, install the card with the label showing and the arrow in the upper left corner. -
Page 114: Installation
Installing and Operating the Workstation 5A Installation Installation This section describes how to install the AC adapter, and discusses the recommended method of cabling the workstation. Cabling the Adjustable Stand This procedure describes how to attach the workstation to the Adjustable Stand. - Page 115 Installing and Operating the Workstation 5A Installation Figure 4-7: Preparing to attach the Workstation to the optional Stand 3. Mount the cabled workstation by placing the rubber feet into the receptacles on the adjustable stand. Figure 4-8, below. Figure 4-8: Placing the Workstation to the Adjustable Stand 4-12 Workstation 5A Setup Guide - Fourth Edition...
- Page 116 Installing and Operating the Workstation 5A Installation 4. When the workstation is fully seated on the stand, turn the knobs on the rear of the stand to the ‘Secured’ position as shown in Figure 4-9. Figure 4-9: Securing the Workstation to the Adjustable Stand 5.
-
Page 117: Operation
Installing and Operating the Workstation 5A Operation Operation This section presents operational procedures for the Workstation 5A including how to use the power button to transition the unit between the , and NOPOWER power states. Operator Features Figure 4-10 points out the operator features of the Workstation including the Power Button, White Operator LED, Magnetic Card Reader, and the Operator Touchscreen LCD. -
Page 118: Turning The Workstation From Nopower To On
Installing and Operating the Workstation 5A Operation Turning the Workstation from NOPOWER to ON When the workstation is NOPOWER, the Operator LCD will be blank and the Operator LED is off. See Chapter 1 for a description of the supported power management states. -
Page 119: Booting To Windows Embedded Ce 6.0 R3
Installing and Operating the Workstation 5A Operation Booting to Windows Embedded CE 6.0 R3 As the POST completes, the splash screen clears, and a series of custom pre-boot firmware utilities start executing. • If the Blue splash screen does not appear, or the operating system does not start, refer to Chapter 5 for troubleshooting information. -
Page 120: Booting To Posready 2009
Installing and Operating the Workstation 5A Operation Booting to POSReady 2009 After the BIOS Splash Screen clears, the Windows XP start up screen and progress bar appears. After the desktop appears, the API loads and the Operator LED stops blinking and turns solid white. Unlike Windows Embedded CE 6.0, on new workstation, the Client Application Loader (CAL) WIN32 is not pre-installed. -
Page 121: Using The Search Feature
Installing and Operating the Workstation 5A Operation • The CAL is started using the ‘Re-Configure CAL’ shortcut. Figure 4-13: Windows CE CAL Password Entry Screen Keypad The CAL requires a password to continue. Apply the following formula to the six-digit number that appears at the upper left box. Password = Digit 1 x Digit 2 + Digit 4 + Digit 6 3. -
Page 122: Configuring A Static Ip Address
Installing and Operating the Workstation 5A Operation • The [Next] button continues processing with the current selection. If the server name you are searching for does not appear, leave the current selection blank and press [Next] to go back to the configuration menu and run the Auto Discovery Configuration again. -
Page 123: Main Screen Saver
Installing and Operating the Workstation 5A Operation Using the Windows Embedded CE Screen Saver and Backlight Utility The Workstation 5A with Windows Embedded CE 6.0 R3 includes a custom enhanced Windows CE Screen Saver and Backlight Utility. By default, after five minutes of inactivity, the screen saver engages and displays a Workstation 5A logo. -
Page 124: Backlight Control
Installing and Operating the Workstation 5A Operation • To use a custom bit map, copy it to the \DOC\Scrnsaver folder. To load a custom bitmap, press the [Browse] button, select the file and press [OK]. Touch [Apply], then [OK]. To view your custom bit map, touch [Preview]. -
Page 125: Controlling The Io Panel Usb Ports (Windows Ce Or Posready)
Installing and Operating the Workstation 5A Operation Controlling the IO Panel USB Ports (Windows CE or POSReady 2009) The Workstation 5A System Board features the ability to individually control each IO Panel USB Port without having to restart the Workstation. •... - Page 126 Installing and Operating the Workstation 5A Operation The ‘USB Port Config’ tab contains five check-boxes, corresponding to a specific IO Panel connector label as shown in the Figure below. The physical location of each connector is shown in the ‘IO Back Panel’ illustration.
-
Page 127: Using The Magnetic Strip Card
Installing and Operating the Workstation 5A Operation Using the Magnetic Stripe Card The Workstation Magnetic Stripe Reader is mounted on the right side of the top cover as shown in Figure 4-17, below. It shows how to orient the mag stripe as the card is inserted into the reader. -
Page 128: Calibrating The Touchscreen
Installing and Operating the Workstation 5A Operation Calibrating The Touchscreen Calibrating the touchscreen is the process of aligning the touchscreen glass with the underlying video display. When to Calibrate the Touchscreen • When installing a new workstation. • Any time the cursor does not follow the movement of your finger, or does not reach the edges of the touchscreen. -
Page 129: Workstation 5A Recovery
Installing and Operating the Workstation 5A Workstation 5A Recovery Workstation 5A Recovery The Workstation 5A offers two methods of recovery, depending on the Operating System installed. For Windows Embedded CE 6.0 R3 clients, WINCE Factory Restore is provided. For details about the internal operation of Factory Restore, see Chapter 3. -
Page 130: Wince Factory Restore - Recovery Button At Splash Screen
Installing and Operating the Workstation 5A Workstation 5A Recovery • BIOS Version Q1000g: Login or Password not required or supported. As of this writing, this BIOS version is installed on the majority of Workstation 5As in the field. • BIOS Version Q1010m: A pre-defined log-in and password required. -
Page 131: Bios Q1010M (Login And Password Required)
Installing and Operating the Workstation 5A Workstation 5A Recovery BIOS Q1010m (Login and Password Required) This BIOS version, distributed through a CE Platform update to support the SparkLan Mini-PCI WiFi Card, requires a pre-assigned login and recovery password to continue. •... -
Page 132: Posready Recovery Cf - Recovery Button At Splash Screen
Installing and Operating the Workstation 5A Workstation 5A Recovery POSReady Recovery CF - Recovery Button at Splash Screen The Workstation 5A Recovery Button is accessed from the bottom of the unit as shown in Figure 4-19. 1. Power off the workstation. •... -
Page 133: Bios Q2010G/Q2011D (Password Required)
Installing and Operating the Workstation 5A Workstation 5A Recovery • When the image transfer is complete, the boot order is restored to the original configuration (optional SATA drive or USB Hard Drive), the workstation restarts. BIOS Q2010g/Q2011d (Password Required by Default) •... -
Page 134: Wince Factory Restore
Installing and Operating the Workstation 5A Workstation 5A Recovery ODM Tab (BIOS Q1000g) The Original Device Manufacturers (ODM) Special Configuration Menu tab provides an alternate method of starting WINCE Factory Restore or CF Recovery. A USB Keyboard is required. WINCE Factory Restore 1. -
Page 135: Pre-Boot Menu (Bios Q1010M Only)
Installing and Operating the Workstation 5A Workstation 5A Recovery • If the path and image name are not specified correctly, an error box appears, stating “Image file not found!” See page 4-36 for more information. • When the image transfer is complete, the boot order is restored to start from the original USB Hard Drive, and the workstation restarts. -
Page 136: Odm Tab (Bios Q2010G And Q2011D)
Installing and Operating the Workstation 5A Workstation 5A Recovery • When the login and password have been entered correctly, then: “Factory Recovery In Progress - Please Wait...” • Windows CE Factory Restore takes from three to five minutes to complete, then formats the CF Card. The Workstation 5A restarts and boots to Windows CE in the ‘out-of-box’... -
Page 137: Sata Win32 Factory Restore
Installing and Operating the Workstation 5A Workstation 5A Recovery • The workstation restarts, and boots from the Recovery CF. A series of prompts appear, including ‘Loading RAM Disk Image’, followed by a ‘Starting Windows Pre-boot Environment’. • After a brief time, a Command Window appears, followed by ‘Loading Recovery Script...’... -
Page 138: Wince Factory Restore From The On State
Installing and Operating the Workstation 5A Workstation 5A Recovery Revision F System Board - Additional Restore/Recovery Options The recently introduced Revision F System Board combined with BIOS Versions Q2010g or later offers more recovery options; In addition to the BIOS splash screen, the Recovery Button can be used when the workstation is in the S1 (On) or S5 (Soft-Off) Power Management States. -
Page 139: Starting The Posready Recovery Cf From The On State
Installing and Operating the Workstation 5A Workstation 5A Recovery Starting the POSReady Recovery CF from the ON State This procedure requires the Revision F System Board and BIOS Version Q2010g or later. The ON state is defined as the BIOS System Configuration Utility, OS Desktop, or Application. -
Page 140: Disabling The Recovery Password In Bios Q2010G/Q2011D
Installing and Operating the Workstation 5A Workstation 5A Recovery • The workstation restarts, and boots from the Recovery CF. A series of prompts appear, including ‘Loading RAM Disk Image’, followed by a ‘Starting Windows Pre-boot Environment’. • After a brief time, a Command Window appears, followed by ‘Loading Recovery Script...’... -
Page 141: Error: 'Recovery Detected 2 Usb Hard Drives Installed
Installing and Operating the Workstation 5A Workstation 5A Recovery • You can enter the path, filename, and extension directly from the error box, or modify the RECOV.DAT file with the correct path and Ghost image filename. The full path is required only if the image file is not located on the root of the CF Card. - Page 142 Chapter 5 WS5A Diagnostics This chapter includes basic troubleshooting procedures for the unit and describes how to use the Diagnostics Utilities. In this chapter Basic Troubleshooting ............... 5-2 Workstation 5A Diagnostics Utility........... 5-4 Wipe Compact Flash (WCF) Utility - WINCE Only....... 5-13 Workstation 5A Setup Guide - Fourth Edition...
-
Page 143: Basic Troubleshooting
WS5A Diagnostics Basic Troubleshooting Basic Troubleshooting This section provides a brief troubleshooting guide for common problems encountered when installing or operating the Workstation 5A. Unlike the Workstation 5, the Workstation 5A BIOS does not issue a POST error if SO-DIMM is not installed or defective. Problem Possible Cause Solution... - Page 144 WS5A Diagnostics Basic Troubleshooting Problem Possible Cause Solution The WS5A starts. Operator The USB Hard Drive is not, Replace the USB Hard LCD displays BIOS splash configured properly, corrupt, Drive. screen and boots to the or defective. Operating System, but or...
-
Page 145: Workstation 5A Diagnostics
WS5A Diagnostics Workstation 5A Diagnostics Utility Workstation 5A Diagnostics Utility Windows Embedded CE 6.0 based units use the WS5A Diagnostics Utility, and POS Ready 2009 uses an updated version of the PCWS Diagnostics Utility. The Diagnostics Utility provides a great deal of information about the platform hardware and software in addition to a set of comprehensive tests of the hardware and supported peripherals. - Page 146 WS5A Diagnostics Workstation 5A Diagnostics Utility Diagnostics Version This field displays the WS5A Diagnostics Utility Software version. Version 1.5 is part of the GR1.5 documented in this edition. Workstation Model This field is new to WS5A Diagnostics to distinguish it from the Workstation 5.
- Page 147 WS5A Diagnostics Workstation 5A Diagnostics Utility CF Size This field displays the total size of CF Card in bytes. Units running Windows Embedded CE 6.0 ship with a 256MB CF Card, but may switch to a 512MB CF Card. A 4GB CF Card option is also available. CPU Type This field is new to Version 1.6 of the Diagnostics Utility and reports the ®...
-
Page 148: Activity Counters, Dump Sys Info And Recovery Image Info
WS5A Diagnostics Workstation 5A Diagnostics Utility LPPower.DLL Version This driver helps manage the power button while the operating system is running. In addition, applications such as the CAL call on this driver to force a restart of the workstation during application downloads platform or upgrades. - Page 149 WS5A Diagnostics Workstation 5A Diagnostics Utility [View Counters] The Diagnostics Utility maintains a set of counters that track the number of times an MSR swipe occurs and the number of times each cash drawer is opened. Press the [View Counters] button to view the counters. All counters are stored in the registry and lost if the CF card is wiped or formatted.
-
Page 150: Testing Cash Drawers
WS5A Diagnostics Workstation 5A Diagnostics Utility Testing Cash Drawers To test cash drawers, press the Cash Drawer tab. The screen displays the prompt below. Figure 5-3: Testing Cash Drawers Accessing the Cash Drawer test requires a Password. Apply the following formula to the six-digit number that appears in the ‘Key’... -
Page 151: Controlling The Io Panel Usb Ports
WS5A Diagnostics Workstation 5A Diagnostics Utility Controlling the IO Panel USB Ports Disabling the WS5A IO Panel USB Ports requires Windows CE Software Platform GR1.2 or later. 1. Tap the ‘USB Port Config’ tab, and password dialog box appears. Figure 5-4: USB Port Configuration Password Entry Dialog Box 2. - Page 152 WS5A Diagnostics Workstation 5A Diagnostics Utility The ‘USB Port Config’ tab contains five check-boxes, corresponding to a specific IO Panel connector. This includes the standard Type A ports USB1 through USB4 and the optional powered USB port, USB6. The location of each connector is shown in the ‘IO Back Panel’...
-
Page 153: Running The Ws5A Diagnostics Utility (Posready 2009)
WS5A Diagnostics Workstation 5A Diagnostics Utility Running the WS5A Diagnostics Utility (POSReady 2009) From the Desktop, touch the ‘Diagnostics Utility’ icon twice. System Information Screen The Figure below displays a sample of the WIN32 version of the Diagnostics Utility, updated to Version 1.7. This version adds the processor type and speed to the System Info tab. -
Page 154: Wipe Compact Flash (Wcf) Utility - Wince Only
WS5A Diagnostics Wipe Compact Flash (WCF) Utility - WINCE Only Wipe Compact Flash (WCF) Utility - WINCE Only In addition to the Diagnostics Utility, the \DOC\Utilities folder also contains WCF.EXE, the Wipe Compact Flash utility. Originally developed for the WS4 production line, we feel it has use as a service tool. - Page 155 WS5A Diagnostics Wipe Compact Flash (WCF) Utility - WINCE Only 5-14 Workstation 5A Setup Guide - Fourth Edition...
- Page 156 Appendix A Equipment Dimensions Workstation 5A and Peripheral Dimensional Drawings. In this appendix Workstation 5A Low Profile................A-2 Workstation 5A Low Profile /w Protégé Customer Display......A-3 WS5A on Adjustable Stand with Rear LCD Customer Display ....A-4 Workstation 5A on Adjustable Stand /w 6” LCD Pole Display ....A-5 Workstation 5A on Adjustable Stand /w Protégé...
-
Page 157: Workstation 5A Low Profile
Equipment Dimensions Workstation 5A Low Profile Workstation 5A Low Profile Workstation 5A Setup Guide - Fourth Edition... -
Page 158: Workstation 5A Low Profile /W Protégé Customer Display
Equipment Dimensions Workstation 5A Low Profile /w Protégé Customer Display Workstation 5A Low Profile /w Protégé Customer Display Workstation 5A Setup Guide - Fourth Edition... -
Page 159: Ws5A On Adjustable Stand With Rear Lcd Customer Display
Equipment Dimensions WS5A on Adjustable Stand with Rear LCD Customer Display WS5A on Adjustable Stand with Rear LCD Customer Display Workstation 5A Setup Guide - Fourth Edition... -
Page 160: Workstation 5A On Adjustable Stand /W 6" Lcd Pole Display
Equipment Dimensions Workstation 5A on Adjustable Stand /w 6” LCD Pole Display Workstation 5A on Adjustable Stand /w 6” LCD Pole Display Workstation 5A Setup Guide - Fourth Edition... -
Page 161: Workstation 5A On Adjustable Stand /W Protégé Customer Display
Equipment Dimensions Workstation 5A on Adjustable Stand /w Protégé Customer Display Workstation 5A on Adjustable Stand /w Protégé Customer Display Workstation 5A Setup Guide - Fourth Edition... -
Page 162: Workstation 5A On Adjustable Stand And Protégé On 6" Pole
Equipment Dimensions Workstation 5A on Adjustable Stand and Protégé on 6” Pole Workstation 5A on Adjustable Stand and Protégé on 6” Pole Workstation 5A Setup Guide - Fourth Edition... -
Page 163: Lcd Pole Display
Equipment Dimensions LCD Pole Display LCD Pole Display Workstation 5A Setup Guide - Fourth Edition... -
Page 164: Protégé Customer Display On 6" Pole
Equipment Dimensions Protégé Customer Display on 6” Pole Protégé Customer Display on 6” Pole Workstation 5A Setup Guide - Fourth Edition... -
Page 165: Cash Drawers
Equipment Dimensions Cash Drawers Cash Drawers A-10 Workstation 5A Setup Guide - Fourth Edition... -
Page 166: Appendix B: Connector And Cable Diagrams
Appendix B Connector and Cable Diagrams On the pages that follow, you will find diagrams of the Workstation 5A I/O Panel connectors, system board connectors, and commonly used hook-up cables. A description of how each cable or connector is used is provided. In this appendix IO Panel Connectors .................. -
Page 167: Io Panel Connectors
Connector and Cable Diagrams IO Panel Connectors IO Panel Connectors The following connectors are located on the Workstation 5A IO Panel. IDN Port The IDN connector is a combination RS422/RS232 port associated with COM4. This port is functionally equivalent to the RS422-A and RS422-B ports on the WS4 or WS4 LX. - Page 168 Connector and Cable Diagrams IO Panel Connectors IDN Port - RS232 Peripheral Figure B-2 shows the IDN port configuration for a basic RS232 interface. Use cable P/N 300319-102 to convert this port to a DB9 connector. Figure B-2: IDN Port Configured for RS232 COM 2 and COM 5 The Workstation 5A includes two modular COM ports, COM2 and COM5.
-
Page 169: Rs232 Connector
Connector and Cable Diagrams IO Panel Connectors RS232 Connector A single DB9F RS232 connector assigned to COM1 is provided. The pin-out is shown below. Figure B-4: DB9 RS232 Connector Diagram Cash Drawer 1 and 2 Connectors Figure B-5: Cash Drawer Connector Diagram Workstation 5A Setup Guide - Fourth Edition... -
Page 170: Remote Customer Display Connector
Connector and Cable Diagrams IO Panel Connectors Remote Customer Display Connector This port supports either the 2x20 VFD customer display or the graphics based LCD customer display. Figure B-6: Customer Display Connector Diagram Workstation 5A Setup Guide - Fourth Edition... -
Page 171: System Board Connectors
Connector and Cable Diagrams System Board Connectors System Board Connectors This section details connectors located on the Workstation 5A system board. Magnetic Stripe Interface The internal magnetic card reader connector is CN13, located on the system board. The pin-outs for this connector are shown in Figure B-7, Figure B-7: Workstation 5A System Board MSR Connector Workstation 5A Setup Guide - Fourth Edition... -
Page 172: Hook-Up Cables
Connector and Cable Diagrams Hook-up Cables Hook-up Cables The following pages show wiring diagrams of various hook-up cables that may be used with the Workstation 5A. IDN Port RS232 Cables Figure B-8 displays a cable that includes the RS232 signals from the IDN Port to a DB9 male connector. -
Page 173: Lcd Customer Display Cables
Connector and Cable Diagrams Hook-up Cables COM5 RS232 Cables Figure B-10 displays a diagram of an extension cable that brings all RS232 signals from the COM5 or COM2 port to a DB9 connector. Figure B-10: COM5 and COM2 RS232 Extension Cable (DB9M) LCD Customer Display Cables The LCD based Customer Display includes two cable assemblies. -
Page 174: Remote Pole Lcd Customer Display
Connector and Cable Diagrams Hook-up Cables Remote Pole LCD Customer Display The cable shown in Figure B-12 is supplied with the Pole LCD Customer Display or Adjustable Stand Pole Display kit. It attaches between the 4-pin Mini-DIN connector on the Workstation 5A I/O panel, through the pole to mate with the cable from the LCD Customer Display Housing Cable shown in Figure B-11. -
Page 175: Ethernet
Connector and Cable Diagrams Hook-up Cables Ethernet Figure B-14 shows a diagram of a standard Cat 5 Ethernet hook-up cable. This cable would be connected from a workstation or server to the system hub. Figure B-14: EIA/TIA-568-A Cat 5A Ethernet Hook-up Cable Diagram B-10 Workstation 5A Setup Guide - Fourth Edition... - Page 176 Connector and Cable Diagrams Hook-up Cables Cross-over Pinning Figure B-15 shows a diagram of a typical Category 5 or later hook-up cable with the transmit/receive cross-over pinning implemented. This cable can be used when only two devices must be connected. For example, it can be used to connect two workstations, or a server connected to a single client.
-
Page 177: Cash Drawer Extension Cable
Connector and Cable Diagrams Hook-up Cables Cash Drawer Extension Cable B-12 Workstation 5A Setup Guide - Fourth Edition... -
Page 178: Appendix C: Fcc/Doc Statement
Appendix C FCC/DOC Statement Federal Communications Commission Radio Frequency Interference Statement This equipment generates, uses, and can radiate radio frequency energy, and if not installed and used in accordance with the instruction manual, may cause interference to radio communications. It has been tested and found to comply with the limits for a Class A computing device pursuant to Subpart J of Part 15 of FCC Rules, which are designed to provide reasonable protection against such interference when operated in a... - Page 179 Caution Changes or modifications not expressly approved by the party responsible for compliance could void the user's authority to operate the equipment. Shielded interface cables must be used in order to comply with the emission limits. Canadian Department of Communications Statement This digital apparatus does not exceed the Class A/Class B (whichever applies) limits for radio noise emissions from digital apparatus as set out in the Radio Interference Regulations of the Canadian Department of...
-
Page 180: Appendix D: Oracle Linux For Micros General Information
Appendix D Oracle Linux for MICROS General Information Accessing Diagnostics on Workstations Running Oracle Linux for MICROS 1. From Simphony OPS, press Ctrl+Alt+Fx (where x = 4, 5, or 6) to open another terminal window. 2. Log in as possupport user. - Page 181 Oracle Linux for MICROS General Information Oracle Linux for MICROS Commands NOTE Most deployments of Oracle Linux for MICROS do not require extensive Linux command line operations. Oracle Linux for MICROS commands are case sensitive. OPEN ANOTHER TERMINAL Press Ctrl+Alt+Fx (where x = 4, 5, or 6) to open another terminal window.$Ctrl Alt F4: Command line with login opens...
- Page 182 RESTART THE DEVICE reboot $reboot TURN OFF THE DEVICE shutdown $shutdown now Note for workstations running Oracle Linux for MICROS: You can press and hold the workstation power button to perform a graceful shutdown. Workstation 5A Setup Guide - Fourth Edition...
- Page 183 • When prompted with Y/N?, press Y, and then press Enter. • Recovery continues for approximately six minutes. Attention! System Recovery The Oracle MIROS Workstation 5A with Oracle Linux for MICROS supports system recovery only via the recovery button. BIOS-based system recovery available at a later date.
Need help?
Do you have a question about the MICROS Workstation 5A and is the answer not in the manual?
Questions and answers