FP PostBase Vision Reference Manual
Hide thumbs
Also See for PostBase Vision:
- Reference manual (206 pages) ,
- Installation and safety (40 pages) ,
- Important information (2 pages)
Table of Contents
Advertisement
Advertisement
Table of Contents

Subscribe to Our Youtube Channel
Related Manuals for FP PostBase Vision


Summary of Contents for FP PostBase Vision
- Page 1 Mailing system Reference Guide...
-
Page 2: About This Reference Guide
The display illustrations in this manual are examples that may differ from the actual display on your PostBase Vision. The explanation of the safety signs and product safety labels on the PostBase Vision mailing system can be found on page 173. -
Page 3: Table Of Contents
Contents About this Reference Guide _____________________________________2 1 For your safety ________________________________________________8 2 PostBase Vision mailing system – Short profile ____________________10 Things worth knowing about the PostBase Vision ______________10 PostBase Vision postage meter ____________________________13 PostBase Vision Feeder (optional) ___________________________15 3 Installation and commissioning _________________________________17... - Page 4 9 Special functions _____________________________________________ 83 Print Advert Only _______________________________________ 83 Print Numbers _________________________________________ 84 Feed Only / Count mail pieces (PostBase Vision with feeder) __________ 86 Seal Only (PostBase Vision with feeder) __________________________ 87 Stamping incoming mail (optional) ___________________________ 88...
- Page 5 Contents 10 Manage shortcuts _____________________________________________90 10.1 Saving a product as a shortcut ____________________________90 10.2 Renaming a shortcut ____________________________________91 10.3 Deleting a shortcut ______________________________________92 10.4 Resetting shortcuts to default _____________________________92 11 Managing printed text and QR codes _____________________________93 11.1 Entering a new text _____________________________________93 11.2 Generating a newQR code _______________________________94 11.3...
- Page 6 17.2 Possible causes and remedy ____________________________ 152 17.3 Remedying a letter jam _________________________________ 163 Inserting the letter guide at the ramp (PostBase Vision Feeder) ______ 165 17.4 Correcting the moistening felt position on the rocker (Sealer) _____ 166 17.5 17.6 Removing / inserting the security device ____________________ 167 17.7...
- Page 7 Contents Appendix Graphical symbols, safety signs and product safety labels on the PostBase Vision mailing system __________________________________173 Glossary ____________________________________________________175 Technical Data _______________________________________________177 Product variants and equipment __________________________________181 Supplies ____________________________________________________182 The Security Device (PSD) ______________________________________182 License _____________________________________________________183 Security Declaration for data usage _______________________________185...
-
Page 8: For Your Safety
• PostBase Vision is a digital mailing system with ink-jet print technology for metering mail. • The PostBase Vision mailing system is intended only for use in enclosed offices or office-like environments. Observe the operating conditions specified in the “Tech- nical Data”... - Page 9 FP, and therefore not vouch for such products. Full functionality of the PostBase Vision mailing system is only guaranteed at the time of delivery if original Francotyp-Postalia ink cartridges are used.
-
Page 10: Postbase Vision Mailing System - Short Profile
PostBase Vision mailing system. Metering To meter, simply place the letter on it – the PostBase Vision will seize the letter and meter it, after which it is exited to the right side ready for dispatch. - Page 11 Load postage Easily load postage for metering from the data center direct- ly into your mailing system. If desired, PostBase Vision will also ensure that you have sufficient credit and will prompt you to visit the postage shop if necessary.
- Page 12 250 letters (format: ISO DL, contents: 1 sheet ISO A4) is the practical alternative to the catch tray. The items ejected by PostBase Vision fall into the Drop Stacker and are carefully stacked there. The finished mail pieces can be easily removed from there in stacks –...
-
Page 13: Postbase Vision Postage Meter
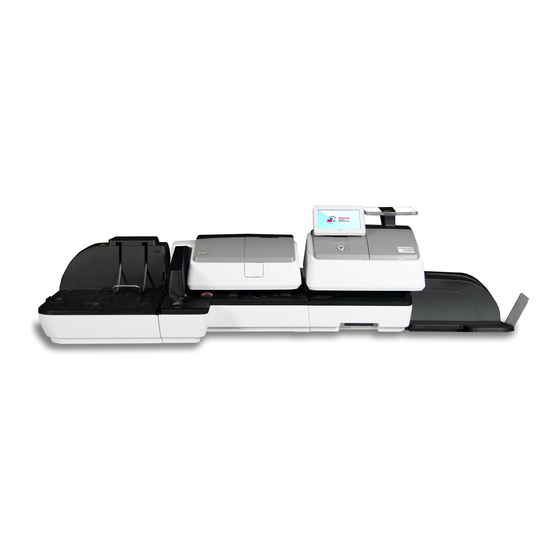
PostBase Vision mailing system – Short profile PostBase Vision postage meter Scale with weighing platform Stylus for touch screen operation (is inserted on the right of the Touch screen display housing) (motor adjustable) Access flap to print system Label compartment... - Page 14 PostBase Vision Postage meter – rear view USB port Ethernet / LAN port PC connection (not used) Emergency release for ink cartridge CAN BUS Type plate Power connection (Feeder connection) (on the bottom side) Slider for unlocking the security device...
-
Page 15: Postbase Vision Feeder (Optional)
PostBase Vision mailing system – Short profile PostBase Vision Feeder (optional) Flap with viewing pane, below Open flap: – Sealant tank Press key – LED status indicator Roller transport Safety sign Release key (move roller transport upward) Pendulum Sensor for... - Page 16 PostBase Vision Feeder – rear view Termination plug (plugged in the factory) Power connection Type plate Catches (lugs) for coupling CAN BUS (connection to Tray with the postage meter housing postage meter) with sponge...
-
Page 17: Installation And Commissioning
Installation and commissioning Installation and commissioning This chapter describes how to set up and commission the PostBase Vision mailing system in the following versions – with hand feed tray (basic model) – with manual sealer – with the “PostBase Vision Feeder”. - Page 18 PostBase Vision Scope of delivery PostBase Vision postage meter Standard configuration: (1 box) 1 PostBase Vision postage meter 2 Weighing platform 3 Ink cartridge (packaged) 4 Hand feed tray 5 Power cable 6 Ethernet cable 7 Catch tray and stop...
- Page 19 Installation and commissioning Optional, only if ordered separately PostBase Vision Feeder 1 Feeder (automatic feeder with sealer) (2 boxes) 2 Power cable 3 Bottle of SEALIT (sealing liquid) 4 Replacement sponge holder with sponge 5 Ramp 6 Pendulum Drop Stacker...
-
Page 20: Step 2: Assembling The Postbase Vision
PostBase Vision Step 2: Assembling the PostBase Vision Installation site The installation site for the PostBase Vision mailing system must meet the following requirements: – Firm, level, low vibration and horizontal base, which offers sufficient space for the mailing system in the ordered version. - Page 21 Installation and commissioning Assembling the catch tray • Attach the catch bracket to the catch tray: To do this, insert the catch bracket into the guides on the underside of the catch tray. • Place the catch tray to the right of the postage meter.
-
Page 22: Step 3: Assembling The Sealer (Optional)
PostBase Vision Step 3: Assembling the sealer (optional) The sealer is positioned to the left of the postage meter instead of the hand feed tray. The catches on the right side of the sealer and slots (on the left side of the bottom side... -
Page 23: Step 4: Connecting The Postbase Vision
(i.e. below 50 °F / 10 °C): Wait at least 2 hours after unpacking before connecting the postage meter. The PostBase Vision needs this time to adjust to the environmental conditions. Caution! Do not connect the PostBase Vision Feeder (the optional automatic feeder) until Step 7. - Page 24 Ethernet cable Power cable Connection If you want the PostBase Vision to use the Computer Network / Router wired connection to your local area network (LAN): • Connect the Ethernet cable to the postage meter and the local network / router.
-
Page 25: Step 5: Turning On The Postbase Vision
The LED lighting (button, weighing platform and letter entrance area) lights up and the system starts. The progress of the process can be followed on the display. PostBase Vision greets the user – acousti- cally accompanied – and finally starts the installation procedure. Step 6:... - Page 26 Default settings for an Ethernet connection are stored for contacting the FP infrastruc- ture. Establishing the connection should run seamlessly with these settings. To test the connection to the FP infrastruc- ture with this default setting: • Tap the C button.
- Page 27 Note: Do not touch the cover flap of the print system or otherwise obstruct the automatic opening. PostBase Vision moves the print system to the change position and then opens the cover flap. The flashing green LED indicates that no cartridge has been inserted yet.
- Page 28 PostBase Vision Caution! The ink causes severe eye irritation and can cause allergic skin reactions. Inges- tion of the ink can be harmful to health. • Observe the hazardous substance mark- ing on the cartridge packaging and the ink cartridge.
- Page 29 Installation and commissioning • Hold the ink cartridges so the contacts are facing to the rear of the PostBase Vision. The green arrow on the cartridge points to the green catch on the cartridge holder. • Insert the ink cartridge into the cartridge holder.
- Page 30 PostBase Vision displays the “Full cartridge” icon in the menu bar. Load postage / Contact data center In order to meter, the PostBase Vision must have corresponding postage credit. This re- quires contact with the data center. • Follow the instructions on the display.
-
Page 31: Step 7: Installing The Postbase Vision Feeder (Optional)
Turning off the postage meter • Press the ON/OFF button for three seconds. 3 seconds The PostBase Vision will complete any cur- rent actions, return the display to its home position, and then turn itself off. Setting up the feeder... - Page 32 PostBase Vision The components are mechanically coupled with catches (each on the right housing side) and slots (each on the underside at the left) and are secured in position relative to each other in this way. • Lift the feeder slightly, align it to the ramp and lower it carefully.
- Page 33 Installation and commissioning Connecting the feeder Caution! If the feeder was previously in a cold environment (i.e. below 10 °C / 50 °F): Wait at least 2 hours after unpacking before connecting the feeder. The feeder needs this time to adjust to the environmental conditions. Connection on the postage meter •...
- Page 34 When filling the tank, make sure that no live parts become wet. However, if this does occur: Immediately disconnect the power plug. Have the PostBase Vision mail- ing system checked by the Customer Sup- port before using it again.
- Page 35 Installation and commissioning • Unscrew sealant tank screw cover. • Fill the sealant tank with SEALIT sealing liquid. • Replace sealant tank screw cover and tighten. • Turn sealant tank upside down in a non- dangerous area (e.g. over a sink) to check if the cover is well sealed.
- Page 36 The LED lighting on the postage meter lights up and the system starts up. You can follow the running startup procedure in the display. Upon system startup, PostBase Vision acti- vates the connected system components - the LED status indicator (sealing function ON/OFF) on the feeder starts to light up.
-
Page 37: The Basics Of Operation
The basics of operation The basics of operation In this chapter, you will learn the basic functions of the PostBase Vision mailing sys- tem and how to use the touch screen. Turning the PostBase Vision on / off The PostBase Vision mailing system can remain connected to the network at all times and is therefore always quickly ready for operation. -
Page 38: Standby (Sleep Mode)
Disconnecting the PostBase Vision from mains Caution! Make sure to always turn the PostBase Vision off with the ON/OFF button before disconnecting the PostBase Vision from mains. Never pull the power plug or separate the power supply in any other way before the printing system has reached its sealed position. -
Page 39: Screen Elements And Operation Philosophy
4.3.1 The touch screen The touch screen of the PostBase Vision mailing system reacts to pressure (= resistive display). With this type of touch screen, it does not matter whether you use your finger, fingernail, pen or gloves. - Page 40 PostBase Vision Operating scrollbars • Press the slider and move it in the desired direction. You can also tap the arrows to scroll up or down the list. Slider Scrollbar Scrolling through lists In lists and menus, dots symbolize the num- ber of available screens (pages).
- Page 41 The basics of operation Buttons Buttons stand out from the background due to their color. Depending on their function, they can assume different states: Button is active (it can be tapped). Button is active (it can be tapped). This color is used for buttons with special functions, such as shortcuts.
-
Page 42: The Home Screen
Operation philosophy To select a function / setting, tap the button. Depending on the function selected, PostBase Vision then opens a selection list, a setting menu or a menu with additional selection options. You can also simply “swipe” the selection list... -
Page 43: The Menu Bar
The basics of operation 4.3.3 The menu bar Menu bar (example) The highlighted area on the left of the window is the menu bar. Displays: In the menu bar, you can see important Volume status information at a glance, such as the Network connection volume of the sound signals, the type of (LAN / Wi-Fi) -
Page 44: Selection Lists
PostBase Vision 4.3.5 Selection lists Selection lists (e.g. for adverts, text mes- sages) offer all available settings. The cur- rent setting is highlighted in color (light blue with a dark blue bar). Use the arrows to scroll through the list. -
Page 45: On-Screen Keyboard
Button assigned according to function (not available here) 4.3.7 On-screen keyboard PostBase Vision opens the on-screen key- Text field (here: 5 lines for text as an advertising imprint) board to enter text, numbers and special characters, e.g. for an individual text as... -
Page 46: Pop-Up Windows
4.3.9 Procedures / wizards PostBase Vision guides you step-by-step through all the necessary entries for compre- hensive settings, e.g. when configuring the network connection. Different window types are used depending on requirements. -
Page 47: Setting The Display Angle
• Press and hold the desired function (raise / lower) until the display is in the desired position. When turning off the unit, PostBase Vision lowers the display to its home position. When the unit is turned on, the display returns to the set position. -
Page 48: Setting The Volume
PostBase Vision Setting the volume You can see the current volume setting for the sound signals in the menu bar at the top left. To adjust the volume, press the sensitive areas to the left and right of the speaker icon on the display frame. -
Page 49: Inserting Labels
Francotyp-Postalia. The manufacturer FP has established reliability, safety and applicability. The manufacturer cannot assess the reliability, safety and applicability for products not approved by FP, and therefore not vouch for such products. We can ensure correct label processing only when you comply with this. -
Page 50: Setting Up The Catch Tray
PostBase Vision mailing system, is placed instead of the catch tray to the right of the postage meter. Retrofitting the PostBase Vision with the Drop Stacker is also very easy. Especially for larger quantities of outgoing mail, the Drop Stacker with a capacity of up to 250 letters (ISO DL containing one sheet ISO A4) is a practical alternative to the letter catch tray. -
Page 51: Setting The Meter Imprint
Setting the meter imprint Setting the meter imprint Advert imprint Advert imprint Date Postage Product details Serial number of the postage meter Data matrix symbol This chapter describes the required settings for metering and additional possible advertising imprints: – Postage / USPS product (see chapter 5.1) –... -
Page 52: Postage / Usps Product
PostBase Vision Postage / USPS product PostBase Vision sets the postage, i.e. the price for the postal product using the chosen mailing data (destination, type, mail piece dimensions, and additional services if applicable), in conjunction with the displayed weight. You simply select the mailing data step by step in the product menu. The built-in scale is available for weighing the items. -
Page 53: Setting Mailing Data
5.1.2 Setting mailing data In the Home screen: • Tap postage. PostBase Vision opens the product menu. Selecting mailing data The PostBase Vision opens the product menu and requests all necessary information on the mail piece in turn. • Tap each of the desired settings. -
Page 54: Setting The Weight
This prevents the weighing results from being falsified and insufficient metering. • Place the mail piece on the weighing platform. PostBase Vision emits a tone when the scale has determined the weight of the mail piece. -
Page 55: 5.1.3.2 Entering The Weight Manually
5.1.3.2 Entering the weight manually PostBase Vision allows you to manually enter the weight for certain products. If the weight can be entered manually, the “Manual weight input” function is available in the product menu. You need this function, for example, for mail pieces whose weight exceeds the weighing range of the built-in scale. -
Page 56: Differential Weighing (Optional)
You simply place a stack of letters on the scale and remove one letter at a time. PostBase Vision measures the change in weight and determines the appropri- ate postage. You can meter each letter immediately or weigh all letters from the stack and sort them by postage. - Page 57 • PostBase Vision determines the weight change and calculates the postage. When you clear the weighing platform, PostBase Vision asks if you want to use the last weight determined. • Confirm with Y to determine the postage for the last letter of the stack.
-
Page 58: Date
You can forward the date for the meter imprint to meter mail pieces for shipment in the next few days today. PostBase Vision does not allow unauthorized entries, e.g. a meter date that is too far ahead or backdating. -
Page 59: Advertising Imprints
Setting the meter imprint Advertising imprints When metering, PostBase Vision can print up to two advertising imprints of your choice on the mail pieces. Advertising imprints may include: – Graphical adverts – Text – Information encrypted as QR code. You can print the advertisement in any order. -
Page 60: Imprint Offset
PostBase Vision Imprint offset PostBase Vision prints the meter imprint at a fixed offset from the right mail piece edge. You can increase this offset and thus shift the meter imprint to the left by adjusting the imprint offset. If an imprint offset is set, it appears together with an icon in the Home screen. -
Page 61: Test Print - Testing The Meter Imprint Settings
PRODUCT additional services list. • Choose T EST PRINT PRODUCT PostBase Vision prompts you for a test print. Print test print on a label • Tap 1 L to print the test print on a ABEL label. - Page 62 – The top edge is flush with the contact area. • Push the envelope in the direction of the arrow and release. PostBase Vision generates the test print and then draws in the envelope and prints. Contact area You can read more about the topic “Feeding...
-
Page 63: Metering
Metering Metering In this chapter, you will learn how to log on to PostBase Vision as a user, set up a cost account to record postage, place letters on the hand feed tray, work with the feeder and the sealer and meter labels to be attached to mail pieces. Also, the counter functions available for metering are described. -
Page 64: Setting Up / Changing Cost Accounts
• Tap the cost account button on the Home screen. Set cost account PostBase Vision opens a selection list with all available cost accounts. The current cost account is highlighted in color (light blue with a dark blue bar). In this example it is “Cost Account 1”. -
Page 65: Feeding Letters And Metering
Feeding letters and metering 6.3.1 Hand feed tray On a PostBase Vision with hand feed tray, you feed mail pieces individually. Please heed the mail piece specifications on page 179. If the Home screen shows a postage, you can feed mail pieces for metering. -
Page 66: Sealer (Optional)
If the Home screen shows a postage, you can feed mail pieces for metering. Please heed the mail piece specifications on page 190. PostBase Vision is ready for metering Moistening the envelope flap • Hold the letter with the open flap facing downward. - Page 67 Metering • Guide the letter through the sealer as shown in the image while turning slightly. This guides the glue on the flap edge below the moistening felt and moistens it. • Align the upper edge of the letter on the contact area in the direction of the arrow and release.
- Page 68 PostBase Vision Large-sized mail pieces Preferably use both hands to feed large- sized mail pieces while moistening them. Once the postage meter has detected the let- ter, you should only lightly support the letter.
-
Page 69: Feeder (Optional)
Metering Feeder (optional) 6.3.3 Equipped with the feeder, PostBase Vision can feed letters and postcards from a stack and process them. Please heed the mail piece specifications and the envelope specifications for automatic sealing on pages 179 to 180. 6.3.3.1 Preparing letter stacks and setting up feeder Caution! Potential danger due to automatic start-up. -
Page 70: 6.3.3.2 Switch The Sealing Function On / Off
PostBase Vision Fold the letter guide down If the letter guide is in the way when feeding large-sized mail pieces, you can fold the letter guide down. • Carefully pull out the letter guide up to the stop. • Fold the letter guide down as shown in the illustration and place it onto the tabletop. -
Page 71: 6.3.3.3 Setting The Letter Thickness
The selected setting is highlighted in color (light blue with a dark blue bar). • Apply the displayed setting by tapping OK. If “thick letters” is set, it takes PostBase Vision significantly longer to process the letters. Remember to reset the setting back to for an optimal processing speed. -
Page 72: 6.3.3.4 Feeding Letters In Stack And Metering
Once the feeder has been set up (see chapter 6.3.3.1 to 6.3.3.3) and the desired meter imprint is set (see chapter 5), you can start processing. PostBase Vision also offers the option to define a unit quantity before metering. Read more about it in chap- ter “Working with the batch counter”... - Page 73 After an interruption or if letters are already in the feeder: • In the Home screen, tap F EEDER PostBase Vision opens the pop-up “Automatic Feeding”. • Start/continue processing with S TART Process single letters with the feeder in the same way.
-
Page 74: 6.3.3.5 Working With The Batch Counter
PostBase Vision 6.3.3.5 Working with the batch counter With the batch counter, PostBase Vision offers the option to define a unit quantity of the mail pieces you want to meter. This function helps you to prepare the finished mail pieces for mailing counted in a stack. - Page 75 Metering The pop-up shows the set amount. • Place the prepared stack of letters. For more details on setting up the feeder and to place stacks of letters, refer to pages 69 to 73. Processing starts automatically. The letters are taken from the stack individually, moist- ened and sealed if necessary, metered and stacked in the catch tray ready for mailing.
-
Page 76: Metering Labels
PostBase Vision Metering labels Thanks to the integrated label feeder, PostBase Vision can automatically feed and print self-adhesive metering labels to be attached to mail pieces. A detailed descrip- tion on how to insert labels is provided in chapter 4.7. - Page 77 Metering PostBase Vision prints the set number of meter labels. The counter shows the number of labels left to print. The pop-up shows the number of labels left to print. Interrupt label printing at any time with the button. Number of labels left to print...
-
Page 78: Correcting Faulty Meter Imprints
Setting the CORRECTION imprint In the Home screen: • Tap postage. PostBase Vision opens the product menu. • Tap the S option PECIALS (is shown at the end of the list). -
Page 79: Redate
Setting the REDATE imprint In the Home screen: • Tap postage. PostBase Vision opens the product menu. • Tap the S option PECIALS (is shown at the end of the list). -
Page 80: Displaying And Resetting The Item Counter
Apart from the counter for meter imprints in the register and the local account coun- ters, the PostBase Vision features an item counter for meter imprints you can use as you like. The item counter counts all meter imprints. Test prints are not registered. -
Page 81: Displaying And Printing Registers
Displaying and printing registers Displaying and printing registers The PostBase Vision mailing system saves important parameters and information on used postage in registers. You can view and print the register states. • Open the M • Choose R EGISTERS The P... -
Page 82: Download Postage
Billing occurs according to your contract with the USPS. If users are enabled, postage download might not be available. In that case, please contact the system administrator. Loading postage • Make sure PostBase Vision has a network connection. • Open the M • Choose D... -
Page 83: Special Functions
Special functions Print Advert Only With the special function “Advert Only” you can print advertising imprints (graphical adverts, text messages and QR codes) that are stored in your PostBase Vision Mail- ing System. • Open the M • Choose S... -
Page 84: Print Numbers
Set imprint offset • Tap the S button. TART VALUE PostBase Vision opens the menu for setting Start value the start value and direction of counting. • Enter the desired start value. You can choose any number between 1 and 999999. - Page 85 Special functions Printing numbers When the “Print Numbers” screen shows the desired settings you can start printing. Pro- ceed exactly as when metering: • Position an envelope / a postcard. • Start label printing. • Use the feeder. For detailed information on feeding letters, label printing and using the feeder, please read chapter 6.
-
Page 86: Feed Only / Count Mail Pieces (Postbase Vision With Feeder)
In this way, you can count mail pieces and prepare your bulk mail for dispatch in counted stacks. You can also test letter transport with this feature. This special function is only available on PostBase Vision systems with feeder. -
Page 87: Seal Only (Postbase Vision With Feeder)
With the special function “Seal Only”, you can seal and count letters without printing (up to 0.3" / 7 mm). This special function is only available on PostBase Vision sys- tems with feeder. Please heed the mail piece specifications on page 180. -
Page 88: Stamping Incoming Mail (Optional)
PostBase Vision Stamping incoming mail (optional) With the optional feature “Date of Mail Entry”, PostBase Vision can print a stamp with date and time onto you incoming mail. An advertising imprint is also possible. • Open the M • Choose S... - Page 89 6. The “Print Date of Mail Entry” special function has its own counter. PostBase Vision shows the number of prints on the upper right side of the display. When quitting the “Print Date of Mail Entry”...
-
Page 90: Manage Shortcuts
Saving a product as a shortcut You can always save the product set in the Home screen as a shortcut (mailing data and weight). The product stored on the first shortcut is used by PostBase Vision as the default setting after it is turned on. -
Page 91: Renaming A Shortcut
10.2 Renaming a shortcut When a shortcut is saved, PostBase Vision automatically issues a name. This name is generated from the selected mailing data and may in some cases not fit on the but- ton. You can easily change the names of the shortcuts. -
Page 92: Deleting A Shortcut
Deleting a shortcut Shortcuts that you no longer need can be overwritten with a new assignment or deleted. You cannot delete the first shortcut. PostBase Vision uses it as the default setting after it is turned on. • Open the M •... -
Page 93: Managing Printed Text And Qr Codes
Managing printed text and QR codes Managing printed text and QR codes PostBase Vision can print freely editable text messages and optionally also QR codes, including an accompanying message. Depending on the version, you have up to 12 storage spaces available, which can be assigned to a text message or QR code of your choice. -
Page 94: Generating A Newqr Code
QR code in clear text. Note: Five short lines are available for this accompanying text. Once the line length has been fully used, PostBase Vision will not allow you to enter anything further in this line. You insert line breaks manually. -
Page 95: Changing A Text /Qr Code
• Choose P /QR-C RINTED • Choose C HANGE PostBase Vision displays all of the saved texts / QR codes. • Tap on the text / QR code that you want to change. PostBase Vision opens the on-screen key- board. -
Page 96: Deleting A Text /Qr Code
• Choose P /QR-C RINTED • Choose D ELETE PostBase Vision displays all of the saved texts / QR codes. • Tap on the text / QR code that you want to delete. PostBase Vision deletes the text and informs you that it has been deleted in a pop-up above it. -
Page 97: Local Cost Account Administration
Local cost account administration Local cost account administration The PostBase Vision mailing system offers you the option to record and analyze mail- ings separately by cost account. To do so, cost accounts must be set up in the dis- coverFP customer portal. After synchronizing with the customer portal (refer to chapter 13 for more information), the cost account function will have been added to your mailing system. -
Page 98: Display / Print Usage Data For A Defined Cost Account
The pop-up for label printing appears. • Tap the S button to print the cost TART account report on a label. • Insert an empty envelope / postcard onto the hand feed tray or the feeder. PostBase Vision prints the report for this cost account. -
Page 99: Deleting Usage Data
OCAL CCOUNTS • Choose C LEAR OUNTER PostBase Vision opens the selection list with all cost accounts. The current cost account is highlighted in color. • Tap on the cost account for which you want usage data to be deleted. -
Page 100: Matching Cost Accounts To Advertising Imprints
OCAL CCOUNTS • Choose A DVERT ATCHING PostBase Vision opens the selection list with all cost accounts. The current cost account is highlighted in color. • Tap on the cost account that you want to match advertising imprints to. Display field with cost account... - Page 101 Local cost account administration The possible settings and their meaning: When setting up the cost accounts, the O DEFAULT SELECTED advertising imprints in the home screen remain unchanged. When setting the cost account, the advertis- ing imprints are switched off. No advert is printed here.
-
Page 102: Synchronizing
Synchronizing Due to postal requirements, the data must be synchronized with Francotyp-Postalia at regular intervals to operate the PostBase Vision mailing system. PostBase Vision automatically synchronizes all important data or reports when the data must be syn- chronized. You only have to make sure that the set up connection (LAN or Wi-Fi) is always available. - Page 103 5 minutes. Send the postal data prescribed to the PLOAD metered postal products. Note: PostBase Vision automatically transmits this data daily at midnight (if PostBase Vision is not turned off) or immediately after it is turned on.
-
Page 104: Advanced Settings & System Information
• Choose C ONTACT NFORMATION You will see a list with phone numbers and website addresses from where you can receive advice and support for anything relat- ing to the PostBase Vision mailing system and where you can order accessories and consumables. -
Page 105: Access Control / Administrator Pin
14.3 Access control / Administrator PIN You can protect the PostBase Vision mailing system from unauthorized use with a PIN, the administrator PIN. If access control is enabled, PostBase Vision requests a PIN to be entered when the system is turned on or wakes up from stand-by mode. -
Page 106: Low Postage Warning
14.4 Low postage warning PostBase Vision can provide support in monitoring your available postage. You only need to define the threshold at which PostBase Vision should notify you when your postage is running low. Defining / adjusting the threshold • Open the M •... -
Page 107: Sound Signals
Sound signals There are several different tones and sounds that accompany the actions on your PostBase Vision mailing system. You can limit the scope of the sound signals to certain events (messages, errors) or turn them off entirely. • Open the M •... -
Page 108: Color Of The Menu Bar
PostBase Vision 14.6 Color of the menu bar You can change the background color of the menu bar. PostBase Vision offers you 12 colors to choose from. • Open the M • Choose C OLOR PostBase Vision opens a setting menu with all available colors. -
Page 109: Standby Time
14.8 Standby time The PostBase Vision mailing system will go to standby automatically if it is not used for some time. The standby time is the time between your last operation and the time PostBase Vision automatically goes to standby. -
Page 110: Auto Off
If you generally meter your mail for the next day (or the next posting date) after a cer- tain time of day, the “Auto Date Advance” function can be very useful. PostBase Vision will then remind you every day at the defined time to set the meter- ing date. - Page 111 – possible settings and their meaning: DVANCE Current Setting PostBase Vision opens a window to set the metering date every day at the set auto advance time. The following options are available to you: – Apply the suggested date –...
- Page 112 On Fridays, PostBase Vision automatically offers the next Monday as a metering date. Only skip Sundays. UNDAYS Do net check whether the suggested metering date falls on a weekend. PostBase Vision always suggests the next calendar day as metering date.
-
Page 113: Switching Weighing Mode (Optional)
“Differential Weighing” option. • Open the M • Choose D IFFERENTIAL EIGHING PostBase Vision opens the settings menu for weighing mode. The current setting is high- lighted in color (light blue with a dark blue bar). • Tap the desired weighing mode:... -
Page 114: Ethernet / Wi-Fi Connection (Connectivity Settings)
Ethernet / Wi-Fi connection (Connectivity settings) To exchange data with FP servers (postage download, customer portal, updating rates and software, etc.) PostBase Vision must be able to connect to the Internet. On commissioning, setting up the network connection is part of the installation rou- tine. - Page 115 / LAN LAN (Local Area Network) connection. THERNET (default setting) Use this setting if you want PostBase Vision to use the wired connection to your local network / router. Use this setting if you want PostBase Vision to connect to the local network / router wirelessly.
- Page 116 ISABLED port DHCP. During manual configuration, you will need to enter the following parameters: – Static IP address for your PostBase Vision – Subnet mask – Default gateway – IP address of the DNS server. Please contact you network administrator for details.
- Page 117 In case your network only supports explicitly authorized devices, your network administra- tor will require the MAC address of your PostBase Vision. You can find the corre- sponding MAC addresses in the “Manage Connection” menu. Reference Information for Network...
-
Page 118: 14.13.3 Deleting The Wi-Fi Connection
14.14 Change ZIP / Re-authorization You must inform FP Mailing Solutions of the new location of your PostBase Vision if you wish to operate the PostBase Vision at another location (e.g. after a relocation). • Make sure PostBase Vision has a network connection. -
Page 119: Ordering Consumables
• Open the M • Choose O RDERING • Choose N RDER PostBase Vision establishes a connection to Order quantity Item name the online ordering system and then shows Price (net) the available items and any discounts. -
Page 120: Displaying Order Status
Note: If not confirmed, the ordering process will be canceled automatically. A message will inform you of this. After the order is complete, PostBase Vision will displays the order number. You can print a summary of the information relating to your order. -
Page 121: Maintenance And Care
Warning! Electrical hazards due to short circuits. Be extremely careful when handling liquids. Take special care that no foreign objects penetrate the sys- tem’s interior. If this should happen, have the mailing system checked by FP Customer Service before using it again. -
Page 122: Cleaning The Sensors
Francotyp-Postalia. Postage meter Feeder (optional) Sensor for letter detection Sensors in the housing top cover Sensors in the letter receiving wall How to clean the sensors • Turn PostBase Vision off. 3 seconds... - Page 123 • Slide the drawer in to the stop. Make sure that the drawer latches correctly on both sides. When the drawer is correctly inserted, the LEDs in the letter entrance area will go out. PostBase Vision is ready to operate again.
- Page 124 PostBase Vision On the feeder Sensor for The sensor for the letter detection is freely letter detection accessible. • Remove the dust from the sensor with a few puffs of the compressed air spray. • Press the release key. The roller transport moves upwards.
-
Page 125: Cleaning The Print System
Maintenance and care 16.3 Cleaning the print system 16.3.1 Starting automatic print system cleaning You should start automatic print system cleaning only if the quality of the imprint is not good enough (e.g. blank spots in the imprint after longer periods out of use). Cleaning •... -
Page 126: Cleaning Ink Cartridge By Hand
PostBase Vision 16.3.2 Cleaning ink cartridge by hand Caution! Inexpert cleaning can damage the ink cartridge and render it use- less. Heed the following hints to avoid damage to the print system: • In case of print quality issues, always run the automatic cleaning functions first. - Page 127 Maintenance and care • Hold the cartridge as shown in the picture. The nozzles must point downwards! • Slowly and carefully wipe the print head with the cloth in the direction of the arrow. Repeat this action several times. The water will blend with ink residues and clean the nozzles.
-
Page 128: Test Imprint - Check Print Quality
PostBase Vision feeds the envelope and prints the Test Imprint consisting of a series of different plane and line patterns. Print Test Imprint on a label • Tap the L button. ABEL PostBase Vision prints the Test Imprint on a label. -
Page 129: Print System: Show Ink Level
Maintenance and care Check print quality Make sure PostBase Vision always produces clean and legible meter imprints. • Check the print quality. There must not be any blurred or blank spots. This illustration shows a perfect imprint. When there are blurred or blank spots in the imprint: •... -
Page 130: Changing The Ink Cartridge
PostBase Vision 16.6 Changing the ink cartridge PostBase Vision monitors the filling level of the ink cartridge and issues a message when it must be replaced. We recommend that you always have a new ink cartridge in stock. Warning! The ink causes severe eye irritation and may cause an allergic skin reaction. - Page 131 Maintenance and care The exchange procedure starts. PostBase Vision moves the ink cartridge to the exchange position and opens the flap. • Follow the instructions on the display. The screen sequence demonstrates the procedure of changing the cartridge. The required steps are described in detail below.
- Page 132 PostBase Vision Caution! Insert the ink cartridge only after it has adapted to the ambient temperature of the PostBase Vision (e.g. after storage in the basement or after transport in a cold vehicle). Else, no correct calibration can be per- formed.
- Page 133 When the cartridge is inserted correctly, the green LED glows continuously. • Close the flap of the print system: Push down the flap in the area of the PostBase Vision logo until the latch catches. Preparing for operation After changing the ink cartridge, PostBase Vision internally prepares the car- tridge for operation.
-
Page 134: Replacing The Transport Brush
PostBase Vision 16.7 Replacing the transport brush When imprints on thin letters or labels appear compressed, the transport brush needs to be replaced. Caution! As long as the print system is in printing position, the drawer is locked. Do not pull out the drawer by force. Wait until the print system moves into idle position, then remove the drawer. - Page 135 • Slide the drawer in to the stop. Make sure that the drawer latches correctly on both sides. When the drawer is correctly inserted, the LEDs in the letter entrance area will go out. PostBase Vision is ready to operate again.
-
Page 136: Calibrating The Touch Screen
• Touch the red circle with the stylus. • Follow the further instructions on the display: Touch each of the displayed calibration circles with the stylus. PostBase Vision will continue its start routine. The touch screen is now calibrated. -
Page 137: Postbase Vision Feeder (Optional)
Be extremely careful when handling liquids. If you fill the sealant tank, make sure not to wetten any parts connected to the mains. If this should happen, immediately pull the power plugs. Have the PostBase Vision mailing system checked by the Customer Support before using it again. - Page 138 PostBase Vision • Remove sealant tank out of housing. • Unscrew sealant tank cover. • Fully empty sealant tank and, if necessary, clean it. • Fill the sealant tank with SEALIT sealing liquid.
- Page 139 Maintenance and care • Place sealant tank screw cover and tighten. • Turn sealant tank upside down in a non- dangerous area (e.g. over a sink) to check if the cover is well sealed. • Insert sealant tank into the housing with the cover downward.
-
Page 140: Adjust Moistening Level
Be extremely careful when handling the sealant tank and tray to prevent spilling any liquids. Make sure not to wetten any parts connected to the mains. If this should happen, immediately pull the power plugs. Have the PostBase Vision mailing system checked by the Customer Support before using it again. -
Page 141: Cleaning / Changing The Moistening Sponge
Be extremely careful when handling the sealant tank and tray to prevent spilling any liquids. Make sure not to wetten any parts connected to the mains. If this should happen, immediately pull the power plugs. Have the PostBase Vision mailing system checked by the Customer Support before using it again. - Page 142 PostBase Vision • Open the flap by pressing the release key. • Remove sealant tank out of the housing and put it at a safe place. At the rear of feeder: • Carefully pull the sealant tray out to the back.
- Page 143 Maintenance and care • Lift the basket with the sponge out of the tray. • Clean sponge or replace with a new one. • Put a new sponge (with basket / sponge holder) into sealing liquid before inserting it, and let it soak completely. The flaps are Sponge Basket / sponge holder thus correctly moistened from the first letter...
- Page 144 PostBase Vision • If necessary: Fill sealing liquid into sealant tank. Check for leakages. (For further information see chapter 16.9.1, page 137.) • Insert sealant tank into the housing with the cover downward. • Close the flap.
-
Page 145: Cleaning / Changing The Moistening Brush
Maintenance and care 16.9.4 Cleaning / changing the moistening brush • Switch the mailing system off. 3 seconds • Open the roller transport by pressing on the release key. The roller transport moves upward. Now you have access to the moistening brush beneath the roller support. - Page 146 PostBase Vision • Clean the brush or replace it with a new one. • Moisten a new brush before inserting it. • Hold the brush as shown in the figure: – The bristles must face down. – One leg of the leg spring is located in the brush groove and the other leg in the sword slot.
-
Page 147: Sealer (Optional)
Maintenance and care 16.10 Sealer (optional) 16.10.1 Cleaning The sealer should be cleaned once a month to remove glue residues. • Separate the sealer from the postage meter: Slightly lift the postage meter on the left side and pull the sealer away to the left. Rocker with moistening felt •... -
Page 148: 16.10.2 Checking The Liquid Level And Filling With Sealing Liquid
PostBase Vision 16.10.2 Checking the liquid level and filling with sealing liquid • Check the liquid level in the sealer regularly. Make sure the sealer is always filled at least to the “min” mark to prevent the felts from drying up. When felts with glue residues dry... -
Page 149: 16.10.3 Replacing Felts
Maintenance and care 16.10.3 Replacing felts • Separate the sealer from the postage meter: Slightly lift the postage meter on the left side and pull the sealer away to the left. • Empty the liquid reservoir. Removing the rocker with moistening felt Rocker with moistening felt •... - Page 150 PostBase Vision Installing the absorption felt • Install a new absorption felt as shown in Positioning contour the illustration. The felt should be halfway in the sealer. • Bend the upper part of the felt to the right Absorption felt...
- Page 151 Maintenance and care Installing the rocker with moistening felt Leg spring The rocker features two clips that engage on the two bolts at the sealer. • Fit the new rocker such that one leg of the leg spring is located in the rocker groove and the other leg in the sealer slot.
-
Page 152: Tips For Troubleshooting
An icon indicates the error group (e.g. “General error“). You can correct many minor errors and issues occurring during PostBase Vision operation yourself. Please contact the Customer Service if you cannot remedy an error by means of the display information and the hints given in this Reference Guide. - Page 153 Tips for troubleshooting Issue Possible cause and remedy … when metering Label metering The labels used were not well suited. – separation error We recommend to use only labels that have been – jam. approved by Francotyp-Postalia. Labels stick to one another. Take the labels out of the dispenser.
- Page 154 The weight is too low or the scale is overloaded. Use scale for mail pieces of the permitted weight range only (see pages 178 and 181). PostBase Vision does not recognize the scale or the scale is defective. Contact Customer Service.
- Page 155 Check / adjust the connectivity settings (see chapter 14.13). Turn off PostBase Vision (see page 37). Wait one minute. Turn PostBase Vision on again. During system start, PostBase Vision activates the network connection (LAN or Wi-Fi). The menu bar shows the icon of the active connection ( , for example).
- Page 156 Ink cartridge not detected. Ink cartridge is not fitted correctly. Remove and insert the ink cartridge once again. PostBase Vision has detected the ink cartridge, when the LED on the left of the cartridge bracket glows green continuously. Wrong ink cartridge inserted.
- Page 157 Tips for troubleshooting Issue Possible cause and remedy … with automatic feeding / sealing (PostBase Vision Feeder) Envelopes are not sealed. Sealing is disabled. Set the switch to the “seal” position (see chapter 6.3.3.2). Sealant tank is empty. Fill more SEALIT sealing liquid (see chapter 16.9.1).
- Page 158 PostBase Vision Issue Possible cause and remedy Letter transport PostBase Vision does not display the Home does not start. screen / the “Automatic Feeding” pop-up (see chapter 6.3.3.4). Letter transport stops / pro- Jam. Carefully read the displayed information. cessing is interrupted.
- Page 159 Tips for troubleshooting Issue Possible cause and remedy … with manual sealing (Sealer) Envelopes are not properly Stroke your hand firmly over the envelope’s flap sealed. area. Use SEALIT, the special sealing liquid available from Francotyp-Postalia. Envelope flaps are not Felts are soiled / dried out.
- Page 160 Issue Possible cause and remedy … during installation / commissioning Delivery is incomplete / Do not start operating the PostBase Vision mailing damaged. system. Contact Customer Service. Blank display. Check whether the power cable is plugged in cor- rectly and that PostBase Vision is turned on.
- Page 161 A system error has occurred. Turn off PostBase Vision (see page 37). background and text “System Failure …” If PostBase Vision does not react to pressing the (blue screen / red screen). ON / OFF button: Pull the power plug. Functions / buttons are Unavailable functions are blanked out.
- Page 162 Select user and enter PIN. Users are missing. Setting up / managing users is done via the customer portal discoverFP. Synchronize PostBase Vision with the customer portal (see chapter 13, page 102). If necessary, contact the system administrator. Other errors …...
-
Page 163: Remedying A Letter Jam
Tips for troubleshooting 17.3 Remedying a letter jam Caution! The drawer on the postage meter is locked while the print system is in the printing position. Do not attempt to open the drawer forcefully. Wait until the print system is back in the standby position. You can now pull out the drawer. Caution! Make sure you do not get ink on yourself, or stain your clothing and other objects. - Page 164 PostBase Vision After remedying the letter jam On the feeder • Press down firmly on the roller transport until it clicks into place. On the postage meter • Slide the drawer in to the stop. Make sure that the drawer latches correctly on both sides.
-
Page 165: Inserting The Letter Guide At The Ramp (Postbase Vision Feeder)
Tips for troubleshooting Inserting the letter guide at the ramp (PostBase Vision Feeder) 17.4 In case the letter guide slips completely out of the ramp when pulling it out, you can re-insert it as described below. • Hold the letter guide as shown in the figure. -
Page 166: Correcting The Moistening Felt Position On The Rocker (Sealer)
PostBase Vision 17.5 Correcting the moistening felt position on the rocker (Sealer) Rocker with moistening felt • Slightly tilt the rocker and pull it off in an obliquely upward direction. Caution! Always hold the leg spring on the pin with one hand while positioning the moist- ening felt. -
Page 167: Removing / Inserting The Security Device
Caution! When the postage meter or the security device was in a cold envi- ronment (i.e. below 50 °F / 10 °C) before: Wait for at least two hours before connecting and commissioning the PostBase Vision postage meter. The post- age meter needs this time to adapt to the ambient conditions. Any condensa- tion evaporates. - Page 168 PostBase Vision • Push the white slider next to the power socket on the PostBase Vision in the direc- tion of the arrow and hold it. The catch retracts and allows access to the security device. • Remove the security device out of its mounting.
-
Page 169: Manually Moving The Ink Cartridge To The Exchange Position
You will need the stylus to operate the cartridge mechanism. Disconnect PostBase Vision from the mains • Turn PostBase Vision off. The PostBase Vision will complete any cur- rent actions, lowers the display and then switches off. The display light and button illu- mination go out. - Page 170 PostBase Vision The connections / interfaces of the PostBase Vision postage meter are described in the figure on page 14. Remove letter catch tray • Lift the front of the postage meter about 2" (5 cm). • Move the letter catch tray away to the right.
- Page 171 • Place postage meter upright again. Move ink cartridge to exchange position • Push the white slider next to the power socket on the PostBase Vision in the direction of the arrow and hold it. Opening for ink cartridge release •...
-
Page 172: Decommissioning And Disposing Of The Mailing System
Decommissioning and disposing of the mailing system To ultimately decommission the PostBase Vision, you must correctly unsubscribe all postal services. PostBase Vision will guide you through all required decommissioning steps in a dialog. We are pleased to assist if required. Please contact the Customer Service. -
Page 173: Appendix
PostBase Vision mailing system Graphical symbols, safety signs and product safety labels are affixed to the PostBase Vision mailing system. You will find the product safety labels on the type plates of the individual components. The following overview lists and explains them. - Page 174 PostBase Vision USB port. Interface for connection to external USB devices. Interface for connection to a local computer network (LAN). CAN-BUS The CAN bus (CAN = Controller Area Network) is a serial bus system. Inter- face for connecting the feeder.
-
Page 175: Glossary
Customer portal The customer portal offers the essentials for the discoverFP PostBase Vision mailing system via PC, e.g. a complete overview of your orders, contracts, and invoices, updates, and an online shop for consumables. The por- tal is the place to go for comprehensive administrative functions (accounts, profiles) and easy to use reporting features. - Page 176 PostBase Vision Swiping Convenient method of operation using the touch screen, e.g. when scrolling through long lists. This is how it works: Touch the area you want to scroll and, without letting go, move it in the desired direction. Test Imprint The Test Imprint generated in the “Print System”...
-
Page 177: Technical Data
Appendix – Technical Data Technical Data Dimensions * 12.2" (310 mm) – housing – Length 5.7" (146 mm) – hand feed tray / sealer 15.2" (385 mm) – feeder 11" (280 mm) – ramp 12.6" / 17.5" (320 mm / 445 mm) – catch tray min / max 13.6"... - Page 178 PostBase Vision Print system – Print technology Ink-jet, 1 ink cartridge – Printing area max. 7.3" × 1" (185 mm × 25 mm) ≥ 300 dpi – Print resolution Depending on machine configuration: Weighing range 0.1 oz to 15 lb (3 g to 7000 g) Noise emission <...
- Page 179 Safety data sheet for users available at sdb.francotyp.com/en. Mail piece specifications Format PostBase Vision (postage meter with hand feed tray): (length × width) 5" × 3.5" up to 9.96" × 13.89" (127 mm × 89 mm up to 253 mm × 353 mm) PostBase Vision with feeder: 5.9"...
- Page 180 PostBase Vision Envelope specifications for automatic sealing (PostBase Vision Feeder) Material Envelopes must be suitable for sealing by machine. The flap must be at the envelope’s long side. Sealing area Sufficient closure can only achieved with continuous sealing area. Subject to short-term modification.
-
Page 181: Product Variants And Equipment
Appendix – Product variants and equipment Product variants and equipment... -
Page 182: Supplies
Suitable supplies, like ink cartridges and labels, for PostBase Vision mailing systems are available via the MyOneFP Customer Portal. Note: The full functioning of the PostBase Vision mailing system at the time of deliv- ery can only be guaranteed when using original Francotyp-Postalia ink cartridges. -
Page 183: License
Appendix – License License This is a copy of the current LICENSE file inside the CVS repository. LICENSE ISSUES ============== The OpenSSL toolkit stays under a dual license, i.e. both the conditions of the OpenSSL License and the original SSLeay license apply to the toolkit. See below for the actual license texts. - Page 184 PostBase Vision * This product includes cryptographic software written by Eric Young * (eay@cryptsoft.com). This product includes software written by Tim * Hudson (tjh@cryptsoft.com). Original SSLeay License ----------------------- /* Copyright (C) 1995-1998 Eric Young (eay@cryptsoft.com) * All rights reserved. * This package is an SSL implementation written * by Eric Young (eay@cryptsoft.com).
-
Page 185: Security Declaration For Data Usage
Security Declaration for data usage Product Description: PostBase Vision Mailing system The PostBase Vision Mailing system is connected to the user’s local network through an Ethernet interface / Wi-Fi to share data with the Francotyp-Postalia Data Center using both the local network and a suitable available internet connection provided by the user. -
Page 186: Fcc Compliance Statement
PostBase Vision FCC Compliance Statement This device complies with FCC Part 15, Subpart B, Class B. Note: This equipment has been tested and found to comply with the limits for a Class B digital device, pursuant to part 15 of the FCC Rules. These limits are designed to provide reasonable protection against harmful interference in a residential installation. -
Page 187: Index
Appendix – Index Index Absorption felt 147, 149, 150, 151 Calibrate (ink cartridge) 121 correct seat 151 CAN BUS 14, 16, 174 install 150 Catch (in the cartridge holder) 29, 131, 132 remove 149 Catch tray 13, 18 Access control 105 adapting to envelope size 50 disabling 105 assembling 21... - Page 188 PostBase Vision Drawer 13, 123, 134 Cost accounts advert matching 100 cannot be opened 156 delete usage data (clear counter) 99 insert 123, 135, 164 latch lever 13 display / print usage data for a cost ac- count 98 remove 123, 134, 163...
- Page 189 Flap (sealant tank) 15 Installation 17 close 36, 139, 144 Installation site 20 open 34, 137, 142 Item counter FP contact information 104, 195 displaying 80 resetting 80 Hand feed tray 13, 18 attaching 21 Jam, remedy 163 feed letter 65...
- Page 190 114 seal (without printing) 87 setting up 114 sealing (PostBase Vision feeder) 70 New shortcut 90 sealing (PostBase Vision with sealer) 66 Non seal 70 License 183 Numeric keypad 45 Load postage credit 82 Low postage warning...
- Page 191 Appendix – Index short profile 10 turning off 37 ON/OFF button 13 turning on 37 Online ordering system 119 PostBase Vision Feeder 12, 15 On-screen keyboard 45 operating elements 15 Operating conditions 178 overview 15 Operation philosophy 39 PostBase Vision product variants...
- Page 192 PostBase Vision Seal Only 87 Sealant tank (feeder) 15 QR code 42, 59, 93, 175 open flap 15, 34, 137, 142 change 95 topping up sealing liquid 137 delete 96 Sealer 12, 13, 18, 147 generate 94 assembling 22 print 83...
- Page 193 Tapping 39 Volume Technical data 177 current setting 48 envelope specifications for sealing 180 set 48 ink cartridge 179 mail piece specification 179 PostBase Vision mailing system 177 scale 178 transmitter module 186 Termination plug 16 Test imprint 128, 176...
- Page 194 PostBase Vision Weekend mode 112 ZIP code, change 118 Weighing 54 differential weighing 56 normal weighing 54 Weighing mode differential 113 normal 113 setting 113 Weighing platform 13, 18 assembling 20 Weighing range 178 Weight 42 display in the Home screen 55...
-
Page 195: Service
Service Service Every PostBase Vision mailing system is thoroughly checked before leaving the factory. Should any faults occur with your PostBase Vision mailing system in spite of our extensive quality control, please contact FP Customer Service. FP Mailing Solutions Francotyp-Postalia, Inc.
Need help?
Do you have a question about the PostBase Vision and is the answer not in the manual?
Questions and answers
How can you manually adjust the postage rate in Postbase Vision? I need to add more postage to my package.
HOW TO SEND MAIL CERTIFIED