FP POSTBASE ONE Operator's Manual
Hide thumbs
Also See for POSTBASE ONE:
- Operator's manual (204 pages) ,
- Operator's manual and parts list (60 pages) ,
- Connectivity manualline (18 pages)
Table of Contents
Advertisement
Quick Links
Advertisement
Table of Contents

Subscribe to Our Youtube Channel
Related Manuals for FP POSTBASE ONE


Summary of Contents for FP POSTBASE ONE
- Page 1 Mailing system Operator Manual...
-
Page 2: About This Manual
Menu names and options from the operating menu are written in small capitals, e.g. M A tip offers advice or additional suggestions for improving the operation. Illustrations The display illustrations in this manual are general examples that may differ from the actual display on your PostBase One. -
Page 3: Table Of Contents
4.1.2 Setting mailing data and weighing __________________________36 4.1.2.1 PostBase One with static scale – normal weighing _____________36 4.1.2.2 PostBase One with static scale – differential weighing (optional) ____38 4.1.2.3 PostBase One with dynamic scale (optional) ___________________41 4.1.3 Setting the weight manually _______________________________43... - Page 4 Displaying and clearing down the item counter ________________ 58 6 Displaying and printing registers ________________________________ 59 7 Download postage ____________________________________________ 60 8 PostBase One with PC connection ______________________________ 61 9 Special imprints and functions __________________________________ 64 Postage correction _____________________________________ 64...
- Page 5 Cleaning ink cartridges / print heads by hand ________________116 12.8 Replacing the ink fleece _________________________________118 Topping up sealing liquid (PostBase One with sealer) _______________120 12.9 Clean / replace the sponge (PostBase One with sealer) _____________122 12.10 12.11 Calibrating the touch screen _____________________________124 12.12...
- Page 6 Graphical symbols, safety signs and product safety labels on the PostBase One mailing system _____________________________ 141 User interface symbols (overview) ________________________________ 143 Moving the PostBase One to another location _______________________ 149 Glossary ____________________________________________________ 169 Technical Data _______________________________________________ 171 PostBase One – components ________________________________ 171 PostBase One –...
-
Page 7: Safety Tips
– is released and the transport stops. You have to bring the safety cap back into position before you can go on using the PostBase One. By no means must you try to block or fasten the safety cap. - Page 8 FP, and therefore not vouch for such products. The full functioning of the PostBase One mailing system at the time of delivery can only be guaranteed when using original Francotyp-Postalia ink cartridges / print heads and ink tanks.
-
Page 9: Short Description Of The Postbase One
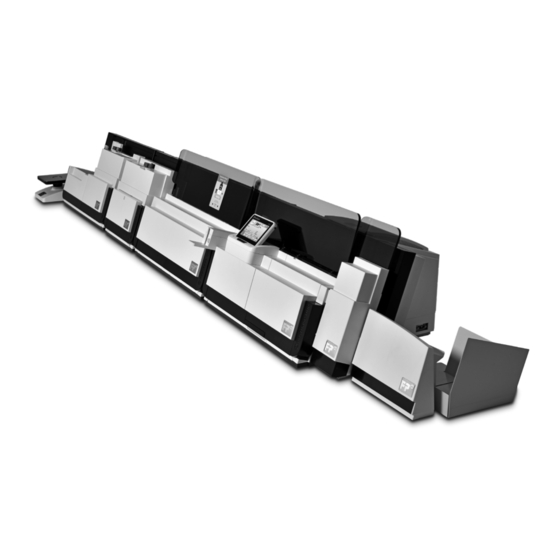
A short description of the PostBase One A short description of the PostBase One PostBase One is a digital mailing system for medium to high mail volumes featuring a touch screen. With its distinctive feature, the vertical letter transport, it can automatically process mail pieces of all sizes –... - Page 10 The Home screen shows all relevant information on the metering process at a glance. You simply select a postal product and position the mail piece – PostBase One will seize the letter and meter it, after which it is exited to the right side ready for dispatch.
- Page 11 Letters can be added during operation. – PostBase One Sealer – for mail pieces with a thickness of up to 0.28" (7 mm). The envelope flap is moistened in the sealer module and firmly pressed down in the power sealer.
- Page 12 PostBase One Mailing System Further options – ReportOne – In addition to RemoteOne’s entire function- ality, ReportOne offers easy to handle administration and report features. – MailOne 2.0 – Integrated Mailing and accounting soft- ware for PostBase Mailing Systems. This software pack-...
-
Page 13: The Basics Of Operation
The basics of operation The basics of operation In this chapter you will learn about the basic functions of the PostBase One mailing system and how to handle the touch screen. Turning the PostBase One on / off The PostBase One mailing system can remain connected to mains all the time to ensure it is always ready for use. -
Page 14: Standby
Caution! Make sure to always turn the PostBase One off by pressing the rocker switch for three seconds before disconnect- ing the PostBase One from mains. Never pull the power plug or separate the power supply in any other way before the printing system has reached its sealed position. -
Page 15: Adjusting The Display Inclination
The basics of operation Adjusting the display inclination • Press the key below the display and set the display in the desired position. The adaptation mechanism features several catches. • Release the key. Setting the letter catch tray The catch tray can be adapted to different envelope sizes – up to ISO B4 (10"... -
Page 16: Adjusting The Feeder (Optional)
PostBase One Mailing System Adjusting the feeder (optional) 3.5.1 Adjusting the letter path You always have to adjust the feeder according to the thickness of the letters being processed. With the slider (thickness) you adjust the letter path of the separation to the thickness of the letters. -
Page 17: Separation Function
The basics of operation 3.5.2 Separation function In most cases, you can use the default setting. In case of letters with ‘critical’ demands for separation, you can adjust the feeder easily. In the following cases, an adjustment is recommended: – very thick letters –... -
Page 18: 3.5.2.2 Adjusting The Pressure
PostBase One Mailing System 3.5.2.2 Adjusting the pressure The pressure needs only adjustment if problems occur while processing letters. Typical cases: – exceptionally thick or heavy letters are not drawn in – the gap between letters drawn in is too large. -
Page 19: 3.5.2.3 Adjusting The Separation
The basics of operation • Re-place cover on feeder. The cover must latch audibly. 3.5.2.3 Adjusting the separation The separation needs only adjustment if problems occur while processing letters. Typical cases: – soft, unstable letters and letters with sensitive surfaces are damaged –... - Page 20 PostBase One Mailing System Separation – possible settings and their meaning: decreased separation (if sensitive letters are being damaged) default setting • Re-place cover on feeder. The cover must latch audibly. If you have to adjust the pressure and the...
-
Page 21: Sealing Function (Optional)
When equipped with the optional components sealer and power sealer, PostBase One can meter and seal your mail in a single run. Coming from the feeder, the mail pieces pass through the sealer. In the sealer, the sealing flap of the envelope is moistened by a sponge. -
Page 22: Screen Elements And Operation Philosophy
PostBase One Mailing System Screen elements and operation philosophy This chapter covers the user interface of the PostBase One mailing system. You will learn how to operate the touch screen, the screen elements and the menus, window types and symbols. - Page 23 The basics of operation Buttons You distinguish buttons from the screen background by a shadow. They can have various states, depending on the function: Button can be pressed / is active. Button is selected / passive (cannot be pressed). Confirmation: Button is being pressed. Button is deactivated / cannot be pressed.
-
Page 24: The Home Screen
A function can be edited or selected by sim- ply touching its button. Depending on the respective function, the PostBase One opens a list, an adjustment menu or a menu offering further options. In the chapters to follow, you will be intro- duced to each of the menu and window types and their operation. -
Page 25: The Product Calculation Menu
Selecting mailing data Mailing data Current settings By pressing the respective buttons, you select mailing data. The PostBase One guides you through the postage calculation process step by step. Press OK to accept the current settings and to return to the Home screen. -
Page 26: The Menu
PostBase One Mailing System Returning to the Home screen Setting the product for metering With the OK button, you set the current selected mailing data for metering and return to the Home screen. Cancelling the Product Calculation menu Pressing the B button repeatedly deletes the mailing data step by step. -
Page 27: Lists
The basics of operation 3.7.5 Lists Lists (e.g. for adverts, SMS texts) offer all available settings in list form. The current set- ting is shown on a dark background. Use the arrow buttons to scroll through the list. Press the respective button to select one of the provided settings and return to the Home screen. - Page 28 Input using the counter principle Display field PostBase One may require you to enter val- ues via a counter principle. Use the arrow buttons to increase or decrease the figure in each digit until the desired amount is displayed in the top right text box.
-
Page 29: Pop-Up Windows
3.7.8 Procedures (wizards) For more complex settings, e.g. when setting up connection data, the PostBase One opens a ‘procedure’, guiding you through all necessary actions step by step. Different win- dow types are used, depending on require- ments. -
Page 30: Test Print
Once all necessary mailing data are set, you can perform a test print. The T EST PRINT PROD option is shown at the end of the addi- tional services list. • Choose T EST PRINT PRODUCT PostBase One prompts you to position a let- ter. - Page 31 PostBase One with feeder Positioning an envelope on the feeder (optional) • When PostBase One prompts you to posi- tion a letter, place an empty envelope (or a post card) on the feeder: – The side to be printed faces the back.
- Page 32 55. • Press the L button. ABEL PostBase One prints the test print on a label and discharges the label to the right. Checking the print quality Make sure the PostBase One always pro- vides clean and legible meter imprints.
-
Page 33: Setting The Meter Imprint
Setting the meter imprint Setting the meter imprint Advert imprint Advert imprint Date Postage Product details Serial number of the postage meter Data matrix symbol This chapter describes the required settings for metering and additional possible advertising imprints: – Postage / USPS product (see chapter 4.1) –... -
Page 34: Postage / Usps Product
PostBase One Mailing System Postage / USPS product PostBase One sets the postage, i.e. the price for the postal product using the chosen mailing data (destination, type, mail piece dimensions, and additional services if applicable), in conjunction with the displayed weight. -
Page 35: Setting A Product Via Shortcut
Shortcut buttons More shortcuts • In the Home screen, press the button. PostBase One opens a list with all available shortcuts. You can re-assign the shortcuts using the PC software from Francotyp-Postalia for manag- ing the PostBase One mailing system (e.g. -
Page 36: Setting Mailing Data And Weighing
PostBase One Mailing System 4.1.2 Setting mailing data and weighing 4.1.2.1 PostBase One with static scale – normal weighing This chapter describes setting the postage when using the static scale in standard weighing mode. If the ‘differential weighing’ option is available on your mailing system, the currently set weighing mode is shown on a button to the right of the weight. - Page 37 A tone signal indicates that the scale has determined the mail piece’s weight. The weight determined by the scale is now set. PostBase One sets the postage based on the displayed weight and the selected mailing data. With the static scale, you can weigh the mail pieces in the Home screen and the Product Calculation menu as well.
-
Page 38: Postbase One With Static Scale - Differential Weighing (Optional)
This function helps you to conveniently and easily weigh and meter large amounts of similar mail pieces. You simply place a letter stack on the static scale and remove one letter at a time. PostBase One determines the weight change and sets the appropri- ate postage. - Page 39 Setting the meter imprint PostBase One opens the Product Calculation menu and prompts you for all required details regarding the mail piece. • Select the respective desired setting by pressing the corresponding button. The selected mailing data appear to the right in the display.
- Page 40 • Meter the letter as usual. • Handle the remaining letters in the same way. When you empty the weighing platform, PostBase One asks you if the set weight is to be used. • Acknowledge with Y to meter the last let- ter of the stack.
-
Page 41: Postbase One With Dynamic Scale (Optional)
Setting the meter imprint 4.1.2.3 PostBase One with dynamic scale (optional) This chapter describes setting the postage using the dynamic scale. The dynamic scale detects the weight and size of the mail piece while transporting it and transmits them to the postage meter to set the postage. For this purpose, dynamic weighing must be activated for the relevant product. - Page 42 PostBase One Mailing System Note: If the ‘Scale selection’ menu does not appear during product calculation, you can only weigh the mail pieces with the static scale or enter the weight manually. In these cases, the dynamic scale only transports the letters.
-
Page 43: Setting The Weight Manually
Setting the meter imprint 4.1.3 Setting the weight manually PostBase One offers the possibility to set the weight manually for product calculation. If no scale is available, PostBase One shows icon in the Home screen. In this case, you have to enter the weight for postage calculation manually in the Product Calculation menu. -
Page 44: Date
The date for the meter imprint is set automatically to the current date by the system clock. You can forward the date for the meter imprint. The PostBase One rejects invalid input, e.g. a metering date too far in the future or redating. -
Page 45: Advertising Imprints
Setting the meter imprint Advertising imprints PostBase One can print up to two advertising imprints of your choice on your mail pieces. Advertising imprints may be: – Graphical adverts – Text messages / SMS texts. You can print advertising imprints in any order. -
Page 46: Imprint Offset
PostBase One Mailing System Imprint offset PostBase One prints the meter imprint at a fixed offset from the right mail piece edge. You can increase this offset and thus shift the meter imprint to the left by adjusting the imprint offset. -
Page 47: Metering
Metering Metering This chapter covers how to log on to the PostBase One mailing system, how to set an account to register the postage used, how you place letters on the hand feed tray, how to use the feeder, and how to meter self-adhesive labels which can be stuck onto the mail piece. -
Page 48: Setting / Changing The Account
In the Home screen: • Press the C button. CCOUNT PostBase One opens a list with all available accounts. You see the account names and numbers. The currently set account is shown on a dark background (in the example: ‘Cost Account 1’). -
Page 49: Positioning And Metering Letters
Positioning and metering letters 5.3.1 Hand feed tray On a PostBase One with hand feed tray, you position letters individually for metering. Please heed the mail piece specifications on pages176 and 176. You can feed mail pieces to meter when the Home screen displays a postage. -
Page 50: Feeder - Batch Processing (Optional)
PostBase One Mailing System Feeder – batch processing (optional) 5.3.2 Equipped with a feeder, PostBase One can batch process letters and postcards. Please heed the mail piece specifications and the envelope specifications for auto- matic feeding and sealing on pages 176 to 178. - Page 51 (See also chapter 3.6, page 21.) Dynamic weighing YES / NO Check the dynamic scale‘s status (PostBase One with dynamic scale) If you want the dynamic scale to detect letter size and weight: • Make sure that the product is set to ‘Dynamic’.
-
Page 52: 5.3.2.2 Positioning Letters In Stack
If the desired product is set and the Home screen shows the Postage or Auto, you can position mail pieces on the feeder to meter. PostBase One is ready to meter • Arrange the letter stack: – the side to be printed faces the back –... -
Page 53: 5.3.2.3 Using The Batch Counter
After an interruption or when there are already letters in the feeder: • In the Home screen, press the L ABEL button. EEDER PostBase One opens the ‘Batch Processing’ pop-up. • Press the S button. TART You process single letters in the same man- ner. - Page 54 For details on how to set up the feeder and position letter stacks, please read pages 50 to 53. PostBase One feeds the letters one by one, prints, and places the metered letters in the catch tray. The counter displays the number of letters still to be metered.
-
Page 55: Metering Labels
Please heed the following when metering labels: – We recommend to use only original FP labels. The manufacturer FP has estab- lished reliability, safety and applicability. The manufacturer cannot assess the reli- ability, safety and applicability for products not approved by FP, and therefore not vouch for such products. - Page 56 When the Home screen shows the desired settings for metering: • In the Home screen, press the L ABEL button. EEDER PostBase One is ready to meter PostBase One opens the ‘Batch Processing’ pop-up. • Select L ABEL • Press the S button.
- Page 57 • S the setting. • Press the S button. TART PostBase One prints the number of labels you have set. The counter displays the num- ber of labels still to be metered. You can interrupt processing with the S button.
-
Page 58: Displaying And Clearing Down The Item Counter
Apart from the counter for meter imprints in the register and the account counters, the PostBase One features an item counter for meter imprints you can use as you like. The item counter counts all meter imprints. Test prints are not registered. -
Page 59: Displaying And Printing Registers
Displaying and printing registers Displaying and printing registers The PostBase One mailing system saves important parameters and information on used postage in registers. You can view and print the register states. • Open the M • Choose R EGISTERS The R... -
Page 60: Download Postage
If users are enabled, postage download might not be available. In that case, please contact the system administrator. Loading postage • Make sure PostBase One is ready to con- nect to the data center (network cable is connected, correct connectivity settings). -
Page 61: Postbase One With Pc Connection
PC and offer extensive booking, analyzing and reporting features. This chapter describes the particularities in handling the PostBase One mailing system when connected to a PC. For information on RemoteOne, ReportOne and MailOne 2.0, please visit our website or contact your local FP representative. - Page 62 During the start routine, the connection to PostBase One is automatically established. When you connect your PostBase One to the FP software for the first time you will need to enter a PIN (see chapter 11.14, page 92). As soon as PostBase One is connected to the respective FP software (e.g.
- Page 63 The connection between PostBase One and the PC is disconnected. Menu and imprint settings are accessible via the PostBase One’s touch screen. PC Software Mode: ON If the PC Software Mode is active on Postbase One, you cannot meter when dis- connected from the PC.
-
Page 64: Special Imprints And Functions
Setting the CORRECTION imprint In the Home screen: • Press the P button. RODUCT PostBase One opens the Product Calculation menu. • Select S PECIALS • Select C ORRECTION PostBase One opens the Correction menu. -
Page 65: Redate
(e.g. date, imprint offset) in the same way as with a regular meter imprint. • Position the mail piece the the address side facing front. PostBase One prints the correction imprint. When printing the postage correction, adver- tising imprints are not available. Redate If the meter imprint shows an incorrect date, you can print a correction with the correct date on the non-address side of the already metered mail piece. - Page 66 Print redate When the Home screen shows the desired settings for the redate imprint: • Position the mail piece the the address side facing front. PostBase One prints the redate imprint. When printing the redate imprint, advertising imprints are not available.
-
Page 67: Reply Mail Metering
Special imprints and functions Reply Mail metering You can meter reply mail. When metering reply mail, PostBase One prints a normal meter imprint without date. Setting the Reply Mail meter imprint In the Home screen: • Press the P button. -
Page 68: Stamping Incoming Mail (Optional)
PostBase One Mailing System Stamping incoming mail (optional) You can use the ‘Incoming mail’ function to mark your incoming mail. Setting the incoming mail stamp • Open the M • Choose S PECIAL UNCTIONS • Choose D ATE OF NTRY... - Page 69 (default position: about 0.4" / 1 cm from the right letter edge). Any changes to this setting remain, even after switching the PostBase One off. The offset for the incoming mail stamp does not affect the imprint when metering.
-
Page 70: Advert Only
PostBase One prints the incoming mail stamp. Advert Only With the special function ‘Advert Only’, you can print advertising imprints (graphical adverts, text messages) that are stored in your PostBase One Mailing System. • Open the M • Choose S PECIAL UNCTIONS •... - Page 71 5. The ‘Advert Only’ special function has its own counter. PostBase One shows the number of imprints on the upper right side of the display. When quitting the ‘Advert Only’ function, the...
-
Page 72: Print Numbers
(SMS). • Press one of the advertising imprint but- tons. PostBase One opens a list of all available advertising imprints. • Press the button of the desired advertising imprint. PostBase One returns to the ‘Print Numbers’... - Page 73 • Press the button for the desired direction of counting (A or D SCENDING ESCENDING PostBase One applies start number and Number to be printed direction of counting. You can start printing numbers. Proceed exactly as when metering: • Position an envelope / a postcard on the hand feed tray.
-
Page 74: Feed Only / Count Mail Pieces
5.3.2. The ‘Feed Only’ special function has its own counter. PostBase One shows the number of transported mail pieces on the upper right side of the display. When quitting the ‘Feed Only’ function, the counter is reset to ‘0’. -
Page 75: Seal Only (Optional)
With the special function ‘Seal Only’, you can seal and count letters without printing (up to 7 mm / 0.3"). This special function is only available on PostBase One systems with feeder. Please heed the mail piece specifications on page 178. -
Page 76: Account Administration
PostBase One Mailing System Account administration If user management is enabled via PC software, the account administration features are only available to the administrator. 10.1 Switch account administration on / off Switching on • Open the M • Choose M... -
Page 77: Display Account Information
Display account information • Open the M • Choose M ANAGE CCOUNTS • Select S PostBase One displays a list of all accounts containing the respective number and value of metered letters. 10.3 Set one account to zero • Open the M •... -
Page 78: Print Account Report (Optional)
Print account report (optional) 10.5 PostBase One can print account reports for all accounts or individual accounts. An account report contains the account name(s), the postage used and the number of performed meterings since last setting the account to zero, as well as the date, the time, and information on the postage meter. - Page 79 • Press the L button. ABEL • Press the S button. TART PostBase One prints the account report on a label. • Press the F button. EEDER • Position an empty envelope / postcard to print the account report.
-
Page 80: Advanced Settings & System Information
You can view a list of all major system parameters (e.g. software version, rate table). • Open the M • Choose S YSTEM NFORMATION PostBase One displays the system informa- tion. 11.2 Display brightness You can adapt the display brightness to fine-tune the contrast and increase the legi- bility of the displayed texts. -
Page 81: Tone Signals
Advanced settings & system information 11.3 Tone signals PostBase One confirms certain actions with a tone signal. A series of tone signals indicates an error. You can restrict the scope of audible signals to warnings or turn off the audible signals altogether. -
Page 82: User Interface Language
11.5 Standby time The PostBase One postage meter will go to standby automatically if it is not used for some time. The standby time is the time between your last operation and the time PostBase One automatically goes to standby. -
Page 83: Product After Standby
• Select the desired setting. • S the setting shown. – possible settings and their meaning: AFTER TANDBY After reactivating PostBase One from HORTCUT standby, the product stored as shortcut 1 is set. PostBase One keeps the current (last) prod- RODUCT uct setting. -
Page 84: Auto Off
PostBase One Mailing System 11.7 Auto Off PostBase One switches off automatically if it is not used for some time. The Auto Off time is the time between your last operation and the time PostBase One automati- cally switches off. -
Page 85: Connection To Data Center
11.9 Connection to data center On commissioning through the FP Customer Service, setting up the connection to the data center is part of the installation routine. You should check and – if need be – cor- rect the settings if changes were made to your equipment / system environment. - Page 86 ISABLED port DHCP. During manual configuration, you will need to enter the following parameters: – Static IP address for your PostBase One – Subnet mask – Default gateway – IP address of the DNS server. Please contact you network administrator for details.
- Page 87 In case your network only supports explicitly authorized devices, your network administra- tor will require the MAC address of your PostBase One. You can find it in the Connec- tivity Settings menu. Reference Information for Network Administrators The PostBase One requires an Ethernet con-...
-
Page 88: View Contact Information
With the PC software, you can set up a user-specific access control for the PostBase One. Please refer to the manual of the PC software. In the PostBase One menu, the PIN function is then only accessible with the administrator PIN. -
Page 89: Auto Postage Download
Auto Postage Download The ‘Auto Postage Download’ feature facilitates keeping track of the remaining post- age. When enabled, PostBase One will warn you once the remaining postage reaches the preset threshold and will give you the opportunity to load postage. - Page 90 PostBase One Mailing System Performing Auto Postage Download When the remaining postage reaches the threshold, PostBase One opens an appropri- ate screen with the following options: • C the displayed load amount, then HANGE load postage. • L the displayed amount directly.
-
Page 91: Uploading Product Data
PostBase One will remind you when it is time to upload the product usage data. If you fail to do so, the postage meter will lock down after a certain amount of time until you performed a data upload. -
Page 92: Authentication Code For Remoteone / Reportone
PostBase One Mailing System 11.14 Authentication code for RemoteOne / ReportOne When you connect your PostBase One to the RemoteOne / ReportOne software for the first time you will need to enter a PIN. • Connect your PostBase One to the PC. -
Page 93: Switch Pc Software Mode On / Off
You can set up the mailing system in such a way that metering is only possible when connected to a PC and special FP software for PostBase mailing systems (RemoteOne, ReportOne or MailOne 2.0). Thus, you can make sure that all meter- ings are registered on the PC for reporting and analysis purposes. -
Page 94: Adjusting Moistening (Postbase One With Sealer)
Adjusting moistening (PostBase One with sealer) 11.16 PostBase One monitors the operational conditions of the sealer. Upon system start, as well as occasionally during operation, sealing liquid from the tank is pumped to the moistening sponge. Thus, PostBase One makes sure the sponge is always properly wetted. -
Page 95: Remote Services
Please stand by. 11.18 Change ZIP / Re-authorization You must inform FP Mailing Solutions of the new location of your PostBase One if you wish to operate the PostBase One at another location (e.g. after a relocation). • Open the M •... -
Page 96: Maintenance And Care
FP Mailing Solutions to do so. 12.1 Cleaning the PostBase One mailing system Warning! Pull the power plugs prior to cleaning the PostBase One mailing system. Warning! Be extremely careful when handling liquids. Take special care that no foreign objects penetrate the system’s interior. If this should happen, have the mailing system checked by FP Customer Service before using it again. -
Page 97: Print System: Show Ink Level / Status
• Choose P RINT YSTEM • Choose I NFORMATION PostBase One shows the following informa- tion, depending on the ink system in use: Ink systems with 2 ink cartridges – Ink level of the two ink cartridges. Bulk Ink – Ink level of the ink tank and –... -
Page 98: Changing The Ink Cartridges
PostBase One Mailing System 12.3 Changing the ink cartridges PostBase One monitors the filling level in the ink cartridges and issues a message when they must be replaced. We recommend that you always have a new FP cartridge kit in stock. - Page 99 Maintenance and care Changing the ink cartridges PostBase One will prompt you to replace the cartridges when they are depleted. • Confirm the message. • Open the M • C HOOSE RINT YSTEM • C HOOSE HANGE ARTRIDGES The exchange procedure starts.
- Page 100 • Pull both ink cartridges upward out of the bracket. Inserting new ink cartridges The full functioning of the PostBase One mail- ing system at the time of delivery can only be guaranteed when using original Francotyp- Postalia ink cartridges.
- Page 101 Maintenance and care • Remove the sticker. Caution! Do not touch the nozzle surface. Always keep unprotected nozzles facing down. Handle cartridges without nozzle pro- tection with extreme care. • Carefully remove the nozzle protection. • Hold the ink cartridge with its connectors facing backwards, i.e.
- Page 102 Please wait until the calibration has finished. Adjustment PostBase One continues with the ink car- tridge adjustment procedure and prompts you to feed a letter for a test imprint. Follow the instructions on the display.
-
Page 103: Changing The Print Heads (Postbase One Bulk Ink)
Changing the print heads (PostBase One Bulk Ink) 12.4 PostBase One monitors the status of the print heads and issues a message when they must be replaced. We recommend that you always have a new FP print head kit in stock We advice to clean the contacts in the print head bracket at each print head replace- ment. - Page 104 PostBase One Mailing System Changing the print heads PostBase One tells you when to change the print heads. • Confirm the message. • Open the M • Choose P RINT YSTEM • Choose C HANGE ARTRIDGES The exchange procedure starts.
- Page 105 Maintenance and care • Release the print heads: Turn the two blue-green levers upwards. • Pull both lifters (blue-green) upwards. The print heads are lifted from their brackets. • Pull both print heads upward out of the bracket.
- Page 106 PostBase One Mailing System Inserting new print heads The full functioning of the PostBase One mail- ing system at the time of delivery can only be guaranteed when using original Francotyp- Postalia print heads. Caution! Insert the print heads only after they have adapted to the ambient tempera- ture of the postage meter (e.g.
- Page 107 Maintenance and care Caution! Do not touch the nozzle surface. Always keep unprotected nozzles facing down. Handle print heads without nozzle protection with extreme care. • Carefully remove the nozzle protection. • Hold the print head with its connectors fac- ing backwards, i.e.
- Page 108 PostBase One Mailing System • Lock the print heads: Turn the two blue-green levers down- wards. • Take hose coupling of the hose connection marked with from stand-by position. • Put hose coupling in left print head and push in firmly. Feel the coupling lock in place.
- Page 109 Calibration / cleaning After changing the print heads, PostBase One calibrates the print heads and cleans the printing system. Please wait until the calibration has finished. Adjustment PostBase One continues with the print head adjustment procedure and prompts you to feed a letter for a test imprint.
-
Page 110: Changing The Ink Tank (Postbase One Bulk Ink)
Changing the ink tank (PostBase One Bulk Ink) 12.5 PostBase One will remind you when it is time to change the ink tank. If the ink tank is empty, PostBase One automatically initiates the tank change procedure. The mailing system is no longer ready for operation. You have to replace the ink tank before you can go on printing with PostBase One. - Page 111 • Pull the tank upward out of the bracket. Insert new ink tank The full functioning of the PostBase One mail- ing system at the time of delivery can only be guaranteed when using original Francotyp- Postalia ink tanks.
- Page 112 PostBase One Mailing System • Insert the ink tank as illustrated. • Push down the ink tank. The ink tank locks into its bracket. • Close the flap.
-
Page 113: Aligning Ink Cartridges / Print Heads
• Choose A in the submenu. LIGNMENT • Place an empty envelope for the test print. PostBase One prints a test print. • On the test print, determine the numbers where – the horizontal lines are as exactly next to each other as possible and –... - Page 114 PostBase One Mailing System Horizontal line • Type the number where the horizontal par- tial lines are as exactly next to each other as possible. (If necessary: Press CE to clear the dis- played number.) • Confirm with C ONTINUE Vertical line •...
-
Page 115: Cleaning The Print System
Maintenance and care 12.7 Cleaning the print system 12.7.1 Starting automatic print system cleaning You should start automatic print system cleaning only if the quality of the imprint is not good enough (e.g. blank spots in the imprint after longer periods out of use). Cleaning •... -
Page 116: 12.7.2 Cleaning Ink Cartridges / Print Heads By Hand
• Remove one ink cartridge / print head. For detailed instructions on how to remove and insert ink cartridges, see chapter 12.3. For detailed instructions on how to remove and insert print heads (PostBase One Bulk Ink), see chapter 12.4. - Page 117 However, tap water contains minerals that may stain the cartridge / print head. For best cleaning results, use FP contact cleaner and cleaning cloths contained in the ‘clean & renew’ cleaning kit offered by FP Mailing Solutions.
-
Page 118: Replacing The Ink Fleece
12.8 Replacing the ink fleece PostBase One will remind you when it is time to change the ink fleece. Caution! Take care not to soil your skin, your clothes, or objects near by. Use a mat to place the fleece tray. - Page 119 • Push in the fleece tray as far as it will go. • C the replacement of the ink fleece. ONFIRM In a pop-up, PostBase One informs you that the ink fleece was replaced. • Confirm the pop-up with OK. PostBase One is ready for operation again.
-
Page 120: Topping Up Sealing Liquid (Postbase One With Sealer)
Using tap water is possible. Note, however, that the sealing process may be less reli- able when using water. Warning! Switch off the PostBase One mailing system and all components connected to it prior to topping up sealing liquid. Warning! Be extremely careful when handling liquids. If you fill the sealant tank, make sure not to wet any parts connected to the mains. - Page 121 Maintenance and care • Put a funnel in the filler hole. • Fill the tank with sealing liquid. The sealant tank holds up to 800 ml. • Pull out the funnel. Retain the funnel, the closing with suction pipe and an empty bottle of the sealing liquid. You need the original bottle in case you have to drain the tank.
-
Page 122: Clean / Replace The Sponge (Postbase One With Sealer)
The sponge for moistening the envelope flaps should be cleaned regularly (e.g. al- ways after weekend). Check the condition of the sponge and replace it if exhausted. We recommend always keeping a new sponge in reserve. • Switch off PostBase One and all compo- nents connected to. • Press the release key. - Page 123 Maintenance and care • Insert a new / the cleaned sponge. • Hook the fixation plate into the lower part of Fixation plate the moistener as illustrated. • Snap in the upper part of the fixation plate. Warning: Mind Your Hands! When closing the unit, do not reach into the area between the moistening unit and the letter guide face.
-
Page 124: 12.11 Calibrating The Touch Screen
• Touch the red circle with the stylus. • Follow the further instructions on the display: Touch each of the displayed cali- bration circles with the stylus. PostBase One will continue its start routine. The touch screen is now calibrated. -
Page 125: 12.12 Replacing The Battery
The manufacturer FP has established reliability, safety and applicability. Observe the instructions enclosed with the battery for correct use and disposal. Caution Switch off the PostBase One. Pull the power plugs out of the power socket prior to replacing the battery. - Page 126 PostBase One Mailing System • Insert new battery (90.4701.8004.00). Make sure that the polarity is correct! Sym- bols in the battery compartment depict the correct polarity. • Close the battery compartment. • Set up all additional components of the mailing system if necessary (see appendix, page 159).
-
Page 127: Tips For Troubleshooting
… with downloading postage (page 132) … when using special functions (page 132) … with basic settings, during maintenance and care (page 133) … with automatic feeding (page 134) … with automatic sealing (page 135) … with using the FP software (page 136). - Page 128 Dynamic weighing is active for the current product. Select ‘Static scale’ (see page 36). is missing. Letter transport fails to start. PostBase One does not show the Home screen. Return to the Home screen and try again Sensor does not recognize letter. Position the letter again.
- Page 129 Credit of the current user is too low. Have the system administrator assign new credit. Metering not possible. PC Software Mode is switched on. PostBase One meters only if data exchange between postage meter and PC is possible. Check if the USB cable is plugged properly into the postage meter and the PC.
- Page 130 Turn the PostBase One on again. Contact Customer Service if the problem persists. The scale is defective. Turn off the PostBase One. Unplug the scale from the postage meter. Turn the PostBase One on again. You have to enter the weight for postage...
- Page 131 Contact the system administrator. Blank display. Check whether the power cable is plugged in cor- rectly and the PostBase One is turned on. PostBase One is in standby. Briefly touch the display. Functions are missing in Unavailable functions are blanked out (e.g. when the display (e.g.
- Page 132 Function not available. The current user is not authorized to access this function. Contact the system administrator. PostBase One fails to estab- Verify that the network cable is properly connected (see page 164). lish connection to the data cen- Check the connectivity settings (see chapter 11.9, ter.
- Page 133 Wrong ink cartridges / print heads / ink tank inserted. Observe the specifications (see page 175). Contacts of the print system are soiled. Use the FP ‘clean and renew’ cleaning kit to clean the contacts. Ink cartridges / print heads / ink tank defective. Contact Customer Service.
- Page 134 Check setting of letter path (slide control) and adjust accordingly (see chapter 3.5.1, page 16). rated. Letter transport PostBase One does not display the Home screen / does not start. the ‘Batch Processing’ pop-up. Sensor does not recognize the letters.
- Page 135 Adjust moistening (see chapter 11.16, page 94). Use the special ‘sealit’ sealing liquid available from FP Mailing Solutions. PostBase One warns you Tap water might produce air bubbles (depending about an empty sealant tank, on the water quality of your local water supply), although there is still enough which may interfere with correct filling level detection.
- Page 136 Possible cause and remedy … with using the FP software Connection to FP software Check if PostBase One displays the Home screen. cannot be established. Check if the USB cable is plugged properly. For further help please refer to the manual of the FP software in use.
-
Page 137: Clearing A Letter Jam In The Feeder
Tips for troubleshooting 13.3 Clearing a letter jam in the feeder Warning: Mind Your Hands! The mechanism is pressed by springs to the letter guide. It does not lock when released, but snatches back. Be cautious when removing jammed letters from the letter path. •... -
Page 138: Clearing A Letter Jam In The Sealer
PostBase One Mailing System 13.4 Clearing a letter jam in the sealer • Press the release key. The moistening unit swings to the front by itself. • Remove the letter. Warning: Mind Your Hands! When closing the unit, do not reach into the area between the moistening unit and the letter guide face. -
Page 139: Safety Cap Has Been Released - Letter Transport Stops
Tips for troubleshooting 13.5 Safety cap has been released – letter transport stops The safety cap helps to avoid injury that may be caused by improper handling within the letter exit of the postage meter. When the safety switch is activated, the safety cap is released and the letter transport stops immediately. -
Page 140: Decommissioning And Disposing Of The Mailing System
Decommissioning and disposing of the mailing system To ultimately decommission the PostBase One, you must correctly unsubscribe all postal services. PostBase One will guide you through all required decommissioning steps in a dialog. We are pleased to assist if required. Please contact the Customer Service. -
Page 141: Appendix
The following graphical symbols, safety signs and product safety labels may be used on the PostBase One mailing system for example, depending on the respective version. You will find the product safety labels on the type plates of the individual products. - Page 142 PostBase One Mailing System Symbol for alternating voltage. Indicates the type of the input voltage. Symbol / Wiring symbol for a fuse. This symbol always stays along with the details of the fuse used. Serial interface for connection of external devices.
-
Page 143: User Interface Symbols (Overview)
Appendix – User interface symbols User interface symbols (overview) The following overview shows and explains the symbols in the user interface of the PostBase One mailing system, grouped by – standard buttons and status indications – menu functions – error categories. - Page 144 Set date for the meter imprint (forward dating) Print system Display print system information: filling level of the ink cartridges / filling level of the ink tank and state of the print heads (PostBase One Bulk Ink) Print head status / remaining service life...
- Page 145 Appendix – User interface symbols Clean print system Align ink cartridges / print heads Change ink cartridges / print heads Change ink tank Change ink fleece Calibrate ink cartridges / print heads Run remote services / synchronize with data center Change account Switch account function on / off, Account administration (show / print list, set accounts to zero)
- Page 146 PostBase One Mailing System Direction of counting: descending Set imprint offset Configure ‘Auto postage download’ feature (turn on / off, set threshold) Display / reset piece counter Adjust display brightness Brighter Default Darker Adjust moistening Increase moistening of envelope flaps...
- Page 147 Appendix – User interface symbols Withdraw machine Set sound signals Edit standby time Configure ‘Auto Off’ feature / adjust ‘Auto Off’ time Configure access control / set PIN Display contact information Change ZIP Code / Re-authorization Set meter type: 0.00 (postage in integer cents) or 0.000 (postage in tenths of cents.) Product after Standby PC Software Mode Access service mode (for service technicians only)
- Page 148 PostBase One Mailing System Error categories General error Cliche error Account error Feeder error Print system error Scale error Label dispenser error Letter transport error, jam Security device error Communication error with the PC (when using the optional PC control software)
-
Page 149: Moving The Postbase One To Another Location
• Switch off the mailing system and all components connected to it prior to dismantling and transporting them. • The PostBase One postage meter weighs around 44 lb (20 kg). You are advised to seek the help of another person when moving the postage meter. - Page 150 PostBase One Mailing System Dismantling the PostBase One mailing system Remove ink cartridges / remove print heads and ink tank (PostBase One Bulk Ink) You only need to remove the ink cartridges / print heads and the ink tank if you move the mailing system to another location or when it is brought to service.
- Page 151 Appendix – Moving the PostBase One to another location Switch off • Switch off the mailing system. 3 seconds • Empty the label dispenser. • Switch off connected external devices (e.g. PC). • Pull the power plugs of the postage meter, as well as all components connected to it (feeder, power supply unit of the sealer, …)
- Page 152 PostBase One Mailing System You need an original sealing liquid bottle and the suction hose, which came as an acces- sory with the sealer. • Screw the suction hose onto the empty original bottle. • To drain the sealant tank: Slightly com-...
- Page 153 Appendix – Moving the PostBase One to another location Remove the hand feed tray When using the original packaging for trans- port, you have to remove the hand feed tray. • Push the hand feed tray forward to release it from the locking device.
- Page 154 PostBase One Mailing System Remove the power sealer and letter catch tray (PostBase One with Sealer / Power Sealer) • Pull out both catch brackets. Catch brackets • Remove the connection cable of the power sealer from the postage meter: Unscrew and carefully pull off the plug.
- Page 155 Appendix – Moving the PostBase One to another location Remove cables Connection cable (postage meter – dynamic scale) Power cable Power cable Spring Connection cable dynamic scale Ethernet cable Connection cable (dynamic scale – sealer) Power supply unit Connection cable (sealer –...
- Page 156 PostBase One Mailing System On the dynamic scale (back cover) • Remove the connection cable of the sealer / feeder: Unscrew and carefully pull off the plug. • Pull out power cable. On the sealer (back cover) • Remove the power supply unit.
- Page 157 Appendix – Moving the PostBase One to another location Remove housing connector The connectors for mechanic coupling of the housings are located in the clearances of the side walls. To remove the connectors: • Slightly lift the affected component and remove the connector to the bottom.
- Page 158 PostBase One Mailing System Transport • Make sure the postage meter and all its components are safely packed before transporting them. We recommend using the original packag- ing when transporting the mailing system or sending it to the Customer Service.
- Page 159 Appendix – Moving the PostBase One to another location Installing the PostBase One mailing system on a new location Feeder Sealer Dynamic scale Postage meter Power Sealer Static scale Letter catch tray Caution! Please observe the following notes on systems with a dynamic scale: •...
- Page 160 PostBase One Mailing System • Place the PostBase One and its optional components on a firm, level, low vibration horizontal base. Please refer to page 173 for the standing sur- face values of the system in different config- urations. Insert housing connector...
- Page 161 Appendix – Moving the PostBase One to another location Connect the power sealer to the postage meter Warning: Mind Your Hands! Be very careful when handling the power sealer. As a conse- quence of its construction design, the power sealer has very sharp edges that might hurt you.
- Page 162 PostBase One Mailing System Mounting the envelope slide On the power sealer If you use a power sealer: • Attach the appropriate envelope slide to the power sealer. Both hooks of the enve- lope slide must snap into the housing of the power sealer.
- Page 163 Appendix – Moving the PostBase One to another location Mounting the protective glass to the postage meter Remove the bar that was attached for trans- Transport bar port: • Remove the four screws. • Remove the transport bar. • Fasten the protective glass to the housing of the postage meter with the four screws.
- Page 164 PostBase One Mailing System Insert cables Interfaces: Serial interface Interface for connection of Power sealer (Connecting is optional components decribed on page 161.) (e.g. feeder, sealer) Static scale connec- tion PC connection USB connection Connection to the local network (LAN)
- Page 165 Appendix – Moving the PostBase One to another location On the postage meter • Connect the network cable to the network connection on the side of the postage meter. Please check the correct position of the spring. • Plug the connection cable of the static scale into the scale connection of the post- age meter.
- Page 166 PostBase One Mailing System On the dynamic scale • Insert the connection cable of the sealer / the feeder into the 15-pin interface (P2) and tighten screws. • Plug the power cable into the power socket of the dynamic scale.
- Page 167 Appendix – Moving the PostBase One to another location On the feeder • Insert the FSCP plug (termination plug) into the 15-pin interface (P2) and tighten screws. • Plug the power cable into the power socket of the feeder. Commissioning and functions check •...
- Page 168 PostBase One Mailing System PostBase One Bulk Ink: • Insert the ink tank (see page 111). • Insert the print heads. To do this, call up the exchange procedure from the menu (see page 103). • Generate and check a test print (see...
-
Page 169: Glossary
Details on the product (e.g. First-Class) appear below the postage. Additionally, the meter imprint can contain custom adverts, i.e. logos or SMS texts. Personal Identification Number. The PostBase One mailing system can be protected against unauthorized use via a PIN. - Page 170 PostBase One Mailing System RemoteOne RemoteOne is a user-friendly PC application enabling you to set up, maintain, and use the PostBase One mail- ing system. RemoteOne enables you to perform your mailing sys- tem’s basic functions directly on your computer.
-
Page 171: Technical Data
Appendix – Technical Data Technical Data PostBase One – components Dimensions Width 21.7" / 550 mm 5.5" 21.7" 21.7" 12" 4.1" (postage meter) 140 mm 550 mm 550 mm 305 mm 103 mm 7.9" / 200 mm (hand feed tray) 11.9"... - Page 172 PostBase One Mailing System PostBase One – components Battery 3.6 V / 2 Ah / 20 mA lithium battery – – – – – order no.: 90.4701.8004.00 Display TFT, 480 x 272 pixels with touch panel – – – –...
-
Page 173: Postbase One - System Configurations
Type of Equipment Stand-alone equipment (Desk-top) Class of Equipment Class I (PostBase One, Dynamic Scale, Feeder), Class III (Sealer) Connection to Supply Pluggable type A (PostBase One, Dynamic Scale and Feeder) Not directly connected to the mains (Sealer: class III equipment) -
Page 174: Postbase One - Equipment
PostBase One Mailing System PostBase One – equipment Subject to short-term modification. -
Page 175: Ink Cartridges / Print Heads / Ink Tank
(2 pcs. FP cartridges, fluorescent red) order no. 58.0055.3190.00 Bulk Ink System FP Print head set (2 pcs. FP easy connect print heads for Bulk Ink System, fluorescent red), order no. 58.0055.3311.00 FP ink tank for PostBase One (fluorescent red) 175 ml, order no. 58.0055.3171.00 FP ink tank for PostBase One (fluorescent red) 350 ml, order no. -
Page 176: Mail Piece Specifications For Metering
Processing direction Only process envelopes in longitudinal direction (not upright) Labels Self-adhesive labels for PostBase One Pre-printed In the areas that are monitored by sensors (the areas envelopes marked gray in the illustration below), the envelopes must not contain any pre-printed surfaces. -
Page 177: Envelope Specifications For Automatic Feeding
Appendix – Technical Data Envelope specifications for automatic feeding Material Paper-based bleached envelopes Machinable Not pre-printed in the activity areas of the sensors (see page 176) Flap must be at the envelope’s long side Glued on the inside White or recycled Suitable, but with certain limitations: Padded envelopes Open flap on the envelope‘s short side... -
Page 178: Envelope Specifications For Sealing
PostBase One Mailing System Envelope specifications for sealing Format 3" x 5" to 10" x 14" (post card size to format ISO B4) Thickness Up to 0.28" (7 mm) Material Envelopes must be suitable for sealing by machine. The flap must be at the envelope’s long side. -
Page 179: Postage Meter Supplies
PostBase One mailing systems are available via the MyOneFP Customer Portal. The Security Device (PSD) The Revenector Security Device (PSD) used in your PostBase One mailing system was authorized according to specifications of the United States Postal Service following an internationally valid practice. To commensurate to this standard the cryp- tographic keys used by the PSD have to be updated or exchanged after a specified period of time. -
Page 180: License
PostBase One Mailing System License This is a copy of the current LICENSE file inside the CVS repository. LICENSE ISSUES ============== The OpenSSL toolkit stays under a dual license, i.e. both the conditions of the OpenSSL License and the original SSLeay license apply to the toolkit. - Page 181 Appendix – License * This product includes cryptographic software written by Eric Young * (eay@cryptsoft.com). This product includes software written by Tim * Hudson (tjh@cryptsoft.com). Original SSLeay License ----------------------- /* Copyright (C) 1995-1998 Eric Young (eay@cryptsoft.com) * All rights reserved. * This package is an SSL implementation written * by Eric Young (eay@cryptsoft.com).
-
Page 182: Security Declaration For Data Usage
Security Declaration for data usage Product Description: PostBase One postage meter The PostBase One postage meter is connected to the user’s local network through an Ethernet interface to share data with the Francotyp-Postalia Data center using both the local network and a suitable available internet connection provided by the user. -
Page 183: Index
Appendix – Index Index Battery compartment 194 Blank spots in meter imprint 32 Access control 11, 88 Bulk ink cartridge. See Ink tank disable 89 Buttons 23 enable 88 overview 143 Accessories 8 Account 24, 48 change 48 set for metering 48 Calibrate cartridges / print heads 96 Account administration 76 CAN BUS 142, 194... - Page 184 PostBase One Mailing System mount to the postage meter 162 Counter Advert Only 71 remove 153, 154 Feed Only 74 Envelopes incoming mail stamp 69 for automatic feeding 177 item counter (meter imprints) 58 for metering 176 Seal Only 75...
- Page 185 Appendix – Index Ink tank 8, 175 change 110 Hand feed tray 194 insert 111 mount 163 order no. 175 remove 153 removal for transport 150 Home screen 24 remove 111 functions 24 Installation (mailing system) 159 operation philosophy 24 Interface Housing connector 157, 160, 190, 191, 192 15-pin 165, 190, 191, 192...
- Page 186 55 Postage meter 9, 159 letters (feeder) 50, 52 overview 194 letters (hand feed tray) 49 Postage used 59 PostBase One with PC connection 62 Postal product Moistening set 25 adjust 94 PostBase One Feeder 9 Moistening unit 192...
- Page 187 98, 103 turning off 13 intensive cleaning 115 turning on 13 show ink level 97 PostBase One Dynamic Scale 9, 191 Print system flap 194 overview 191 Procedures 29 PostBase One Feeder 11, 190 Product 36, 38, 41, 43...
- Page 188 PostBase One Mailing System Sealing liquid 21, 120 Register display 59 topping up 120 print 59 sealit 21, 120 Release key 192 Security Device 179 Release knob Separation lever 190 letter removal in case of a jam 190 Separation (feeder) 17...
- Page 189 Turning off (mailing system) 13, 14 error categories 148 Turning on (mailing system) 13 in this manual 2 menu functions 144 on the PostBase One 141 URL 88 standard buttons 143 Usage data, upload 91 status indications 143 USB connection 164...
-
Page 190: Postbase One Mailing System (Overview)
PostBase One Feeder Release knob (letter removal in case of a jam) Slider (adjust letter path / PostBase One mailing system (overview) thickness) Letter guide face (black) Pressure bar Letter guide Cover Housing connector Pressure lever (below cover) Separation lever... - Page 191 PostBase One Dynamic Scale Protective glass Letter guide face (black) Housing connector Ventilation slots Power connection Connection cable 15-pin interface (P2) (dynamic scale – postage meter) optional...
- Page 192 PostBase One Sealer Switch seal / non seal envelopes Release key (moistening unit) Letter guide face (black) Housing connector Lid, behind sealant tank To open / close the lid: shortly press on the marker Connection cable (to dynamic scale or...
- Page 193 PostBase One Power Sealer Protective glass Letter guide face (black) Connection cable power sealer – postage meter Housing slots to mount the envelope slide Safety sign Envelope slide (version for systems with power sealer) optional...
- Page 194 PostBase One (postage meter) Display / touch screen (hinged) Label dispenser Protective glass Letter guide face (black) Hand feed tray 9-pin interface (power sealer connection) Weighing platform Letter catch tray Static scale To adjust the display incli- nation: Press the key...
-
Page 195: Service
Service Service Every PostBase One mailing system is thoroughly checked before leaving the factory. Should any faults occur with your PostBase One mailing system in spite of our extensive quality control, please contact FP Customer Service. FP Mailing Solutions Francotyp-Postalia, Inc.
Need help?
Do you have a question about the POSTBASE ONE and is the answer not in the manual?
Questions and answers