ProMinent DULCOMARIN 3 Compact Assembly And Operating Instructions Manual
Multi-channel measuring and control system
Hide thumbs
Also See for DULCOMARIN 3 Compact:
- Installation and configuration manual (28 pages) ,
- Assembly and operating instructions manual (184 pages)
Table of Contents
Advertisement
Quick Links
Assembly and operating instructions
Multi-channel measuring and control system
DULCOMARIN
3 Compact
®
EN
A2600
Please carefully read these operating instructions before use. · Do not discard.
The operator shall be liable for any damage caused by installation or operating errors.
The latest version of the operating instructions are available on our homepage.
Part number: 982801
Target group: Trained user.
Version: BA DC 089 09/18 EN
Advertisement
Table of Contents

Related Manuals for ProMinent DULCOMARIN 3 Compact


Summary of Contents for ProMinent DULCOMARIN 3 Compact
- Page 1 Assembly and operating instructions Multi-channel measuring and control system DULCOMARIN 3 Compact ® A2600 Please carefully read these operating instructions before use. · Do not discard. The operator shall be liable for any damage caused by installation or operating errors. The latest version of the operating instructions are available on our homepage.
- Page 2 Supplemental directives General non-discriminatory approach In order to make it easier to read, this document uses the male form in grammatical structures but with an implied neutral sense. It is aimed equally at both men and women. We kindly ask female readers for their understanding in this simplification of the text.
-
Page 3: Table Of Contents
Table of contents Table of contents Safety and responsibility............6 1.1 Introduction..............6 1.2 Labelling of Warning Information........6 1.3 General safety information..........7 1.4 Intended use..............9 1.5 User qualification............10 1.6 Warranty..............10 1.7 Network security............11 Functional description............12 2.1 Open-source software licences........ - Page 4 Table of contents 7.4 Wi-Fi interface (optional)..........70 Data logger................. 72 Operating the device............73 9.1 Home................73 9.2 System settings............73 9.2.1 Login/logout............. 73 9.2.2 Setting the language..........73 9.2.3 Display..............73 9.2.4 System > System settings........74 9.2.5 Network..............75 9.2.6 Web services >...
- Page 5 Table of contents Factory settings of device........... 94 13.1 Factory settings for free chlorine measured vari‐ able................94 13.2 Factory settings for combined chlorine measured variable..............95 13.3 Factory settings for pH measured variable....96 13.4 Factory settings for ORP measured variable.... 97 13.5 Factory settings for temperature measured vari‐...
-
Page 6: Safety And Responsibility
The printed version of the assembly and operating instructions is naturally not updated. We would therefore ask you to regularly visit the manufacturer’s homepage www.prominent.com to find out about the new electronic versions of the assembly and operating instructions. These versions may contain, among other things, information about new fault remedies or spare parts. -
Page 7: General Safety Information
Safety and responsibility CAUTION! Nature and source of the danger Possible consequence: Slight or minor injuries. Material damage. Measure to be taken to avoid this danger. – Denotes a possibly hazardous situation. If the situation is disregarded, it could result in slight or minor injuries. - Page 8 Safety and responsibility WARNING! Danger from hazardous substances! Possible consequence: Fatal or very serious inju‐ ries. Please ensure when handling hazardous sub‐ stances that you have read the latest safety data sheets provided by the manufacture of the haz‐ ardous substance. The actions required are described in the safety data sheet.
-
Page 9: Intended Use
Safety and responsibility Protection of radio reception This equipment is not intended to be used in resi‐ dential areas and cannot guarantee appropriate protection of radio reception in these environ‐ ments. The control’s limit values need to be permanently activated with swimming pool controllers. -
Page 10: User Qualification
Safety and responsibility 1.5 User qualification WARNING! Danger of injury with inadequately qualified per‐ sonnel The operator of the system / equipment is respon‐ sible for ensuring that the qualifications are ful‐ filled. If inadequately qualified personnel work on the unit or loiter in the hazard zone of the unit, this could result in dangers that could cause serious injuries and material damage. -
Page 11: Network Security
Responsibility for network security lies with the operator of the system. ProMinent GmbH in particular is not liable for any consequences resulting from inadequate security measures and the potential misuse of the user’s identification features. -
Page 12: Functional Description
Functional description Functional description The measuring and control system DULCOMARIN 3 controls the ® entire range of swimming pools – from private pools to public adventure pools. The measuring and control system DULCOMARIN ® 3 is used to treat swimming pool water. Eco!Mode adapts the circulation ®... -
Page 13: Open-Source Software Licences
Functional description 2.1 Open-source software licences The DULCOMARIN 3 controller may contain firmware with open- ® source software packages. You will find a list in table format of the possible software packages, the licensing conditions for these packages and the source code on the data carrier provided with the controller and on the product and download page for the DUL‐... -
Page 14: Operating Concept
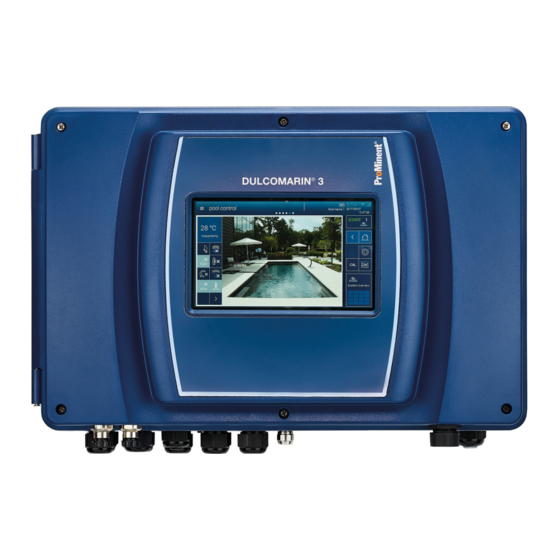
Operating concept Operating concept 3.1 Operating elements Operating elements The device is operated by a touchscreen as a combined input and output interface between man and machine (HMI). The capacitative touchscreen display provides a quick overview of all functions. It responds like a smartphone, which ensures simple and intuitive operation. - Page 15 Operating concept Help topics Pool name 2018-11-06 14:21:28 STOP STOP Operating elements System 1... 3 System information Pool name 1 06/11/2017 14:21:28 Menu Page index active pool Start/Stop START active pool Pool Home back Start screen Alarms Settings Errors & warnings Calibrate Recorder Pool measured value...
- Page 16 Operating concept Tab. 2: Pictograms as operating elements. Picto. Name Meaning and function Active pictograms are highlighted, while inactive pictograms remain dimmed. Only the active pictograms can be actuated. System alarms This key immediately opens the global list with all system alarms. Calibration This key immediately opens the calibration menu.
-
Page 17: Navigation Levels
Operating concept 3.2 Navigation levels Login Login System designation 2018-06-22 14:21:28 Select user A2532 Fig. 3: Login interface Select user Login System designation 2018-06-22 14:21:28 alias User1 Service Name User2 User Select user A2533 Fig. 4: User selection interface... -
Page 18: Interactions
Operating concept Entering a PIN/PUK Login System designation 2018-06-22 14:21:28 alias User1 Service A2534 Fig. 5: PIN entry interface You can enter the PIN you have assigned here. If you can’t remember your PIN, you can enter the PUK. The PUK is supplied with the device and can be found in a sealed envelope. -
Page 19: Navigation Levels
Operating concept 3.2.2 Navigation levels Help topics System designation 2018-06-22 14:21:28 STOP STOP Navigation levels (principle) System 1... 3 System level Pool level System overview Detail level A2517 Fig. 7: Principle of navigation levels Swipe between the pages of a level e.g. 1.1-1.3. Tapping on a level takes you one level lower in the menu if this is possible. - Page 20 Operating concept System measured values System measured values System designation 2018-06-22 14:21:28 STOP Temp Free chlorine System 1... 3 30.8 0.96 0.0 % 1.0 % 1.0 % 8.0 % 0.00 0.0 % 0.0 % 0.0 % 0.0 % 0.00 0.0 % 0.0 % 0.0 % 0.0 %...
- Page 21 Operating concept Measured values of pools, details Measured values pool System 1 2018-06-22 14:21:28 Setpoint Dosing START 7.09 7.00 7.20 10.0% 6.00 9.00 0.00 Setpoint Dosing 1.0 % °C °C Temperature Setpoint System overview 30.5 30.0 A2507 Fig. 11: Detailed pool display interface. This display is more detailed, the set limit values are also displayed here.
- Page 22 Operating concept Screen recorder Recorder System 1 2018-06-22 14:21:28 START Temperature Free chlorine Value Value Value Value System overview A2508 Fig. 12: Screen recorder mode interface. This is the screen recorder : tapping on it takes you to the next page of the display.
- Page 23 Operating concept Pool control (attractions) Pool control System 1 2018-06-22 14:21:28 START 30.6 °C Water temperature System overview A2511 Fig. 14: Pool control interface (attractions) You can switch the attractions (flood shower, fountains etc.) on and off here.
- Page 24 Operating concept Process flowchart Process flowchart System1 2018-06-22 14:21:28 START 7.10 pH 729 mV 30.5 °C Temp 0.96 ppm 1.15 ppm Clcomb. 25.7 % 42.2 % Floccculant 5.5 % Circulating pump Mode Pump Filter backflushing System overview Auto manual 50.0 m3/h Normal mode...
- Page 25 Operating concept Pool settings Pool settings System 1 2018-06-22 14:21:28 START Settings ECO! mode parameters Settings Control parameters for superchlorination Settings Timer, details, operating mode Background image, select pool geometry, Settings pool name System overview A2514 Fig. 17: Pool settings interface You can set or select the parameters for Eco!Mode ®...
-
Page 26: Access To The Setting Menus
Access to the setting menus Access to the setting menus You can use various means of access to access the controller’s setting menus: Hamburger menu with access to the system. Hamburger menu with access to the selected pool. Cog wheel icon Swiping and tapping on the display. -
Page 27: Pool
Access to the setting menus 4.2 Hamburger menu with access to the selected pool In the Hamburger menu with access to the selected pool, you can undertake all settings, which affect a certain pool. The pool in question is selected by tapping on the pool required before acti‐ vating the Hamburger menu Menu item Destination of the menu item... -
Page 28: Cog Wheel Icon
Access to the setting menus 4.3 Cog wheel icon ‘System settings’ The cog wheel icon takes you to the Ä Chapter 9.2 ‘System settings’ on page 73 menu item. The ‘System settings’ menu item contains the following submenus: Menu item Submenu item for which param‐... -
Page 29: Swiping And Tapping On The Display
Access to the setting menus Menu item Submenu item for which param‐ Destination of the menu item eters are to be set Gateway Ä Chapter 9.2.13 ‘Gateway (planned extension)’ on page 78 Ä Chapter 9.2.13 ‘Gateway (planned extension)’ on page 78 Ä... -
Page 30: Storage And Transport
Storage and transport Storage and transport User qualifications, storage and transport: trained personnel Ä Chapter 1.5 ‘User qualification’ on page 10 CAUTION! Danger of material damage The device can be damaged by incorrect or improper storage or transportation! – The unit should only be stored or transported in a well packaged state - preferably in its original packaging. -
Page 31: Assembly And Installation
Assembly and installation Assembly and installation User qualification, mechanical installation: trained and qualified Ä Chapter 1.5 ‘User qualification’ on page 10 personnel User qualification, electrical installation: electrical technician Ä Chapter 1.5 ‘User qualification’ on page 10 NOTICE! Installation site and ambient conditions –... -
Page 32: Installation, Mechanical
Assembly and installation 6.2 Installation, mechanical User qualification, mechanical installation: trained and qualified Ä Chapter 1.5 ‘User qualification’ on page 10 personnel 40317570 A2566 Fig. 19: Dimensional drawing, all dimensions in millimetres. Install the device so that it is at eye level and is easily accessible to operating personnel. - Page 33 Assembly and installation Wall mounting Take the wall bracket out of the housing A0490 Fig. 20: Removing the wall bracket Pull the two snap hooks (1) outwards ð The wall brackets snaps slightly downwards. Push the wall bracket downwards (2) from the housing and fold (3) it out Use the wall bracket as a drilling template to mark the posi‐...
- Page 34 Assembly and installation A0491 Fig. 21: Fitting the wall bracket Screw the wall bracket into position using the washers, see Fig. 21 A0492 Fig. 22: Fitting the wall bracket Hook the bottom of the housing (1) into the wall bracket Lightly press the housing at the top (2) against the wall bracket Then check that the housing is hooked in at the top and...
-
Page 35: Electrical Installation
Assembly and installation 6.3 Electrical installation User qualification, electrical installation: electrical technician Ä Chapter 1.5 ‘User qualification’ on page 10 WARNING! Mains connection via mains plug is not permis‐ sible. The device must not be connected to the mains using a mains plug. If the socket is incorrectly wired, there is a risk of the electric safety not being met due to faulty potentials. -
Page 36: Dimensioning/ Arrangement Of Threaded Connectors
Assembly and installation 6.3.1 Dimensioning/ arrangement of threaded connectors (4x33=)132 (4x33=)132 A2580 Fig. 23: Dimensioning/ arrangement of threaded connectors Bleeding (must not be removed or sealed) II. Blanking plug Remove the blind plugs on the device and insert the appro‐ priate threaded cable connectors. -
Page 37: Connection Labels, Base Module
Assembly and installation 6.3.2 Connection labels, base module Tab. 5: DULCOMARIN ® 3, connection labels, 100 ... 230 V AC Description Terminal iden‐ Terminals Pin Signal Function tifier [Power IN] Power supply 12 (L) Phase AC voltage supply to 100 ... 230 V AC unit 8 (N) Neutral conductor... - Page 38 Assembly and installation Description Terminal iden‐ Terminals Pin Signal Function tifier 7 (N) Neutral conductor 4 (PE) Protective earth conductor 3 (PE) Protective earth conductor Output relay 4 10 (L*) Phase switched feeding NC switched 9 (L*) Phase switched switched 6 (N) Neutral conductor 5 (N)
- Page 39 Assembly and installation Description Terminal iden‐ Terminals Pin Signal Function tifier 3 (+V) +15 V/10 mA power supply Digital input 6 1 (-) Reference potential External contact input with 15 V/10 mA 2 (+) Contact input power supply 3 (+V) +15 V/10 mA power supply Digital input 5...
- Page 40 Assembly and installation Description Terminal iden‐ Terminals Pin Signal Function tifier 5 (CANL) CAN low Modules 1 Module slot 1 for 2- channel IO modules Modules 2 Module slot 2 for 2- channel IO modules Modules 3 Module slot 3 for 2- channel IO modules Modules 4 Module slot 4 for 2-...
- Page 41 Assembly and installation Tab. 6: DULCOMARIN 3, connector labels, 24 V DC ® Description Terminal Terminals Signal Function identifier 24 VDC supply [Power IN] 12 (+) Phase DC supply to unit 24 VDC, - 15% ... 8 (-) Neutral conductor +20 % 4 (PE) Protective earth...
- Page 42 Assembly and installation Description Terminal Terminals Signal Function identifier 4 (PE) Protective earth conductor 3 (PE) Protective earth conductor Output relay 4 10 (+) Phase switched feeding NC switched 9 (+) switched Phase switched 6 (-) Neutral conductor 5 (-) Neutral conductor 2 (PE) Protective earth...
- Page 43 Assembly and installation Description Terminal Terminals Signal Function identifier supply 2 (+) Contact input 3 (+V) 15 V/10 mA power supply Digital input 5 1 (-) Reference potential External contact input with 15V/ 2 (+) Contact input 10mA power supply 3 (+V) +15 V/10 mA power supply...
- Page 44 2 (B) Cable B 3 (GND) RS485 reference potential 4 (shield) RS485 shield Customer LAN interface cNet Internal ProMi‐ nent system interface for dis‐ tributed system USB interface for customer’s USB stick SD card ProMinent internal SD card reader...
- Page 45 Outlet 100 …240 V AC, L, N, PE, max.10 A for feed Rel1, Rel2, Rel3 Tab. 9: Connection label on the upper part of the housing Connection label Function USB interface for customer’s USB stick. cNet Internal ProMinent system interface for distributed systems. Customer LAN interface. Modbus (RS485) interface, input. Modbus (RS485) interface, output.
-
Page 46: Terminal Layout
Assembly and installation 6.3.3 Terminal layout A2567 Fig. 24: Terminal layout Base module Internal connection to the HMI Module plug-in contacts Fan connector Position of fuses under the cover... -
Page 47: Terminal Diagram
Assembly and installation 6.3.4 Terminal diagram To preserve the relay’s contacts, we recommend using a protective RC circuit (e.g. part number 710802). This should be connected in parallel to the load, also see Ä Chapter 6.3.6 ‘Switching of induc‐ tive loads’ on page 55 . 6.3.4.1 Interfaces in the lower part of the housing - 1 A2591... - Page 48 Assembly and installation 6.3.4.2 Interfaces in the lower part of the housing - 2 A2592 Fig. 26: Interfaces in the lower part of the housing - 2...
- Page 49 Assembly and installation 6.3.4.3 Interfaces in the top part of the housing A2594 Fig. 27: Interfaces in the top part of the housing...
- Page 50 2-wire sensor, e.g. for chlorine, bromine or peracetic acid (PES). mA interface: for use with ProMinent 2-wire transmitters and sensors with 2- wire mA interface. Processing of active mA signals, type of connector: current source.
- Page 51 Assembly and installation Tab. 10: Sensor connection cable, coaxial, for terminal XE1/XE2 Description Part number Cable combination, coaxial, Ø 5 mm 0.8 m - SN6 – pre-assembled. 1024105 Cable combination, coaxial, Ø 5 mm 2 m - SN6 – pre-assembled. 1024106 Cable combination, coaxial, Ø...
- Page 52 Assembly and installation 6.3.4.4.3 Module: 2x conductive conductivity/temperature sensors. Part number 734223 Belegungsvarianten 2x Konduktive Leifähigkeit/ Kanal 1 Kanal 2 Temperatur A2385 Fig. 30: Module: 2x conductive conductivity/temperature sensors. Part number 734223 A module for the direct measurement of the electrolytic conductivity based on the conductive principle.
- Page 53 Assembly and installation Electrical data Parameter Value Cell constant: 0.005 1/cm ... 15 1/cm Measuring ranges dependent on the sensor type: Specific conductivity: 0.001 µS/cm ... 200 mS/cm Specific electrical resistance: 5 Ωcm ... 1000 MΩcm TOS (total dissolved solids): 0 ...
- Page 54 (PES), and pH and ORP via the pH transmitters, pHV1, part number 809126, and ORP, RHV1, part number 809127. For use with ProMinent 2-wire transmitters and sensors with 2- wire mA interface. Processing of active mA signals (type of connector: current source).
-
Page 55: Cable Cross-Sections And Cable End Sleeves
Assembly and installation 6.3.5 Cable Cross-Sections and Cable End Sleeves Minimum cross-section Maximum cross-section Stripped insulation length Without cable end sleeve 0.25 mm 1.5 mm Cable end sleeve without 8 - 9 mm 0.20 mm 1.0 mm insulation Cable end sleeve with 10 - 11 mm 0.20 mm 1.0 mm... -
Page 56: Connect The Sensors Electrically To The Controller
Assembly and installation The switching-off process can be investigated and documented using an oscilloscope. The voltage peak at the switch contact depends on the selected RC combination. A0842 Fig. 32: Switching-off process shown on the oscillogram. A0835 Fig. 33: RC protective circuit for the relay contacts Typical AC current application with an inductive load: 1) Load (e.g. - Page 57 Assembly and installation 6.3.7.1 Connection of pH or ORP sensors via a coaxial cable NOTICE! Possible incorrect measurement due to poor elec‐ trical contact Only use this type of connector if you do not wish to use pre-assembled coaxial cables. Observe the following with this type of connection: Remove the black plastic layer from the inner coaxial cable.
- Page 58 Assembly and installation When is potential equalisation used? Use potential equalisation if the pH/ORP measure‐ ment is interfered with by interference potentials from the sample media. For example interference potentials may be produced by electric motors with incorrect interference suppression or due to insuffi‐ cient galvanic insulation of electrical conductors etc.
- Page 59 Assembly and installation With a symmetrical connection, connect the cable for potential equalisation to the terminals of the controller. Beforehand, remove the respective wire jumper at these terminals. The potential equalisation must always be in con‐ tact with the medium being measured. A special potential equalisation plug (order no.
- Page 60 Assembly and installation Tab. 12: If you use a sensor without fixed cable or wish to extend the fixed cable, you must use the pre- assembled sensor cables: Accessories Part number Measuring line LF 1 m: 1046024 Measuring line LF 3 m: 1046025 Measuring line LF 5 m: 1046026...
-
Page 61: Compact System, Arrangement Of Components, Can Connectivity
Assembly and installation Sensor Connector Cell constant T-correction Max. temp. Measuring Measuring element range κ min range κ max Cell constant (°C) (1/cm) (Unit) (Unit) DIN 4-pin 1.00 0.01 mS/cm 20 mS/cm CKPt1 DIN 4-pin 1.00 Pt100 0.01 mS/cm 20 mS/cm 6.4 Compact system, arrangement of components, CAN connectivity General knowledge of CAN bus (Controller Area Network) is required in order to understand the document. -
Page 62: T-Connectors
Assembly and installation that the threaded connectors are not damaged. In environments with aggressive chemicals, the cables and plug connectors may be discoloured. This has no impact on functionality assuming that the components are correctly screw-connected. The discolouration is simply optical in nature. Various components are available for installing the CAN system bus: pre-assembled M12 cables of various lengths... -
Page 63: Can Construction
Assembly and installation If using M12 plug connectors provided by the customer, it is essential that suitable cable end sleeves are used and that the braid is connected in the plugs with protection against short cir‐ cuits. Sections of more than 50 m should be produced using rolled goods (Li02YSCY). - Page 64 Assembly and installation A2584 Fig. 37: Measuring and control system for a filter circuit Multi-channel measuring and control system pH sensor 10. ORP sensor DULCOMARIN ® 11. Coaxial cable Bypass fitting DGMa 12. Control cable Chlorine sensor CLE 13. Metering pump 1 (e.g. Beta) Chlorine sensor CTE 14.
-
Page 65: Determine The Requirement For Cables And Accessories
Assembly and installation 6.5.1 Determine the requirement for cables and accessories A2583 Fig. 38: Central unit connected to CAN bus Tab. 13: Accessories, supplied Pos. Quantity Name Order no. Connecting cable, CAN, M12, 5-pin, 0.5 m 1022137 T-coupler, M12, 5-pin. CAN 1022155 Terminal resistance, M12 coupling 1022154... -
Page 66: Routing The Can Bus Backbone
Assembly and installation Tab. 14: Accessories, supplied Pos. Quantity Name Order no. T-coupling, M12, 5-pin, CAN 1022155 Connecting cable, CAN, M12, 5-pin, 1 m 1022139 Fig. 40: Sensors Tab. 15: Accessories, supplied Pos. Quantity Name Order no. T-coupling, M12, 5-pin, CAN 1022155 Connecting cable, CAN, M12, 5-pin, 0.5 m 1022137... - Page 67 Assembly and installation CAUTION! Branching cables Possible consequence: Malfunctions. It is essential that the T-pieces and connecting cables (branching cables) enclosed with the mod‐ ules (M, A, G, N, R and I modules, CAN sensors and metering pumps with CAN bus) are used. Branching cables are the connections branching from the CAN bus backbone to the modules.
-
Page 68: Interfaces
Interfaces Interfaces 7.1 SD card A2593 Fig. 41: SD card slot in the top part of the housing SD card (industrial version) Wi-Fi USB stick (optional) Data backup / limited service life There is a possibility of loss of data with all types of data storage. -
Page 69: Usb Port
Interfaces 7.2 USB port Ensure IP66/IP67 degree of protection When you don't need the USB port, seal it with the screw cap. IP66/IP67 degree of protection is only ensured when the screw cap is screwed on. Functionality: Importing firmware updates Loading log book data (tabulator with separate CVS format) Loading recorder book data (tabulator with separate CVS format) -
Page 70: Digital Certificate
Interfaces 7.3.1 Digital certificate When using a digital certificate, should an error message appear in your browser, acknowledge the message so that you can continue working. 7.4 Wi-Fi interface (optional) Range within buildings Due to the fact that data transfer is based on the wireless setup, the range within buildings may vary greatly. - Page 71 Interfaces [Wireless mode AP (Access Point)] [wireless mode AP (Access Point)] , the device provides Wi-Fi and enables other smart devices (tablet, smartphone etc.) to con‐ nect to and communicate with the device. [WLAN mode client (station mode)] [WLAN mode client (station mode)] , the device accesses an existing Wi-Fi.
-
Page 72: Data Logger
Data logger Data logger The device has the function of a data logger. The data logger func‐ tion brings together all data from the screen recorder and the var‐ ious log books, such as error log book, user input log book, calibra‐ tion log book etc. -
Page 73: Operating The Device
Operating the device Operating the device 9.1 Home Jump back to the screen defined as “Home”. 9.2 System settings You can adjust the following sub-items in this menu item: 9.2.1 Login/logout ‘login’ or ‘log out’ as a user. Your system adminis‐ Here you can trator will provide the access data you need for this. -
Page 74: System > System Settings
Operating the device 9.2.3.2 Setting units Here you can set which units are to be used. The following units are available: Temperature in °C or °F ppm or mg/l 9.2.3.3 Reduce brightness after: Here you can set how long after a period without user intervention the display brightness is reduced. -
Page 75: Network
Operating the device 9.2.4.1 Unit settings Number of pools Here you can set the number of pools which your device is to con‐ trol. Up to 16 pools are possible. 9.2.4.2 System names ‘such as’ "Swim‐ Here you can enter the names of your system, ming pool in hotel"... -
Page 76: Web Services > Network Settings
Operating the device 9.2.6 Web services > NETWORK settings You can adjust or run the following sub-items in this menu item: 9.2.6.1 Web server settings Web server: Here you can set whether you want to permit access by remote maintenance software if needed. 9.2.6.2 VNC server Virtual Network Computing, or VNC for short, is software, which... -
Page 77: Screen Recorder
Operating the device Authorisation level/ Authorisation Recommended user role qualification Administration As service, but also: Trained user. Service. Create users. Administer roles. Delete user. Ä Chapter 1.5 ‘User qualification’ on page 10 Define user qualification: As a user, you can change your password. As an administrator, you can create, manage and delete users as well as changing the administrator password. -
Page 78: Network Can
You can adjust or run the following sub-items in this menu item: 9.2.13.1 9.2.13.2 9.2.13.3 9.2.14 Functional test This function is only available to the ProMinent Service. 9.2.15 Default settings Here you can reset various settings / values to the factory settings: All default values Reset users... -
Page 79: Help Topics
Operating the device Deletes the list of modules which have been assigned, but no longer exist in the bus. Deletes the list of modules which are assigned in the bus. A new assignment is needed. You will find the values available for replacing the factory setting Ä... -
Page 80: Measured Values Pool
Operating the device 9.9 Measured values pool ‘Measured values pool’ entry takes you to ‘Measured values pool’ (depiction of all measured variables for the selected pool). Here you can then read all parameters or configure all parameters according to your user rights. 9.10 Process flowchart In the Process flowchart menu you can see the relationships... -
Page 81: Superchlorination
Operating the device 9.12.4 Superchlorination Superchlorination is needed at the start of the bathing season, after refilling the swimming pool or if the pool has temporarily been affected by harmful microorganisms. But the balance can also be upset in the summer or if water temperatures are high and there is increased growth of organic substances. -
Page 82: Application-Specific Settings
Application-specific settings Application-specific settings Ä Chapter 1.5 ‘User qualifica‐ User qualification: trained user, tion’ on page 10 Application-specific settings include Configuring pools Setting the measured variables Setting the control Set the pumps Setting the relays, digital inputs and digital outputs Setting Eco!Mode and superchlorination You can access the application-specific settings via the [Measured value pool] menu, Fig. - Page 83 Application-specific settings Details of measured variables System designation 2018-06-22 14:21:28 START Screen recorder of the last 2 hours 14.00 7.10 7.00 6.00 14.00 0.00 Alarms max. Setpoints and control parameters System overview Setpoint, normal mode Setpoint, Eco!Mode Superchlorination A2506 Fig. 45: [Details of measured variables] interface. 1.
-
Page 84: Calibrating
Calibrating Calibrating Ä Chapter 1.5 ‘User qualifica‐ User qualification: trained user, tion’ on page 10 Every measured variable, active in a control circuit, can and must be calibrated. Every calibration process is logged by the device. You are guided by the device, context-sensitively through the menu, to calibrate the respective measured variable. -
Page 85: Calibrate: Measured Variable, Ph
Never pour the buffer back into the storage bottle, but dispose of it. Tab. 16: The following calibration buffers can be used, for example: Manufacturer pH value ProMinent ® ® DIN 19266 DIN 19267 Merck+Riedel ®... - Page 86 Calibrating Calibration Pool 1 2018-06-22 14:21:28 START Calibrate the measured value Temperature Free chlorine Total chlorine System overview Temperature of Cl sensor A2521 Fig. 46: Calibration interface. Select the measured variable to be calibrated by tapping and scrolling on the display. In this case pH. Under CAL setup, set calibration parameters expedient for your measurement.
-
Page 87: Calibrate: Measured Variable, Orp
Calibrating 11.2 Calibrate: measured variable, ORP Once the packaging has been opened, the ORP buffers often veer towards higher mV values due to the addition of oxygen. Therefore use as small a vessel as possible and use up the ORP buffer quickly. -
Page 88: Calibrate: Measured Variable, Free Chlorine
Calibrating 11.3 Calibrate: measured variable, free chlorine Measured variable Sensor DPD tablet Free chlorine CLE 3-CAN-P DPD 1 CLE 3.1-CAN-P DPD 1 CBR 1-CAN-P DPD 1 CLO 1-CAN-P DPD 1 [CAL] Tap on Calibration Pool 1 2018-06-22 14:21:28 START Calibrate the measured value Temperature Free chlorine Total chlorine... -
Page 89: Calibrate: Measured Variable, Total Available Chlorine
Calibrating 11.4 Calibrate: measured variable, total available chlorine Measured variable Sensor DPD tablet Total available chlorine CGE 3-CAN-P DPD 1 [CAL] Tap on Calibration Pool 1 2018-06-22 14:21:28 START Calibrate the measured value Temperature Free chlorine Total chlorine System overview Temperature of Cl sensor A2521 Fig. -
Page 90: Calibrate: Measured Variable, Total Available Bromine
Calibrating 11.6 Calibrate: measured variable, total available bromine Measured variable Sensor DPD tablet Total available bromine BRE 3-CAN-P For DBDMH, free bromine: DPD1. For BCDMH: one DPD 4 tablet or one DPD 1 tablet + one DPD 3 tablet [CAL] Tap on Calibration Pool 1... -
Page 91: Calibrate: Measured Variable, Chlorine Dioxide
Calibrating 11.8 Calibrate: measured variable, chlorine dioxide Measured variable Sensor DPD tablet Chlorine dioxide CDR 1-CAN DPD 1 [CAL] Tap on Calibration Pool 1 2018-06-22 14:21:28 START Calibrate the measured value Temperature Free chlorine Total chlorine System overview Temperature of Cl sensor A2521 Fig. -
Page 92: Calibrate: Temperature Measured Variable
Calibrating 11.10 Calibrate: Temperature measured variable [CAL] Tap on Calibration Pool 1 2018-06-22 14:21:28 START Calibrate the measured value Temperature Free chlorine Total chlorine System overview Temperature of Cl sensor A2521 Fig. 55: Calibration interface. Select the measured variable to be calibrated by tapping and scrolling on the display. -
Page 93: Flocculant Treatment
Flocculant treatment Flocculant treatment A flocculant (ml/h) is metered into the volumetric flow circulated /h) upstream of the filter. The quantity to be added is noted on the flocculant packaging, e.g. 0.5 ... 1.5 ml per m /h circulation capacity. Assumption: If the circulation capacity of pool X is 100 m /h and the amount of flocculant to be added is 1.0 ml per m... -
Page 94: Factory Settings Of Device
Factory settings of device Factory settings of device 13.1 Factory settings for free chlorine measured variable Free chlorine measured variable - factory settings Name Normal mode Superchlorination Eco!Mode ® Controller Control param‐ active inactive inactive settings eter Control type Control direction Increase value, on Increase value, on Increase value, on... -
Page 95: Factory Settings For Combined Chlorine Measured Variable
Factory settings of device 13.2 Factory settings for combined chlorine measured variable Combined chlorine measured variable - factory settings Name Normal mode Eco!Mode ® Controller Control parameter inactive inactive settings Control type 2 points 2 points Control direction Decease value, on one Decease value, on one side side... -
Page 96: Factory Settings For Ph Measured Variable
Factory settings of device 13.3 Factory settings for pH measured variable pH measured variable Name Normal mode Superchlorination Eco!Mode ® Controller set‐ Control param‐ active active active tings eter Control type Control direc‐ On both sides; On both sides; On both sides; tion dead zone dead zone... -
Page 97: Factory Settings For Orp Measured Variable
Factory settings of device 13.4 Factory settings for ORP measured variable ORP measured variable Name Normal mode Superchlori‐ Eco!Mode ® nation prohibited! Controller set‐ Control param‐ inactive inactive tings eter Control type Control direc‐ On one side; increae On one side; increase tion value value... -
Page 98: Factory Settings For Temperature Measured Variable
Factory settings of device 13.5 Factory settings for temperature measured variable Temperature measured variable Name Normal mode Warm bathing Eco!Mode ® Controller Control parameter inactive inactive inactive settings Control type 2-point 2-point 2-point Control direction Raise Raise Raise Setpoint Display range (bar graph) min. -
Page 99: Commissioning
Commissioning Commissioning Ä Chapter 1.5 ‘User qualifica‐ User qualification: trained user, tion’ on page 10 The following tasks should be undertaken for commissioning pro‐ vided they haven't already been carried out. Once the sensors have been calibrated, the system controlled by the DULCO‐ MARIN 3 is in principle ready for use. - Page 100 Commissioning Description of procedure for starting The following requirements must be met: up a swimming pool for the first time mechanical assembly carried out, (single pool) hydraulic installation carried out, circulating pump running, electrical installation carried out, CAN connectivity carried out, communication interfaces configured.
-
Page 101: Diagnostics, Error And Warning Messages
Diagnostics, error and warning messages Diagnostics, error and warning messages Ä Chapter 1.5 ‘User qualifica‐ User qualification: trained user, tion’ on page 10 The unit guides you and notifies you with complete help, warning and error texts that appear on the display when required. These texts enable a trained user to deal with the error etc. -
Page 102: Software Update
Only the latest software is installed, all the application settings are retained. Download the latest software version from the manufacturer’s homepage www.prominent.com. Copy this software onto a commercially available USB storage device. Unscrew the protective cap from the USB port on the bottom right of the upper part of the housing and insert the USB storage device into the USB port. -
Page 103: Maintenance
Maintenance Maintenance Ä Chapter 1.5 ‘User qualifi‐ User qualification: instructed user, cation’ on page 10 The device requires no maintenance. Use a soft cloth and commercially available window cleaner to clean the surfaces. Regularly check the device for damage, e.g. each time the device is used. -
Page 104: Technical Data
Technical data Technical data 18.1 General information Parameter Value Ambient temperature: -5 ... 50 °C (for use indoors or with a protective enclosure). Requires a low voltage cable with a temperature resistance of ≧ 70 °C. Storage temperature: -20 ... 70 °C Electrical connection: 90 ... - Page 105 Technical data Output relay, feeding Relay Function Protective circuit Switching power Load type XR4 relay 4 Output relay 100 ... Varistor on NO and Max. 1100 VA (≤ Ohmic and induc‐ 230 VAC, feeding NC terminal and tive on NO terminal additionally RC cir‐...
- Page 106 Technical data Digital input with power supply (XK1 ..., XK8) Tab. 20: Static/dynamic signal (frequency ≤ 10 kHz) Insulation voltage 500 V pp max. Output voltage of digital input: max. 18 V (electrical strength of the switch) Short circuit current, digital input (also capacitive max.
-
Page 107: Spare Parts And Accessories
Spare parts and accessories Spare parts and accessories Ordering address for spare parts and accessories: The current address for ordering spare parts and accessories can be found on the manufacturer’s homepage ProMinent GmbH. 19.1 Spare parts Fuses Component Part number [H] = high switching capacity. - Page 108 Spare parts and accessories Additional measuring modules The measuring modules available as accessories can be fitted to Ä Chapter 6.3.3 ‘Terminal the base modules shown in chapter layout’ on page 46 . For terminal diagrams see Ä Chapter 6.3.4 ‘Terminal diagram’ on page 47 . The measuring modules can replace or supplement the existing measuring modules.
-
Page 109: Formal Information And Standards
Refer to the Material Safety Data Sheet for your feed chemical. A current Declaration of Decontamination is available to download on the ProMinent website. Sign indicating EU collection system In accordance with the European Directive 2012/19/EU on waste electrical and electronic equipment, this device features the symbol showing a waste bin with a line through it. -
Page 110: Index
Index Index Accessibility ......32 Installation site and ambient conditions ..31 Action, step by step . - Page 111 Index RC member ......107 Recycling ......30 Reference measuring device .
- Page 112 ProMinent GmbH Im Schuhmachergewann 5 - 11 69123 Heidelberg Telephone: +49 6221 842-0 Fax: +49 6221 842-419 Email: info@prominent.com Internet: www.prominent.com 982801, 2, en_GB © 2018...
Need help?
Do you have a question about the DULCOMARIN 3 Compact and is the answer not in the manual?
Questions and answers