Table of Contents
Advertisement
Quick Links
Control Console
User Manual
Version 3.0.1
C o p y r i g h t © 2 0 1 1 . E le c tr o n i c T h e a t r e C o n t r o l s , I n c .
A l l R i g h t s r e s e r v e d .
P r o d u c t in f o r m a t i on a n d s p e c i f i c a t i o n s s u bj e c t t o c h a n g e .
P a r t N u m b e r : 7219M1200-3.0.1 R e v A
R e le a s ed : 2 0 1 1 - 1 0
Advertisement
Table of Contents

Related Manuals for ETC SmartFade


Summary of Contents for ETC SmartFade
- Page 1 Control Console User Manual Version 3.0.1 C o p y r i g h t © 2 0 1 1 . E le c tr o n i c T h e a t r e C o n t r o l s , I n c . A l l R i g h t s r e s e r v e d .
- Page 2 E T C pe r m i t s t h e r e p r o d u c t i o n o f m a t e r i a l s i n th i s m a n u a l o n l y f o r n o n - c o m m e r c i a l p u r p o s e s . A l l o t h e r r i g h ts ar e r e s e r v e d b y E T C .
-
Page 3: Table Of Contents
Text Conventions........2 Help from ETC Technical Services ......3 Power-up and Shutdown Procedures. - Page 4 Edit Sequences & Stack ........45 Edit the content of a Step ......45 SmartFade v3.0.1 User Manual...
- Page 5 Delete a Step ........46 Insert a Step .
- Page 6 Update the Software ....... . .73 SmartFade v3.0.1 User Manual...
-
Page 7: Introduction
SmartFade console offers a great feature range including hands-on manual control, memory driven operation, and an impressive array of features for systems work. SmartFade is perfect for any venue, usable for small touring shows, auditorium productions, or as a stage manager’s remote console. -
Page 8: Using This Manual
C A U T I O N : A Caution statement indicates situations where there may be undefined or unwanted consequences of an action, possible data loss or equipment problems. Please E-mail comments about this manual to: TechComm@etcconnect.com SmartFade v3.0.1 User Manual... -
Page 9: Help From Etc Technical Services
You can ask other users for advice on the ETC forums at www.etcconnect.com/community. If none of these resources is sufficient, contact ETC Technical Services directly at one of the offices identified below. Emergency service is available from all ETC offices outside of normal business hours. -
Page 10: Power-Up And Shutdown Procedures
Power up P o w e r - u p P r o c e d u r e SmartFade uses the power button for power-up and power-down. It is also used to access the operating mode selection menu. Action... -
Page 11: Operating Modes
O p e r a t i n g M o d e s Hold the power button during start-up to enter the Operating Modes menu. This allows you to select different operating modes. No data is lost when changing modes, it will reappear when the corresponding mode is selected again. -
Page 12: Save & Load To Memory Card
Save & Load to Memory Card SmartFade uses either a standard SD Memory card or SDHC Memory card as the primary external storage device. Before you can use a new SD card make sure it is formatted correctly (FAT16). See “Format SD Memory Card” on page 7. -
Page 13: Format Sd Memory Card
F o r m a t S D M e m o r y C a r d SD and SDHC Memory cards are usually pre-formatted. You may need to reformat your card(s) so that they will function with the console. SmartFade supports the following formats on SD and SDHC cards: •... - Page 14 Right-click on the SD card icon and select Format. This will open the formatting window. Step 4: In the File System field, select FAT. This will establish the card’s file system as FAT16. Step 5: Click Start and then complete the formatting process. SmartFade v3.0.1 User Manual...
-
Page 15: General Information
C h a p t e r 1 General Information This chapter gives you the general information you need to get started. This chapter contains the following sections: • Control Capacity ........10 •... -
Page 16: Control Capacity
Control Capacity SmartFade is a simple to use but very powerful lighting console for 48 (96) intensity channels a specifically designed to be usable right out of the box. Intensity channels There are 48 (96) intensity channels. Each intensity channel can control one or more dimmers. -
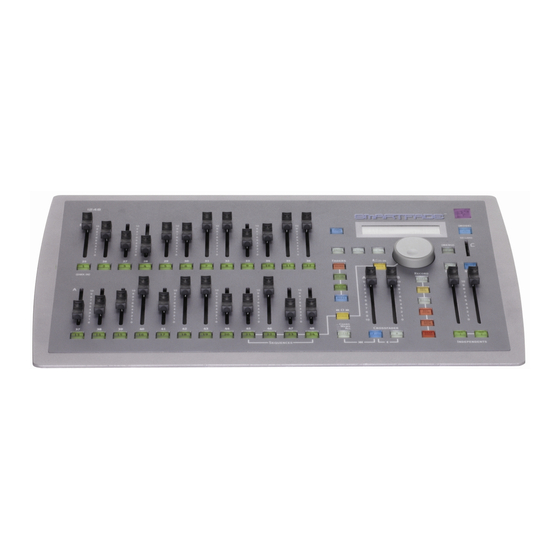
Page 17: Frontpanel Functionality
Frontpanel Functionality This is an overview of the functionality of the frontpanel of your SmartFade console. SmartFade 1248 and 1296 look exactly like this 2496 console, LCD Menus the only difference being that they have two rows of 12 faders The display with wheels and buttons is used instead of two rows of 24 faders. -
Page 18: Faders & Bump Buttons
199 steps of the programmable Stack, or for single- scene fading into intensities that are set blind in NEXT mode. Stack & Crossfader, page 60 The following buttons are used together with the crossfader NEXT STACK SmartFade v3.0.1 User Manual... -
Page 19: Sequence & Stack Functions
S e q u e n c e & S t a c k f u n c t i o n s These buttons are used to program and edit Sequences in the Mems faders, and the Stack of the Crossfader. See “Sequences”... -
Page 20: Lcd & Wheel Functions
In preview mode it’s possible to see programmed intensities for MEMS faders 1-24 Action Console Feedback Activate preview mode Bumps 1-24 start blinking. Press again to VIEW deactivate preview mode. Select fader The selected Bump stops blinking. The LCD(s) will show intensities for the currently selected fader mode. SmartFade v3.0.1 User Manual... -
Page 21: Philosophy Of The Console
Phi losophy of the Console SmartFade is designed to be simple to use, and still offer advanced functionality for a standard rig of conventional lights. The back-lit buttons make it possible to run SmartFade without an additional screen. They offer information about content, fader mode and channel intensities. -
Page 22: Data Structure & Timing
Stack. There are 24 fader memories in 12 fader pages = 288 memories in total (in SmartFade 24/96 this is doubled to 576 memories in total). -
Page 23: Chapter 2 Setup
C h a p t e r 2 Setup The default setup of any SmartFade console allows you to run 48 or 96 dimmer channels straight out of the box with a one-to-one patch. You can create your own patch as well. -
Page 24: Dmx Output
In rare cases some DMX devices may have trouble reading DMX at the full standard speed supplied by SmartFade. This is often seen as flicker in your lighting devices. You can slow down the DMX out speed to try to alleviate such communications errors with other manufacturer’s equipment. -
Page 25: Clear/Set Patch
Clear/Set Patch C l e a r P a t c h The patch is cleared from the Patch Menu. Menu>Patch>Patch - special>[Clear Patch] Press (MENU) to confirm. S e t P a t c h 1 t o 1 The patch is set 1 to 1 from the Patch Menu. -
Page 26: Patch Dimmers
Patch Dimmers Your SmartFade controls 48 or 96 intensity channels that can be patched to a DMX universe with 512 outputs. The Default Patch SmartFade defaults to a “1 to 1” patch for dimmers. This is the simplest version of a patch and is the most common, as it is easy to remember and provides immediate control with all of your available channels. -
Page 27: Patch By Channel
P a t c h b y C h a n n e l Patching by channel is just as simple as patching by dimmer. The only difference is that the starting point is the intensity channel. By doing it Live you can check what is patched to each intensity channel, and then patch or unpatch more dimmer outputs to this channel. -
Page 28: Patch Independents
Patch Independents Independent buttons IND 1 and IND 2 provide two outputs separated from all other controls. They are intended to operate devices such as smoke machines, tab tracks, cue lights, etc. • SOLO does not affect these outputs. •... -
Page 29: Console Settings
D M X I n There are two settings for DMX In. One is the mode, which is how the incoming DMX is patched and merged. The other is what Smartfade shall do if incoming DMX stops (data loss). D M X I n m o d e This is set up in the Settings menu. -
Page 30: Dmx Out
Menu>Settings>Language>[English] Current choices are • English • Français • Deutsch • Español • Italiano D i s p l a y Display settings are done from the Settings menu. Menu>Settings>Display>[Contrast] Menu>Settings>Display>[Brightness] SmartFade v3.0.1 User Manual... -
Page 31: Buttons
B u t t o n s You can set the overall intensity for the LED buttons. This is done from the Buttons menu. Menu>Settings>[Buttons] D i s a b l e R e c o r d i n g Select OFF to allow recording and ON to disable recording. -
Page 32: Midi Setup
MSC is a show control standard within MIDI that usually is used when different devices are linked in a show control setup. SmartFade supports a basic set of Midi Show Control (MSC) commands. They are both sent and received at all times - regardless of the settings for MIDI channel. -
Page 33: Synchronising Two Smartfades
S y n c h r o n i s i n g T w o S m a r t F a d e s To synchronise playback of two SmartFade consoles, just connect MIDI OUT from console A to MIDI IN on console B. Now the main playback functions are “mirrored” from console A to console B. -
Page 34: Midi Channel
The Basic and Advanced MIDI functions apart from MSC are sent and received on the same MIDI channel. This is set in the MIDI menu. Menu>Setup>MIDI>[Midi Channel] Use MENU to select MIDI Channel (1-16) or On/Off. Use the wheel to change the currently selected parameter. SmartFade v3.0.1 User Manual... -
Page 35: Program
C h a p t e r 3 Program Once you have set up your console to control the dimmers in your rig, you can start programming. This chapter contains the following sections: • Intensity channels ........30 •... -
Page 36: Intensity Channels
Crossfader - which means that these levels will be output after the next crossfade. This allows you to preset levels manually and fade into them like in a traditional single-scene manual lighting console. See “Single Scene Crossfading” on page 63. SmartFade v3.0.1 User Manual... -
Page 37: Adjust Channel Range
A d j u s t C h a n n e l R a n g e It’s possible to select any channel range and adjust proportionally in the Channels menu. Step 1: Open the Adjust Channel Range menu: Menu>Channels>[Adjust Channel Range] Step 2: Use the wheel to select start channel. -
Page 38: Memories
Every intensity can be stored to a memory for playback. There are 12 fader pages with 24 (48) memory faders in each page. This provides a possible total of 288 memories in a SmartFade 1248/1296 and 576 memories in a SmartFade 2496. -
Page 39: Record A Magic Memory
R e c o r d a M a g i c m e m o r y You can set up and record a random look using the Magic function. Action Console Feedback 1. Set channels or memory Faders All channel and memory faders over 0% will faders be included in the Magic function. -
Page 40: Snapshots
C l e a r a l l S n a p s h o t s Action Console Feedback Clear the Snapshot buffer The Snapshot buffer is immediately deleted, SNAP CLEAR SHOT this cannot be undone. SmartFade v3.0.1 User Manual... -
Page 41: Copy A Snapshot To A Memory
C o p y a S n a p s h o t t o a M e m o r y It’s possible to copy a Snapshot to a memory live (View & Copy Snap) or blind (Copy Snap) in the Snapshot menu. -
Page 42: Sequences
Sequence steps can have three times; Up, Down and Wait time. There is also an override Rate and Fade factor. See “Sequence & Stack Times” on page 52. Playback modes Sequences can be played back as a loop (chase), OneShot or manually. See “Run Modes” on page 51. SmartFade v3.0.1 User Manual... -
Page 43: Record A Sequence
R e c o r d a S e q u e n c e Action Console Feedback 1. Activate record All buttons that can record in this mode will sequence blink at full in yellow. If there is a memory or sequence stored already, this button will be dimmed (press CLEAR to exit). -
Page 44: Record A Magic Sequence
It lights up at full if the fader is above zero and contributing to the output. Select MEMS mode and move the fader for the recorded sequence up. The sequence you recorded should appear on stage. SmartFade v3.0.1 User Manual... -
Page 45: Stack
Stack The Stack sequence is recorded and played back on the Crossfader. It is intended to be the main cue list for a show. The Stack can contain up to 199 steps. Stack steps are arranged as 199 incremental steps with up to 9 decimal insertions allowed between major steps. -
Page 46: Record The Stack From Bumps
Repeat steps 3-4 until satisfied. 5. End recording End recording. The console will return to the fader mode prior to recording this sequence. Press UNDO to skip the recording. SmartFade v3.0.1 User Manual... -
Page 47: Record A Memory And Stack Step
R e c o r d a M e m o r y a n d S t a c k s t e p It’s possible to set up and record a memory state as a step of the Stack at the same time. Action Console Feedback... -
Page 48: Record A Stack State
Live step. 4. Confirm recording The moment the button is pressed, the output is stored and the console will automatically return to it’s previous fader mode. Press UNDO to undo this recording. SmartFade v3.0.1 User Manual... -
Page 49: Chapter 4 Edit
C h a p t e r 4 Edit Once you have started recording information as described in Program you can play back this information, and you can edit it. This Chapter is about editing. This chapter contains the following sections: •... -
Page 50: Edit Memories
(change page if neces- gets for this copy operation will blink. Empty sary). ones blink at full, occupied ones are dimmed. 3. Select target As soon as the button is pressed, the source memory is recorded. SmartFade v3.0.1 User Manual... -
Page 51: Edit Sequences & Stack
Edi t Sequences & Stack Sequence and Stack steps can be edited in the same way. The Stack has some extra editing functions since there are unique Stack states and point cues, which don’t exist in sequences. There is also a way to edit any Stack step directly, without entering the edit menus. -
Page 52: Delete A Step
Use the wheel to select Delete. Press (MENU) to confirm. Step 6: You will be asked to confirm this command. Press (MENU) to confirm. You can press UNDO to skip and revert to the data previous to this action. SmartFade v3.0.1 User Manual... -
Page 53: Insert A Step
I n s e r t a S t e p Step 1: Open the Sequences menu: Menu>[Sequences] Step 2: Use the wheel to select Sequence (1-24) or Stack (XF). Press (MENU) to confirm. Step 3: Use the wheel to select Modify Steps. Press (MENU) to confirm. -
Page 54: Insert A Pointq
Press (MENU) to confirm. The new step will be inserted after the selected step. You can continue selecting steps and inserting steps. You can press UNDO to skip and revert to the data previous to this action. SmartFade v3.0.1 User Manual... -
Page 55: Change The Content Of A Step
C h a n g e t h e c o n t e n t o f a S t e p Use this function to change the memory or channel content of a step to another content. This is the only way to edit a step referencing to a single channel. Step 1: Open the Sequences menu: Menu>[Sequences]... -
Page 56: Edit The Content Of A Stack Step Directly
Select Sequence by pressing a bump button, or press STACK. The content of the current step will be selected for editing. Step 3: Use the intensity faders to edit the memory. Press EDIT MEM to confirm. SmartFade v3.0.1 User Manual... -
Page 57: Copy A Sequence
C o p y a S e q u e n c e Action Console Feedback 1. Activate Copy mode This button lights up. All buttons with content COPY will blink at full (press CLEAR to exit). 2. Select source sequence When this button is pressed, all possible tar- (change page if neces- gets for this copy operation will blink. -
Page 58: Sequence & Stack Times
The RATE button can provide Fade controls for the Stack. This will affect the playback of the whole Stack. Press RATE (with STACK active). Use the wheel to set a balance between the fade and the wait time for all steps. Fade 0% means no fade. SmartFade v3.0.1 User Manual... - Page 59 E d i t s t e p t i m e s b l i n d It is possible to edit the times blind, for each step of a Sequence or Stack. This is done with the Step Timing - One Step function in the Sequences menu. Step 1: Open the Set Sequences menu: Menu>[Sequences]...
- Page 60 Menu choice Console Feedback U> Wheel Global Up times D> Wheel Global Down times W> Wheel Global Wait times Step 5: Press (MENU) to store. Press (MENU) to confirm Step 6: Done. Press EXIT to exit. SmartFade v3.0.1 User Manual...
-
Page 61: Playback
C h a p t e r 5 Playback As soon as you have programmed information you can play it back in different ways. This Chapter is about playback functions. This chapter contains the following sections: • General Functions ........56 •... -
Page 62: General Functions
All Rate settings are cleared. CLEAR RATE B u m p M a s t e r The Bump Master sets the level to which bump buttons will flash. See Bump Button functionality for each type of fader mode. SmartFade v3.0.1 User Manual... -
Page 63: Memories
Memories Memories are played back from the faders in MEMS mode. In each of the 12 fader pages the buttons with memories stored will light up dimmed in red when a page is selected. When the fader is contributing to the output, the button will light up in full. S e l e c t F a d e r P a g e If a fader is above zero when a different page is selected, it will not be updated to the content of the new page until it is brought to zero. -
Page 64: Sequences
Use the wheel to set a Rate % that will scale the total time of the whole Sequence. Original timing is not lost and may be recovered by clearing the Rate %. If a BPM is set, it will replace the Rate %. SmartFade v3.0.1 User Manual... - Page 65 F a d e Activate RATE and then press the bump button of any fader (in MEMS mode) with a sequence.Then hold RATE. Use the wheel to set a Fade % that will scale the fade times of the whole Sequence. Fade 0% means no fade.
-
Page 66: Stack & Crossfader
Stack. N o t e : DIPLESS: SmartFade provides dipless crossfades as long as both faders are moved in parallel. This means that active channels which remain unchanged in both scenes will not 'dip' to 50% of their level as you move the crossfaders from one scene to the next, making for much better-looking scene transitions. -
Page 67: Rate & Fade For The Stack
J u m p t o s t e p It’s possible to go directly to any step of the Stack with this function. Action Console Feedback Activate GOTO mode (held) As long as the button is held, the display will STACK allow you to scroll to any step. -
Page 68: Tap Mode For The Stack
Step 8: Press EXIT to confirm and exit. N o t e : You can reset all wait times set with Tap to zero. See “Global Time for all steps” on page 54. SmartFade v3.0.1 User Manual... -
Page 69: Single Scene Crossfading
S i n g l e S c e n e C r o s s f a d i n g When STACK is off and NEXT is on, SmartFade is set up to run like a single-scene crossfading console. When Next is on the green channel bumps are lit with the levels to be output to stage on the next Crossfade, when Next is Off the lights indicate the actual stage levels. - Page 70 SmartFade v3.0.1 User Manual...
-
Page 71: Two Scene Mode
Two Scene Mode There are three operating modes, and Two Scene Mode is one of them. In this mode you can use your SmartFade console straight out of the box like a manual two scene presetting console. This chapter contains the following sections: •... -
Page 72: General Information
To use the console as a two scene console, you have to start it in Two Scene Mode. “Operating Modes” on page 5. You will no longer be able to access “normal” SmartFade functions as described in this manual. It is now only a two scene presetting console. -
Page 73: Two Scene Fading
Your SmartFade console has two rows of faders. When the console is started in Two Scene Mode the top row is connected to Crossfader A, and the bottom row is connected to Crossfader B. - Page 74 SmartFade v3.0.1 User Manual...
-
Page 75: Dmx Backup
C h a p t e r 7 DMX Backup Backup mode is the third console operating mode. You can capture 512 outputs of DMX from an external console and store to 24 (48) memories that can be played back from the faders or the Stack. -
Page 76: General Information
See “Operating Modes” on page 5. You will no longer be able to access “normal” SmartFade functions as described in this manual. It is now only a backup console. In Backup Mode, there can be no console output until you connect DMX input from another DMX output device or until you record DMX from another device into the memory faders. -
Page 77: Backup Memories
The backup memories are recorded by connecting the DMX output of an external console to the DMX in port of your SmartFade console when it is started in Backup Mode. P r e p a r a t i o n Step 1: Set DMX In:To Memory. -
Page 78: Stack In Backup Mode
The Stack provided in DMX Backup mode consists of memories 1-24 (48) linked in order. This Stack cannot be edited. Stack step 1 is the memory recorded to fader 1, etc. S t a c k f u n c t i o n s By pressing STACK, the Stack is activated (lit at full) and connected to the Crossfader controls.The cue stack is loaded onto the Crossfader at step 0 (a non-existent step before... - Page 79 Connecting with USB to a PC Software can be downloaded from the ETC Web site: www.etcconnect.com Please make sure to download the correct software for your console - SmartFade and SmartFadeML use different software. To verify the version that your console is running, See “Software Version”...
- Page 80 Windows 2000, Windows XP, or Windows 7). Step 1: Obtain the software update file SMRTFADE.SRC and the USB Download application SFDownloader.exe from the download section of the ETC Web site: www.etcconnect.com Step 2: Connect a USB cable between the SmartFade and the PC.
- Page 81 Record backup memories ....71 ETC locations ......3 Record Selected .
- Page 82 USB Update ......74 web site....... . . 3 SmartFade v3.0.1 User Manual...
- Page 84 Service: (Americas) service@etcconnect.com (UK) service@etceurope.com (DE) techserv-hoki@etcconnect.com (Asia) service@etcasia.com Web: www.etcconnect.com Copyright © 2011 ETC. All Rights Reserved. Product information and specifications subject to change. 7219M1200-3.0.1 Rev A Released 2011-10 ...
Need help?
Do you have a question about the SmartFade and is the answer not in the manual?
Questions and answers