Ricoh Ri 100 Operating Instructions Manual
Hide thumbs
Also See for Ri 100:
- Safety information manual (404 pages) ,
- Manual (176 pages) ,
- User manual (60 pages)

Related Manuals for Ricoh Ri 100


Summary of Contents for Ricoh Ri 100
-
Page 1: Operating Instructions
Operating Instructions For safe and correct use, be sure to read Safety Information before using the machine. -
Page 3: Table Of Contents
TABLE OF CONTENTS Notice.................................. 8 Important................................. 8 User's Notes..............................8 How to Read This Manual..........................11 Symbols................................ 11 Notes................................11 Model-Specific Information..........................12 Presentation of the Product Names in This Manual...................12 1. About This Product Guide to Components............................15 Front View..............................15 Left Side View............................... 16 Cassette (A4 Standard Tray)........................ - Page 4 Installing the Printer Driver...........................44 Sharing the Printer............................48 Connecting the Computer and Installing the Software (Network Connection).......... 50 Connecting the Machine via Ethernet Interface..................50 Network Settings for Ethernet and Wireless LAN..................52 Connecting the Machine via a Wireless LAN Interface................53 Installing the Printer Driver...........................62 Installing the Printer Driver Manually Using the Network.................64 Fabric................................
- Page 5 Positioning of One Point T-shirts........................100 4. Printing via the Printer Driver Setting the Accessories Tab on the Printer Driver..................103 Printing................................104 Displaying the Printing Settings........................ 105 Canceling Printing............................106 Canceling Printing from the Status Monitor.....................106 Canceling Printing Using the [Stop] Key....................106 Canceling Printing from the Taskbar......................
- Page 6 Precautions to Take When Using in a Network..................148 Using the [Language] Menu......................... 150 6. Monitoring and Configuring the Machine Using the Status Monitor..........................151 Using Web Image Monitor...........................152 Displaying Top Page..........................152 Menu................................154 Logging in Using Web Image Monitor....................154 Changing the Machine Settings.......................
- Page 7 Replacing an Ink Collector Unit........................188 Checking the Waste Ink Level........................188 Replacing an Ink Collector Unit....................... 189 Cleaning................................. 193 Cleaning the Top Cover..........................193 Cleaning the Power Cable Plug....................... 194 Moving................................196 Moving a Short Distance.......................... 196 Moving a Long Distance...........................197 Disposing................................198 When Not Using for a Long Period of Time....................
- Page 8 If a Message Appears during Installation....................223 Error & Status Messages on the Display......................224 Status Messages............................224 Error Messages............................224 Status Monitor Errors............................. 229 Status Monitor Does Not Open....................... 229 No Response from Machine........................229 No Tray..............................230 Garment Misfeed............................230 Garment Size Mismatch........................... 230 Cover Open...............................230 Print Cartridge(s) Not Detected/Wrong Cartridge/Cover Open............231 Cartridge Almost Empty..........................
- Page 9 Where to Inquire............................247 Recommended Consumables........................248 Options and Consumables........................... 249 Trademarks..............................250 INDEX ................................253...
-
Page 10: Notice
Notice Important In no event will the company be liable for direct, indirect, special, incidental, or consequential damages as a result of handling or operating the machine. For good output quality, the manufacturer recommends that you use genuine ink from the manufacturer. The manufacturer shall not be responsible for any damage or expense that might result from the use of parts other than genuine parts from the manufacturer with your office products. - Page 11 DSA504 1. Toothed rubber belt 2. Ink tubes • Take care not to drop foreign objects inside the machine. • After you install the ink cartridge and turn the machine on for the first time, the print head priming process will begin. This process sometimes clogs the print head. If this happens, perform the head cleaning procedure.
- Page 12 • Printing hundreds of copies in a single day might cause the print head to clog the following day. If this happens, perform the head cleaning procedure. • This machine performs regular automatic maintenance, after and during printing, to ensure consistent print quality.
-
Page 13: How To Read This Manual
How to Read This Manual Be sure to read this section before anything else. This guide uses Windows 7 procedures for its examples. Procedures and screens might vary depending on the operating system you are using. Symbols This manual uses the following symbols: Indicates points to pay attention to when using the functions. -
Page 14: Model-Specific Information
Region A model, refer to the metric units. If your machine is a Region B model, refer to the inch units. Presentation of the Product Names in This Manual This section describes the abbreviations of the standard products and options in this manual. Product name Abbreviation RICOH Tray for Standard Size Type 1 A4 standard tray... - Page 15 Ink cartridge - Magenta RICOH Garment Ink Cartridge Y Type 1 Ink cartridge - Yellow RICOH Garment Ink Cartridge K (Hi Yield) Type 1 Ink cartridge - Black RICOH Garment Ink Cartridge C (Hi Yield) Type 1 Ink cartridge - Cyan...
-
Page 17: About This Product
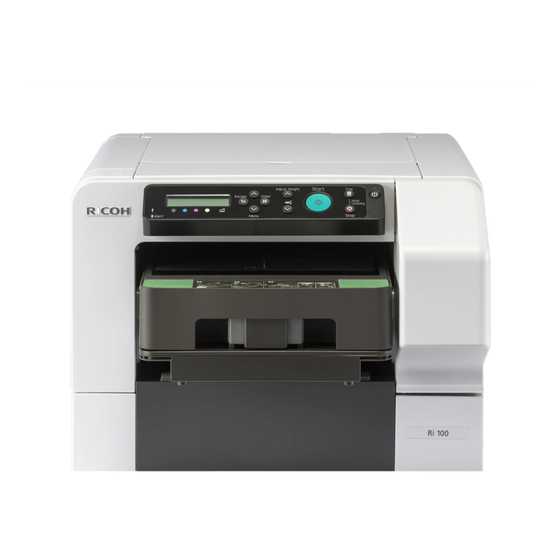
1. About This Product This chapter describes the names and functions of the machine's parts and options. Guide to Components Front View DSA261 1. Rear Cover 2. Top Cover Normally, keep this cover closed. For safety reasons, opening or closing the top cover will cause the power to turn off immediately. -
Page 18: Left Side View
1. About This Product Left Side View DSA262 1. Wireless LAN cable Connect this to the Ethernet port if you are accessing the machine via wireless LAN. 2. Ethernet port Port for connecting the 100BASE-TX or 10BASE-T cable. 3. USB port Port for connecting the USB2.0 interface cable. -
Page 19: Cassette (A4 Standard Tray)
Guide to Components Installing the Manual Pocket DSA194 Cassette (A4 Standard Tray) You can print within an A4 size (210 × 297 mm) (8.3 × 11.7 inches) area on a garment using this cassette. DSA108 1. Table A stand for setting fabrics. 2. -
Page 20: Cassette (A5 Tray)
1. About This Product Cassette (A5 Tray) You can print within an A5 size (148 × 210 mm) (5.9 × 8.3 inches) area on a garment using this cassette. DSA109 1. Table A stand for setting fabrics. 2. Cover Open the cover when setting fabrics on the table. 3. -
Page 21: Cassette (Multi Tray)
Guide to Components Cassette (Multi Tray) DSA110 1. Detection Lever Switch the lever location when using or not using the sleeve attachment. For details, see page 75 "Loading a Fabric in the Multi Tray" and page 77 "Loading a Sleeve in the Multi Tray". 2. -
Page 22: Control Panel
1. About This Product Control Panel 12 13 DSB251 1. Display Displays the current machine status and messages. 2. [Escape] key Press this key to return to the previous condition on the display. 3. [ ], [ /Menu] keys Use these keys to increase or decrease values on the display when making settings. Keep the key pressed to quicken scrolling, and increase or decrease values on the display in units of 10. - Page 23 Control Panel 9. Cartridge replacement indicator Each color corresponds to an ink cartridge. K, C, M, and Y indicate black, cyan, magenta, and yellow, respectively. The amount of ink remaining in each ink cartridge is indicated on the six-level display. 10.
-
Page 24: Loading And Removing The Cassette
1. About This Product Loading and Removing the Cassette Cassette Type The following three types of cassettes can be used with this machine. For fabrics that can be used for each cassette, see page 70 "Usable Fabric". • A4 standard tray Use this cassette when printing within an A4 size area on a fabric. -
Page 25: Removing The Cassette
Loading and Removing the Cassette DSA063 Removing the Cassette After printing is completed, remove the cassette once it returns and stops at the position so that you can see the cassette positioning line on the left side of the cassette. When the [Start] key is lit up, printing has not yet completed. -
Page 26: Turning On/Off The Power
1. About This Product Turning On/Off the Power • When you turn the machine off, make sure you press and hold down the [Power] key. If you unplug the Power cord from the wall outlet, ink consumption for maintenance operations may increase. Turning on the power Press the [Power] key. - Page 27 Turning On/Off the Power • The machine recovers from Energy Saver mode when it receives a print job, or when any key is pressed.
- Page 28 1. About This Product...
-
Page 29: Preparing For Printing
2. Preparing for Printing This chapter describes installation and setup procedures. Setup Procedure This section explains the tasks necessary for printing. Install and set up the machine by following the steps in the order shown. Step Task Reference for Full Details Check the installation environment. -
Page 30: Checking The Computer And Installation Area
2. Preparing for Printing Checking the Computer and Installation Area The machine's location should be carefully chosen because environmental conditions greatly affect its performance. The area where the machine is to be placed • Do not use flammable sprays or solvents in the vicinity of this machine. Also, avoid placing these items in the vicinity of this machine. - Page 31 Checking the Computer and Installation Area • areas of high/low temperature and high/low moisture • humidifying appliances • oil stoves and ammonia-emitting appliances (such as diazo copiers) • Do not place the machine on an unstable surface. The vibration of the machine could deteriorate the print quality.
-
Page 32: Checking The Power Source
2. Preparing for Printing DSA073 a. 27 cm (10.6 inches) b. 10 cm (4.0 inches) c. 53 cm (20.9 inches) d. 25 cm (9.9 inches) e. 0 cm (0 inches) Checking the power source • Do not use any power sources other than those that match the specifications shown. Doing so could result in fire or electric shock. -
Page 33: Checking The Computer To Be Connected
Checking the Computer and Installation Area • The supplied power cord is for use with this machine only. Do not use it with other appliances. Doing so could result in fire or electric shock. • If the power cord is damaged and its inner wires are exposed or broken, contact your service representative for a replacement. -
Page 34: Checking The Supplied Items And Unpacking The Machine
2. Preparing for Printing Checking the Supplied Items and Unpacking the Machine • The following explains the warning messages on the plastic bag used in this product's packaging. • Keep the polythene materials (bags, etc.) supplied with this machine away from babies and small children at all times. - Page 35 Checking the Supplied Items and Unpacking the Machine • CD-ROM • User's Guide • Quick Guide • Notes for Wireless LAN Users • Maintenance Guide • Replacing the Ink Collection Unit Type 1 • Manual Pocket Take off the protective covering. Remove the plastic bag.
- Page 36 2. Preparing for Printing DSA192 Press the unlock button and lift the cover, and then remove the adhesive tape the rest of the way. DSA193 Install the manual pocket. DSA194 Set the "User's Guide" supplied with this machine to the manual pocket. •...
-
Page 37: Installing The Ink Cartridges
Installing the Ink Cartridges Installing the Ink Cartridges • Keep ink and ink containers out of reach of children. • If ink gets into contact with eyes, wash eyes immediately with running water. Consult a doctor if necessary. • If ink is ingested, induce vomiting by drinking a strong saline solution. Consult a doctor immediately. - Page 38 2. Preparing for Printing Remove the packaging from the ink cartridges. Do not touch the ink supply ports or silicon substrates of ink cartridges. Open the right front cover. DSA158 Check the orientation of each cartridge, and then install them gently. DSA159 Install in the following order from the left: black, cyan, magenta, and yellow.
- Page 39 Installing the Ink Cartridges Close the right front cover. DSA161...
-
Page 40: Plugging In The Power Cord And Turning The Power On
2. Preparing for Printing Plugging in the Power Cord and Turning the Power On Before connecting the machine to a computer, connect the machine's power cord and turn the machine • Do not use any power sources other than those that match the specifications shown in this manual. - Page 41 Plugging in the Power Cord and Turning the Power On • When disconnecting the power cord from the wall outlet, always pull the plug, not the cord. Pulling the cord can damage the power cord. Use of damaged power cords could result in fire or electric shock.
- Page 42 2. Preparing for Printing Set the power cord as shown in the figure, and then close the power cover. DSA163 Plug the power cord fully into the wall outlet. DSA164 The surface should be level within two degrees. Make sure the power cord is not trapped under the machine. Press the [Power] key.
- Page 43 Plugging in the Power Cord and Turning the Power On You might hear a clicking sound while the print heads are being filled. This is not a malfunction and it will stop after a while. When the supplying of ink is complete, the power lamp changes from flashing to remaining lit.
-
Page 44: Connecting The Computer And Installing The Printer Driver
2. Preparing for Printing Connecting the Computer and Installing the Printer Driver The machine has three connection methods: USB, wired, and wireless. Check the flow from connecting the computer to installing the printer driver by looking at the following table: Connection method Reference for full details page 43 "Connecting the Computer and Installing the Software... -
Page 45: Connecting The Computer And Installing The Software (Usb Connection)
Connecting the Computer and Installing the Software (USB Connection) Connecting the Computer and Installing the Software (USB Connection) Connect the machine to the computer via a USB cable. Then, install the printer driver. Finally, configure the network share settings as necessary. This guide uses Windows 7/10 procedures for its examples. -
Page 46: Installing The Printer Driver
2. Preparing for Printing DSA187 Close the port cover. DSA339 Insert the USB cable's rectangular (type A) plug into the computer's USB port. Check the shape and direction of the plug and make sure the cable is fully inserted. • When also sharing the machine connected via USB over a network, connect the machine to the computer in accordance with the explanation above. - Page 47 Connecting the Computer and Installing the Software (USB Connection) • When sharing the machine connected via USB over a network, configure the share settings upon installing the printer driver. See page 48 "Sharing the Printer". Quick Install for USB Follow the procedure below to install the printer driver. •...
- Page 48 2. Preparing for Printing Select whether or not to open the Status Monitor automatically, and then click [Next >]. If you want to make initial settings for the printer, click [Set Now]. Make initial settings, and then click [OK]. Click [Finish]. The printer driver is now installed.
- Page 49 Connecting the Computer and Installing the Software (USB Connection) When you insert the CD-ROM, the installer launches. Auto Run might not work automatically with certain OS settings. If this is the case, double-click "SETUP.EXE", located on the CD-ROM root directory, or click [Run SETUP.EXE] in the [AutoPlay] dialog box. If the screen does not appear even when you double-click the [SETUP.EXE] icon, or if an error occurs during the installation, access the CD-ROM drive.
-
Page 50: Sharing The Printer
2. Preparing for Printing • Confirm the printer driver is correctly installed by checking the Power lamp is lit, and then performing a test print. To perform a test print, open the [Printer Properties] dialog box, click [Print Test Page] on the [General] tab. If the test page does not print properly, see page 204 "If Test Print Fails". - Page 51 Connecting the Computer and Installing the Software (USB Connection) Click [Change advanced sharing settings]. Click the chevron to expand [Home or Work (current profile)]. In [File and printer sharing], click [Turn on file and printer sharing]. Click [Save changes]. On the [Start] menu, click [Devices and Printers]. •...
-
Page 52: Connecting The Computer And Installing The Software (Network Connection)
2. Preparing for Printing Connecting the Computer and Installing the Software (Network Connection) Connect the machine to the computer via an Ethernet cable or wireless LAN. Then, configure the network settings in accordance with the network environment. Finally, install the printer driver. This guide uses Windows 7/10 procedures for its examples. - Page 53 Connecting the Computer and Installing the Software (Network Connection) Plug the Ethernet cable into the port. DSA186 Connect the other end of the cable to the machine's network, such as to a hub. Check the LEDs on the Ethernet port. CHU123 1.
-
Page 54: Network Settings For Ethernet And Wireless Lan
2. Preparing for Printing Network Settings for Ethernet and Wireless LAN Make the following network settings according to the network interface you are using. The following example explains how to allocate an IPv4 address. Press the [Power] key. DSB151 Press the [ /Menu] key. DSB253 Press the [ ] or [ /Menu] key to display the [Host Interface] menu, and then press the [#Enter] key. -
Page 55: Connecting The Machine Via A Wireless Lan Interface
Connecting the Computer and Installing the Software (Network Connection) The current IP address appears on the display. Press the [ ] or [ /Menu] key to enter the left most entry field of the IP address, and then press the [#Enter] key. <IPv4 Address>... - Page 56 2. Preparing for Printing Before configuring the wireless LAN settings, configure the machine's IP address or make DHCP enabled. For details about configuring the machine's IP address, see page 52 "Network Settings for Ethernet and Wireless LAN". Check that the access point is operating. CHV600 Plug the wireless LAN cable into the Ethernet port before configuring the wireless LAN settings.
- Page 57 Connecting the Computer and Installing the Software (Network Connection) Does the access point support "Easy Setup" of the wireless LAN? Is there a push button on the access point? Easy Setup Easy Setup Manual setting “PBC Method” “PIN Method” DSB252 Easy Setup using the Push Button Turn the machine on.
-
Page 58: Easy Setup
2. Preparing for Printing Press the WPS button on the access point. CHV607 Press the [ ] or [ /Menu] key to select [PBC Method], and then press the [#Enter] key. <Easy Setup> PBC Method If the access point cannot be detected within 120 seconds, the search session expires. If the connection attempt has failed, press the [#Enter] key again. - Page 59 Connecting the Computer and Installing the Software (Network Connection) Easy Setup using a PIN code Turn the machine on. DSB151 Press the [ /Menu] key. Press the [ ] or [ /Menu] key to display the [Host Interface] menu, and then press the [#Enter] key.
-
Page 60: Manual Setting
2. Preparing for Printing Enter the machine's PIN on the access point web page. CHV609 For details, see the manual supplied with the wireless LAN access point. Execute WPS (PIN system) from the access point's web page. Press the [Escape] key. Press the [ ] or [ /Menu] key to select [PIN Method], and then press the [#Enter] key. - Page 61 Connecting the Computer and Installing the Software (Network Connection) • Connect the machine and computer with an Ethernet cable before configuring the settings. DSA345 • Check the security method employed by the access point being used. • Check the machine's IP address. Press the [ /Menu] key to display [Host Interface], select [Network Setup], and then select [IPv4 Address] to display the IP Address.
- Page 62 2. Preparing for Printing Specify the wireless LAN settings. If the security method is WEP DSB202 1. Enter the network name of the access point. 2. Select [WEP]. 3. Enter the password for the access point, and then select the [Apply] check box. If the security method is WPA DSB203 1.
- Page 63 Connecting the Computer and Installing the Software (Network Connection) If the WPA authentication method is WPA-PSK or WPA2-PSK DSB205 1. Select [WPA-PSK] or [WPA2-PSK]. 2. Enter the PSK (Pre-Shared Key), and then select the Apply check box. 3. Configure other settings if needed. If the WPA authentication method is WPA or WPA2 DSB204 1.
-
Page 64: Installing The Printer Driver
2. Preparing for Printing Configure other settings if needed. Click [OK]. Click [Administrator Logout]. Turn the machine off. Remove the Ethernet cable, and then connect the wireless LAN cable. Turn the machine on. Setting is complete. Configuring Settings Using the Control Panel •... - Page 65 Connecting the Computer and Installing the Software (Network Connection) Notes on the Installation Although the Windows security warning may appear during installation, ignore it and continue with the installation. Insert the CD-ROM in the CD-ROM drive. Quit all other applications currently running. Select a language for the interface, and then click [OK].
-
Page 66: Installing The Printer Driver Manually Using The Network
2. Preparing for Printing Installing the Printer Driver Manually Using the Network For a network connection, you can either perform direct printing (over a peer-to-peer network) using the Windows printer port or access the printer as a network printer via the print server. Using this Printer as the Windows Printing Port DSA346 Using as a Network Printer... - Page 67 Connecting the Computer and Installing the Software (Network Connection) • Only administrators can perform this installation. Log on as a member of the Administrators group. Insert the CD-ROM in the CD-ROM drive. Quit all applications currently running. Select an interface language, and then click [OK]. Click [Printer Driver].
- Page 68 2. Preparing for Printing • A message appears if there is a newer version of the printer driver already installed. If this is the case, you cannot install the printer driver using Auto Run. See page 223 "If a Message Appears during Installation".
- Page 69 Connecting the Computer and Installing the Software (Network Connection) Click [Finish]. If a dialog box asking whether you want to restart now appears, select [Yes, restart now.], and then click [Finish]. • Although the Windows security warning may appear during installation, ignore it and continue with the installation.
- Page 70 2. Preparing for Printing Using as the Windows network printer This section assumes that the client has already been configured to communicate with a print server. Do not begin the following procedure before the client is set up and configured correctly. To use the print server, install the printer driver by selecting "Network printer server", and then select the shared printer.
- Page 71 Connecting the Computer and Installing the Software (Network Connection) Click [Finish]. If a dialog box asking whether you want to restart now appears, select [Yes, restart now.], and then click [Finish]. • The installer launch automatically as Auto Run programs when you insert the CD-ROM. Auto Run might not work automatically with certain OS settings.
-
Page 72: Fabric
2. Preparing for Printing Fabric This section explains the usable fabric and precautions regarding fabric. Usable Fabric This machine can print on fabric having a 50 to 100% cotton blending ratio. The print quality of T-shirts with pockets, polo sleeves (sleeve and back side), T-shirts for pets, towels, handkerchiefs, bibs, etc. - Page 73 Fabric Fabric type precautions Thin fabrics • With thin fabrics, ink bleeding through them may adhere to other parts. You can avoid this happening by placing paper on the back side. Do so at your own risk. Non-compatible fabric • Fabrics having a cotton blend ratio of 50% or less (the machine cannot print on quick-drying and dry fabrics) Printable area Printable and unprintable areas...
-
Page 74: Loading Fabrics
2. Preparing for Printing Loading Fabrics This section explains the procedures for loading fabrics. • When loading or removing fabrics, keep your hands or fingers clear of the cassette. Otherwise, your hands or fingers might get caught, resulting in injury. Loading a Fabric in the Standard Tray This section explains how to load a fabric in the A4 standard tray. - Page 75 Loading Fabrics DSA071 Load the fabric on the table. When loading the fabric, align the corners of the table with the marks on the fabric. • When loading a T-shirt or sweatshirt DSA219 • When loading a canvas tote bag or natural cotton tote bag DSA220 When loading a medium size canvas tote bag or natural cotton tote bag in the A4 standard tray, the cassette might not have enough space for the tote bag.
- Page 76 2. Preparing for Printing Tuck the edges of the fabric under the table. Smooth out the fabric so that no wrinkles or slack remain on the print surface. Tuck the fabric so that no wrinkles or folds remain in the area at the edges of the table. DSA370 After checking that no wrinkles or slack remains on the print side, close the cover.
-
Page 77: Loading A Fabric In The Multi Tray
Loading Fabrics DSA218 After closing the cover, if there are still wrinkles or slack on the printing surface at the center of the table, push both ends of the cassette lightly and push the fabric under the table. After closing the cover, check that the fabric is not caught between the cover and the cassette. DSA048 DSA049 Loading a Fabric in the Multi Tray... - Page 78 2. Preparing for Printing • When you fasten fabric to the table with tape, stick the tape to the sides of the table so that the tape extends towards the back of the table. If you wrap the tape onto the bottom of the multi tray, you may not be able to set the multi-tray correctly on the cassette stand.
-
Page 79: Loading A Sleeve In The Multi Tray
Loading Fabrics Tuck the fabric so that no folds or wrinkles remain at the edges of the table. DSA351 Loading a Sleeve in the Multi Tray When printing on the sleeves of a T-shirt, attach the sleeve attachment to the multi tray and load the sleeves in the sleeve attachment. - Page 80 2. Preparing for Printing Move the detection lever located on the underside of the multi tray in the direction shown in the figure. DSA352 Adjust the height of the multi tray table. Turn the 4 knobs counterclockwise on the underside of the multi tray to release the lock, and then adjust the height of the table.
- Page 81 Loading Fabrics DSA355 Load the frame for pressing the sleeve attachment, and then tuck the protruding fabric under the table. Load it so that no folds or wrinkles remain at the edges of the frame for pressing sleeves. DSA356 Make sure to push down the frame so that it is placed below the surface of the fabric.
- Page 82 2. Preparing for Printing...
-
Page 83: Printing On T-Shirts
Insert the CD-ROM into the CD-ROM drive. If another application software is running, exit it. Click [RICOH Design Software]. Follow the on-screen instructions to install the application. When the Windows security warning appears during installation, ignore it and continue the... -
Page 84: Launching
3. Printing on T-shirts Launching Windows: Click [All Programs] from the [Start] menu in Windows, and then click [RICOH Design Software] - [RICOH Design Software]. Alternatively, double-click the [RICOH Design Software] shortcut created on the desktop. Mac: Click [RICOH Design Software] from the [Launchpad]. -
Page 85: Creation Flow
Creation Flow Creation Flow The operation flow for printing on T-shirts is as follows. Steps 3 to 7 are the operations using the Design Software. • Do not use the optional finisher for purposes other than flattening fibers, removing wrinkles, and fixing ink. -
Page 86: Removing Dust And Flattening Fibers
3. Printing on T-shirts Removing Dust and Flattening Fibers This process is to print on T-shirts clearly. The optional finisher is used. • Do not use the optional finisher while using the multi tray and the sleeve attachment because using it may cause a failure. -
Page 87: Loading A T-Shirt In The Cassette
Loading a T-shirt in the Cassette Loading a T-shirt in the Cassette Load a T-shirt in the cassette. For details of the procedure, see page 72 "Loading a Fabric in the Standard Tray". • The image will be printed in the direction from the front side to the back side of the cassette. •... -
Page 88: Specifying The Type And Thickness Of The Fabric
3. Printing on T-shirts Specifying the Type and Thickness of the Fabric Operations using the Design Software start from this step. The Design Software has two modes: "Easy Designer" and "Advanced Designer". Mode Explanation Easy Designer In this mode, you can follow the instructions simply on the screen, starting from designing to printing the T-shirt. -
Page 89: Selecting The Cassette Size And Direction
Selecting the Cassette Size and Direction Selecting the Cassette Size and Direction Select the cassette to use and the direction of the image. Select the cassette size and direction of the image, and then click [Prepare Garment]. DSB019 Prepare the cassette in which the T-shirt has been loaded. For the loading method of a T-shirt, see page 85 "Loading a T-shirt in the Cassette". -
Page 90: Selecting The Image To Print
3. Printing on T-shirts Selecting the Image to Print Select the image to print, and then feed it into the Design Software. It is also possible to shoot an image with the camera in your computer, tablet, or smart phone on the spot. Windows Click [Select Image]. - Page 91 Selecting the Image to Print Click [Take a photo] to shoot an image using the camera built in a computer or tablet, or click [Import from Smart Device via Network] to feed an image from your smart phone. DSB020 • When using the camera in the computer or tablet to shoot an image, click [Take a photo]. The shooting screen is displayed and you can shoot an image on the spot.
-
Page 92: Configuring The Layout Settings
3. Printing on T-shirts Configuring the Layout Settings Edit the image using the Design Software and lay it out. Edit the image. DSB021 Function Explanation Rotation Rotates the image by 90 degree counterclockwise when clicked. Click the [Crop] button, and then drag the point around the image in order to change the displayed range of the image. - Page 93 Configuring the Layout Settings Click [Print]. DSB022...
-
Page 94: Printing
3. Printing on T-shirts Printing Using the Design Software, perform printing. • Do not touch the cassette or put your hand in the machine while printing is performed. • Do not open the top cover while printing is performed. Printing is forcibly interrupted and cannot be resumed. - Page 95 Printing DSA063 Click [Start Printing] on the Design Software. DSB023 Printing data is sent to the machine. Once the machine receives the data correctly, the [Start] key on the machine lights up blue. Make sure that the [Start] key lights up blue, and then press the [Start] key. DSB003 After the cassette is loaded into the machine and the height of the table is automatically adjusted, printing starts.
- Page 96 3. Printing on T-shirts Once the cassette returns to the front side of the machine, remove the cassette. • While the [Start] key is lit, printing has not been finished. Press the [Start] key again without removing or moving the cassette from the machine. Printing resumes. •...
-
Page 97: Removing The T-Shirt From The Cassette
Removing the T-shirt from the Cassette Removing the T-shirt from the Cassette • When removing the T-shirt, be sure to prevent the print surface from touching any other part. • If you touch the print surface before the ink fixes, the ink might blot on the fabric. When using the A4 standard tray or A5 tray Press the unlock button and lift the cover. - Page 98 3. Printing on T-shirts Hold the T-shirt by the shoulders and remove it from the cassette. DSA344 When using the multi tray Remove the tape used to fix the T-shirt. DSA574 Hold the T-shirt by the shoulders and remove it from the cassette. DSA575...
-
Page 99: Fixing Ink
Fixing Ink Fixing Ink Use the optional finisher to fix the ink to the fabric. When using the multi tray, remove the fabric from the cassette, and then fix the ink to the fabric. • Do not use the optional finisher while using the multi tray and the sleeve attachment because using it may cause a failure. -
Page 100: Handling Printed Goods
3. Printing on T-shirts Handling Printed Goods Precautions When Washing Printed Goods Note the following handling precautions for T-shirts and sweatshirts: • Turn garments inside out before washing them. • When washing T-shirts and other garments by hand, dissolve some neutral detergent in lukewarm water of about 30°C (approx. - Page 101 Handling Printed Goods DSA543 • Do not use a dryer or bleach. • Avoid ironing the printed surfaces. • Do not dry-clean garments. Note the following handling precautions for tote bags: • Do not machine wash tote bags. Doing so may cause the tote bag to lose its shape or cause its colors to fade.
-
Page 102: Positioning Of One Point T-Shirts
3. Printing on T-shirts Positioning of One Point T-shirts When you want to print a stitched ornament such as a logo on T-shirts, position the T-shirt using the following steps. Put the protective cover of the cassette on the T-shirt and mark out the A4 size area using the marker. - Page 103 Positioning of One Point T-shirts Launch the Design Software and perform as specified on "Specifying the Type and Thickness of the Fabric" and "Selecting the Cassette Size and Direction" described in this chapter, and then shoot an image of the cassette with a camera. Confirm that the marked position for the unstitched ornament picture can be found on the shot image.
- Page 104 3. Printing on T-shirts...
-
Page 105: Printing Via The Printer Driver
4. Printing via the Printer Driver This chapter explains the printer driver setting screen and basic printing procedures using an application other than the Design Software. This guide uses Windows 7/10 procedures for its examples. Procedures and screens might vary depending on the operating system you are using. -
Page 106: Printing
4. Printing via the Printer Driver Printing In this example, the procedure using Microsoft Paint is explained. How to open the setting screen of the printer driver depends on the application. For details, see the user manual for the application. •... -
Page 107: Displaying The Printing Settings
Printing • The settings changed here are effective only in this application. When printing is performed using other applications, the settings here are not reflected. Depending on the application, the setting contents of the printer driver may be automatically changed. Displaying the Printing Settings From the [Start] menu, click [Devices and Printers]. -
Page 108: Canceling Printing
4. Printing via the Printer Driver Canceling Printing Print jobs can be canceled from either a machine or computer. How to cancel print jobs differs according to their job status. Check the job status first. Canceling a print job already sent to the machine Cancel the print job using the Status Monitor or pressing the [Stop] key. -
Page 109: Canceling Printing From The Taskbar
Canceling Printing Press the [Stop] key. DSB254 The confirmation screen appears. Job Reset? Current Job Press the [#Enter] key. DSB255 Only the print job being printed is deleted. If there are other print jobs waiting, they will be printed after the current print job is deleted. It takes time to cancel the print job. - Page 110 4. Printing via the Printer Driver...
-
Page 111: Machine Setup Menus
5. Machine Setup Menus This section describes the menu items for configuring and adjusting machine settings. Making Machine Settings Using the Control Panel Counter You can check how many sheets have been printed. Item Show Counter Print See page 114 "Using the [Counter] Menu". List/Test Print You can check the machine's present settings and operational status. - Page 112 5. Machine Setup Menus Item Date/Time Key Repeat Default: [On] Feed Test Move Prnt-Heads Height Adjust Clean Maint Unit Auto Head Maint. Clean Internals See page 119 "Using the [Maintenance] Menu". System You can configure basic system settings. Item Energy Saver E.Saver Timer Default: [5 minutes] Notify by Email...
- Page 113 Making Machine Settings Using the Control Panel Item I/O Timeout Default: [15 seconds] Machine Name Host Name Domain Name IPv4 DNS Default: [0.0.0.0] Network Setup IPv4 DDNS Default: [On] DHCP Default: [On] IPv4 Address Default: [11.22.33.44] IPv4 Subnet M. Default: [0.0.0.0] IPv4 Gatewy.Ad.
- Page 114 5. Machine Setup Menus Item SSID Security Method Default: [Not Active] Wireless LAN Easy Setup MAC Address USB Speed Default: [Auto] USB Setting Port Setting Default: [Off] See page 144 "Using the [Host Interface] Menu". Language You can select which language the menu is displayed in. Item English German...
- Page 115 Making Machine Settings Using the Control Panel The [Language] menu will be displayed in English. See page 150 "Using the [Language] Menu". • You can prevent users other than the administrator from changing the machine's settings. For details, see page 181 "Restricting Machine Functions".
-
Page 116: Using The [Counter] Menu
5. Machine Setup Menus Using the [Counter] Menu You can check and print out the printer's counter figures. Show Counter You can check on the display the number of prints made by the printer. • Color: Indicates the total number of color originals printed using the printer driver's [Color] setting. •... -
Page 117: Displaying The Counter
Using the [Counter] Menu • A Full Color Coverage count: (Full Color Coverage)=(Full Color Coverage (K))+(Full Color Coverage (C))+(Full Color Coverage (M))+(Full Color Coverage (Y)) Ex.: Multiple color consumption on a fabric K: 3%, C: 8%, M: 7%, Y: 2% (3% + 8% + 7% + 2% = 20%) Full Color Coverage: 00000020 •... -
Page 118: Printing The Counter
5. Machine Setup Menus Press [ ] or [ /Menu] key, and then check the [Color:] and [Black:] on the display. Color: 12345678 Press the [Escape] key. Printing the Counter This section explains how to print the counter numbers. Load the print media in the cassette. Press the [ /Menu] key. -
Page 119: Using The [List/Test Print] Menu
Using the [List/Test Print] Menu Using the [List/Test Print] Menu Use the [List/Test Print] menu to check that the machine is working properly and to also check the machine's system configuration and settings. Config. Page You can print the current configuration of the machine. Color Demo Page You can print color samples. -
Page 120: Interpreting The Configuration Page
5. Machine Setup Menus Press the [Escape] key. Interpreting the Configuration Page System Reference Information such as the counter numbers (Pages Printed), the machine's version, printer language name, and remaining amount of ink are printed in this area. Maintenance The specified settings in the [Maintenance] menu are printed in this area. System The specified settings in the [System] menu are printed in this area. -
Page 121: Using The [Maintenance] Menu
Using the [Maintenance] Menu Using the [Maintenance] Menu You can specify machine maintenance settings for adjusting print quality. Nozzle Check Print a test pattern to check that print head nozzles become clogged. If nozzle problems occur, print head nozzles become clogged and ink cannot be ejected properly. This will result in lower print quality. -
Page 122: Nozzle Check
5. Machine Setup Menus For details about how to adjust the height using the [Adjust Height ] and [Adjust Height ] keys, see page 210 "Adjusting the Height of the Cassette". Clean Maint Unit Move the maintenance unit to a position where cleaning can be carried out. If the message prompting you to provide regular maintenance appears, clean the Maintenance Unit. -
Page 123: Head-Cleaning
Using the [Maintenance] Menu DSA196 Using the test pattern, check print head clogging and the number of clogged heads. The number appearing above each color in the test pattern is the number of the print head. The print head for cyan and black is [Head 1]. The print head for yellow and magenta is [Head 2]. - Page 124 5. Machine Setup Menus When the ink cartridge is empty, replace it instead of performing a print head cleaning. After an ink cartridge is replaced, a print head cleaning will be automatically performed. • Do not turn the machine off during print head cleaning. If the machine is turned off during print head cleaning, start again from the beginning.
-
Page 125: Head-Flushing
Using the [Maintenance] Menu Press the [Tray] and [Stop] keys at the same time. DSB256 The following message appears: Press # to clean heads Press the [#Enter] key. Head cleaning starts. Head-flushing Follow the procedure below to perform a thorough print head cleaning. Because head flushing consumes more ink than head cleaning, do it only if the print head cannot be cleaned properly by head cleaning. -
Page 126: Head Position
5. Machine Setup Menus Press the [ ] or [ /Menu] key to select a color, and then press the [#Enter] key. <Head-flushing> All Heads To clean all the print heads, select [All Heads]. To clean the print head for cyan and black, select [Head 1]. To clean the print head for yellow and magenta, select [Head 2]. - Page 127 Using the [Maintenance] Menu Press the [ ] or [ /Menu] key to display [Pr.Test Pattern], and then press the [#Enter] key. <Head Position> Pr.Test Pattern Press the [ ] or [ /Menu] key to select the target's resolutions, and then press the [# Enter] key.
- Page 128 5. Machine Setup Menus CHU018 Each vertical line is made of an upper part and lower part. If the print head is not properly positioned, the vertical line will be displayed as two disconnected lines, so that the line looks misaligned.
-
Page 129: Registration
Using the [Maintenance] Menu Press the [ ] or [ /Menu] key to select a resolution from Step 6, and then press the [#Enter] key. <Adjustment> T-shirt Fine Select the items that you need to adjust, and then press the [# Enter] key. <Adjustment>... - Page 130 5. Machine Setup Menus Fold the test pattern sheet in half lengthwise. CFT069 The optimal adjustment value is the difference between the single vertical line and the cross's vertical line that you can see when the folded sheet is held up to light. When the difference is one calibration mark in the "+"...
-
Page 131: Setting The Date And Time
Using the [Maintenance] Menu Press the [ ] or [ /Menu] key to enter the adjustment values (-4.0 to +4.0) in the [Read Direction] from Step 8, and then press the [#Enter] key. <Read Direction> (-4, +4) Press the [ ] or [ /Menu] key to enter the adjustment values (-4.0 to +4.0) in the [Feed Direction] from Step 9, and then press the [#Enter] key. - Page 132 5. Machine Setup Menus To specify the time right after this step, go to Step 4 in "Time Setting". See page 130 "Time setting". Press the [Escape] key. Time setting Press the [ /Menu] key. Press the [ ] or [ /Menu] key to display [Maintenance], and then press the [#Enter] key. <Menu>...
-
Page 133: Move Print-Heads
Using the [Maintenance] Menu Press the [ ] or [ /Menu] key to display [Date/Time], and then press the [#Enter] key. <Maintenance> Date/Time Press the [ ] or [ /Menu] key to display [Time Zone], and then press the [#Enter] key. <Date/Time>... - Page 134 5. Machine Setup Menus 2. Ink tubes • When the cartridge runs out, the machine will not operate. After replacing the ink cartridge, perform this operation. • Do not use tools with sharp tips to remove stuck foreign objects. Using it may cause a failure. Check that the top cover is closed.
-
Page 135: Clean Maint Unit
Using the [Maintenance] Menu CFT168 When print heads are clogged CFT169 If the print head is clogged, perform Head Cleaning. See page 121 "Head-cleaning". Clean Maint Unit You can move the Maintenance Unit to the position for cleaning. If a message prompting you to provide regular maintenance appears, clean the Maintenance Unit. - Page 136 5. Machine Setup Menus Press the [ ] or [ /Menu] key to display [Clean Maint Unit], and then press the [#Enter] key. <Maintenance> Clean Maint Unit Press the [#Enter] key. Press # to clean Maint Unit When "Open Top Cover to clean unit" is displayed, open the top cover. The Maintenance Unit will move to a position where you can clean it.
- Page 137 Using the [Maintenance] Menu DSA106 DSA199 1. Top part 2. Side part 3. Inner part Wipe the side part, top part, and inner part of the cap until all the solidified ink is removed. DSA107 1. Top part 2. Inner part 3.
-
Page 138: Auto Head Maint
5. Machine Setup Menus The video instructions we provide also explain how to clean the Maintenance Unit. For details, see the manufacturer's website. After cleaning the Maintenance Unit, close the top cover. Head-cleaning starts after restart, after which the machine returns to the usual condition. Auto Head Maint. -
Page 139: Clean Internals
Using the [Maintenance] Menu Press the [ ] or [ /Menu] key to display [Maintenance], and then press the [#Enter] key. <Menu> Maintenance Press the [ ] or [ /Menu] key to display [Auto Head Maint.], and then press the [#Enter] key. - Page 140 5. Machine Setup Menus • Once cleaning of the interior has started, it cannot be canceled. Cleaning must be completed before the machine can be used again. Once cleaning is completed, replace the ink cartridge, turn the machine on, and provide the initial supply of ink. Once the message "Ready" appears after the initial supply of ink is provided, you can use the machine.
- Page 141 Using the [Maintenance] Menu Press the [ ] or [ /Menu] key to display [Maintenance], and then press the [#Enter] key. <Menu> Maintenance Press the [ ] or [ /Menu] key to display [Clean Internals], and then press the [#Enter] key.
- Page 142 5. Machine Setup Menus Press the [#Enter] key. Press # to start Clean Internals Insert Cleaning Cartridge Cleaning of the interior will start. It takes 16 minutes to clean the interior. When "Cleaning finish Restart machine" is displayed, hold down the [Power] key to turn off the power.
-
Page 143: Using The [System] Menu
Using the [System] Menu Using the [System] Menu You can set basic functions required to use the machine. The machine can be used on factory default, but the configuration can be changed depending on the condition of the user. The changed condition holds even if the machine is turned off. -
Page 144: Changing The [System] Menu
5. Machine Setup Menus Normally, the way the ink is ejected depends on the fabric type. If you select [Always], printing is performed unidirectionally regardless of the fabric type. By printing unidirectionally, you can eliminate differences in ink ejection timing and so prevent misregistration when printing thin lines. - Page 145 Using the [System] Menu Press the [#Enter] key. Press the [Escape] key.
-
Page 146: Using The [Host Interface] Menu
5. Machine Setup Menus Using the [Host Interface] Menu In the [Host Interface] menu, you can specify settings related to connection and communication. Settings made using the [Host Interface] menu remain effective even if you turn the machine off. To configure the machine's network settings, use the [Network Setup] menu. I/O Timeout Specify how long the printer waits for the currently-connected interface to respond. - Page 147 Using the [Host Interface] Menu Default: [On] DHCP You can specify whether or not to use DHCP in an IPv4 environment. • On • Off Default: [Off] IPv4 Address You can specify the machine's IPv4 address. When DHCP is set to on, the IP address cannot be changed. To change it, set DHCP to off. Contact your network administrator for information about the network configuration.
- Page 148 5. Machine Setup Menus • DHCPv6-Full • Off Default: [Off] IPv6 Statlss Ad Select whether to enable or disable IPv6 stateless address auto configuration. • On • Off Default: [On] IPv6 Address You can specify the machine's IPv6 address. IPv6 Gatewy.Ad. You can specify the IPv6 gateway address.
- Page 149 Using the [Host Interface] Menu • 100Mbps Full D. Default: [Auto Select] Prmt SNMPv3 Com Select SNMPv3 communication for managing the machine using MIB. • Ciphertext • Cleartext Default: [Ciphertext] Pmt SSL/TLS Com Set SSL/TLS communication under IPv4 and IPv6 to [Active] or [Not Active]. This communication mode will be used when you specify machine settings using a Web browser.
-
Page 150: Changing The [Host Interface] Menu
5. Machine Setup Menus • Auto Default: [Auto] Port Setting • On • Off Default: [Off] Changing the [Host Interface] Menu This section gives an example of changing a setting in the [Host Interface] menu. Press the [ /Menu] key. Press the [ ] or [ /Menu] key to display [Host Interface], and then press the [#Enter] key. - Page 151 Using the [Host Interface] Menu • When there are multiple DHCP servers, make the same configuration for all. This printer uses information from the DHCP server that responds first.
-
Page 152: Using The [Language] Menu
5. Machine Setup Menus Using the [Language] Menu This section explains how to select the language used for the settings and messages displayed on the display. Press the [ /Menu] key. Press the [ ] key once, and then press the [#Enter] key. <Menu>... -
Page 153: Monitoring And Configuring The Machine
6. Monitoring and Configuring the Machine This chapter describes how to monitor and configure the machine. Using the Status Monitor Using the Status Monitor, you can check the print job status, error messages, amount of remaining ink and other machine status information. You can specify how to receive notification of print job status via the Status Monitor. -
Page 154: Using Web Image Monitor
6. Monitoring and Configuring the Machine Using Web Image Monitor The following operations can be remotely performed using Web Image Monitor from a client computer. • Displaying machine status or settings • Making machine settings • Making e-mail notification settings •... - Page 155 Using Web Image Monitor In the address bar, enter "http://(machine's IP address or host name)/". When setting SSL, a protocol for encrypted communication, under environment which server authentication is issued, enter "https://(machine's IP address or host name)/". The displayed Web Image Monitor page is split into the following areas: DSB425 1.
-
Page 156: Menu
6. Monitoring and Configuring the Machine 7. Main Area Displays the contents of the item selected in the menu area. See page 165 "About the Web Image Monitor Help". • To display Web Image Monitor, click [Web Image Monitor...] on the [Configuration/About] tab in the [Printing Preferences] dialog box. -
Page 157: Changing The Machine Settings
Using Web Image Monitor Enter the user name and password, and then click [OK]. If this is the first time to do this, enter "admin" as the user name and leave the password blank. To ensure security, it is important you change the password. In the menu area, click [Settings]. - Page 158 6. Monitoring and Configuring the Machine [Interface] area • [Interface Settings] page • [Ethernet] You can specify [Ethernet Speed]. • [Wireless LAN Settings] page • [Wireless LAN Settings] You can specify [SSID] and [Security Method]. • [WEP Settings] You can specify [New WEP Key] and [Confirm WEP Key]. •...
- Page 159 Using Web Image Monitor (Device) Port Number], [WSD (Printer)], [WSD (Printer) Port Number], [WSD (Printer) / IPP Timeout], and [LLTD]. • [DHCPv6] page You can specify [DHCPv6 Operation Mode], [IAID], and [Request Timeout]. • [DDNS] page You can specify [IPv4], [IPv6], [A Record Registration for DHCP], [AAAA Record Registration for DHCPv6], [Operation when records are duplicated], and [Interval to Update Device's Record].
- Page 160 6. Monitoring and Configuring the Machine You can specify [DIPRINT], [LPR], and [IPP]. [Security] area • [Network Security] page • [SSL/TLS Version] You can specify [TLS1.1], [TLS1.0], and [SSL3.0]. • [Encrypted Communication Settings] You can specify [AES], [3DES], and [RC4]. •...
-
Page 161: Notifying The Machine Status By E-Mail
Using Web Image Monitor You can specify the [Request No.] to be used in [Confirm] and [Program] for Remote Communication Gate. When the [Status] is set to [Registered], the [Request No.] used for the registration is displayed. • [Remote Communication Gate Proxy Server] page You can specify whether to enable or disable the [Remote Communication Gate Proxy Server]. - Page 162 6. Monitoring and Configuring the Machine • How to log in as the administrator, see page 154 "Logging in Using Web Image Monitor". Specifying notification the printer status by e-mail On the [Email] page, you can specify the basic and authentication settings for sending e-mail. You can enable or disable Auto Email Notification.
- Page 163 Using Web Image Monitor Default: Blank • [SMTP Auth. Password] Enter the password using up to 63 characters. Default: Blank • [Confirm SMTP Auth. Password] Enter the password using up to 63 characters. Default: Blank • [SMTP Auth. Encryption] If you select [Auto Select], the printer logs on using DIGEST MD5, CRAM MD5, NTLM Authentication, LOGIN, and then PLAIN.
- Page 164 6. Monitoring and Configuring the Machine If you select [On], the printer logs on only by APOP login. If you select [Off], the printer logs on only in plain text. Default: [Auto Select] • [Timeout setting after POP Auth.] In standby time following POP authentication (in milliseconds), you can specify how long the printer can wait for logging on to the SMTP server after logging on to the POP server.
- Page 165 Using Web Image Monitor [Error Items to Notify] Select which errors are sent as e-mail notifications. • [Error: Printer] • [Out of Ink] • [Low Ink] • [Replace Ink Collector Unit] • [Prepare new Ink Collector Unit] • [Garment Misfeed] •...
- Page 166 6. Monitoring and Configuring the Machine Default: [Occurs] • [Notify within:] Default: [0 minute(s)] [Out of Ink] • [Notify when error:] Default: [Occurs] • [Notify within:] Default: [0 minute(s)] [Low Ink] • [Notify when error:] Default: [Occurs] • [Remaining] Default: [10 %] [Replace Ink Collector Unit] •...
-
Page 167: About The Web Image Monitor Help
Using Web Image Monitor [Cover Open] • [Notify when error:] Default: [Occurs] • [Notify within:] Default: [0 minute(s)] [Unit/Cartridge Not Set] • [Notify when error:] Default: [Occurs] • [Notify within:] Default: [0 minute(s)] [Device cannot be used in this temperature conditions.] •... - Page 168 6. Monitoring and Configuring the Machine If you click on the displayed page, you can view Help for that page. When you cannot access the Internet: Insert the CD-ROM into the CD-ROM drive. Click [Browse This Disk]. Double-click the WIMHELP folder. Copy the language folder and save it on your computer.
-
Page 169: Snmp
SNMP SNMP The Ethernet interface includes the Simple Network Management Protocol (SNMP) agent for UDP. Using the SNMP manager, you can obtain printer data. The default community name is "public". Using this community name, you can obtain MIB data. Supporting MIB SNMPv1/v2c/SNMPv3 •... - Page 170 6. Monitoring and Configuring the Machine...
-
Page 171: Using The Machine With A Macintosh
7. Using the Machine with a Macintosh This chapter describes how to use the machine with a Macintosh. System Requirements for Macintosh The machine is compatible with Mac OS X 10.8 and later versions. The operating environment for the printer driver depends on the application in use. OS X Server is not supported. -
Page 172: Instructions Applicable To Both Macintosh And Windows Computers
7. Using the Machine with a Macintosh Instructions Applicable to Both Macintosh and Windows Computers The instructions in the following sections apply to both Windows and Macintosh computers. Checking the machine status and settings See page 117 "Using the [List/Test Print] Menu". Specifying the interface and network settings See page 144 "Using the [Host Interface] Menu". - Page 173 Instructions Applicable to Both Macintosh and Windows Computers Disposing See page 198 "Disposing". When not using for a long period of time See page 199 "When Not Using for a Long Period of Time". Printing will not start See page 207 "Printing Does Not Start". Cassette does not operate normally See page 209 "The Cassette Does Not Operate Correctly".
-
Page 174: Installing The Printer Driver On A Macintosh
7. Using the Machine with a Macintosh Installing the Printer Driver on a Macintosh This section explains how to install the printer driver on a Macintosh and then register the printer in accordance with the type of connection. The following procedures are based on Mac OS X 10.11. The procedures for your machine might differ slightly from those shown if you are using a different version of Mac OS. -
Page 175: Adding The Printer In The Printers & Scanners Panel Using Bonjour
Installing the Printer Driver on a Macintosh Click [Default], and then make sure [Kind] is set to [USB]. Select the name of the printer you want to use. Make sure the product name appears in the [Name] field, and then click [Add]. The name of the added printer appears in [Printers &... - Page 176 7. Using the Machine with a Macintosh Select the name of the printer you want to use in the list, click [OK], and then click [Add]. The IP address of the added printer appears in [Printers & Scanners]. Click [×].
-
Page 177: Maintenance Of The Machine Using A Macintosh
Maintenance of the Machine Using a Macintosh Maintenance of the Machine Using a Macintosh You can perform the maintenance of the machine using a Macintosh. For details about maintenance, see page 119 "Using the [Maintenance] Menu". Displaying the [Maintenance Utility] on a Macintosh On the [Apple] menu, click [System Preferences...], and then click the [Printers &... -
Page 178: Printing With A Macintosh
7. Using the Machine with a Macintosh Printing with a Macintosh This section explains how to load a fabric in the cassette and print on it. How to open the printer properties pane on a Macintosh depends on the application in use. For details, see the application's manual. - Page 179 Printing with a Macintosh • Depending on the application, the setting contents of the printer driver may be automatically changed. • For details on how to handle the cassette, see page 22 "Loading and Removing the Cassette". • For usable fabric types and precautions, see page 70 "Fabric".
-
Page 180: Canceling Printing On A Macintosh
7. Using the Machine with a Macintosh Canceling Printing on a Macintosh You can cancel a print job from either the machine or the computer. Canceling a print job from the machine You can cancel the print job by pressing the [Stop] key. See page 106 "Canceling Printing Using the [Stop] Key". -
Page 181: Opening Help On A Macintosh
Opening Help on a Macintosh Opening Help on a Macintosh Help is useful for learning about what the various settings do and how to specify them. On the [Apple] menu, click [System Preferences...], and then click the [Printers & Scanners]. Select the printer you want to use, and then click [Open Print Queue...]. - Page 182 7. Using the Machine with a Macintosh...
-
Page 183: Maintenance
8. Maintenance This chapter describes how to maintain and operate the machine. Restricting Machine Functions This section explains how to lock keys on the control panel to prevent general users from changing settings and performing certain functions. By locking certain control panel keys, you can prevent users other than the administrator from doing the following: •... -
Page 184: Replacing An Ink Cartridge
8. Maintenance Replacing an Ink Cartridge • If the ink cartridge has been empty for a long time, you will not be able to perform the maintenance for the print head. This may cause a printer malfunction. Make sure you always have a new ink cartridge. -
Page 185: Replacing An Ink Cartridge
Replacing an Ink Cartridge Checking the remaining ink level on the Status Monitor The cartridge status can be used to check when to replace the cartridge. DSA429 Open the [Printing Preferences] dialog box. Click the [Maintenance] tab. Click [Display Status Monitor]. Check the cartridge status. - Page 186 8. Maintenance • If ink is ingested, induce vomiting by drinking a strong saline solution. Consult a doctor immediately. • When replacing ink, avoid getting ink on your clothing. If ink comes into contact with your clothing, wash the stained area with cold water. Hot water will set the ink into the fabric and make removing the stain impossible.
- Page 187 Replacing an Ink Cartridge DSA365 Check the cartridges' orientation, and then install them carefully. Install in the following order from the left: black, cyan, magenta, and yellow. DSA366 Push each cartridge fully in. DSA367 Close the right front cover. Make sure that the ink cartridge has been fully pushed in before closing the right front cover.
-
Page 188: Handling Ink Cartridges
8. Maintenance DSA368 Handling Ink Cartridges Important points about handling ink cartridges are explained. • The following explains the warning messages on the plastic bag used in this product's packaging. • Keep the polythene materials (bags, gloves, etc.) supplied with this machine away from babies and small children at all times. - Page 189 Replacing an Ink Cartridge About ink cartridges • Ink cartridges comply with the manufacturer's safety specifications. To ensure safety and reliability, use genuine ink cartridges. • When using the machine for the first time, install genuine ink cartridges. • Do not reuse the ink cartridges. Using ink cartridges •...
-
Page 190: Replacing An Ink Collector Unit
8. Maintenance Replacing an Ink Collector Unit Checking the Waste Ink Level Follow the procedure below to check when to replace an ink collector unit using the Status Monitor or the waste ink full indicator. Checking the waste ink level on the display You can check the waste ink level by looking at the icon that appears above the waste ink full indicator. -
Page 191: Replacing An Ink Collector Unit
Replacing an Ink Collector Unit DSA431 Open the [Printing Preferences] dialog box. Click the [Maintenance] tab. Click [Display Status Monitor]. Check the ink collector unit status. Replacing an Ink Collector Unit • The following explains the warning messages on the plastic bag used in this product's packaging. - Page 192 8. Maintenance • If ink is ingested, induce vomiting by drinking a strong saline solution. Consult a doctor immediately. • When replacing ink, avoid getting ink on your skin. If ink comes into contact with your skin, wash the affected area thoroughly with soap and water. •...
- Page 193 Replacing an Ink Collector Unit Wait at least five seconds, and then remove the full ink collector unit from the machine. DSA322 While pulling the unit out, keep the unit level and press on the area marked "PUSH". Put the Ink collector unit in the supplied plastic bag. DSA228 Insert the new ink collector unit.
- Page 194 8. Maintenance Slide the ink collector unit carefully into the machine until you hear it click. DSA324 Close the right front cover.
-
Page 195: Cleaning
Cleaning Cleaning Clean the outside of the machine regularly to maintain the condition of the machine. • Do not remove any covers or screws other than those explicitly mentioned in this manual. Inside this machine are high voltage components that are an electric shock hazard. Contact your sales or service representative if any of the machine's internal components require maintenance, adjustment, or repair. -
Page 196: Cleaning The Power Cable Plug
8. Maintenance Open the top cover. DSA309 Moisten a cloth with water or cleaning liquid, wring it firmly, and then wipe the stain from the area shown in the following image: DSA050 Close the top cover. DSA311 Cleaning the Power Cable Plug This section describes precautions for cleaning the power cable plug. - Page 197 Cleaning • Be sure to disconnect the plug from the wall outlet at least once a year and check for the following: • There are burn marks on the plug. • The prongs on the plug are deformed. • If any of the above conditions exist, do not use the plug and consult your dealer or service representative.
-
Page 198: Moving
8. Maintenance Moving The precautions when moving the machine a short distance or long distance are explained. Moving a Short Distance Take the following precautions when moving the machine a short distance - for instance, when relocating the machine inside the same room. •... -
Page 199: Moving A Long Distance
Moving Lift the machine and move it to the place where you want to install it. DSA155 Grip the indentations for lifting at the base of the machine's sides with two people or more, as shown. Lift and carry the machine slowly and carefully. •... -
Page 200: Disposing
8. Maintenance Disposing To dispose of this machine, consult with an authorized dealer. When disposing of the machine by yourself, be sure to comply with local disposal regulations. -
Page 201: When Not Using For A Long Period Of Time
When Not Using for a Long Period of Time When Not Using for a Long Period of Time If you do not use the machine for a long time, ensure the following: • Clean the internal compartments using the dedicated cleaning cartridge in advance. For the cleaning method, see page 137 "Clean Internals". - Page 202 8. Maintenance...
-
Page 203: Troubleshooting
9. Troubleshooting This chapter describes troubleshooting procedures that are applicable to all functions of this machine and what to do when print results are not satisfactory or error messages appear on the display. Software Cannot Be Installed This section explains how to troubleshoot software installation problems under different environments. Confirming Installation Check whether the software has been installed. - Page 204 9. Troubleshooting Other applications are not closed. When installing software, quit all other applications. Installation may be disrupted if other applications are open. Also, quit any anti-virus applications that are running. The machine is turned on before installation. Turn the machine off and then on, and then try "Quick Install for USB" again. The USB connection does not work.
-
Page 205: Printer Driver Cannot Be Installed
Software Cannot Be Installed The computer and printer are not on the same network segment. If the printer cannot be found and only "Printer Port" appears in the [Printer Selection] dialog box, either the machine's IP address is not specified or the computer and printer are not on the same network segment. -
Page 206: If Test Print Fails
9. Troubleshooting If Test Print Fails This section explains how to troubleshoot Test Print problems. The power cord or USB cable or Ethernet cable is not properly connected. Check that the power cord and USB cable, Ethernet cable are properly connected. The port connection is not properly set. -
Page 207: Uninstalling
Uninstalling Uninstalling If software was installed incorrectly or incompletely, uninstall and then re-install it. This guide uses Windows 7/10 procedures for its examples. Procedures and screens might vary depending on the operating system you are using. • Before uninstalling software or deleting devices, turn off any other printers connected to your computer via USB, or disconnect the USB cable to the printers. -
Page 208: Deleting Devices
9. Troubleshooting • To update the printer driver, download the latest driver from the manufacturer's Web site. Deleting Devices If Windows automatically establishes a USB connection because of an unauthorized device, you can delete the device and any others like it. Be sure not to delete necessary devices. If USB connection is established normally, you do not need to perform this procedure. -
Page 209: Printing Does Not Start
Printing Does Not Start Printing Does Not Start If printing fails, check the following: Check the machine's power. • The power lamp is not lit. Turn the machine on. See page 24 "Turning On/Off the Power". • The power lamp does not light up or flash despite the [Power] key being pressed. Check whether the power cord is plugged into the receptacle properly. - Page 210 9. Troubleshooting 4. On the [General] tab, check the displayed version number. • Use the Internet to find the latest version of the driver. See manufacturer's Web site for the latest driver. • Update the printer driver. If you are using Windows, install the downloaded driver and check [Update the current printer driver] in the dialog box that allows you to select what to install.
-
Page 211: The Cassette Does Not Operate Correctly
The Cassette Does Not Operate Correctly The Cassette Does Not Operate Correctly This section explains how to troubleshoot when printing does not start even though the cassette is loaded, when the cassette cannot be removed or the fabric or a foreign object is stuck. Checking the Status of the Fabric and the Cassette If printing does not start with an error message even after the cassette is loaded, check the following: The fabric is incorrectly loaded... -
Page 212: Adjusting The Height Of The Cassette
9. Troubleshooting See page 104 "Printing". The cassette is incorrectly loaded The cassette is not pushed to the back. Place the rear side of the cassette on the cassette stand, and then slowly push it in all the way until it clicks. - Page 213 The Cassette Does Not Operate Correctly Press the [Adjust Height ] key to lower the cassette. If a height detection error occurs, press the [Adjust Height ] key to lower the cassette. You can adjust the height in increments of 0.1 mm (0.01 inches). Look inside the machine as you lower the cassette so that you can see the position at which the sensor is not obstructed.
- Page 214 9. Troubleshooting DSA214 If the distance between the print head and the fabric is too small, dust might stick to the fabric. If this is the case, clean both the Maintenance Unit and print head. If the problem is not resolved, enter a positive value as the height value.
-
Page 215: Removing The Cassette Manually
The Cassette Does Not Operate Correctly Press the [ ] or [ /Menu] key to enter the height value, and then press the [#Enter] key. • You can enter a height value from -20 to 20 in increments of 0.1. We recommend changing the existing setting by entering values in increments of ±0.1 to 0.3. -
Page 216: Removing A Fabric Or Foreign Object By Opening The Top Cover
9. Troubleshooting Removing a Fabric or Foreign Object by Opening the Top Cover • Do not open the cover while the machine is operating and keep your hands or fingers clear of the machine. Doing so might cause your hands or fingers to get trapped in the machine, potentially causing injury. - Page 217 The Cassette Does Not Operate Correctly Remove the stuck fabric or foreign object through the top cover opening. DSA310 Remove the fabric or foreign object carefully. Forcibly removing them may cause parts to come off. If the print head has stopped halfway, move it to either end. Close the top cover.
-
Page 218: Print Results Are Not Satisfactory
9. Troubleshooting Print Results Are Not Satisfactory If print quality is poor, check the machine and printer driver settings for problems. If no problems are apparent, check the ink cartridge or other consumables. For details about handling fabric, see page 70 "Fabric". - Page 219 Print Results Are Not Satisfactory Have the print heads been aligned? Blurred or double lines indicate the print heads are incorrectly positioned. Resolve this by selecting [Head Position]. If the problem persists, print the nozzle check test pattern and clean the print heads as necessary.
- Page 220 9. Troubleshooting Is the fabric loaded in the correct orientation? The print direction varies depending on the application you use. Make sure that the orientation of the image to be printed matches the orientation of the fabric loaded in the cassette. See page 72 "Loading Fabrics".
-
Page 221: Colors Do Not Match The Displayed Image
Print Results Are Not Satisfactory Do you perform regular maintenance? If the Maintenance Unit and print head nozzles are not cleaned regularly, normal printing results may not be achieved. If the message prompting you to provide regular maintenance appears, clean both the Maintenance Unit and print head. -
Page 222: Positions Do Not Match The Displayed Image
9. Troubleshooting Does the fabric (garment) type setting match? Make sure that the fabric (garment) type setting of the Design Software or the printer driver matches the type of fabric (garment) loaded. See page 86 "Specifying the Type and Thickness of the Fabric", page 104 "Printing". Positions Do Not Match the Displayed Image If the position of printed items differs from the position of displayed items, refer to the following questions: Have the settings for page layout been made? - Page 223 Print Results Are Not Satisfactory • On the [Detailed Settings] tab, select [Driver Options], and then select the [Spool Data in EMF Format] check box. • On the [Detailed Settings] tab, select [Print Quality], and then clear the [Adjust Photographs] and [Smooth Low Resolution Images] check boxes.
-
Page 224: Checking The Consumables
9. Troubleshooting • Change the saving format you are using Checking the Consumables If you cannot find anything wrong with the printer or printer driver, check the consumables. Is an old ink cartridge being used? Ink cartridges should be used up before their expiry date, preferably within three months of being removed from their packaging. -
Page 225: If A Message Appears During Installation
If a Message Appears during Installation If a Message Appears during Installation Message number 13, 14, 34, or 58 indicates the printer driver cannot be installed using Auto Run. Uninstall and then re-install the printer driver as follows: Double-click the [RP_SETUPXX.EXE] icon in the [DRIVERS] folder on the CD-ROM, and then install the printer driver according to the displayed instructions. -
Page 226: Error & Status Messages On The Display
9. Troubleshooting Error & Status Messages on the Display This section explains what the messages that appear on the display mean and what to do when a particular message appears. Status Messages Message Status Ink being filled. Loading Ink... / WAIT! N minutes "N"... - Page 227 Error & Status Messages on the Display Message Causes Solutions Thin fabric (up to 16 mm Adjust height, press Start (about 0.6 inches) thick) Load thin fabric (up to 16 mm (about 0.6 to / restart or Tray to reset is loaded on the bottom inches) thick) on the top row of the multi tray.
- Page 228 9. Troubleshooting Message Causes Solutions Check the installation area and relocate the machine. Alternatively, wait until the machine Cannot use High Temp. / The temperature is acclimates to the room temperature. Power Off On abnormally high. See page 235 "Out of Printable Temperature Range".
- Page 229 Error & Status Messages on the Display Message Causes Solutions Run the maintenance again after clearing the error. Head cleaning, head You can clear a maintenance error as flushing, or other Maintenance failed follows: maintenance operations have failed. • The machine receives another print job. •...
- Page 230 9. Troubleshooting Message Causes Solutions Right Front Cover is Close the right front cover. The right front cover is open / Close Right Front open. See page 230 "Cover Open". Cover Internal unit is a service For details about internal unit replacement, Right Int.
-
Page 231: Status Monitor Errors
Status Monitor Errors Status Monitor Errors If an error occurs with the machine, the Status Monitor displays an error message. Read the explanation about the corresponding error and check the detailed solution you can take. Status Monitor Does Not Open If the Status Monitor does not open for a shared printer, refer to the following questions: Are the share settings correct? •... -
Page 232: No Tray
9. Troubleshooting No Tray The cassette is not installed or is incorrectly installed. Resolve the error using any of the following procedures: • Load the cassette. See page 85 "Loading a T-shirt in the Cassette". • Remove the cassette. Press the [Tray] key and remove the cassette, and then reset the cassette. •... -
Page 233: Print Cartridge(S) Not Detected/Wrong Cartridge/Cover Open
Status Monitor Errors Close the cover. If these covers are closed, open and close each of them again. If the top cover is open: Close the cover. DSA311 If the right front cover is open: Close the right front cover. DSA368 Print Cartridge(s) Not Detected/Wrong Cartridge/Cover Open The ink cartridges are not installed or are incorrectly installed. - Page 234 9. Troubleshooting If the ink cartridges are not installed or are installed incorrectly: Open the right front cover. DSA321 Push the cartridge fully in. DSA367 Close the right front cover. DSA368 • If the error persists, remove the ink cartridge, and then re-install it. Do this once only. •...
-
Page 235: Cartridge Almost Empty
Status Monitor Errors Cartridge Almost Empty One of the ink cartridges is almost empty. Check which color ink cartridge will soon have to be replaced, and then have a new cartridge handy. • If you print an image that needs a lot of ink, the machine may stop printing before the print is finished. -
Page 236: Ink Collector Unit Not Detected/Wrong Unit
9. Troubleshooting • Ink cartridges should be used up before their expiry date, preferably within three months after its package is opened. Ink Collector Unit Not Detected/Wrong Unit The ink collector unit is not installed or is incorrectly installed. Install the ink collector unit correctly. Alternatively, an ink collector unit not designated for this machine may have been installed. -
Page 237: Ink Collector Unit Almost Full
Status Monitor Errors Close the right front cover. DSA368 If the message reappears, contact your sales or service representative. Ink Collector Unit Almost Full The ink collector unit is almost full. Have a new ink collector unit handy. • If an ink cartridge starts running out of ink when the ink collector unit is almost full, the alert indicator will flash and a message informing you of the cartridge's low ink level will appear on the display. -
Page 238: Printer Error
9. Troubleshooting Move the machine to a more suitable environment. Press and hold down the [Power] key for one second. Place the machine in an environment where a temperature range is between 10 and 40°C (50 and 104°F). Turn the machine on. •... -
Page 239: Cannot Recover Error Page
Status Monitor Errors Cannot Recover Error Page If you resume printing after resetting the garment misfeed error or other errors, printing may not be correctly performed and a message appears. Depending on the printing result, resolve the error using any of the following procedures: If Nothing Printed If the cassette is not automatically ejected, press the [Tray] key and move the cassette stand to the front. - Page 240 9. Troubleshooting...
-
Page 241: 10. Appendix
10. Appendix Software on the CD-ROM Files The following is a list of the files on the CD-ROM. For Windows • RPCS Raster Printer Driver for Windows Vista/7/8.1/10 and Windows Server 2008/2008 R2/2012/2012 R2/2016 • WebImageMonitor Help • Manuals • Tools to acquire computer information •... -
Page 242: Manuals
10. Appendix DRIVERS\X64\RPCS_R\X64\disk1 • RPCS raster printer driver for Mac OS X macOS\RPCS_R System Requirements for the Printer Drivers • Operating Systems Windows: Windows Vista/7/8.1/10 and Windows Server 2008/2008 R2/2012/2012 R2/2016 Macintosh: Mac OS X 10.8 and later versions • Display Resolution Conforms to the system requirements of each operating system. -
Page 243: Electromagnetic Interference
Electromagnetic Interference Electromagnetic Interference If another electronic device is placed next to the machine, each will influence the other negatively. In the case of a television or radio, noise may be generated. If this happens, do the following: • Move the television or radio as far as possible from the machine. •... -
Page 244: Specifications
10. Appendix Specifications Specifications of the machine and options are listed. Machine Body Item Print method GELJET print technology Print time • Full color 74 seconds (after pressing the [Start] key) • B&W 72 seconds (after pressing the [Start] key) Print resolution Max 1200 ×... - Page 245 Specifications Item Power source (mainly Europe, Asia, and China) 220-240 V: 50/60 Hz 0.6 A (when fully equipped) (mainly North America) 100-120 V: 60 Hz 1 A (when fully equipped) Power consumption Main unit only Ready (mainly Europe, Asia, and China) 9.0 W (mainly...
- Page 246 10. Appendix Item Energy Saver mode Reduced power (mainly Europe, Asia, and China) consumption in Energy 1.8 W Saver mode (mainly North America) 1.7 W Time of switch into 5 minutes Energy Saver mode Time of switch out from 2.9 seconds Energy Saver mode Operating environment Temperature: 10 to 40 °C (50 to 104 °F)
- Page 247 Specifications Item Wireless LAN Transmission Based on IEEE 802.11b/g/n Specification Data Transfer Speed Auto select from the following speed: • 802.11b 1, 2, 5.5, 11 (Mbps) • 802.11g 6, 9, 12, 18, 24, 36, 48, 54 (Mbps) • 802.11n 6.5, 7.2, 13, 13.5, 14.4, 15, 19.5, 21.7, 26, 27, 28.9, 30, 39, 40.5, 43.3, 45, 52, 54, 57.8, 58.5, 60, 65, 72.2, 81, 90, 108, 120, 121.5, 135, 150 (Mbps)
-
Page 248: Optional Cassettes
10. Appendix Optional Cassettes Item External dimensions • A5 tray (W × D × H) 242.2 × 409.2 × 97.9 mm (9.5 × 16.1 × 3.9 inches) • Multi tray (W × D × H) 242.2 × 409.2 × 84.9 mm (9.5 × 16.1 × 3.3 inches) •... -
Page 249: Where To Inquire
Where to Inquire Where to Inquire For inquiries, contact your sales or service representative. -
Page 250: Recommended Consumables
10. Appendix Recommended Consumables Consumables recommended for this machine are listed. Purchase necessary consumables before your supply runs out. For information about consumables, contact your sales or service representative. • Ink cartridges • Ink Collector Unit • Cleaning cartridge • Cleaning tool •... -
Page 251: Options And Consumables
Options and Consumables Options and Consumables RICOH Tray for Small Size Type 1 This tray is for printing within an A5 size area on a fabric. RICOH Tray for Multi Purpose Type 1 This tray is for fabrics on which printing cannot be performed with the A4 standard tray and A5 tray. -
Page 252: Trademarks
10. Appendix Trademarks Apple, AppleTalk, Bonjour, ColorSync, Leopard, Macintosh, Mac OS, OS X, iMac, MacBook, Mac mini, Power Mac, Safari and TrueType are trademarks of Apple Inc., registered in the United States and other countries. Citrix, Citrix Presentation Server and Citrix XenApp are either registered trademarks or trademarks of Citrix Systems, Inc. - Page 253 Trademarks • The product names of Windows 10 are as follows: ® ® Microsoft Windows 10 Home ® ® Microsoft Windows 10 Pro ® ® Microsoft Windows 10 Enterprise ® ® Microsoft Windows 10 Education • The product names of Windows Server 2008 are as follows: ®...
- Page 254 10. Appendix...
-
Page 255: Index
INDEX Active Protocol............ Head Position............Adjust Height keys..........Head-cleaning............ Alert indicator............Head-flushing............Auto Head Maint..........Height Adjust............Host Interface............Host Name............Canceling printing..........Cartridge replacement indicator......Cassette (A4 Standard Tray)........ I/O Timeout............Cassette (A5 Tray)..........Img Recov. Error..........Cassette (Multi Tray)..........Indentations for Lifting........... - Page 256 Unit of Measure........... Unlock Button..........17, 18 Network connection..........USB connection............. Network Setup............ USB port..............No-Fuss Head Cleaning........USB Setting............Notify by Email............ USB Speed............Nozzle Check............. Vent................. Pmt SSL/TLS Com..........Port Setting............Power cover............Waste ink full indicator......... Power inlet.............. Web Image Monitor...........
- Page 257 MEMO...
- Page 258 MEMO J088-6622B...
- Page 260 EN GB EN US EN AU J088-6622B © 2017 Ricoh Co., Ltd...
Need help?
Do you have a question about the Ri 100 and is the answer not in the manual?
Questions and answers