Table of Contents
Advertisement
Quick Links
Digital Color Label Printer
Operation & Setup Guide
Specifications are subject to change without notice
___________________________________________
QuickLabel, An AstroNova™ Division
600 East Greenwich Ave., West Warwick, RI 02893
Tel: (877) 757-7978 Fax: (401) 822-2430
___________________________________________
www.QuickLabel.com/support/
Part Number 22834667-EN-E
Revision 1.0
Firmware V 2.3
World Headquarters
E-mail: info@QuickLabel.com
www.QuickLabel.com
Technical Support
Tel: 877-757-7310
support@QuickLabel.com
4/17
Advertisement
Table of Contents

Subscribe to Our Youtube Channel
Related Manuals for QuickLabel Systems QLS-4100


Summary of Contents for QuickLabel Systems QLS-4100
- Page 1 Digital Color Label Printer Operation & Setup Guide Part Number 22834667-EN-E Revision 1.0 4/17 Firmware V 2.3 Specifications are subject to change without notice ___________________________________________ QuickLabel, An AstroNova™ Division World Headquarters 600 East Greenwich Ave., West Warwick, RI 02893 Tel: (877) 757-7978 Fax: (401) 822-2430 E-mail: info@QuickLabel.com www.QuickLabel.com ___________________________________________...
-
Page 2: Limited Warranty
© 2017 AstroNova, Inc. All Rights Reserved This manual is copyrighted with all rights reserved. No part of this manual may be reproduced, transmitted, transcribed, stored in a retrieval system, or translated into any language in any form by any means without written permission of QuickLabel. -
Page 3: Obtaining Service
This warranty is void if the product has been damaged by accident, abuse, neglect or misapplication, or if the product has been improperly installed, or if the product has been modified without the express written permission of QuickLabel. QuickLabel makes no warranty, either express or implied, with respect to this product’s fitness for a particular purpose. - Page 4 QuickLabel Deutschland Senefelderstraße 1/ T6 D-63110 Rodgau Tel. +49 (0) 6106-28368-20 Fax: +49 (0) 6106-771121 Web Site: www.QuickLabel.de Sales e-mail: info@QuickLabel.de Technical Support e-mail: support@QuickLabel.de QuickLabel France Parc Euclide ZA la Clef de St Pierre 10A Rue Blaise Pascal 78990 ELANCOURT Tel: 33 1 34 82 09 00 Fax: 33 1 34 82 05 71 Web Site: www.QuickLabel.fr...
- Page 5 Ownership Information Congratulations and thank you for your business. Your purchase of a quality QuickLabel product is an investment in the finest of state-of-the-art printing and labeling technology. Please use the spaces below to list the model name/number and serial number of your product. Model Name/Number: ____________________ Serial Number: ____________________...
- Page 6 ETL Listed Mark. RoHS Compliance We declare that the QLS-4100 Xe complies with The European RoHS Directive 2002/95/EC (Restriction of the Use of Certain Hazardous Substances in Electrical and Electronic Equipment), as of 6/6/2007.
-
Page 7: Declaration Of Conformity
AstroNova, Inc. Nom et adresse du fabricant 600 East Greenwich Avenue Hersteller West Warwick, RI 02893 USA Nome del costruttore Model No. QLS-4100 Xe Modele No. Model Nr. Modello No. Standards to which conformity is declared Safety: UL 60950-1 Standards auquel la conformité appartient CSA C22.2 No. -
Page 9: Table Of Contents
Quick Start Guide ...................... 1-3 Chapter 2: Physical Setup ..............2-1 Unpacking the Printer ....................2-2 Printer Orientation ..................... 2-3 Features of the QLS-4100 Xe ..................2-4 Side view ........................ 2-5 Rear Panel View ....................2-6 Installing the Media Unwind Mandrel ..............2-7 Power Connection ..................... - Page 10 TCP/IP Subnet Mask ................... 4-46 TCP/IP Gateway ....................4-47 TCP/IP Connections .................... 4-48 System Menu ......................4-49 Display Counter ....................4-49 Memory Card - Write Protection ..............4-50 Front Panel Lock/Unlock ..................4-51 Memory Card - Formatting ................4-54 Time ........................4-55 QLS-4100 Xe...
- Page 11 Ignore Host Commands ..................4-68 System Configuration ..................4-69 Print & Peel ......................4-70 Chapter 5: Operation ................5-1 Printing with the QLS-4100 Xe ................. 5-2 Powering the Printer On ..................5-2 Operating Without Compressed Air ..............5-3 Memory Card Detection..................5-3 Printer Indicators .......................
- Page 12 Compatible Media ....................8-3 Important Safety Features ..................8-4 Print & Peel Installation .................... 8-5 Refitting an Existing QLS-4100 Xe ..............8-6 Installing the Print & Peel System ..............8-8 Print & Peel Setup ....................8-11 Enabling/Disabling Print & Peel ................8-13 Printing and Peeling Labels ..................
-
Page 13: Chapter 1: Quick Start
Chapter 1: Quick Start Congratulations ! You have purchased QuickLabel’s best digital color label printer - ever. The QLS-4100 Xe represents years of careful research and development to perfect digital color label printing technology. The QLS-4100 Xe represents . . . -
Page 14: Quicklabel Media
QuickLabel media Your QLS-4100 Xe has been designed to provide optimal print quality only when used with Genuine QuickLabel Labels, Tags and Thermal Transfer Ribbon. QuickLabel Thermal Transfer Ribbon is formulated to provide the most vibrant and durable image while helping to maintain long printhead life. -
Page 15: Quick Start Guide
Page 3-7 Adjust the media sensor Page 3-8 Calibrate the printer to the appropriate media type Setup software parameters Appendix D Printing from Custom QuickLabel Appendix E Printing from a Windows application with the QuickLabel Windows Printer Driver QLS-4100 Xe... - Page 16 Quick start...
-
Page 17: Chapter 2: Physical Setup
Physical Setup This chapter will help you to familiarize yourself with the orientation and components of the QLS-4100 Xe. This chapter also covers the various connections that need to be made to the printer before it can be operated. This chapter provides the following information: •... -
Page 18: Unpacking The Printer
Unpacking the Printer Remove the printer from the packing carton. Ensure that the printer has suffered no visible signs of damage during shipment. Verify that the following items have been included in the packing carton: • AC Power Cord • Media Retainer •... -
Page 19: Printer Orientation
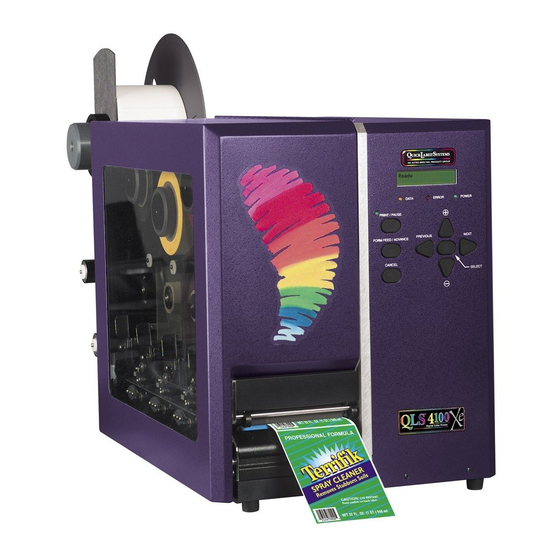
Printer Orientation The illustration below is provided to orient you to the QLS-4100 Xe printer. The keypad and display is the printer’s user interface. QLS-4100 Xe... -
Page 20: Features Of The Qls-4100 Xe
Features of the QLS-4100 Xe Facing the left side of the QLS-4100 Xe with its cover lifted, you can view the media unwind, print stations, and related mechanical parts. The items below identify the QLS-4100 Xe components as shown in the side-... - Page 21 QLS-4100 Xe...
-
Page 22: Rear Panel View
Rear Panel View Facing the rear panel of the printer, you will observe the air intake regulator, power connection, and other interface connections as shown in the illustration below. Note: Interface options vary based on printer model. Physical setup... -
Page 23: Installing The Media Unwind Mandrel
Installing the Media Unwind Mandrel Your QLS-4100 Xe was shipped with the media unwind mandrel uninstalled to protect it from damage during transit. The mandrel is easily installed by following the procedure outlined below. Tools Needed: 1/8” Allen Wrench Slide the media unwind mandrel onto the shaft until the back plate flange is seated firmly against the collar located on the inside of the shaft. -
Page 24: Power Connection
Power Connection Locate the AC Power Input at the bottom of the rear panel. Plug the power cord into the printer. Be sure to use only the AC Power Cord supplied with the printer. Ensure that the power switch is in the OFF position before proceeding to the next step. -
Page 25: Computer Connections
Connect the opposite end of the parallel cable to the host computer. Be sure to note which port (LPT1, LPT2, etc.) you have connected the printer to as this will later be needed for driver or software setup. Note: The maximum recommended parallel cable length is 10 feet (3 m). QLS-4100 Xe... -
Page 26: Rs-232 Serial Port
RS-232 Serial Port Using a standard (straight through connection) RS-232 serial cable, connect the appropriate mating end of the cable into the printer. Tighten the cable securing screws into the serial port to secure the cable to the printer. Connect the opposite end of the serial cable to the host computer. Be sure to note which port (COM1, COM2, etc.) you have connected the printer to as this will later be needed for software setup. -
Page 27: Ethernet Port And Tcp/Ip Communication
RJ-45 connector. TCP/IP (Transmission Control Protocol/Internet Protocol) communication provides a direct link to the QLS-4100 Xe printer via the ethernet port. Using standard twisted-pair wiring, the printer can be connected to your existing network and shared by all network users. -
Page 28: Print Servers
Print Servers The QLS-4100 Xe can be connected to a Local Area Network (LAN) using an appropriate external print server. The print server must be capable of passing ASCII data to the printer without corrupting or modifying the data stream. Any printer language emulations such as PostScript™... -
Page 29: Utility Port Connection
Notes: If you are using a cutter or cutter/stacker, refer to the unit’s setup and operation manual for information on setting up the unit with your printer. Functionality may be modified via host commands. For information, see the QuickLabel Programmer's Reference (PN 22834615-EN-E). QLS-4100 Xe 2-13... -
Page 30: Compressed Air Connection
Compressed Air Connection Preparing the Air Regulator When you receive the QLS-4100 Xe Printer, the Air Regulator is ready for operation. The air pressure regulator has been set at the factory for the proper air pressure. You only need to connect your in-house air supply to the printer. -
Page 31: Chapter 3: Loading Media And Calibration
Loading Media and Calibration Now that your QLS-4100 Xe is unpacked and all connections have been made to the printer, you are ready to load label or tag stock, thermal transfer ribbon, and calibrate the printer in preparation for printing. -
Page 32: Loading Thermal Transfer Ribbon
Loading Thermal Transfer Ribbon The QLS-4100 Xe is capable of printing using Spot Color or Process Color thermal transfer ribbons. When using Spot Color ribbons, each of the four stations prints a fully saturated color. Any color can be installed on any print station and the location of each color is defined in Custom QuickLabel software or the QuickLabel Windows Printer Driver. - Page 33 Turn the ribbon rewind knob clockwise to take up any slack in the ribbon. Flip the Print Station Lift Lever clockwise to close the printhead. 10 Repeat this process to install ribbon on each of the print stations. QLS-4100 Xe...
-
Page 34: Loading Label Or Tag Media
Loading Label or Tag Media The QLS-4100 Xe is capable of printing on a wide variety of media types and sizes and is designed to accept media up to a 12” OD (outside diameter) roll capacity on a 3” ID (inside diameter) core. - Page 35 10 Continue to thread the media over and around the Upper Media Guide Roller then under and around the Lower Media Guide Roller. 11 Thread the media through the Media Sensor Assembly and then through the Media Travel Roller assembly. QLS-4100 Xe...
- Page 36 12 Continue to thread the media through each of the print stations over the platen rollers. 13 Finally, thread the media between the drive roller and pinch roller so that it exits from the front of the printer. 14 Ensure that the media rests against each of the four Media Guide Rollers located just behind the print stations on center plate.
-
Page 37: Adjusting The Media Sensor
Adjusting the Media Sensor The QLS-4100 Xe is equipped with two intelligent media sensors. One sensor is used for gap, or notched media types, and the other is used for reflective media types. Under normal operation, the sensor has to be calibrated to the media type being used only once. -
Page 38: Calibrating For Media Types
Calibrating for Media Types Calibrating the printer for the type of media being used is essential and is the first procedure that must be performed prior to printing and whenever the media type is changed. If the printer is not properly calibrated, any of the following may occur: •... - Page 39 Media Sensor Assembly and in close proximity to the guide arrow indicated on the center plate. 13 Press the SELECT key. The following message will be displayed: Calibration OK If calibration was unsuccessful, the following message will be displayed: QLS-4100 Xe...
- Page 40 The user must re-initiate the calibration procedure. 14 After successful calibration, press the PRINT/PAUSE key to return the printer to a Ready state. Note: The QLS-4100 Xe is capable of sensing media with a maximum gap or notch size of 50 mm. 3-10...
-
Page 41: Calibrating Reflective Media
Press the SELECT key. The display will show the following prompt: Place Mark @ Sensor Then Press Select Press the SELECT key again. The display will show the following prompt: Place Media @ Sensor Then Press Select QLS-4100 Xe 3-11... - Page 42 10 Reposition the media by pressing and holding the FORM FEED/ADVANCE key until the red light no longer shines through the mark but through the media. 11 Press the SELECT key. The display will show the following prompt: Place Mark @ Arrow Then Press Select 12 Press and hold the FORM FEED/ADVANCE key until the reflective mark is positioned behind the Media Sensor Assembly and in close proximity...
-
Page 43: Calibrating Continuous Media
When using media of this type, the printer is calibrated using the Gap Calibration method outlined previously in this chapter. The only difference in the procedure is that you would align the sensing mark when the printer prompts for placement of the liner or gap. QLS-4100 Xe 3-13... - Page 44 3-14 Loading media and calibration...
-
Page 45: Chapter 4: Keypad Controls And Menus
Chapter 4: Keypad Controls and Menus The QLS-4100 Xe features an intuitive control panel consisting of a backlit LCD display, status LED indicators, and a multi-function keypad. The control panel permits the user to change settings and make adjustments on- the-fly without the need for a host computer. -
Page 46: Keypad Layout And Functions
Keypad Layout and Functions The keypad buttons perform the following general functions. PRINT/PAUSE Toggles the printer between Ready and Pause states Pauses or resumes printing If viewing a sub-menu, returns you to main Pause menu FORM FEED/ADVANCE When the printer is in a Pause state, feeds the media by one calibrated label length each time the key is pressed, or continually advances the media when the key is held... -
Page 47: Print/Pause
While a batch of labels or the test pattern is being printed, pressing the CANCEL key will display the following message: Deletes all labels SELECT to confirm Pressing SELECT will immediately cease printing, canceling any pending batches from memory and will return the printer to a Ready state. QLS-4100 Xe... -
Page 48: Menu Overview
Menu Overview The following list outlines all of the menus that are accessible via the user interface. Some menus, as noted, are only accessible when the printer has been paused using the PRINT/PAUSE key. Some menus, like the Cutter menus, are only available when a specific option is enabled or in use. The menus are organized in two levels. - Page 49 Horiz. Line Pattern Large Blocks 1”, 2”, 3”, 4”, 5” Vertical Baseline Synchronizes the vertical registration across multiple QLS-4100 Xe printers. Possible values range from -120 to +120 dots. Horizontal Baseline Synchronizes the horizontal registration across multiple QLS-4100 Xe printers. Possible values range from <-120 to ->...
- Page 50 Operation Menu Options are available in a Pause state only. Pull Back Requires special hardware. Contact QuickLabel for more information on this function. Label Reprint Reprints up to 999 copies of the last label printed, if using the Windows print driver. Synchronize Labels Synchronizes labels when using printer/applicator or Print &...
- Page 51 Activates the cut flag. Possible values are ON or OFF. This option is available only if the cutter is enabled. Pull Back Enables/disables the pull back function. Possible values are Disabled, Enabled (Manual), or Enabled (Auto). This option requires special hardware. Contact QuickLabel for more information. QLS-4100 Xe...
- Page 52 Applicator Activates the label applicator mode. Possible values are Enabled 1, Enabled 2, or Disabled. Ignore Host Ignores all Speed, Intensity, Vertical Offset, and Commands Horizontal Offset commands issued by the host computer. “No Air” Warning Enables/disables the “No Air” warning that appears at startup if air is not connected to the printer.
-
Page 53: Ready State & Adjust Menu
Note: Some thermal transfer ribbon (typically, Resin type) reacts differently, actually printing lighter if too much heat is applied. This is a result of over- burning the ink. If this occurs, decreasing the heat will darken the printed image. QLS-4100 Xe... - Page 54 To set printhead intensity via the front panel: If the printer is in a Ready state, proceed to the next step. If the printer is in a Pause state, press the NEXT or PREVIOUS key until the Adjust menu is displayed. Then press the SELECT key. Pause: Adjust Press SELECT Press the NEXT or PREVIOUS key until the Intensity menu for the print...
-
Page 55: Print Speed
You can set the print speed via Custom QuickLabel or the QuickLabel Windows Printer Driver. Note: The printer’s maximum speed will depend on the content of the format. For example, formats with incrementing or database fields may have to be printed at slower speeds. QLS-4100 Xe 4-11... -
Page 56: Print Line Adjustment
Once this procedure has been performed, it rarely needs to be repeated during normal operation. Print line adjustments are best performed dynamically while the QLS-4100 Xe is printing a block test pattern. To perform a print line adjustment: Select the slowest print speed for the adjustment process to conserve media and ribbon. - Page 57 1 by 24 pixels. The direction of misalignment will dictate whether you move the print line +24 or -24. Negative values adjust the line on the label away from the printer; positive values adjust the line toward the printer. QLS-4100 Xe 4-13...
-
Page 58: Cross Web Adjustment
This procedure is typically performed in conjunction with a Print Line Adjustment. Once this procedure has been performed, it rarely needs to be repeated during normal operation. Cross web adjustments are best performed dynamically while the QLS-4100 Xe is printing a block test pattern. To perform a cross web adjustment: Select the slowest print speed for the adjustment process to conserve media and ribbon. - Page 59 Continue making adjustments until you observe that the blocks in the test pattern are horizontally aligned. When all the blocks are aligned in the media travel and the cross web directions, and the black block prints without any color shadows, the color alignment is optimal. QLS-4100 Xe 4-15...
-
Page 60: Vertical Offset
Press the + or – key until the desired vertical offset setting is displayed. Offset settings range from – 1200 to + 1200 pixels (or dots). On the QLS-4100 Xe, there are 12 pixels per millimeter. 4-16 Keypad controls and menus... -
Page 61: Horizontal Offset
If the printer is in a Pause state, press the NEXT or PREVIOUS key until the Adjust menu is displayed. Then press the SELECT key. Pause: Adjust Press SELECT Press the NEXT or PREVIOUS key until the Horizontal Offset menu is displayed. Horizontal Offset = < 16 QLS-4100 Xe 4-17... - Page 62 Offset settings range from <– 1200 to -> 1200 pixels (or dots). On the QLS-4100 Xe, there are 12 pixels per millimeter. The final image position will be constrained by the label width. Press the SELECT key to confirm your choice.
-
Page 63: Display Counter
The printer’s label counting feature can also be turned off. Note: The counter will disappear while menus are being navigated during printing. The counter will be displayed and updated when the QLS-4100 Xe resumes printing labels. To set up the counter: If the printer is in a Ready state, proceed to the next step. -
Page 64: Cut Offset
Cut Offset When printing on media with registration marks (gaps, reflective marks, etc.), the printer will place the label image area between the registration marks. If necessary, you can adjust the location of the cut line relative to the printed image. The cut offset can be used to move the cut line forward or backward with respect to the top of the label. -
Page 65: Label Reprint
In Print & Peel single label mode, you can increase/decrease the distance labels are advanced after printing. Note: This option is available only in Print & Peel single label mode. For more information about Print & Peel, refer to Chapter 8: Print & Peel. QLS-4100 Xe 4-21... -
Page 66: Peel Delay
Peel Delay When labels are printed, they are advanced from the front of the printer for removal. After you remove a label, the printer will wait for a specified amount of time before performing the next action (pulling media back, advancing another label, etc.). -
Page 67: Cal & Setup Menu
The printer’s internal label queue is reset during the calibration process. Any labels pending in the queue are terminated. Refer to the calibration procedures outlined in Chapter 3 for detailed information about calibrating the printer. QLS-4100 Xe 4-23... -
Page 68: Test Print
Test Print The QLS-4100 Xe is equipped with a number of built-in test patterns used for checking color alignment, print quality, and printhead integrity. To perform a test print: If the printer is in a Ready state, press the PRINT/PAUSE key to pause the printer. -
Page 69: Vertical Baseline
Vertical Baseline This function is used to synchronize printing when using multiple QLS-4100 Xe printers. If you are sending the same image file to two or more printers and notice that the image prints in different vertical locations, you can use this function to move the vertical baseline of a printer. -
Page 70: Horizontal Baseline
Horizontal Baseline This function is used to synchronize printing when using multiple QLS-4100 Xe printers. If you are sending the same image file to two or more printers and notice that the image prints in different horizontal locations, you can use this function to move the horizontal baseline of a printer. -
Page 71: Printer Settings
Print With Head 1 Press the + or – key to specify the printhead that will be used to print the settings. Press the SELECT key to print out a listing of current settings for the QLS-4100 Xe. QLS-4100 Xe 4-27... - Page 72 The sample report shown below indicates the type of information that will be printed. QLS-4100 Xe Settings: SPEED = 2 INCHES/SEC INTENSITY (1, 2, 3, 4): 15, 15, 15, 15 OFFSET: V = 0 (0), H = 0 (0), C = 0 PRINT LINE ADJ (1, 2, 3): -23, -9, -8 CROSS WEB ADJ (1, 2, 3, 4): 0, 0, <...
-
Page 73: Variable Maximum Gap
Press the NEXT or PREVIOUS key until the Maximum Gap menu is displayed. Maximum Gap (mm) Max Gap = 200 Press the + or – key to set the maximum gap from 1-200mm. Press the SELECT key to confirm. QLS-4100 Xe 4-29... -
Page 74: Cutter Baseline
Cutter Baseline This function is used to synchronize printing when using multiple cutters. If you are sending the same image file to two or more printers/cutters and notice that the cutter cuts in different vertical locations, you can use this function to move the vertical baseline of a cutter. -
Page 75: Operation Menu
Pull Back When the QLS-4100 Xe stops printing, a section of blank media will extend from the printhead near the rear of the printer (print station #4) to the front of the printer. - Page 76 To activate manual media pull back with the Operation menu: If the printer is in a Ready state, press the PRINT/PAUSE key to pause the printer. Press the NEXT or PREVIOUS key until the Operation menu is displayed. Then press the SELECT key. Pause: Operation Press SELECT Press the NEXT or PREVIOUS key until the Pull Back menu is displayed.
- Page 77 To activate automatic media pull back: In Automatic mode, the printer automatically performs the pull back operation after a queue is finished printing. No manual intervention is necessary. QLS-4100 Xe 4-33...
-
Page 78: Label Reprint
Label Reprint When using the QuickLabel Printer Driver for Windows to print to the QLS- 4100 Xe, data is transmitted from the PC software application to the printer as a bitmapped image. You can use the Reprint option to quickly print any quantity of the last label printed. -
Page 79: Synchronize Labels
NEXT or PREVIOUS key until the Operation menu is displayed. Then press the SELECT key. Pause: Operation Press SELECT Press the NEXT or PREVIOUS key until the Synchronize Labels menu is displayed. Synchronize Labels Press SELECT QLS-4100 Xe 4-35... - Page 80 Press the SELECT key. The printer will feed one or two labels and then be ready for applicator mode or Print & Peel Multiple Label mode operation. If no labels feed, the printer did not require synchronization. • If the following message appears, the front panel pause is enabled and the synchronize function will not operate.
-
Page 81: Ribbon Menu
Selecting a ribbon type allows you to select a printhead heat and history profile that has been tailored to a specific media and ribbon combination. This feature enables the QLS-4100 Xe to print on an even wider range of specialty materials. - Page 82 Drop/Lift Adjust The QLS-4100 Xe is equipped with QuickLabel’s patented RibbonRation™ technology. This feature automatically determines when to enable or disable each of the four print stations, thus consuming thermal transfer ribbon only when a particular color is needed. In some cases, multiple drop/lift points will be used on individual labels. The number of drops and lifts depends on the size of the label.
-
Page 83: Drop/Lift Adjust
Press the SELECT key to confirm your choice. Any changes will take effect only after a new label is sent. QLS-4100 Xe 4-39... -
Page 84: Ribbon Sensor
Ribbon Sensor This function is for use by QuickLabel technicians when performing diagnostics at the factory. In general use, the Ribbon Sensor should always be enabled. To adjust the ribbon sensor: If the printer is in a Ready state, press the PRINT/PAUSE key to pause the printer. -
Page 85: Communications Menu
Press the NEXT or PREVIOUS key until the Communications menu is displayed. Then press the SELECT key. Pause: Communications Press SELECT Press the NEXT or PREVIOUS key until the Data Port menu is displayed. Data Port Parallel QLS-4100 Xe 4-41... -
Page 86: Parallel Mode
Press the + or – key until the desired data port is displayed. Available options are Parallel, Serial, or Ethernet. Press the SELECT key to confirm your choice. Parallel Mode If you are using the parallel port to connect the printer to a host computer, you can select a parallel port mode. -
Page 87: Rs232 Baud Rate
Press the NEXT or PREVIOUS key until the RS232 Baud Rate menu is displayed. RS232 Baud Rate 19200 Press the + or – key until the desired baud rate is displayed. Available options are 4800, 9600, 19200, or 38400. Press the SELECT key to confirm your baud rate choice. QLS-4100 Xe 4-43... -
Page 88: Rs232 Handshaking
RS232 Handshaking If you are using the RS232 serial port connection, you can configure the printer handshaking method. To select a handshaking method: If the printer is in a Ready state, press the PRINT/PAUSE key to pause the printer. Press the NEXT or PREVIOUS key until the Communications menu is displayed. -
Page 89: Tcp/Ip: Ip Address
A TCP/IP address uniquely identifies each device connected to your network. If you are using ethernet to connect your printer to a network, you will need to assign a TCP/IP address to your QLS-4100 Xe printer. The default TCP/IP address is 192.168.255.1. -
Page 90: Tcp/Ip Subnet Mask
TCP/IP Subnet Mask You will use the TCP/IP Subnet Mask option in the Communications menu to set a subnet mask for the QLS-4100 Xe printer. The default subnet mask is 255.255.255.1. Note: For more detailed information on the topic of networking, refer to the documentation applicable to your network environment and/or contact your network administrator. -
Page 91: Tcp/Ip Gateway
TCP/IP Gateway You will use the TCP/IP Gateway option in the Communications menu to set a subnet mask for the QLS-4100 Xe printer. The default gateway is 0.0.0.0. Note: For more detailed information on the topic of networking, refer to the documentation applicable to your network environment and/or contact your network administrator. -
Page 92: Tcp/Ip Connections
TCP/IP Connections You will use the TCP/IP Connections option in the Communications menu to select whether the TCP/IP status socket is enabled. By default, the status socket is enabled. Note: If you are using Custom QuickLabel in bidirectional communication mode, the TCP/IP status socket must be enabled. For more detailed information on the topic of networking, refer to the documentation applicable to your network environment and/or contact your network administrator. -
Page 93: System Menu
Off – No counter is displayed. Total – Count of labels printed since last power on is displayed Batch – Count of labels printed in current batch is displayed The selected counter mode will now appear on the display while printing. QLS-4100 Xe 4-49... -
Page 94: Memory Card - Write Protection
Memory Card - Write Protection Memory cards allow you to save fonts, bitmap images, and other configuration information in a portable format. Memory cards use non- volatile memory, so the contents of the card remain intact even after the printer is powered off. You can write protect memory cards to prevent contents from being accidentally erased while using the printer. -
Page 95: Front Panel Lock/Unlock
Press the NEXT or PREVIOUS key until the System menu is displayed. Then press the SELECT key. Pause: System Press SELECT Press the NEXT or PREVIOUS key until the Front Panel Lock menu is displayed. Front Panel Lock 0000 QLS-4100 Xe 4-51... - Page 96 Press the + or – key to increase or decrease the first number in the password, then press the SELECT key. Press the + or – key to increase or decrease the second number in the password, then press the SELECT key. Press the + or –...
- Page 97 SELECT key. Press the + or – key to increase or decrease the fourth number in the password, then press the SELECT key. Press the SELECT key to unlock the front panel using the appropriate password. QLS-4100 Xe 4-53...
-
Page 98: Memory Card - Formatting
Memory Card - Formatting Memory cards must be formatted before they can be used. If you have a memory card inserted in the memory card slot, which is located on the rear panel, use the following instructions to format the card. The memory card write protection setting must be off to allow memory card formatting. -
Page 99: Time
Time The QLS-4100 Xe provides a built-in, real-time clock that is used for displaying the time and date. It is also used to provide a time/date stamp for fonts and images. You will use the Time menu option to set the time for the clock. -
Page 100: Date
Date The QLS-4100 Xe provides a built-in, real-time clock that is used for displaying the time and date. It is also used to provide a time/date stamp for fonts and images. You will use the Date menu option to set the date. - Page 101 Factory Reset The factory reset feature of the QLS-4100 Xe returns all parameters available through the printer’s front panel to their factory default values. Use the procedure in this section to perform a factory reset to return the printer to the default values listed below.
-
Page 102: Factory Reset
To perform a factory reset: If the printer is in a Ready state, press the PRINT/PAUSE key to pause the printer. Press the NEXT or PREVIOUS key until the System menu is displayed. Then press the SELECT key. Pause: System Press SELECT Press the NEXT or PREVIOUS key until the Factory Reset menu is displayed. -
Page 103: Options Menu
Mirror Mode The QLS-4100 Xe has the ability to print labels in a mirror image format. This format is useful when printing on transparent media to be applied to a transparent surface such as glass. This mode mirrors the printed image horizontally. -
Page 104: Cutter
Cutter If using an optional cutter or cutter/stacker accessory, you can enable it using the Cutter menu option. To enable or disable the cutter: If the printer is in a Ready state, press the PRINT/PAUSE key to pause the printer. Press the NEXT or PREVIOUS key until the Options menu is displayed. -
Page 105: Cut Flag
Press the NEXT or PREVIOUS key until the Options menu is displayed. Then press the SELECT key. Pause: Options Press SELECT Press the NEXT or PREVIOUS key until the Cut Flag menu is displayed. Cut Flag QLS-4100 Xe 4-61... - Page 106 Press the + or – key until the desired setting is displayed. Available options are On or Off. Press the SELECT key to confirm your choice. Note: Do not select Append Flag or Set as Flag in Custom QuickLabel if the flag is enabled via the front panel.
-
Page 107: Pull Back - Enable/Disable
Press the NEXT or PREVIOUS key until the Options menu is displayed. Then press the SELECT key. Pause: Options Press SELECT Press the NEXT or PREVIOUS key until the Pull Back menu is displayed. Pull Back Disabled QLS-4100 Xe 4-63... - Page 108 Press the + or – key to choose the type of pull back mode to enable. Available options are Disabled, Enabled (Manual), and Enabled (Auto). Press the SELECT key to confirm your choice. Note: Media pull back can also be activated via host command. Consult the QuickLabel Host Protocol documentation for details on this command.
-
Page 109: Applicator
Press the SELECT key to confirm your choice. Note: Before printing labels in applicator mode, use the Synchronize Labels command from the Operation menu to synchronize the printer with the label applicator or Print & Peel system. QLS-4100 Xe 4-65... -
Page 110: Image Normalization
The following message will appear if you attempt to print without synchronizing. Synch Required Image Normalization Image normalization is used to prevent unwanted variations in print intensity along the length of the label, which occur in certain label formats. The default setting is off, since most users are unaffected by these variations. To enable or disable image normalization: If the printer is in a Ready state, press the PRINT/PAUSE key to pause the printer. -
Page 111: No Air" Warning
Press the NEXT or PREVIOUS key until the Ignore Host Commands menu is displayed. “No Air” Warning Enabled Press the + or – key until the desired setting is displayed. Available options are Enabled or Disabled. Press the SELECT key to confirm your choice. QLS-4100 Xe 4-67... -
Page 112: Ignore Host Commands
Ignore Host Commands This option causes the printer to disregard the Speed, Intensity, Vertical Offset, and Horizontal Offset commands issued by the host computer. To enable or disable these host commands: If the printer is in a Ready state, press the PRINT/PAUSE key to pause the printer. - Page 113 If the printer is in a Ready state, press the PRINT/PAUSE key to pause the printer. Press the NEXT or PREVIOUS key until the Options menu is displayed. Then press the SELECT key. Pause: Options Press SELECT QLS-4100 Xe 4-69...
-
Page 114: System Configuration
Press the NEXT or PREVIOUS key until the System Configuration menu is displayed. System Configuration Standard Press the + or – key to choose the system configuration to enable. Available options are Standard, Custom 1, and Custom 2. Press the SELECT key to confirm your choice. Print &... -
Page 115: Chapter 5: Operation
Chapter 5: Operation To prepare the QLS-4100 Xe for printing, make sure that: • Power connection has been made • Communication connections have been made between host and printer • Compressed air is supplied to the printer if RibbonRation™ will be used •... -
Page 116: Printing With The Qls-4100 Xe
QuickLabel Systems Loading Program . . . The next display will show the printer model, QLS-4100 Xe, followed by the system firmware version number. Periodically, QuickLabel may provide upgraded firmware to add functionality to the printer. You may visit the QuickLabel website to check for updated firmware. -
Page 117: Operating Without Compressed Air
Operating Without Compressed Air The QLS-4100 Xe RibbonRation ribbon conservation system has been designed so that the printer can operate normally without compressed air, but without the advantage of ribbon savings. If sufficient compressed air is not available during the power up self-test, the... -
Page 118: Printer Indicators
Printer Indicators When power is on, the printer has four indicator lights that provide a visual cue to the printer’s current state. Indicator Function POWER When the green POWER indicator light is illuminated, the printer is ready to operate. Assuming the printer is properly set up and a label has been downloaded or a test pattern has been selected pressing the PRINT/PAUSE key will cause printing to begin. -
Page 119: Error Messages
• The ribbon unwind is not turning at a steady rate. Ensure that the ribbon has been loaded correctly and that the ribbon unwind tension has not been set too high. QLS-4100 Xe... - Page 120 After reloading media or ribbon, the printer will reprint any label formats that were partially under the print stations when the error occurred. Note: Media Out or Film Out errors can occur if either the media or film is not feeding, winding or unwinding properly. A physical adjustment to the media path or film tension usually corrects this condition.
- Page 121 The following message is displayed after a printhead is disabled: Head x Disabled Printheads Disabled • Displayed after the self-test when the printer is powered on with one or more of the heads already lifted. The printer indicates which heads have been disabled upon power up. QLS-4100 Xe...
- Page 122 Deletes all labels SELECT to confirm • Displayed when the CANCEL key is pressed while a batch is being printed. Pressing the SELECT key will cancel all pending labels in the batch. NVRAM Test Failed Please reset printer • Displayed during the printer power-up sequence if the non-volatile RAM test fails.
-
Page 123: Color Alignment
To examine the color alignment, you can print the process Proc. Block test pattern. The process black box on this test pattern should appear black, without any other color along an edge. If a color shadow appears along an edge, that color’s print station is in need of alignment. QLS-4100 Xe... - Page 124 You will also examine the block patterns to observe both the horizontal and vertical alignment. If any color appears horizontally misaligned, the cross web values require adjustment; if any color appears vertically misaligned, the print line adjustment values require adjustment. When the black box prints without any color shadows and the block pattern appears correctly aligned, the color alignment is optimal.
-
Page 125: Common Adjustments And Tasks
Common Adjustments and Tasks Test Patterns The QLS-4100 Xe is equipped with a number of built-in test patterns used for checking color alignment, print quality, and printhead integrity. Refer to the Cal & Setup Menu section of Chapter 4 for more information on test prints. -
Page 126: Evaluating Print Quality
Evaluating Print Quality Press the PRINT / PAUSE key to put the printer into the pause mode. Press the NEXT or PREVIOUS key until the Cal & Setup menu is displayed. Pause: Cal & Setup Press SELECT Press SELECT. Then press the NEXT or PREVIOUS key until the Test Print menu is displayed. - Page 127 As you change the parameter settings, examine the test pattern to ensure that the changes you are making are improving print quality. 10 Continue to adjust the parameter settings until you are satisfied that print quality has been optimized. QLS-4100 Xe 5-13...
-
Page 128: Enabling And Disabling Ribbonration
Enabling and Disabling RibbonRation™ The QLS-4100 Xe RibbonRation™ feature can be enabled or disabled via the user control panel of the printer as well as Custom QuickLabel software or the QuickLabel Windows Printer Driver. The software will always override any setting that has been made on the front panel of the printer. -
Page 129: Printing Labels
Before sending a label to the QLS-4100 Xe: Make sure that the QLS-4100 Xe is in a Ready state. Press the PRINT/PAUSE pushbutton if necessary until Ready is displayed. Specify the label quantity from within your software application. - Page 130 5-16 Operation...
-
Page 131: Chapter 6: Advanced Adjustments
Chapter 6: Advanced Adjustments Your QLS-4100 Xe has been carefully set at the factory to print optimally using your specific type of media and ribbon. This chapter describes how to perform advanced adjustments that may be needed when specialized media is used in the printer. -
Page 132: Printhead Tangency Alignment
Printhead Tangency Alignment The proper alignment of the printhead over the platen roller produces optimum transfer of ribbon to the media. Although this mechanical adjustment is a factory setting, there are situations where a slight repositioning of the platen support strut will optimize print quality on different media types and thicknesses. -
Page 133: Printhead Angularity Adjustment
Tighten the two nuts on the printhead bracket. Care should be taken not to over-tighten this hardware or damage to the printhead or print station may result. When all printstations are aligned, all colors will be perfectly superimposed on the process black line at the top of the test pattern. QLS-4100 Xe... -
Page 134: Ribbon Wrinkling Adjustments
Ribbon Wrinkling Adjustments The QLS-4100 Xe features an automatic ribbon tensioning mechanism to ensure consistent tension from a full to empty ribbon supply roll. The ribbon width should be matched to the label or tag width. Make sure that the ribbon is not more than ¼ inch wider than the label because it may cause the ribbon to wrinkle. - Page 135 Loosen the screw securing the shaft and using a wrench, turn the eccentric until wrinkles have been eliminated then retighten the screw to secure the shaft. QLS-4100 Xe...
-
Page 136: Printhead & Drive Station Lift
Printhead & Drive Station Lift Your QLS-4100 Xe printhead and drive station are mounted to a center- pivoting shaft. This permits even pressure to be applied across the width of the media. When using narrow media, the Printhead and Drive Station Lift Screws allows you to relieve unnecessary pressure against the platen roller and drive roller. -
Page 137: Vertical Baseline
Vertical Baseline This function is used to synchronize printing when using multiple QLS-4100 Xe printers. If you are sending the same image file to two or more printers and notice that the image prints in different vertical locations, you can use this function to move the vertical baseline of a printer. -
Page 138: Horizontal Baseline
Horizontal Baseline This function is used to synchronize printing when using multiple QLS-4100 Xe printers. If you are sending the same image file to two or more printers and notice that the image prints in different horizontal locations, you can use this function to move the horizontal baseline of a printer. -
Page 139: Chapter 7: Maintenance And Repair
Chapter 7: Maintenance and Repair Your QLS-4100 Xe is designed for long-life and trouble-free operation. In order to keep your printer operating at optimal performance, some periodic maintenance is required. This chapter provides the following information: • List of recommended tools for performing maintenance and repairs. -
Page 140: Recommended Tool List
Recommended Tool List The following is a list of recommended tools for maintenance and repair of the QLS-4100 Xe. 3/16” X 4” long Slotted Screwdriver 3/32” X 4” long Slotted Screwdriver #2 1/4” X 15/16” Phillips Screwdriver #2 1/4” X 8” Phillips Screwdriver #1 3/16”... -
Page 141: Routine Cleaning
Isopropyl Alcohol. Harsh chemicals and solvents should be avoided as damage to the printhead could occur. Print Line Ribbon Guide Rollers Platen Roller Drive Roller Peel Edge Pinch Roller QLS-4100 Xe... - Page 142 To clean printheads: While the printer is on, lift the printhead that will be cleaned. The following message will display. Head x up SELECT to disable Press the SELECT button. The indicated print station will be disabled and the following message will display. Head x Disabled Turn the printer off and unplug the AC power cord.
-
Page 143: Printhead Replacement
There are three inline screws on the outer plate at the end of the guide roller. Remove the two lower screws and pull on the tab to slide the center shaft out, releasing the guide roller to drop down. QLS-4100 Xe... - Page 144 Remove the platen roller if you are changing the printhead on print station #1. Use a Phillips screwdriver to loosen the captive printhead mounting screw over the top of the printhead. Raise the printhead assembly by the handle to allow the printhead to drop down away from the bracket.
-
Page 145: Platen Replacement
Remove the two outside screws from the shaft end plate at the outer end of the platen shaft on the frame plate. Reach under the printer to loosen the collar on the outside end of the platen roller by turning the black lever counterclockwise. QLS-4100 Xe... - Page 146 Slide the plate and shaft assembly away from the frame plate. The collar and roller will drop down as this assembly is pulled away from the frame plate. Reinsert the small plate and shaft assembly into the hole in the side plate. Add the collar over the shaft behind the side plate.
-
Page 147: Drive And Pinch Roller Replacement
Slip the cup washer over the plate shaft just before inserting it into the drive roll bearing. The cup must face away from the bearing surface as illustrated. 10 Secure the shaft end plate with the two mounting screws. QLS-4100 Xe... -
Page 148: Pinch Roller Replacement
11 Loosen the set screw on the inner side of the drive roll and pull the roller to the outside against the frame plate. This will reduce the side play on the roller. Tighten both set screws on the inner drive roll side. Pinch Roller Replacement Turn the printer off and unplug the AC power cord. -
Page 149: Changing The Fuse Or Line Voltage
Changing the Fuse or Line Voltage Your QLS-4100 Xe has been configured for your line voltage at the factory. Should you need to replace the fuse(s) or reconfigure the printer for a different line voltage, follow the procedure outlined below. -
Page 150: Firmware Upgrades
Firmware Upgrades Firmware is the internal operating system of the QLS-4100 Xe. Periodically, firmware upgrades are made available to add new features or change operational characteristics of the QLS-4100 Xe. A firmware upgrade should only be performed when available new functionality is needed or when a firmware upgrade is required for compatibility with QuickLabel software. - Page 151 When complete, the menu will indicate that you may either continue with the upgrade or that an error occurred. If an error occurs, follow the message instructions to correct the problem on the printer if necessary and press the Retry button. QLS-4100 Xe 7-13...
- Page 152 When no error is indicated, press the Next button to proceed to the final screen. This last screen begins the actual upgrade process. Press the Finish button to begin the file transfer. All of the necessary files will be transmitted to the printer. When the file transfer is complete, choose the Done or Cancel button on the display to exit the upgrade utility.
-
Page 153: Upgrading Additional Printers With The Compactflash Card
Reading New Files Erasing Flash Programming Flash OCR_A.BIN etc . . . When the upgrade is complete, the printer will reset again. Please verify the version displayed during the power-up sequence. Your printer will be ready to use. QLS-4100 Xe 7-15... - Page 154 7-16 Maintenance and repair...
-
Page 155: Chapter 8: Print & Peel
This chapter provides the following information: • A general overview of the Print & Peel system. • Information about media compatibility. • System setup instructions. • Printing and peeling instructions. • Print & Peel adjustment instructions. QLS-4100 Xe... -
Page 156: Print & Peel System Overview
Print & Peel System Overview The Print & Peel system is made up of two components: • QLS-4100 Xe (with Pull Back option) and hardware modifications • Print & Peel Base The Print & Peel system presents one label at a time. As the label exits the printer, it is automatically peeled from the liner and positioned for easy removal. -
Page 157: Compatible Media
Compatible Media Standard QLS-4100 Xe media types including paper and synthetic may be used. However, some flexible synthetic media types may not peel reliably and it is recommended that any application be qualified by QuickLabel to ensure reliable operation. Print & Peel is to be used with adhesive backed labels on continuous liner. -
Page 158: Important Safety Features
1. Emergency Stop Button The emergency stop button can be used to terminate power to both the QLS-4100 Xe and the Print & Peel Base. Using this button shuts down both systems immediately. 2. Rewind Switch The rewind switch enables/disables the rewind motor in the Print & Peel Base. -
Page 159: Print & Peel Installation
In this situation, the printer will require modification prior to installing the Print & Peel System. See Refitting an Existing QLS-4100 Xe for QLS-4100 Xe refit instructions. Then refer to Installing the Print & Peel System for installation instructions. -
Page 160: Refitting An Existing Qls-4100 Xe
Refitting an Existing QLS-4100 Xe QLS-4100 Xe printers (models with Pull Back option only) can be refitted for use with the Print & Peel Base. Note: These instructions apply only when refitting an existing QLS-4100 Xe for use with the Print & Peel Base. Skip this section if you received the Complete Print &... - Page 161 Position the QLS-4100 Xe as indicated in the following illustration. The printer is heavy and it is suggested that at least two people lift it. Remove the two #6 binder head screws (10658610) from the spring clip on the media supply mandrel.
-
Page 162: Installing The Print & Peel System
The QLS-4100 Xe spacer feet fit into the holes on the top plate. On some units the leg struts must be adjusted by loosening the screws that locate them. - Page 163 9-pin connector on the Print & Peel Base. Note: If your QLS-4100 Xe was manufactured prior to October 2008, you will need to install a utility port adapter (26732101) in the QLS-4100 Xe utility port. Install the adapter before connecting the 9-pin cable.
- Page 164 Ensure the Print & Peel Base on/off switch is in the off position. Connect the AC power cord to the Print & Peel Base power input. Connect the opposite end of the AC power cord into an earth grounded AC receptacle.
-
Page 165: Print & Peel Setup
Thread the liner as indicated. Ensure the liner passes beneath the sensor on the right side of the liner guide. Wrap the end of the liner under the takeup core and secure the end with a small piece of adhesive tape. QLS-4100 Xe 8-11... - Page 166 Move the Rewind Enable/Disable switch to the up position to enable the rewind motor. Enable Print & Peel as described in the Enabling/Disabling Print & Peel section later in this chapter. Note: The Pull Back option should be disabled in both the printer menu and Custom QuickLabel when operating in Print &...
-
Page 167: Enabling/Disabling Print & Peel
If the printer is in a Ready state, press the PRINT/PAUSE key to pause the printer. Press the NEXT or PREVIOUS key until the Options menu is displayed. Then press the SELECT key. Pause: Options Press SELECT QLS-4100 Xe 8-13... - Page 168 Press the NEXT or PREVIOUS key until the Print & Peel Mode menu is displayed. Print & Peel Mode Press the + or – key to choose the Print & Peel Mode option. The following options are available. Off - Print & Peel mode is disabled. Multiple Label - Enables multiple label mode.
-
Page 169: Printing And Peeling Labels
Use the following instructions to print and peel labels. To print and peel labels: Make sure that the QLS-4100 Xe is in a Ready state. Press the PRINT/PAUSE pushbutton if necessary until Ready is displayed. Specify the label quantity from within your software application. -
Page 170: Adjusting The Liner Guide
The appropriate liner guide position will vary according to the media width. Required Tools: 5/32 Allen wrench Ensure the media is tracking correctly through the QLS-4100 Xe before adjusting the liner guide. To adjust the liner guide: Loosen the two 5/32 set screws located on the underside of the liner guide. -
Page 171: Liner Guide Adjustment Notes
Adjusting the outside of the liner guide forward will correct this issue. • Observe the tension across the liner before it reaches the liner guide. This will indicate how you will adjust the angle of the liner guide. QLS-4100 Xe 8-17... - Page 172 • In single label mode, when the media is retracting you may notice the liner drift from right to left across the peel edge. This is normal. A 2mm to 5mm drift is expected. The media should correct itself while the next label is being printed.
-
Page 173: Print & Peel Adjustment Options
Press the + or – key until the desired form stop adjust setting is displayed. Form stop adjust settings range from -300 dots to +14400 dots (-1 inch to +48.0 inches) (-25.4 mm to 1219.2 mm). Press the SELECT key to confirm. QLS-4100 Xe 8-19... -
Page 174: Peel Delay
Peel Delay When labels are printed, they are advanced from the front of the printer for removal. After you remove a label, the printer will wait for a specified amount of time before performing the next action (pulling media back, advancing another label, etc.). -
Page 175: Appendix A: Physical Data
Appendix A: Physical Data QLS-4100 Xe... - Page 176 QLS-4100 Xe Dimensions *all dimensions are in inches Physical data...
- Page 177 QLS-4100 Xe Dimensions *all dimensions are in inches QLS-4100 Xe...
- Page 178 Physical data...
-
Page 179: Appendix B: Specifications
Appendix B: Specifications QLS-4100 Xe... - Page 180 QLS-4100 Xe Specifications Printing Method Thermal Transfer, Spot and CMYK Process Color Print Stations 4 printheads Registration Accuracy +/- 0.5 dot typical (0.0015”, 40 microns) Ribbon Management User selectable, patented RibbonRation™ systems conserves thermal transfer ribbon automatically using air-operated cylinders.
- Page 181 4 rolls, each 3,281 ft long (1000m); Spot or CMYK rolls Label / Tag Size Width: 5.125” Max. (130mm), 2” Min. (51mm); Length: 0.395” Min. (10mm) Label / Tag Thickness 12 point Max. (0.16”, 0.007mm) recommended Label / Tag Roll Capacity 12” Max. Outside Diameter (305mm) QLS-4100 Xe...
- Page 182 QLS 4100 Xe plus consumables loaded. Length Length (base only): 22.0 inches Length (base + printer): QLS-4100 Xe length + 1.85inches Width Width (base only): 18.5 inches Width (base + printer): 18.5 inches. Additional width needed (left side) to open printer door for loading of consumables and access to rewind mandrel for threading of liner.
-
Page 183: Appendix C: Replacement Parts
Appendix C: Replacement Parts QLS-4100 Xe... - Page 184 Replacement Parts Part Number Description 14076-001 Printhead 14039-001 Drive Roll (black polyurethane) 14039-401 Drive Roll (blue silicone) 14041-101 Pinch Roller (aluminum with coating) 14039-101 Platen Roller (black polyurethane, 60 Dur., bearings installed) 14039-501 Platen Roller (blue silicone, 50 Dur., bearings installed) 14058-000 Bearing Block Assembly (drive roll) 14057-201...
- Page 185 Cable, Parallel High-Speed 24164-000 Cable, Serial 10787-001 Cord, Power Parts specifications are subject to change without notice. Contact QuickLabel Technical Support to identify the correct parts and obtain current pricing. Please have the serial number of your printer available. QLS-4100 Xe...
- Page 186 Replacement parts...
-
Page 187: Appendix D: Custom Quicklabel Setup
Appendix D: ® Custom QuickLabel setup QLS-4100 Xe... - Page 188 Custom QuickLabel setup The following guide explains how to configure Custom QuickLabel software for use with the QLS-4100 Xe printer. If you are using and older version of software (i.e. Color QuickLabel), please contact QuickLabel for an upgrade. To configure Custom QuickLabel from Create and Print: Note: Skip to step 4 if you are configuring the Print application.
- Page 189 All fonts will be sent to an internal 4 Mb memory dedicated to fonts. If your images/fonts exceed this capacity, some or all of the images/fonts may not print. Place a check mark in the Save Ribbon box if RibbonRation™ will be used. QLS-4100 Xe...
- Page 190 Click on the Communications tab. The following screen will appear: Select the desired Printer Communication: Bidirectional (recommended) - This option permits two-way communication with the printer. The printer will report status back to the host computer via the serial port connection. The parallel, serial, or ethernet port is used to transmit data to the printer.
- Page 191 Note: Custom QuickLabel supports parallel ports LPT1 and LPT2 and serial ports COM1 and COM2. The maximum supported baud rate for the serial port is 38,400 baud. Hardware handshaking (DTR/DSR) is always used by default. 12 Click OK when all printer settings have been made. QLS-4100 Xe...
- Page 192 Custom QuickLabel setup...
-
Page 193: Appendix E: Windows Printer Driver Setup
Appendix E: Windows Printer Driver Setup QLS-4100 Xe... - Page 194 Accessing Device Options Open the Printers and Faxes window. (Start >> Control Panel >> Printers and Faxes) Right-click the QLS-4100 Xe printer option and choose Properties. The QLS-4100 Xe Properties window will open. Device Options Ribbon Ration - Check this option to enable the automatic ribbon saving feature of the printer.
- Page 195 Accessing Printing Preferences Open the Printers and Faxes window. (Start >> Control Panel >> Printers and Faxes) Right-click the QLS-4100 Xe printer option and choose Printing Preferences. The QLS-4100 Xe Printing Preferences window will open. Page Options Label Size - Use this drop-down list to select the label size you are printing.
- Page 196 Inches/Centimeters - Select the unit of measure that will be used on the label. Width - If you are setting up a custom label size, enter the label width. The minimum and maximum label widths are displayed directly below the Width field.
- Page 197 You can also apply a smoothing filter to the fine, medium, and coarse halftoning options. Results are best for photographic images or for labels without large solid areas. QLS-4100 Xe...
- Page 198 Error Diffusion - Choose Error Diffusion for labels containing complex graphics and logos. It can also be used to better represent darker solid color areas. The following error diffusion options are available: • Fast - Choose this option when an error diffusion pattern is desired, especially for lighter solid colored areas, but when the processing time required to produce the best quality error diffusion pattern would be objectionable for larger labels.
- Page 199 100%. The higher the number, the more intense a particular color component will print. The sample graphic changes as options are changed, but actual output is dependent upon many factors, including media type, ribbon type, printer heat settings and speed, etc. QLS-4100 Xe...
- Page 200 Brightness and Contrast - Use these controls to adjust the brightness and contrast of the image. As you adjust the brightness and contrast, the sample graphic will be updated. Actual output is dependent upon many factors, including media type, ribbon type, printer heat settings and speed, etc. •...
- Page 201 If you leave this option unchecked, the driver executes a nearest color algorithm, and attempts to match the label colors with the correct printhead. In this case, no specific RGB value setup is required. Simply QLS-4100 Xe...
- Page 202 pick colors that closely resemble those that are on the label when setting up the driver. Intensity & Speed Options Intensity - Use the Intensity settings to adjust the printhead temperature on each printhead. Intensity values range from 1 to 32. Higher numbers result in more heat being applied, resulting in transfer of more color to the label.
- Page 203 The default setting is 1. • Cut Offset - Cut offset allows the adjustment of the cutter up or down the label, allowing correct positioning of the cut. Range of adjustment is +/- 1200 dots (+/- 4 inches). QLS-4100 Xe E-11...
- Page 204 E-12 Windows printer driver setup...
-
Page 205: Appendix F: Format Error Codes
Appendix F: Format error codes QLS-4100 Xe... - Page 206 QLS-4100 Xe Format Error Codes Field X location error The X coordinate of a Set Field Location command (<STX>FLx,y) is out of bounds. Field Y location error The Y coordinate of a Set Field Location command (<STX>FLx,y) is out of bounds.
- Page 207 Acceptable batch count range is 1 to 100000. Group count error Acceptable group count range is 0 to 100000. Serial copies error Acceptable serial copies range is 1 to 100000. Box width error The width value of a graphics field is invalid. QLS-4100 Xe...
- Page 208 Box height error The height value of a graphics field is invalid. Line thickness error The value for line thickness in a graphics field is invalid. Print intensity error Valid print intensity settings are 1 to 32. Print speed error Valid print speeds are 2 to 7 inches per second.
- Page 209 PDF417 security level error An invalid error correction (security) level has been specified for a PDF417 bar code. PDF417 reserved 1 error Must be 0 PDF417 reserved 2 error Must be 0 PDF417 reserved 3 error Must be 0 QLS-4100 Xe...
- Page 210 Format error codes...
-
Page 211: Appendix G: Menu Structure
Appendix G: Menu Structure QLS-4100 Xe... - Page 212 Menu Structure...
- Page 213 QLS-4100 Xe Menus Ready State Ready Ready: Intensity Ready: Intensity Ready: Intensity Ready: Intensity Ready: Speed Ready: Prnt Line Adj Ready: Prnt Line Adj Ready: Prnt Line Adj Ready: Cross Web Adj Ready: Cross Web Adj Ready: Cross Web Adj...
- Page 214 Media Sensor Adjustment ....... 3-7 Replacement ......... 7-5 Media Unwind Mandrel Tangency Alignment ......6-2 Installing ..........2-7 Printing Labels ........5-15 Memory Card Pull Back ..........4-31 Detection ..........5-3 Enable/Disable ........4-63 Formatting ......... 4-54 Quick Start ..........1-3 QLS-4100 Xe...
- Page 215 Rear Panel ..........2-6 Connections ........4-48 Recommended Tools ......7-2, 8-6 Gateway ..........4-47 Replacement Parts ........C-2 IP Address .......... 4-45 Ribbon Subnet Mask ........4-46 Wrinkling Adjustments ...... 6-4 Test Print ..........4-24 Ribbon Sensor ......... 4-40 Thermal Transfer Ribbon Ribbon Type ..........
Need help?
Do you have a question about the QLS-4100 and is the answer not in the manual?
Questions and answers