dji INSPIRE 1 PRO User Manual
Hide thumbs
Also See for INSPIRE 1 PRO:
- Quick start manual (11 pages) ,
- User manual (71 pages) ,
- Quick start manual (11 pages)
Table of Contents
Advertisement
Quick Links
Advertisement
Table of Contents

Related Manuals for dji INSPIRE 1 PRO


Summary of Contents for dji INSPIRE 1 PRO
- Page 1 INSPIRE 1 PRO User Manual V1.0 2015.12...
-
Page 2: Using This Manual
Quick Start Guide. Refer to this manual for more comprehensive information. Watch the video tutorials Please watch the tutorial video below to learn how to use Inspire 1 Pro correctly and safely: http://www.dji.com/product/inspire-1-pro-and-raw/video Download the DJI GO app Download and install the DJI GO app before use. -
Page 3: Table Of Contents
Contents Using this manual Legends Before Flight Watch the video tutorials Download the DJI GO app Product Profile Introduction Feature Highlights Assemble the Aircraft Installing the Gimbal and Camera Aircraft Diagram Remote Controller Diagram Aircraft Flight Controller Flight Mode Flight Status Indicator... - Page 4 INSPIRE 1 PRO User Manual Gimbal and Camera Camera Profile Status LED Gimbal DJI GO App Camera Library Explore Flight Flight Environment Requirements Flight Limits and Flight Restriction Area Preflight Checklist Calibrating the Compass Auto Take-off and Auto Landing Flight Test Starting/Stopping the Motors...
-
Page 5: Product Profile
Product Profile This chapter describes the features of Inspire 1 Pro, instructs you to assemble the aircraft and explains the components on the aircraft and remote controllers. © 2015 DJI. All Rights Reserved. -
Page 6: Introduction
Vision Positioning technology provides hovering precision. Feature Highlights The Inspire 1 Pro is a professional aerial filmmaking and photography platform that is ready to fly right out of the box. Featuring an onboard camera equipped with a 15mm f/1.7 (35 mm format equivalent 30 mm) lens and 3-axis stabilized gimbal, it shoots sharp 16mp stills and stable video at up to 4K. -
Page 7: Installing The Gimbal And Camera
(e.g. carpet) before switching between the travel modes and landing mode. Installing the Gimbal and Camera The following steps use the DJI MFT 15mm f/1.7 ASPH as illustration of how to mount the camera lens to the camera body. Be sure to power off the battery before installation. - Page 8 A filter can be installed in place of the Camera Balancing Ring. Remember to use a filter that fulfills the weight requirement. The Lens Hood can only be installed on the DJI MFT 15mm f/1.7 ASPH or Panasonic Lumix G Leica DG Summilux 15mm f/1.7 ASPH. DO NOT install the Lens Hood on the Olympus M.Zuiko Digital ED 12mm f/2.0.
- Page 9 Filters must have a weigh 7 - 11 g, with those weighing 10 - 11 g performing the best. Outside this range, the filter will decrease gimbal performance. DJI MFT 15mm f/1.7 ASPH supports filters have a size of 46mm. The Balancing Ring must be installed on the camera lens when a filter is not used.
- Page 10 INSPIRE 1 PRO User Manual Attaching 1345T Quick-Release Propellers Following the steps below to attach the 1345T Quick-Release propellers. 1. Pair the propellers and motors with arrows of the same color (red or white). Propeller Lock Rotate the propeller lock until...
-
Page 11: Aircraft Diagram
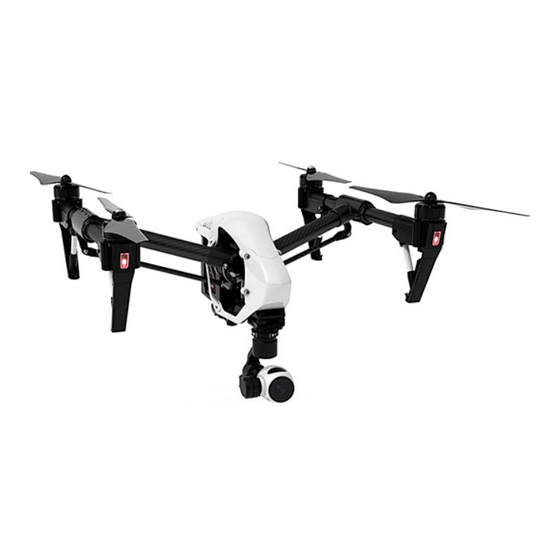
INSPIRE 1 PRO User Manual Aircraft Diagram Propeller (P20) Motor Front LED (P14) Landing gear Gimbal and Camera (P37) Intelligent Flight Battery (P20) [10] [11] Aircraft Micro-USB Port Rear LED (P14) Camera Micro-USB Port [10 ] [11 ] Camera Micro-SD Card Slot (P38) - Page 12 Circular LED around the RTH button displays RTH status. [16] [17] [18] [19] [10] Camera Settings Dial Turn the dial to adjust camera settings. Only functions when the remote controller is connected to a mobile device running the DJI GO app. [15] [10] [11]...
-
Page 13: Aircraft
Aircraft This chapter describes the features of the Flight Controller, Vision Positioning System and the Intelligent Flight Battery. © 2015 DJI. All Rights Reserved. -
Page 14: Flight Controller
Use the Flight Controller mode switch to change the flight mode of the aircraft, refer to the “Flight Mode Switch” on P29 for more information. Flight Status Indicator The Inspire 1 Pro comes with the Front LED, Rear LED and Aircraft Status Indicator. The positions of these LEDs are shown in the figure below: Aircraft Status Indicator... -
Page 15: Return To Home (Rth)
Using the RTH button on the remote controller (refer to “RTH button” on P30 for more information) or the RTH button in the DJI GO app when GPS is available to enables smart RTH. The aircraft return to the latest recorded Home Point, you may control the aircraft's orientation to avoid collision during the Smart RTH. - Page 16 Low Battery RTH The low battery level failsafe is triggered when the DJI Intelligent Flight Battery is depleted to a point that may affect the safe return of the aircraft. Users are advised to return home or land the aircraft immediately when these warnings are shown.
-
Page 17: Dynamic Home Point
(65 feet) radius of the Home Point. Aircraft cannot avoid obstruction during the Failsafe RTH, therefore it is important to set an reasonable Failsafe altitude before each flight. Launch the DJI GO app and enter “Camera” view and select “MODE” to set the Failsafe altitude. -
Page 18: Vision Positioning System
DJI Vision Positioning is a positioning system that uses ultrasonic and image data to help the aircraft identify its current position. With the help of Vision Positioning, your Inspire 1 Pro can hover in place more precisely and fly indoors or in other environments where there is no GPS signal available. The main components of DJI Vision Positioning are located on the bottom of your Inspire 1 Pro, including [1]two sonar sensors and[2]one monocular camera. - Page 19 Inspire 1 Pro will hover in place. The performance of your Inspire 1 Pro’s Vision Positioning System is subject to the surface you are flying over. The ultrasonic waves may not be able to accurately measure the distance over sound absorbing materials, and the camera may not function correctly in suboptimal environments.
-
Page 20: Flight Recorder
ONLY use original DJI propellers for a better and safer flight experience. DJI Intelligent Flight Battery The DJI Intelligent Flight Battery has a capacity of 4500mAh, voltage of 22.2V, and smart charge- discharge functionality. It can only be charged with an appropriate DJI approved charger. - Page 21 9. Short Circuit Protection: Automatically cuts the power supply when a short circuit is detected. 10. Battery Cell Damages Protection: DJI GO app shows warning message when damaged battery cell is detected. 11. Battery Information History: Show the last 32 entries of battery information records that include warning messages and so on.
- Page 22 5℃ before using it in the low temperature environment. 5. When using the Inspire 1 Pro in a low temperature environment, begin by allowing the aircraft to hover at a low altitude, for approximately one minute, to heat the battery.
- Page 23 Do not charge the Intelligent Flight Battery and remote controller with standard charger (model: A14-100P1A) at the same time, otherwise the charger may overheat. Always turn off the battery before inserting it or removing it from the Inspire 1 Pro. Never insert or remove a battery when it is powered on.
- Page 24 Leave it on until there is less than 5% of power left, or until the battery can no longer be turned on. Launch the DJI GO app to check battery level. Rapid: Fly the Inspire 1 Pro outdoors until there is less than 5% of power left, or until the battery can no longer be turned on.
-
Page 25: Remote Controllers
Remote Controllers This chapter describes the features of the remote controller that includes aircraft and remote controller operations and dual remote controller mode. © 2015 DJI. All Rights Reserved. -
Page 26: Remote Controller Profile
Powering On And Off The Remote Controller The Inspire 1 Pro remote controller is powered by a 2S rechargeable battery with a capacity of 6000mAh. The battery level is indicated by the Battery Level LEDs on the front panel. Follow the steps below to power on your remote controller: 1. - Page 27 INSPIRE 1 PRO User Manual Power Outlet Charger Power Button Controlling Camera Shoot videos or images and adjust camera settings via the Shutter Button, Camera Settings Dial, Playback Button and Video Recording Button on the remote control. [1] Camera Settings Dial Turn the dial to quickly adjust camera settings such as ISO and shutter speed without letting go of the remote controller.
- Page 28 Push the stick up to fly forward and down to fly backward. The Inspire 1 Pro will hover in place if the stick is centered. Push the stick further away from the center position for a larger pitch angle (maximum 35˚) and faster flight.
- Page 29 IOC, refer to the IOC in Appendix. The Flight Mode Switch is locked in P mode by default. To unlock the switch, launch the DJI GO app, enter the "Camera" page, tap "MODE", and then activate "Multiple Flight Mode" .
- Page 30 INSPIRE 1 PRO User Manual 2. Lower: The landing gear will lower to its lowest position for landing. Do not raise the landing gear when the aircraft is on the ground. Ensure the landing gear is lowered before landing. RTH button Press and hold this button to start the Return to Home (RTH) procedure.
-
Page 31: Dual Remote Controllers Mode
INSPIRE 1 PRO User Manual Optimal Transmission Range The signal transmission between aircraft and remote controller perform best within the range that displayed in the picture shown below: Optimal Transmission Range Strong Weak Ensure the aircraft is flying within the optimal transmission range. Adjust the distance and position between the operator and the aircraft to achieve optimal transmission performance. - Page 32 DJI GO app. Follow the steps below for setup: “Master” Remote Controller: 1. Connect the remote controller to your mobile device and launch the DJI GO app. 2. Go to the Camera page, and tap to enter the remote controller settings window.
-
Page 33: Remote Controller Status Led
“Slave” remote controller cannot control the orientation of the aircraft. Reset the remote controller to “Master” in DJI GO app if you wish to link the remote controller to the aircraft. 2. Search the “Master” remote controller in the surrounding area in the “Request Control” section. -
Page 34: Linking The Remote Controller
The remote controller is linked to your aircraft before delivery. Linking is only required when using a new remote controller for the first time. Follow these steps to link a new remote controller: 1. Power on the remote controller and connect to the mobile device. Launch DJI GO app. 2. Power on the Intelligent Flight Battery. - Page 35 “Slave” remote controller cannot control the orientation of the aircraft. Reset the remote controller to “Master” in DJI GO app if you wish to link the remote controller to the aircraft. Remote controller will disconnect from the linked aircraft if a new remote controller is linked to the same aircraft.
-
Page 36: Remote Controller Compliance Version
The remote controller is compliant with both CE and FCC requirements. Used with the DJI Focus DJI Focus is fully compatible with the Zenmuse X5 series gimbal and camera. No calibration is required when using the Focus with the Zenmuse X5 camera. -
Page 37: Gimbal And Camera
Gimbal and Camera This chapter provides the technical specifications of the camera and explains the working mode of the gimbal. © 2015 DJI. All Rights Reserved. -
Page 38: Camera Profile
To store your photos and videos, plug in the micro-SD card into the slot shown below before powering on the Inspire 1 Pro. The Inspire 1 Pro comes with a 16GB micro-SD card and supports up to a 64GB micro- SD card. -
Page 39: Status Led
Camera Operation Use the Shutter and Record button on the remote controller to shoot the images or the videos through the DJI GO app. For more information about how to use these buttons, refer to “Controlling Camera” P27. © 2015 DJI. All Rights Reserved. -
Page 40: Gimbal
Follow the instructions below to use the gimbal dial to control the pan movement of the gimbal: 1. Power on the aircraft and remote control, launch DJI GO app and enter “Camera” page. 2. Tap “RC Control Settings” icon and select either C1 or C2 customizable button as the gimbal pitch/ yaw switching button. - Page 41 While pressing the C2 button, turn the camera settings dial to fine tune the roll axis of the gimbal. Using DJI GO App to Control Gimbal Follow the steps below to use DJI GO app to control the gimbal orientation: 1. Launch DJI GO app, enter “Camera” page.
- Page 42 Three Gimbal operation modes are available. Switch between the different operation modes on the Camera page of the DJI GO App. Note that your mobile device must be connected to the remote controller for changes to take effect. Refer to the table below for details:...
-
Page 43: Dji Go App
DJI GO App This chapter describes the four main GUI of the DJI GO app. © 2015 DJI. All Rights Reserved. -
Page 44: Camera
DJI GO App The DJI GO app is a new mobile app designed specifically for the Inspire 1 Pro. Use this app to control the gimbal, camera and other features of your flight system. The app also comes with Map, Store a User Center, for configuring your aircraft and sharing your content with friends. - Page 45 INSPIRE 1 PRO User Manual [1] Flight Mode : The text next to this icon indicates the current flight mode. Tap to configure the MC (Main Controller) Settings. These settings allow you to modify flight limits and set the gain values.
- Page 46 INSPIRE 1 PRO User Manual 4. Custom Sharpness: -3 to +3 Contrast: -3 to +3 Saturation: -3 to +3 MENU: White Balance Tap MENU -> ->White Balance to choose from the following modes: 1. Auto The camera adjusts the white balance automatically.
- Page 47 : Playback in the DJI GO app or press the Playback Button on the remote controller to review photos and videos that you have captured. Press the same button again to return to capturing images. [10 ] Map Display the flight path of the current flight.
-
Page 48: Library
Find out about our latest events, featured products and trending Skypixel uploads in the Explore page. If you already have a DJI account, you will be able to participate in forum discussions, earn Credits in the DJI Store, and share your artwork with the community ©... -
Page 49: Flight
Flight This chapter describes the flight safety and flight restrictions. © 2015 DJI. All Rights Reserved. -
Page 50: Flight Environment Requirements
Max Height & Radius limit flying height and distance, and the user may change these settings in the DJI GO App. Once complete, your Inspire 1 Pro will fly in a restricted cylinder that is determined by these settings. The tables below show the details of these limits. - Page 51 If you fly out of the limit, you can still control the Inspire 1 Pro, but cannot fly it further. If the Inspire 1 Pro flies out of the max radius in Ready to Fly (non-GPS) mode, it will fly back within range automatically.
- Page 52 The value of R varies depending on the definition of the Restricted Area. (3) A “warning zone” has been set around each Restricted Area. When the aircraft is within 0.6 miles (1 km) of this zone, a warning message will appear in the DJI GO app. Restricted Areas...
- Page 53 INSPIRE 1 PRO User Manual GPS Signal Strong Blinking Green Aircraft Zone Restriction DJI GO App Prompt Status Indicator Warning: You are in a No-fly Motors will not start. zone. Take off prohibited. If the aircraft enters the No-fly Zone...
-
Page 54: Preflight Checklist
4. Gimbal is functioning as normal. 5. Motors can start and are functioning as normal. 6. DJI GO app connected to the aircraft. Calibrating the Compass IMPORTANT: Make sure to calibrate the compass in every new flight location. The compass is very sensitive to electromagnetic interference, which can cause abnormal compass data leading to poor flight performance or even failure. -
Page 55: Auto Take-Off And Auto Landing
3. When the mechanical structure of the Inspire 1 Pro has changed, i.e. changed mounting position of the compass. 4. When severe drifting occurs in flight, i.e. the Inspire 1 Pro does not fly in straight lines. Auto Take-off and Auto Landing... -
Page 56: Flight Test
Stopping Motors There are two methods to stop the motors. Method 1: When the Inspire 1 Pro has landed, push the throttle down , then conduct CSC . Motors will stop immediately. Release both sticks once motors stop. Method 2: When the aircraft has landed, push the throttle down and hold. The motors will stop after 3 seconds. - Page 57 Video Suggestions and Tips 1. Work through the checklist before each flight. 2. Select desired gimbal working mode in the DJI GO app. 3. Aim to shoot when flying in P mode only. 4. Always fly in good weather, such as sunny or windless days.
-
Page 58: Faq
© 2015 DJI. All Rights Reserved. - Page 59 6. Do you have an LCD monitor available for the Inspire 1 Pro? No, DJI does not sell LCD or HD monitors for the Inspire 1 Pro. However, you can output the live streaming video to a compatible monitor or mobile device of your own.
- Page 60 14. What flight controller does the Inspire 1 Pro use? The Inspire 1 Pro uses its own new flight controller. 15. Which motors and propellers does the Inspire 1 Pro come with? The Inspire 1 Pro uses 3510H motors and 1345T propellers. 16. Aircraft frame arm joints appear loosen, is that normal? The space of the joins shown in the below figure is normal and it will not affect the performance of aircraft, do not adjust the position of the screws on your own.
-
Page 61: Appendix
Appendix © 2015 DJI. All Rights Reserved. -
Page 62: Specifications
Camera Replaceable lens Lens M43 mount supporting auto-focus DJI MFT 15mm f/1.7 ASPH Panasonic Lumix G Leica DG Summilux 15mm f/1.7 ASPH Supported Lenses Olympus M.Zuiko Digital ED 12mm f/2.0 Olympus M.Zuiko 17mm f/1.8 (Balancing ring will be available on the DJI Store soon) ©... - Page 63 INSPIRE 1 PRO User Manual Sensor Type 4/3 CMOS sensor Effective Pixels 16 M Max Resolution 4608x3456 ISO Range 100-25600 Electronic Shutter Speed 8 s-1/8000 s Field of View DJI MFT 15mm f/1.7 ASPH 72° Single shot Burst shooting:3/5/7 frames Still Photography Modes Auto Exposure Bracketing (AEB):3/5 bracketed frames at 0.7EV bias...
- Page 64 INSPIRE 1 PRO User Manual Remote Controller Name 922.7MHz~927.7 MHz (Japan Only) Operating Frequency 5.725~5.825 GHz;2.400~2.483 GHz FCC Compliant: 3.1 miles (5 km); CE Compliant: 2.1 miles (3.5 km) Max Transmitting Distance (unobstructed, free of interference) EIRP 10 dBm@900 MHz, 13 dBm@5.8 GHz, 20 dBm@2.4 GHz...
- Page 65 INSPIRE 1 PRO User Manual Model TB48 Capacity 5700 mAh Voltage 22.8 V Battery Type 6S LiPo High voltage battery Energy 129.96 Wh Net Weight 670 g Operating Temperature 14° to 104° F (-10° to 40° C) Less than 3 months: -4° to 113° F (-20° to 45° C) Storage Temperature More than 3 months: 72°...
-
Page 66: Intelligent Flight
The flight path can be saved and re-apply in the future. Enable Multiple Flight Mode by launching the DJI GO app > Camera View > > Advanced Settings > Multiple Flight Mode before using the Intelligent Flight Mode for the first time. - Page 67 Ensure the DJI GO app has been updated to v1.2.0 before updating the remote controller. The System Status bar in Camera View of the DJI GO App will flash several times if a firmware update is available. Follow these steps to update the firmware via the DJI GO App.
-
Page 68: Fcc Compliance
INSPIRE 1 PRO User Manual Updating Intelligent Flight Battery Firmware The Intelligent Flight Battery is upgraded during the aircraft firmware upgrade process. It is recommended to keep the upgrade package files in your SD card. The upgrade will start automatically after power cycling the aircraft. - Page 69 INSPIRE 1 PRO User Manual harmful interference in a residential installation. This equipment generates uses and can radiate radio frequency energy and, if not installed and used in accordance with the instructions, may cause harmful interference to radio communications. However, there is no guarantee that interference will not occur in a particular installation.
- Page 70 This content is subject to change. Download the latest version from www.dji.com/product/inspire-1-pro-and-raw If you have any questions about this document, please contact DJI by sending a message to DocSupport@dji.com. © 2015 DJI. All Rights Reserved.
Need help?
Do you have a question about the INSPIRE 1 PRO and is the answer not in the manual?
Questions and answers