Table of Contents
Advertisement
Advertisement
Table of Contents
Troubleshooting

Related Manuals for Oce 9400-II


Summary of Contents for Oce 9400-II
- Page 1 Océ 9400-II User Manual...
- Page 2 To assist you in finding parts of the copier/printer and the functions on the operating panel quickly, an illustration of the Océ 9400-II is presented on the inside front cover and of the operating panel on the inside back cover, both of which can be folded out.
-
Page 3: Table Of Contents
Contents Chapter 1 Getting started The Océ 9400-II printer 10 The printer operating panel 11 Buttons 12 Display 13 The Océ 9400-II copier 14 Image logic 14 Optional 14 The scanner operating panel 15 Stand-by mode 16 Buttons and functions 16... - Page 4 Modifying the exposure 67 Inverted copies/Blueprints 68 Poster mode 68 Chapter 5 Print jobs Printing files 70 Océ application 71 Océ drivers 71 Cut method 72 Plot Center 72 Leading/trailing edge 73 Demo plot 74 Cancel plot 74 Océ 9400-II User Manual...
- Page 5 Chapter 6 Use of the Scan-to-File option Introduction 76 Related documentation 77 Chapter 7 Customizing the printer Defining pen settings 80 Defining language settings 82 Automatic language sensing 82 Data format recognition 83 Manual data format selection 84 HP-GL 85 HP-GL print origin 85 HP-GL page advance 85 Merge mode 86...
- Page 6 Operator recoverable errors (printer) 121 Clearing paper jams 122 Printer recoverable errors 124 Problem solving copier 125 Scanner error 125 Operator recoverable errors scanner 125 Please wait 126 Printer error 126 Clearing original jam 126 Cleaning the glass platen 127 Océ 9400-II User Manual...
- Page 7 Safety data sheets 147 Safety data sheet Océ 9400-II printer 148 Safety data sheet Océ 9400-II scanner 149 Safety data sheet Océ 9400-II Printer and Scanner 150 Safety data sheet B4 toner 151 Safety data sheet Océ D4 developer 153 Safety data sheet OPC drum 155 EPA Energy Star®...
- Page 8 Océ 9400-II User Manual...
-
Page 9: Getting Started
User Manual Chapter 1 Getting started This chapter contains a general description of the Océ 9400-II and how to install and setup the printer to be ready for use. Furthermore it describes how to get the copier ready to copy. -
Page 10: The Océ 9400-Ii Printer
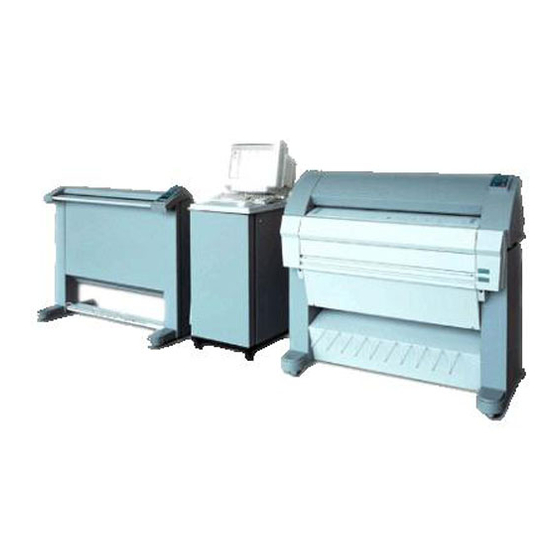
The Océ 9400-II printer The Océ 9400-II is the successor of the Océ 9400. It has an improved faster controller and a higher memory configuration. The Océ 9400-II is a wide format printing system. The machine is equipped with an automatic 1- or 2-roll unit. The Océ 9400-II prints on paper, transparent paper, vellum and polyester film. -
Page 11: The Printer Operating Panel
The printer operating panel The operating panel which is located at the right hand side of the printer console is easy to use (see figure 1).The panel consists of buttons and a display. READY previous next/select program cancel/ continue [1] Printer operating panel In normal operation, the printer can process print jobs, and the 2 line display indicates the current status of the printer (e.g. -
Page 12: Buttons
This button is used to cancel the present print job or to ‘Cancel/continue’ continue after an operator recoverable error. Océ 9400-II User Manual... -
Page 13: Display
Display The two-lines LCD display provides feedback about print job status in normal mode and menu items in Program mode. During normal operation the following messages may appear: indicates the actual status of the printer, e.g. ‘READY’, Status messages ‘PROCESSING’ etc. during a warning message the printer will continue to Warning messages operate, but it is possible that the print quality is not optimal, e.g. -
Page 14: The Océ 9400-Ii Copier
Océ. To use the Océ 9400-II as a copier, a wide-format scanner is connected to the printer. Please note that you still can send print jobs when the Océ 9400-II is used as a copier. -
Page 15: The Scanner Operating Panel
The scanner operating panel The operating panel which is located at the right hand side of the scanner is easy to use (see figure 2). standard trailing synchro leading steps edge zoom manual lighter roll 2 roll 1 auto media darker darker exposure... -
Page 16: Stand-By Mode
The operating panel (see the illustration on inside back cover) on the Océ 9400-II is easy to use and specially designed to carry out copy jobs. After switching on the scanner, (see page 18), the machine is always ready for operation. - Page 17 During the copying process: If you press this button while an original is being fed, the copying process will stop immediately. If you want to abort a multicopy job after the scanning of the original is finished, you must abort the copying process by pressing the ‘cancel/continue’...
-
Page 18: Switching On/Off The Copier
There is no need to switch it off after each copy job. You can leave the copier switched on for the rest of the day. At all times, the Océ 9400-II is ready for operation. If the copier has been inactive for more than 1 minute, the operating panel returns automatically to the stand-by mode. -
Page 19: Switching On/Off The Printer
Switching on/off the printer After switching on the printer is ready for operation. Switching on the printer Set the on/off switch at the rear of the printer to position ‘1’ (see figure 4). If the mains is connected correctly, the green switch will light up. [4] On/off switch of the printer When ‘Ready’... - Page 20 Océ 9400-II User Manual...
-
Page 21: Installation Of The Printer
Océ 9400-II User Manual Chapter 2 Installation of the printer This chapter describes how to connect your printer to your host environment and how to configure the printer to your convenience. -
Page 22: Connect The Printer To Your Host Environment
To ensure proper operation, please follow the next steps when connecting your host to the Océ 9400-II. Ensure both, the host and the Océ 9400-II are switched OFF see ‘Centronics’ on page 23 or ‘SCSI-2’ on page 25. Connect the appropriate interface cable to your local host and the corresponding interface connector to the Océ... -
Page 23: Centronics
IEEE P1284 Compatible mode (disabled). Default is disabled. With some specific host environment, the ECP mode does not work correctly, and the Océ 9400-II offers the option to use the so-called compatible mode (ECP mode disabled). Note that if your host allows this mode, ECP mode is faster than compatible mode. - Page 24 Press ‘next/select’ to enter the ‘ ’ menu. PLOT TIME OUT Select the required plot time out using the button. Press ‘next/select’ to confirm the selected plot time out. Press ‘Program’ to leave the main menu. Océ 9400-II User Manual...
-
Page 25: Scsi-2
SCSI-2 If you are using the SCSI-2 port (for the scan to file option), you need to configure two parameters; the SCSI-2 ID and the terminator. The SCSI-2 port is used only for the scan to file option to upload data Note: from the controller to the connected PC. - Page 26 Switch the printer off/on to activate the configured settings. Defining terminator The termination should be set to ‘ON’ if the Océ 9400-II is the last device on the SCSI-2 chain. It should be set to ‘OFF’ when it is placed in between.
-
Page 27: Ethernet
Ethernet On your controller you find both an AUI transceiver connector (10 MB/s) and an RJ45 connector (10 or 100Mb/s). Ethernet connections can therefore use Thin or Thick Ethernet or UTP cabling. It is advisable to use the RJ45 100 Mbit to have the highest possible Note: performance. - Page 28 IP ADDRESS Select the ‘ 0’ menu using the button. FIELD Press ‘next/select’ to enter the ‘ 0’ menu. FIELD Enter the number of ‘ 0’ of your ‘ ’ using the button. FIELD IP ADDRESS Océ 9400-II User Manual...
-
Page 29: Supported Printing Protocols
Switch the printer off/on to activate the configured Ethernet-ID. Supported printing protocols The Océ 9400-II supports the following printing protocols LPD, FTP, SMB (also know as LAN Manager or Windows networking) on top of TCP/IP. Simultaneous multi protocols and users are supported. -
Page 30: Preferred Printing Solution
Win 95/98 LPD is not standard and must be supplied by third parties. Contact your local service organisation to check the availability of third party shareware or freeware. Use lpd or ftp (in this preference order). Océ 9400-II User Manual... - Page 31 Note: RCF 1179. The Océ 9400-II uses only one queue thus the queue name itself is not important, and you are free to use the queue name you want (e.g. queue 1). For setting the client side, please contact your system administrator.
-
Page 32: Printing Via Lpd
Printing via FTP After the network connection for the Océ 9400-II has been set up you can print via FTP. We implement the File Transfer protocol (FTP) as specified in RCF 959. Note: We are also web browser compatible and thus the Océ 9400-II printer can be accessed like any Ftp site from your web browser. - Page 33 The data are now sent to the input spool directory of the controller, then processed and finally printed. Quit FTP by entering the ‘bye’ or ‘quit’ command. Two other directories are provided: Help and status. Putting files in this Note: directories will result in an ‘access denied’...
-
Page 34: Printing Via Smb
Windows 95/98 Windows NT 4.0. Setting up SMB on Windows 95/98 and NT Once the Océ 9400-II has been configured for printing via SMB, you can make the Océ 9400-II available on Windows 95/98/NT. This involves the following steps. Enabling the Océ 9400-II on your Windows 95/98 and NT Log on to your workstation. -
Page 35: Troubleshooting
Click on the "Start" Icon. Click on the "Find" Icon. Click on the "Computer..." icon. Enter the device name of the Oce 9400-II machine and click on the "Find Now" icon. When the device is found, follow the above procedure starting from step... -
Page 36: Setup The Memory Configuration
If you do not restart the printer the new memory allocation is not Note: taken into account. Any print data in the printer’s memory (files in the queue), will be lost when you switch off the printer. Océ 9400-II User Manual... -
Page 37: Bitmap Buffer
Bitmap buffer This buffer defines a percentage of the total RAM memory that can be used as the bitmap partition. This value will be set between two values depending on the RAM configuration. The installed RAM can be divided into: bitmap partition processing area for files The size of the bitmap partition determines the max. - Page 38 (e.g. larger number of vectors). A high percentage of bitmap partition allocation, allows printing of long plots without windowing. A low percentage of bitmap partition allocation, means the ability of processing very complex files (vector and raster). Océ 9400-II User Manual...
-
Page 39: (Re)Load Media And Toner
Océ 9400-II User Manual Chapter 3 (Re)load media and toner This chapter describes how to insert new media, how to add toner and how to program the media settings. -
Page 40: Inserting A New Print Material Roll
If there is no match of material type and material format, you have to refill the empty roll. Océ 9400-II User Manual... -
Page 41: Reloading Rolls
Defining automatic roll switching Press ‘Program’ to enter the main menu. Select the ‘ ’ item using the button. MEDIA SETTINGS Press ‘next/select’ to enter the ‘ ’ menu. MEDIA SETTINGS Select ‘ ’ using the button. MEDIA MODE Press ‘next/select’ to enter the ‘ ’... - Page 42 It is important to have the knob at the right hand side and paper as shown in figure 11. [11] Pressing the knob Align the roll with the appropriate lines on the roll holder while pressing the knob. This line has to be completely visible. Océ 9400-II User Manual...
- Page 43 Place the roll holder with the material in the drawer (see figure 12). [12] Repositioning the roll Feed the material between the input guide plates against the rollers. Turn the rollers until the material is visible (see figure 13). Also refer to the sticker inside the drawer.
-
Page 44: Cutting The Paper To Get A Straight Leading Edge
Pull back the material until it is visible and positioned correctly (see figure 13 on page 43). Close the drawer. Press the button ‘Cancel/Continue’. Reloading roll 2 Open the cover to get access to roll 2 (see figure 14). [14] Opening the lower drawer Océ 9400-II User Manual... - Page 45 Remove the roll holder (see figure 15). [15] Removing the roll holder from the lower drawer Remove the empty core from the roll holder while pressing the knob (see figure 11 on page 42). Slide the roll holder in the roll of print material while pressing the knob (see figure 11 on page 42).
- Page 46 If you want to cut the paper to get a straight leading edge refer to ‘Cutting the paper to get a straight leading edge’ on page 44. Otherwise continue with the next step. Close the lower paper compartment. Press the button ‘Cancel/Continue’. Océ 9400-II User Manual...
-
Page 47: Printing Using The Manual Feed
Printing using the manual feed There are two possibilities to select manual feed: via remote control commands added to the print file (by means of Plot Director, drivers (see ‘Use of the Scan-to-File option’ on page 75). by changing the ‘MEDIA MODE’ in the program mode. If the user wants to use manual feed, he has to: program the media settings on the printer, refer to ‘Programming media settings’... -
Page 48: Programming Media Settings
Vellum 16 lbs vellum Contrast paper 135 g/m paper Fluor paper 90 g/m paper Pastel paper 80 g/m paper ** The sticker on this polyester roll contains ‘4 mil’, but the thickness is really 4.5 mil. Océ 9400-II User Manual... - Page 49 Programming media width settings Press ‘Program’ to enter the main menu. Select the ‘ ’ item using the button. MEDIA SETTINGS Press ‘next/select’ to enter the ‘ ’ menu. MEDIA SETTINGS Select ‘ 1’, ‘ 2’, ‘ ’ using the button.
- Page 50 Select the ‘ ’ using the button. TIMEOUT Press ‘next/select’ to enter the ‘ ’ menu. TIMEOUT Select the desired timeout using the button. Press ‘next/select’ to confirm the selected timeout. Press ‘Program’ to leave the main menu. Océ 9400-II User Manual...
-
Page 51: Refilling Toner
Refilling toner If the message ‘REFILL TONER’ --- > Press Continue, appears in the display, you must refill toner immediately. Refilling toner Use only Océ B4 toner (the B4 toner is equal to the Océ 9400 Attention: toner). Unscrew the knurled nut at the left hand side of the printer and open the left cover (see figure 19). - Page 52 Move the toner bottle to a vertical position (see figure 20) and 21). [21] Adding toner Tap the toner out of the bottle. When the toner bottle is empty return the bottle to the original position. Unscrew the toner bottle anti clockwise. Océ 9400-II User Manual...
- Page 53 Replacing the waste toner bag Pull the waste toner bag from the holder and place the cap provided on the bag (see figure 22). [22] Replacing the waste toner bag Slide a new waste toner bag over the holder. Close the cover and tighten the knurled nut. Press the ‘Continue’...
- Page 54 Océ 9400-II User Manual...
-
Page 55: Copy Jobs
Océ 9400-II User Manual Chapter 4 Copy jobs This chapter describes how to make copies. -
Page 56: Introduction
With the Océ 9400-II you can make 1:1 copies and you can reduce or enlarge your original from 25% to 400%. You can set the zoom in fixed or in % steps. -
Page 57: Making Copies
Making copies The copying process starts after pressing the ‘start’ button. Before pressing the ‘start’ button, you can change the settings. Feeding the original Insert the original face down and right aligned, along the original guide on the scanner feed table in such way that the line is completely visible (see figure 23). -
Page 58: Starting The Copy Process
If the printer is busy at the moment you press the ‘start’ button, the ‘PLEASE WAIT’ indicator lights up. Printing will resume 1 minute after the copying process is finished. The scanning will start automatically when the printer is ready again. Océ 9400-II User Manual... -
Page 59: Activating/De-Activating The Rewind Function
Activating/de-activating the rewind function The default setting is configured by the Océ service technician. Note: If you have a very precious original, it may be useful not to return the original back to the operator. In this case you can use the ‘start’ button to activate a deviation from the default settings. -
Page 60: Change Settings
Change settings To perform special copy jobs, the Océ 9400-II offers you the possibility to change settings, to match your requirements. This section explains in detail how to change these particular settings. Number of copies If you want to have multiple copies from one original you have to enter the desired number of copies on the scanner operating panel. -
Page 61: Copying Using Manual Feed
Copying using manual feed If you want to copy a job on a paper type and/or size that is not available on the paper rolls, it can be convenient to manually feed sheets of paper instead of changing the paper rolls.The sheet feed is a special slot just above the paper roll drawers on the print engine. -
Page 62: Reduction/Enlargement
50). Reduction/enlargement With the Océ 9400-II you can reduce or enlarge your original from 25% to 400%. By pressing the ‘zoom’ button you can toggle between the fixed step zoom mode or the % zoom mode. In fixed steps mode 8 pre-set zoom settings are available. -
Page 63: Copying Using Synchro Or Standard Cut
Copying using synchro or standard cut In synchro cut mode, the copy is cut at the length of the original, taking into account the zoom factor and the leading/trailing edge setting. Synchro cut mode is selected by default. In standard cut mode, the copy is cut at a standard format (portrait). You select the width of the standard format with the ‘up’... -
Page 64: Adjusting The Leading/Trailing Edge
The behaviour of adjusting the leading/trailing edge is different, depending on using roll feed or manual feed (see ‘Leading/trailing edge when copying on rolls of paper’ on page 65) and ‘Leading/trailing edge when copying on sheet of paper’ on page 66). Océ 9400-II User Manual... -
Page 65: Leading Edge
Leading/trailing edge when copying on rolls of paper Leading edge Null Positive Negative Copy Original [25] Using rolls Copy jobs... - Page 66 Leading/trailing edge when copying on sheet of paper Leading edge Null Positive Negative Copy Original [26] Using sheets Océ 9400-II User Manual...
-
Page 67: Modifying The Exposure
Modifying the exposure The automatic exposure setting ensures the production of background-free copies of most line drawings. In this case the automatic background compensation is activated. The background is constantly measured during scanning of the original. However, the result of some originals may not match your requirements. Normally the automatic background compensation is active and the exposure level is 0. -
Page 68: Inverted Copies/Blueprints
The Exposure light will flash. The Poster mode is now active. If required you can still modify the exposure level. Feed the original. Press the ‘Start’ button. De-activating the Poster mode Press the ‘lighter’ and ‘darker’ button again at the same time. Press the ‘Stop/Correction’ button. Océ 9400-II User Manual... -
Page 69: Print Jobs
Océ 9400-II User Manual Chapter 5 Print jobs This chapter describes how to print files. -
Page 70: Printing Files
Printing files The Océ 9400-II can be connected to a host environment, which may be either a stand alone PC/Workstation or a PC/Workstation connected to a network. It accepts various standard format CAD/CAM vector and EDMS raster data files from the host environment and converts these into high quality plots (see figure 27). -
Page 71: Océ Application
In order to compose such a header, you may: Compose the header within your application. Please refer to the Océ 9400-II Programmers Manual for details about the RCF syntax and functionality. Use an Océ Windows and/or Autocad ADI driver to generate both a plottable file (e.g. -
Page 72: Cut Method
If Synchro Cut is selected, the bounding box of the plot sets the hard clip limits. If Plot Center is ON, the plot is shifted left/right to be centered on the page. Océ 9400-II User Manual... -
Page 73: Leading/Trailing Edge
Programming Plot Center Press ‘Program’ to enter the main menu. Select ‘ ’ item using the button. MEDIA SETTING Press ‘next/select’ to enter the ‘ ’ menu MEDIA SETTING Select the ‘ ’ item using the button. PLOT POSITION Press ‘next/select’ to enter the ‘ ’... -
Page 74: Demo Plot
Demo plot Having installed the Océ 9400-II it is recommended to check the printer and the controller. Making a demo plot Press ‘Program’ to enter the main menu. Select the ‘ item using the button. ’ PLOT Press ‘next/select’ to enter the ‘... -
Page 75: Use Of The Scan-To-File Option
Océ 9400-II User Manual Chapter 6 Use of the Scan-to-File option This chapter describes the digitizing of analogue drawings while using the Océ 9400-II. -
Page 76: Introduction
SCSI-2 board (option) in the PC to connect the Océ 9400-II SCSI-2 cable (option) Making uploads After everything has been installed correctly on the Océ 9400-II and on the PC both systems should be connected with SCSI-2 cable and the uploading can start, refer to ‘SCSI-2’ on page 25. -
Page 77: Related Documentation
Display for number of copies is cleared The size of the drawing which can be uploaded (and printed with checkplot) is limited by the amount of memory which is installed in the Océ 9400-II controller and the bitmap partitioning (see ‘Setting the bitmap buffer’ on page 38). - Page 78 Océ 9400-II User Manual...
-
Page 79: Customizing The Printer
Océ 9400-II User Manual Chapter 7 Customizing the printer How to set the Océ 9400-II defaults like pen settings and languages to accommodate print jobs that you use most frequently. -
Page 80: Defining Pen Settings
A pen can be selected by the plot file to draw a line or to fill a polygon. All lines or polygons on the plot can be drawn with a predefined pattern or shade of grey. Default is pen pattern 16. The following pen patterns are available. white black [28] Available pen patterns Océ 9400-II User Manual... - Page 81 Defining the pen settings Press ‘Program’ to enter the main menu. Select the ‘C ’ item using the button. ONFIGURATION Press ‘next/select’ to enter the ‘C ’ menu. ONFIGURATION Select the ‘ ’ option using the button. PEN MENU Press ‘next/select’ to enter the ‘ ’.
-
Page 82: Defining Language Settings
Defining language settings The Océ 9400-II accepts print files in various data formats (languages). You can change the settings for PostScript, HP-GL, HP-GL/2, HP-RTL, CalComp, CALS, TIFF or EDMICS. Automatic language sensing Automatic language sensing (ALS) is the mechanism which the system uses to detect the language (data format) of a file for which the format has not been specified in the file header. -
Page 83: Data Format Recognition
Data format recognition To optimize your printer’s language recognition and reduce the risk of errors, each of the above mentioned data formats can be individually set ‘ON’ or ‘OFF’. Default is ‘ON’. Optimizing data format recognition Press ‘Program’ to enter the main menu. Select the ‘C ’... -
Page 84: Manual Data Format Selection
Press ‘next/select’ to enter the ‘ ’ menu. SELECT FORMAT Select the required language using the button. Press ‘next/select’ to confirm the selected language. Press ‘Program’ to leave the main menu. When PostScript is selected no RCF header is recognized. Note: Océ 9400-II User Manual... -
Page 85: Hp-Gl
HP-GL With this function you can define the settings for the HP-GL file types. HP-GL print origin The starting position of the print on the paper depends on the print origin. You can choose between: upper right, upper left, center, lower right and lower left. Default is Center. -
Page 86: Merge Mode
’ item using the button. MERGE Press ‘next/select’ to enter the ‘ ’ menu. MERGE Select ‘ ’ or ‘ ’ using the button. Press ‘next/select’ to confirm the selected setting. Press ‘Program’ to leave the main menu. Océ 9400-II User Manual... -
Page 87: Hp-Gl/2 Print Origin
HP-GL/2 HP-GL/2 print origin The starting position of the print on the paper depends on the print origin. You can choose between: upper right, upper left, center, lower right and lower left. Default is Lower right. Defining the HP-GL/2 print origin Press ‘Program’... -
Page 88: Hp-Gl/2 Pen Priority
PEN PRIORITY Press ‘next/select’ to enter the ‘ ’ menu. PEN PRIORITY Select the required pen priority using the button. Press ‘next/select’ to confirm the selected pen priority. Press ‘Program’ to leave the main menu. Océ 9400-II User Manual... -
Page 89: Designjet Compatibility
Designjet compatibility If you print a colour data file on a black and white printer the result may be not sufficient. If you emulate the HP 650C the information which is defined in colour is printed in black; if you emulate to print on the HP 750C the information which is defined in colour will be printed in gray scale levels. -
Page 90: Hp-Rtl
HP-GL/2 format mode. Without this command, the plot results will be unpredictable and the printer will stop. The following HP-RTL statements have no meaning on the Océ 9400-II and will be treated as no-ops: ESC*v#a, ESC*v#b, ESC*v#c, ESC*v#i, ESC*v#W[data], ESC*b#l and ESC&b#V[data]. -
Page 91: Calcomp
CalComp The Océ 9400-II offers compatibility with the CalComp graphics language. CalComp print origin The starting position of the drawing position on the paper depends on the print origin: upper right, upper left, center, lower right and lower left. Default CalComp origin is Lower right. This print origin is used for all CalComp files, no matter whether select format was set to CalComp or Auto or a remote control command for CalComp was sent. -
Page 92: Checksum Parameter
’ item using the button. CALCOMP SETUP Press ‘next/select’ to enter the ‘ ’ menu. CALCOMP SETUP Select the ‘ ’ item using the button. PEN PRIORITY Press ‘next/select’ to enter the ‘ ’ menu. PEN PRIORITY Océ 9400-II User Manual... -
Page 93: Merge Mode
Select the required pen priority using the button. Press ‘next/select’ to confirm the selected pen priority. Press ‘Program’ to leave the main menu Merge mode This option determines what happens when two or more colours intersect at the same point of a plot, especially in area fills. Default setting is ‘On’. Only the last colour specified is printed for a given line or area. -
Page 94: Synchronization Code Parameter
SYNC CODE Press ‘next/select’ to enter the ‘ ’. menu. SYNC CODE Select the required sync code using the button. Press ‘next/select’ to confirm the selected sync code. Press ‘Program’ to leave the main menu. Océ 9400-II User Manual... -
Page 95: Double Synchronization Code Parameter
Double synchronization code parameter The synchronization code parameter is significant in all cases where CalComp format is selected or auto-recognized when select format is set to Auto or a remote control command for CalComp was sent. The double synchronization parameter allows one or two synchronization characters to identify the beginning of a message of print data. -
Page 96: Calcomp Step Size
’ item using the button. STEP SIZE Press ‘next/select’ to enter the ‘ ’ menu. STEP SIZE Select the required value using the button. Press ‘next/select’ to confirm the selected value. Press ‘Program’ to leave the main menu. Océ 9400-II User Manual... -
Page 97: Raster Formats
Raster formats CALS CALS (Computer Aided Acquisition and Logistics Support). The Océ 9400-II printer supports CALS type 1 files. (Untiled, compatible with CCITT Group 4 format). NIRS NIRS is a sub-set of CALS. The data format consists of a CALS header followed by a NIRS header followed by TIFF raster data. -
Page 98: Postscript Level 2
Your PostScript document can be printed on any PostScript printer and the output should look the same. The Océ 9400-II PostScript driver takes care of translating the application’s internal data into PostScript, and it also makes sure you can select printer features in a simple way. -
Page 99: Default Postscript Page Size
Press ‘next/select’ to enter the ‘C ’ menu. ONFIGURATION Select the ‘ ’ item using the button. DATA FORMAT Press ‘next/select’ to enter the ‘ ’ menu. DATA FORMAT Select the ‘ ’ item using the button. PS SETUP Press ‘next/select’ to enter the ‘ ’... - Page 100 Océ 9400-II User Manual...
-
Page 101: Advanced Printer Menu Functions
Océ 9400-II User Manual Chapter 8 Advanced printer menu functions This chapter describes the more advanced print functions. -
Page 102: Introduction
Introduction The Océ 9400-II offers the possibility to make use of advanced printer menu functions such as: Media saver (see page 103). Replot (see page 108). Quality Setup (see page 109). Transformation (see page 112). Password setting for display (see page 116). -
Page 103: Selecting The Media Saver
Selecting the media saver The Océ 9400-II offers two options for optimizing media usage for printing: Nesting and Autoposition. This applies for vector and raster formats. The media saver can also be set off. Media saver is flushed: after a time out... - Page 104 ’ menu. S MODE Select the ‘ ’ item using the button. NESTING Press ‘next/select’ to select the required setting. Press ‘Program’ to leave the main menu. 420 mm 420 mm 420 mm [29] Media saver nesting Océ 9400-II User Manual...
-
Page 105: Autoposition
Autoposition This option ignores the origin declared in the print file and automatically shifts the print data to the lower right corner of the media. If necessary, prints are rotated 90 ° to better use the available media. The autoposition feature is useful in reducing the clipping of a print and/or reducing wasted media. -
Page 106: Media Saver Time Out
Setting the flush media saver Press ‘Program’ to enter the main menu. Select the ‘ ’ item using the button. FLUSH M SAVER Press ‘next/select’ to print the file being held. Press ‘Program’ to leave the main menu. Océ 9400-II User Manual... -
Page 107: Media Saver Plot Size
Media saver plot size When the media saver is set to Nesting, you have three choices of paper size: The print is printed on the paper size selected. It is not clipped. ‘STD NO CLIP’ If necessary, the print is clipped to fit on the paper size ‘STD CLIPPED’... -
Page 108: Replot
’ item using the button. COPIES Press ‘next/select’ to enter the ‘# ’ menu. COPIES Select the required number of copies using the button. Press ‘next/select’ to confirm the number of copies. Press ‘Program’ to leave the main menu. Océ 9400-II User Manual... -
Page 109: Quality Setup
Quality setup Quality setup includes: Poster mode, to print documents with large black areas. Rendering, to change the first 16 pen patterns into another 16 gray-shaded pen patterns. Image type, to use the correct scaling method. Poster mode It is advisable to enable the Poster mode when you have to make prints which contain large black areas. -
Page 110: Rendering
’ option using the button. RENDERING Press ‘next/select’ to enter the ‘ ’ RENDERING MENU Select the required option clustered or cloud using the button. Press ‘next/select’ to confirm the selected option. Press ‘Program’ to leave the main menu. Océ 9400-II User Manual... -
Page 111: Image Type
Image type The Océ 9400-II has an optimised quality mode for scaling down raster files in order to deliver the best possible quality. The default setting is CAD. will use scaling in order not to loose thin lines when scaling down raster files or converting the resolution of the file into the resolution of the rpinter (300 dpi). -
Page 112: Transformation
Transformation With the Océ 9400-II it is possible to change the position of the image on the print, such as: rotating and scaling of the image. This applies only for vector languages and when the media saver is switched off. -
Page 113: Autoscaling
Select the ‘ ’ item using the button. TRANSFORM Press ‘next/select’ to enter the ‘ ’ menu. TRANSFORM Select the ‘ ’ item using the button. SCALING Press ‘next/select’ to enter the ‘ ’ menu. SCALING Select the required scaling method using the button. - Page 114 Clipping does not affect the position of the print origin. [32] Print clipping A: Only the left part of the drawing is plotted. B: The part of the drawing outside the margins is clipped. Océ 9400-II User Manual...
- Page 115 Defining autoscaling Press ‘Program’ to enter the main menu. Select the ‘C ’ item using the button. ONFIGURATION Press ‘next/select’ to enter the ‘C ’ menu. ONFIGURATION Select the ‘ ’ item using the button. PLOT MANAGER Press ‘next/select’ to enter the ‘ ’...
-
Page 116: Password
Select the required menu level using the button. Press ‘next/select’ to confirm. Depending on the selected menu level, a password must be entered. Press ‘next/select’ to confirm the password. Press ‘Program’ to leave the main menu. Océ 9400-II User Manual... -
Page 117: Dump Configuration
Dump configuration Dumping the configuration is an easy way to obtain a list of the current print settings on paper. The dump configuration cannot be performed while a file is being Note: processed. Dumping the configuration Press ‘Program’ to enter the main menu. Select the ‘C ’... -
Page 118: Service
Service This menu is only meant for the Océ service technician. Océ 9400-II User Manual... -
Page 119: Solving Problems
Océ 9400-II User Manual Chapter 9 Solving problems This chapter describes the problems that may occur while using the Océ 9400-II. -
Page 120: Problem Solving Printer
Problem solving printer This chapter documents problems that may occur with the Océ 9400-II and how to solve them. For the printer we distinguish three types of warnings/errors: Warnings Operator recoverable errors printer Printer recoverable errors Printer warnings The warning appears in the display. The printer will continue to print but the print quality may decrease. -
Page 121: Operator Recoverable Errors (Printer)
Operator recoverable errors (printer) When the printer detects an error, the printer stops immediately. An error message will be displayed on the panel. The user has to take action to solve the problem. Message Description ERROR FEED TA- Paper in feed table or feed table not closed Remove the paper and/or close the feed table PAPER REMOVED The paper is removed from the feed table during a... -
Page 122: Clearing Paper Jams
(see figure 33). [33] Lowering the feed table Remove the jammed material. Check thoroughly that no scraps of material are left behind. Note: Close the feed table. Close the upper drawer. Switch on the printer. Océ 9400-II User Manual... - Page 123 If the paper jam can not be cleared by opening the feed table than open the fusing section. Clearing the paper jam in the fuser section Switch off the printer. Unscrew the knurled nut at the left hand side of the machine and open the cover (see figure 34).
-
Page 124: Printer Recoverable Errors
Switch off the printer and check the complete paper path refer to ‘Clearing paper jams’ on page 122. Then switch the printer on again. If no error number is shown in the display, you can continue printing. If the printer error maintains, then call the key operator. Océ 9400-II User Manual... -
Page 125: Problem Solving Copier
Problem solving copier When an error occurs, the scanner operating panel informs you about the nature of the problem. if the printer error indicator is on, a jam has occurred in the printer (see ‘Problem solving printer’ on page 120) on how to solve the problem. if the display shows an error code letter E followed by an error code number, an original jam has occurred in the scanner (see ‘Clearing original jam’... -
Page 126: Please Wait
Clearing an original jam Unlock the top cover by pushing the front side of the cover down and pulling it towards. Raise the cover (see figure 37). [37] Opening the top cover of the scanner Océ 9400-II User Manual... -
Page 127: Cleaning The Glass Platen
Remove the original. Lower the top cover. Lock the cover by pushing the front side of the cover down and pushing it back to the rear until you hear a click. Make sure that the cover is closed correctly, to ensure proper original Note: transport. - Page 128 Lock the cover by pushing the front side of the cover down and pushing it back to the rear until you hear a click. Make sure that the cover is closed correctly, to ensure proper original Note: transport. Switch on the scanner. Océ 9400-II User Manual...
-
Page 129: Overview And Tables
Océ 9400-II User Manual Appendix A Overview and tables... -
Page 130: Product Specifications Printer
Product specifications printer The Océ 9400-II is a wide format low to mid volume copying and printing system. Printer Technology electrophotography (LED head) Photoconductive drum organic photoconductor (OPC) Printing speed 3m/min Warm up time none, once the printer is switched on... -
Page 131: Product Specifications Scanner
(limited to single copy only and without ABC) Poster mode increases the density of the copy Image logic The Océ 9400-II makes use of Océ image logic technology. This technology ensures that the quali- ty of every copy is automatically optimised. Overview and tables... -
Page 132: Interfaces
Centronics supports P1284 compatible and ECP modes. SCSI-2 protocol When the printer is attached to a SCSI-bus, it behaves itself as a standard SCSI tape device. SCSI tape commands are used to address the Océ 9400-II for upload. Ethernet protocol... -
Page 133: Centronics Port Configuration
Centronics port configuration The Centronics parallel port is located at the rear of the printer. It is a DB25 female connector. The following table describes the Centronics port pin assignment. For further details, refer to the IEEE P1284 standard. Printer Pin No. Name of the signal STROBE Data 1... -
Page 134: Scsi-2 Port Configuration
ANSI X3.131 standard. Printer Pin No. Name of the signal 1 - 25 26 - 34 SD10_N 35 - 37 TERM_PWR ATNO_N BSYO_N ACKO_N SELI_N MSGO_N SELO_N CDO_N REQO_N IOO_N [40] SCSI connector Océ 9400-II User Manual... -
Page 135: Ethernet Port Configuration
Ethernet port configuration The Ethernet connector is a 10/100 base T connector (RJ45). The following table describes the Ethernet RJ45 pin assignment. Printer Pin No. Name of the signal Common mode Term Common mode Term Common mode Term Common mode Term The following table describes the AUI connector (DB15 female with locking mechanism). -
Page 136: Originals That Can Be Used
Paste-ups should be taped down 100 % at all edge; a carrier sheet may be used (not thicker than 0.3 mm) Folded originals should be straightened out before feeding. Wrinkles and folds may be visible on the copy. Feed plotter originals in carrier sheets. Océ 9400-II User Manual... -
Page 137: Copy Material That Can Be Used
It is therefore recommended to use only approved Océ materials in the Océ 9400-II. A full list of Océ materials suited for use in the Océ 9400-II, including plain paper, transparent paper, coloured papers and various polyester films is available from your Océ representative. - Page 138 Guaranteed print quality ca. 3 meter or 10 (A3) feet. This is also the limit for prints and multiple copies made on the Océ 9400-II. For single copies/prints made on the Océ 9400-II printer or hybrid, the maximum length may be up to 15 meter, but the oper- ator has to accept that the copy/print quality may not conform to all quality aspects.
-
Page 139: Overview Of Standard Zoom Formats
Overview of standard zoom formats Standard zoom fixed steps ISO Origi- Copy Standard zoom fixed steps ANSI Origi- Copy Standard zoom fixed steps Architectural Origi- Copy Overview and tables... -
Page 140: Order Of Standard Sizes For Using Standard Cut
This table represents the order of standard sizes displayed on the Note: scanner when using standard cut. The order depends on the setting which is set on the printer operating panel refer to ‘The printer operating panel’ on page 11. Océ 9400-II User Manual... - Page 141 Océ 9400-II User Manual Appendix B Controller firmware upgrade...
-
Page 142: Controller Firmware Upgrade
Note: recent firmware. The Océ 9400-II offers you the ability to upgrade the firmware version of the controller by uploading the firmware through the Centronics port. You must connect a terminal to the controller port Com 1. On this terminal you will have explicit messages on the procedure to follow. - Page 143 Open a terminal session on your host (e.g. WINDOWS terminal) with the following settings: baud rate 9600 data bit stop bit parity none flow control none Switch on the printer. You will be prompted to press the CTRL-P key with the following message: “Press CTRL-P to update the application / fls/EPC-M1..”...
-
Page 144: Troubleshooting
If you do not sent the correct file, if the file is corrupted or if you switch off the printer during the upgrade procedure, you will be prompted with an error message and you are asked to upgrade again, refer to step 9 of the above procedure. Océ 9400-II User Manual... -
Page 145: Safety Information
Océ 9400-II User Manual Appendix C Safety information... -
Page 146: Instructions For Safe Use
Do not block the ventilation openings of the machine. Ensure that the machine is placed on a level, horizontal surface of sufficient strength. See the Océ 9400-II safety data sheet in this appendix for information about the weight of the machine. -
Page 147: Safety Data Sheets
Safety data sheets The disclaimer below is valid for all safety data sheets in this Disclaimer manual. These safety data sheets have been compiled to the best of our knowledge as a compact guide to safe handling of this product. We reserve the right to revise safety data sheets as new information becomes available. -
Page 148: Safety Data Sheet Océ 9400-Ii Printer
Safety data sheet Océ 9400-II printer PRODUCT SAFETY DATA SHEET Number E-661-f-UK Date March 1999 Model Océ 9400/9400-II Printer Description Electrostatic printer, instant printing, console model, plain paper, organic photoconductive drum, powder toner Max. process speed 3 m/min 1 roll... -
Page 149: Safety Data Sheet Océ 9400-Ii Scanner
Safety data sheet Océ 9400-II scanner PRODUCT SAFETY DATA SHEET Number E-622-e-UK Date March 1999 Model Océ 9400/9400-II Scanner Description Freestanding scanner, maximum original size 1020 mm x 3000 mm Max. process speed 3 m/min Dimensions Width 1240 mm Depth... -
Page 150: Safety Data Sheet Océ 9400-Ii Printer And Scanner
Safety data sheet Océ 9400-II Printer and Scanner PRODUCT SAFETY DATA SHEET Number E-685-b-UK Date March 1999 Model Océ 9400/9400-II Printer - Océ 9400/9400-II Scanner Description Multifunction device , instant copying/printing, consisting of an electrostatic printer, console model, plain paper, organic photoconductive drum, powder toner and a free standing scanner, maximum original size 1020 mm x 3000 mm. -
Page 151: Safety Data Sheet B4 Toner
Safety data sheet B4 toner MATERIAL SAFETY DATA SHEET Number E-196-a-UK (93/112/EEC and ISO 11014-1) Date October 1997 Page 1 of 2 Océ B4 Toner 1. Product and company identification Product name Océ B4 Toner Packing Polyethylene bottle, contents 0,45 kg/1.1 lb Company Océ... - Page 152 Use: ink powder for printers. Room ventilation: see operator manual or safety data sheet for the machine. ©1997 Océ-Technologies B.V. The contents of this safety data sheet is subject to the disclaimer on page 147 of this manual. Océ 9400-II User Manual...
-
Page 153: Safety Data Sheet Océ D4 Developer
Safety data sheet Océ D4 developer MATERIAL SAFETY DATA SHEET Number E-197-a-UK (93/112/EEC and ISO 11014-1) Date October 1997 Page 1 of 2 Océ D4 Developer 1. Product and company identification Product name Océ D4 Developer Packing Polyethylene bottle, contents 1,75 kg/3.86 lb Company Océ... - Page 154 Use: ink powder for printers. Room ventilation: see operator manual or safety data sheet for the machine. ©1997 Océ-Technologies B.V. The contents of this safety data sheet is subject to the disclaimer on page 147 of this manual. Océ 9400-II User Manual...
-
Page 155: Safety Data Sheet Opc Drum
Safety data sheet OPC drum MATERIAL SAFETY DATA SHEET Number E-218-a-UK (93/112/EEC and ISO 11014-1) Date April 1998 Page 1 of 2 Océ OPC Drum Part No. 2912571, Océ ES102 OPC Part No. 7069008 1. Product and company identification Product name Océ... - Page 156 This product is an article and contains no dangerous substances. Therefore, indications of special risks or safety advice on the packing are not prescribed for this product. 16. Other information Use: photoconductor for printers and copiers. ©1998 Océ-Technologies B.V. The contents of this safety data sheet is subject to the disclaimer on page 147 of this manual. Océ 9400-II User Manual...
-
Page 157: Epa Energy Star
Using the energy management features outlined below prevents unnecessary power consumption, which helps to prevent air pollution from electricity generating plants and saves money on your utility bills. The Océ 9400-II is a multifunction device which includes the following separate units: 1. Océ 9400 series printer 2. - Page 158 TAR ® is a U.S. registered mark NERGY Océ 9400-II User Manual...
-
Page 159: Miscellaneous
Océ 9400-II User Manual Appendix D Miscellaneous... -
Page 160: Notation Conventions
There are a number of notation conventions used in this manual. This consistent style enables you to quickly become conversant with the use of this manual and consequently the Océ 9400-II. Each section or subsection contains a description of the feature or Description operation identified in the title. -
Page 161: Reader's Comment Sheet
Reader’s comment sheet Have you found this manual to be accurate? Could you operate the product after reading this manual? Does this manual provide enough background information? Is the format of this manual convenient in size, readability and arrangement (page layout, chapter order, etc.)? Could you find the information you were looking for? Always Most of the times... - Page 162 Please return this sheet to: Océ-Technologies B.V. For the attention of ITC User Documentation. P.O. Box 101, 5900 MA Venlo The Netherlands Send you comments by E-mail to : itc-userdoc@oce.nl For the addresses of local Océ organizations see : www.oce.com Océ 9400-II User Manual...
-
Page 163: Addresses Of Local Océ Organisations
Addresses of local Océ organisations Océ-Australia Ltd. Océ-Danmark A.S. P.O.Box 363 Kornmarksvej 6 Brøndby Ferntree Gully MDC VIC 3165 DK 2605 Australia Denmark Océ-Österreich GmbH Océ-France S.A. Postfach 95 32, Avenue du Pavé Neuf, 1233 Vienna 93161 Noisy-le-grand, Cedex Austria France Océ-Belgium N.V./S.A. - Page 164 190 MacPherson Road Singapore 348548 Océ España SA Business Park MAS BLAU C/Osona 2, 2-3a Planta 08820 El Prat del Llobregat (Barcelona) Spain Océ-Svenska AB P.O.box 1231 S-164 28 Kista Sweden Océ-Schweiz AG Sägereistrasse 29 CH8152 Glattbrugg Switzerland Océ 9400-II User Manual...
-
Page 165: Index
dump configuration 117 Index end of message 93 end of plot time out 24 end of print 24 auto roll selection 48, 50 ethernet automatic language sensing 82 connector 135 automatic roll switch 50 ethernet connection 27 autoposition 105 ethernet port 28 ethernet protocol 132 bitmap buffer 37 feeding the original 57... - Page 166 11 media width 49 operating panel scanner 15 optional software 10 optionals 10 origin 91 original guide 57 refill toner 51 rendering 110 replot 108 rewind 59 rotation 112 page advance hp-gl 86 hp-gl/2 88 Océ 9400-II User Manual...
- Page 167 safety data sheets 147 safety information 146 scaling 112 scan to file 76 scanner feed table 57 scsi connector 134 scsi port 25 scsi-2 id 26 scsi-2 terminator 26 serial protocols 132 setting up tcp/ip 28 short menus 116 smb 34 standard cut 56, 72 standard cut mode 17 step size 96...