
Related Manuals for Saeco Cristallo 600 EVO


Summary of Contents for Saeco Cristallo 600 EVO
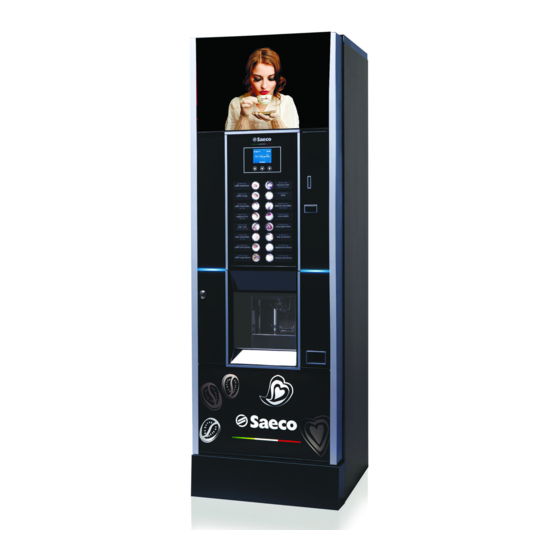
- Page 1 Vending Machine WARNING: This instruction manual is intended exclusively for specialized personnel.
-
Page 2: Main Parts
English MAIN PARTS CRISTALLO 400 EVO MAIN PARTS Door lock Display Coin slot Coin return button Product keypad Dispensing outlet door Coin return slot Power cord socket Water connection coupling Instruction plate... -
Page 3: Table Of Contents
English CRISTALLO 400 EVO Main parts - Espresso version with double containers Safety switch Fluid discharge tank Container 5 (instant products) Collecting tray Container 3/4 (instant products) CPU card Container 1/2 (instant products) Cup dispenser Coffee bean container Stirrer dispenser Coffee grinder Sugar container Mixer... - Page 4 English CRISTALLO 400 EVO Main parts - Espresso version with single containers Safety switch Cup dispenser Container 5 (instant products) Stirrer dispenser Coffee bean container Sugar container Coffee grinder Change-giving coiner support Mixer Dispensing outlet Instants opening Coin return duct Spiral mixer Coin box set Gran Gusto Brew Group...
- Page 5 English CRISTALLO 400 EVO MAIN PARTS CAPSULES Safety switch Dispensing outlet Mixer Coin return duct Instants opening Coin box set Spiral mixer Sugar opening Drip Tray Chute Dispensing arm Container 4 (instant products) Fluid discharge tank Container 3 (instant products) Collecting tray Container 2 (instant products) CPU card...
- Page 6 English CRISTALLO 600 EVO MAIN PARTS Door lock Display Coin slot Coin return button Product keypad Dispensing outlet door Coin return slot Power cord socket Water connection coupling Instruction plate...
-
Page 7: Safety Switch
English CRISTALLO 600 EVO Main parts - Espresso version with double containers Safety switch Fluid discharge tank Container 5 (instant products) Collecting tray Container 3/4 (instant products) CPU card Container 1/2 (instant products) Cup dispenser Coffee bean container Stirrer dispenser... -
Page 8: Container 5 (Instant Products)
English CRISTALLO 600 EVO Main parts - Espresso version with single containers Safety switch Cup dispenser Container 5 (instant products) Stirrer dispenser Coffee bean container Sugar container Coffee grinder Change-giving coiner support Mixer Dispensing outlet Instants opening Coin return duct... -
Page 9: Container 3/4 (Instant Products)
English CRISTALLO 600 EVO Main parts - T.T.T. version Safety switch Collecting tray Container 5 (instant products) CPU card Container 3/4 (instant products) Cup dispenser Container 1/2 (instant products) Stirrer dispenser Coffee bean container Sugar container Coffee grinder Change-giving coiner support... - Page 10 English CRISTALLO 600 EVO MAIN PARTS CAPSULES Safety switch Dispensing outlet Mixer Coin return duct Instants opening Coin box set Spiral mixer Sugar opening Drip Tray Chute Dispensing arm Container 4 (instant products) Fluid discharge tank Container 3 (instant products)
- Page 11 English SAFETY INSTRUCTIONS For professional use only. This appliance can be used by children aged from 8 years vending machine and above and persons with cannot installed reduced physical, sensory or outdoors; avoid placing it mental capabilities or lack of areas where experience and knowledge if...
- Page 12 English Before connecting Access to the service area is appliance to water network, restricted to persons having please read and follow the knowledge practical applicable regulations in force experience of the appliance, in in your country. particular as far as safety and hygiene are concerned.
-
Page 13: Contents
English CONTENTS 9.1 KEY DESCRIPTION OF PROGRAMMING AND MAIN PARTS MAINTENANCE PHASES 1 CONTENTS 9.2 PROGRAMMING MENU 2 INTRODUCTION TO THE MANUAL 9.3 MAINTENANCE MENU 2.1 INTRODUCTION 9.4 MACHINE READY / FREE BUTTON 2.2 SYMBOLS USED 10 OPERATION AND USE 3 INFORMATION ON THE VENDING 10.1 BEVERAGE SELECTION MACHINE... -
Page 14: Introduction To The Manual
Always refer this All the images in this manual refer to the CRISTALLO 400 publication before carrying EVO model. out any operation. Manufacturer: SAECO Vending S.p.A. Località Casona, 1066 40041 Gaggio Montano Bologna, Italy... -
Page 15: Symbols Used
English Symbols used This publication contains various warnings which indicate different degrees of danger or skills required. The symbol is integrated with a message suggesting use procedures or actions and providing useful information for the correct operation of the machine. Warning Indicates dangerous situations for the users, supply operators and maintenance technicians dealing either with... -
Page 16: Information On The Vending Machine
English INFORMATION ON THE VENDING MACHINE Information for the Description and intended use Maintenance Technician The vending machine is intended for automatic distribution of The vending machine must coffee and hot beverages (decaffeinated coffee, cappuccino, chocolate, etc.) and is programmable for every single type of be installed in a well-lit, dry dispensing dosage. -
Page 17: Vending Machine Identification
English Vending Machine Identification The vending machine is identified by the name, model and serial number which can be found on the relevant data plate. Data plate The following data can be found on the plate: • name of Manufacturer; •... -
Page 18: Technical Data
English Container capacity Technical data Coffee beans 3,5 kg Decaffeinated coffee 1 kg 3.4.1 Cristallo 400 EVO Hot Chocolate 3 kg Milk 2,5 kg Lemon tea 3 kg Dimensions (w x h x d) 580 x 1700 x 670 mm Sugar 3 kg Weight... - Page 19 English Container capacity 3.4.2 Cristallo 600 EVO Coffee beans 4,2 kg Dimensions (w x h x d) 580 x 1830 x 670 mm Decaffeinated coffee 1 kg Weight 125 kg Ground coffee 1,6 kg Hot Chocolate 3 kg Milk 2,5 kg...
-
Page 20: Safety
• use original spare parts; regulations, SAECO VENDING has prepared a technical • read the instructions contained in this publication and in the file relating to the CRISTALLO 400 and CRISTALLO 600 enclosed documents carefully; vending machines at its premises, acknowledging the following standards in the design stage: •... -
Page 21: Operators' Requirements
English Maintenance Technician case failure The Maintenance Technician is the only person authorized to intervene malfunctioning, please refer and start programming procedures, and perform adjusting, setting up and maintenance operations on the vending machine. only qualified Access to the service area is personnel of the technical restricted to persons having service. -
Page 22: Residual Risks
English This operation, necessary Before removing the cup for starting up the vending from the outlet, please machine, disables the safety wait message system. “REMOVE CUP” display. must therefore carried out by qualified personnel (Maintenance Technician) aware of the risks resulting from the presence of live or moving outlet door... - Page 23 English Before brewing another beverage, check that the previous one has been taken out and that the cup support is empty.
-
Page 24: Handling And Storage
English HANDLING AND STORAGE Unloading and handling Avoid: • dragging the vending machine; Unloading and handling operations after transportation must be carried out only by qualified personnel and using • overturning or laying the vending machine flat during suitable equipment. transport and handling;... -
Page 25: Installation
English INSTALLATION Warning vending machine cannot installed outdoors; avoid placing it areas where temperature is less than 2°C or more than 32°C Unpacking and positioning and in particularly dump or dusty areas. It should not On receipt of the vending machine make sure that it has not been damaged during transportation and that package installed places... - Page 26 English If damage of any kind is found, the courier must be Screw the four supporting feet B. informed and notice must be given to the importer or the seller immediately. If these are not in the purchaser’s country, please contact the manufacturing company directly.
-
Page 27: Use Of Different-Sized Stirrers
English Use of different-sized stirrers Label application The vending machine is delivered with the stirrer set designed for use of 90 mm stirrers. 6.4.1 Product labels If 90 mm stirrers are used, Remove the cup dispenser and unscrew the 4 knobs holding the keypad panel in place. - Page 28 "Labels" module available on our web portal Remove the labels from the product label sheet by "Saeco Vending Online" at www.saecovending-online.com. following the pre-cut line. For printing, we suggest using paper with the following Cut the labels as shown in the figure to make the left ones properties: 170-g matte coated paper.
- Page 29 English Standard product configuration Cristallo 400 EVO Espresso Version - 4 instant products Cristallo 600 EVO Espresso Version - 4 instant products...
- Page 30 English Standard product configuration Cristallo 400 EVO Espresso Version - 5 instant products Cristallo 600 EVO Espresso Version - 5 instant products...
- Page 31 English Standard product configuration Cristallo 400 EVO Capsule Version - 4 instant products Cristallo 600 EVO Capsule Version - 4 instant products...
- Page 32 English Standard product configuration Cristallo 600 EVO T.T.T. Version - 5 instant products...
-
Page 33: Fitting The Coffee Grounds Bag
English 6.4.2 Instruction plate Used capsule collection bag assembly Slide the instruction plate into the slot, pressing the flap (For Capsule version only) inwards. You need to remove the keypad panel in order to carry For the assembly of the used capsule discharge duct, carry out the same operations as described in section "Coffee out this operation. -
Page 34: Connection To Water Mains
English After the chosen payment The Manufacturer declines system has been installed, any liability for any damage corresponding to the vending machine, to parameters can be set property and/or injury to through the programming persons, caused by the menu (see section installation of the payment “Programming menu”). -
Page 35: Connection To The Electric Network
English Before connecting The new hose-sets supplied appliance water with the appliance are to be network, please read and used and that old hose-sets follow applicable should not be reused. regulations in force in your country. 6.10 Connection to the electric network Remove the cap from the coupling placed on the vending The Maintenance Technician,... - Page 36 English Do not use adapters or multi-sockets. Make sure that the electrical plug is easily accessible even after installing the machine.
-
Page 37: Description Of Controls For Cristallo 400-600 Evo
English DESCRIPTION OF CONTROLS FOR CRISTALLO 400-600 Display Key description in standard operation mode The display shows the messages during standard operation, programming and maintenance modes. 7.3.1 “+” Key - Sugar Quantity Increases the quantity of sugar in the selected beverage. Keypad Press the key before selecting the beverage. -
Page 38: Cpu Card Keys
English Restore independence. If the independence management is CPU card keys enabled, press the key to set the enabled quantities for each spiral to the maximum value. The CPU electronic card has 4 keys enabling the In practice, the person in charge of refilling the snack Maintenance Technician to carry out programming or vending machine should press this key to report that the maintenance operations. -
Page 39: Supply And Starting Up
English SUPPLY AND STARTING UP Container Configuration The containers delivered are designed to dispense the following products: Cristallo Cristallo Cristallo Cristallo 400 EVO 400 EVO 400 EVO Cristallo Cristallo capsules 600 EVO 600 EVO Cristallo T.T.T. - 4 instant - 5 instant 600 EVO products products... -
Page 40: Sugar Supply
English Sugar supply Capsule refill Lift the cover of the sugar container and fill the container Loosen the knob to the right of the hopper. with sugar. Rotate the hopper. Close the container cover. Coffee bean supply Remove the container cover. Remove the container cover. -
Page 41: Dose Calibration
English Pour the capsules into the hopper. Dose calibration The vending machine is delivered with standard calibration values set by the manufacturer. The quantity of coffee powder is set to 7.0 gr. Dose calibration can be performed by means of two calibration levels: •... -
Page 42: Coffee Grinding Calibration
English Introduce the stirrers with their packing band into the Coffee grinding calibration column; once they are placed on the bottom, cut and remove the band. Turn the ring until the required results are obtained. After any calibration three selections are necessary before the new setting becomes effective. -
Page 43: Cup Supply
English Cup supply 8.10 First start-up of the vending machine Supply the vending machine (following the instructions Use only cups suitable for automatic dispensing. Do not given previously) and plug it into the power supply (see press them against each other during the loading section "Power Grid Connection"). -
Page 44: Cleaning The Parts In Contact With Foodstuffs
English • Enter the Maintenance/ Boiler Refill menu and start the automatic refill cycle; The rinsing operation must be repeated until water flows out of the brewing nozzles regularly. 8.12 Cleaning the parts in contact with foodstuffs Clean all the parts of the VM which are in contact with foodstuffs. -
Page 45: Programming And Maintenance Menu
English PROGRAMMING AND MAINTENANCE MENU Key description of programming This section illustrates how and maintenance phases to set up or modify the To scroll through the vending machine menu, the keys described vending machine below are used. programming “e” Key: ENTER By pressing this key it is possible to enter the following maintenance settings. -
Page 46: Programming Menu
English Programming menu Now the password should be entered using the UP The structure of the programming menu is indicated in section “Structure of the Programming Menu”. and DOWN keys. Confirm The section “Description of Messages in the Programming Menu” describes all the entries in the programming menu. digit entered pressing the ENTER key. - Page 47 English 9.2.2 Structure of the 1.19. Enable reset programming menu 1.20. Buttons 1.20.1. Button P3 ITEM NO. MENU ITEM 1.21. Set 1 Pre-Selection SYSTEM MANAGEMENT 1.22. Set 2 Pre-Selection 1.1. VM Code 1.23. Programmable texts 1.2. Stops 1.23.1. Dispensing 1.2.1. Stop coffee C 1.23.2.
- Page 48 English ITEM NO. MENU ITEM 4.3.1. Normal 2.4.11. Commit to vend 4.3.2. Differentiated 1 2.4.12-16 Bill Enabling 4.3.3. Differentiated 2 2.4.13. Bill Escrow 4.3.4. Card 2.4.14. MDB Slave Address 4.4. Snack 2 Prices 2.4.15. no change =no bills 4.4.1. Normal 2.5.
- Page 49 English ITEM NO. MENU ITEM 6.13. Enabled groups 6.14. Groups (*) = Visible only if complete menus are enabled.
- Page 50 English 9.2.3 Description of messages in the programming menu DISPLAY Description The SYSTEM MANAGEMENT items are: SYSTEM MANAGEMENT … 1.1. Enables an identification code to be assigned to the vending machine. VM Code 531000 Enables setting of the maximum amount of beverage or coffee. 1.2.
-
Page 51: Mixer
English DISPLAY Description The “ECO” mode is activated after some minutes of inactivity which can be set by means of 1.5.1. this menu option. By setting it to zero the function is disabled. In “ECO” mode, the target temperature of the boiler is reduced by a preset value (see the following menu option). - Page 52 English DISPLAY Description Settings for the pre-cooling of water circuits (cups/mixers). 1.8.3-5 Before dispensing a cold product, a cold rinse of the circuit must be performed, if: the circuit for cold products has to be used after the same mixer had been used for hot products.
- Page 53 English DISPLAY Description Enables selection of the stirrer dispensing mode. 1.12. STIRRER ALWAYS: the stirrer is dispensed anyway; STIRRER SUGAR: the stirrer is dispensed only if the beverage is served with sugar; Stirrer STIRRER SUGAR OR BITTER: the stirrer is dispensed for all the beverages which should be served with sugar, although the user requires them without it.
- Page 54 English DISPLAY Description It enables the function that allows to dispense beverages that have different prices if they are 1.13.3.2. dispensed with or without the cup. Important The Set1 = No cup option shall be used to set a discount for beverages dispensed without the cup.
- Page 55 English DISPLAY Description 1.18.2. Allows selecting which beverages will be enabled for multiple brewing Enable Mult. bev. 1.18.3. enables the free-of-charge dispensing of the multi beverage Free 1.19. It allows enabling of the “RESET” for data in the statistics maintenance menu. Enable reset 1.20.
- Page 56 English DISPLAY Description Allows you to set the message appearing on the display when the pre-selection mode of 1.23.4. button 10 is activated for beverages 33-48. Set2 Pre-selection 1.23.5. It allows bringing the programmable messages back to their pre-set default value (this is useful when changing the language is required).
- Page 57 English DISPLAY Description 1.24.9. Delete value = 0 data from EVA-DTS report Quick Reading 1.24.10. Prolongation of response waiting time from EVA-DTS data players Extended Time-outs Allows setting a delay between the end of beverage preparation and the display of the 1.25-8 "Remove cup"...
- Page 58 Important Service Password If the password is lost, you will have to contact the Saeco Vending Technical Assistance Service to regain access to the Programming Menus. Enables selection of whether the entries of the programming menu should be shown fully or 1.31.
- Page 59 MDB settings … 2.4.1. It allows disabling or enabling the possibility of performing any Saeco Card recharge operation By setting RECHARGE = NO the vending machine will only deduct the cost from MDB cards. Recharge enabled Enables setting of the maximum credit level, beyond which all recharge operations (if 2.4.2.
- Page 60 English DISPLAY Description With MDB coin return, the "no change available" status can be selected through the "CHANGE TABLE". 2.4.7. Note Exact change policy Even if the no change available message is displayed, the vending machine continues to give change as long as coins are present in the channels.
- Page 61 English DISPLAY Description Enabling this option, an internal control is activated, which resets the communication with 2.10. the payment systems if the communication is blocked. Credit Wdog 2.11. Management of pre-selection options Preselection 2.11.1. Pre-selection time duration (in seconds) Pre-selection Time It enables the current pre-selection cancellation by pressing any button other than sugar 2.11.2.
- Page 62 English DISPLAY Description This defines the quantity of coffee to be brewed. 3.3. H2O / Coffee The quantity of dispensable coffee can be adjusted from “1” to “999”. 3.3. Sets the quantity of water to be dispensed for the programmed coffee type (C, P, F, or B). The quantity can be set from 1 to 999.
- Page 63 English DISPLAY Description Enables brewing tests to be carried out on the beverage just set. 3.3. By pressing ENTER, the following dispensing buttons are displayed: Beverage Full beverage; test Beverage without sugar, stirrer and cups; Beverage without powder (soluble/coffee); Beverage without water. 3.4.
- Page 64 English DISPLAY Description 3.6.7.2. Espresso percentage in fresh coffee for medium aroma medium aroma 3.7. It allows the user to view the composition of the selected beverage before brewing it. The ingredients are displayed if, when pressing the selection button, the credit necessary for completing the sale has not been inserted yet.
- Page 65 English DISPLAY Description Single price setting 4.2.1.2. Allows selecting the price level to be associated with each one of the products (use UP and Single Prices DOWN buttons and then ENTER to confirm). B01:P00 0.00 Select the desired product first, and then the price. Differentiated 1 Price Range.
- Page 66 English DISPLAY Description 4.3.3. Differentiated 2 … 4.3.3.1. Global price 0.00 4.3.3.2. Single Prices B01:P00 0.00 4.3.4. Card … 4.3.4.1. Global price 0.00 4.3.4.2. Single Prices B01:P00 0.00 It allows associating each snack product in slave 1 or 2 to one of the price levels set in the 4.4.
- Page 67 English DISPLAY Description Allows you to select if the beverages will be provided free-of-charge, upon payment, or 4.5. free-of-charge within a time range. Free Never 4.6. Allows the beginning and end of the free-of-charge beverage supply to be set. Free On Immgvsd 00:00 4.7.
- Page 68 English DISPLAY Description [° C] “food” alarm temperature [Range: 3 .. 30]. 5.8.9. The machine deactivates the selections set as food if the internal temperature exceeds this value for a time longer than the value set at the following option (Error 75). Alarm Temperature This error signal can be reset by pressing button 5 (black) on the 5-button keypad or by selecting product 997 within 20 seconds of closing the door or switching the vending...
- Page 69 English DISPLAY Description The following is necessary in order to operate with independent control: 5.13. 1- enable independence control (menu "Capacity ctrl enabled"); 2- programme the capacity of each spiral (menu "Capacity"); 3- inform the vending machine each time it is refilled. This information can be sent by pressing button 5 (black) on the 5-button keypad or by Capacity selecting product "997"...
- Page 70 English DISPLAY Description This is convenient for the customer who need merely note a single code. It is also useful for the service 5.15. provider, as it guarantees that the products at the front of the unit spirals will be dispensed first, thereby avoiding problems of products remaining in the machine for too long as they have not been selected.
- Page 71 English DISPLAY Description 6.1. It enables the control of slave 1 (or slave 2) through the Cristallo vending machine. Enable … 6.2. NO = temperature control disabled, cooling group always OFF. YES = temperature control enabled. Enable Refrigerat. … It selects the machine submodel: the values are 6S for the models with 6-spiral drawers (i.e. 6.3.
- Page 72 English DISPLAY Description Max. number of consecutive photoelectric cell errors before the system of detection of the product fall is 6.10.4. deactivated. Photoelectric cells block If it is set to 0, the system will never be disabled. (NOTE: typing 999 on the keypad, the display of the vending machine will show for a few seconds a message concerning the status of the photoelectric cell system - see the section - Display of Special Information).
- Page 73 English DISPLAY Description When the units are enabled, each time the unit code is selected the vending machine enables a unit spiral 6.14. (the choice of which spiral of the unit to be enabled is made on a rotation basis involving all spirals of the unit to guarantee equal use).
- Page 74 English PAIRING TABLE Channel Payment system Coin validator Coin validator Coin validator Coin validator Coin validator Coin validator Cancelling machine SUGAR TABLE Settings Sugar in beverage without Sugar in beverage with preselection preselection Without sugar Quantity preselected Quantity preselected Quantity preselected Quantity preselected Quantity preselected Stop sugar...
- Page 75 English CRISTALLO 400/600 EVO: BUTTONS 9 AND 10 TABLE KEY 9 and 10 = BEVERAGE 9 and KEY 9 and 10 = PRESELECTION Press Press Press Press PRESELECTION PRESELECTION 9+KEY 10+KEY Beverage 1 Beverage 1 Beverage 17 Beverage 33 Beverage 2 Beverage 2 Beverage 18 Beverage 34...
-
Page 76: Maintenance Menu
English Maintenance menu 9.3.2 Structure of the maintenance menu The structure of the maintenance menu is indicated in ITEM NO. MENU ITEM section “Structure of the Maintenance Menu”. MAINTENANCE 1.1. Error log The section “Description of Messages in the Maintenance 1.2. - Page 77 English 9.3.3 Description of messages in the maintenance menu DISPLAY Description This function allows to show and reset the errors that may be present. It is also possible to carry out maintenance on the vending machine. To reset the errors, use the menu under the maintenance item. MAINTENANCE Important To correct errors see chapter "Troubleshooting"...
- Page 78 English DISPLAY Description Allows the value of the current absorbed by the capsule orientation device to be displayed 1.4.6. on the monitor Orientation device calibration 1.4.7. Allows handling the capsule dispensing group BU Caps calibration … Allows quick cooling of the boiler. 1.5.
- Page 79 English DISPLAY Description 2.12. Allows resetting the statistical data. Reset … SNACK 1 … It allows manual testing of the photoelectric cell system operation. 3.1. Photocell test The machine emits a beep each time the photoelectric cell system detects an object. …...
- Page 80 English LOG TABLE WHAT ==> xx code error/warning alarm aabb WHERE ==> if Myy = spiral motor yy aabb WHERE ==> if Syy = yy instant product dispensing aabb WHERE ==> if Lyy = yy instant product rinsing aabb WHERE ==> if C —...
-
Page 81: Machine Ready / Free Button
English Machine Ready / Free Button Open the door, disable the safety device (see section “Safety Devices”) and press the P3 key. If pressed during the initial warm-up, this button allows inducing the “MACHINE READY” status before the boilers reach their set temperature. If pressed after the “MACHINE READY”... -
Page 82: Operation And Use
English OPERATION AND USE • the credit available is sufficient or the vending machine has This appliance can be used by been set in free mode. If this is not the case, the display shows the message "INSERT XXX"; children aged from 8 years and above and persons with •... -
Page 83: Snack Products
English During the brewing of a beverage: Special messages • payment systems are disabled; signals are indicated in • the first line on the display shows the programmable dispensing message (default message is: "WAIT FOR chapter "Troubleshooting". PRODUCT"). Beverage selection If the vending machine is not set to dispense free beverages, insert the credit required. -
Page 84: Cleaning And Maintenance
English CLEANING AND MAINTENANCE Unplug the power cord Avoid using chlorine-based before performing tablets so as to prevent cleaning and/or oxidation phenomena maintenance operation. inside the vending machine. 11.1 General notes for correct operation It is prohibited to perform The vending machine and cleaning or maintenance non-removable operations on the internal... -
Page 85: Cleaning And Scheduled Maintenance
English 11.2 Cleaning and scheduled maintenance All components must be rinsed with warm water only, without using any detergent or solvent that could modify their form and operation. Removable components cannot be rinsed in the dishwasher. During the cleaning and maintenance operations do not stress the following electrical... -
Page 86: Drip Tray
English 11.2.1 Maintenance schedule COMPONENT TO BE MAINTENANCE CLEANED Display Use a cloth dampened with cleansers suitable for contact with food. "Operating instructions" label Use a cloth dampened with cleansers suitable for contact with food. Beverage dispensing outlet Use a cloth dampened with cleansers suitable for contact with food. Keypad Use a cloth dampened with cleansers suitable for contact with food. - Page 87 English 11.2.2 Drip tray cleaning 11.2.3 Replacement of the coffee ground bag Tighten the clip, extract the full bag and replace it with a Take out the tray and clean it thoroughly new one. 11.2.4 Used capsule collection bag replacement (For Capsule version only) Tighten the clip, extract the full bag and replace it with a new one.
-
Page 88: Dispensing Arm
English Wash the brew group with lukewarm water and clean the 11.2.6 Cleaning of the coffee brew upper filter carefully. group Remove the protection carter and disconnect the hose from the dispensing arm. Upper filter When inserting brewing group, make sure that the reference arrows are aligned. - Page 89 English 11.2.7 Cleaning the Capsule Coffee To ensure the correct Brew Group operation of the brew This unit includes very group, grease it each 4000 sharp parts which may cycles by using the specific cause injuries tube as shown in the operator.
- Page 90 English Remove the cap and the powders chute. Assemble the components in reverse order and connect the dispensing hose correctly. 11.2.9 Cleaning the dispensing outlet Operate on the dispensing outlet locking lever. Turn the ring nut clockwise and remove the mixer body. Remove the dispensing outlet.
- Page 91 English The following operations are necessary to clean the sugar container: 11.2.10 Cleaning the containers • turn the container locking lever clockwise; To clean the coffee bean hopper the following operations are necessary: • push the moving panel inward; • dispense a few test coffee cups in order to empty the coffee grinder from coffee beans;...
- Page 92 English Remove the brewing unit. 11.2.11 Cleaning the dispensing arm Remove the elastic which blocks the hoses. Wash the arm with lukewarm water and follow the above procedure in the reverse order to refit into place 11.2.12 Cleaning the coffee grinder Disconnect the hoses from the dispensing arm.
- Page 93 English 11.2.14 Cleaning the stirrer channel Remove the stirrer chute In case of removal of the front bushing from the instant product container, care should be taken to respect following Wash the stirrer chute with lukewarm water and follow the above procedure in the reverse order to refit into place combination during...
-
Page 94: Non-Scheduled Maintenance
English 11.3 Non-scheduled maintenance The vending machine is equipped with an assembly plate containing most of the vending machine components (Coffee grinder, Gear motor, Mixer, Instant product motors, Pump, Turbine and De-humidifier). To access one of these components, remove the instant product and coffee containers and loosen the four fastening screws. - Page 95 English Lower filter: 11.3.1 Coffee Bean Brew Group • unscrew the two side screws (1) and remove the upper Maintenance piston stop (2) Plastic group. It is advisable to remove it and rinse carefully with hot water on a monthly base; every 5,000 strokes and, in any case, every month all moving parts of the group must be lubricated with silicon grease for food use:...
- Page 96 English Unscrew the 4 screws located at the rear of the brew 11.3.2 Capsule Coffee Brew Group group. Maintenance To ensure the correct operation of the brew group, carry operations described below each 8000 cycles. This unit includes very Widen the walls of the brew group slightly, and take out the non-removable container for coffee capsules.
- Page 97 English Remove the used perforator and put the new perforator 11.3.2.2 Removing the lower piercer back in place. To remove the piston, pry on the rod using a flat-head The perforator can be screwdriver as shown in the figure. installed only in a pre-set position.
- Page 98 English When the pin has been released, press it with your finger In this phase, press the to dislodge it from its seat. piston downwards. lower piercer is located inside the piston and may come out when firmly pressed, thus causing injury to the operator.
- Page 99 English • If there are any capsules jammed in the upper part of the 11.3.3 Capsule jam conveyor, remove them. Then replace the capsule drawer in the vertical position and re-insert the two orange knobs. If any capsules become jammed in the dispensing tube, If there are no jammed capsules, replace the capsule restore normal operation as follows: drawer in the vertical position and re-insert the two...
-
Page 100: Software Update
English • Turn the conveyor channel and remove the jammed If the file name contains capsule. empty spaces, the software will not be recognised (the red light on the CPU will remain on). • switch off the vending machine; • insert the USB key into the CN1 connector; •... - Page 101 English • remove the USB key. *All common USB keys used on PCs are suitable. Some restrictions are: • the device has to be FAT12, FAT16 or FAT32 formatted • The sector size has to be of 512 Bytes...
-
Page 102: Troubleshooting
English TROUBLESHOOTING The following table indicates the possible error or alarm causes which may lead to a partial or total arrest of the vending machine. The following is reported for each cause: • associated code, reported in the error LOG; •... - Page 103 English Error Machine without Machine With Cause Notes / Recommended Intervention Code snack slaves Snack Slaves Instant product boiler Models with 2 boilers Beverages with Check the instant product boiler temperature sensor ==>beverages with instant products (connections, thermostats, temperature reading out of range instant products not not available sensor).
- Page 104 English Error Machine without Machine With Cause Notes / Recommended Intervention Code snack slaves Snack Slaves Slow coffee boiler Models with 2 Models with 2 Check the coffee boiler (connections, warm-up boilers ==>coffee boilers ==>coffee thermostats) beverages not beverages not available available Models with 1...
- Page 105 English Error Machine without Machine With Cause Notes / Recommended Intervention Code snack slaves Snack Slaves Spiral motor rotation Selection disabled Selection disabled. not read. Use the “automatic alignment” to enable again. Spiral motor rotation Selection disabled Selection disabled. not read. Use the “automatic alignment”...
- Page 106 English Error Machine without Machine With Cause Notes / Recommended Intervention Code snack slaves Snack Slaves Reset the grounds counter (key 4 on the 5-button Stop CofGrounds keypad). Low voltage supply / Vending machine Beverages not Boiler fill-up not out of service available performed correctly (Cristallo/Atlante)
-
Page 107: Storage Disposal
English STORAGE DISPOSAL 13.1 Change of location 13.2 Inactivity and storage periods Should the vending machine be positioned in another site If the vending machine needs to be stored or remains it is necessary to carry out the following operations: inactive for a long period, carry out the same operations as described in section “Change Location", therefore: •... -
Page 108: Instructions For End-Of-Life Disposal Treatment
English INSTRUCTIONS FOR END-OF-LIFE DISPOSAL TREATMENT INFORMATION FOR THE USER This product complies with EU Directive 2002/96/EC. The symbol on the product or on its packaging indicates that this product may not be treated as household waste. Instead it shall be handed over to the applicable collection point for the recycling of electrical and electronic equipment.