Table of Contents
Advertisement
Available languages
Available languages
Quick Links
Advertisement
Chapters
Table of Contents
Troubleshooting

Related Manuals for Saeco ROYAL OFFICE SUP 015V


Summary of Contents for Saeco ROYAL OFFICE SUP 015V
- Page 1 Distributore automatico di bevande modello ROYAL OFFICE Type SUP 015V...
-
Page 2: Table Of Contents
Italiano INDICE USO DEL DISTRIBUTORE........16 PARTI PRINCIPALI............3 INTRODUZIONE AL MANUALE......4 Stati del distributore........16 Spento ed isolato elettricamente ...... 16 Premessa ............4 Acceso ............16 Simbologia utilizzata ........4 In risparmio energia ........16 Consigli e raccomandazioni ...... -
Page 3: Parti Principali
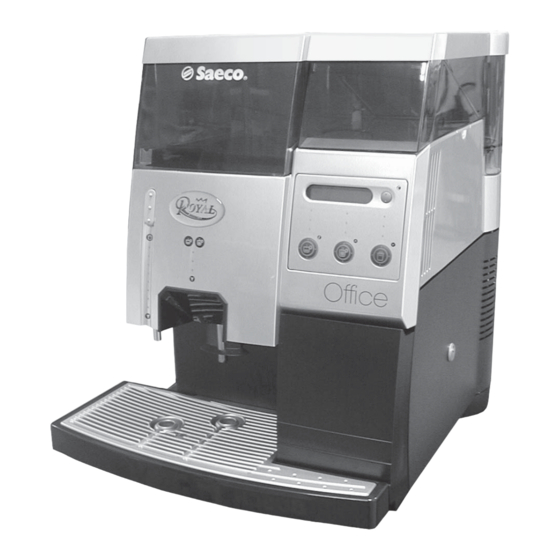
Italiano PARTI PRINCIPALI Fig. 1 Cassetto raccoglifondi Cassetto per residui di Contenitore caffè in grani Vasca raccogligocce caffè Coperchio caffè in grani Griglia appoggia tazze (sotto il coperchio con serratu- Microinterruttore di sicu- Interruttore generale rezza (parte posteriore macchina) Leva di regolazione del Coperchio con serratura Cavo alimentazione Piastrina per serratura... -
Page 4: Introduzione Al Manuale
2 - INFORMAZIONI Fate sempre riferimento a questa pubblicazione prima di GENERALI compiere qualsiasi operazione. Costruttore: Saeco International Group S.p.A. Premessa Via Panigali, 39 - 40041 GAGGIO MONTANO (Bo) Il distributore è destinato alla distribuzione automatica di La presente pubblicazione va conservata con cura e deve caffè... -
Page 5: Identificazione Del Distributore
Italiano Identificazione del distributore Il distributore è identificato dal nome del modello e dal numero di matricola rilevabili sull’apposita targhetta (Fig. Sulla targhetta sono riportate le seguenti specifiche: nome del Costruttore marcatura CE modello distributore N° di matricola anno di fabbricazione alcune specifiche costruttive: tensione dell’energia elettrica di alimentazione (V) frequenza della corrente elettrica di alimentazio-... -
Page 6: Movimentazione Eimmagazzinamento
Italiano Alimentazione elettrica 3 - MOVIMENTAZIONE E Non toccare mai le parti in tensione! Possono provocare IMMAGAZZINAMENTO gravi lesioni. Collegare il distributore ad una presa di ali- mentazione adeguata. La tensione deve corrispondere a quella indicata sulla targhetta posta all’interno del distri- Movimentazione butore (Fig. -
Page 7: Requisiti Degli Operatori
Italiano Pulizia Prima di pulire il distributore è indispensabile disinserire l’interruttore generale e staccare la spina dall’alimentazio- ne elettrica. Aspettare quindi che il distributore si raffred- di. Non immergere mai il distributore nell’acqua! È seve- ramente vietato smontare l’apparecchio o cercare di inter- venire in qualsiasi modo all’interno dello stesso. -
Page 8: Descrizione Comandie Strumenti
Italiano Fase di erogazione 5 - DESCRIZIONE COMANDI In questa fase di normale funzionamento, premendo i tasti E STRUMENTI indicati nella figura 6, si eseguono le operazioni di segui- to riportate: Importante Il distributore è fornito con i tasti erogazione già program- Tasti mati su valori standard. -
Page 9: Installazione
Italiano parecchio come indicato in figura 3; 6 - INSTALLAZIONE il piano di appoggio non deve superare i 2° di inclinazione. Attenzione Collegamento elettrico La presenza di campi magnetici o la vicinanza di macchi- ne elettriche che generano disturbi, potrebbe causare malfunzionamenti al controllo elettronico del distributore. -
Page 10: Programmazione
Italiano Struttura delle funzioni di programmazione 7 - PROGRAMMAZIONE CODICE ?? Questo capitolo descrive come impostare e/o modificare i parametri programmabili del distributore. È quindi opportuno leggere il capitolo con attenzione, in- RESET CONTATORE tervenendo solamente dopo aver compreso e capito l’esatta sequenza di tutte le operazioni da compiere. - Page 11 Italiano ITALIANO FRANÇAIS ATTIVATA Deutsch PREINFUSIONE DISATTIVATA JAPAN LUNGA NEERLANDAIS LINGUA ATTIVATA PORTUGUES PREMACINATURA DISATTIVATA ESPAGNOL ATTIVATA ENGLISH PROGRAMMAZ. DOSE DISATTIVATA ATTIVATA RISCIACQUO DECALCIFICAZ. DISATTIVATA IN CORSO DECALCIFICAZ. DUREZZA 4 TERMINATA DECALCIFIC. RISCIACQUARE DUREZZA 3 DUREZZA ACQUA DUREZZA 2 RISCIACQUO TERMINATO QUANTITA ACQUA DUREZZA 1...
-
Page 12: Descrizione Dei Menu
Italiano Premendo il tasto C ( ) si interrompe invece l’inserimento Descrizione dei menu del nuovo valore e, di conseguenza, si mantiene la prece- dente impostazione del contatore. C O D I C E C O D I C E C O D I C E C O D I C E C O D I C E... -
Page 13: Visualizzazione Del Numero Dei Prodotti Erogati
Italiano Ad esempio, se il codice 312241 deve essere impostato, "PREZZO " la sequenza di inserimento è la seguente: "1 ESPRESSO 0 " Tasto 3 Acqua calda "PREZZO " Tasto 1 E (Ent) Caffè espresso "1 CAFFÈ 0 " Tasto 2 Caffè... -
Page 14: Selezione Della Lingua
Italiano “T E M P . E S P R E S S O T E M P . E S P R E S S O” o “T E M P . C A F F È T E M P . C A F F È” e selezio- indica il numero totale di erogazioni di “C A F F E C A F F E”... -
Page 15: Decalcificazione
Italiano l’ultima erogazione di un prodotto. Se dopo pochi secondi Premendo i tasti portare l’asterisco sulla voce viene erogato di nuovo caffè, il temporizzatore inizia da “P R O G R A M M A Z . D O S E P R O G R A M M A Z . -
Page 16: Uso Del Distributore
Italiano Non appena raggiunta la temperatura necessaria, sul di- 8 - USO DEL DISTRIBUTORE splay appare invece: "SELEZ. FUNZIONE " Importante "PRONTO X L'USO " Prima di utilizzare il distributore è necessario aver letto attentamente la presente pubblicazione ed aver acquisito Mancanza caffè... -
Page 17: Prima Accensione Del Distributore
Italiano Prima accensione del distributore Riempimento serbatoio acqua Rimuovere il serbatoio e portarlo sotto ad un rubinetto. Riempimento contenitore caffè Riempire il serbatoio dell’acqua (Fig. 9) con acqua potabi- le fresca. Versare il caffè in grani all’interno del contenitore (Fig. 7). Reinserire il serbatoio dell’acqua nell’apposita sede. -
Page 18: Caricamento Circuito Idraulico
Italiano Fissata la piastrina è obbligatorio posizionare il coperchio sopra ai contenitori di acqua e caffè prima di iniziare ad Importante usare il distributore (Fig. 11). Il caricamento del circuito é da eseguirsi preliminarmente alla prima messa in funzione, dopo un periodo prolunga- to di inattività, se il serbatoio acqua é... -
Page 19: Miscele Di Caffè
Italiano Per regolare la macinatura procedere nel seguente modo: Per tazze alte posizionare l’erogatore come in figura 15. con il distributore spento, aprire lo sportello di servizio (rif. 15 - Fig. 1) tramite la chiave in dotazione, posi- zionare il tubo in silicone (rif. 26 - Fig. 1) (esclusione del microinterruttore di sicurezza), accendere l’inter- ruttore generale e controllare che il distributore si ac- cenda;... -
Page 20: Erogazione Del Caffè
Italiano Durante la fase di programmazione appare sul display il Erogazione del caffè seguente messaggio: "EROGAZ. ACQUA " Mettere la tazza sulla griglia appoggiatazze (rif. 3 - Fig. "PROGRAMMAZ.DOSE " 1) in corrispondenza dell’erogatore (rif. 6 - Fig. 1). Inserire il bicchiere o la tazza sotto all’erogatore acqua Premere il tasto di selezione corrispondente ed il distribu- calda (rif. -
Page 21: Manutenzione
Italiano Pulizia e manutenzione 9 - MANUTENZIONE Le operazioni di manutenzione sono da eseguire almeno ogni anno e comprendono il controllo dell’integrità del di- stributore e la conformità alle norme degli impianti. Premessa Serbatoio dell’acqua / Vasca raccogligocce / Cassetto raccogli-fondi / Sistema Attenzione erogatore del caffè... -
Page 22: Gruppo Erogatore
Italiano L’erogatore di caffè (rif. 6 - Fig. 1) può essere smontato Lavare il canale di erogazione (Fig. 22) e risciacquare ac- per essere pulito. curatamente con acqua calda. Rimuovere la protezione (Fig. 19). Fig. 19 Allentare la vite zigrinata, posta sotto l’erogatore (Fig. 20). Fig. - Page 23 Italiano Estrarre il cassetto per residui di caffè per pulirlo (Fig. 26). Estrarre il gruppo erogatore tenendolo per l’apposita ma- niglia e premendo sull’iscrizione “PRESS” (Fig. 24). Fig. 26 Utilizzare solo detergenti non abrasivi. Pulire accuratamente il vano di servizio e inserire di nuovo il cassetto per residui di caffè.
-
Page 24: Macinacaffè
Italiano Tirare con precauzione la leva verso l’alto (Fig. 30) anno- tandosi il grado i macinatura selezionato. Macinacaffè Ora il contenitore può essere tolto per essere pulito. Attenzione Mai immettere acqua nel macinacaffè, si potrebbero arre- care danni irreparabili all’apparecchio! Eseguire periodicamente la pulizia del contenitore caffè... -
Page 25: Decalcificazione
Italiano Ripulire con il pennello in dotazione (Fig. 33) e con un aspirapolvere tutta la zona del macinacaffè e l’anello di Importante macinatura. Data la complessità del circuito idraulico della caffettiera, i Procedere con la massima cautela cercando di non modi- ficare le posizioni dei riferimenti. -
Page 26: Decalcificazione Automatica
Italiano Eliminazione del messaggio di decalcificazione Attenzione Nella funzione di programmazione, premendo i tasti Non usare assolutamente l’aceto di vino, per non causa- portare l’asterisco a fine riga sulla voce Segnal. Decalc. e re danni al distributore! confermare la segnalazione con il tasto E (Ent). Sul display apparirà... -
Page 27: Custodia
Italiano 13 - VARIANTI 10 - CUSTODIA Il distributore Royal Office, può essere corredato dai se- Quando non è in uso, il distributore deve essere disinserito guenti componenti opzionali: e la spina deve essere staccata dalla presa. Box monetiera. Custodire il distributore in luogo asciutto e lontano dalla Predisposizione per l’alloggiamento di una monetie- portata dei bambini. -
Page 28: Manutenzione Ordinaria
Italiano 14 - MANUTENZIONE ORDINARIA Per la buona efficienza dell’apparecchio è consigliabile effettuare le operazioni di pulizia e manutenzione come indicato nella seguente tabella. Operazioni da eseguire Ad ogni rifornimento Dopo 2 rifornimenti Dopo 5-10 rifornimenti Svuotamento e pulizia del cassetto raccoglifondi Svuotamento e pulizia del cassetto raccogligocce Svuotamento e pulizia del serbatoio acqua Pulizia del gruppo erogatore di caffè... - Page 29 INTERNATIONAL GROUP EC DECLARATION OF CONFORMITY EC 73/23, EC 89/336, EC 92/31, EC 93/68, EC 98/37 We : SAECO INTERNATIONAL GROUP S.p.A Via Panigali, 39 40041 GAGGIO MONTANO (BO) declare under our responsibility that the product : AUTOMATIC VENDING MACHINE...
- Page 31 Vending Machine model ROYAL OFFICE Type SUP 015V...
- Page 32 English TABLE OF CONTENTS MAIN PARTS..............3 USE OF THE VENDING MACHINE...... 16 Machine status ..........16 Off and electrically insulated ......16 INTRODUCTION TO THE MANUAL...... 4 On ..............16 Foreword ............4 Energy saving ..........16 Symbols used ...........
-
Page 33: Main Parts
English MAIN PARTS Fig. 1 Dump box Water level gauge Brew group Drip Tray (inside water tank) Coffee residue drawer Grill drip tray Coffee bean hopper Safety microswitch Main switch Coffee bean hopper cover Cover with lock (rear side of the machine) (under the cover with lock) Cover lock plate Power cord... -
Page 34: Introduction To The Manual
Always refer to this manual before performing any opera- tion. Foreword Manufacturer: Saeco International Group S.p.A. Via Panigali, 39 - 40041 GAGGIO MONTANO (Bo) Italy This machine is an automatic coffee and hot water dis- penser with programmable dosing of all beverages. -
Page 35: Machine Identification
English Machine identification The machine is identified by the model and serial numbers outlined on the specific plate (Fig. 2). The plate also contains the following specifications: name of Manufacturer CE marking machine model serial number manufacturing year technical specifications Power supply voltage (V) Power supply frequency (Hz) Power consumption (W) -
Page 36: Handling And Storage
English Power cord 3 - HANDLING AND If damaged, the power cord must be replaced by an Ap- STORAGE proved Assistance Centre. Do not connect the cord near corners and sharp or very hot objects. Avoid contact with oil. Do not stretch the cord when moving the machine. Do Handling not unplug the machine by pulling the cord or touch it with During handling and transport, the machine must be kept... -
Page 37: Operators Requirements
English Cleaning Safety microswitch efficiency Before cleaning the machine, turn the main switch off and test disconnect the power supply. Wait until the machine is cold. When the machine is on, open the side door and check Do not soak the machine in water! Do not disassemble the that the display (ref. -
Page 38: Controls Description
English Dispensing mode 5 - CONTROLS DESCRIPTION In this normal running mode, the following operations can be performed by pressing the keys as indicated in figure 6: Important Keys Dispensing programmed beverages The dispensing keys of the machine are programmed with pre-set values. -
Page 39: Installation
English near an easily reachable power source; 6 - INSTALLATION the distance from the walls must be as shown in Fig.3; the maximum angle of inclination of the supporting surface must not exceed 2° Warning The presence of nearby magnetic fields or electric devices generating interference may cause malfunctioning in the Electric connection electronic control of the machine. -
Page 40: Settings
English Structure of the programming functions. 7 - SETTINGS This chapter illustrates how to set up or modify the ma- CODE?? chine programmable parameters. The chapter should therefore be read carefully, to fully un- RESET COUNTER derstand the correct sequence of operations to be per- formed. - Page 41 English ITALIANO FRANÇAIS Deutsch PREBREWING JAPAN LONG NEDERLANDS LANGUAGE PORTUGUES PREGRINDING ESPAGNOL ENGLISH PROGR. QUANTITY RINSING MACHINE IS DESCALING DESCALING HARDNESS 4 FINISHED DESCALING RINSE MACHINE HARDNESS 3 WATER HARDN. HARDNESS 2 RINSING FINISHED QUANTITY WATER HARDNESS 1 SIGN. DESCAL. NOT REACHED MINIMUM STANDBY...
-
Page 42: Menu Description
English Menu description H O T W A T E R H O T W A T E R H O T W A T E R H O T W A T E R H O T W A T E R T O T A L T O T A L T O T A L... -
Page 43: Displaying The Number Of Products Dispensed
English For example, if the new code is 312241, the key se- “PRICE “ quence must be as follows: “HOT WATER “ Key 3 Hot water Key 1 E (Ent) Small Coffee Important Key 2 Coffee The pre-set prices of the machine correspond to 0 0 0 0 0 , mean- Key 2 Coffee ing that beverages are free. -
Page 44: Language Selection
English Language selection “TEMP. COFFEE “ “MEDIUM “ Press the keys to position the asterisk on the “L A N - L A N - L A N - L A N - L A N - G U A G E” option and select it by pressing E ( G U A G E G U A G E G U A G E... -
Page 45: Descaling
English following message appears on the display: “ SAVING ” and the machine turns off. If necessary, the machine can be “ESPRESSO “ turned back on by pressing C (Esc). “SET DOSE “ “COFFEE “ “SET DOSE “ Rinsing cycle The machine is equipped with a washing program to be “HOT WATER “... -
Page 46: Use Of The Vending Machine
English When the necessary temperature has been reached, the 8 - USE OF THE VENDING display reads: MACHINE “SELECT PRODUCT “ “READY FOR USE “ Important Read this manual in full before using the machine so as to become sufficiently familiar with its functioning. Bean hopper empty Before using the machine after a period of inactivity it is advisable to read again paragraph 8.3 “First switching... -
Page 47: First Switching On
English First Switching on Filling the water tank Remove the water tank and place it under a water faucet. Filling the bean hopper Fill the tank (Fig. 9) with tap water. Pour coffee beans in the hopper (Fig. 7). Put the water tank back in place. Fig. -
Page 48: Water Circuit Filling
English After fixing the plate the cover must be placed on the water and bean hoppers before using the machine (Fig. 11). Important Prime the circuit before starting the machine for the first time, following a long period of inactivity, if the water tank has been fully emptied or if the pump has malfunctioned. -
Page 49: Coffee Blends
English To adjust grinding, follow the procedure outlined below: Adjusting the cup filling level when the machine is off, open the service door (ref. 15 - Fig. 1) using the supplied key, position the silicon pipe (ref. 26 - Fig. 1) (cutting out the safety microswitch), turn the main switch on and verify that the machine turns on;... -
Page 50: Coffee Dispensing
English When setting the desired quantity, the following message Coffee dispensing appears on the display: “HOT WATER “ Place the cup on the Grill drip tray (ref. 3 - Fig. 1) under “PROGR. QUANTITY “ the dispenser (ref. 6 - Fig. 1). Place the glass or cup under the hot water spout (ref. -
Page 51: Maintenance
English Cleaning and maintenance 9 - MAINTENANCE Maintenance operations must be performed at least once a year and include testing the condition of the machine and the conformity of the electric system. Foreword Water tank/ Drip tray/ Dump box/ Brew Warning group / Machine Before performing maintenance and /or cleaning proce-... -
Page 52: Brew Group
English The coffee dispenser (ref. 6 - Fig. 1) can be removed for Wash the dispensing channel (Fig. 22) and rinse carefully cleaning. with hot water. Remove the protection cover (Fig. 19). Fig. 19 Unfasten the knurled screw under the dispenser (Fig. 20). Fig. - Page 53 English Remove the brew group using the handle and pressing the the filter back in and fasten the screw using the key. “PRESS” sign (Fig. 24). Remove the coffee residue drawer for cleaning (Fig. 26). Fig. 26 Use non-abrasive detergents only. Clean the dispensing outlet and place the coffee residue drawer back in.
-
Page 54: Coffee Grinder
English Pull up the lever carefully (Fig. 30) noting down the grind- ing selection. Coffee grinder Now the hopper can be removed for cleaning. Warning Never put water inside the grinder, to avoid irreparable damage to the machine! Clean the coffee bean hopper regularly. This operation must be performed only by a specialized technician only. -
Page 55: Descaling
English Clean the ring using the supplied brush (Fig. 33) and vacuum the grinding area and ring. Important Proceed carefully so as not to modify the positioning of the Given the complex structure of the machine hydraulic cir- reference signs. cuit, descaling cycles outlined below (automatic and stand- ard) do not include all the channels. -
Page 56: Automatic Descaling
English Eliminating the descaling message Warning Press the keys to position the asterisk on the Descal. Warn- Never use vinegar to avoid damaging the machine! ing option from the settings menu and select it by pressing E (Ent). The display reads: Two descaling procedures are available: “RESET DESCALING “... -
Page 57: Care
English 13 - ACCESSORIES 10 - CARE The Royal Office machine can be equipped with the fol- When the machine is not used, it must be turned off and lowing optional components: unplugged from the socket. Coiner box Keep the machine in a dry place away from children. A coiner box can be attached to the machine. -
Page 58: General Maintenance
English 14 - GENERAL MAINTENANCE To keep the machine in good working conditions cleaning and maintenance procedures should be performed according to the instructions in the table below. Operations to be performed At each supply After 2 supplies After 5-10 supplies Emptying and cleaning the Dump box Emptying and cleaning the drip tray Emptying and cleaning the water tank... - Page 59 INTERNATIONAL GROUP EC DECLARATION OF CONFORMITY EC 73/23, EC 89/336, EC 92/31, EC 93/68, EC 98/37 We : SAECO INTERNATIONAL GROUP S.p.A Via Panigali, 39 40041 GAGGIO MONTANO (BO) declare under our responsibility that the product : AUTOMATIC VENDING MACHINE...