
Related Manuals for Britax UNITY


Summary of Contents for Britax UNITY
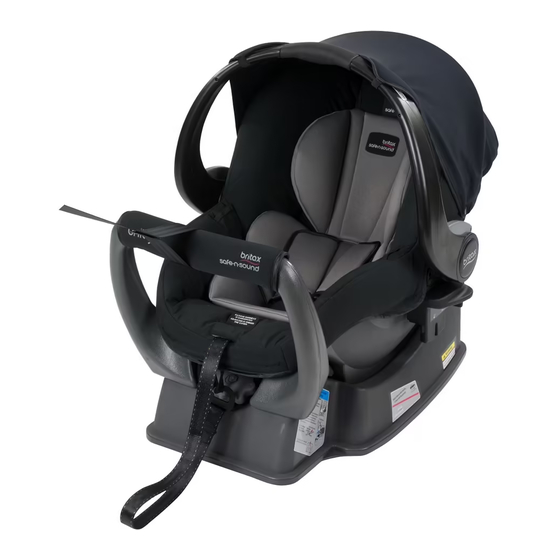
- Page 1 Unity ™ Infant Carrier Series No. 40/A/2010 NOTE: Style may vary from image shown. IMPORTANT: KEEP THIS BOOKLET IN THE PLACE PROVIDED ON THE CHILD RESTRAINT.
-
Page 2: Table Of Contents
SHOULDER HEIGHT MARKERS AND THE NEXT STEP CARE & MAINTENANCE ACCESSORIES TRAVELLING TIPS TRAVEL SYSTEM - INTEGRAL LATCH TRAVEL SYSTEM - BRITAX STROLLER CLICK & GO™ADAPTOR INSTALLATION OF CAR ANCHOR FITTING ALTERNATIVE INSTALLATION IF SEATBELT LOOSENS IN CASE OF ACCIDENT... -
Page 3: Introduction
The Carrier is suitable for fitting to a variety of Britax, Steelcraft and BOB Strollers using one of the adaptor systems. For compatible Strollers refer to www.britax.com.au. Britax Stroller Click & Go™ Adaptor is required for some strollers and if not fitted then it is available as a separate purchase. -
Page 4: Warnings
• Use the restraint exactly as shown in the instructions. • Fit the restraint firmly to the car seat. • Fit the harness firmly to the child. • A loose restraint or harness is dangerous. • DO NOT LEAVE CHILDREN UNATTENDED IN THE CAR. •... - Page 5 • The restraint is not intended to be a substitute baby cot or bed. It is only designed to enable safe transportation of children in motor vehicles. Do not leave a baby in the restraint for long periods of time. •...
-
Page 6: Shoulder Height Markers And A Growing Child
SHOULDER HEIGHT MARKERS AND A GROWING CHILD New Baby Older Baby Shoulders below the Shoulder Shoulders inline with the Shoulder Height Marker. Height Marker- then you will need to move to the next child restraint. Maximum Shoulder Height Marker Maximum Shoulder Height Marker. FRONT OF VEHICLE The Infant Carrier is not suitable for your child when their shoulders are above the shoulder height marker. - Page 7 SHOULDER HEIGHT MARKERS AND A GROWING CHILD IMPORTANT: Follow this advice. DO NOT MOVE TO THE NEXT RESTRAINT UNTIL SHOULDER REACHES THE SHOULDER MARKER. When the child's shoulders reach this marker, the child is now too big for the child restraint.
-
Page 8: Special Features
SPECIAL FEATURES 1. Padded Insert 2. Shoulder Height marker 3. Buckle Tongue Holders (if fitted) (holders are on both sides of the Padded Insert or the sides of the cover) 4. Harness Buckle 5. Harness Adjuster (under flap) 6. Harness adjustment strap hook (disconnected) 7. - Page 9 10. Anchor Fitting 18. Carry Handle 11. Stabilising Bar 19. Canopy 12. Car Seat belt 20. Carry Handle release latch 13. Britax Stroller Click & Go™ 21. Adjuster Adaptor (if fitted) 22. Upper anchorage strap 14. Infant Carrier 23. Attachment Clip...
-
Page 10: Suitable For Use
SUITABLE FOR USE TO BE USED WITH A LAP-SASH OR LAP ONLY SEAT BELT IN THE BACK OF MOST CARS WITH FORWARD-FACING SEATS. To be used only in a rearward-facing position for an infant until their shoulder’s reach the shoulder height marker (approximately 12 months of age). Continue to use this infant restraint until child reaches this limit. - Page 11 SUITABLE FOR USE THE TETHER STRAP MUST ALWAYS BE FITTED WHEN THE CHILD RESTRAINT IS USED IN A VEHICLE. Do not use the restraint without the Upper Anchorage Strap correctly attached. The upper anchorage strap must be attached to an anchorage point using an extension strap if necessary.
-
Page 12: How To Set-Up
HOW TO SET-UP REMOVING INFANT CARRIER FROM BASE A. Grasp the handle with one hand. With the other hand, lift the catch located at the front of the Infant Carrier. B. With the catch still lifted raise the Infant Carrier Lift clear of the base. - Page 13 HOW TO SET-UP ADJUSTMENT OF HANDLE POSITION The Unity™ Travel System Infant Carrier features a sturdy carry handle which can be used in conjunction with the curved base to convert it to a rocker. At the base of the handle there are two large buttons which control the three positions of the handle.
- Page 14 HOW TO SET-UP ADJUSTMENT OF HANDLE POSITION WITH BRITAX STROLLER CLICK & GO™ ADAPTOR A. Squeeze the carry handle release latch on each side of the handle and rotate to the first position-“rocking position” B. Squeeze the latch again and start to rotate the...
- Page 15 HOW TO SET-UP TO FIT CANOPY A. With the viewing window flap on the outside, grasp the Canopy ensuring the two plastic frame sections at both sides are aligned. B. Push the two plastic frame sections at both sides onto the Infant Carrier at the inside of the handle pivot point.
- Page 16 HOW TO SET-UP SETTING UP THE HARNESS The Infant Carrier is fitted with three shoulder strap positions. As the baby grows the shoulder straps must be moved to higher slots. Refer to page 17 - 20 for correct fitment of the harness shoulder straps. Lift the Harness A.
- Page 17 HOW TO SET-UP F. The Infant Carrier is fitted with three shoulder strap positions. As the baby grows, the shoulder straps must be moved to higher slots. The shoulder straps must be in the slots which are nearest to the child’s shoulders, but not lower than the child’s shoulders.
-
Page 18: Crotch Strap
HOW TO SET-UP CROTCH STRAP The Infant Carrier is fitted with two crotch strap positions. Correct location of crotch strap will securely position the baby correctly in Infant Carrier and will prevent baby from slipping further into Infant Carrier. As baby grows the crotch strap must be moved to SMALLER BABY the outer slot. - Page 19 HOW TO SET-UP ADJUSTING THE SHOULDER HARNESS A. At the rear of the Infant Carrier, remove one of the harness shoulder straps from metal Strap Connector by slipping strap through open slot. The Metal Strap Connector is shown in diagram right. Metal Strap Connector B.
- Page 20 HOW TO SET-UP D. Ensure there are no twists in the straps. FOR SMALL BABY E. Connect it to the Metal Strap Connector at rear of Infant Carrier. F. Repeat for the other shoulder strap. It is better to change one strap at a time so that the other strap will be a guide for re-assembly.
-
Page 21: How To Install
HOW TO INSTALL Consult the car owner’s handbook for location of anchor fittings or anchorage points. Some vehicle manufacturers recently have an anchor fitting fitted in the car. If there is no child restraint anchor fitting or child restraint anchor point refer to pages 53-57 for the installation of the anchor fitting as well as the use of extension straps. - Page 22 HOW TO INSTALL Always leave a rearward slope angle of approximately 10° to 15° 10° to 15° ROAD MANUAL PACKING The angle may also be altered by placing a firm packing between the seat and the underside of the base (packing can be a firmly rolled up towel or nappy) For some vehicles with flat seats some packaging may be required at the front edge of the base to get some recline.
- Page 23 HOW TO INSTALL C. Place the base into the car in the selected seating position with the Stabilising bar beside the car’s seat back as shown. D. Extend the seat belt to maximum length. For a lap-sash seat belt, position the tongue in the middle of the fully extended belt.
- Page 24 HOW TO INSTALL D. Engage the seat belt tongue to Belt Guide Hooks the buckle. Pull Sash portion of seatbelt to E. Pull the slack out of the seat remove slack belt and ensure the base is held firm against the seat back. If a lap-sash seat belt is used then allow the excess sash belt to feed back in to the retractor.
- Page 25 HOW TO INSTALL INSTALLING UPPER ANCHORAGE STRAP A. Locate the child restraint anchor fitting Attachment Clip in the car that is directly behind the seat location in the rear seat you have chosen. Refer to the car owner’s manual for the location (If there is no anchorage fitting then refer to pages 53 - 57 for instructions in adding Car's Anchor Fitting...
- Page 26 HOW TO USE PLACING BABY IN INFANT CARRIER When positioning baby into Infant Carrier make sure baby's back is fully supported onto the flat section and the baby's nappy area (bottom) is resting in the bottom curvature as shown. It is recommended that bulky nappies are not used when baby is travelling in the Infant Carrier as they can cause incorrect positioning of the baby's back in the Infant Carrier.
- Page 27 HOW TO USE B. Move the two harness tongues to the outer extents of the infant carrier, into the Buckle Tongue Holder (if fitted). Move the harness buckle towards the Harness Adjuster. Buckle Tongue Holder (if fitted) C. Place baby into Infant Carrier lying on its back so that the buckle is between the baby’s legs.
- Page 28 HOW TO USE SECURING BABY IN INFANT CARRIER A. Place each arm through each shoulder strap of the harness. Position the buckle of the crotch strap as shown right. B. Fit either harness tongue into the Harness buckle followed by the other tongue until a click is heard. If the second tongue does not engage - press the red button and re-insert the tongues.
- Page 29 HOW TO USE C. Ensure slack is removed from the lap straps by pulling the shoulder harness straps through the buckle tongues, then pull the Harness Adjustment Strap to take up the slack in the harness, adjusting to a firm but comfortable fit.
- Page 30 C. The handle may be rotated into other positions if needed although this may be difficult with the seat in front. CAUTION: If fitted with the Britax Stroller Click & Go™Adaptor, ensure to operate the handle as per pages 13 and 14 to prevent pinching fingers.
- Page 31 HOW TO USE D. Ensure the upper anchorage strap attachment clip Locating Slots have been fitted to the car’s anchor fitting. If not already connected, refer to page 25. E. Feed the Upper Infant Carrier strap on the inside of the handle and through the locating slots in the front of the Infant Carrier.
- Page 32 HOW TO USE REMOVING BABY & INFANT CARRIER FROM BASE A. Loosen the upper anchorage strap. Ensure that the adjuster does not fall on the baby. B. Remove the upper anchorage strap from the locating slots in the Infant Carrier. C.
- Page 33 HOW TO USE REMOVAL OF BABY FROM INFANT CARRIER A. Rotate the carry handle to either the access or "non-rocking position" and ensure the Canopy is fully open. B. Press the Harness Adjuster while pulling shoulder straps to loosen the harness. C.
-
Page 34: Shoulder Height Markers And The Next Step
SHOULDER HEIGHT MARKERS AND THE NEXT STEP FOR THE NEXT CHILD RESTRAINT CHOOSE FROM: • Convertible Child Seat, If the convertible seat Convertible is suitable for approximately 12 months then Child Seat continue to keep your child rear facing until they reach the shoulders reach the lowest marker. -
Page 35: Care & Maintenance
CARE & MAINTENANCE REGULAR CARE OF THIS RESTRAINT: Please check the following items regularly to ensure the safety of your child: A. Check the webbing for fraying. B. Ensure the inside of the buckle is free of foreign matter, food or feeding liquids. Check that the buckle clicks and is not sluggish or sticky in operation. - Page 36 CARE & MAINTENANCE COVER For baby’s comfort and health the Infant Carrier cover is removable for cleaning. Cleaning instructions are on the care label attached to the liner. Washing the cover prior to use will remove excess fluff and dye’s. TO REMOVE THE COVER A.
- Page 37 CARE & MAINTENANCE TO REPLACE THE COVER A. Place the cover over the infant carrier ensuring all slots in cover line up with slots in infant carrier. B. Ensure that there are no twists in all straps underneath the Infant Carrier. Pull elastic cover over Infant Carrier C.
- Page 38 CARE & MAINTENANCE COVER (style may vary) The cover has been designed to protect your child when seated in the restraint. Care should be taken if children either eat or drink while in the restraint as some products may cause damage or marking to the cover. IMPORTANT: Do not pull sticky items from covers as the cover may be damaged - soak in water and gently remove.
- Page 39 If the Harness Buckle cannot be Click returned to its original working condition then contact Britax Childcare Customer Service. E. Refit the harness buckle to the restraint with the red button facing out & feeding each 3-bar slide through appropriate...
-
Page 40: Accessories
ACCESSORIES The following instructions apply to accessories that may be supplied with this restraint at point of purchase. If not, a variety of accessories are available from various retailers of Safe-n-Sound products. TO REMOVE PADDED INSERT - Style may vary The Padded insert is only required for supporting the smaller baby and must be removed once baby's shoulders reach the... - Page 41 These bases can mean that the Carrier can be easily and quickly switched between cars. An extra upper anchorage strap is supplied with the Base. OTHER ACCESSORIES Only use accessories designed and recommended by Britax Childcare Pty Ltd for this product.
-
Page 42: Travelling Tips
TRAVELLING TIPS SAFETY Never hold a baby in arms when riding in a motor vehicle. In this position the baby could be thrown against the dashboard, windscreen or other occupant and suffer serious injury or death. When riding in a motor vehicle never nurse a baby and use the same seat belt for both of you. - Page 43 TRAVELLING TIPS CLOTHING/BATHING Take several changes of clothing and bibs for possible car sickness. Disposable nappies and liners are very handy while travelling. Since it is often warmer in the car, dress the baby in light clothing. When cooler, it is easier to place a blanket over the baby than it is to remove the baby from the restraint and change clothes.
-
Page 44: Travel System
Integral latch which fits to the arm bar or tray, or • Britax Stroller CLICK & GO™ Adaptor that fits to the receivers on the stroller side armrests. DO NOT LEAVE THE CHILD IN THE INFANT CARRIER FOR EXTENDED PERIODS. -
Page 45: Travel System - Integral Latch
TRAVEL SYSTEM - INTEGRAL LATCH INSTALLATION INSTRUCTIONS PREPARING THE INFANT CARRIER - LATCH METHOD A. Remove Infant Carrier with the Baby from the Base by loosening the upper anchorage strap and disengaging the upper restraint strap from the guides on the back of the Infant Carrier. - Page 46 TRAVEL SYSTEM - INTEGRAL LATCH INSTALLING THE INFANT CARRIER INTO THE STROLLER - LATCH METHOD A. Ensure that the arm bar (or tray) is fully locked in position on both sides of the armrests. B. Position the Infant Carrier over the Stroller with the baby’s head end of the Infant Carrier over the Stroller arm bar (or tray).
- Page 47 TRAVEL SYSTEM - INTEGRAL LATCH D. Then lower the foot end of the Infant Carrier until it rests on the seating surface of the stroller. E. Fold the Infant Carrier handle down if required, then check the Infant Carrier is securely fixed to the stroller before use.
-
Page 48: Travel System - Britax Stroller Click & Go™Adaptor
BRITAX STROLLER CLICK & GO™ADAPTOR TO FIT INFANT CARRIER INTO STROLLER - BRITAX STROLLER CLICK & GO™ADAPTOR METHOD If the Infant Carrier is fitted with Britax Stroller Click & Go™Adaptor, then fit as follows: IMPORTANT : Only use Infant Carrier with compatible Britax/Steelcraft Stroller. - Page 49 TRAVEL SYSTEM - BRITAX STROLLER CLICK & GO™ADAPTOR To avoid pinching your fingers follow the steps on page 48. Push down until it clicks into place. VERY IMPORTANT: Always lock the Infant Carrier to the stroller frame by rotating the handle.
- Page 50 FITTING OF THE BRITAX STROLLER CLICK & GO™ADAPTOR If you wish to upgrade this Infant Carrier to use the Britax Stroller Click & Go™ Adaptor system the you will need to fit the adaptors . Press Pin The Britax Stroller Click & Go™ Adaptors is available at most Nursery Stores.
- Page 51 TRAVEL SYSTEM - BRITAX STROLLER CLICK & GO™ADAPTOR A. To attach the Britax Stroller Click & Go™ Adaptor to the Infant Carrier ensure the Carrier's Handle is in “Rocking position” , disconnect the elastic under the handle boss and pull the trim away from the side of the carrier and trim is placed aside to align the holes.
- Page 52 HOW TO REMOVE THE BRITAX STROLLER ADAPTOR If you need to remove the Britax Stroller Click & Go™ Adaptor ensure cover is moved aside and handle is in “rocking position” . First unscrew the Press Pin half way and then pull out.
-
Page 53: Installation Of Car Anchor Fitting
INSTALLATION OF CAR ANCHOR FITTING Consult the vehicle owner’s handbook for location of anchorage fittings or anchorage points and the possible use of spacers. Some vehicles may have an anchor fitting fitted by the vehicle manufacturer. If anchorage points cannot be found refer to car manufacturer or local child restraint fitting station or traffic authority for optimum position of anchorage point and the use of spacers. - Page 54 INSTALLATION OF CAR ANCHOR FITTING Extension Strap distance to be measured. Length 300mm (Use Safe-n-Sound part 0035 or equivalent). Length 600mm (Use Safe-n-Sound part 0036 or equivalent). Available from all major child restraint retailers. DISTANCE TO MEASURE TO THE ANCHOR POINT FRONT OF VEHICLE Adjustable upper Anchorage strap.
- Page 55 INSTALLATION OF CAR ANCHOR FITTING IF THE CAR IS FITTED WITH CHILD UPPER ANCHORAGE FITTING RESTRAINT ANCHORAGE POINT Fig.1. Attachment Bolt Locate the anchorage point behind the rear Lock washer seating position. (consult the car owners handbook for the location of the anchorage Anchor fitting point).
- Page 56 INSTALLATION OF CAR ANCHOR FITTING IF THE CAR IS NOT FITTED WITH CHILD UPPER ANCHORAGE RESTRAINT ANCHORAGE POINTS FITTINGS FOR SEDANS For Sedans only - Drill 9mm diameter hole ONLY Fig.2. in the parcel shelf on the centre line of the Attachment Bolt seating position as shown in Fig 3.
- Page 57 INSTALLATION OF CAR ANCHOR FITTING ONLY USE A 5/16 UNC GRADE 5 BOLT. IF THE Note: Marking on BOLT IS NOT THE CORRECT LENGTH THE CAR the top of a Grade 5 MANUFACTURER’S HAND BOOK CAN PROVIDE Bolt. ADVICE ON THE CORRECT LENGTH BOLT. Front of Vehicle CHILD RESTRAINTS MUST NOT BE ATTACHED TO 200mm...
-
Page 58: Alternative Installation If Seatbelt Loosens
ALTERNATIVE INSTALLATION IF SEATBELT LOOSENS LAP-SASH SEAT BELT If a seat belt will not stay tight, then a Gated 3-Bar Slide may be used to prevent loosening. There may be two types of Gated Slides available, Curved and Flat. Flat Curved Before installing the restraint, join the lap-sash seat belt by using the Gated 3-Bar... - Page 59 ALTERNATIVE INSTALLATION IF SEATBELT LOOSENS D. Feed the straps through the Gated 3-Bar Slide to remove any slack. When fitting the Curved Gated Slide, the seat belt route can only go one way, as shown above. Sash belt portion Use this seat belt configuration to install the child restraint according to the instructions on pages 23 to 24.
-
Page 60: In Case Of Accident
This notice is to advise you of the requirements of the Australian/New Zealand Standards and our obligation in complying with the standards. Please assist the owner of this restraint in their claim. Britax Childcare Pty. Ltd. (Incorporated in Victoria) New Zealand Office A.B.N 55 006 773 600... - Page 61 Since its inception in 2006, the Crash Exchange program has helped 100’s of families ensure that their children have new restraints and that the restraints are not sold second hand placing others at risk. Our Crash Exchange Terms and Application form are accessible on our website. Please visit www.britax.com.au for further information.
- Page 62 NOTES...
- Page 63 NOTES...
- Page 64 The Safe-n-Sound trademark is the property of Britax Childcare Pty. Ltd. (Australia). The Britax and Click & Go trademark are the property of Britax Excelsior Limited (UK). We reserve the right to alter this product without notice. © 2002-2012 Britax Childcare Pty. Ltd. Patent Pending.
Need help?
Do you have a question about the UNITY and is the answer not in the manual?
Questions and answers