Table of Contents
Advertisement
Advertisement
Table of Contents
Troubleshooting

Related Manuals for Power Computing PowerCenter PRO


Summary of Contents for Power Computing PowerCenter PRO
- Page 1 PowerCenter ™ User’s Guide Part number 6600-0034-01 Rev. number 970605...
- Page 2 © 1997 Power Computing Corporation. All rights reserved. Under copyright laws, this manual may not be copied, in whole or in part, without the written consent of Power Computing. Your rights to the software are governed by the accompanying software license agreement.
- Page 3 Web Site at: http://www.powercc.com Customers who purchased systems directly from Power Computing should use the numbers listed below to contact Power Computing for assistance (all times are United States Central Time). Customers who did not purchase systems directly from Power Computing must contact the dealer they purchased their system from for assistance.
-
Page 5: A Word From The Power Computing Team
Our goal is to provide you with the best product available. Power Computing was chosen by Apple as the first licensed manufacturer of Mac OS systems. We created our company with the focus on providing customers with more choice, better service, and more affordable systems. -
Page 7: Table Of Contents
Table of Contents A word from the Power Computing team ........v PowerCenter™ Pro Overview ............xiii Minitower system front view .............. xiv Minitower system rear view ..............xv Low-Profile system front view ............xvi Low-Profile system rear view ............. xvii Return, Support, Warranty, Satisfaction Guarantee, and License Information .............. - Page 8 The mouse pointer does not move when you move the mouse ..41 No characters appear on the screen when you type ......41 You see a dialog box with a bomb ........... 42 You cannot launch a program or it quits unexpectedly ....42 viii PowerCenter Pro User’s Guide...
- Page 9 What you need to know about installing internal drives ....85 Installation steps ................85 Preparing the drive ................86 Set the SCSI ID .................. 87 Preparing a Minitower system ............90 Inserting a drive into a Minitower system ........94 PowerCenter Pro User’s Guide...
- Page 10 An Overview of Hard Disk ToolKit• PE The Selector Window: Hard Disk ToolKit•PE’s Main Screen .... 132 The Partition List Window ..............135 Using Hard Disk ToolKit• PE Starting Hard Disk ToolKit•Personal Edition ........139 Auto Initializing a Disk Device ............141 PowerCenter Pro User’s Guide...
- Page 11 Playing Audio Discs with CDT Remote ..........182 Troubleshooting ................185 Overview .................... 185 Troubleshooting Installation ............. 185 Drive Setup: Suggested Settings ..........187 Overview .................... 187 Some Notes About Settings ..............188 Bitstream Typeface Library ..........195 Index ..................199 Registration Cards ..............207 PowerCenter Pro User’s Guide...
-
Page 13: Powercenter Pro Overview
PowerCenter Pro systems has a high-speed PowerPC 604e processor. PowerCenter Pro systems come with at least 16 MB of RAM, built-in video with 2 or 4 MB of video RAM, at least a 2 GB hard drive, a 16x CD-ROM player, a 1 MB level 2 cache, built-in Ethernet, and two SCSI buses. -
Page 14: Minitower System Front View
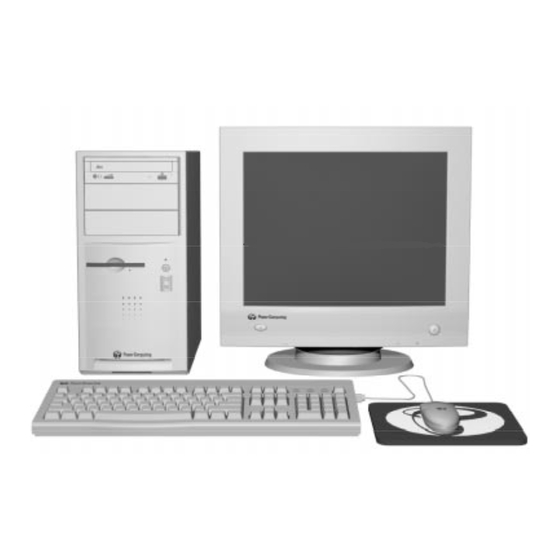
Here are the key features of the Minitower system from the front. monitor (not included) computer CD-ROM drive floppy disk drive front panel power button programmer’s interrupt button reset keyboard button power key mouse keyboard PowerCenter Pro User’s Guide For Technical Support, Call 1-800-708-6227... -
Page 15: Minitower System Rear View
Macintosh- standard video port built-in VGA video port external SCSI port modem port printer port AAUI expansion Ethernet port slots 10Base-T Ethernet port ADB port sound in port sound out port PowerCenter Pro User’s Guide For Technical Support, Call 1-800-708-6227... -
Page 16: Low-Profile System Front View
Here are the key features of the Low-Profile system front panel. monitor (not included) floppy disk drive front panel computer power button CD-ROM player programmer’s interrupt button keyboard power key reset button mouse keyboard PowerCenter Pro User’s Guide For Technical Support, Call 1-800-708-6227... -
Page 17: Low-Profile System Rear View
115/230 sound built-in VGA volt switch in port video port external ADB port SCSI port 10Base-T power modem port Ethernet port cord socket printer port AAUI Ethernet port xvii PowerCenter Pro User’s Guide For Technical Support, Call 1-800-708-6227... -
Page 19: Return, Support, Warranty, Satisfaction Guarantee, And License Information
Retain all shipping materials. Contact Power's Customer Service Department if you need assistance with any such claims. Customers who did not purchase systems directly from Power Computing must contact the dealer they purchased their system from for assistance. Returns for refund... - Page 20 Computing. We recommend that the package(s) be insured for the full purchase amount. These policies are subject to change at the discretion of Power Computing, except that any changes in these policies will not apply to Hardware sold to customers prior to the effective date of any policy change. If you have any questions regarding these policies, please contact Power Computing Customer Service.
-
Page 21: Support Information
To contact Power Customer Service call (800) 671-6227, fax (512) 388-6798, or e-mail custserv@powercc.com and describe in detail any problems or issues you need resolved with respect to Power Computing. Be sure to include your order or quote number, serial number, and phone number with all correspondence. -
Page 22: Contacting Technical Support
Central Time). M – F 8 AM to 9 PM Technical For help with a tech- 1-800-708-6227 10 AM to 4 PM Support nical problem 10 AM to 4 PM xxii PowerCenter Pro User’s Guide For Technical Support, Call 1-800-708-6227... -
Page 23: Limited Warranty
Power Computing Corporation (“Power”) warrants the computer hardware delivered to you by Power (“Hardware”) against defects in components, materials and workmanship for a period of one year from the date of original purchase of the Hardware by the end user (proof of purchase required). -
Page 24: Obtaining Warranty Service
Some states do not allow the exclusion or limitation of incidental or consequential damages or exclusions of implied warranties, so the above limitations or exclusions may not apply to you. xxiv PowerCenter Pro User’s Guide For Technical Support, Call 1-800-708-6227... -
Page 25: Customer Satisfaction Guarantee
Note: The Customer Satisfaction Guarantee applies only to Hardware purchased directly from Power Computing. Hardware purchased from a reseller, dealer, or retailer is handled by that reseller, dealer, or retailer. If you did not purchase your Hardware directly from Power Computing, contact whoever you purchased your Hardware from for their terms and follow their procedures. - Page 26 7. Hardware received with any shipping charges due or after the tenth day after issuance of the RMA number will be refused by Power Computing and returned to the sender. We will also return any Hardware that is not in “like- new”...
-
Page 27: Apple Computer, Inc. System Software License Agreement
Apple Software, related documentation and fonts and all copies thereof. This License will terminate immediately without notice from Apple if you fail to comply with any provision of this License. Upon termination you must de- xxvii PowerCenter Pro User’s Guide For Technical Support, Call 1-800-708-6227... - Page 28 AND FITNESS FOR A PARTICULAR PURPOSE, ARE LIMITED IN DURATION TO NINETY (90) DAYS FROM THE DATE OF DELIVERY. THIS WARRANTY GIVES YOU SPECIFIC LE- GAL RIGHTS, AND YOU MAY ALSO HAVE OTHER RIGHTS WHICH VARY BY JURISDIC- TION. xxviii PowerCenter Pro User’s Guide For Technical Support, Call 1-800-708-6227...
- Page 29 REPRESENTATIVE HAS BEEN ADVISED OF THE POSSIBILITY OF SUCH DAMAGES. SOME JURISDICTIONS DO NOT ALLOW THE LIMITATION OR EXCLUSION OF LIABIL- ITY FOR INCIDENTAL OR CONSEQUENTIAL DAMAGES SO THE ABOVE LIMITATION OR EXCLUSION MAY NOT APPLY TO YOU. xxix PowerCenter Pro User’s Guide For Technical Support, Call 1-800-708-6227...
- Page 30 No amendment to or modification of this License will be binding unless in writing and signed by a duly authorized representative of Apple. Note: The Apple Software Registration Card is in the back of the manual. PowerCenter Pro User’s Guide For Technical Support, Call 1-800-708-6227...
-
Page 31: Chapter 1 Getting Started
Your computer has been designed for easy plug-and-play setup in four simple steps - if you are in need of technical assistance, after completing the setup process described in this chapter, please feel free to call Power Computing Technical Support at 1-800-708-6227. -
Page 32: Plugging In The Computer
CAUTION: Do not press the power switch on the front panel of the computer or the keyboard power switch until you have completed all of the setup instructions. 1. Place the computer in the location you have chosen. PowerCenter Pro User’s Guide For Technical Support, Call 1-800-708-6227... -
Page 33: Connecting The Monitor
A 4 MB VRAM video card is also available as an upgrade option from Power Computing. Video memory configurations on page 110 lists the various monitor sizes, resolutions, and number of colors supported for both the 2 MB and 4 MB video cards. PowerCenter Pro User’s Guide For Technical Support, Call 1-800-708-6227... - Page 34 ) or the Mac OS documentation that came with your system for additional information about using the M o n i t o r s and Sound control panel and the Control Strip. PowerCenter Pro User’s Guide For Technical Support, Call 1-800-708-6227...
- Page 35 1. Place the monitor on the location you have chosen. 2. If necessary, connect the power cord to the monitor. Some monitors have permanently attached power cords. 3. Plug the monitor power cable into a grounded, three-hole electrical outlet. PowerCenter Pro User’s Guide For Technical Support, Call 1-800-708-6227...
- Page 36 CAUTION: Do not connect monitors to both built-in video ports simultaneously. The internal video card will support only one output type at a time. PowerCenter Pro User’s Guide For Technical Support, Call 1-800-708-6227...
- Page 37 VGA port (the smaller of the two connectors). • Be sure to tighten the monitor cable connector screws that secure the monitor cable connector to the computer’s video monitor connector. PowerCenter Pro User’s Guide For Technical Support, Call 1-800-708-6227...
-
Page 38: Connecting The Mouse And Keyboard
1. Plug the mouse cable into one of the ADB ports on the keyboard. There is an ADB port at each end of the keyboard; use whichever one you prefer. keyboard ADB ports PowerCenter Pro User’s Guide For Technical Support, Call 1-800-708-6227... - Page 39 Getting Started 2. Plug the keyboard cable into the ADB port (marked with ) on the back of the computer. ADB port PowerCenter Pro User’s Guide For Technical Support, Call 1-800-708-6227...
-
Page 40: Turning The Computer On
See the documentation that came with the monitor for the location of the power switch. 2. Turn the computer on by pressing the keyboard power key (marked with a triangle) on the upper right corner of the keyboard. keyboard power key PowerCenter Pro User’s Guide For Technical Support, Call 1-800-708-6227... -
Page 41: Problems Starting Up
Adapters are available from most monitor vendors that allow the use of older Sync on Green monitors on your new Power Computing computer. PowerCenter Pro User’s Guide For Technical Support, Call 1-800-708-6227... - Page 42 Press the reset button on the front of the computer firmly and release it. reset button If these steps do not resolve the problem, see Chapter 4, Troubleshooting, on page 35 for additional help. PowerCenter Pro User’s Guide For Technical Support, Call 1-800-708-6227...
-
Page 43: Shutting Down The Computer
2. Press the p o w e r k e y on the keyboard. A Shut Down dialog box is displayed. Choose the Shut Down option by pressing the return key. PowerCenter Pro User’s Guide For Technical Support, Call 1-800-708-6227... - Page 44 Getting Started 3. In the unlikely event that the system does not respond to mouse movement or the keyboard, see Chapter 4, Troubleshooting, on page PowerCenter Pro User’s Guide For Technical Support, Call 1-800-708-6227...
-
Page 45: Chapter 2 Connecting Peripheral Devices
115/230 port port built-in VGA volt switch video port printer sound port in port external power sound AAUI SCSI port cord socket out port Ethernet port 10Base-T Ethernet port PowerCenter Pro User’s Guide For Technical Support, Call 1-800-708-6227... -
Page 46: Using Scsi Devices
SCSI port may be available on the back of your UltraSCSI PCI card. This connector supports wide SCSI devices. At this time, the use of the external UltraSCSI connector is not supported with the PowerCenter Pro computer. Using the external high-speed SCSI connector may lead to conflicts and performance issues with the internal drives. -
Page 47: Setting The Scsi Id
The important thing to remember is that each device must have an ID that is unique within its bus. If there is an ID conflict, your computer and the SCSI devices connected to it will malfunction. PowerCenter Pro User’s Guide For Technical Support, Call 1-800-708-6227... -
Page 48: Ensuring Proper Termination
Active termination is recommended for external SCSI chains, as it reduces noise and increases reliability. Devices located between the computer and the end of the chain must be unterminated. PowerCenter Pro User’s Guide For Technical Support, Call 1-800-708-6227... -
Page 49: Connecting The Device
25-pin connector on one end and a 50-pin connector on the other. For each additional cable, you need a cable with 50-pin connectors on both ends. The cables you use should be double-shielded and have PowerCenter Pro User’s Guide For Technical Support, Call 1-800-708-6227... - Page 50 Connecting an internal SCSI device You install internal SCSI devices in one of the computer’s internal storage bays. See Chapter 7, Installing Internal Drives, on page 85 for instructions on installing internal SCSI devices. PowerCenter Pro User’s Guide For Technical Support, Call 1-800-708-6227...
-
Page 51: Installing Software Device Drivers
), which can be used with a standard modem or the Apple GeoPort Telecom Adapter. The GeoPort Telecom Adapter offers advanced communications features not available with standard modems. It is available from authorized Apple dealers. PowerCenter Pro User’s Guide For Technical Support, Call 1-800-708-6227... -
Page 52: Connecting To A Network
Connecting to a Token Ring network You can connect to a Token Ring network by installing an expansion card and appropriate networking software. Token Ring cards and software are available from several vendors. PowerCenter Pro User’s Guide For Technical Support, Call 1-800-708-6227... -
Page 53: Using Audio Equipment
The following section gives general instructions for connecting an audio device. If you plan to connect a microphone or external speakers, read Connecting a microphone on page 25 or Connecting external speakers on page 24 later in this section. PowerCenter Pro User’s Guide For Technical Support, Call 1-800-708-6227... -
Page 54: Connecting External Speakers
2. Connect one end of the cable to the sound output port of the computer. 3. Connect the other end of the cable to the speakers. If necessary, use a Y-shaped adapter. PowerCenter Pro User’s Guide For Technical Support, Call 1-800-708-6227... -
Page 55: Connecting A Microphone
The computer requires the Apple PlainTalk Microphone, pictured below. PlainTalk software is required for voice commands. PlainTalk microphones and software are available from authorized Apple dealers. Other line-level microphones can be used for sound recording. PowerCenter Pro User’s Guide For Technical Support, Call 1-800-708-6227... -
Page 56: Playing Audio Cds On A Cd-Rom Drive
Computer Speaker Volume control CD-ROM Player front-panel CD-ROM drive front-panel volume Headphones connector ( control ( Computer rear panel Monitors and Sound control panel Sound Out Level control Sound Out port ( PowerCenter Pro User’s Guide For Technical Support, Call 1-800-708-6227... - Page 57 If you want to turn off the sound to the internal speaker, select the M u t e check box in the Computer Speaker Volume control. PowerCenter Pro User’s Guide For Technical Support, Call 1-800-708-6227...
-
Page 59: Chapter 3 Getting Started With Mac Os
By placing the tip of the mouse pointer over an icon and clicking twice quickly (double-clicking), you can open a folder or launch a program. PowerCenter Pro User’s Guide For Technical Support, Call 1-800-708-6227... -
Page 60: Using Online Help
OS is called Mac OS Guide and is available through the Guide menu (marked with To use the Mac OS Guide: 1. Choose Finder from the Application menu (in the upper-right corner of the desktop) to make it the active application. PowerCenter Pro User’s Guide For Technical Support, Call 1-800-708-6227... - Page 61 2. Choose Mac OS Guide from the Guide menu (marked with ) or press x x x x -shift-?. The Mac OS Guide window appears. 3. Follow the on-screen instructions to get the information you need. PowerCenter Pro User’s Guide For Technical Support, Call 1-800-708-6227...
-
Page 62: Shutting Down The Computer
S S S S l l l l e e e e e e e e p p p p 2. Press the p o w e r k e y on the keyboard. A Shut Down dialog box is displayed. PowerCenter Pro User’s Guide For Technical Support, Call 1-800-708-6227... -
Page 63: Sleep
To wake the system up, press the keyboard power key. Additional information about Mac OS For detailed information about the Mac OS, refer to the Mac OS manual that came with your system. PowerCenter Pro User’s Guide For Technical Support, Call 1-800-708-6227... -
Page 65: Chapter 4 Troubleshooting
Power Computing’s Technical Support Department. Power Computing Technical Support can be reached toll- free in the United States at 1-800-708-6227. Before contacting Technical Support, please be certain to follow the pre-contact instructions detailed in Technical Support Contact Information on page 56. -
Page 66: Restarting The Computer
Troubleshooting Restarting the computer You can eliminate some common problems by restarting the computer, which clears the computer’s memory. If the mouse is still working, choose R e s t a r t from the Special menu. If an error dialog box is displayed, it may have a Restart button. If the mouse is not working, try holding down the and control keys while pressing the keyboard power key. -
Page 67: The Monitor Is Dark After You Turn On The Computer
Troubleshooting If you cannot restart the computer from Mac OS, use the Reset button on the front panel. If the Reset button does not work, use the power button on the front panel to turn off the computer. Wait at least ten seconds before turning it back on. - Page 68 Troubleshooting 3. INSERT the Power Computing System Software CD. This CD contains a System Folder and tools that can be used to resolve your issue. The computer should present the “Happy Macintosh” and begin starting-up. If the computer does not begin booting from the Power CD, contact Power Technical Support for assistance.
-
Page 69: A Floppy Disk Icon With An X In It Appears
ID 0. If the hard disk does not appear in the HDT Primer window, contact Power Technical Support. Tip: The PowerCenter Pro has two SCSI buses. Hard Disk Toolkit•PE lists the bus and SCSI ID for all of the devices on both buses. The UltraSCSI bus is Bus 1;... -
Page 70: A Hard Disk Icon Does Not Appear On The Mac Os Desktop
Troubleshooting If you can start up from your Power Computing Mac OS CD-ROM, follow the steps under the previous section, Flashing question mark on start-up on page 37. A hard disk icon does not appear on the Mac OS desktop If the start-up hard disk is internal, restart your machine. -
Page 71: The Mouse Pointer Does Not Move When You Move The Mouse
Try using a different mouse or input device. If it works, there is a problem with the original mouse. Try starting up from the Power Computing Mac OS CD-ROM. If the mouse works, there is a problem with the system software on your normal start-up disk. -
Page 72: You See A Dialog Box With A Bomb
Troubleshooting Try starting up from the Power Computing Mac OS CD-ROM. If the keyboard works, there is a problem with the system software on your normal start-up disk. Reinstall the system software as described in Using the System Software installer on page 51. -
Page 73: Isolating System Software Issues
Troubleshooting Rebuild the desktop by restarting and holding down the and option keys. Answer Yes when the computer asks you if you want to rebuild the desktop. Turn on virtual memory to use some of the computer’s hard disk space as memory. - Page 74 Troubleshooting 2. Use the Extensions Manager to test the computer with Mac OS 7.6.x Base extensions only. The Extensions Manager is located in the Control Panels folder and can be accessed via the Apple menu. You can also access the Extensions Manager during startup by holding down the spacebar as the computer boots.
-
Page 75: Procedures Involved In Troubleshooting
Troubleshooting 6. If the issue seems related to a specific type of system software like printing software, CUSTOM RE-INSTALL that software as detailed in Custom install, starting on page 53. 7. If the issue seems to occur system-wide, regardless of the application you are using, or a re-installation of a suspect application did not fix the issue, CLEAN INSTALL the system software as detailed in Clean install, starting on page 54. -
Page 76: Starting Up From The Power Cd
Starting up from the Power CD In order to test the hard disk or reinstall system software, it is necessary to startup from the Power Computing System Software CD. There are two primary methods for booting from the Power CD:... -
Page 77: Using Disk First Aid
Troubleshooting 2. HOLD down the , Option , S h i f t , and D e l e t e keys on the keyboard all at the same time. key is also called the command or key on some keyboards. Tip: There are , Option, and Shift keys on both the left and right sides of the keyboard, these keys are identical in function. -
Page 78: Using Hard Disk Toolkit•Pe To Test And Repair Scsi Disks
Re-initializing the hard disk, starting on page 50. Using Hard Disk Toolkit• PE to test and repair SCSI disks Hard Disk Toolkit•PE is the formatting software Power Computing includes for formatting, initializing, and testing SCSI storage devices. Although most devices can be formatted by Hard Disk Toolkit•PE, it does not support all devices. - Page 79 If the drive fails, the actual hardware of the drive is most likely damaged, Contact Power Computing Technical Support for further assistance. PowerCenter User’s Guide For Technical Support, Call 1-800-708-6227...
- Page 80 Troubleshooting Re-initializing the hard disk If the low level data on your hard disk becomes corrupted and cannot be repaired by Disk First Aid or another drive maintenance program, it may be necessary to remove all software from the hard drive to eliminate the data corruption.
-
Page 81: Using The System Software Installer
Troubleshooting Using the System Software installer The System Software installer can be used to refresh an old System Folder with a new copy of the system software. The installer allows for both “easy” and custom installs. Either of these install types can be used to update the existing System Folder or to create a whole new System Folder altogether. - Page 82 Troubleshooting 4. When the installer is open you will be presented with a welcome screen followed immediately by the following screen listing the following four steps. 5. Follow the four Mac OS Install steps. Click on the icon associated with each step to perform that operation. The steps will lead you through reading the readme file, updating your hard disk driver, choosing a disk for installation, and installing the system software.
- Page 83 Troubleshooting Easy install In most cases, you will want to do an easy install when re-installing system software. This allows the computer to determine which components are appropriate for your computer and install them for you. The easy install is the default of the system software installer.
- Page 84 Troubleshooting Clean install A clean install of the system software disables the existing System Folder, re- naming it “Previous System Folder”, and creates a fresh System Folder on the hard drive. A clean installation of the system software does not delete or erase any of the software on your hard drive.
-
Page 85: Rebuilding The Desktop File
Troubleshooting 6. Follow the on-screen instructions for completing the system software installation. After the clean installation, you will have a new System Folder containing only the licensed Apple system software, and a Previous System Folder which contains all your old system software. Because the new System Folder contains only Apple system software, non-Apple peripherals which require their own drivers will not function until the driver is reinstalled. -
Page 86: Resetting (Zapping) The Pram
Technical Support Contact Information Our goal at Power Computing is to provide you with the most accurate technical support possible. Please collect the following information before calling. It will enable us to diagnose and resolve your issue as quickly and efficiently as possible. - Page 87 Troubleshooting Back Up and Save. It is always a good idea to back up and save your information prior to calling Power’s technical support team. Be in front of the computer when you call. In some cases in depth troubleshooting may be required to identify the issue you are experiencing.
- Page 88 Troubleshooting Isolate your computer. Your technician may ask you to disconnect external devices, such as scanners and printers in an effort to isolate the issue to its true source. Isolating your computer prior to contacting Power Technical Support will help facilitate the resolution of the issue you are experiencing in a timely manner.
-
Page 89: Chapter 5 Installing Pci Expansion Cards
For example you can increase processing power, improve graphics and video performance, or add networking and communications capabilities. The PCI riser card allows you to install up to three standard PCI cards. riser card PowerCenter Pro User’s Guide For Technical Support, Call 1-800-708-6227... -
Page 90: Required Tools
CAUTION: If an anti-static grounding strap was supplied with the expansion card or other device that you are installing, put it on and ground it as directed by the device’s instructions before touching any components inside the computer. PowerCenter Pro User’s Guide For Technical Support, Call 1-800-708-6227... -
Page 91: How To Remove The Cover
4. Rotate the computer so that its back panel faces you. 5. Remove the screws and cover as follows: If you have a Minitower chassis 1. Remove the four large thumb screws from the rear of the computer cover. PowerCenter Pro User’s Guide For Technical Support, Call 1-800-708-6227... - Page 92 3. Gently, but firmly, pull apart the bottom corners of the cover, pull the cover toward you slightly, lift it off and set it aside. PowerCenter Pro User’s Guide For Technical Support, Call 1-800-708-6227...
- Page 93 These Phillips-head screws are for the base only; don’t use the Phillips screws for the cover, or the thumb screws for the base. Phillips- head screws 6. Remove the Minitower base and set it aside. PowerCenter Pro User’s Guide For Technical Support, Call 1-800-708-6227...
- Page 94 If necessary, use a small coin or a flat-bladed screwdriver to loosen the screws. 2. Gently, but firmly, pull apart the bottom corners of the cover, pull the cover toward you slightly, lift it off and set it aside. PowerCenter Pro User’s Guide For Technical Support, Call 1-800-708-6227...
- Page 95 To replace the cover, reverse the cover-removal steps and re-connect everything. CAUTION: Be careful not to get any cables caught in the cover or the fan housing when you put it back on the computer. PowerCenter Pro User’s Guide For Technical Support, Call 1-800-708-6227...
-
Page 96: Installing Expansion Cards
The system must be plugged in (see step 1 on page 61) for this to work. CAUTION: Use an anti-static grounding strap and handle cards by the non- metallic edges only. 2. Select an unoccupied slot on the riser card. PowerCenter Pro User’s Guide For Technical Support, Call 1-800-708-6227... - Page 97 4. Remove the card from its static-proof bag. Hold the card by its non-metallic edges and its metal bracket to avoid touching components or contacts on the board. PowerCenter Pro User’s Guide For Technical Support, Call 1-800-708-6227...
- Page 98 • the slot cover on the card lines up with the slot on the back panel • the slot cover tongue fits into the groove at the base of the slot. socket groove slot connector tongue slot cover slot cover screw PowerCenter Pro User’s Guide For Technical Support, Call 1-800-708-6227...
- Page 99 CAUTION: Be careful not to get any cables caught in the cover or the fan housing when you put it back on the computer. WARNING! To prevent electrical shock, always replace the cover before turning on the computer. PowerCenter Pro User’s Guide For Technical Support, Call 1-800-708-6227...
-
Page 101: Chapter 6 Adding Memory
Please call technical support at 1-800-708-6227 for additional information about this or any other warranty question. PowerCenter Pro User’s Guide For Technical Support, Call 1-800-708-6227... -
Page 102: How To Remove The Cover
4. Rotate the computer so that its back panel faces you. 5. Remove the screws and the cover as follows: If you have a Minitower chassis 1. Remove the four large thumb screws from the rear of the computer cover. PowerCenter Pro User’s Guide For Technical Support, Call 1-800-708-6227... - Page 103 3. Gently, but firmly, pull apart the bottom corners of the cover, pull the cover toward you slightly, lift it off and set it aside. PowerCenter Pro User’s Guide For Technical Support, Call 1-800-708-6227...
- Page 104 These Phillips-head screws are for the base only; don’t use the Phillips screws for the cover, or the thumb screws for the base. Phillips- head screws 6. Remove the Minitower base and set it aside. PowerCenter Pro User’s Guide For Technical Support, Call 1-800-708-6227...
- Page 105 If necessary, use a small coin or a flat-bladed screwdriver to loosen the screws. 2. Gently, but firmly, pull apart the bottom corners of the cover, pull the cover toward you slightly, lift it off and set it aside. PowerCenter Pro User’s Guide For Technical Support, Call 1-800-708-6227...
- Page 106 To replace the cover, reverse the cover-removal steps and re-connect everything. CAUTION: Be careful not to get any cables caught in the cover or the fan housing when you put it back on the computer. PowerCenter Pro User’s Guide For Technical Support, Call 1-800-708-6227...
-
Page 107: Removing And Installing Ram
Removing and Installing RAM What you need to know about adding RAM The computer has four DIMM slots on the motherboard, near the front panel, (see the illustration below). front panel motherboard DIMM slots PowerCenter Pro User’s Guide For Technical Support, Call 1-800-708-6227... - Page 108 CAUTION: Handle DIMMs by the ends and avoid touching their contacts or other metal components. CAUTION: Always store DIMMs in static-resistant bags. Take your time; don’t hurry. PowerCenter Pro User’s Guide For Technical Support, Call 1-800-708-6227...
-
Page 109: Prepare The Computer
The system must be plugged in (see step 1 on page 72) for this to work. CAUTION: Use an anti-static grounding strap and handle memory modules by the non-metallic edges only. PowerCenter Pro User’s Guide For Technical Support, Call 1-800-708-6227... -
Page 110: Removing A Dimm
CAUTION: Be careful not to get any cables caught in the cover or the fan housing when you put it back on the computer. PowerCenter Pro User’s Guide For Technical Support, Call 1-800-708-6227... -
Page 111: Inserting A Dimm
Notice that there are two notches in the contact edge of the DIMM module. 2. Lower the DIMM squarely to the slot so that the notches line up with the raised key areas of the DIMM socket. PowerCenter Pro User’s Guide For Technical Support, Call 1-800-708-6227... -
Page 112: If The New Ram Doesn't Work
About This Macintosh… . If a particular module consistently fails to show up, it may be defective or simply incompatible with your computer. PowerCenter Pro User’s Guide For Technical Support, Call 1-800-708-6227... - Page 113 Double-check the information that came with your memory module against the memory specifications listed in RAM configurations on page 110 to make sure you are installing compatible RAM. If the RAM is defective, return it to your vendor for replacement. PowerCenter Pro User’s Guide For Technical Support, Call 1-800-708-6227...
-
Page 115: Chapter 7 Installing Internal Drives
2. Preparing the computer and inserting the drive (page 90). 3. Installing any required software drivers (page 102). Required tools A small regular (slot-head) screwdriver or a small coin A small Phillips-head screwdriver PowerCenter Pro User’s Guide For Technical Support, Call 1-800-708-6227... -
Page 116: Preparing The Drive
SCSI drives must be set up before they are installed. Drive set up involves setting the SCSI ID, checking termination, and, if you’re installing a 3.5-inch drive in a 5.25-inch drive bay, installing a drive bay adapter. PowerCenter Pro User’s Guide For Technical Support, Call 1-800-708-6227... -
Page 117: Set The Scsi Id
H D T P r i m e r ™ P E . HDT Primer will scan your SCSI buses and display the Bus number (0 or 1), the SCSI ID, name, and other parameters of all of the SCSI devices on the bus (see example below). PowerCenter Pro User’s Guide For Technical Support, Call 1-800-708-6227... - Page 118 Installing Internal Drives The 20 MB per second UltraSCSI bus is Bus 1; the conventional 5 MB per second SCSI bus is Bus 0. PowerCenter Pro User’s Guide For Technical Support, Call 1-800-708-6227...
- Page 119 2. If you are installing a 3.5-inch drive in a 5.25-inch drive bay, install a 3.5-inch drive in a 3.5 to 5.25-inch adapter. 3.5 to 5.25-inch adapters are available at most computer parts stores. 3.5-inch to 5.25- inch drive adapter PowerCenter Pro User’s Guide For Technical Support, Call 1-800-708-6227...
-
Page 120: Preparing A Minitower System
floppy disk drive, the hard drive and the CD- ROM drive which come with the system. The location of the available 5.25- inch bays on the Minitower system is shown below. available 5.25- inch drive bays PowerCenter Pro User’s Guide For Technical Support, Call 1-800-708-6227... - Page 121 Installing Internal Drives The available Minitower 3.5-inch drive bay is above the floppy disk drive. available 3.5- inch drive bay floppy disk drive PowerCenter Pro User’s Guide For Technical Support, Call 1-800-708-6227...
- Page 122 Leaving the computer plugged in ensures that it is grounded. 2. Disconnect everything but the power cord from the back of the computer. 3. Rotate the computer so that its back panel faces you. PowerCenter Pro User’s Guide For Technical Support, Call 1-800-708-6227...
- Page 123 5. Gently, but firmly, pull apart the bottom corners of the cover, pull the cover toward you slightly, lift it off and set it aside. PowerCenter Pro User’s Guide For Technical Support, Call 1-800-708-6227...
-
Page 124: Inserting A Drive Into A Minitower System
If the drive must be front-accessible or has a faceplate which should be visible, you must remove the CD-ROM drive and install the new drive from the front. If you don’t remove the CD-ROM drive, skip to Front access on page 97. PowerCenter Pro User’s Guide For Technical Support, Call 1-800-708-6227... - Page 125 Installing Internal Drives 1. To remove the CD-ROM drive, first disconnect the sound, SCSI, and power connectors from the rear of the drive. sound power SCSI connector connector connector PowerCenter Pro User’s Guide For Technical Support, Call 1-800-708-6227...
- Page 126 find them later. Note: These screws are different from the four thumbscrews which hold the cover on; keep them separate. 3. Slide the CD-ROM drive out through the front of the chassis. PowerCenter Pro User’s Guide For Technical Support, Call 1-800-708-6227...
- Page 127 If you don’t need front access, skip to step 6 on page 100. PowerCenter Pro User’s Guide For Technical Support, Call 1-800-708-6227...
- Page 128 If the drive you are installing doesn’t use removable media, do not remove the metal plate or the plastic filler panel. metal plate PowerCenter Pro User’s Guide For Technical Support, Call 1-800-708-6227...
- Page 129 firmly on the middle of the plastic insert to pop it out the front of the computer. The plastic insert is very flexible and should pop out quite easily. plastic filler panel PowerCenter Pro User’s Guide For Technical Support, Call 1-800-708-6227...
- Page 130 Install the drive so that it faces up; if it isn’t clear which way the drive should face (e.g., hard drives), assume that the connectors should be in the back and that the SCSI connector key should face up. PowerCenter Pro User’s Guide For Technical Support, Call 1-800-708-6227...
-
Page 131: Hard Drive
(see the illustration above). PowerCenter Pro User’s Guide For Technical Support, Call 1-800-708-6227... -
Page 132: Install Software Drivers
Some SCSI devices require special software called device drivers to operate with your computer. If a device driver is required, it is normally supplied with the device; if you are unsure whether one is required, contact the PowerCenter Pro User’s Guide For Technical Support, Call 1-800-708-6227... -
Page 133: If The Drive Doesn't Work
SCSI chain. The only internally-terminated device on the internal SCSI chain should be the pre-installed CD-ROM drive. 8. Replace the cover on the computer, replace and tighten the thumb screw(s), re-connect the external cables, and restart the computer. PowerCenter Pro User’s Guide For Technical Support, Call 1-800-708-6227... - Page 134 CAUTION: Be careful not to get any cables caught in the cover or the fan housing when you put it back on the computer. If these steps do not correct the problem, contact the drive manufacturer or Power Computing Technical Support at 1-800-708-6227 for assistance. PowerCenter Pro User’s Guide For Technical Support, Call 1-800-708-6227...
-
Page 135: Safety Instructions
No set of guidelines can cover every situation, but if you follow a few common-sense suggestions, you can prevent the eye fatigue and musculoskeletal discomfort sometimes experienced by computer users. PowerCenter Pro User’s Guide For Technical Support, Call 1-800-708-6227... - Page 136 Do not place your wrists on the hard edge of your table. Use a wrist pad. Sit up straight in your chair. Slouching puts unnecessary strain on your back. Do not strike the keys any harder than necessary. PowerCenter Pro User’s Guide For Technical Support, Call 1-800-708-6227...
-
Page 137: Specifications
Technical Information Appendix This appendix contains technical information and specifications for the Minitower and Low-Profile PowerCenter Pro 604e/180 and 604e/210 systems. Specifications Processor (upgradeable via daughtercard) Minitower/Low-Profile Model 604e/180 PowerPC 604e at 180 MHz Minitower/Low-Profile Model 604e/210 PowerPC 604e at 210 MHz... - Page 138 Horizontal refresh rate up to 75 Hz On-the-fly resolution switching 2 MB EDO RAM standard video 4 MB EDO RAM video riser card available from Power Computing as an option 3 PCI slots available for enhanced-performance cards Audio system...
- Page 139 0.5 A 0.35 A +3.3 V 15 A 10 A Clock and calendar CMOS circuitry with long-life 3.6-volt lithium battery (1/2 AA cell) Keyboard and mouse Supports all ADB-compatible keyboards and mice PowerCenter Pro User’s Guide For Technical Support, Call 1-800-708-6227...
-
Page 140: Ram Configurations
Weight: 21 lb (9.5 kg) RAM configurations The PowerCenter Pro has four slots for memory modules (or DIMMs). The computer will work with a number of different memory configurations, from a minimum of 8 MB to a maximum of 512 MB. Follow these guidelines when configuring your system’s RAM:... -
Page 141: Monitor Resolution/Color Tables
1280 X 1024 Thousands Power requirements Apple Desktop Bus Maximum power draw for all devices: 500 mA Mouse power: up to 10 mA Keyboard power: 25–80 mA (depending on keyboard model) PowerCenter Pro User’s Guide For Technical Support, Call 1-800-708-6227... - Page 142 PCI cards total +12 V 2.5 A 30 W (3 slot maximum) -12 V 0.5 A +5 V 4.5 A 22.5 W Internal storage +12 V 1.7 A 20 W device PowerCenter Pro User’s Guide For Technical Support, Call 1-800-708-6227...
- Page 143 PCI cards total +12 V 1.7 A 20 W (3 slot maximum) -12 V 0.35 A 4.2 W +5 V 4.0 A 20 W Internal storage +12 V 1.7 A 20 W device PowerCenter Pro User’s Guide For Technical Support, Call 1-800-708-6227...
-
Page 145: Appendix C Regulatory Information
If your computer system does cause interference to radio or television reception, try to correct the interference by using one or more of the following measures: PowerCenter Pro User’s Guide For Technical Support, Call 1-800-708-6227... -
Page 146: Doc Statement
Observation des normes—Classe B Cet appareil numérique respecte les limites de bruits radioélectriques applicables aux appareils numériques de Class B prescrites dans la norme sur le matériel brouilleur: “Appareils Numériques”, NMB-003 édictée par le ministre des Communications. PowerCenter Pro User’s Guide For Technical Support, Call 1-800-708-6227... -
Page 147: Cd-Rom Drive
ATTENTION! Il y a danger d’explosion s’il y a remplacement incorrect de la batterie. Remplacer uniquement avec une batterie du méme type ou d’un type recommandé par le constructer. Mettre au rébut les batteries usagées conformément aux instructions du fabricant. PowerCenter Pro User’s Guide For Technical Support, Call 1-800-708-6227... -
Page 148: For Use In European Countries
Regulatory Information For use in European countries Use an HAR approved power cord with proper plug configuration. Bitte nur mit zugelassener HAR-Stromkabel benutzen. PowerCenter Pro User’s Guide For Technical Support, Call 1-800-708-6227... -
Page 149: Hard Disk Toolkit•Personal Edition Reference Guide
Print the software serial number here: RB290343999 ™ Hard Disk ToolKit•Personal Edition Reference Guide 970420... - Page 150 FWB. © 1996, 1997 FWB Software, LLC; © 1997 Power Computing Corporation. All rights reserved. April, 1997...
- Page 151 End-User Software License Agreement DO NOT USE THIS SOFTWARE UNTIL YOU HAVE CAREFULLY READ THIS AGREEMENT AND AGREE TO THE TERMS OF THIS LICENSE. BY USING THE ENCLOSED SOFTWARE, YOU ARE AGREEING TO THE TERMS OF THIS LICENSE. The software license agreement for this program is included in this manual so you can read it before installing the program.
- Page 152 NINETY (90) DAYS FROM THE DATE OF THE ORIGINAL RETAIL PURCHASE OF THIS PRODUCT. The warranty and remedies set forth above are exclusive and in lieu of all others, oral or written, expressed or implied. No FWB dealer, representative, agent, or employee is authorized to make any modification, exten- sion, or addition to this warranty.
-
Page 153: Introduction
I n t r o d u c t i o n Additional Documentation This manual is an abbreviated version of the Hard Disk ToolKit•Personal Edition User Guide. A full version of that manual is found on your hard drive and on the . -
Page 154: Before You Begin
FWB Software currently offers a support package that allows recipients of bundled software to receive FWB’s top-rated technical support and FWB’s latest version for a small registration fee. Please contact FWB for more information. Before you begin Before using Hard Disk ToolKit•Personal Edition, you should be familiar with the Mac OS. -
Page 155: Maintaining Data Integrity
Hard Disk ToolKit• Personal Edition ’s software modules The Hard Disk ToolKit•Personal Edition software package includes two separate applications: • Hard Disk ToolKit•PE • FWB Mounter The features of each of these applications are described within this man- ual. The HDT•PE software package also includes two System Extensions and two specialized data files. -
Page 157: Installing And Removing
I n s t a l l i n g a n d R e m o v i n g H a r d D i s k T o o l K i t • P E Your OEM version of Hard Disk ToolKit•Personal Edition is on the CD- ROM that came with your system and is ready to run. - Page 158 The Hard Disk ToolKit•PE folder on the CD-ROM contains the files in the following table: Module Name Location Purpose Hard Disk ToolKit• PE Hard Disk ToolKit• PE folder This is the main application of the HDT• PE software package. It formats, initializes, and partitions SCSI &...
- Page 159 For instructions on how to start you computer from the Power CD, follow the instructions in Starting Up from the CD-ROM elsewhere in your Power Computing User’s Guide. If you wish to reformat or auto initialize your current system startup disk, then first back up all its valuable data to another medium, and restore it...
- Page 160 To install Hard Disk ToolKit•PE only: Note: To install Hard Disk ToolKit•PE along with the system software, follow the instructions in Installing System Software in your Power Computing User’s Guide). 1. Insert the Power CD into your CD-ROM drive. 2. Open the Utilities folder on your Power CD.
-
Page 161: An Overview Of Hard Disk Toolkit• Pe
A n O v e r v i e w o f H a r d D i s k T o o l K i t • P E Hard Disk ToolKit•Personal Edition is a powerful application that formats and partitions SCSI and IDE storage devices. -
Page 162: The Selector Window: Hard Disk Toolkit•Pe's Main Screen
The Selector Window: Hard Disk ToolKit• PE ’s Main Screen The main screen of Hard Disk ToolKit•PE is referred to as the Selector window. Devices must be selected within it before any of HDT•PE’s pri- mary functions can be used. All devices attached to all SCSI and IDE buses are listed in the Selector window. - Page 163 Table 1. Parts of the Selector window. Name Function Column headings Column headings describe the data that appear directly underneath them. Change the sort order by clicking on a different column heading. 2 2 2 2 Device list All SCSI and IDE devices installed on all native and/or installed SCSI /IDE buses are listed and include information on capacity, volume(s), manufacturer, model number, and more.
- Page 164 Table 2. The Hard Disk ToolKit•PE toolbar buttons. Button Name Function Get Info Opens a dialog box that contains detailed information about the device that has been selected. Security Add password protection to volume(s) on the selected device. Test Test selected device for defects. Auto Initialize Begin an automated formatting and partitioning process on the device(s) selected in the Selector window.
-
Page 165: The Partition List Window
cated free space is displayed in parentheses, to let you know that you can create more volumes on the device. (On a removable media device, this field is empty if a cartridge is not inserted. A newly formatted drive that has not yet been initialized will have a capacity figure slightly NOTE higher than the free space figure because the driver takes up space on the disk that cannot be used to create volumes. - Page 166 window). The address of the device is listed in the Partition List window’s title bar. Figure 7.4: The Partition List window. Notice that the bus and ID information for the device is displayed in the title bar. Every storage device must have a Partition Map, driver partitions, and at least one Mac OS partition created for general storage before any vol- ume(s) can be mounted to the Desktop.
- Page 167 Four fields appear at the top of the Partition List window. • Capacity The total capacity of the storage mechanism as specified by its manufacturer. • Unallocated The amount of unallocated, free space on the storage device. • # of Partitions The total number of partitions on the storage device.
- Page 168 • Resize Volume The size of existing volumes of the Simple HFS type can be increased or decreased—without data loss. For more information on this feature, see Resizing volumes in the online manual. • Delete A volume’s partition can be deleted by selecting it in the Partition List window and then clicking Delete.
-
Page 169: Using Hard Disk Toolkit• Pe
U s i n g H a r d D i s k T o o l K i t • P E This chapter assumes that external SCSI devices have been installed according to their manufacturers’ instructions. If you are a new user to this version of Hard Disk ToolKit•PE, then we rec- ommend that you read Chapter 3, An Overview of Hard Disk Tool- Kit•PE,”... - Page 170 Hard Disk ToolKit•Personal Edition cannot format or partition the startup drive or a drive NOTE from which it has been launched. In addition, for HDT•PE to start, the Device Data file and the Device Data ATA file must be in the same folder as the HDT•PE application. Hard Disk ToolKit•...
-
Page 171: Auto Initializing A Disk Device
Should I use Format or Auto Initialize? Auto Initialize is the easiest and most automated way to prepare your SCSI and IDE disk devices. Auto Initialize will: • erase any existing data on the selected device • install the driver •... - Page 172 Hard Disk ToolKit•PE’s Auto Initialize command overwrites all previously existing data on the drive. Be sure that you have backed up all valuable data on the drive before performing an Auto Initialize operation. To auto initialize a drive: Back up all valuable data before proceeding! Auto Initialize will write over the contents of the entire disk.
- Page 173 • Verify After Formatting: If this checkbox is enabled, Hard Disk ToolKit•PE will verify that all blocks on the disk are free of errors. This option causes the format to take more time. If a bad block is encountered, the Auto Initialize is stopped and a warning message will appear.
-
Page 174: Formatting A Disk Device
A message box appears that says the Auto Initialize completed suc- cessfully. 6. Click OK to return to the Selector window. The device’s entire capacity has been partitioned into volumes of the maximum possible size. Different versions of the Mac OS support different maximum volume sizes. For more NOTE information, refer to Maximum volume sizes in the online manual. - Page 175 blocks of the disk device, where the partition map and device drivers are normally located. The partition map contains information about the location of each file on your disk. STOP Hard Disk ToolKit•PE’s Low Level Format maps out the entire disk device’s magnetic media into error-free sectors, zones, and tracks.
- Page 176 To format a device: Back up all valuable data before proceeding! Formatting will write over the contents of the entire disk. 1. In the Selector window, select the device to be formatted. 2. From the Devices menu, choose Format. The Format Device dialog box appears (Figure 7.8).
- Page 177 free of defects immediately after the format process completes. If a bad block is encountered, the verify is stopped and a warning message appears. This option will make the format take more time, but can be useful when reformatting older or suspect drives.
- Page 178 A message box appears that says the format completed successfully. 6. Click OK. The Create New Volume dialog box appears (Figure 7.10). Figure 7.10: The Create New Volume dialog box. By default, the settings create an Apple HFS volume of the maxi- mum possible size.
- Page 179 If the volume you specified does not use all the space on the drive, then a warning box appears that says you can create additional vol- umes at a later time (Figure 7.11). Figure 7.11: The unused free space warning box.
- Page 180 Figure 7.12 shows an example of a device that had part of its capacity par- titioned into a mountable volume. Unallocated free space Figure 7.12: The amount of unallocated free space on a device appears in parentheses under the Capacity heading. If you are unable to Format or Auto Initialize a device, it may be because the HDT•PE NOTE application does not have enough free RAM to work with.
-
Page 181: Viewing And Modifying A Device's Partitioning Scheme
Viewing and Modifying a Device’s Partitioning Scheme You can view the partitioning scheme of a disk that has been formatted or auto initialized, or that has had an FWB driver installed onto it by HDT•PE. This information is presented in the Partition List dialog box. You may want to view the partitioning scheme: •... -
Page 182: Updating A Device's Driver
Updating a Device’s Driver The hard drive in your Power Computing computer was initialized with the latest FWB hard disk driver. You do not need to update your hard disk driver on preinstalled drives. If you are using a SCSI hard drive which has an older FWB Hard Disk ToolKit PE™... - Page 183 3. The Save Device Test Log File dialog box appears. Figure 7.13: Save Log File dialog box. 4. Click Save to proceed with the test. A status box appears. A message box appears when the test is complete that indicates if any bad blocks were found and reallocated during the test.
- Page 184 You can use any standard text editor (such as SimpleText or Microsoft Word ) to view the log file (Figure 7.14): ™ Figure 7.14: The Test feature log file. Hard Disk ToolKit• Personal Edition Reference Guide...
-
Page 185: Compatibility Notes & Troubleshooting
C o m p a t i b i l i t y N o t e s & T r o u b l e s h o o t i n g Compatibility Notes Table 5. Compatibility Notes Item Description Limited block size for some... -
Page 186: Troubleshooting
Table 5. Compatibility Notes Item Description Stacker 1.x and 2.x The FWB driver in this release is now compatible with Stacker 1.x and 2.x on systems using SCSI Manager 4.3.1 (or later), but only on the main SCSI bus (i.e., the internal bus on dual bus systems, e.g., Quadra 950, Power Macintosh 8100, or the standard bus on other Macintoshes). - Page 187 Table 1. Troubleshooting Problem/Question Potential Cause Solution I’m having trouble Your device might be having SCSI For advice on solving SCSI problems, see the table entry “Hard accessing partitions on a problems. Disk ToolKit•PE does not recognize a device on the SCSI bus device, and my system after bus rescan.”...
- Page 188 Table 1. Troubleshooting Problem/Question Potential Cause Solution Hard Disk ToolKit• PE does Is the device getting power? Check the power indicators on the device. For example, for an not recognize a device on internal hard disk, you should see the LED turn on (if it is the SCSI bus after bus externally visible) and hear the drive spinning up.
- Page 189 Table 1. Troubleshooting Problem/Question Potential Cause Solution I’m having problems You might not have enough “contiguous Take the following steps. Try installing the driver after each updating or installing a free space,” or unpartitioned space, to step. driver. install the driver. NOTE: Back up your data before you begin.
- Page 190 Table 1. Troubleshooting Problem/Question Potential Cause Solution I’m having trouble testing HDT• PE needs more memory. Increase the HDT• PE application’s memory size by using Get a device. Info from the Finder File Menu. Your device might have SCSI problems, For advice on solving SCSI problems, see the table entry “Hard such as improper termination, loose Disk ToolKit•PE does not recognize a device on the SCSI bus...
- Page 191 Table 1. Troubleshooting Problem/Question Potential Cause Solution The computer does not Your hard disk may have been incorrectly Check your cabling. For advice on solving SCSI problems, see boot up (question mark terminated. the table entry “Hard Disk ToolKit•PE does not recognize a icon displays).
-
Page 193: Cd-Rom Toolkit Reference Guide
Write the product serial number here: MA291475999 CD-ROM ToolKit ™ Reference Guide 970420... - Page 194 FWB. © 1996, 1997 by FWB Software, LLC; © 1997 Power Computing Corporation. All rights reserved. April, 1997...
- Page 195 End-User Software License Agreement DO NOT USE THIS SOFTWARE UNTIL YOU HAVE CAREFULLY READ THIS AGREEMENT AND AGREE TO THE TERMS OF THIS LICENSE. BY USING THE ENCLOSED SOFTWARE, YOU ARE AGREEING TO THE TERMS OF THIS LICENSE. The software license agreement for this program is included in this manual so you can read it before installing the program.
- Page 196 defect, error, or omission in the diskette, manual, or software or from any other events including, but not limited to, any interruption of service, loss of business, loss of profits or good will, legal action or any other consequential damages. The user assumes all responsibility arising from the use of this software. FWB’s lia- bility for damages to you or others will in no event exceed the total amount paid by you for this software.
-
Page 197: Quick Start
Q u i c k S t a r t This chapter provides a minimal outline for how to install CD-ROM ToolKit. Since CD-ROM Toolkit comes installed on your startup drive, you should not have to install it unless it has become damaged or been deleted In the online manual found on the P o w e r C D in the Bundled Software folder under CD-ROM Toolkit, you will find a complete guide to installation in the, CD-ROM Toolkit User Guide, in Chapter 3, Installing CD-ROM ToolKit. - Page 198 9. You have seven options: a. Select Easy Install to install everything on the application disk. b. Select Custom Install to install only the files you specify. c. Select Remove to remove earlier versions of CD-ROM ToolKit. d. Click Switch Disk to install on a disk other than your default drive. e.
-
Page 199: How To Use Cd-Rom Toolkit
H o w T o U s e C D - R O M T o o l K i t Overview CD-ROM Drive Setup screen Table 5: Name Function Display Non-CD’s Checked means all devices attached to your system will show on the Device List (item 4). Unchecked means only CD-ROM drives will show. -
Page 200: Opening Cd-Rom Toolkit
Table 5: Name Function Device List Shows the following: • Icons of the devices attached to your system. • CDT Enabler Switches: On indicates you want the CDT driver to support the selected CD-ROM drive at startup. Fast enables use of CDT’s caching features. •... - Page 201 Double-clicking on a CD-ROM drive in the Devices List will also take you to Setup. NOTE Figure 1. CD-ROM ToolKit Drive Setup features screen: Cache Setup feature Many options within the Setup features are controlled by checkboxes. These act as toggle switches to enable or disable feature options.
- Page 202 Setup feature All Setup features have Default, Cancel and OK button options. • Click Default to return feature options in the current screen to their original CDT settings. • Click Cancel to leave Setup Features, leaving all options unchanged. • Click OK to save your changes to the feature options. Drive Setup features are discussed in detail in the online CD-ROM Toolkit User Guide.
- Page 203 A cache is a temporary storage area for information used frequently by your system. Cache stores data that has been gathered from your CD-ROM into RAM or to your hard disk. Acceleration results from the fact that your system is able to find and supply data from RAM and your hard disk much faster than it can from a CD-ROM.
- Page 204 Prescan Figure 3. Prescan options A system can retrieve information from a hard disk much faster than it can from a CD. This is NOTE one of the primary acceleration techniques used by CDT. Select the Prescan icon to cache specific types of information from a CD to a hard drive.
- Page 205 More detail about prescan options is found in Chapter 4 of the online CD-ROM Toolkit User NOTE Guide. Mounting Figure 4. Mounting options Select the Mounting icon to allow the Macintosh to recognize CDs that are in formats other than Apple’s standard Hierarchical File System (HFS) for- mat.
- Page 206 General recommendations: • Use this option only when you want to mount and use PC-formatted data that is on a disc employing both Macintosh and PC formats. Note that application programs on PC-based volumes are not written to run on the Macintosh. You will need PC emulator software or a DOS card in order to run PC-based programs.
- Page 207 Disabled Click the Disabled button to turn Read Ahead off. Disable Read Ahead for titles that require a constant data flow, such as those that use QuickTime™. General recommendations: • Select Disabled for multimedia CDs with lots of QuickTime. This includes games, interactive educational CDs, multimedia encyclopedias, and Enhanced CDs, like CD Extra and ActiveAudio.
-
Page 208: How To Use Cdt Remote
H o w T o U s e C D T R e m o t e Overview Some initial facts CDT Remote is designed to look like a standard remote control for a home stereo. To use it you need the following: Table 6: Requirement Detail... - Page 209 The CD-ROM ToolKit Installer places CDT Remote in a folder you specify at installation. It puts an alias in the Apple Menu Items folder. The Remote Player Table 7: Name Function Elapsed Time Window Shows the current track number and either the elapsed or remaining time on the track Play Starts playing the CD at the track displayed in the Elapsed Time Window.
- Page 210 Table 7: Name Function Eject Stops play and ejects the disc. You also can eject by dragging the disc to Trash. Time Toggles between elapsed time and remaining time in the Elapsed Time Window. Shuffle Randomly rearranges the order of play. Audio Controls the delivery of audio.
- Page 211 You have four views to choose from: Figure 6. The four views of CDT Remote 1. CDT Remote standard view. 2. CDT Remote at the first level of Show Fewer Controls. 3. CDT Remote at the second level of Show Fewer Controls. 4.
-
Page 212: Playing Audio Discs With Cdt Remote
Traditional audio CDs contain only audio tracks. Multimedia and Enhanced audio CDs are not encoded in the same way as traditional audio CDs. They contain digital data as well as audio tracks. On multimedia CDs, track 1 is reserved for data. The audio tracks always start after track 1. If a player is not equipped to handle multimedia CDs, it may try to play the data and could cause speaker damage. - Page 213 If you are not getting any sound, verify the following: Table 8: Check Detail Is your volume high enough? • Is it high enough on the remote control? • Is it high enough in the Sound Control Panel under Sound Out? (internal CD-ROM drives with internally connected speakers only) •...
-
Page 214: Troubleshooting
T r o u b l e s h o o t i n g Overview This section addresses possible sources of problems. If you are having diffi- culty using or installing CD-ROM ToolKit, read through the relevant section in the manual first, then consult this section. Troubleshooting Installation At the restart following installation, if the CDT Extension icon briefly appears with an “X”... - Page 215 4. You may find that renaming the conflicting Extension so that it follows CDT alphabetically will solve the problem. Sometimes changing the order that Extensions load is all that’s needed. Extensions normally load in alphabetical order. In some cases, Extensions are named with a space preceding the name to make them load first.
-
Page 216: Overview
D r i v e S e t u p : S u g g e s t e d S e t t i n g s Overview CDT’s default settings do quite well for most CDs, but it may be possible to fine-tune settings for smoother operation and greater speed. -
Page 217: Drive Setup: Suggested Settings
Some Notes About Settings Cache For most applications, bumping up Dynamic RAM in the Cache feature in Drive Setup will show an improvement in your CD-ROM drives speed and responsiveness. Remember, though, when CDT is active this RAM will be dedicated to caching CDs, and will otherwise be unavailable to your system. - Page 218 The charts The charts on the following pages contain suggestions for settings within each general category. As you become more familiar with CDT’s special fea- tures, you can adjust the settings to fit even more closely any unique require- ments of the types of CDs you use most frequently. For more information on settings, see Drive Setup: Suggested Setting in the online CD-ROM NOTE Toolkit User Guide.
- Page 219 Special Hide custom icons for faster Finder browsing Unchecked Allow messages about badly mastered CDs Unchecked Use slower “Polled Non-Blind SCSI I/O” (rarely needed) Unchecked Do not eject tray at shutdown: your choice. This does not affect speed. CD-ROM ToolKit Reference Guide...
- Page 220 Interactive Children’s Stories and Educational CDs Moderately interactive CDs with text, sound, and some animation. Cache Dynamic RAM Cache 128k + Static RAM Cache Unchecked Static Disk Cache 3000k Prescan Prescan File and Folder Information Checked Prescan Desktop Information Checked Prescan System 7 Icon Files Unchecked Prescan System 7 Alias Files...
- Page 221 Encyclopedias Moderately interactive CDs with text, sound, animations, and movies. Cache Dynamic RAM Cache 128k + Static RAM Cache Unchecked Static Disk Cache 3000k Prescan Prescan File and Folder Information Checked Prescan Desktop Information Checked Prescan System 7 Icon Files Unchecked Prescan System 7 Alias Files Unchecked...
- Page 222 Photo CDs CDs with lots of files, each containing one photograph. Use CDT’s default settings. Cache Dynamic RAM Cache 128k Static RAM Cache Unchecked Static Disk Cache 3000k Prescan Prescan File and Folder Information Checked Prescan Desktop Information Checked Prescan System 7 Icon Files Unchecked Prescan System 7 Alias Files Unchecked...
-
Page 223: Bitstream Typeface Library
Bitstream Typeface Library T y p e f a c e L i b r a r y ® The Bitstream Collection CD contains 250 professional-quality typefaces in both ® ® ® ® TrueType and PostScript Type 1 format for Macintosh and IBM PCs (Microsoft Windows, ™... -
Page 227: Index
AppleCD Audio Player 26 defined 105 AppleShare 155 on increasing memory 69, 110 APT Extension 129 CD Extra 182 At Ease 155 CD+G 182 audio equipment 23 CD-ROM drive audio device connection 23 PowerCenter Pro User’s Guide For Technical Support, Call 1-800-708-6227... - Page 228 170 contacting xxi display non-CDs 169 Customer Support, contacting iii drive setup screen 169 fast 170 miscellaneous notes 188 data integrity mounting 175 maintenance 125 MouseHelp 171 DC power OK 172 PowerCenter Pro User’s Guide For Technical Support, Call 1-800-708-6227...
- Page 229 1 low-level 144 warning alert 2 options 147 electrical shock safety guidelines 105 quick 144 e-mail address, Power Computing team v Format Type 142 energy-saving mode (sleep mode) 33 format type 146 Enhanced CD 182 formatting 150...
- Page 230 112 internal drives 85 modem port memory (RAM and VRAM) 71 connecting printer to 21 interfaces illustrated xv, xvii, 15 specifications 108 Low-Profile system illustrated xvii internal storage devices PowerCenter Pro User’s Guide For Technical Support, Call 1-800-708-6227...
- Page 231 Partition List dialog box 135 Low-profile system illustrated xvii partition map 136 symbol for xv partitions printer port, illustrated xvii, 15 number of 137 printers, connecting 21 PCI cards problems and solutions (see troubleshooting) PowerCenter Pro User’s Guide For Technical Support, Call 1-800-708-6227...
- Page 232 1 illustrated xiv Sharing Setup 129 Resize Volume 138 shipping hardware to Power Computing xx Restart command (Special menu) 36 Shut Down (Special menu) 13, 32 restarting the computer, troubleshooting 36 shutting down your computer 13, 32...
- Page 233 137 support numbers iii, xxi capacity 135 Sync on Green 11 updating a driver 152 system upgrading 124 chassis types xiii upgrading your computer 59, 71, 85 Low-Profile, front view xvi PowerCenter Pro User’s Guide For Technical Support, Call 1-800-708-6227...
- Page 234 2 see also: caution notices warranty xxiii warranty limitations and disclaimer of damages xxiv warranty service xxiv Web address, Power Computing team iii, xxi X icon 39 PowerCenter Pro User’s Guide For Technical Support, Call 1-800-708-6227...
-
Page 235: Registration Cards
Registration Cards... - Page 237 State/Province Zip/Postal code Country Daytime telephone Evening telephone Fax telephone The software purchased is System 7.6, and the software was acquired through Power Computing Corporation. The software purchased is System 7.5, and the software was acquired through Power Computing Corporation.
- Page 238 Place Stamp Here. Apple Computer Inc. PO BOX 876 Brea CA 92622-9905 U.S.A...
- Page 239 ____________________ RMA#____________ ____________________ Reason for Return: ___ General disatisfaction ___ Technical difficulties ___ Pricing To: Power Computing Corporation ___ Upgrading system Attn: RMA Returns Department ___ Downgrading system 5100 North IH-35 ___ Competitive replacement Round Rock, TX 78681 ___ Evaluation return...
Need help?
Do you have a question about the PowerCenter PRO and is the answer not in the manual?
Questions and answers