Sharp MX-C300P Operation Manual
Digital full color printer
Hide thumbs
Also See for MX-C300P:
- Operation manual (108 pages) ,
- Software setup manual (44 pages) ,
- Start manual (40 pages)
Table of Contents
Advertisement
Quick Links
Download this manual
See also:
Configuration Manual
Advertisement
Chapters
Table of Contents
Troubleshooting

Related Manuals for Sharp MX-C300P


Summary of Contents for Sharp MX-C300P
-
Page 1: Operation Guide
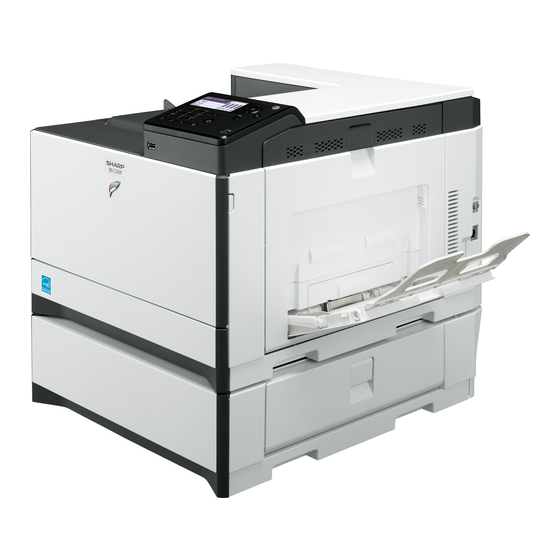
MODEL: MX-C300P MX-C300PL DIGITAL FULL COLOR PRINTER OPERATION GUIDE... -
Page 2: Introduction
INTRODUCTION This manual describes MX-C300P/MX-C300PL Digital full color printer system. • Where "MX-XXXX" appears in this manual, please substitute the name of your model for "XXXX". For the name of your model, see p.6. Note • The screen images and procedures that appear in this manual are mainly for Windows 7. With other versions of Windows, some screen images may be different from those in this manual. -
Page 3: Table Of Contents
CONTENTS INTRODUCTION ..........2 USING THE MANUAL ........5 ● ABOUT THE MANUALS ........5 ● CONVENTIONS USED IN THIS MANUAL ..5 DIFFERENCES BETWEEN MODELS....6 BEFORE USING THE MACHINE PRINTER PART NAMES AND FUNCTIONS ..... 7 PRINTER FUNCTION OF THE MACHINE ..22 ●... - Page 4 TROUBLESHOOTING WEB FUNCTIONS IN THE MACHINE TROUBLESHOOTING .......... 63 ABOUT THE WEB PAGES ......95 ● NETWORK PROBLEMS.........63 ● HOW TO ACCESS THE WEB PAGE .... 95 ● PRINTING PROBLEMS........63 ABOUT THE WEB PAGES (FOR USERS) ..96 INDICATORS AND DISPLAY MESSAGES .... 67 CONFIGURING THE PRINTER CONDITION MISFEED REMOVAL..........
-
Page 5: Using The Manual
To enjoy the full benefit of the machine's features, read and understand this manual before using the machine. In addition, read the manual for your computer. For quick reference during machine use, SHARP recommends printing out this manual and keep it in a handy location. ABOUT THE MANUALS... -
Page 6: Differences Between Models
DIFFERENCES BETWEEN MODELS This manual covers the following models. Model Wireless LAN MX-C300P MX-C300PL AB series (metric) and inch series references Both specifications are quoted where applicable. For example: Page 4: 8-1/2" x 11" and 5-1/2" x 8-1/2" (A4 and B5) Although inch series size indications are shown on the operation panel of this manual, AB series indications are displayed on the AB series machines. -
Page 7: Before Using The Machine
BEFORE USING THE MACHINE This chapter contains basic information that should be read before using the machine. PART NAMES AND FUNCTIONS (14) (15) (10) (11) (16) (12) (13) Power switch Front cover Press to turn the machine power on and off. Open to replace the toner cartridge etc. - Page 8 BEFORE USING THE MACHINE (19) (20) (22) (23) (17) (21) (18) (17) Toner cartridge (Y/M/C/Bk) (21) Roller rotating knob Contains toner. When the toner in a cartridge Rotate to remove misfed paper. runs out, the cartridge of the color that ran out (22) Paper tray right side cover must be replaced.
-
Page 9: Operation Panel
BEFORE USING THE MACHINE OPERATION PANEL (10) (11) (12) (13) (14) Display Numeric keys Shows various messages. (p.10) Enter characters/numbers. [SPECIAL FUNCTION] key ( [SYMBOL] key ( Press to set the paper size and configure system Press to enter a symbol when entering settings. -
Page 10: Display
BEFORE USING THE MACHINE DISPLAY This section explains how to use the display. HOME SCREEN The machine is set at the factory to return the display to the home screen one minute after a print job is finished or when the [HOME] key ( ) is pressed (auto clear function). -
Page 11: How To Use The Display
BEFORE USING THE MACHINE HOW TO USE THE DISPLAY Selecting an item with the arrow keys (up/down) Use the up/down arrow keys (indicated in this manual by [ ]) to move to and select (highlight) a setting item in the selection screen. Press the [OK] key to display the screen of the selected setting item. Press [OK] in the setting screen to save your settings. -
Page 12: Power On And Off
BEFORE USING THE MACHINE POWER ON AND OFF The power switch is located on the left side of the machine. POWER ON POWER OFF Make sure that the machine is not in Turn the power switch to the "ON" operation and then turn the power switch position. -
Page 13: Loading Paper
)). For paper specifications, see the specifications in the Start Guide. • Plain paper other than SHARP standard paper (16 lbs. to 28 lbs. (60 g/m to 105 g/m Recycled paper, colored paper and pre-punched paper must meet the same specifications as plain paper. Contact your dealer or nearest SHARP Service Department for advice on using these types of paper. -
Page 14: Bypass Tray
BEFORE USING THE MACHINE PRINT SIDE FACE UP OR FACE DOWN Paper is loaded with the print side face up or face down depending on the paper type and tray. The loading orientation of punched paper, letterhead paper, and pre-printed paper differs from that of other paper. For details, see "Example: Placement orientations of punched paper, letter head paper, and pre-printed paper"... -
Page 15: Paper That Cannot Be Used
• Use SHARP recommended transparency film and label sheets. Using other than SHARP recommended paper may result in misfeeds or smudges on the output. If other than SHARP recommended media must be used, feed each sheet one at a time using the bypass tray (do not attempt continuous printing). -
Page 16: Loading Paper
BEFORE USING THE MACHINE LOADING PAPER Make sure that the machine is not printing, and then follow these steps to load paper. Loading the paper tray Gently lift and pull out the paper tray until it stops. Push the pressure plate down, and adjust the plates in the tray to the length and width of the paper. - Page 17 BEFORE USING THE MACHINE Loading the bypass tray To feed an envelope, first press down the fusing unit release levers (2 places) to release the pressure, and then follow the steps below. Open the bypass tray. Open out the bypass tray extension. Push the center of the pressure plate down until it locks into place.
- Page 18 • When loading envelopes, make sure that they are straight and flat and do not have loosely glued construction flaps (not the closure flap). • Special papers except SHARP recommended transparency film, labels, and envelopes must be fed one sheet at a time through the bypass tray.
-
Page 19: Tray Settings
BEFORE USING THE MACHINE Inserting transparency film • Use SHARP-recommended transparency film. • Do not touch the print side of transparency film. • When loading multiple sheets of transparency film in the bypass tray, be sure to fan the sheets several times before loading. -
Page 20: User Authentication Mode
BEFORE USING THE MACHINE CHANGING THE PAPER TYPE OF A TRAY To change the paper type setting for a tray, follow the steps below. Press the [SPECIAL FUNCTION] key ( ), select "Paper Type", select the tray with the [ ] or [ ] key, and press the [OK] key. -
Page 21: Entering Characters
BEFORE USING THE MACHINE ENTERING CHARACTERS This section explains how to enter characters. CHARACTERS THAT CAN BE ENTERED Upper case alphabet, lower case alphabet, numbers, special characters, symbols. Characters are entered by pressing the numeric keys on the operation panel. The letters entered with each numeric key are shown below. -
Page 22: Printer
PRINTER PRINTER FUNCTION OF THE MACHINE The machine is equipped with a full color printing function as standard. To enable printing from your computer, a printer driver must be installed. See the table below to determine which printer driver to use in your environment. Environment Printer driver type PCL6... -
Page 23: Printing From Windows
PRINTER PRINTING FROM WINDOWS PRINTER DRIVER PROPERTIES WINDOW (1) Select the printer driver of the machine. • If the printer drivers appear as icons, click the icon of the printer driver to be used. • If the printer drivers appear as a list, select the name of the printer driver to be used from the list. (2) Click the [Preferences] button. -
Page 24: Basic Printing Procedure
PRINTER BASIC PRINTING PROCEDURE The following example explains how to print a document from "WordPad", which is a standard accessory program in Windows. Select [Print] from the [File] menu of (1) Click the [Paper] tab. (2) Select the paper size. WordPad. -
Page 25: Printing On Envelopes
PRINTER PRINTING ON ENVELOPES The bypass tray can be used to print on special media such as envelopes. The procedure for printing on an envelope from the printer driver properties screen is described below. For the types of paper that can be used in the bypass tray, see "USEABLE PAPER" (P.13). For the procedure for loading paper in the bypass tray, see "Loading the bypass tray"... -
Page 26: Printing When The User Authentication Function Is Enabled
PRINTER PRINTING WHEN THE USER AUTHENTICATION FUNCTION IS ENABLED When the user authentication function is enabled in the machine's system settings (administrator), your user number must be entered in the printer driver properties window before you can print. Open the printer driver properties (3) Enter the user name and job name as necessary. -
Page 27: Viewing Printer Driver Help
PRINTER VIEWING PRINTER DRIVER HELP When selecting settings in the printer driver, you can display Help to view explanations of the settings. Open the printer driver properties window from the print window of the software application. Click the [Help] button. The Help window will open to let you view explanations of the settings on the tab. -
Page 28: Saving Frequently Used Print Settings
PRINTER SAVING FREQUENTLY USED PRINT SETTINGS Settings configured on each of the tabs at the time of printing can be saved as user settings. Saving frequently used settings or complex color settings under an assigned name makes it easy to select those settings the next time you need to use them. -
Page 29: Using Saved Settings
PRINTER USING SAVED SETTINGS Open the printer driver properties window from the print window of the software application. Select the print settings. (1) Select the user settings that you wish to use. (2) Click the [OK] button. Start printing. Deleting saved settings Select the user settings that you want to delete in (1) of step 2 above, and click the [Delete] button. -
Page 30: Changing The Printer Driver Default Settings
PRINTER CHANGING THE PRINTER DRIVER DEFAULT SETTINGS The default settings of the printer driver can be changed using the procedure below. The settings selected using this procedure are saved and become the default settings when printing from a software application. (Settings selected in the printer driver properties window when printing from an application remain in effect only while the application is in use.) Click the [Start] button (... -
Page 31: Printing From A Macintosh
PRINTER PRINTING FROM A MACINTOSH BASIC PRINTING PROCEDURE The following example explains how to print a document from the standard accessory program "TextEdit" in Mac OS X. To use the machine for the Macintosh, the machine must be connected to a network. Note To install the PPD file and configure printer driver settings, see Software Setup Guide. - Page 32 PRINTER Select print settings. Click the [Print] button. Click in the menu to select a setting. The corresponding setting screen will appear. If the settings do not appear in Mac OS X v10.5, Printing begins. 10.6 and 10.7, click " "...
- Page 33 PRINTER PRINTING ON ENVELOPES The bypass tray can be used to print on special media such as envelopes. The procedure for printing on an envelope from the printer driver properties screen is described below. For the types of paper that can be used in the bypass tray, see "USEABLE PAPER" (P.13). For the procedure for loading paper in the bypass tray, see "Loading the bypass tray"...
-
Page 34: Printing When The User Authentication Function Is Enabled
PRINTER PRINTING WHEN THE USER AUTHENTICATION FUNCTION IS ENABLED When the user authentication function is enabled in the machine's system settings (administrator), you must enter your user number in order to print. Select [Print] from the application's Start printing. [File] menu. (1) Enter your user information. -
Page 35: Frequently Used Function
PRINTER FREQUENTLY USED FUNCTION This section explains frequently used functions. • "SELECTING THE COLOR MODE" (P.35) • "FITTING THE PRINT IMAGE TO THE PAPER" • "TWO-SIDED PRINTING" (P.38) (P.39) • "PRINTING MULTIPLE PAGES ON ONE PAGE" (P.40) The explanations assume that the paper size and other basic settings have already been selected. For the basic procedure for printing and the steps for opening the printer driver properties window, see the following section: •... -
Page 36: Black And White Printing
PRINTER BLACK AND WHITE PRINTING [Black and White] can be selected on the [Main] tab as well as on the [Color] tab. Click the [Black and White Print] checkbox on the [Main] tab so that a checkmark appears. The [Black and White Print] checkbox on the [Main] tab and the "Color Mode" setting on the [Color] tab are linked. When the [Black and White Print] checkbox is selected on the [Main] tab, [Black and White] is also selected on the [Color] tab. -
Page 37: Selecting A Print Mode Setting
PRINTER SELECTING A PRINT MODE SETTING This section explains the procedure for selecting a print mode setting. The "Print Mode Settings" consist of the following two items: Normal: This mode is suitable for printing data such as regular text or a table. High Quality: The print quality of color photos and text is high. -
Page 38: Two-Sided Printing
PRINTER TWO-SIDED PRINTING The machine can print on both sides of the paper. This function is useful for many purposes, and is particularly convenient when you want to create a simple pamphlet. Two-sided printing also helps conserve paper. Paper Print results orientation Windows Macintosh... -
Page 39: Fitting The Print Image To The Paper
PRINTER FITTING THE PRINT IMAGE TO THE PAPER This function is used to automatically enlarge or reduce the printed image to match the size of the paper loaded in the machine. This is convenient for such purposes as enlarging an invoice or A5 size document to letter or A4 size to make it easier to view, and to print when the same size of paper as the document image is not loaded in the machine. -
Page 40: Printing Multiple Pages On One Page
PRINTER PRINTING MULTIPLE PAGES ON ONE PAGE This function can be used to reduce the print image and print multiple pages on a single sheet of paper. This is convenient when you want to print multiple images such as photos on a single sheet of paper, and when you want to conserve paper. - Page 41 PRINTER Windows (1) Configure the settings on the [Main] tab. (2) Select the number of pages per sheet. (3) If you wish to print borderlines, click the [Border] checkbox so that a checkmark appears. (4) Select the order of the pages. (2) (3) Macintosh (1) Select [Layout].
-
Page 42: Convenient Printing Functions
PRINTER CONVENIENT PRINTING FUNCTIONS This section explains convenient functions for specific printing objectives. • "CONVENIENT FUNCTIONS FOR CREATING • "FUNCTIONS THAT COMBINE TEXT AND PAMPHLETS AND POSTERS" (P.42) IMAGES" (P.51) • "FUNCTIONS TO ADJUST THE SIZE AND • "PRINT FUNCTIONS FOR SPECIAL PURPOSES" ORIENTATION OF THE IMAGE"... - Page 43 PRINTER Macintosh (1) Select [Printer Features]. (2) Select the "Binding Edge". (3) Select [Tiled Pamphlet] or [2-Up Pamphlet]. INCREASING THE MARGIN (Margin Shift) This function is used to shift the print image to increase the margin at the left, right, or top of the paper.
- Page 44 PRINTER CREATING A LARGE POSTER (Poster Printing) (This function is only available in Windows.) One page of print data can be enlarged and printed using multiple sheets of paper (4 sheets (2 x 2), 9 sheets (3 x 3) or 16 sheets (4 x 4)). The sheets can then be attached together to create a large poster.
-
Page 45: Functions To Adjust The Size And Orientation Of The Image
PRINTER FUNCTIONS TO ADJUST THE SIZE AND ORIENTATION OF THE IMAGE ROTATING THE PRINT IMAGE 180 DEGREES (Rotate 180 degrees) This feature rotates the image 180 degrees so that it can be printed correctly on paper that can only be loaded in one orientation (such as envelopes or paper ABCD with punch holes). - Page 46 PRINTER ENLARGING/REDUCING THE PRINT IMAGE (Zoom/XY-Zoom) This function is used to enlarge or reduce the image to a selected percentage. This allows you to enlarge a small image or add margins to the paper by slightly reducing an image. When using the PS printer driver (Windows), you can set the width and length percentages separately to change the proportions of the image.
-
Page 47: Color Mode Adjustment Function
PRINTER Macintosh (This function can not be used in Mac OS X 10.4/10.5.) (1) Select [Layout]. (2) Select a mirror image setting. If you wish to reverse the image horizontally, select [Flip horizontally] checkbox so that a checkmark appears. If you wish to reverse the image vertically, select [Reverse page orientation] checkbox so that a checkmark appears. -
Page 48: Printing Faint Text And Lines In Black
PRINTER PRINTING FAINT TEXT AND LINES IN BLACK (Text To Black/Vector To Black) (This function is only available in Windows.) • When printing a color image in grayscale, color text ABCD ABCD and lines that are faint can be printed in black. (Raster data such as bitmap images cannot be adjusted.) This allows you to bring out color text and lines that are faint and difficult to see when printed in grayscale. - Page 49 PRINTER SELECTING COLOR SETTINGS TO MATCH THE IMAGE TYPE (Advanced Color) Preset color settings are available in the machine's printer driver for various uses. These enable printing using the most suitable color settings for the color image type. Advanced color settings can also be configured to match the objective of the color image, such as color management settings and the screening setting for adjustment of color tone expression.
- Page 50 PRINTER Macintosh (1) Select [Color]. (4) Select advanced color settings. If you wish to select detailed settings, click the (2) Select color print settings. [Advanced] tab. To use the Mac OS Color Management function, select the [ColorSync] checkbox . When this is done, To configure color management settings, select the "Image Type"...
-
Page 51: Functions That Combine Text And Images
PRINTER FUNCTIONS THAT COMBINE TEXT AND IMAGES ADDING A WATERMARK TO PRINTED PAGES (Watermark) Faint shadow-like text can be added to the background of the printed image as a watermark. The size, color, density, and angle of the watermark text can be adjusted. - Page 52 PRINTER PRINTING AN IMAGE OVER THE PRINT DATA (Image Stamp) (This function is only available in Windows.) A bitmap or JPEG image stored on your computer can be printed over the print data. The size, position, and angle of the image can be adjusted. This feature can be used to "stamp"...
-
Page 53: Printing With An Overlay File
PRINTER CREATING OVERLAYS FOR PRINT DATA (Overlays) (This function is only available in Windows.) The print data can be printed in a previously created XXXX XXXX overlay. By creating table rulings or a decorative frame in an application different from that of the text file and 1 100 1 100 registering the data as an overlay file, an attractive... -
Page 54: Print Functions For Special Purposes
PRINTER PRINT FUNCTIONS FOR SPECIAL PURPOSES PRINTING SPECIFIED PAGES ON DIFFERENT PAPER (Different Paper) The front cover can be printed on paper that is different from the other pages. Use this function when you wish to print the front cover on heavy paper, or different paper such as colored paper. -
Page 55: Convenient Printer Functions
PRINTER CONVENIENT PRINTER FUNCTIONS SAVING AND USING PRINT FILES (Retention) This function is used to store a print job as a file on the machine, allowing the job to be printed from the operation panel. When printing from a computer, a password (5 to 8 digits) can be set to maintain the secrecy of information in a stored file. - Page 56 PRINTER Printing a job stored by retention When retention is performed, the display appears as follows: Press the [ ] key to display the list of print hold jobs. Select the print job with the [ ] keys. Press the [OK] key. Print or delete the print job with the [ ] keys.
-
Page 57: Printing Without The Printer Driver
PRINTER PRINTING WITHOUT THE PRINTER DRIVER When you do not have the printer driver installed on your computer, or when the software application used to open a file that you wish to print is not available, you can print directly to the machine without using the printer driver. The file types (and corresponding extensions) that can be printed directly are shown below. -
Page 58: Directly Printing A File In Usb Flash Memory
PRINTER DIRECTLY PRINTING A FILE IN USB FLASH MEMORY A file in a USB flash memory connected to the machine can be printed from the operation panel of the machine without using the printer driver. When the printer driver of the machine is not installed on your computer, you can copy a file into a commercially available USB flash memory and connect the device to the machine to print the file directly. -
Page 59: Directly Printing From A Computer
PRINTER DIRECTLY PRINTING FROM A COMPUTER Settings can be configured in the Web pages of the machine to enable direct printing from a computer without using the printer driver. For the procedure for accessing the Web pages, see "ABOUT THE WEB PAGES" (P.95). FTP PRINT You can print a file from your computer by simply dragging and dropping the file onto the FTP server of the machine. -
Page 60: Appendix
PRINTER APPENDIX PRINTER DRIVER SPECIFICATION LIST Available functions and output results may vary depending on the type of printer driver being used. Windows Macintosh Function PCL6 Frequently Copies 1-999 1-999 1-999 1-999 used Orientation functions N-Up Number 2,4,6,8,9,16 2,4,6,8,9,16 2,4,6,9,16 2,4,6,9,16 of pages Order... - Page 61 PRINTER Windows Macintosh Function PCL6 Image Print Mode Normal/ Normal/ Normal/ Normal/ Quality High Quality High Quality High Quality High Quality Graphics Mode Selection Toner Save Font Resident font 80 fonts 136 fonts 136 fonts 136 fonts Selectable download bitmap, bitmap, bitmap, font...
-
Page 62: Troubleshooting
Many problems can be easily resolved by the user. If you are unable to solve the problem using the troubleshooting guide, turn off the power switch and unplug the machine, and contact your SHARP Service Department. "**-**" represents a code consisting of numbers and letters. When contacting your dealer, inform your dealer of the code that is displayed. -
Page 63: Troubleshooting
TROUBLESHOOTING TROUBLESHOOTING NETWORK PROBLEMS Problem Cause and solution Page The LAN cable is disconnected. → Make sure that he LAN cable is firmly inserted in the connectors on the machine and your computer. To connect the cable, see the "Software setup guide". The machine does not connect to Is the machine configured for use on the same network as the network. -
Page 64: Paper Misfeed
TROUBLESHOOTING Problem Cause and solution Page The paper is outside of the specified size and weight range. → Use paper within the specified range. Paper curled or damp. → Do not use curled or crimped paper. Replace with dry paper. –... -
Page 65: The Machine Does Not Print
In Windows XP, click the "start" button, and then click "Printers and Faxes". 2 If the "SHARP MX-XXXX" printer driver icon is shown but you still cannot print, the printer driver may not have been installed correctly. In this case, delete the software and then reinstall it. -
Page 66: The Printed Image Is Dirty
TROUBLESHOOTING Problem Cause and solution Page You are using paper that is outside the specified size and weight range. → Use paper within the specified range. Paper curled or damp. → Do not use curled or crimped paper. Replace with dry paper. –... -
Page 67: Indicators And Display Messages
If one of the following messages appears in the display, take prompt action as instructed by the message. Message Action Maintenance required. Call for Maintenance required soon. Contact your SHARP Service Department. service. (Maintenance icon) Obtain replacement toner. The toner cartridge must be replaced soon. -
Page 68: Misfeed Removal
TROUBLESHOOTING MISFEED REMOVAL When a misfeed occurs during printing, the message " Clear paper path." and the location of the misfeed will appear. Check the location and remove the misfeed. The paper may tear when you remove a misfeed. In this event, be sure to remove all torn pieces of paper from the Note machine. -
Page 69: Misfeed In The Machine
TROUBLESHOOTING If you were able to remove the misfed paper If you are unable to remove the misfed paper Close the auxiliary tray and then the Grasp the side cover open/close bypass tray, grasp the side cover handle and gently open the side open/close handle, and gently open cover. - Page 70 TROUBLESHOOTING Misfeed in the paper feed area A Carefully remove the misfed paper. Turn the roller rotating knob in the direction of the arrow to assist in removing it. Fusing unit Be careful not to tear the misfed paper during removal. Roller rotating knob The fusing unit is hot.
- Page 71 TROUBLESHOOTING Remove the misfed paper. Be careful not to tear the misfed paper during removal. The fusing unit is hot. Do not touch the fusing unit when Warning removing misfed paper. Doing so may cause a burn or injury. • When removing misfed paper, do not touch or damage the transfer Caution belt.
- Page 72 TROUBLESHOOTING Misfeed in the transport area C Lift up the duplex conveyor lever and open the reversing unit. Remove the misfed paper. Return the duplex conveyor lever to its original position and close the side cover. The message " Clear paper path." will be cleared and printing will be possible. •...
-
Page 73: Misfeed In The Paper Tray 1
TROUBLESHOOTING MISFEED IN THE PAPER MISFEED IN THE PAPER TRAY 1 TRAY 2 (Option) Open the lower side cover. Note Make sure that there is no misfed paper in the tray before pulling it out. (p.69) Grasp the handle to open the lower side cover. Open the side cover and remove the misfed paper. -
Page 74: Replacing The Toner Cartridge
TROUBLESHOOTING REPLACING THE TONER CARTRIDGE When the "Prepare a new toner." appears, little toner remains. You should keep one set of replacement toner cartridges on hand so that you can replace a toner cartridge immediately when toner runs out. Be sure to replace the toner cartridge when the message "Change the toner cartridge." appears. •... - Page 75 TROUBLESHOOTING Take out the new toner cartridge. Shake it vertically five or six times. When holding the toner cartridge, do not grasp the shutter. This may Caution cause toner to leak. Insert the toner cartridge along the guides until it locks in place. If there is any dirt or dust on the toner cartridge, remove it before installing the cartridge.
-
Page 76: Replacing The Toner Collection Container
TROUBLESHOOTING REPLACING THE TONER COLLECTION CONTAINER This section explains the procedure for replacing the toner collection container. The toner collection container collects any excess toner that occurs during printing. When the toner collection container becomes full, the message "Replace waste box" will appear. •... - Page 77 TROUBLESHOOTING Install a new toner collection container. Push the toner collection container in completely. Close the front cover. Note You cannot close the front cover when the toner collection container is not attached. Replace tray 1.
-
Page 78: Checking The Total Output Count And Toner Remaining
ROUTINE MAINTENANCE This chapter explains how to keep the machine operating smoothly, including viewing print count, and cleaning the machine. CHECKING THE TOTAL OUTPUT COUNT AND TONER REMAINING You can check by pressing the [SPECIAL FUNCTION] key ( ) and selecting "Total Count"... -
Page 79: Cleaning The Bypass Tray Paper Feed Roller
ROUTINE MAINTENANCE ROUTINE MAINTENANCE Do not spray flammable cleaner gas. Gas from the spray may come in contact with the internal electrical components or high-temperature parts of the fusing unit, creating a risk of fire or Warning electrical shock. CLEANING THE BYPASS TRAY PAPER FEED ROLLER If misfeeds occur frequently when feeding envelopes, heavy paper, etc. -
Page 80: Cleaning The Laser Unit
ROUTINE MAINTENANCE Procedure of "REPLACING THE TONER COLLECTION CONTAINER" (p.76), push the toner collection container into the machine. • If this does not solve the problem, pull the knob out and push it back in 2 more times. Note • When pulling and pushing the knob to clean the charger, pull and push the knob slowly from one end to the other. - Page 81 ROUTINE MAINTENANCE (4) Push down and close the laser unit cover. Repeat step 4 to clean all holes in the laser unit (4 holes). There are a total of 4 places to be cleaned in the laser unit, including the hole cleaned in step 4. Clean all holes. Cover Replace the cleaning tool.
-
Page 82: Adjusting The Display Contrast
ROUTINE MAINTENANCE ADJUSTING THE DISPLAY CONTRAST The contrast of the display can be adjusted as explained below. Press the [SPECIAL FUNCTION] key ( Select "Display Contrast" with the [ ] or [ ] key. Press the [OK] key. Adjust the contrast with the [ ] or [ ] key. To reset the contrast to the default setting, press the [C] key. -
Page 83: System Settings
SYSTEM SETTINGS PURPOSE OF THE SYSTEM SETTINGS The system settings are used by the administrator of the machine to enable or disable functions to suit the needs of your workplace. PROGRAMMING AN ADMINISTRATOR PASSWORD The administrator password is a 5-digit number that must be entered in order to access the system settings. The administrator (administrator of the machine) should change the default administrator password that was set at the factory to a new 5-digit number. -
Page 84: System Settings List
SYSTEM SETTINGS SYSTEM SETTINGS LIST This is a list of the machine's system settings. Program name Page Program name Page Change Admin PW List Print Change Admin PW User Info. Print Initial Setting Color Adjustments Date & Time Set Easy Calibration Daylight Saving Time Tone Adjustments Printer... - Page 85 SYSTEM SETTINGS ADMINISTRATOR SETTINGS MENU The system settings are accessed via the following menu structure. Refer to this menu when enabling or disabling the settings that are explained beginning on p.88. Some settings contain an additional level of settings (a settings screen). Level 1 Level 2 Level 3...
- Page 86 SYSTEM SETTINGS Level 1 Level 2 Level 3 Energy Save Auto Power Shut-Off Auto Power Shut-Off Timer Preheat Mode Enter Auto Power Shut-Off after the Remote Job Toner Save Mode List Print User Info. Print Color Adjustments Easy Calibration Tone Adjustments Return to Default Security Settings IPsec Settings...
-
Page 87: Using The System Settings
SYSTEM SETTINGS USING THE SYSTEM SETTINGS Press the [SPECIAL FUNCTION] key ( Select "System Settings" with the [ ] or [ ] key and press the [OK] key. Enter the administrator password with the numeric keys. • " " appears for each digit that you enter. •... -
Page 88: Connection Type
SYSTEM SETTINGS Change Admin PW Confirmation of Network Confirm network settings. Use this function to change administrator password. To change the administrator password, see Connection Type "PROGRAMMING AN ADMINISTRATOR PASSWORD" (p.83). You can change the machine's network connection type. Wired Settings Initial Setting IPv4 Settings When using the machine on a TCP/IP (IPv4) network,... -
Page 89: Wireless (Access Point
SYSTEM SETTINGS Wireless (Infrastructure) Wireless (Access Point) (Only on models with wireless LAN) (Only on models with wireless LAN) This sets connection using wireless infrastructure This sets connection using wireless access point mode. mode. Manual Input of SSID Setting of SSID Enter up to 32 half-width characters for the SSID. -
Page 90: User Control
SYSTEM SETTINGS User Control User Count Display This setting is used to display the print page counts of User Control is used to configure settings for user each account, and the usage limits for printing. Misfed authentication. Select the [User Control] to configure pages are not included in the page counts. -
Page 91: Device Control
SYSTEM SETTINGS Device Control Operation Setting These settings are used to configure settings for These settings are used to configure various settings related to the operation panel. To access one of these hardware functions of the machine. To access one of programs, select "Operation Setting"... -
Page 92: Energy Save
SYSTEM SETTINGS Disable Auto Key Repeat Auto Power Shut-Off Timer This setting is used to stop a setting from changing This setting is used to set the duration of time until continuously when the [ ] or [ ] key is held down, auto power shut-off mode activates when the such as selecting a menu item (auto key repeat will not operation panel is not used. -
Page 93: Color Adjustments
SYSTEM SETTINGS Color Adjustments This machine provides the color adjustment ways as shown below. If you desire this color of gray, the Easy Calibration and Tone Adjustments coordinates are X = 2, Y = 5. The machine has two color adjustment functions. Use X = 4, Y = 4 the appropriate function depending on the situation. -
Page 94: Security Settings
SYSTEM SETTINGS Tone Adjustments (2) Confirmation screen appears and select [Yes] to initialize the value to default, or select [No] This function is used to adjust each of the density to return to [Mode Select] screen. levels (low, mid, and high) of the four color components, cyan, magenta, yellow and black. -
Page 95: Web Functions In The Machine
WEB FUNCTIONS IN THE MACHINE ABOUT THE WEB PAGES The machine includes a built-in Web server. The Web server is accessed using a Web browser on your computer. The Web pages include both pages for users and pages for the administrator. In the user Web pages, users can monitor the machine, and select printer configuration settings. -
Page 96: About The Web Pages (For Users)
WEB FUNCTIONS IN THE MACHINE ABOUT THE WEB PAGES (FOR USERS) When you access the user Web pages in the machine, the following page will appear in your browser. A menu frame appears on the left side of the page. When you click an item in the menu, a screen appears in the right frame that allows you to configure settings for that item. -
Page 97: Configuring The Printer Condition Settings
WEB FUNCTIONS IN THE MACHINE CONFIGURING THE PRINTER CONDITION SETTINGS The printer condition settings allow basic printer settings to be configured. The following items can be set: ● "Default Settings" (p.98): Basic settings that are mainly used when the printer driver is not used. ●... -
Page 98: Printer Condition Setting Menu
WEB FUNCTIONS IN THE MACHINE PRINTER CONDITION SETTING MENU Condition Settings Condition Settings Default Settings Factory default settings PCL Settings Factory default settings Orientation Portrait Symbol Set PC-8 Default Paper Size 8-1/2" x 11" Font 0: Courier (internal font) Default Paper Type Plain Line Feed Code CR=CR;... -
Page 99: Pcl Settings
WEB FUNCTIONS IN THE MACHINE PCL Settings Item Selections Description Symbol Set Select one of 35 sets. This specifies which country's characters (PCL symbol set) are assigned to certain of the symbols in the character code list. The factory default setting is [PC-8]. Font Select one internal This specifies which PCL font to use for printing. -
Page 100: About The Web Pages (For The Administrator)
WEB FUNCTIONS IN THE MACHINE ABOUT THE WEB PAGES (FOR THE ADMINISTRATOR) In addition to the menus that appear for users, other menus that can only be used by the administrator appear in the administrator Web pages. A menu frame appears on the left side of the page. When you click an item in the menu, a screen appears in the right frame that allows you to configure settings for that item. -
Page 101: Configuring Smtp And Dns Server Settings
WEB FUNCTIONS IN THE MACHINE CONFIGURING SMTP AND DNS SERVER SETTINGS The procedures for using [Quick Setup] are explained here. [Quick Setup] is used to quickly configure only the required settings for "SMTP", and "DNS" servers. These settings are normally configured first. SMTP server: SMTP is used to transmit e-mail. -
Page 102: Protecting Information Programmed In The Web Page ([Passwords])
WEB FUNCTIONS IN THE MACHINE PROTECTING INFORMATION PROGRAMMED IN THE WEB PAGE ([Passwords]) Passwords can be set (click [Passwords] in the menu frame) to restrict Web page access and protect settings. The administrator must change the password from the factory default setting. The administrator must also take care to remember the new password. -
Page 103: Administrator Settings
WEB FUNCTIONS IN THE MACHINE ADMINISTRATOR SETTINGS The administrator settings are used to prohibit changes to the [Condition Settings] and to configure interface settings. ● "Default settings" Select the setting for which you wish to prohibit changes. ● "Fusing Control" : The temperature of toner fusing is controlled according to the weight of the paper that is used. -
Page 104: E-Mail Status And E-Mail Alert Settings
WEB FUNCTIONS IN THE MACHINE Interface settings Item Settings Description I/O Timeout 1- 60 - 999 (sec) During reception of a print job, if remaining data is not received after the time set here elapses, the port connection is broken and the next print job is begun. -
Page 105: Status Message Setup
WEB FUNCTIONS IN THE MACHINE STATUS MESSAGE SETUP Use the status message function to send the current counter information, including print count and total output count, based on the specified schedule. The destinations can be set for administrators and dealers respectively. To set up the status message, follow these steps. - Page 106 The copyrights for the software components and various relevant documents included with this product that were developed or written by SHARP are owned by SHARP and are protected by the Copyright Act, international treaties, and other relevant laws. This product also makes use of freely distributed software and software components whose copyrights are held by third parties.
-
Page 107: Trademark Acknowledgments
• PCL is a registered trademark of the Hewlett-Packard Company. • IBM, PC/AT, and PowerPC are trademarks of International Business Machines Corporation. • Sharpdesk is a trademark of Sharp Corporation. • All other trademarks and copyrights are the property of their respective owners. - Page 108 OPERATION GUIDE MXC300P-US1...
Need help?
Do you have a question about the MX-C300P and is the answer not in the manual?
Questions and answers